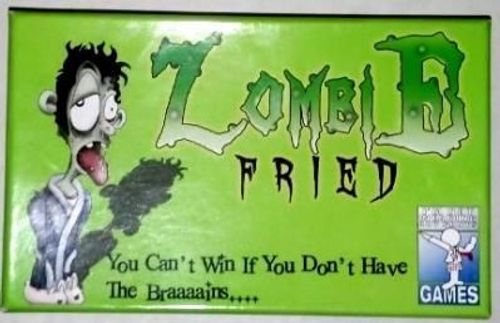
Zombie Fried
Zombie Fried Rulebook
Table of Contents
Table of Contents
Goal
The goal of Zombie Fried is to reach a pre-determined Brain Point total agreed upon by the players prior to the start of the game.
- 25 Brain Points for a Quick Game
- 35 Brain Points for a Standard Game
- 50 Brain Points for a Longer Game
Survivors try to earn Brain Points for their Brain Pan by hiring Big Damn Heroes (BDH) and equipping them with Fried Weapons and Weapon MODs to assist in killing Zombies. A standard game lasts 40-60 minutes.
Set Up
Each player (Survivor) starts the game with no special abilities or equipment. Shuffle the Zombie Deck and the Resources Deck separately and place them in their respective positions as shown below. You will need one six-sided die - feel free to place it wherever you like.
[Setup diagram: image in source, not reproduced.]
The Killing Field is supplied from the Zombie Deck. To start the game, draw four Zombies from the top of the Zombie Deck and place them face up in the Killing Field. Randomly choose who will play first. Starting with the first Survivor and continuing clockwise, each Survivor draws five cards from the Resources Deck for their starting hand. Game play then proceeds in a clockwise fashion, starting with the first Survivor.
Gameplay
Equipment Phase
On your turn, replenish your hand size up to five cards from the Resources Deck. Then the following actions may happen in any order:
Hiring and Firing Big Damn Heroes (BDH)
Survivors may increase their ZAP of 1 by hiring a BDH from their hand. BDH are hired by completing all requirements, if any, on the BDH card when it comes into play. Once a BDH has been hired, the Survivor's ZAP is replaced with the ZAP of the BDH. The Survivor's ZAP is NOT added to the BDH's ZAP. Survivors may only have ONE BDH on their payroll (in play) at any given time. If they wish, Survivors may fire their BDH by placing it in the Resources Discard pile. They may then hire another one from their hand. Hiring and firing can only be done during the Survivor's turn.
- Equip a Fried Weapon and/or enhance a weapon with Weapon MODs.
- Play Action Plans. (See Attack Phase for other opportunities to play Action Plans.)
Attack Phase
The Attack Phase happens in the following order:
- Survivor may select a Zombie from the Killing Field to attack. If Survivor does not want to attack, skip the Attack Phase.
- Calculate Attacker's starting Zombie Attack Power (ZAP) by adding the ZAP from any equipped Fried Weapon(s) and Weapon MODs, and either the BDH's or Survivor's ZAP.
- Reveal any traps, one at a time, on the chosen Zombie. Traps trigger in Last In-First Out order as soon as they are revealed. (See Terms to Know.) If a Trap ends combat, leave unrevealed Traps face down under the Zombie. Step 4 may occur during Trap resolution.
- Play combat effect cards. a) Attacker may play any card or cards from their hand. b) Starting with the next player, all opponents (in clockwise order) may each play a Reality Check. c) The attacker may choose to repeat steps a) and b) as many times as they like.
- Calculate Attacker's final ZAP. Roll a six-sided die (Chance Effect roll) and add its value to the attacker's ZAP after all other card effects are resolved. No other Action Plans or Reality Checks may be played to affect the combat after this point.
- Calculate the final ZAP for the Zombie and compare it with the final ZAP for the Attacker. Higher ZAP wins the combat. a) If the Attacker's ZAP is higher, place defeated Zombie into Attacker's Brain Pan. b) If the Zombie's ZAP is higher, follow the Defeat consequences on the Zombie card and leave the Zombie in the killing field. c) If the Attacker's ZAP equals the Zombie's ZAP, follow the Defeat consequences on the Zombie card and leave the Zombie in the killing field. Sorry, Zombies still win on ties.
- Begin End of Turn Phase.
End of Turn Phase
The End of Turn Phase happens in the following order:
- Refresh the Killing Field from the top of the Zombie Deck.
- Discard any unwanted cards from hand.
- Place Traps in the Killing Field.
Traps can be played strategically to discourage opponents from attacking certain Zombies. Traps can either be helpful by making it easier to kill a Zombie, or harmful by making the Zombie harder to kill. Some traps can even make it impossible to defeat the Zombie by ending the turn or combat immediately. Survivors may place one Trap per turn in the Killing Field by placing an Action Plan face down under the Zombie of their choice. Once placed, no Survivor (including the Survivor who placed the trap) may look at the Trap until the Zombie is attacked. The Survivor who springs the trap must then suffer its consequences. If a Zombie has more than one trap, the Traps are revealed and resolved one at a time in Last In-First Out order. Traps may only be placed at the end of the Survivor's turn.
- End of turn.
- When a value is halved, round up.
- In the case of a conflict between the rules and the card text, the card always wins.
Winning the Game
Before the start of the game Survivors decide how many Brain Points to play for. The first Survivor to accumulate the predetermined Brain Point total in their Brain Pan wins the game. Even if you steal a Zombie from or trick another player to gain enough points to reach the designated Brain Points, you must still kill a Zombie to win the game.
Card Types
Zombie Fried has two basic card types: Zombies and Resources. They are broken down further and explained in more detail here.
Zombie Types
Basic Zombies: Basic Zombies are the standard Zombies and are fairly easy to defeat. They have no special abilities or consequences for being defeated by them.
Fried Zombies: Fried Zombies are unique, and they have special abilities and consequences for failing to defeat them. They tend to be more difficult to defeat and have more abilities and restrictions in combat.
Resource Types
Action Plans: Action Plans can either be played face up any time during the Survivor's turn, or they can be played as a Trap on a Zombie in the Killing Field at the end of a Survivor's turn. Action Plans give advantages to the Attacker or hinder the Zombie in some way. Action Plans can only be played during the Survivor's turn.
Reality Checks: Reality Checks can be used to affect attacks on Zombies, either positively or negatively, or affect another Reality Check played on the same attack. Survivors may play them during an opponent's Attack Phase after that opponent has declared an attack on one of the Zombies in the Killing Field. Attackers may also play a Reality Check on their own combat. Reality Checks resolve as soon as they are played. Reality Checks can be played during either a Survivor's or an opponent's turn, but cannot be played after the Chance Effect has been rolled, regardless of whose turn it is.
Fried Weapons: Fried Weapons are zany contraptions that are used to destroy the targeted Zombie(s) by increasing a Survivor's ZAP. They can be enhanced with MODs and inflict one of four types of damage: Blunt, Blade, Bang, or Boom.
Weapon MODs: Weapon MODs are enhancement features that are attached to the Fried Weapons. They increase the total ZAP of the weapon and sometimes change the damage type.
Big Damn Heroes: Big Damn Heroes (BDH) are special characters in Zombie Fried. They are the last line of defense against the constant onslaught of the Zombie's Fried Horde. They are a great help, but sometimes they come with a price.
Weapons and Modifications
Weapons and Weapon Modifiers (MODs) are used to increase your ZAP.
Weapons
Survivors may only have ONE weapon in play at any given time unless specified by another card. The weapon is placed in front of the Survivor and its ZAP is added to the BDH's or Survivor's ZAP. You may discard or equip a weapon any time during your turn.
Modifying Weapons
Adding a MOD to a weapon can be done to increase a Survivor's ZAP and/or change the type of weapon in play. Survivors may only have ONE MOD on a weapon at any given time. Survivors may only modify weapons during their turn. Once played on a weapon, the MOD is permanently attached to that weapon and may not be replaced with a different MOD. In addition, when a modified weapon is discarded or destroyed, the MOD is discarded or destroyed as well.
Damage and Damage Immunity
Weapons inflict one of the following four types of damage: Blunt, Blade, Boom, or Bang. (The source shows each as an icon labelled "damage type".)
Some Zombies have immunity to certain types of damage. When attacking these Zombies, Survivors may not include any weapons or MODs in the final ZAP that inflict that particular type of damage.
Terms to Know
Big Damn Hero (BDH)
Big Damn Heroes are the guys you want to hire to help save your butt from the Zombie Horde. They are drawn from the Resources Deck.
Brain Pan
The Brain Pan is where a Survivor's Brain Points are kept.
Brain Points
Brain Points are awarded for defeating Zombies. The Brain Point value is found in the upper left corner of each Zombie card.
Chance Effect
The Chance Effect is a six-sided die roll that is added to an Attacker's ZAP. It is the last modifier to be added. This roll is not necessary if the Attacker is already defeating the Zombie.
Killing Field
The Killing Field is located in the center of the playing area and contains the Zombies that are currently chasing the Survivors.
Last In-First Out Card Resolution
Trap resolution happens in Last In-First Out order. When there are multiple traps on the same Zombie, the last trap to be played is the first one to be resolved. If that trap doesn't end the turn or combat, the second to last trap played resolves next. Continue in this manner until all traps are resolved, or until a trap ends the turn or combat.
Resources Deck
The Resources Deck is located at one end of the Killing Field and supplies the Survivors with the resources necessary to take out the Zombie Horde. If the deck is exhausted, reshuffle the discard pile and place it as the new Resources Deck. Because of certain card effects, the empty deck should only be reshuffled when new cards need to be drawn.
Survivor
A Survivor is YOU! For combat purposes, Survivors have a ZAP of 1.
Traps
Traps are Action Plan cards played face down under Zombies in the Killing Field in order to trip up or prevent opponents from winning the game. They usually hinder the Attacker or give the attached Zombie an advantage in combat. Occasionally they can help the Attacker defeat the Zombie. Zombies may have more than one Trap at a time.
Zombie Attack Power (ZAP)
The Zombie Attack Power is used to determine the winner of the Zombie battles. The Survivor's ZAP can be boosted with Weapons, Weapon MODs, and BDH. Because of certain card effects, it is possible to end up with a negative ZAP.
Zombies also have their own ZAP. Their ZAP is located in the bottom right corner of the card.
Zombie Deck
The Zombie Deck is located at the opposite end of the Killing Field from the Resources Deck and is used to refresh the Killing Field at the end of each Survivor's turn. If the deck is exhausted, reshuffle the discard pile and place it as the new Zombie Deck. Because of certain card effects, the empty deck should only be reshuffled when a new Zombie needs to be drawn.
Zombie Fried Frequently Asked Questions
-
Can zombie Rights Rally be played after combat? No. No reality checks or anything that affects combat can not be played after the Chance Die is rolled.
-
Do you have to roll the chance die if you win the combat without rolling? Technically, yes. That determines the end of combat.
-
When can Reality Checks be played? Anytime after the attack has been declared, but before the Chance die is rolled.
-
Officer Sluggs has no ZAP printed on his card. What is it? It is 12. Sorry for the misprint. In future expansions we have talked about reprinting. In the meantime, customize your deck by writing it in :)
-
I can't find the Deluxe Illustrated Rules on the website. Where are they? We are revamping the website. They will be up as soon as possible.
-
Do I discard my weapon after combat? Not unless it is a consequence of a card or a defeat consequence.
-
Can I play more than one BDH, weapon, or mod at a time? Not unless a card specifically allows you to.
-
May I discard a mod to play a better one? No. Once a mod is attached to the weapon, you can't separate them, unless a card is played against you that states "discard a mod". You are allowed to discard a weapon and mod combo and replace it with a new weapon and mod combo.
In Conclusion
Whether you are an everyday hero, a great military hero, a superhero, or just someone who gets the heroes their coffee, come be a Big Damn Hero! Help rid the world of the Zombies that are plaguing this world with their evil - especially the ones who don't use a coaster.
The world may have gone to Hell in a hand-basket, but now the Zombie Fried horde will have to contend with the basket weavers that are the Big Damn Heroes, for they are the ones that will craft a new hand-basket for humanity.
So hurry up and take the fight to the Zombie Fried Zombies - because we are double parked!