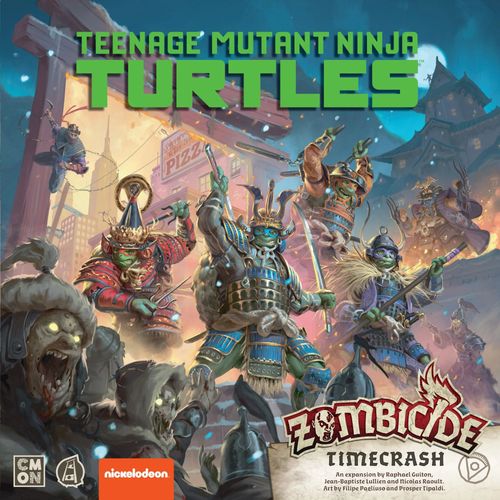
Zombicide: White Death – Teenage Mutant Ninja Turtles: Timecrash
Zombicide: White Death – Teenage Mutant Ninja Turtles: Timecrash Rulebook
Table of Contents
Table of Contents
Components
- 14 cards
- 7 Equipment cards: April's Harp x1, Casey's Hockey Stick x1, Donatello's Bo Staff x1, Leonardo's Ninjatōs x1, Michelangelo's Nunchaku x1, Raphael's Sai x1, Splinter's Cane x1
- 6 Zombie cards (541 to 546)
- 1 Necromancer card (Shredder)
- 42 tiles
- 36 Chi tokens
- 6 Power tokens
- 4 map tiles (double-sided)
- 7 Survivor miniatures and character sheets: Leonardo, Raphael, Michelangelo, Donatello, April O'Neil, Splinter, Casey Jones
- 16 Zombie miniatures: 1 Shredder (Defiler Necromancer), 15 Foot-Ninjas
The Turtles
Chaos gripped New York, and our human friends threw themselves into the melee with us. The more, the better, right? This strange place was called Wintergrad, and I guess they have been suffering under the Zombies here for longer than we have. But if we don't want New York to suffer the same fate, we need the entire Turtle Team! Brain-dead people need not apply... except for Casey. He's kind of a mascot.
There's one thing in this city: weapons! Weapons everywhere. I have my favorite weapons, but you use whatever works best. Sometimes it's a blade. Another time a bow. And sometimes whatever is at hand. I'd love to take a few of these babies home with me. But I don't know whether Master Splinter would approve.
Turtle Team Equipment
The members of the Turtle Team do not start the game with the usual starting equipment. Instead, they have a second Skill on Blue Danger Level: Starts with: [Equipment]. This Skill grants each member their well-known weapon from the Teenage Mutant Ninja Turtles universe.
The Turtle Team is made up of 7 miniatures with matching character sheets. They are played like standard Survivors, and all of them have the Turtle symbol, which gives them access to the following special rules.
The Turtle Equipment cards are laid out at the start of the game with their normal side (grey) up. They can be swapped and discarded like standard Equipment. However, they cannot be used by Survivors who are not part of the Turtle Team.
Note: April's Harp is a combat spell.
Power Tokens and Power Equipment
This whole feudal junk inspires me to write a few poems. Listen to me croak: "They help me to the greatest joy, tasty triangular pieces, pizza fills my heart's gap." Well... I'm a ninja. We can't do haiku.
The Power tokens are placed on the zones of the game board indicated during setup. Check the Quest's overview card for this. Each Timecrash map tile shows a modern building with a zone that shows an empty pizza box. That is where the Power token is placed.
Callout: Power tokens in pizza form are placed during setup on the indicated zones in each modern building.
Power tokens are reserved for members of the Turtle Team. They can be picked up and activated with the Pick Up/Activate Objective action, just like Objectives.
A Turtle Team Survivor who picks up a Power token may turn exactly 1 Turtle Equipment in their inventory to its Power side (green). Turtle Power Equipment has better combat values and new Skills. The Equipment can still be swapped and discarded like standard Equipment. However, it cannot be used by Survivors who are not part of the Turtle Team.
Callout: With a Power token, a Survivor can turn 1 Turtle Equipment to its Power side.
Turtle Team Chi Rules
You should have seen our faces when April spoke her first combat spell. BOOM! Charred Zombies everywhere! It didn't take long before we started channeling this "inner Chi" that Master Splinter always talked about. We are all pretty flexible, but what you see in kung fu movies is impossible. But here it works! I wonder if there are dwarves and elves here too?!
Callout: The Turtle Team members use Chi, a mystical energy with which they can achieve extraordinary things!
Chi tokens are a special currency that Turtle Team members can earn and use to improve their combat Skills. Chi tokens are placed on the Survivor dashboards and collected there. They do not take up space in the inventory and cannot be traded.
Each Turtle Team member starts with 4 Chi tokens. The Chi reserve has no upper limit and cannot drop below 0. The Chi reserve can go above 4 through certain game effects, such as Skills of Turtle Power Equipment.
EXAMPLE: Raphael has 4 Chi tokens and performs a melee Action with his Power Sai. He rolls three dice. His Power Sai has the Skill "Roll 6: +1 Chi" (see New Skills), and one of the dice shows a 6, which gives him one additional Chi token and raises his reserve to 5.
Translator's note: the dice faces in this example appear only as pictures in the German rulebook.
New Action: Turtle Meditation
Turtle Meditation can only be used by Turtle Team members. Turtle Meditation can be performed in any zone without Corruption and without Zombies. A Turtle Team member can perform one Turtle Meditation Action per Turn (even as a free Action). The Survivor refills their Chi tokens up to 4.
Special Skill: Turtle Power
The Turtle Power Skill can only be used by Turtle Team members. Before a combat Action (Magic, Melee or Ranged), a Turtle Team member can spend 1 Chi and choose 1 of the following Skills:
- +2 Dice: Combat
- Dice result +1: Combat
- Damage 2: Combat
The chosen Skill applies only to the Action that follows.
The Turtles and Eternal Empire
The expansion Eternal Empire extends the Chi rules and the Chi Equipment. The Chi, however, is the same in both expansions.
Note: all Chi rules of Eternal Empire also apply to Turtle Team members with one exception: Turtle Team members cannot perform the standard Meditation Action. They can only use Turtle Meditation.
Notes:
- Turtle Meditation has no further effect in zones with a Chi Statue.
- Instead, Turtle Meditation sets your Chi reserve to 4 (instead of 3 for the normal Meditation of Eternal Empire).
- Turtle Power is a Chi effect. This means it can be used to kill Zombies when Warden Brutes are on the board.
- Spending Chi to improve a weapon from Eternal Empire or to trigger a weapon Skill prevents it from breaking due to a breakage face.
Whatever happens, keep your Turtle Equipment at all costs!
Breaking Standard Weapons
Turtle Team members are not used to handling the medieval weapons they find in Wintergrad. Each breakage face rolled during a combat Action breaks the weapon the Survivor used. Discard the Equipment card after resolving the Action.
This rule does NOT apply in the following cases:
- The Equipment card is Turtle Equipment.
- The Turtle Team member spent Chi for the combat Action (for example, to use Turtle Power).
New Zombies: Foot-Ninjas and Shredder
Apart from the Teenage Mutant Ninja Turtles and their friends, Timecrash also features new enemies: Foot-Ninjas and Shredder! Although they are technically not undead, these enemies are treated as Zombies for rules purposes.
Foot-Ninjas
Shredder naturally brought his thugs from the Foot Clan. I don't know how he keeps the Zombies from chewing on them like everybody else... Oh, wait! I know! No brains.
Adding Foot-Ninjas is simple. Shuffle the corresponding Zombie cards into the Zombie deck. Foot-Ninjas follow these rules:
- Wounds caused on attack: 1
- Damage needed to kill one: 1
- Adrenaline points: 1
- Special rules:
- Foot-Ninjas are Walkers and have the same Target priority as Walkers.
- Foot-Ninjas appear on Objectives. Each time a Foot-Ninja card is drawn, the indicated number appears on each Objective. If there are no Objectives, no Foot-Ninjas appear.
- Chi cannot be spent before combat Actions (Magic, Melee or Ranged) in zones with Foot-Ninjas, and on combat Actions that target zones with Foot-Ninjas.
Note: Survivors, beware! Foot-Ninjas combined with the Warden Brutes of Eternal Empire are a deadly mix. If the Warden Brutes are on the board, Zombies can only be killed with combat Actions for which Chi was spent. If both are on the board, you must kill the Warden Brutes first. As a last resort, dragonfire and cauldrons can still be used.
Shredder
The blade-armed Shredder has always been a feared enemy of the Teenage Mutant Ninja Turtles. During the events of Timecrash he becomes a Necromancer and follows these rules:
- Wounds caused on attack: 1
- Damage needed to kill him: 1
- Adrenaline points: 1
- Special rules: Each failed die roll during an attack on Shredder's zone inflicts 1 Wound on the attacking Survivor. This rule also applies when the attack targets other Zombies in the zone, and when the attacking Survivor is not in the same zone.
Shredder in Black Plague, Green Horde and White Death
Shredder replaces the Necromancer (Black Plague), the Orc Necromancer (Green Horde) or the Defiler Necromancer (White Death). Swap the miniature: Shredder plays like the Necromancer or Orc Necromancer with his additional special rule.
Timecrash includes Shredder's Necromancer card, which can be added to the Necromancer deck of White Death or used as the overview card in Black Plague and Green Horde.
Quests
These Quests are designed for use with the White Death base game. It is recommended to play them in order, to follow the events of the Timecrash between New York and Wintergrad.
Quest 1: Turtles on Ice
Short / 6 Survivors / Medium
Required map tiles: 28R, 32V, 33V, 40R, 41R and 42V.
Setup overview: Survivor start zone; 6x Objectives (blue, green and red); Spawn Zones 1, 2 and 3; 3x Corruption; 3x Power tokens; 1x Beacon; 2x Rope Ladders; 12x Guards.
Objectives
Welcome to Wintergrad. You win as soon as the conditions of all of the following tasks are met at the same time:
- You have picked up all Objectives.
- Shredder has been defeated at least once.
Special Rules
- Setup: Shuffle the blue and green Objectives randomly and face down under the red Objectives. Divide the Survivors (as evenly as possible) between the two Survivor start zones.
- Wintergrad's Story: Each red Objective brings 5 AP to the Survivor who picks it up.
- Is this a loot box? The blue and the green Objective each bring 1 random vault artifact to the Survivor who picks it up. That Survivor may then rearrange their inventory for free. If no vault artifacts are available, the Survivor receives 5 AP instead.
Quest 2: Necromancy for Dummies
Medium / 6 Survivors / Medium
Required map tiles: 26R, 31V, 39V, 40R, 41R and 42V.
Setup overview: Survivor start zone; 4x Power tokens; 12x Guards; 3x Corruption; 1x Beacon; 6x Objectives (blue, green and red); Spawn Zones 1, 2 and 3.
Objectives
Search for Clues. You win as soon as the conditions of all of the following tasks are met at the same time:
- You have picked up all Objectives.
- Shredder has been defeated at least once.
Special Rules
- Setup: Shuffle the blue and green Objectives randomly and face down under the red Objectives.
- As Easy as D'n'D: Each red Objective brings 5 AP to the Survivor who picks it up.
- I saw it first! The blue and the green Objective each bring 1 random vault artifact to the Survivor who picks it up. That Survivor may then rearrange their inventory for free. If no vault artifacts are available, the Survivor receives 5 AP instead.
Quest 3: The Glitch
Medium / 6 Survivors / Medium
Required map tiles: 28V, 31V, 39R, 40V, 41R and 42R.
Setup overview: Survivor start zone; 4x Power tokens; Spawn Zones 1, 2 and 3; 3x Corruption; 7x Objectives (red, blue and green); 12x Guards.
Objectives
- Reach the portal first. Complete the following Objectives first, in any order:
- Pick up all Power tokens.
- Find the Beacon. The Beacon is the portal you want to reach (see Special Rules).
- THEN:
- Defeat Shredder.
Special Rules
- Setup:
- Shuffle the blue and green Objectives randomly and face down under the red Objectives.
- Make sure the Beacon is not yet placed during setup.
- Race to the portal. For Shredder, the nearest Objective counts as the Beacon. Reveal it as soon as he reaches its zone. If the second coloured Objective (green or blue) is revealed in this way, Shredder has found the Beacon and you have lost. If several Objectives are gone at the same time, you decide.
- Unstable portal. The blue and the green Objective each bring 5 AP to the Survivor who picks it up. The second coloured Objective (green or blue) reveals the location of the portal. Place the Beacon in this zone. From now on, Shredder tries to reach the Beacon and follows the normal rules of the Defiler Necromancers.
- Weapons of the past. Each red Objective brings 1 random vault artifact to the Survivor who picks it up. That Survivor may then rearrange their inventory for free. If no vault artifacts are available, the Survivor receives 5 AP instead.
Quest 4: Head First
Medium / 6 Survivors / Short
Required map tiles: 28R, 30V, 32V, 33V, 41V and 42V.
Setup overview: Survivor start zone; Rope Ladder; Beacon; 3x Corruption; 2x Power tokens; 12x Guards; 8x Objectives (red, blue and green); Spawn Zones 1, 2 and 3.
Objectives
- Break the portals. The Beacon represents a portal. Break it 3 times (see Special Rules) before Shredder reaches it.
Special Rules
- The three portals. The blue and the green Objectives cannot be picked up.
- The Beacon is a portal. It has 10 life points and can only be damaged by Equipment that causes 2 (or more) Damage. It is destroyed when it reaches 0 life points. It loses 1 life point per Damage inflicted (2 Damage = -2 life points). The attacker receives 1 AP per Damage inflicted. The portal is immune to game effects that kill all figures in a zone (such as dragonfire).
- As soon as the portal is destroyed, another portal appears in the zone with the blue Objective, and you remove the blue Objective. The second portal must be destroyed in the same way.
- As soon as it has been destroyed a second time, a third portal appears in the zone with the green Objective, and you remove the green Objective. You win as soon as the third portal has been destroyed in the same way.
- More Is Better. Each red Objective brings 1 random vault artifact to the Survivor who picks it up. That Survivor may then rearrange their inventory for free. If no vault artifacts are available, the Survivor receives 5 AP instead.
Quest 5: Shredding the Curtain
Medium / 6 Survivors / Medium
Required map tiles: 30V, 33R, 39V, 40R, 41V and 42R.
Setup overview: Survivor start zone; 4x Power tokens; Beacon; 3x Corruption; 7x Objectives (red, blue and green); Spawn Zones 1, 2 and 3.
Objectives
- Uncover Shredder's secret. You win as soon as the conditions of all of the following tasks are met at the same time:
- Seek the forbidden knowledge. Pick up the blue and green Objectives.
- Defeat Shredder.
Special Rules
- Setup: Shuffle the blue and green Objectives randomly and face down under the red Objectives.
- Forbidden knowledge. The blue and the green Objective each bring 5 AP to the Survivor who picks it up. Each time a coloured Objective (green or blue) is picked up, Shredder appears in Spawn Zone 1. If Shredder is already on the board, he immediately receives an extra activation.
- A not-so-subtle hint. Each red Objective brings 1 random vault artifact to the Survivor who picks it up. That Survivor may then rearrange their inventory for free. If no vault artifacts are available, the Survivor receives 5 AP instead.
Quest 6: Shredder's Revenge
Hard / 6 Survivors / Medium
Required map tiles: 29R, 32R, 33V, 34V, 39V and 41V.
Setup overview: Survivor start zone; 2x Power tokens; Beacon; Spawn Zones 1, 2 and 3; 12x Guards; 8x Objectives (red, blue and green); 3x Corruption.
Objectives
- Rescue Wintergrad's soldiers. You win as soon as all Guards stand on the battlements (Wehrgänge).
Special Rules
- Setup:
- Shuffle the blue and green Objectives randomly and face down under the red Objectives.
- Divide the Survivors (as evenly as possible) between the two Survivor start zones.
- Fuel for the villains. Each red Objective brings 1 random vault artifact to the Survivor who picks it up. That Survivor may then rearrange their inventory for free. If no vault artifacts are available, the Survivor receives 5 AP instead.
- Siege equipment. The blue and the green Objective each give a Rope Ladder to the Survivor who picks it up.
Quest 7: Crumbling Walls
Hard / 6 Survivors / Long
Required map tiles: 26R, 27V, 28R, 29R, 33R and 34V.
Setup overview: Survivor start zone; Beacon; 6x Corruption; 12x Guards; 6x Objectives; 3x Cauldron; Spawn Zones 1, 2 and 3.
Objectives
- Evacuate the civilians. You win as soon as all Guards (civilians) have escaped through the Beacon. Guards can leave this zone at the end of the Action Phase, as long as there are no Zombies in this zone.
Special Rules
- Setup: Divide the Survivors (as evenly as possible) between the two Survivor start zones.
- Civilians. The Guard miniatures are civilians. They cannot perform Guard Actions. They can move only one zone per Turn, at the end of the Action Phase. They move into zones without Zombies (if possible) and use the shortest route to the Beacon. They cannot move if there are Zombies in their zone, or if all zones they could enter contain Zombies.
- Wintergrad's treasures. Each red Objective brings 1 random vault artifact to the Survivor who picks it up. That Survivor may then rearrange their inventory for free. If no vault artifacts are available, the Survivor receives 5 AP instead.
Quest 8: Short Circuit
Hard / 6 Survivors / Medium
Required map tiles: 31V, 32V, 39R, 40R, 41R and 42R.
Setup overview: Survivor start zone; 4x Power tokens; 3x Corruption; Beacon; 7x Objectives (red, blue and green); Spawn Zones 1, 2 and 3.
Objectives
- Trigger a short circuit. You win as soon as the conditions of all of the following tasks are met at the same time:
- Cut the power. Pick up all Objectives.
- Defeat Shredder. Defeat Shredder while Corruption has spread to one or more zones of the large building that spans map tiles 39R, 40R, 41R and 42R.
Special Rules
- Setup: Shuffle the blue and green Objectives randomly and face down under the red Objectives.
- That belongs in a museum! The blue and the green Objective each bring 5 AP to the Survivor who picks it up.
- Steal Shredder's energy! Each red Objective brings 1 random vault artifact to the Survivor who picks it up. That Survivor may then rearrange their inventory for free. If no vault artifacts are available, the Survivor receives 5 AP instead.
Quest 9: World Shift
Hard / 6 Survivors / Long
Required map tiles:
- World Shift map: 27R, 29V, 30V, 31V, 32V and 34R.
- Start map: 39R, 40R, 41R and 42V.
Setup overview: Survivor start zone; 3x Power tokens; 3x Corruption; Beacon; 12x Guards; 6x Objectives (red, blue and green); Spawn Zones 1, 2 and 3.
Objectives
- Start the World Shift. Remove all map tiles with modern buildings (39R, 40R, 41R and 42V). You lose immediately if a Guard is killed.
Special Rules
- Setup: The map has 2 levels. First set up the World Shift map. Then place further map tiles on the indicated map tiles to complete the Start map. Check the illustration for the orientation.
- Place 39R on 30V.
- Place 40R on 27R.
- Place 41R on 31V.
- Place 42V on 32V.
- Stacked map tiles are connected to neighbouring map tiles as if they were on one level (see Close the Rift).
- Close the rift. As soon as an Objective on a map tile with a modern building (39R, 40R, 41R or 42V) has been picked up, the World Shift takes place. That map tile is removed during the End Phase and reveals the map tile underneath it. All figures and tokens on the map tile (except Corruption and Spawn Zones) are removed (this gives no AP). Corruption and Spawn Zones are transferred to the map tile underneath.
- Pretty cunning! The blue and the green Objective each bring 5 AP to the Survivor who picks it up.
- We also have superweapons! Each red Objective brings 1 random vault artifact to the Survivor who picks it up. That Survivor may then rearrange their inventory for free. If no vault artifacts are available, the Survivor receives 5 AP instead.
Quest 10: Love Letters from Wintergrad
Hard / 6 Survivors / Long
Required map tiles: 26V, 27R, 28V, 31V, 33R and 42R.
Setup overview: Survivor start zone; Power tokens; Beacon; 3x Corruption; 7x Objectives (red, blue and green); Spawn Zones 1, 2 and 3.
Objectives
- Search for clues. You win as soon as the conditions of all of the following tasks are met at the same time:
- All Spawn tokens (Brutplättchen) are in the first Spawn Zone (see Special Rules).
- You have picked up all Objectives. When the last Objective is picked up, Shredder and all Survivors must be on map tile 42R during the following End Phase.
Special Rules
- Setup: Shuffle the blue and green Objectives randomly and face down under the red Objectives.
- Necromancer anchor. The blue and the green Objective each bring 5 AP to the Survivor who picks it up. The Objective is then placed on a Spawn token (free choice). It cannot be picked up again, but Foot-Ninjas continue to appear there. As soon as Shredder appears in the zone, the Spawn token (and the Objective lying on it) is moved to the first Spawn Zone.
- A little souvenir? Each red Objective brings 1 random vault artifact to the Survivor who picks it up. That Survivor may then rearrange their inventory for free. If no vault artifacts are available, the Survivor receives 5 AP instead.
New Skills
If the description contradicts the basic rules, the special rules of the Skill take precedence. The effects of the following Skills and/or bonuses can already be used in the Turn in which they were acquired. So if an Action causes a Survivor to level up and gain a Skill, they can use it immediately if they still have an Action left. If the Skill grants them an extra Action, they can use that as well, even if they acquired the Skill with their last Action.
1 Free Turtle Power
The Survivor can use this Skill once per Turn. The Survivor can use Turtle Power without spending a Chi token.
+2 Dice: [Action]
Each weapon of the Survivor gets 2 additional dice for Actions of the indicated type (Magic, Melee or Ranged). Two-handed weapons each get +2 dice, that is, +4 dice per two-handed Action of the indicated type.
Note: this Skill cannot be used if Foot-Ninjas are in the target zone.
Improvised Weapon: Combat
The Survivor may use this Skill once per Turn, for free. They may perform one free Melee or Ranged combat Action with the attributes below. All game effects that affect that combat (for example, other Skills) still apply.
- Improvised Weapon: Melee: Range 0, 2 dice, hits on 4+, 1 Damage.
- Improvised Weapon: Ranged: Range 1 to 1, 2 dice, hits on 4+, 1 Damage.
Translator's note: the attribute icons on the source cards are shown in the order range, dice, hit value, Damage.
Damage 2: [Action]
Weapons of the indicated type (Magic, Melee or Ranged) with a Damage value of 1 have a Damage value of 2 while they are used by this Survivor.
Transmute
The Survivor can use this Skill any number of times per Action. For 1 Action, they can discard an Equipment card from their inventory and draw a new card. Then the Survivor may rearrange their inventory for free. This is not a Search Action. "Aaahh!!" cards are handled as usual.
Turtle Bonus: [Skill]
Whenever the Survivor uses a Turtle Power Skill, they also receive the indicated Skill in addition to the other Skill they chose for that combat Action.
EXAMPLE: Donatello has Turtle Bonus: +2 Dice: Combat. Whenever he chooses Turtle Power "Dice result +1: Combat" or "Damage 2: Combat", he additionally receives +2 Dice: Combat.
Turtle Focus: +3 Dice: Combat
When the Survivor chooses the Turtle Power Skill "+2 Dice: Combat", they receive +3 Dice: Combat instead. Each weapon of the Survivor gets 3 additional dice for combat Actions. Two-handed weapons each get +3 dice, that is, +6 dice per two-handed combat Action.
Turtle Focus: Damage 3: Combat
When the Survivor chooses the Turtle Power Skill "Damage 2: Combat", they receive Damage 3: Combat instead. For each combat Action, the Damage value counts as 3.
Turtle Focus: Dice Result +2: Combat
When the Survivor chooses the Turtle Power Skill "Dice result +1: Combat", they receive Dice result +2: Combat instead. The Survivor raises the result of each die they roll for a combat Action by 2. A die result of 1 is always a miss, and the highest possible result in this case is 6.
Turtle Power: 2 for 1
When the Survivor uses Turtle Power, they choose 2 Skills from the list (instead of 1).
Roll 6: +1 Chi
For each 6 rolled during a combat Action, the Survivor gains 1 Chi token.
Turn Overview
This is the reference sheet printed at the back of the German rulebook.
Each Turn begins with:
01 – Action Phase
The starting player activates all of their Survivors one after another, in any order. When they are finished, the Turn of the next player clockwise begins. Each Survivor initially has 3 Actions, which they can choose from the following list. Unless otherwise stated, each Action can be performed several times per Turn. All details apply per activation of the individual Survivor.
- Move: Move 1 zone further (+1 Action per Zombie in the starting zone).
- Search (once per Turn): Only in building zones without Zombies. Draw 1 card from the Equipment deck. The Survivor may then rearrange their inventory for free.
- Rearrange/Trade: Rearrange your inventory and/or trade Equipment with other Survivors in the same zone. Trading nothing is allowed, provided both players agree.
- Combat Action:
- Melee Action: Requires an equipped melee weapon.
- Ranged Action: Requires an equipped ranged weapon.
- Magic Action: Requires an equipped combat spell (Kampfzauber).
- Enchantment Action: Requires an equipped Enchantment.
- Pick up an Objective or activate an Objective (in your own zone).
- Make noise: Place 1 Noise token in the Survivor's zone.
- Do nothing: All remaining Actions are forfeited.
- Cauldron Action (3 Actions):
- Move cauldron: From the Survivor's zone into an adjacent zone that has an open path. The Survivor moves together with the cauldron.
02 – Zombie Phase
Step 1 – Activation: Attack or Movement
All Zombies have 1 Action, with which they do the following:
- Zombies in zones with at least one Survivor attack.
- Zombies that did not attack move.
When Zombies can see several Survivors, they choose reachable Targets before Targets they cannot reach. If they cannot see any Survivors, they choose the loudest reachable zone before zones they cannot reach. In doing so, they always take the shortest route. If several zones come into question, ignore those with no open path. Otherwise, you decide together in which direction the Zombies move.
Step 2 – Spawn
- Draw the Zombie cards for the Spawn Zones always in ascending order: first the first Spawn Zone, then the other normal Spawn Zones, and finally the Defiler Spawn Zone (Schänder-Brutzone).
- The highest Danger Level reached by all active Survivors applies.
- No miniatures of a certain type left? Place all those that are still there, then place a Monster. If one is already on the board, it receives an extra activation.
- Defiler Necromancer: Instead of moving, it pushes its original Spawn token 1 zone closer to the Beacon and places a Corruption token in the new zone.
03 – End Phase
- Remove all Noise tokens from the board.
- The next player clockwise receives the Starting Player token.
Target Priorities
If several Targets have the same Target priority, you decide which enemies are eliminated first.
| Target priority | Zombie type | Actions | Damage needed | Adrenaline points |
|---|---|---|---|---|
| 1 | Abominations (all types) / Monsters (all types) / Dragon | 1 | 2/3/Special | 1/5/1 |
| 2 | Walkers (all types) / Rat swarms / Murder Crows | 1 | 1 | 1 |
| 3 | Runners (all types) / Zombie wolves | 2 | 1 | 1 |
| 4 | Necromancers (all types) | 1 | 1 | 1 |