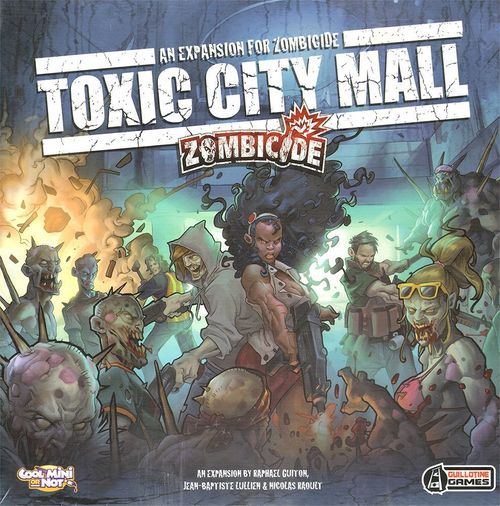
Zombicide: Toxic City Mall
Zombicide: Toxic City Mall Rulebook
Table of Contents
Table of Contents
- 1. Toxic City Mall Game Contents
- 2. Introducing Toxic City Mall
- 3. New Zombies: Toxic Zombies
- 4. Zombivors
- 5. New Tiles: The Mall & Parking
- 6. Barricades
- 7. Rubble
- 8. Ultrared Mode
- 9. Stashing Equipment in Cars
- 10. Playing with 7+ Survivors
- 11. Additional Skills
- 12. TCM Missions
- 13. Index
- 14. Designers' Notes
1. Toxic City Mall Game Contents
4 game tiles (double-sided)
14 Survivor miniatures
- Derek, the locator (standard and Zombivor version)
- Elsa, the cat burglar (standard and Zombivor version)
- Neema, the executive (standard and Zombivor version)
- Raoul, the contractor (standard and Zombivor version)
- Wanda, the waitress (Zombivor version)
- Goth Amy (Zombivor version)
- Crazy Ned (Zombivor version)
- Josh, the thug (Zombivor version)
- Phil, the cop (Zombivor version)
- Doug, the office guy (Zombivor version)
29 Zombie miniatures
- 16 Toxic Walkers
- 4 Toxic Fatties
- 8 Toxic Runners
- 1 Toxic Abomination
10 double-sided Survivor ID cards: Derek the locator, Elsa the cat burglar, Neema the executive, Raoul the contractor, Crazy Ned, Doug the office guy, Goth Amy, Josh the thug, Phil the cop, and Wanda the waitress (each card shows the standard and Zombivor version).
56 mini-cards
Equipment cards
- .44 Magnum x2
- 911 Special x1
- Assault Rifle x2
- Betty x1
- Doug's Dream x1
- Cookies x2
- Gas mask x2
- Jack & Jill x1
- Flamethrower x1
- Hollow-point rounds x2
- Laser pointer x4
- Ned's Atomic Flashlight x1
- Pa's Gun x1
- Pan x4
- Spare change x2
- Sweet Sisters x1
Zombie cards
- Toxic Zombies cards x12
Wounded cards x16
49 tokens
- First Player Token
- Rubble token: small x4, large x2
- Skill counters x12
- Experience trackers x10
- Barricade token x4
- Rotten Skill token x2
- Mall double door: Blue x1, Standard x4
- Mall door token x16
- Zombie spawn token: Red/Green x1, Red/White x1, Red/Yellow x1, Red/Violet x1
2. Introducing Toxic City Mall
You'd like to play with Toxic City Mall? Unless stated otherwise in the Mission's briefing, add all Zombicide Expansion: Toxic City Mall's Equipment and Zombie cards to their respective standard piles.
Put aside the following card: Pa's Gun.
Toxic Zombies: Zombies with the Toxic Blood Spray ability and featured with green Zombie miniatures. Introduced in Toxic City Mall.
Standard Zombies: Zombies without special ability and featured with grey Zombie miniatures. Core Game Zombies.
3. New Zombies: Toxic Zombies
Maybe it's a side effect of radiation, a mutation, or just something nasty they ate, but Toxic Zombies have something in their blood. Going up close and personal with them isn't a good idea.
Toxic Zombies rules
1- Upon elimination, a Toxic Zombie inflicts 1 Wound on its assailant if they are both in the same Zone. This is called a Toxic Blood Spray. Toxic Blood Sprays are Zombie attacks.
Example 1: Elsa attacks and kills a Toxic Walker standing in her Zone. The Toxic Walker is eliminated and hits Elsa with a Toxic Blood Spray, inflicting 1 Wound on her.
Example 2: While standing in an adjacent Zone, Neema shoots a Toxic Runner with her sniper rifle before it can grab Elsa. The kill doesn't wound Neema, because she and her target are in different Zones. As there's no Toxic Blood Spray, Elsa isn't wounded either.
Neema shoots down the Toxic Zombie with her sniper rifle. This does not cause a Toxic Blood Spray, as Neema killed it from another Zone.
Elsa knocks out a Toxic Zombie with her bat. As they both stand in the same Zone, the Zombie delivers a Toxic Blood Spray, and Elsa suffers a Wound.
2- Toxic Zombies exist in all types: Fatties, Runners, Walkers, etc. They have the same characteristics and get the same targeting priority level as their counterparts but are removed first in Ranged Combat (and car attacks). Players still choose the targets in Melee Combat.
Example: Derek shoots with an Assault Rifle in a Zone where two Walkers, a Toxic Walker, a Runner, and a Toxic Runner stand. He scores two hits with his first Ranged Combat Action. A Toxic Walker and a Walker are removed. Derek scores two more hits with his second Ranged Combat Action. The last Walker and the Toxic Runner are removed. A Runner remains. Let's roll the dice!
First salvo. With two hits, Derek kills the Toxic Walker and a Standard Walker.
Second salvo. Two more hits. Derek kills the last Standard Walker and the Toxic Runner.
May I refrain from killing?
A Survivor may not refrain from killing Toxic Zombies.
In other words, when you score more successes than needed to kill Standard Zombies while there are Toxic Zombies in the Zone, the extra successes are distributed among Toxic Zombies.
Toxic Abomination
The Toxic Abomination has an additional game effect: all Zombies standing in its Zone at the end of the Zombies' Phase become Toxic Zombies. Replace their miniatures with matching Toxic Zombie miniatures. If there aren't enough Toxic Zombie miniatures, any remaining Zombies are simply not replaced. Replacing Standard Zombies with Toxic Zombies in this way doesn't generate a new activation for the Toxic Zombies. This effect only applies to Standard Zombies.
3- Toxic Fatties come with an escort of 2 Toxic Walkers.
4- Toxic Zombies do not benefit from the extra activation cards of other Zombie types.
5- Eliminating a Toxic Zombie with a car attack does not cause a Toxic Blood Spray.
Example: Three Walkers, two Runners, and a Fatty are joined by a Toxic Abomination. The players' Zombie stock contains four Toxic Walkers, a single Toxic Runner, and a single Toxic Fatty. The players replace all the Walkers and the Fatty with their Toxic counterparts, but they can only replace a single Runner. The last Runner remains the same.
4. Zombivors
These guys are infected but somehow managed to keep their free will. Most of them grow a strange sense of humor helping them to cope with an overwhelming urge for murder. Yes, we all agree they don't smell very nice, but their sheer resilience and willpower are awe-inspiring.
Toxic City Mall introduces a new kind of Survivor: Zombie Survivors called "Zombivors". The Zombivors' status is indicated with a biohazard symbol on the Survivors' Identity Card. All Survivor rules apply to them.
The killer feature about Zombivors is their incredible endurance: a Zombivor is only eliminated by five Wounded Cards in his Inventory (instead of two for a standard Survivor).
Zombivors are great tanks. There's a serious drawback, though (besides the foul breath): at Yellow Level, Zombivors don't gain the +1 Action Skill of standard Survivors. They're tougher but somewhat slower, and thus offer a whole different gaming experience. You'll see!
Toxic City Mall Zombie ecology
| Targeting priority | Name | Actions | Min Dmg to destroy | Experience points |
|---|---|---|---|---|
| 1 | Toxic Walker | 1 | 1 | 1 |
| 2 | Walker | 1 | 1 | 1 |
| 3 | Toxic Fatty (1) | 1 | 2 | 1 |
| 3 | Toxic Abomination (3) | 1 | 3 | 5 |
| 4 | Fatty (2) | 1 | 2 | 1 |
(1) Each Toxic Fatty comes with 2 Toxic Walkers when it Spawns.
(2) Each Fatty comes with 2 Walkers when it Spawns.
(3) Toxic Abomination: All Standard Zombies standing in its Zone at the end of the Zombies' Phase become Toxic Zombies.
Toxic City Mall Targeting Priority
Ranged hits are assigned in the following order. At each step, Toxic Zombies are removed first.
1- Survivors who are in the Zone (except the shooter) 2- Walkers (Toxic first, then Standard) 3- Fatties or Abominations (Toxic first, then Standard) 4- Runners (Toxic first, then Standard)
An Abomination (Toxic or not) counts as a Fatty for targeting purposes.
Resurrection mode
The Resurrection mode lets you to begin the game with your favorite Survivors in their "standard" version and then switch them to their "Zombivor" version when things go awry. You read it right: if your Survivor gets eliminated, he comes back as a Zombie! You can also "play dead" and begin the game with a Zombivor.
The Resurrection mode is great for beginners, campaign-driven players, and super-heroic Missions.
Resurrection mode: When any standard Survivor gets his second Wound, lay down his miniature. Getting killed by a team member doesn't grant a resurrection. A standard Survivor can't receive more than two Wounds. If he receives more Wounds than needed to kill him, distribute these Wounds to other Survivors, or ignore them if nobody can take them. Ignore the downed Survivor for all game effects until his resurrection, as if he was removed from the board.
At the beginning of any following Players' Phase, before the first player acts, resurrect the Survivor. Discard all of his Wounded cards, and replace his downed miniature by his standing Zombivor miniature. Flip his Survivor Identity Card to its Zombivor version side. The new Zombivor immediately gains:
- Any remaining Equipment cards his standard version had. The inventory is reorganized for free.
- As many experience points as the standard version had. Choosing new Skills is allowed.
Ongoing game effects previously applied to the standard version no longer apply. Except for Resurrection, all rules affect Zombivors the same way they do Survivors.
Example: Elsa and Raoul stand in a Zone with four Walkers.
Elsa is unharmed, has 21 experience points and two Equipment cards: a Chainsaw and a Sub MG. Neema just gave her an additional Action thanks to her Born leader Skill.
Raoul has a single Wound, 27 experience points, and four Equipment cards: a Katana, Hollow-point rounds, a Rifle, and some Cookies.
An unexpected extra activation allows the four Walkers to attack, inflicting four Wounds to share between Elsa and Raoul.
The first and second Wounds go to Elsa. The player discards the Chainsaw and Sub MG. Elsa is eliminated, and her miniature is laid down in the Zone. She has no Equipment left.
The third Wound lands on Raoul. The player discards the Cookies and, as Raoul now has two Wounds and is eliminated, lays the miniature down. Raoul keeps his remaining Equipment cards (Katana, Hollow-points, and Rifle).
The fourth Wound is ignored, as there's no one left to harm.
At the beginning of the next Players' Phase, Elsa and Raoul's players decide to resurrect their fallen heroes. Zombivor Elsa and Zombivor Raoul are put in the Zone, replacing the laid down miniatures.
Zombivor Elsa has no Equipment, loses the additional Action granted by Neema, but has 21 experience points. The player can choose an Orange level Skill for her.
Zombivor Raoul still has the Katana, Hollow-points, and Rifle cards, along with 27 experience points. The player can choose an Orange level Skill for him.
5. New Tiles: The Mall & Parking
The mall tiles offer new opportunities for playing original and themed Missions by mixing indoor and outdoor rules (see below). For all game purposes shops are treated as buildings and indoor alleys are treated as streets.
The mall indoor alleys
The mall tiles feature large marble indoor alleys. Indoor alleys count as street Zones for all purposes (see the Zombicide rulebook). Cars can be driven inside the indoor alleys, as long as they got in by an opened double door. Yes, cars can get in the mall!
This influences:
- Lines of sight: Lines of sight cover as many Zones as the line can go through before reaching a wall or the edge of the board.
- Search: You can't Search in a mall indoor alley.
Diagram captions: The Survivors standing in the street can see these Zombies, since the door is open and the mall indoor alley is considered a street. Don't resolve a Zombie spawn in the mall indoor alleys when you open the mall door. They count as street Zones. This Zone can't be Searched. All mall indoor alleys are considered street Zones.
The mall shops
The shops are separated by walls. This influences:
- Movement: You can only enter a shop through an opened door.
- Lines of sight: Shops are building Zones.
- Search: You can Search in shops.
- Zombie spawning: Opening a shop's door generates a Zombie spawn in the shop. The same happens if the shop door is opened (or missing) when the mall double door is opened.
Diagram captions: Resolve a Zombie spawn in the shop if its door is opened. This shop is a building Zone and can be Searched.
Parking
Covered by 9 street Zones, parking is a real arena for your Survivors. This tile's great for outdoor shooting and Zombie splitting. The central area counts as a single Zone.
6. Barricades
We've all heard about a survivor named Jericho piling up tons of junk to put a wall between the zombie world and him. And we can all guess how it ends. He finally feels safe. He lets his guard down. And then the wall falls under some undead weight.
Survivors build barricades to keep Zombies at bay. Unfortunately, hastily built barricades are temporary at best and always break down sooner or later. Barricades can only be built in specified locations, indicated on the Mission's map. Unless otherwise stated in the Mission's briefing, when there's a barricade on the map it can be rebuilt in the same spot when it's broken down.
Barricade tokens have two facings indicating their two states, "incomplete" and "complete". On his turn, any Survivor can spend 3 Actions at once to start or finish building a barricade in the Zone he stands in. The Zone must be free of Zombies.
1- To start building a barricade, a single Survivor spends 3 Actions at once. Put a Barricade token, with its "incomplete" face showing, over a straight border of the Zone the Survivor stands in. An incomplete barricade doesn't have any effect.
2- To complete a barricade, one Survivor may select an "incomplete" barricade on a border of the Zone he stands in, spend 3 Actions at once, and flip the token to the "complete" side. All Survivors who took part in the construction of the barricade earn 5 experience points.
A barricade can be completed in a single turn if two Survivors spend 3 Actions each. The first Survivor spends 3 Actions to start it, then the second Survivor spends 3 Actions to complete it.
Designer's note: "Free" Actions can't be spent to build or finish a barricade.
No path to Survivors!
On rare occasions, Zombies may not have any suitable path to get to the Survivors. A Survivor may use the Lock it down Skill to trap Zombies in a building, for example.
In that case, Zombies follow the shortest route to the noisiest Zone as if all doors were opened, though locked doors still stop them.
Here's how barricades work
1- Adjacent Zones are set apart if their common border is fully blocked by any combination of walls and barricades. Half street Zones and doors only need one complete barricade token to be blocked, but a mall double door and standard street Zones need two complete barricade tokens to be blocked. A single barricade in a Zone that needs two has no effect.
2- Barricades can't be crossed but don't block line of sight. You can shoot over them! Zombies can see over barricades.
3- Complete barricades aren't considered doors for spawning. They don't isolate rooms from the rest of the building.
4- A Survivor can entirely break a barricade in the same way he could open a door. He still needs to have a door-opening weapon (Axe, Chainsaw, etc.) in hand to do so.
5- Whenever Zombies get an extra activation (because of a card, miniatures lacking or another game effect), remove all barricades tokens from Zones where at least one Zombie of the indicated type stands. These Zombies spend their entire activation to destroy the barricade, even if they have several Actions to spend. If a Runner gets an extra activation that moves him into a Zone with a barricade on his first Action, he'll use his second Action to destroy the barricade.
6- The Zombies follow the shortest route to the noisiest Zone or visible Survivor, as if there was no barricade, though complete barricades still stop them. They pile there until a shorter path is defined or the barricade is destroyed.
Diagram captions: "This barricade is useless; a street needs two barricades to be blocked." "Zombies will choose to go this way, since they act as if there were no barricades. For them, the path is clear!" "This barricade works fine; a door is efficiently blocked by only one barricade." "The Zombies won't take this way. It's the shortest, but it's blocked by a door that the Zombies can't open. They'll go to the barricade!"
7. Rubble
Toxic City Mall introduces Rubble. A Zone even partially covered with one or more Rubbles can't be entered or crossed and blocks line of sight. Don't spawn Zombies in Zones covered by rubble or made inaccessible by it.
Diagram captions: "Zombies can't see the Survivors and vice versa. Zombies will wait behind the door while the Survivors skirt around the rubble in the street through the mall. Then it'll be lunchtime!" "This building is collapsed. Nobody can enter it, but the streets surrounding it are still usable… …mostly. This Zone can't be walked on or through (even with a car!)." "This shop is covered with a Rubble. It can't be entered."
8. Ultrared Mode
The Ultrared mode allows your Survivors to gain experience points beyond the Red Danger Level and pick up additional Skills. It also allows them to use Ultrared weapons, awesome killing machines for Red Level Survivors. This mode is great to reach amazing body counts and complete very large boards.
Toxic City Mall introduces Ultrared weapons: 911 Special, Betty, Doug's Dream, Jack & Jill, Ned's Atomic Flashlight, and Sweet Sisters.
These weapons are so powerful they can only be used by Red Level Survivors. Any Survivor can discard an Ultrared weapon on his turn to gain 5 experience points immediately.
Ultrared mode: Put all Ultrared weapons in the Equipment pile and shuffle it. When your Survivor reaches the Red Level, put the experience tracker to "0" and add any experience points gained past the minimum required to hit the Red Level. Your Survivor is still on the Red Level and keeps his Skills. Count additional experience points as usual and gain unselected Skills upon reaching Danger Levels again.
When all the Survivor's Skills have been selected, choose a Skill among any Zombicide Skills (except those featuring brackets, such as Start with [Equipment], for example) upon reaching Orange and then Red Level.
Example: Elsa (standard version) just earned her 43rd experience point, getting to the Red Level. She has the following Skills: Break-in (Blue), +1 Action (Yellow), Slippery (Orange), and +1 free Combat Action (Red). The player puts the experience tracker back to the start as the zombicide continues. Elsa is still at Red Level.
- Elsa won't get an additional Skill upon reaching the Blue and Yellow Levels for the second time. She has all available Skills for these Levels. Reaching the Orange Level again, she gains "+1 free Ranged Action", her second Orange Level Skill. Reaching the next Red Level again, the player chooses a new Skill among the two remaining ones for this Level and goes for "+1 free Move Action". The experience counter returns to the start.
- During her third run on the experience bar, Elsa doesn't get any Skill at Blue, Yellow, or Orange Levels, as she already has them all. Upon reaching the Red Level for the third time, she earns the last Red Level Skill: "2 Zones per Move Action". The experience counter goes to the start again.
From now on, Elsa still earns experience points and gets a player-chosen Skill every time she reaches the Orange level, and then another upon reaching the Red Level. Who will get the highest body count?
9. Stashing Equipment in Cars
At the cost of 1 Action, a Survivor can store Equipment cards in a car standing in the same Zone. Remove the Equipment cards from the Survivor's inventory and put them under the car token.
Taking any Equipment card stashed in a car cost 1 Action as well. Look at the Equipment cards stored in the car and move any amount of them from the car to the Survivor's inventory. Both of these Actions can be accomplished by the car's driver and passengers.
Example: Elsa owns Glass bottles and Raoul, standing a few Zones away, has Gasoline. Meeting and exchanging stuff would allow the mixing of a delicious Molotov cocktail. Unfortunately, the body count is getting very high in the block, and the Survivors can't afford to lose any turns. A police car is parked in Elsa's Zone. She spends an Action to move the Glass bottles Equipment card from her inventory to the police car before moving on. Later, Raoul gets into the police car's Zone. He spends an Action and takes the Glass bottles Equipment card into his inventory. The Molotov's ready!
10. Playing with 7+ Survivors
Basically, there are two conflicting philosophies about Survivor groups. The first believes in small, tight, quick travelling teams. These commando-wannabes are really agile but vulnerable whenever the unexpected occurs. If something comes up they're not prepared or equipped for, be it an open wound or a single reinforced door, it can turn out to be lethal. The other side favors strength in numbers. An army of people can look and feel invincible, but remember that we are prey for the zombies. Food. And the more of us there are, the more we look, smell, and sound like a walking buffet.
Zombicide has an expanding gallery of Survivors to play with. Sooner or later, you may be tempted to try playing with 7 or more Survivors. Playing with an increased number of Survivors (or players!) is quite easy. Follow these guidelines, and adjust them to fit your challenge level.
- Classic starting Equipment cards won't be enough to fit a 7+ Survivors game. Include an additional Pan per odd additional Survivor (7, 9, 11, etc.) and an additional weapon (Axe, Pistol, or Crowbar, you choose!) per even additional Survivor (8, 10, 12, etc.). Everyone must begin the "zombicide" with a weapon.
- Add 1 additional Spawn token per 2 Survivors above the sixth (round up). Stack these additional Spawn tokens in the same Zones as existing ones or in any new Spawn Zone of your choice, if you have several available. Yes, that means some Zones will double or even triple their spawn rate!
7+ Survivors / 7+ players: Zombicide allows the players to move around with one, two, three, or more Survivors each. Playing with 7+ Survivors is easy and fun, as players learn to manage growing teams of zombie killers.
Zombicide can be played with 7+ PLAYERS as well, though it wasn't originally designed that way. The game time extends, as it takes longer to complete every players' turn. On the other hand, playing with a lot of friends can be a lot of fun!
11. Additional Skills
Add these Skills to the Core Game's Skills list. Feel free to use them with your custom Survivors!
- +1 Damage with [Equipment] – The Survivor gets a +1 Damage bonus with the specified Equipment.
- +1 Damage: [Type] – The Survivor gets a +1 Damage bonus with the specified type of Action (Combat, Melee or Ranged).
- +1 free Melee Action – The Survivor has one extra, free Melee Combat Action. This Action can only be used for Melee Combat.
- +1 free Ranged Action – The Survivor has one extra, free Ranged Combat Action. This Action can only be used for Ranged Combat.
- Roll 6: +1 die Combat – You may roll an additional die for each "6" rolled on any attack, Melee or Ranged. Keep on rolling additional dice as long as you keep getting "6". Game effects that allow re-rolls (the "1 re-roll per turn" Skill or the "Plenty of ammo" Equipment card, for example) must be used before rolling any additional dice for this Skill.
- Roll 6: +1 die Melee – You may roll an additional die for each "6" rolled on a Melee attack. Keep on rolling additional dice as long as you keep getting "6". Game effects that allow re-rolls (the "1 re-roll per turn" Skill, for example) must be used before rolling any additional dice for this Skill.
- Roll 6: +1 die Ranged – You may roll an additional die for each "6" rolled on a Ranged attack. Keep on rolling additional dice as long as you keep getting "6". Game effects that allow re-rolls (the "1 re-roll per turn" Skill or the "Plenty of ammo" Equipment card, for example) must be used before rolling any additional dice for this Skill.
- 2 cocktails are better than 1 – The Survivor gets two Molotov cards instead of one when he creates a Molotov.
- Break-in – The Survivor doesn't need any Equipment to open doors. He doesn't make Noise while using this Skill. However, other prerequisites are still mandatory (such as taking a designated Objective). Moreover, the Survivor has one extra, free Door opening Action. This Action can only be used to open doors. Please note the Break-in Skill doesn't apply to removing barricades (See P. 10).
12. TCM Missions
Missions 01 to 06 were conceived and tested with Zombicide Season 1 and Toxic City Mall contents. Missions 07 to 10 were designed with Zombicide Season 2: Prison Outbreak and Toxic City Mall contents. Feel free to alter them to suit your tastes...at your own risk!
Map diagrams are not reproduced. Where a Mission's rules refer to a map marking ("red X", "blue door", "Exit Zone"), the marking is named as the rules name it.
M01 The Big Rubble
EASY / 4 to 12 Survivors / 150 minutes
We've heard someone shooting. One, maybe two shooters. It's coming from a building in a severely damaged block downtown. We have to check it out to see if there is someone still alive, but to get there, we'll have to go through this giant, half-crumbled mall. And it's Saturday. I hate malls on Saturdays.
Tiles needed: 1B, 1M, 2B, 2M, 3C, 3M, 4M, 5C & 7B.
Objectives
We have a plan! Accomplish the following tasks in this order:
1- Explore this area. The would-be Survivors are likely in one of the Zones marked with a red "X". We have to save both Survivors or, if there's only one alive, take all Objectives.
2- Get out! The mall isn't a nice place on Saturday, even less since the Zombies appeared. Fortunately, there are lots of cars waiting for us. So, we just have to reach the Exit Zone with all Survivors aboard as many cars as needed. Any car may escape through this Zone at the end of its driver's turn, as long as it's free of Zombies. An escaped car is removed from the board, with its passengers and their Equipment, upon reaching the Exit Zone.
3- Be careful! We don't leave anybody behind. If there's at least one Survivor left on the board and no means to reach the Exit in a car, the game is lost.
Special rules
- One, maybe two shooters. The board contains 7 Objectives. Up to two of them may reveal Survivors to rescue. When setting up the game, take 6 "neutral" Objectives (red on both sides), plus the green-sided and blue-sided Objectives, totaling 8. Shuffle them (red side up) and put 7 of them at random in the indicated Zones. No one should know which Objective is neutral or not. Put the eighth Objective aside without looking at it.
- Each Objective, whatever the color, gives 5 experience points to the Survivor who takes it. Revealing a colored Objective allows the player who took it to add a new hero to the team and play him. The blue Objective reveals a standard Survivor. The green Objective reveals a random Zombivor (put aside the Zombivors matching any Survivor on the board). The new Zombivor or Survivor is revealed and placed without experience or equipment on the Zone where the Objective was taken. He may now be played as normal. Revealing a "neutral" Objective doesn't grant an additional Survivor but still grants 5 experience points.
- Toxic roamers. Put a Toxic Walker in each Zone of the mall's indoor alley.
- You can use cars.
- Each pimpmobile can be searched only once. It contains either the Evil Twins, Ma's Shotgun, or Pa's Gun (draw randomly).
- You can search a police car more than once. Draw cards until you find a weapon. Discard the other cards. The Aaahh! card triggers the appearance of a Walker as usual and interrupts the search.
M02 Death Row
MEDIUM / 6+ Survivors / 90 minutes
This street looks like a zombie-filled death row. We think something is drawing all these zombies here, probably an abomination of this new "toxic" kind. It must hide in the general store on the other side. This place is surely filled with toxic zombies, but probably with food and ammo as well! It will be hard, but the reward is worth the risk. And one last thing: last time we found sauerkraut without sausages. That was nasty. This time, I take the sausages first; no way I fight this abomination without finding some.
Tiles needed: 1B, 4M, 5B & 6B.
Objectives
1- Find the sausages! They are represented by the two red Objectives.
2- Find the keys! The General Store is locked down with an iron curtain. The key is under the blue Objective.
3- Kill the Toxic Abomination. It waits in the general store.
Special rules
- Mmm...sausage. Each Objective gives 5 experience points to the Survivor who takes it.
- The iron curtain. The blue door cannot be opened until the blue Objective has been taken. Taking the blue Objective also activates the blue Spawn Zone.
- Toxic roamers. Put a Toxic Fatty (with its two Toxic Walker escorts) in each Zone of the mall's indoor alley.
- Toxic Abomination's haven. Put the Toxic Abomination in the designated area.
M03 Zombie Square
EASY / 4+ Survivors / 60 minutes
This was a nice place to walk around before the zombies. Now, zombies come pouring out of the four sewer holes whenever anyone comes around. Makes it less nice than it was.
We wouldn't be here at all but for the helicopter. It needs gas, but that's the easy part. Peering through his scope, Raoul saw that some smart ass had removed some... well, we need spare parts for this baby to take off. The missing parts are probably around somewhere, likely crawling with the genius that took them.
We must be nuts to explore this area. At least nobody has been able to plunder anything here.
I wonder what scares me more, flying or zombies. Guess I'll find out.
Tiles needed: 1B, 1C, 2B, 2C, 3M, 4M, 5B, 7M & 8M.
Objectives
We just have to do this in the right order:
1- Find the spare parts. The places where they may be hidden have been marked with a red "X" on the map. You also will need at least 2 Gasoline cards.
2- Fly away! Reach the Exit Zone with the remaining Survivors and at least 2 Gasoline cards. Any Survivor may escape through this Zone at the end of his turn, as long as it's free of Zombies.
Special rules
- Spare parts. Each Objective gives 5 experience points to the Survivor who takes it.
- Toxic roamers. Put two Toxic Walkers in each Zone of the mall's indoor alley.
- You can use cars.
- Each pimpmobile can be searched only once. It contains either the Evil Twins, Ma's Shotgun, or Pa's Gun (draw randomly).
M04 Heliport
HARD / 6+ Survivors / 120 minutes
The helicopter dropped us in the parking lot. We have to explore the buildings, find some food, and come back ASAP. Unfortunately, every zombie in the area heard us land. Hell of a crowd! I should have kept some gasoline for a Molotov. I screamed like a little girl when we lifted off the ground. I think I prefer zombies.
Tiles needed: 1B, 2C, 2M, 4M, 7B & 8M.
Objectives
Simple plans never work as we want. Accomplish the following tasks in this order:
1- Resupply! Special, extremely important supplies (bacon, new socks, toothpaste, more bacon) are under the Objectives. Also collect at least one supply card per remaining Survivor. The supply cards can be Canned food, Cookies, Rice, or Water cards.
2- Fly away with all these treasures! Reach the Exit Zone with the remaining Survivors. Any Survivor may escape through this Zone at the end of his turn, as long as it's free of Zombies. Gather the Equipment cards and Survivors that escaped. You win if you have at least one supply card per Survivor.
Special rules
- Enjoy the little things. Each Objective gives 5 experience points to the Survivor who takes it.
- Let's call this baby the noisycopter. Place one Noise token per Survivor, plus one on the Exit Zone. They're never removed.
- Toxic roamers. Put two Toxic Walkers in each Zone of the mall's indoor alley.
M05 Mall Raid
MEDIUM / 4 TO 12 Survivors / 180 minutes
Never, NEVER get separated by more than twenty yards. Craving food and supplies, some of us improvised a small excursion to the mall and got trapped inside. One barely escaped to tell us the others are barricaded and left defenseless. We have to jump in quick and escape as fast as we can, or we'll lose some friends. Stupid friends, I have to say, but friends nonetheless.
Hey, both these police cars belong to a private security company. Could we expect automatic weapons?
Tiles needed: 1M, 3B, 3C, 5B, 5C, 5M, 6M, 7B & 7M.
Objectives
Rescue our friends and get out in the parked cars. Escape through the Exit Zone with all starting and rescued Survivors, aboard as many cars as needed.
Special rules
- Objectives. Each Objective gives 5 experience points to the Survivor who takes it.
- Cornered! The Zones in the upper left tile 6M can't spawn Zombies and Survivors cannot Search in them. The barricades can be broken but not rebuilt. Put one Survivor of your choice per player in the designated Zone of tile 6M, up to a maximum of 12 Survivors on the board. They don't have any Equipment (even those with the Starts with [Equipment] Skill). Each cornered Survivor is played normally and doesn't count toward the maximum number of Survivors a player can start with (see the rulebook).
- Hello, my little friend! Put aside all Assault Rifle Equipment cards before the game starts. Each red Objective in tiles 5B and 5C give one of these Assault Rifle Equipment cards to the Survivor who takes it.
- Behind the wheel. All cars are locked. They can be searched normally but not driven until you find the matching keys.
- The blue and red Objectives in tile 3B are the police cars keys. Taking one of them unlocks a single police car for any Survivor to use (choose one). Taking both unlocks both police cars.
- The green Objective in tile 3C is the pimpmobile keys. Taking it unlocks the pimpmobile for any Survivor to use.
- You can use cars. Remember you need the matching keys to unlock them (see the Behind the wheel special rule).
- The pimpmobile can be searched only once. It contains either the Evil Twins, Ma's Shotgun, or Pa's Gun (draw randomly).
- You can search a police car more than once. Draw cards until you find a weapon. Discard the other cards. The Aaahh! card triggers the appearance of a Walker as usual and interrupts the search.
M06 Zombie Riot
HARD / 6+ Survivors / 5 HOURS
Some people tried to secure the area with barricades, but it looks like the zombies came at them from behind. The whole thing became a deadly trap. Anyway, there's lots of ammo, electronic parts, food, fuel, and weapons; useful stuff they salvaged "just in case". We're all feeling funny. What are the odds that it's just the flu?
Tiles needed: 1B, 1M, 2B, 2M, 3C, 5B, 5C, 6C & 6M.
Objectives
We could all turn to Zombivors. Take all the Objectives. When that's done, reach the Exit Zone with all Survivors. Any Survivor may escape through this Zone at the end of his turn, as long as it's free of Zombies.
Special rules
- Toxic roamers. Put a Toxic Fatty (with its two Toxic Walker escorts) in each marked Zone of the mall's indoor alley. Put two Toxic Runners in each marked Zone of the mall's indoor alley. Put a Toxic Abomination in the marked Zone of the mall's indoor alley.
- You cannot use the car.
- The pimpmobile can be searched only once. It contains Pa's Gun.
- Lust for life. You may only start with Survivors, not Zombivors.
- Objectives. Each Objective gives 5 experience points to the Survivor who takes it.
- Just in case. Put the blue and green Objectives randomly among the Objectives, face down. Each of them gives a Molotov Equipment card (if there are any) to the Survivor who takes it. If there's no Molotov cards left, ignore this special rule.
M07 Administration
MEDIUM / 6+ Survivors / 120 minutes
The prison administrative offices are near a mall we used to know. We can surely find some valuable information here, as the place was used as an emergency HQ at the beginning of the invasion. We could find out where the main zombie hordes are, or where food, weapons, and medicine are stashed. We plan to use the mall to reach the administration building unnoticed by zombies. And as long as we're in the mall, we can probably grab some stuff there too.
Tiles needed: 2M, 3M, 4M, 5P, 6P & 10P.
Objectives
Let's follow the plan carefully:
1- Explore all shops. Each shop is marked with a red "X". Take all red Objectives in the mall (tiles 2M, 3M, and 4M).
2- Look for the emergency files. They are in one of the three rooms marked with a red "X" in the headquarters. Take the red Objectives in the administrative building (tiles 10P, 6P, and 5P) until you find the green one.
3- Run as you never have. Reach the Exit Zone with all Survivors. Any Survivor may escape through this Zone at the end of his turn, as long as it's free of Zombies.
Special rules
- Emergency stuff. Each Objective gives 5 experience points to the Survivor who takes it.
- Where are these files marked with an "X"? Put the green Objective randomly among the three red Objectives of the administrative areas, face down.
- The blue pass for the blue door! Once the blue Objective is taken, the blue door can be opened.
- Police cars are ready to go. You can drive the police cars.
- You can search a police car more than once. Draw cards until you find a weapon. Discard the other cards. The Aaahh! card triggers the appearance of a Walker as usual and interrupts the search.
M08 Out Of Rags
MEDIUM / 6+ Survivors / 120 minutes
Killing zombies is a dirty job. Our clothes are really suffering from blood spray, stinking from rotten flesh, and of course, from being grabbed by filthy zombie hands. We desperately need some new rags, so it's time to go shopping. We need more gasoline for the car, as we don't have enough to get back to our shelter. Time to fuel up.
Tiles needed: 2M, 3P, 4M, 4P, 6M, 8M, 10P & 17P.
Objectives
You can't do real shopping without a plan:
1- Take the blue key. The mall is locked down, but you can see the corpse of the parking guard in its entry box. He has the key. Take the blue Objective.
2- Explore all shops. Each shop is marked with a red "X". Take all red Objectives in the mall.
3- Find a Gasoline card. Search the area until you find a Gasoline card to refuel the car.
4- Go back to the car. Reach the Exit Zone with all Survivors. Any Survivor may escape through this Zone at the end of his turn, as long as it's free of Zombies. You win if there is at least one Gasoline card in the inventory of a Survivor.
Special rules
- Fashion victims. Each Objective gives 5 experience points to the Survivor who takes it.
- The blue key for the blue door! Once the blue Objective is taken, the blue door can be opened.
- Our pimpmobile is out of fuel. You can't drive the car.
- Ma's fitness club. Do you remember Ned? His mother used to work out here, and she stored one of her "special" weapons in the gym. Set a Gunblade card in the fitness club. Any Survivor searching in this Zone can take it instead of an Equipment card.
- Ma's sparring partner. One of the security guards was Ma's sparring partner. He left his own gunblade in his entry box. Set another Gunblade card in the specified entry box. Any Survivor searching in this Zone can take it instead of an Equipment card.
- The pimpmobile can be searched only once. It contains Pa's Gun.
M09 Ultrared District
HARD / 6+ Survivors / 60-180 minutes
We heard about a police station used to store some really dangerous evidence, custom weapons of unmatched efficiency. The station is locked down since all cops went to the nearby mall in a useless fight. Everybody is now dead. We just have to search the corpses until we find the pass to enter the station. The only question is: can we use these weapons? Some of us think we should explore the entire mall and kill all zombies until we feel strong enough. Of course, that will take time, meaning more and more zombies will show up.
Tiles needed: 1M, 2M, 5M, 6M, 6P & 10P.
Put aside six Ultrared weapon cards. They are put in the Zone marked as an "Evidence Room".
Objectives
We want these weapons, and there is only one way to get them.
1- Find the pass to enter the police station. We need a police white pass to enter the station. The place where the bodies are is marked with a red "X". Take the red Objectives until you find the white one.
2- Search the police station. Search the Zone marked "Evidence Room" to find all six Ultrared weapons.
3- Go home with your new toys. Reach the Exit Zone with all Survivors. At least one of them has to possess an Ultrared weapon in his inventory. Any Survivor may escape through this Zone at the end of his turn, as long as it's free of Zombies.
Special rules
- Sense of accomplishment. Each Objective gives 5 experience points to the Survivor who takes it.
- The white pass! Put the white Objective randomly, face down, among the ten red Objectives. Once this Objective is taken, the White prison main entry door can be opened.
- The violet switch. Activating the violet Switch opens the violet door. The Survivor switching the violet Switch for the first time also takes the violet Objective and gains 5 experience points. The violet door closes when the violet Switch is placed back in its original setting.
- Ultrared weapons. A Zone is marked "Evidence Room" in the police station. Stored here are six Ultrared weapons. Any Survivor Searching in the Evidence Room can choose and take one of the remaining Ultrared weapons instead of a regular Equipment card.
M10 Running Mall
HARD / 6+ Survivors / 120 minutes
The mall is huge but we have finally reached its end: the administrative section and storage area. There is only a delivery door between us and the exit. Unfortunately, it's a great iron curtain. We need to get some power back to the mall to open this thing. Not an easy task.
Tiles needed: 1M, 3M, 4M, 6P, 7M, 11P, 14P, 15P & 16P.
Objectives
The great escape is a three steps plan.
1- Find the keys to the security rooms. There are two security rooms in the storage area of the mall. We need the keys to open their reinforced doors. We have marked the place where the key could be with red "X's". Take the red Objectives until you find the blue and green ones.
2- Activate the three switches. Marked as the exit, the rear entrance of the mall is closed. We need to start the emergency generator to open the rear door. Activate the three Switches, and the delivery door will open!
3- Fly, you fools! Go past the Exit Zone with all Survivors.
Special rules
- Tense as a thriller. Each Objective gives 5 experience points to the Survivor who takes it.
- The green key! Put the green Objective randomly, face down, among the red Objectives. Once this Objective is taken, the green door can be opened.
- The blue key! Put the blue Objective randomly, face down, among the red Objectives. Once this Objective is taken, the blue door can be opened.
- Stop the silent alarms. Remove one Spawn Zone (any color, even the blue one) when you find the blue Objective and a second one when you find the green Objective.
- A silent alarm. Where does it ring? In a place full of zombies, of course. The blue Spawn Zone activates when the blue Objective is taken. It can be selected for immediate removal with the "Stop the silent alarms" special rule.
- The white switch. Activating the white Switch is a step to opening the rear door. The Survivor switching the white Switch for the first time also takes the white Objective.
- The violet switch. Activating the violet Switch is a step to opening the rear door. The Survivor switching the violet Switch for the first time also takes the violet Objective.
- The yellow switch. Activating the yellow Switch is a step to opening the rear door. The Survivor switching the yellow Switch for the first time also takes the yellow Objective.
- The three switches open the rear door. Once the white, violet, and yellow Switches have been activated, Survivors can cross the Exit.
13. Index
- Barricades: 10-11
- Components: 2-3
- Extra successes: 6
- Indoor alleys: 9
- Mall shops: 9
- Missions: 16-26
- No path to Survivors: 10
- Parking: 10
- Playing with 7+ Survivors: 14
- Resurrection mode: 8
- Rubble: 12
- Skills: 15
- Stashing Equipment in cars: 14
- Targeting priority (TCM update): 7
- Toxic Abomination: 6
- Toxic Blood Spray: 4-5
- Toxic Zombies: 4-7
- Ultrared mode: 13
- Ultrared weapons: 13
- Zombivors: 7-8
Page numbers are those of the printed booklet.
14. Designers' Notes
The Guillotine Spirit – Liberté, égalité, fraternité
"Liberté, égalité, fraternité" (liberty, equality, brotherhood) is the French motto and Guillotine Games' motto as well. We believe in cooperation, friendship, and trust to reach success in a challenging world. We took inspiration from these values to create our company and design Zombicide. That is the Guillotine Spirit.
Zombivors
When players saw the Zombivor drawings for the first time, many thought about the introduction of Player vs Player rules to the game or, at least, heroes joining the zombie force against other players. We thought about these options. But another idea slowly arose.
The Guillotine Spirit inspired us to create heroes turning into zombies and remaining heroes by sheer willpower. This allowed us to introduce changes in their game profile with new features and a new feel. Creating Zombivors also seemed a unique way to strengthen the Zombicide universe. Survivors are heroes strong enough to face infection and death, and win. What can be learned from Zombivors about the zombie infection? What place will they hold in the future of Zombicide? Zombivors introduced concepts of "before" and "after" in Zombicide and thus, the beginning of a lasting storyline.
Lines of Sight
Some game components, especially the parking tile, raised questions in our team. How can an Actor just see in straight lines in an open field like a parking lot?
As most of us had designed war games before, we studied ways to introduce diagonal lines of sight to the game. Such a change was possible but had numerous consequences, the first of them being greater complexity in the core rules. After a while, we chose to keep the original rules. Rules simplicity is a pillar for Zombicide's popularity and, on a winky side note, we don't want our wives and kids out of the game!
House Ruling
We wanted Zombicide to have very flexible features and easy rules. This combination opens endless possibilities for house ruling. You don't like a rule? Change or ignore it. You want a token to represent something we didn't think about? Surprise us. You've thought about your own Survivor or have a miniature you'd like to play? Blank ID cards and Equipment cards are available for download on Guillotine Games' website (http://guillotinegames.com). Let your imagination open the gates of your own zombie world. Having fun shall be the only rule.