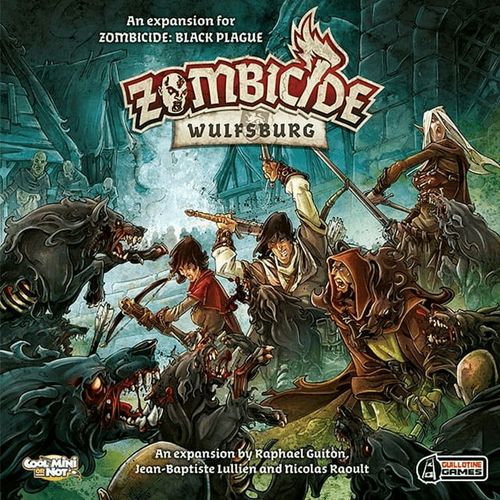
Zombicide: Black Plague – Wulfsburg
Zombicide: Black Plague – Wulfsburg Rulebook
Table of Contents
Table of Contents
Game Components
- 2 Game tiles (double-sided)
- 4 Survivor miniatures and ID cards
- 4 Survivor dashboards
- 32 Trackers
- 4 Survivor colored bases
- 30 Mini-cards
- 22 Equipment cards:
- Axe Of Carnage x1
- Bastard Sword x2
- Chain Lightning x2
- Chaos Longbow x1
- Deflecting Dagger x1
- Disintegrate x2
- Dragon Fire Blade x1
- Earthquake Hammer x1
- Flaming Great Sword x1
- Ironclad: Zombie Wolfz x1
- Mana Blast (starting Equipment) x1
- Quicksilver Sword x1
- Shield Of Ages x1
- Short Bow (starting Equipment) x1
- Short Sword (starting Equipment) x2
- Storm Bow x1
- Transmutation x1
- Vampire Crossbow x1
- 8 Zombie cards (#55 to #62)
- 22 Zombie miniatures: 1 Wolfbomination and 21 Zombie Wolfz
Using Wulfsburg
Wulfsburg requires a core Zombicide: Black Plague box to play. Using it to enhance your games is easy: unless stated otherwise in the Quest's briefing, simply add all Wulfsburg Equipment and Zombie cards to their respective standard piles.
New Zombies
Zombie Wolfz
- Min. Damage to destroy: 1
- Experience provided: 1 point
- Special rule: Zombie Wolfz have 3 Actions per Game Turn.
After all Zombies (including the Runners and Zombie Wolfz) have gone through their Activation step and resolved their first Action, the Runners and Zombie Wolfz go through the Activation step again, using their second Action to Attack a Survivor in their Zone or Move if there is nobody to Attack. Then the Zombie Wolfz go through the Activation step for a third time, using their third Action to attack a Survivor in their Zone or Move if there is nobody to attack.
Wolfbominations
- Min. Damage to destroy: Damage 3
- Experience provided: 5 points
- Special rules:
- Wolfbominations are Abominations.
- Wounds inflicted by Abominations can't be prevented by Armor rolls.
- A Damage 3 weapon or Dragon Fire is required to kill an Abomination.
- Wolfbominations have 3 Actions per Game Turn. This is played in the same way as Zombie Wolfz.
Updated Targeting Priority Order
This updated Targeting Priority Order chart includes Zombicide: Black Plague and this expansion.
| Targeting Priority | Name | Actions | Min Damage to Destroy | Experience Points |
|---|---|---|---|---|
| 1 | Walker | 1 | 1 | 1 |
| 2 | Fatty / Abomination (1) / Wolfbomination (2) | 1/1/3 | 2/3/3 | 1/5/5 |
| 3 | Runner | 2 | 1 | 1 |
| 4 | Zombie Wolfz | 3 | 1 | 1 |
| 5 | Necromancer | 1 | 1 | 1 |
When several targets share the same Targeting Priority Order, the players choose which ones are eliminated first.
(1) Abomination: Ignore Armor rolls. (2) Wolfbomination: Ignore Armor rolls.
New Tiles: Towers
Wulfsburg features four towers on both sides of two additional tiles. They are great to deepen the fantasy theme in your Zombicide games, as well as adding a strategy component to your Quest plans. They can be used to control vast areas on the board without fear of Zombie retaliation (as long as your rate of fire is high enough), or as starting areas for your Survivors and foes.
Tower tiles feature both building and street Zones, bordered by ramparts (see examples below).
- Ramparts can't be crossed but don't block Lines of Sight.
- Ramparts can be shot through.
- An Actor in a tower Zone can see over a building to Zones beyond it. Likewise, any Actors in one of these Zones has a Line of Sight to the Actor on the tower.
- A Survivor can shoot from a tower Zone, over a building Zone. The building Zone that is shot through counts towards the weapon or spell's Range, but there is no Line of Sight to it.
- Lines of Sight can't be drawn between tower Zones bordered with ramparts and building Zones next to them, even with an open door.
Each tower tile featured in Wulfsburg has nine Zones. The building Zones are marked on the tile. All other Zones in these tiles are street Zones.
Tower Line of Sight Examples
The example diagrams are not reproduced here; their captions are transcribed.
- Karl has a Line of Sight on all indicated Zones.
- No Line of Sight here, even with the open door: it's a building Zone. However, the Line of Sight extends beyond it.
- Ariane's Line of Sight goes no further in this direction. The tower's building Zone blocks it.
- Theo has no Line of Sight into this building Zone, but sees beyond it.
- The passage is open: following classic Line of Sight rules, Theo has a Line of Sight on the first building Zone, but not on the next.
- Both Survivors have no Line of Sight into these building Zones (even with the open doors), but see beyond it.
- The open door allows Theo to see inside the first Zone of the building.
- Morrigan sees beyond the first building into the street, but the wall blocks her Line of Sight from going further.
- Morrigan and Theo can't see into this building Zone.
- Karl and the Walker have a Line of Sight to each other through the rampart. None of them sees inside the building Zone.
- The Walker takes this route to reach Karl.
Magic Equipment
Magic Equipment cards are Equipment cards in every aspect, but feature a specific Danger Levels pre-requisite of their own, represented by the gems at the top of the card. They can only be used by Survivors at the Danger Levels displayed by unbroken gems on the card. Unless they are armors, Magic Equipment cards can't be equipped in Body slots.
Magic Equipment cards often have special rules.
Wulfsburg comes with ten Magic Equipment cards:
- Axe Of Carnage
- Chaos Longbow
- Deflecting Dagger
- Dragon Fire Blade
- Earthquake Hammer
- Flaming Great Sword
- Quicksilver Sword
- Shield Of Ages
- Storm Bow
- Vampire Crossbow
Ultrared Mode
The Ultrared mode allows your Survivors to gain experience points beyond the Red Danger Level and pick up additional Skills. This mode is great to reach amazing body counts and complete very large boards.
Ultrared mode: When your Survivor reaches the Red Level, move the experience tracker back to "0" and add any experience points gained past the minimum required to hit the Red Level. Your Survivor is still on the Red Level and keeps his Skills. Count additional experience points as usual and gain unselected Skills upon reaching Danger Levels again. When all the Survivor's Skills have been selected, choose a Skill among any Zombicide: Black Plague Skills (except those featuring brackets, such as Starts with [Equipment], for example) upon reaching Orange and then Red Level.
EXAMPLE: Morrigan just earned her 43rd experience point, getting to the Red Level. She has the following Skills: Reaper: Combat (Blue), +1 Action (Yellow), +1 free Melee Action (Orange) and Bloodlust: Combat (Red).
The player moves the experience tracker back to the start as the zombicide continues. Morrigan is still at Red Level, and keeps on earning experience points as she kills Zombies.
Morrigan doesn't get an additional Skill upon reaching the Blue and Yellow Levels for the second time: she has all available Skills for these Levels. Reaching the Orange Level again, she gains "Spellcaster", her second Orange Level Skill. Reaching the Red Level again, the player chooses a new Skill among the two remaining ones for this Level and goes for "+1 to dice roll: Magic".
The experience counter returns to the start.
During her third turn on the experience bar, Morrigan doesn't get any Skill at Blue, Yellow, or Orange Levels, as she already has them all. Upon reaching the Red Level for the third time, she earns the last Red Level Skill: "+1 Damage: Melee". The experience counter goes to the start again.
From now on, Morrigan still earns experience points and gets a player-chosen Skill every time she reaches the Orange Level, and then another upon reaching the Red Level.
Additional Quests
These Quests were conceived and tested mixing Wulfsburg's contents with Zombicide: Black Plague. Feel free to add or alter anything you want, at your own risk!
The map diagrams of each Quest are not reproduced here; the Tiles needed and the Quest text are transcribed.
Quest 1: Welcome to Wulfsburg
Easy / 6 Survivors / 60 minutes. Material needed: Zombicide: Black Plague, Wulfsburg. Tiles needed: 1V, 3V, 5R, 6V, 8V & 10V.
Objectives: Reach the objectives in this order to win the game:
- Gather all you need for your punitive trip. Take all Objectives. Some of them hide nice surprises!
- Reach the inner city. Reach the Exit Zone with all Survivors. Any Survivor may escape through this Zone at the end of his turn, as long as there are no Zombies in it.
Special Rules:
- Setup. Put the blue and the green Objectives randomly among the red Objectives, face down.
- Dirty lethal secrets. Each Objective gives 5 experience points to the Survivor who takes it. Taking either the blue or green Objective also grants a random Vault artifact.
Quest 2: Know Your Enemy
Medium / 6 Survivors / 90 minutes. Material needed: Zombicide: Black Plague, Wulfsburg. Tiles needed: 1R, 4R, 6R, 9V, 10V & 11R.
Objectives: Reach the objectives in this order to win the game:
- Get a clue. Take all Objectives.
- Reach the Exit. Reach the Exit Zone with all Survivors. Any Survivor may escape through this Zone at the end of his turn, as long as there are no Zombies in it.
Special Rules:
- Setup. Put a random Vault artifact in the Vault.
- Find the clues. Each Objective gives 5 experience points to the Survivor who takes it.
Quest 3: The Evil Twins
Medium / 6 Survivors / 120 minutes. Material needed: Zombicide: Black Plague, Wulfsburg. Tiles needed: 2R, 3V, 4V, 5V, 6R, 7R, 9V, 10V & 11V.
Objectives: Reach the objectives in this order to win the game:
- Monster hunting. Take all Objectives. The Evil Twins are hiding out there and must be stopped!
- Reach the Exit. Reach the Exit Zone with all Survivors. Any Survivor may escape through this Zone at the end of his turn, as long as there are no Zombies in it, and no Abomination in play.
Special Rules:
- Setup.
- Put the blue and the green Objectives randomly among the red Objectives, face down.
- Put a Vault artifact randomly in each Vault.
- Hide and Stink. Each Objective gives 5 experience points to the Survivor who takes it. Taking either the blue or green Objective also spawns an Abomination in the Zone. If an Abomination is already in play, taking the colored Objective spawns a Zombie card read at Red Level's worth of Zombies in the Zone instead.
Quest 4: The Ambush
Medium / 6 Survivors / 90 minutes. Material needed: Zombicide: Black Plague, Wulfsburg. Tiles needed: 3V, 5R, 8R, 9V, 10V, & 11V.
Objectives: Clear the breach. You can achieve the first two objectives in any order.
- Destroy the lures. Take all Objectives.
- Secure the way out. Get the blue Spawn Zone out of the board by killing Necromancers. Then, get at least one Survivor in each tower of tiles 10V and 11V.
Special Rules:
- Zombie lures. Each Objective gives 5 experience points to the Survivor who takes it.
- Clear the way! The blue Spawn Zone represents the Necromancers' chokepoint. Lock it down for good! It's active at the start of the game, and can be removed as usual using Necromancer rules.
Quest 5: Immortal
Medium / 6 Survivors / special duration. Material needed: Zombicide: Black Plague, Wulfsburg. Tiles needed: 1V, 3V, 6R, 8V, 10V & 11R.
Objectives: Reach the objectives in this order to win the game:
- Destroy the anchors. Take all Objectives.
- Purge the evil. You win the game when there are no colored Spawn Zones and no Necromancers on the board.
NOTE: This Mission's duration relies in great part on luck.
Special Rules:
- The anchors. Each Objective gives 5 experience points to the Survivor who takes it.
- Weak points. The blue and the green Spawn Zones are active at the start of the game. They can't be removed when a Necromancer is killed (see below).
- Immortal (?) Necromancers don't add a Necromancer Spawn Zone token when they spawn on the board. However, when they spawn through a colored Spawn Zone (blue or green), that Spawn Zone token is replaced with a Necromancer Spawn Zone token.
Quest 6: Zombie Court
Hard / 6 Survivors / special duration. Material needed: Zombicide: Black Plague, Wulfsburg. Tiles needed: 1R, 3V, 6V, 9V, 10V & 11R.
Objectives: Get the crown and the scepter. Find the blue and the green Objectives to win the game.
NOTE: This Mission's duration relies in great part on luck.
Special Rules:
- Setup.
- Put the blue and the green Objectives randomly among the red Objectives, face down.
- Put a Vault artifact randomly in each Vault.
- A dangerous quest. Each Objective gives 5 experience points to the Survivor who takes it. It also triggers a Zombie Spawn in the Zone (except for the blue and the green Objectives).
Quest 7: Blood Red
Medium / 6 Survivors / 180 minutes. Material needed: Zombicide: Black Plague, Wulfsburg. Tiles needed: 2R, 3V, 6R, 9V, 10V & 11R.
Objectives: Paint it red. Get every Survivor to Ultrared levels (see Ultrared Mode, p. 10).
Special Rules:
- Setting. Put the blue and the green Objectives randomly among the red Objectives, face down.
- One step closer to the Apocalypse. Each Objective gives 5 experience points to the Survivor who takes it. Taking the blue or the green Objective also grants a random Vault artifact.
- Special guests. Only the Necromancer Spawn Zone token can be removed when a Necromancer is killed.
Quest 8: The Ghost Door
Hard / 6 Survivors / 150 minutes. Material needed: Zombicide: Black Plague, Wulfsburg. Tiles needed: 1R, 2R, 3V, 5R, 6V, 7V, 8R, 9V & 10R.
Objectives: Reach the objectives in this order to win the game:
- Achieving power. Get at least one Survivor to the Red Danger Level.
- Through the Ghost Door. Reach the Exit Zone with a Survivor at the Red Danger Level. He may escape through this Zone at the end of his turn, as long as there are no Zombies in it.
Special Rules:
- Setup. Put two random Vault artifacts in the Vault.
- Nice artifacts. Each Objective gives 5 experience points to the Survivor who takes it. It also grants him an Equipment card of your choice, taken either from the Equipment deck or the Equipment discard deck. The Survivor can then reorganize his Inventory for free. Shuffle the deck afterwards.
Quest 9: The Zombie Army
Hard / 6 Survivors / 120 minutes. Material needed: Zombicide: Black Plague, Wulfsburg. Tiles needed: 1V, 6R, 9V & 10R.
Objectives: Facing a zombie army. The Zombie deck is not reshuffled once the sixth Spawn Zone token is put on the board (see the Special Rules). The game is won when the Zombie deck is empty and no Zombie remains on the board.
Special Rules:
- Setup. Put the blue and the green Objectives randomly among the red Objectives, face down.
- Necromancer treasure. Each Objective gives 5 experience points to the Survivor who takes it.
- Taking the blue or the green Objective also grants a Vault artifact of your choice.
- Taking a double-sided red Objective also grants the Survivor an Equipment card of your choice, taken either from the Equipment deck or the Equipment discard deck. The Survivor can then reorganize his Inventory for free. Shuffle the deck afterwards.
- The zombie army. Spawn Zone tokens can't be removed. That includes Necromancer Spawn Zones. Once the sixth Spawn Zone is set on the board, Necromancers don't come with Necromancer Spawn Zones anymore. However, the game is lost if a Necromancer leaves the board afterward!
Quest 10: A Coin for the Ferryman
Hard / 6 Survivors / 180 minutes. Material needed: Zombicide: Black Plague, Wulfsburg. Tiles needed: 1R, 2R, 3V, 4R, 5R, 6R, 7V, 8R & 10R.
Objectives: Destroy the Necromancers' portal. Take the blue Objective representing the dark portal. And wish the Necromancers happy holidays!
Special Rules:
- Setup. Put a random Vault artifact in the marked Zone.
- Mystical keys. Each Objective gives 5 experience points to the Survivor who takes it.
- The Necromancers' portal. The Zone with the Blue Objective can only be entered when all red Objectives are taken.
Game Round Summary
Game rules override this round summary.
1. First Step: Choose the first player at the beginning of the game. He receives the "first player" token.
2. Players' Phase: Each Game Round begins with the Players' Phase. The first player activates all of his or her Survivors, one after the other, in any order. When he or she's done, the next player's Turn begins. Play clockwise. Each Survivor has three Actions to spend, chosen from the following list. Unless stated otherwise, each Action may be performed several times per Activation.
- Move: Move one Zone.
- Search (1x/Activation and per Survivor): Building Zone only. Draw a card in the Equipment deck.
- Open a door: Melee weapon required. Spawn Zombies inside a building if it's the first door.
- Reorganize/Trade: Equipment exchange with another Survivor standing in the same Zone is possible. You can trade everything for nothing.
- Combat Action:
- Magic Action: Equipped Combat spell required
- Melee Action: Equipped Melee weapon required
- Ranged Action: Equipped Ranged weapon required
- Enchantment Action: Equipped Enchantment required
- Take or activate an Objective in the Survivor's Zone.
- Make Noise. Put a Noise token in the Survivor's Zone.
- Do Nothing. All remaining Actions are lost.
3. Zombies' Phase: When every player's finished:
-
Step 1 – Activation: Attack OR Move. All Zombies spend one Action doing one of these two things:
- Zombies in the same Zone as at least one Survivor attack them.
- The Zombies which didn't Attack, Move.
Each Zombie favors visible Survivors, then noise. Necromancer follow special rules. Choose the shortest path. If several paths share the same length, split the Zombies in equal groups.
NOTE: Runners get two Actions per Activation, Wolfz get three Actions per Activation. Once all Zombies have taken their first Action, Runners and Wolfz go through the Activation step again to resolve their second Action. Then Wolfz resolve their third Action.
-
Step 2 – Spawn:
- Always draw Zombie cards for all Spawn Zones in the same order (play clockwise).
- Danger Level used: highest Danger Level among active Survivors.
- No more minis of specified type? All Zombies of specified type get an extra Activation!
End Phase:
- Remove all Noise tokens from the board.
- The next player receives the "first player" token (play clockwise).
Targeting Priority Order
When several targets share the same Targeting Priority Order, the players choose which ones are eliminated first.
| Targeting Priority | Name | Actions | Min Damage to Destroy | Experience Points |
|---|---|---|---|---|
| 1 | Walker | 1 | 1 | 1 |
| 2 | Fatty / Abomination (1) / Wolfbomination (2) | 1/1/3 | 2/3/3 | 1/5/5 |
| 3 | Runner | 2 | 1 | 1 |
| 4 | Zombie Wolfz | 3 | 1 | 1 |
| 5 | Necromancer | 1 | 1 | 1 |
(1) Abomination: Ignore Armor rolls. (2) Wolfbomination: Ignore Armor rolls.