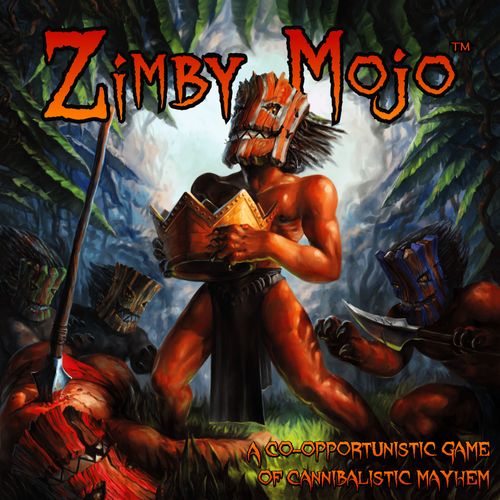
Zimby Mojo
Zimby Mojo Rulebook
Table of Contents
Table of Contents
- Part 1. Components
- Part 2. Concepts
- Part 3. Parts of a game round
- Part 4. Columns
- Part 5. Movement
- Part 6. Mojo, scrolls, and the stack
- Part 7. Combat and wounds
- Part 8. Spawning and eating
- Part 9. Shrines and wards
- Part 10. Obstacles
- Part 11. Portals
- Part 12. Zombies
- Part 13. The King and the Crown
- Game Setup
- Solitaire play
- Advanced rules
- Sample game rounds
- Reference cards
Part 1. Components
What's in the box?
- 1 Rule book
- 1 Bag o' Fate
- 1 Game board
- 8 Tribal boards
- 1 White D6
- 104 Scroll cards
- 4 Reference cards
- 2 Sticker sheets
- 1 Punchout board
- 1 Black D6
- 128 Thin wooden discs (4mm)
- 4 Thick wooden discs (8mm)
- 16 Thicker wooden discs (12mm)
- 1 Thickest wooden disc (16mm)
- 1 White D4
Creature tokens
The 149 colored wooden discs are creature tokens. Affix a creature sticker that matches the disc color to one side of each disc. Some stickers have additional markings (e.g., a square) to help visually impaired players.
Zimby tokens. The 128 thin discs are zimby tokens. Each color represents one zimby tribe. There are 16 zimby tokens per tribe.
Thug tokens. The 4 thick orange discs are the thug tokens.
Zombie tokens. The 16 thicker discs are the zombie tokens. There are 2 zombie tokens for each tribe.
The King token. The 1 thickest orange disc is the Cannibal King. This is the only token that needs a sticker on both sides. Affix the Cannibal King sticker to one side and the Cannibal Crown sticker to the other.
Mojo tokens
Mojo is the mystical force that shamans use to power scrolls and influence creatures. Mojo tokens are used to track a shaman's available mojo.
Tribal boards
A tribal board is a shaman's homeland. Shamans use zimbies on their tribal boards as resources. When a shaman spawns zimbies, they appear on the shaman's tribal board.
Main board
The main board is a map of the halls of the King's compound. This is where all the action takes place! Instructions for setting up the game are on page 13.
Bag o' Fate
The Bag o' Fate is used to assign items and wounds to one zimby in a group.
Scroll library
The scroll library is the shuffled deck of scroll cards.
Scroll cards
Each scroll card holds a powerful spell that a shaman can use to help or hinder their friends and foes.
Example scroll cards: Stolen Pages (Ritual, 2 mojo): Target shaman may draw 2 scrolls from the scroll library. Slippery Devils (Incantation, 1 mojo): Columns containing the target shaman's zimbies gain +1 brutality when they defend. Death Curse (Witchery, 3 mojo): Target sustains 1d4 wounds. These wounds may not be prevented by armor.
Part 2. Concepts
How do you win?
Each shaman in the game has the same goal: grab the Cannibal Crown and deliver it to their tribal board. That's it. That shaman then becomes the new Cannibal King and wins the game! To do this, the player will have to:
- Get some zimbies onto the main board,
- Work with another tribe to open a way into the Cannibal King's sanctum in the center of the main board,
- Kill the Cannibal King,
- Get the King's Crown and deliver it to their tribal board!
Important terms
- Active: Ready, able to be used. Active tokens are turned face up.
- Depleted: Spent, unusable. Depleted tokens are turned face down.
- Dismiss: Keep a creature active and remove it from the main board. Zimbies go to their tribal board; thugs, to a barracks tile. Zombies go to the Far Shore. The King cannot be dismissed.
- Expel: Deplete a creature and remove it from the main board. Zimbies go to their tribal board; thugs, to a barracks tile. Zombies go to the Far Shore. The King cannot be expelled.
- Far Shore: The realm of spirits. The spirits of all "zimbies dead" and all "zimbies yet to be" reside on the Far Shore. It is the common "out of play" area for creature tokens.
- Target: The object of a scroll effect or an attack.
- Tile: A square on the main board. Two tiles are adjacent if they share a common side.
- 1d2: A 2-sided die. Roll 1d6 and 1-3 = 1, 4-6 = 2.
- 1d3: A 3-sided die. Roll 1d6 and 1-2 = 1, 3-4 = 2, 5-6 = 3.
- 1d4: A 4-sided die. That's the pyramid-shaped die.
- 1d6: A 6-sided die. That's a standard die.
- xdy: Roll x-many y-sided dice and add them together. For example, 4d3 means to roll 1d3 four times and add the results together.
Creatures
There are four creature types in the game: zimbies, obnoxious little cannibals that do a shaman's bidding with ruthless (sometimes inept) fanaticism; zombies, undead meat-puppets; thugs, the Cannibal King's dim-witted, fervently devoted brutes; the Cannibal King, the vicious and sadistic overlord of the zimby tribes. Shamans are players and don't count as creatures: they have infinite vitality and are cartoonishly immortal.
Creatures have brutality and vitality. Brutality denotes combat savagery: a creature's brutality is added to its combat roll to determine outcomes and wounds from battle. The King's brutality is equal to 1 plus the number of thugs in play on the main board. Vitality denotes robustness: a creature dies when it suffers wounds from a single source equal to or in excess of its vitality.
| Creature | Brutality | Vitality |
|---|---|---|
| Zimby | 1 | 1 |
| Thug | 3 | 2 |
| Zombie | 2 | 3 |
| King | 1 + number of thugs in play | 4 |
Time
The game progresses in rounds. On each round, the Cannibal King, the players, and the thugs each get a turn. The players' turns proceed clockwise from the first mover. The initial first mover is randomly chosen. Once play begins, the player ending the round with the most active, non-chanting zimbies on their tribal board becomes the first mover for the next round (randomly break ties).
Part 3. Parts of a game round
Sequence of events
A game round consists of six parts:
- Refresh
- King's turn
- Players' turns
- Thugs' turn
- Zombies shamble
- Wrap-up
The King does not act during the first round. The first round of the game begins with the players' turns. Refresh and wrap-up are updating phases. Shamans may not cannibalize, use mojo, or use scrolls during refresh and wrap-up.
Refresh
Refresh is used to update the game for the new round. Shamans may not use mojo, use scrolls, or cannibalize during refresh. To refresh the game for the new round, the players:
- make active all depleted mojo tokens;
- make active all depleted creatures;
- remove from the main board all obstacles showing their B side, then flip (as appropriate) all obstacles showing their A side to show their B side;
- draw one card each from the scroll library and put it into their hand.
King's turn
The King minds his own business until his shaman turn against him, so he doesn't get a turn the first round of the game. After the first refresh, the King goes first each round. Unlike other creatures, the King does not get combat locked.
The King's actions
The King brings discord and destruction to the shamans by means of the King's rituals. The King powers his rituals with blood mojo.
On any turn in which the King starts in the blood mist, the King will move onto a random ritual tile and cast the ritual assigned to that tile. If the ritual associated with that tile has not yet been used, flip over the ritual marker and reveal the ritual assigned to the tile. The King will cast that ritual as it is revealed and again each time he lands on that ritual tile. This ends his turn.
If the ritual tile onto which the King would move contains an obstacle, the King will check the obstacle immunity afforded him by his Crown (p. 12). If the immunity holds, he will enter the tile and cast the ritual; if not, he will remain in the blood mist and end his turn. If the ritual tile onto which the King would move is occupied by a creature, the King will attack the creature. If the King kills the creature, he will move onto the ritual tile, cast his ritual, and end his turn. If the King fails to kill the creature, he will remain in the blood mist and end his turn. The King replenishes his blood mojo while in the blood mist.
On any turn in which the King starts outside the blood mist, he will move 1 tile closer to or into the blood mist. The King will move by the shortest path, including diagonal, and only attack a creature if the creature is in his path and if claiming the creature's tile with a successful attack would move him closer to or into the blood mist. Otherwise, the King will avoid combat. The King ends his turn after moving 1 tile or attacking a creature.
The King's rituals
The King's rituals target either the shamans or areas of the main board. A quadrant is a section of the main board consisting of all the tiles comprising and encompassed by an outer patrol path (e.g., the footprint route). The King's rituals are inescapable: when the King casts a ritual, no mojo may be used and no effects may be placed on the stack until the ritual resolves. The King has 8 rituals at his disposal, but only 4 will be used in a game (p. 13).
Ritual of Blood. Roll X = 1d6. The blood mist roils and swells until it fills all the tiles in the King's sanctum and X-many contiguous, adjacent tiles beyond the sanctum in all directions. Creatures caught in the blood mist suffer 1 wound. Blood mist passes freely through elemental warded tiles and vanishes at the end of the King's turn.
Ritual of Discord. Choose a random quadrant. Multi-zimby columns in that quadrant bicker and squabble amongst themselves. Every zimby column in the quadrant containing 2 or more zimbies expels all but 1 randomly chosen zimby.
Ritual of Exhaustion. The King weakens the shamans by draining their mojo. Roll X = 2d2. All shamans must deplete X-many of their mojo tokens. No mojo may be drawn from the depleted tokens until they are reactivated.
Ritual of Madness. The King sends a wave of madness over all the shamans. Roll X = 1d2. Each player must randomly discard X-many scroll cards from their hand.
Ritual of Hunger. The King sends forth a wave of insatiable hunger that affects all the shamans. Roll X = 1d2. All shamans must eat X-many zimbies on their tribal boards and send them to the Far Shore. No mojo or scrolls may be gained from this forced cannibalism.
Ritual of Winnowing. Each player draws 2 random cards from the player to their left and looks at them, then puts their choice of one of the cards into their hand and the other on the discard pile. In solitaire play, the player may choose to either discard 1 random card from their hand or place the top card of the scroll library on the discard pile.
Ritual of Portals. The King flushes the portal system. Choose a random portal tile and roll X = 1d6. Expel all creatures within X-many contiguous, adjacent tiles of that portal tile in all directions.
Ritual of Terror. Choose a random quadrant. All zimbies in that quadrant are stunned by the terrifying aspect of the King. Deplete all zimbies and zimby columns in that quadrant. Depleted zimbies may not be zombified, move, attack, or channel mojo or witcheries. Depleted zimby columns may defend with brutality 0 when attacked. All depleted creatures become active during refresh. Thugs and zombies are unaffected by this ritual.
Player turns
Each player gets one turn, starting with the first mover and proceeding clockwise. Some of a player's actions are only available on their turn. Some actions are available at any time, including other players' turns.
Only on a player's turn, a player may:
- Spawn new zimbies to their tribal board (up to 2 per turn),
- Create zombies (only 1 per turn, 2 maximum in play),
- Move active creatures they control,
- Make attacks with active creatures they control.
At any time, a player may:
- Extract and spend mojo (e.g., activate a seal, use a scroll),
- Cannibalize zimbies on their tribal board (up to 2 per round),
- Cannibalize their zimbies on the main board.
Players may take their actions on their turn in any order. A player's turn ends when the player declares it over or runs out of mojo.
Example. On their turn, a player may move some zimbies from their tribal board to the main board, have a creature they control attack an enemy, cast an incantation, move a zimby on the main board, spawn a zimby to their tribal board, channel a witchery, create a zombie, cast a ritual, and so on... as long as the shaman has mojo to spend!
Thugs' turn
After the last player has taken their turn, the thugs get their turn. A thug is "in play" if it is active on the main board. The thugs' turn consists of a movement phase followed by an attack phase.
Thug movement phase
Each thug in play on the main board that is not combat locked moves to or along a patrol route.
Each active thug on a barracks tile returns to play on a random portal tile and moves to a patrol route. Dismiss any creature already on the thug's entry portal tile when the thug enters.
If a moving thug encounters an opponent in its attack zone, it will stop moving and initiate combat. It will not attack until the thug attack phase. There is no combat lock until an attack is actually made. If a moving thug enters a tile occupied by other thugs, it will continue to move through the tile if it has movement remaining and the thugs are not currently initiating combat or combat locked. Otherwise, the moving thug will join the thugs for the fight. The newly formed thug column will not attack until the thug attack phase.
Thug attack phase
Any thug or thug column engaged in or initiating combat will make its attack during this phase. Thugs that survive combat resume their patrols. Expel thugs that are killed.
Thugs follow strict patrol routes. While the King is alive, they individually move 1d6 tiles per turn along the footprint-marked patrol route around the King's sanctum. When the King is dead, they individually move 2d6 tiles per turn and each thug will follow the inner route to a unique quadrant to patrol (each of the four outer patrol routes marked by a footprint symbol). Only one thug will patrol each quadrant. Thugs may only move in the direction indicated by the foot symbol. Thugs will stupidly walk into any obstacles in their path.
Thugs returning to play via portal tiles will move away from their entry tile in a random direction. While the King is alive, they will follow the shortest path to the inner patrol route and resume their patrol. When the King is dead, they will start to patrol the first outer patrol route they come across. If two or more thugs end up patrolling the same quadrant, each of the thugs except the last to reach the inner route will follow the inner route to the first unpatrolled quadrant it encounters and begin to follow that outer patrol route.
If a thug ever wins the Cannibal Crown in combat, moves over it, or enters play on a portal tile on which the Crown rests, the thug will pick up the Crown and carry it to the blood mist by the most direct sequence of patrol routes, forming a column with any and all other thugs it encounters on the way. This column will remain intact and move at 2d6 tiles per turn until it reaches the blood mist or loses the Crown. If the column makes it into the blood mist with the Crown, turn the Crown over to reveal a new King and expel all the thugs in the column. The new King will resume the King's rituals and all thugs will return to patrolling the inner path around the King's sanctum.
(Map diagram: shows a quadrant bounded by an outer patrol route, the King's sanctum, the inner patrol route, portal tiles and barracks tiles.)
Zombies shamble
All zombies not combat locked shamble individually 1d6 tiles toward the nearest living thing. A zombie's owner may pay 1 mojo to keep their zombie from shambling but may not otherwise affect it during this phase. A shambling zombie will stop and attack any living creature in its combat zone, even members of its former tribe.
Wrap-up
Wrap-up is used to prepare for the next round. Shamans may not use mojo, use scrolls, or cannibalize during wrap-up. During wrap-up:
- Any creature in a wound-causing obstacle suffers wounds.
- Any player with more than 6 scroll cards in their hand must discard down to 6 scroll cards (player's choice).
- The shaman with the most active, non-chanting zimbies on their tribal board becomes the first mover for the next round (roll a die to break ties). The first mover:
- places the Bag o' Fate by their tribal board,
- makes all draws from the Bag o' Fate,
- makes all die rolls for the thugs and King,
- takes the first turn the next round (player turns then continue clockwise).
Part 4. Columns
Creature tokens may be stacked atop each other to form columns. Zimbies may only form columns with zimbies and thugs may only form columns with thugs. The two critical things to remember about columns are:
- A column is a single creature.
- A single creature is still a column (with just 1 member).
Zimby columns
A zimby column seeking to join an existing zimby column must ask for and receive permission to do so from that column's controller, or from every shaman with zimbies in that column if that column is uncontrolled.
Column controller
A shaman that has zimbies of their tribe in a column becomes that column's controller during their turn. Zimby columns that do not contain a shaman's zimbies are uncontrolled during that shaman's turn. If a shaman removes all of their zimbies from a column, the shaman loses control of the vacated column.
Example. Consider a column of 3 gray zimbies and 3 yellow zimbies. On the yellow shaman's turn, the yellow shaman is the column's controller. On the gray shaman's turn, the gray shaman gains control of the column. On the red shaman's turn, the column is uncontrolled.
Column limits
A column may contain up to but no more than 3 zimby tribes and each tribe in a column may contain up to but no more than 3 zimbies of that tribe. If a column ever contains excess zimbies in a tribe or excess tribes, expel the excess zimbies or random tribes until the column limits are met.
Column brutality
When attacking, a zimby column has brutality equal to the number of zimbies of the controller's tribe in the column +1 for each other tribe in the column. When defending, a zimby column has brutality equal to the number of zimbies in the largest tribe in the column +1 for each other tribe in the column.
Example. Under the white shaman's control, a column of 2 white, 1 gray and 3 yellow zimbies has an attacking brutality of 4 = 2 (2 white zimbies in the column) + 2 (2 other tribes besides white in the column). The column's brutality when defending is 5 = 3 (the largest tribe in the column has 3 zimbies) + 2 (2 other tribes in the column besides the largest tribe).
Allied columns
Two zimby columns are allied if they share a common tribe. For example, two columns that both contain blue zimbies are allied. Allied columns may not attack each other. This does not apply to scroll use: shamans are free to channel witcheries though any zimby they control at any legal target they desire, including allied columns.
Thug columns
Thugs only form columns when taking the Cannibal Crown to the blood mist or by happenstance as they patrol. Thug columns have no size limit. A thug column has brutality = 1 + 2 per thug in the column. A column of thugs in combat will remain in a column until the combat ends and naturally separate as the thugs in the column resume their individual patrols. A thug column carrying the Crown will not break apart until it either loses the Crown or enters the blood mist.
Part 5. Movement
Movement zones
Only active creatures may move. Zimbies and thugs may move onto any unoccupied tile adjacent to the tile they occupy. This set of tiles is their movement zone and is represented by the white tiles in the diagram (the four orthogonally adjacent tiles). A zimby column may only move onto a tile occupied by another zimby column in order to join that column. Thugs may freely move onto and pass through tiles occupied by other thugs. The King's movement zone is all tiles surrounding the one he occupies, including adjacent tiles and corner-corner touching tiles.
Moving zimbies
Shamans use mojo to move zimbies. Shamans may only move active columns they control and may only move them on their turn. The mojo required to move a column depends on the number of zimbies in the column. Every two zimbies in a column reduces the maximum number of tiles that the column can move for a given mojo expenditure.
| Zimbies in the column | Max. Movement |
|---|---|
| 2 or fewer | 4 tiles per 1 mojo |
| 3 - 4 | 2 tiles per 1 mojo |
| 5 - 6 | 1 tile per 1 mojo |
| 7 - 8 | 1 tile per 2 mojo |
| 9 or more | 1 tile per 4 mojo |
A column of 2 or fewer zimbies may move up to 4 tiles per 1 mojo spent whereas a column of 9 or more zimbies requires 4 mojo to move it one tile! If there is an item on a tile (e.g., the King's Crown), a creature entering the tile may stop and pick the item up. The item is added to the creature's column and then carried until dropped. A creature may drop an item at any time, even on the run, without stopping its movement.
Mojo is expended to move a creature and may not be divided among different creatures or different members of a column. A creature may continue to move as long as its controller is willing and able to expend mojo.
Movement from a mojo expenditure immediately ends if any one of the following happen:
- The maximum number of tiles is reached,
- The creature forms or joins a column,
- The creature picks up an item or its movement burden increases,
- The creature relocates to a portal tile or exits a patch o' darkness,
- The creature channels mojo or casts a witchery,
- The creature attacks an opponent,
- A column loses one or more member zimbies (e.g., a zimby is killed or cannibalized).
Moving zimbies between boards
Tribal boards count as single tiles for movement. Players use normal movement rules to move their zimbies between their tribal board and the main board. These examples show a single zimby moving 4 tiles (diagrams: counting tiles moving from the tribal board to the main board, and from the main board to the tribal board).
A zimby must be active on the tribal board to move onto the main board. A zimby moving from the main board to its tribal board remains active, so a shaman may cannibalize or draw mojo from a zimby the same turn it moves onto its tribal board from the main board. No zimby may move onto any tribal board other than its own.
Moving multi-tribe columns
Mojo is spent to move a creature. Since a zimby column is a single creature, the controller of a multi-tribe column may:
- move some or all of their own zimbies out of the column, individually or in groups, or
- move the entire column.
Other than moving their own zimbies, a shaman may not break up or move pieces of a column. The column controller decides where and by what path the column will move. Tribes in the column other than its controller's may not refuse to move and must go along for the ride.
Part 6. Mojo, scrolls, and the stack
Mojo
Mojo is the mystical force that shamans use to power scrolls and influence zimbies. Each shaman has 4 mojo tokens and may extract mojo from active zimbies on their tribal board. Mojo may not be extracted from zimbies on the main board. To use a mojo token, a shaman depletes the token and gains 1 mojo. To extract mojo from an active zimby, a shaman depletes the zimby token and gains 1 mojo. Depleted tokens reactivate as part of refresh.
From a usage perspective, it doesn't matter where shamans get their mojo, and only active, non-chanting zimbies on a shaman's tribal board count toward determining the first mover for the next round. To illustrate, suppose a shaman with 5 zimbies on their tribal board wished to use 5 mojo to activate a few scrolls. The shaman could use any combination of zimbies and mojo tokens to get the 5 mojo. Two possibilities are:
(Diagram: Case A and Case B, each showing 5 zimby tokens and 4 mojo tokens, with the depleted ones shown as empty circles.)
In Case A, the shaman has 1 active zimby and 3 active mojo tokens remaining after activating the scrolls. In Case B, the shaman has 4 active zimbies and no active mojo tokens remaining after activating the scrolls. A shaman not wanting to be the first mover the next round would be in a better position in Case A. A shaman wanting to be the first mover the next round would be in a better position in Case B.
The scroll library
The shuffled collection of all 104 scroll cards comprises the scroll library. The players' starting hands are dealt from the scroll library and all cards drawn by players during the game are taken from the scroll library. Used scroll cards are placed face up on a discard pile. When the scroll library is depleted, the shuffled contents of the discard pile form a new scroll library.
Scrolls
Scrolls are parchments looted from the scroll library that yield magical effects when infused with mojo. To use a scroll, a shaman pays the scroll's mojo cost and the scroll effect goes onto the stack to await resolution. After a scroll's effect resolves, the used scroll card is placed face up on the discard pile. A red dot in a scroll's mojo symbol means that the scroll must be removed from the scroll library for solitaire play.
Scroll card anatomy: mojo symbol, mojo cost to use, scroll type, scroll name, allowable targets, scroll type symbol, scroll effect.
Some scrolls refer to "items." This wording is used to support the advanced rules. In the basic game, read "item" or "items" as "Crown."
There are three types of scroll: rituals, incantations, and witcheries.
Rituals
Rituals are formal rites that target either a shaman or a scroll effect (rituals, incantations, witcheries). They have an immediate effect and are then placed on the discard pile.
Incantations
Incantations are chants that target a shaman and have a lasting effect. When an incantation is cast, the casting shaman pays its mojo cost and places the incantation card face-up next to the tribal board of the target shaman (target player). In addition, the casting shaman must also dedicate one active zimby on their tribal board to sustain the incantation by chanting. The casting shaman places the zimby token face-up inside the incantation symbol on the card. Although the zimby token is placed on the card, the chanting zimby actually resides on the casting shaman's tribal board, counts against the tribal board zimby limit (p. 9), and may be used just like any other active zimby on the tribal board. As long as the zimby remains active and on the card, the incantation remains in effect. If the chanting zimby is removed or becomes depleted, the incantation immediately ends and the card is placed on the discard pile.
Multiple incantations may be active on the same shaman but no more than X-many incantations may be in play in a game, where X is equal to 1 + 1/2 the number of players rounded up (e.g., X = 4 for a 5 player game). If an incantation is cast after this limit is reached, the new incantation will come into play and a random existing incantation will be sent to the discard pile to make room for it. The chanter on the discarded incantation becomes depleted from the shock of the incantation's destruction.
Witcheries
Witcheries are channeled through a shaman's zimbies on the main board or their tribal board. Witcheries have a wide range of targets: zimby and thug columns, the Cannibal King, zombies, and tiles on the main board. Witcheries have three constraints:
- Channel: The casting shaman must designate an active zimby they control on the main board or their tribal board to channel their mojo through.
- Range: The target of the witchery must be on the main board and no more than 3 tiles away from the channeling zimby.
- Line of Sight (LOS): The target of the witchery must be in the channeling zimby's direct and unobstructed line of sight: the path between the channeling zimby and the witchery target must be a straight line through adjacent tiles that are free of blood mists, creatures, and darkness. Line of sight may not turn, bend, or be diagonal. If an obstruction between a zimby channeling a witchery and its target blocks line of sight, the tile occupied by the obstruction may itself still be targeted.
The diagrams illustrate targeting. The lines are witchery paths starting from a zimby and targeting a zimby, thug, zombie, or tile. The dashed red lines are invalid witchery paths to the target; the solid blue lines are valid witchery paths to the target. Diagram annotations: "Valid path: The tile covered by darkness is itself a valid target." "Invalid: path obstructed." "Invalid: Path may not bend around a corner." "Valid path." "Invalid: Too far away and path may not bend around a corner." "Invalid: Too far away." "Invalid: path obstructed."
Witcheries are extremely fast and may target creatures on the move. As a creature passes through a zimby's LOS, the zimby's controller may say "stop" and halt the creature's movement to target it with a witchery in that position. The creature must stop. If the witchery fails, the creature may finish its movement.
The stack
The stack is a "push/pop" system for resolving scroll effects, combat rolls, and wounds. The stack works like this for scroll effects:
- When a scroll is used, the scroll effect is "placed on the stack." This starts the stack.
- If a second scroll is used in response to the first, the second scroll effect is "pushed" on top of the first. This builds up the stack.
- This "stacking" of scroll effects continues until scroll use ends, with each new effect sitting on top of the previous one.
- When scroll use ends, the stacked effects begin to resolve in reverse casting order. Each effect is "popped" off the stack as it comes into play. The players resolve the effect on the top of the stack first, then resolve the next effect down, and so on all the way to the bottom of the stack.
New scroll effects may be "pushed" onto the stack at any time during effect resolution, rebuilding the stack on-the-fly. Unless an effect on the stack is nullified, all effects on the stack will occur, even if a zimby dies before the effect of its witchery is resolved!
Combat rolls and wounds are also placed on the stack to give players an opportunity to modify them with scroll effects prior to their resolution.
- Combat rolls are "pushed" onto the stack. Scrolls may be "pushed" onto the stack in response.
- The stack resolves. Combat rolls are settled.
- Wounds are determined and "pushed" onto the stack. Scrolls may be "pushed" onto the stack in response.
- The stack resolves. Wounds are delivered to creatures.
Part 7. Combat and wounds
Combat
While channeling a destructive witchery at a target is an "attack," it is not a physical attack governed by the rules of combat. For this section, "attack" means a physical attack.
Entering and leaving combat
A creature enters combat whenever it attacks or is attacked. A creature leaves combat when there are no opponents in its combat zone. When blows are exchanged, the attacker is the combatant launching the attack and the defender is the one receiving the attack.
Combat zones
Creatures may only attack opponents in their combat zone. Zimbies and thugs have the same combat zone as their movement zone: the set of tiles that are adjacent to the one they occupy. The King's combat zone is all the tiles that surround his own, including diagonals.
Attacking
Only active creatures may attack. An attack is an "aggressive push" into a tile occupied by another creature. To initiate combat with an opponent in its combat zone, a creature declares its intent and launches an attack. Thugs are required to attack creatures in their combat zones. Zimbies are not required to attack creatures in their combat zones. Zombies are required to attack living creatures in their combat zones.
Attack timing
A creature may only make an attack during its controller's turn and may only make one attack per turn. Single-tribe zimby columns therefore make one attack each round. Multi-tribe zimby columns make one attack on the turn of each of their controllers. Whenever a zimby column leaves combat, its "one attack per turn" flag resets and it may make another attack.
Combat lock
Thugs, zimbies, and zombies never willingly leave combat: thugs and zombies are too stupid to retreat and zimbies are too fanatic to run away. Once in a fight, creatures are combat locked until they either die or find no opponents in their attack zone. A creature immediately leaves combat if it ever finds no opponents in its attack zone.
Combat locked creatures must attack their opponent each turn they are able. A combat locked zimby column must attack its foe once per turn on each of its controllers' turns, however, the controller may decide when during their turn the column will attack. Zimbies in combat locked columns may freely channel witcheries at any legal target in range and LOS.
Multiple opponents
If a zimby column or controlled zombie is engaged in combat against multiple opponents, its controller may choose which opponent to attack each turn. Thugs and uncontrolled zombies choose randomly.
Defending
Creatures may always defend against incoming attacks, regardless of whether or not they made an attack that round.
Combat rolls
When creatures fight, both the attacker and the defender make a combat roll. A creature's combat roll is a 1d6 die roll to which it adds its brutality and any effects from scrolls or cannibalism.
Combat roll = 1d6 + brutality + other effects
Resolving combat rolls
Combat rolls are placed on the stack and may therefore be modified by scroll effects pushed onto the stack after die rolls are made (page 7).
Claiming the defender's tile
Combatants stay in their separate, adjacent tiles during combat. If a creature is the attacker and kills its opponent, the creature must move onto the defender's tile as part of combat resolution. If a creature is the defender and kills its opponent, the creature does not move onto the attacker's tile. Only attackers leave their tiles as a consequence of combat victory.
Wounds
Wounds from non-combat sources (such as scrolls) are delivered directly to a creature. Combat wounds are determined by combat rolls. The combatant with the higher combat roll delivers wounds to the combatant with the lesser combat roll equal to the difference in the two combat rolls. For example, if a thug had a 4 combat roll and its opponent zimby had a 5 combat roll, the zimby would hit the thug and deliver 5 - 4 = 1 wound to it. If the combat rolls are equal, no wounds are delivered by or to either party.
Mitigating wounds
Wounds are placed on the stack and may therefore be modified by scroll effects pushed onto the stack after they are assigned but before they are delivered (page 7). Effects that prevent wounds must be applied to a creature before wounds are delivered.
Delivering wounds
Once wounds are determined, they need to be delivered to creatures. Delivering wounds to a lone creature is pretty clear. It's a little more complicated with columns:
Single-tribe and thug columns. Each wound delivered kills 1 zimby in a single-tribe zimby column. Every 2 wounds delivered kills 1 thug in a thug column.
Multi-tribe zimby columns. Each wound is randomly delivered to a zimby in the column using the Bag o' Fate. Set aside all items held by zimbies in the column and drop the entire column into the Bag o' Fate. Shake up the bag, then draw out at random one zimby for each wound delivered to the column. These zimbies are killed by the wounds. After all wounds have been delivered, draw from the Bag o' Fate one zimby per item set aside. The drawn zimby now holds the item.
Killing creatures
Wounds are not accumulated. A creature only dies when it sustains wounds equal to or greater than its vitality from a single source. Zimbies have 1 vitality: delivering a single wound to a zimby will kill it. Thugs have 2 vitality: delivering 1 wound to a thug will do nothing -- a thug will shrug off any and all attacks delivering 1 wound since wounds are not accumulated. It requires a single source to deliver 2 or more wounds to a thug to kill it. Similarly, it requires 3 or more wounds from a single source to kill a zombie and 4 or more wounds from a single source to kill the King! Dead zimbies and dead zombies go to the Far Shore. Dead thugs are expelled from the main board.
Witcheries that affect brutality (e.g., "Nasty Sharp Knives") modify combat rolls and thereby have a direct impact on wounds determined by differences in combat rolls (p. 8). These witcheries and their associated combat rolls contribute to the same source of wounds: a single exchange of blows.
Witcheries that directly wound a target (e.g., "Blow Guns") do not affect combat rolls and therefore do not contribute to the same source of wounds as a combat exchange. All witcheries that deal wounds directly to a target are considered different sources of wounds.
Part 8. Spawning and eating
Spawning zimbies
Zimbies tend not to live long and eventually shamans will need to spawn zimbies to replenish their stock. Spawning a zimby moves 1 zimby token from the Far Shore to a shaman's tribal board. The shaman must have a zimby available on the Far Shore to spawn a zimby. The rules for spawning are:
- Shamans may only spawn zimbies on their turn.
- Spawning 1 zimby costs 3 mojo and moves 1 zimby token from the Far Shore to the shaman's tribal board.
- Spawned zimby tokens move onto the shaman's tribal board depleted.
- A shaman may not spawn more than 2 zimbies per turn.
Although a shaman may not spawn more than 2 zimbies per turn, a shaman may acquire more zimbies by other means, such as scroll effects.
Tribal boards
A shaman's tribal board is their power base and ancestral homeland. All zimbies in play will reside on the main board or their shaman's tribal board. All of a player's unused zimby and zombie tokens remain on the Far Shore. A shaman may never have more than 8 zimby tokens on their tribal board. If there are ever more than 8 zimby tokens on a shaman's tribal board, immediately move all excess zimby tokens to the Far Shore.
Eating zimbies
Cannibalism is a sacred rite that may be used by shamans and zimbies to provide a short-term boost to their capabilities.
Shaman cannibalism
During a round, a shaman may choose to eat active zimbies on their tribal board. This may be done at any time during the round but not more than twice in the same round. Each active zimby eaten will provide the shaman with their choice of either 2 mojo or a draw of one card from the scroll library. The eaten zimby is sent to the Far Shore. A shaman may not eat depleted zimbies.
Zimby cannibalism
The ritualistic eating of a tribesman is a sacred ritual polluted by the presence of outsiders. Only zimbies in single-tribe columns may cannibalize their tribesmen. A zimby in a single-tribe column may eat up to 2 zimbies in its column and may do so at any time during the round. Eaten zimbies are sent to the Far Shore. A zimby cannot cannibalize itself. For each tribesman eaten, the eater gains the shaman's choice of one of the following effects:
- +4 brutality for its next combat roll,
- double range for its next witchery channeled,
- double effect for its next witchery channeled.
Combat effects from cannibalism are additive: each zimby eaten adds +4 to the eater's brutality. Witchery doubling effects from cannibalism are multiplicative: the first zimby eaten to increase the range of a witchery doubles the range; the second one eaten to increase the range of the same witchery doubles it again (quadrupling the range). The same doubling and quadrupling occurs for zimbies devoured to increase the effect of a witchery.
Cannibalism must immediately precede the action that it will enhance. Cannibalism to increase brutality must immediately precede the eater's casting their 1d6 for their combat roll. Similarly, cannibalism to affect a witchery must immediately precede channeling the witchery.
Part 9. Shrines and wards
Shrines
The 4 white pentagonal tiles along the footprint path around the King's sanctum are shrine tiles. At the start of the game, the 4 elemental seals are randomized and placed face down on the shrine tiles. Note that the shrine tiles are in the combat zone of creatures on the adjacent gray pentagonal tiles on the footprint path.
Wards
Each of the 4 tiles leading into the King's sanctum from the footprint path begins the game covered with one of the 4 small elemental wards. These wards prevent creatures from entering the tiles from either direction and block line of sight for witchery channeling. The wards are placed face up and may be randomly or deliberately arranged as the players desire.
Removing a ward
The elemental wards must be removed in order for the players' zimbies to gain access to the King. An elemental ward is removed when its corresponding elemental seal is activated. For example, the "fire ward" will remain on the main board and remain in effect until the "fire seal" is activated.
It requires two different shaman to each channel 1 mojo directly into an elemental seal at the same time to activate it. To channel mojo directly into a seal, a shaman must have a zimby in contact with the seal. Therefore, to activate an elemental seal, two shaman must each have at least 1 zimby of their tribe present in the same column on the shrine tile where the seal is located. Activating a seal reveals it (turn the seal over to reveal its element) and removes both the seal and its corresponding ward from the game. This opens the path into the King's sanctum that was blocked by that element.
(Diagram: the King's sanctum with four elemental seals on the shrine tiles and the corresponding ward in the matching sanctum entrance tile.)
Part 10. Obstacles
Obstacle effects
Obstacles thwart a creature's ability to move, fight, or cast witcheries. An obstacle's effects on combat (CBT) and line of sight (LOS) are either + or - as noted below:
- + CBT: Creatures in the obstacle tile may attack and be attacked.
- - CBT: Creatures in the obstacle tile may not attack or be attacked.
- + LOS: The obstacle tile does not affect a creature's line of sight.
- - LOS: The obstacle blocks line of sight. In addition, creatures on the obstacle tile may not channel mojo or witcheries and may not be targeted by witcheries (although the tile the obstacle is on may itself be targeted).
All obstacles except the blood mist have an A side and a B side to track their time remaining in play. Obstacles have their full effect regardless of whether their A or B side is facing up!
Permanent obstacles
The blood mist is the only permanent obstacle in the game. The blood mist cannot be affected by scrolls or player actions.
The blood mist [+CBT, -LOS]
The blood mist in the center of the King's sanctum is a living acid cloud from which the King draws blood mojo to cast his rituals. Any creature that enters the blood mist tile suffers 1 wound. Any creature on the blood mist tile during wrap-up suffers 1 wound.
The King's obstacles
The blood thickets and blood vines are the King's obstacles: they are created and maintained by the King's mojo and die when he dies. While the King is alive, these obstacles remain in play with their A sides up. On the first refresh after the King dies, flip these obstacle tokens to their B side. On the next refresh, remove them from play. These obstacles do not stop dying or re-appear if a new King enters play.
Blood Thickets [-CBT, -LOS]
Blood thickets are completely impassible tangles of twisted, thorny vines that prohibit all movement. Creatures may not move into or out of a tile containing blood thickets.
Blood Vines [+CBT, +LOS]
Blood vines are ravenous, flesh-eating plants. Creatures that enter a tile containing blood vines suffer 1d3 wounds. Any creature on a tile containing blood vines during wrap-up suffers 1d3 wounds.
Conjured obstacles
Conjured obstacles are created by scrolls and include deadly vines, entangling vines, and patches o' darkness. When a conjured obstacle comes into play, place the obstacle token on the main board with its A side facing up. During the refresh following the obstacle's creation, turn the token over so that it's B side is facing up. During the next refresh, remove the obstacle token from the board.
Deadly Vines [+CBT, +LOS]
A creature that is caught in deadly vines as they appear or enters a tile covered in deadly vines suffers 1 wound. A creature on a tile covered in deadly vines during wrap-up suffers 1 wound. Deadly vines stacked atop deadly vines or blood vines add their wounds together and are a single source of wounds.
Entangling Vines [+CBT, +LOS]
A creature that is caught in entangling vines as they appear or enters a tile with entangling vines may not move out of the tile. Creatures may fight in a tile covered with entangling vines but may not claim their foe's tile as a consequence of an attack while they remain in the entangling vines.
Patch o' Darkness [-CBT, -LOS]
A creature that is caught in a patch o' darkness as it appears or is occupying a tile covered by a patch o' darkness is completely disoriented and may only randomly exit the tile. A creature exiting a darkened tile must randomly determine onto which adjacent tile it emerges (including the one by which it entered). If a creature attempts to enter or attack into an occupied darkened tile or a creature exits a darkened tile onto an occupied tile, the creature and the tile occupant swap tiles.
Example. A zimby in a non-darkened tile tries to attack a thug that is in a darkened tile. The zimby and thug switch tiles. Combat is not engaged.
Creatures are disoriented and lose all remaining movement when they initially exit a patch o' darkness. A creature's controller may expend mojo to move the creature after it has left the darkness. Items may be dropped but not picked up in darkened tiles.
Part 11. Portals
Portal and barracks tiles
There are 4 portal tiles and 4 barracks tiles on the main board. Portal tiles are teleportation gateways for items and creatures in play. Barracks tiles allow new thugs to enter play to replace dead ones. Only expelled thugs may use barracks tiles.
Using portals on the main board
When a creature moves onto a portal tile, the portal immediately activates and relocates the creature along with any items carried from the portal tile entered (the origin tile) to a different, randomly determined portal tile (the destination tile). Any creature, obstacle, or item on the destination tile relocates to the origin tile as part of the process, swapping places with the relocating creature. A relocating creature must end its movement on its destination tile, but its controller may use mojo to move it after relocation.
Thugs and zombies always relocate to a random destination tile. When a zimby column enters a portal tile, however, its controller may expend mojo to influence its destination tile:
- For 1 mojo, the controller may eliminate their choice of any 1 destination tile. This means that the column's destination tile will be randomly selected from two possible portal tiles rather than three.
- For 2 mojo, the controller may eliminate their choice of any 2 potential destination tiles. This means that the controller effectively selects the destination tile.
- For 3 mojo, the controller may eliminate all 3 potential destination portals. This essentially "deactivates" the portal and the creature does not teleport anywhere and may freely continue its remaining movement over the portal tile.
Using portals from the tribal board
A shaman may spend 1 mojo to move a zimby column on their tribal board directly onto a randomly selected portal tile on the main board. The selection of the portal tile must be random and may not be influenced with additional mojo. If the tile is already occupied by a creature, the incoming zimby column dismisses and replaces that creature.
Part 12. Zombies
Making zombies
A zombie is the shambling, unliving remnant of a zimby -- a brainless, animated meat puppet. They are very powerful, very slow, and very stupid.
A shaman may only create a zombie from one of their own zimbies on the main board. The chosen zimby must be active and alone on its tile. To turn the chosen zimby into a zombie, the shaman moves 2 active zimbies from their tribal board to the Far Shore and replaces the chosen zimby token on the main board with an active zombie token. The replaced zimby token goes to the Far Shore. A shaman may only create a zombie on their turn, may not create more than 1 zombie per turn, and may not have more than 2 zombies in play. Zombies go to the Far Shore if they leave the main board for any reason other than to relocate between portal tiles.
Using zombies
A zombie is controlled by its creator on that shaman's turn, otherwise it is uncontrolled. Controlled zombies move 2 tiles per 1 mojo and have the same movement and combat zones as zimbies. Zombies cannot pick up or carry items; a zimby holding an item will drop it when zombified. Zombies cannot form, join, or be included in columns and cannot channel mojo or witcheries. Zombies are unaffected by death curses and ignore both patches o' darkness and entangling vines. Zombies cannot pass through blood thickets and will suffer wounds from blood mists, blood vines, and deadly vines.
Zombies will attack any living creature in their combat zone, even zimbies of their (former) tribe. If a zombie encounters a living creature in its combat zone, the zombie must stop moving and attack that creature. If there are two or more living creatures in an uncontrolled zombie's combat zone, randomly choose which one the zombie will attack. Zombies combat lock just like zimbies. Controlled and combat locked zombies attack on their controller's turn.
Shambling zombies
At the end of the round, before wrap-up, all zombies become uncontrolled and any zombie not combat locked will shamble. A shambling zombie will move 1d6 tiles toward the closest living creature as measured by the number of contiguous tiles along a valid movement path from the zombie to the living creature. Include paths through obstacles as zombies are too stupid to avoid them. If a shambling zombie encounters a living creature in its attack zone, it will stop shambling and attack the creature. A zombie's controller may pay 1 mojo to prevent their zombie from shambling but cannot otherwise affect it once it begins to shamble.
Part 13. The King and the Crown
Killing the King
When the King is killed, the blood thickets and blood vines begin to die and the King's token is flipped over to reveal the Cannibal Crown. If the King died by combat, the Crown will go to the column of zimbies that delivered the killing blow (use the Bag o' Fate to determine possession). If the King died by a witchery, the Crown will land on the tile where the King fell.
Powers of the Crown
The Cannibal Crown grants the Crown carrier 50% immunity to obstacles, 50% immunity to witcheries, and the ability to activate the King's rituals. Because a zimby column is a single creature, if the zimby in possession of the Crown is part of a column, that column is the "Crown carrier."
- 50% obstacle immunity. Roll 1d6 whenever the Crown carrier enters or remains in any obstacle. On a roll of 3 or lower (50%), the Crown carrier is completely unaffected and unhindered by the obstacle for that turn.
- 50% witchery immunity. Roll 1d6 whenever the Crown carrier is targeted by any witchery, including its own. On a roll of 3 or lower (50%), the witchery is cast but has no effect on the Crown carrier. This witchery defense applies only to witcheries that target the Crown carrier: the Crown provides no defense against witcheries that target the tile occupied by the Crown carrier.
- Ritual activation. The Crown carrier's controller may activate (or reveal and activate) the King's rituals by moving the Crown carrier onto a ritual tile and channeling 4 mojo into the tile. When a ritual affects a quadrant or portal, the controller may choose the quadrant or portal affected.
Burden of the Crown
The Cannibal Crown imposes upon its carrier a steep movement burden. This burden slowly decreases after the King dies until it reaches the equivalent of having +2 zimbies added to its carrier's column.
| Game timepoint | Crown burden to carrier |
|---|---|
| King's death | Crown carrier moves as though there are +8 zimbies in its column. Lasts until next refresh. |
| First refresh after King's death | Crown carrier moves as though there are +4 zimbies in its column. Lasts until next refresh. |
| Second refresh after King's death | Crown carrier moves as though there are +2 zimbies in its column. Lasts for the remainder of the game. |
Example. Suppose the Crown carrier moves as though there are +4 zimbies in its column. If the Crown carrier has 3 zimbies in its column, the column moves as though there are 3 + 4 = 7 zimbies in the column!
Game Setup
The following 9 steps will set up a game of Zimby Mojo.
- Set out the main board and place the blood thickets and blood vines as shown in the diagram with their A sides facing up.
- Place the 4 small elemental wards on the 4 entry tiles to the King's sanctum as shown in the diagram. You may place them as you desire.
- Turn the 4 large elemental seals face down, randomize them, and place face down on the shrine tiles as shown in the diagram. No one should know which seal is on which shrine tile.
- Turn the 8 ritual markers face down, randomize them, and place 1 on each of the 4 tiles pointed to by the 4 ritual tiles in the King's sanctum. The 4 unplaced markers won't be used (set them aside). No one should know which markers have been assigned to which ritual tiles until they are revealed by the King.
- Place the King in the blood mist (marked A on the diagram) in the center of his sanctum and the 4 thugs on the 4 pentagonal tiles (marked B) adjacent to the shrines.
- Give each player a tribal board to attach to one of the main board entry point tiles (marked C). Each player may choose their own entry point tile. Give each shaman 4 active mojo tokens.
- Shuffle together all the scroll cards. This is the scroll library. Place it in an easily accessible location on the table.
- Each player puts X-many active zimby tokens on their tribal board and their remaining creature tokens on the Far Shore. Each player draws a starting hand of Y-many scrolls from the scroll library. We suggest X = 4 and Y = 3 for new players or players seeking a slow game, and X = 8 and Y = 6 for experienced players or players seeking a faster game.
- Players randomly decide on a first mover then start the game on the "players' turns" phase, beginning with the first mover and proceeding clockwise.
(Setup diagram labels: Quadrant, Entry Point Tile, Outer Patrol Route, Sanctum, Elemental Ward, Ritual Tile, Ritual Marker, Inner Patrol Route, Elemental Seal, Shrine Tile, Portal Tile, Barracks Tile, Blood Vines, Blood Thickets, Tribal Board, Main Board.)
Solitaire play
In a solitaire game, only one tribe of zimbies is involved. The rules for solo play are the same as for a multi-player game with the following changes:
Scroll library setup
Remove from the game all scroll cards that have a red dot in their mojo symbol: these are for multi-player games and won't be used. Shuffle the remaining scroll cards, then deal out 17 scroll cards for the solitaire game scroll library. Only these 17 scroll cards will be used.
Player setup
Place 8 active zimby tokens and 4 active mojo tokens on the player's tribal board. Deal a starting hand of 6 cards from the scroll library.
Activating an elemental seal
One zimby must be sacrificed on a shrine tile to activate the elemental seal in that shrine. There must be at least 2 zimbies in the column at the shrine: one to perform the sacrifice and one to be the sacrifice. The sacrificed zimby goes to the Far Shore. Its blood activates the seal.
The King's Crown
The 50% witchery immunity granted by the King's Crown applies to witcheries that target the tile he occupies as well as those that target the King himself.
King's rituals and thug re-entry
When a thug returns to play on a random portal tile or when the King performs a ritual that requires him to randomly select a quadrant or portal tile, roll 1d6 instead of 1d4. Assign a roll of 1 - 4 to the four quadrants (or portal tiles) as normal and assign a roll of 5 or 6 to the one connected to (or nearest) the player's tribal board.
Thug behavior
The thugs behave normally until the King dies. When the King dies, all four thugs move independently at 2d6 tiles per turn along the footprint route until they reach the outer patrol route that connects to the player's tribal board (marked with a footprint in the diagram). All thugs then begin to patrol that route at 2d6 tiles per turn.
The first two thugs to reach the points on the patrol route that flank the player's entry point will stop patrolling and hold position on those tiles. The first thug to arrive will stop on the first X it encounters; the second will hold position on the next X. The other two thugs will keep patrolling the quadrant at 2d6 per turn. If any thug defeats a zimby column carrying the Crown and is able to deliver the Crown to the blood mist tile in the King's sanctum, that thug becomes the new Cannibal King and the player immediately loses the game.
(Diagram: first entry point on route, second entry point on route. "It's a little harder if you pick your entry point to be the first one along the thugs' patrol route!")
Running out of scrolls
If the player can't draw a card from the scroll library during refresh, the player loses the game.
Winning the solo game
The player wins the game by killing the King and getting his Crown to their tribal board. If the player wins, their score is equal to the number of cards left in the scroll library when they get the Crown to their tribal board. A win with a score of zero is possible!
Advanced rules
So, you want a game that requires a little more up-front cooperation with a few more variables tossed into the mix for even greater mayhem? Then add the elemental seals to your game as items! To add elemental seals:
- It requires two different shaman to each channel 1 mojo directly into an elemental seal at the same time to reveal and detach the seal. This does not, however, remove an elemental ward. It just releases the seal as an item for zimbies to carry about and use. If a seal is held by a zimby in a column, the entire column is the "seal carrier."
- A zimby column carrying an elemental seal moves as though there is +1 zimby in the column. The +1 zimby burden is cumulative for each elemental seal carried by a column.
- A zimby tribe in a column may carry only 1 item, regardless of the number of zimbies of that tribe in the column.
- To remove an elemental ward, a zimby column must bring the matching elemental seal to a tile adjacent to the warded tile and the column's controller must channel 1 mojo through the seal into the warded tile. This will permanently remove the ward and open the tile for passage. The elemental seal itself remains in the game.
Once they are released from their shrines, the elemental seals are usable items and remain in play after their matching elemental wards are removed. At any time, the seal carrier's controller may channel 1 mojo into the seal to activate its unique ability. The activation mojo must be spent on a per event basis. For example, the expenditure of X-many mojo to move a zimby column Y-many tiles is a single event. One attack is a single event. If the column is uncontrolled, the shaman whose zimby is in actual possession of the seal must pay the mojo cost to activate the seal's ability.
The elemental seal abilities are:
- Seal of Earth: Prevent 2 wounds assigned to the seal carrier. This does not work against curses.
- Seal of Air: The seal carrier's line of sight is not obstructed by creatures and its witchery range is doubled.
- Seal of Fire: The seal carrier gains +2 brutality.
- Seal of Water: The seal carrier may move through (but not co-occupy) tiles occupied by creatures and is unaffected by all obstacles except patches o' darkness.
Sample game rounds
The following pages provide some examples of play to help you ease your way into your first game. The examples use the table space next to the players' tribal boards as the Far Shore. Any convenient and readily accessible spot near the main board can serve as the Far Shore.
Setup
The game board is set up for 2 players starting with 4 zimbies each. We'll ignore scrolls for the time being. The players each roll 1d6 to determine who will be the first mover. Yellow wins and will be fist [sic] mover.
(Diagrams: START STATE and END STATE of the main board and both tribal boards.)
Round 1 (a focus on movement)
The yellow shaman uses 1 mojo to move 1 zimby onto the board by using a random portal. Yellow rolls 1d4 and ends up on portal tile A. Yellow uses 1 mojo to move that zimby 4 tiles away from A. Yellow then uses 1 mojo to move another 1 zimby onto the main board via a random portal and ends up on B. Yellow then spends 3 mojo to spawn 1 new zimby and ends their turn. The blue shaman uses 2 mojo to move a 2 zimby column 8 tiles from their tribal board and 3 mojo to spawn 1 new zimby. The thugs roll their 1d6s individually and move along the footprint patrol route. This ends the round.
Round 2 (King's turn)
The King goes first. He rolls a 1d4 to select a ritual tile and ends up moving onto the upper right ritual tile. He reveals and casts the ritual associated with that tile: the Ritual of Blood. The King rolls 1d6 and gets a 4, so the blood mist fills the sanctum and 4 contiguous, adjacent tiles beyond in all directions. The numbers 1, 2, 3, 4 illustrate counting the tiles out of the sanctum for a die roll of 4 (recall that blood mist may pass through the elemental warded tiles). All creatures caught in the mist suffer 1 wound. Since thugs have 2 vitality and wounds are not accumulated, the thugs are not killed by the blood mist.
Round 2 (seal activation)
Blue spends 3 mojo to move 1 zimby 9 tiles to a shrine and 1 mojo bring a zimby onto the board via a portal. Blue rolls 1d4 and enters at A, then ends their turn. Yellow asks Blue to join Blue's zimby on the shrine tile and Blue agrees. Yellow uses 2 mojo to move 1 zimby 7 tiles onto the shrine tile with Blue, forming a multi-tribe column. It is Yellow's turn, so Yellow controls that column but cannot force Blue to spend mojo. Blue and Yellow agree to each spend 1 mojo to activate the seal in the shrine. They reveal the Seal of Air: both the seal and its matching ward are removed from the board. Yellow spends 1 mojo to move a zimby 4 tiles away from a portal tile and 3 mojo to spawn 1 zimby, then ends their turn. The thugs roll their 1d6s to move along the footprint route. One thug moves past another and two thugs form a column.
Round 3 (some portal work)
There is a lot going on in this round, so lets break it down a little:
- The King goes first. He started on a ritual tile, so he moves onto the blood mist tile and ends his turn.
- Blue goes next. On Blue's turn, Blue becomes the controller of the Blue/Yellow column because Blue has a zimby in that column. Blue spends 2 mojo to move the column 8 tiles to another shrine (the thugs haven't moved yet, so the path is clear). Both Blue and Yellow each spend 1 mojo to activate and reveal the Seal of Earth in that shrine. The seal and its matching ward are both removed from the board. Blue decides to leave the lone zimby on the portal tile at A and uses 3 mojo to spawn 1 zimby, then ends their turn.
- On Yellow's turn, Yellow becomes the controller of the Blue/Yellow column. Yellow spends 1 mojo to bring a column of 2 yellow zimbies onto the main board using a portal. Yellow rolls 1d4 and enters on portal A. Blue's zimby on A is dismissed to make room for the yellow column. Yellow then spends 2 mojo to move 1 zimby from that column 6 tiles away and another 1 mojo to move the remaining zimby off and back onto the portal tile. The zimby relocates to a random portal tile other than A. Yellow rolls 1d3 and the zimby relocates to portal tile B. Yellow then ends their turn.
- The thugs each roll their individual 1d6 movement rolls and continue their patrol around the footprint path.
Since both shaman have 1 active, non-chanting zimby on their tribal boards during wrap-up, they roll 1d6 to determine the first mover for the next round. Blue rolls a 4 and Yellow rolls a 5: Yellow wins.
Round X (some combat)
(In the printed text, the columns discussed below are shown as rows of zimby token icons; the colors and sizes below follow the surrounding text.)
Consider some combat during the player's turns with Yellow as first mover:
- Yellow orders a yellow column to attack the thug at A. The column's attacking brutality is 2 against the thug's 3 brutality. Both roll 4 on their 1d6s: the column's combat roll is 4 + 2 = 6 and the thug's is 4 + 3 = 7, so the thug delivers 7 - 6 = 1 wound to the column. Yellow drops the column into the Bag o' Fate and draws out a blue zimby. The blue zimby goes to the Far Shore and the remaining column returns to play. Yellow then makes a zombie. Yellow moves 2 active zimbies from their tribal board to the Far Shore and replaces the lone zimby token at B with a zombie token. The replaced zimby token also goes to the Far Shore. Yellow then ends their turn.
- On Blue's turn, Blue controls the blue/yellow column. Since the thug is still alive, the column is combat locked and must attack the thug during Blue's turn. However, Blue may decide when it attacks. Blue pays 1 mojo to move the one blue zimby at C 2 tiles to join the column, bringing it to a three-zimby column. Permission to join the column isn't needed since Blue controls the column. Blue now attacks the thug with the column. On Blue's turn, the column has brutality 3. They roll 1d6s: the column gets a 4 and the thug gets a 1, so the column's combat roll is 4 + 3 = 7 and the thug's is 1 + 3 = 4. The thug takes 7 - 4 = 3 wounds. This exceeds the thug's 2 vitality and expels it from the board. The thug token is placed depleted (face down) on a barrack's tile.
- Next, Blue spends 1 mojo to move the column and attack the King at D. Before attacking, Blue has a zimby cannibalize two others in the column for +8 brutality to give the remaining zimby 1 + 8 = 9 brutality! The King's brutality is 1 plus the number of thugs in play. The thug that was killed was expelled from the board and is no longer in play, so the King has 1 + 3 = 4 brutality. They roll their 1d6s: the cannibalizing zimby rolls 2 and the King rolls 4. The zimby's combat roll is 2 + 9 = 11 and the King's combat roll is 4 + 4 = 8. Based on these combat rolls, the zimby would assign 11 - 8 = 3 wounds to the King when the combat rolls resolve. That isn't good enough: the King has 4 vitality so it requires a minimum of 4 wounds from the same damage source to kill him. Before allowing the combat rolls to resolve, Blue has the cannibalizing zimby target itself with the witchery "Spikey Bone Claws." This costs 1 mojo to cast and pushes the scroll effect onto the stack on top of the combat rolls. The witchery resolves first, giving the zimby +1 brutality and a combat roll of 2 + 9 + 1 = 12. Combat rolls resolve and the King dies from 12 - 8 = 4 wounds! The zimby claims the Crown and the tile!
- After Blue ends their turn and the thugs patrol, the yellow zombie will shamble. As it stands, a lone yellow zimby is the closest living creature to the zombie, just beyond a portal tile...
(Scroll card: Spikey Bone Claws, Witchery, cost 1: Target gains +1 brutality.)
Round X + 2 (some scroll use)
It is two rounds after the King has died. The Crown's movement burden to its carrier is the equivalent of adding +2 zimbies to the column. Yellow has the Crown. The yellow Crown carrier is denoted by red eyes and teeth.
- Yellow is the first mover and the Crown carrier is at A. Yellow wants to avoid the blue zombie and instead run across the sanctum to B. Due to the Crown's burden, the lone zimby carrying it moves as though it were a column of 1 + 2 = 3 zimbies: 2 tiles per mojo. Yellow could pay 3 mojo to run the zimby across the center through the blood mist, but the Crown's obstacle immunity is only 50%, so there is a 50% chance that it would die when it entered the mist. Instead, Yellow decides to pay 4 mojo to have it cross the sanctum by the marked path and avoid entering the line of sight of the blue zimby at C. When it reaches B, Blue says, "Stop!" and uses a scroll. The Crown carrier stops.
- Blue pays 2 mojo and has the zimby at D cast "Entangling Vines." The zimby targets the E tile in the hope of catching the Crown carrier in the spread of vines. No scrolls are used in response to the witchery, so the "Entangling Vines" resolves and clears the stack. Blue rolls 1d2 and gets a 2, so the vines will cover the target tile E plus 2 random, adjacent tiles. Blue rolls randomly for the extra tiles and manages to capture the Crown carrier in the vines!
(Scroll card: Entangling Vines, Witchery, cost 2: Place entangling vines A side up on the target tile and on 1d2 randomly determined adjacent tiles.)
-
Although Blue used a scroll, it is still Yellow's turn. Yellow checks the Crown carrier's obstacle immunity. Yellow rolls 1d6 and gets a 2, so the carrier is immune to the "Entangling Vines" for the turn. Yellow pays 1 mojo and moves it onto the A tile and prepares to run closer to home, but Blue again says, "Stop" while it is on A.
-
Blue uses the blue zimby at B to channel "Bungle" in an attempt to rid the Crown carrier of the Crown. In response, Yellow has the Crown carrier channel "Blow Guns" at the blue zimby that channeled "Bungle." Blue does not want to lose the zimby, especially now that there is a chance that the Crown could bounce near it, so Blue uses a "Nix" scroll and targets the "Blow Guns" effect on the stack. In response, Yellow uses a "Nix" scroll as well, this one to target Blue's "Nix"! The stack forms like this (bottom to top): Blue's Bungle, Yellow's Blow Guns, Blue's Nix, Yellow's Nix. The order of resolution is from top to bottom.
- Bungle (Witchery, 1): Target drops the item it was carrying. The item bounces randomly 2d2 times. Each bounce moves the item into a new, randomly determined adjacent tile. The item may bounce into and out of obstacles and occupied tiles. (Part of this card text is cut off in the source image.)
- Blow Guns (Witchery, 1): Target takes 1 wound.
- Nix (Ritual, 1): Nullify the scroll effect on top of the stack. Remove both Nix and that scroll effect from the stack.
So, what happens? The stack resolves in reverse casting order, from the top to the bottom. The first effect to resolve is Yellow's "Nix," which targets and nullifies Blue's "Nix" and removes both scroll effects from the stack. The next scroll effect on the stack is Yellow's "Blow Guns." This resolves and pushes 1 wound onto the stack, assigned to Blue's zimby at B.
The "Bungle" effect is already on the stack, so "Bungle" will resolve even if the zimby that channeled it is killed before it does so. Blue, however, wants to keep the zimby. In response to the wound being placed on the stack, Blue has the zimby target itself with "Lil' Bits o' Armor." The "Lil' Bits o' Armor" effect goes on the stack on top of the wound. Because the stack resolves from top to bottom, the "Lil' Bits o' Armor" effect will resolve first and prevent the wound from being delivered. The blue zimby at B will be alive and well when the "Bungle" resolves!
- Lil' Bits o' Armor (Witchery, 1): Caster may prevent 1 wound from being delivered to the target. This does not work against death curses.
Since "Bungle" is a witchery targeting the Crown carrier, Yellow rolls 1d6 to check the carrier's 50% immunity. Yellow fails the roll. The carrier drops the Crown and watches it bounce away. No longer in possession of the Crown, the carrier immediately becomes ensnared by the entangling vines on the tile!
Blue rolls 2d2 for the "Bungle" effect and gets a 4. The Crown bounces 4 times with each bounce taking it into a randomly determined adjacent tile. The ending locations for each bounce are noted by 1, 2, 3, 4. As Blue had hoped, the Crown ends up by Blue's zimby! Unfortunately, it is not Blue's turn and Yellow may still act.
-
Yellow uses 2 mojo to target themself with the ritual "Energy." The Cannibal Crown's 50% witchery immunity does not come into play because "Energy" is not a witchery. The ritual makes active 1 + 1d3 depleted zimbies on Yellow's tribal board. Yellow rolls a 3 on 1d3 and reactivates 4 zimbies! That brings the active zimby total on Yellow's tribal board to 7.
- Energy (Ritual, 2): Target shaman may make active 1+1d3 depleted zimbies on their tribal board.
Yellow pays 1 mojo to move 1 zimby onto portal tile C and pays an extra 1 mojo to shut down one possible exit portal X. This gives Yellow a 50% chance of exiting at portal D. Yellow rolls a die and successfully relocates to portal tile D! Yellow pays 2 mojo to move 7 tiles and picks up the Crown. Now the new Yellow Crown carrier suffers the Crown's added burden and will only move 2 tiles per mojo. Yellow's tribal board now has 3 active zimbies remaining.
Yellow uses 2 mojo and has the carrier target itself with "Big Bits o' Map." Yellow rolls 1d6 and gets a 6, so the Crown's witchery immunity fails and the witchery affects the carrier. This gives the Crown carrier 2 + 2d3 tiles of free movement! Yellow rolls 2d3 and gets 2 and 3. "Big Bits o' Map" gives the carrier a free 2 + 2 + 3 = 7 tiles of movement!
- Big Bits o' Map (Witchery, 2): Caster may move target zimby column up to 2+2d3 tiles in its legal movement zone. Moving zimbies keep their items.
Yellow chooses to move only 6 tiles instead of 7. This will prevent the carrier from being in the nearby thug's combat zone come patrol time!
Yellow's turn ends and it moves to Blue's turn... and Blue really wants that Crown!
Reference cards
Creature Statistics
| Brutality | Vitality | |
|---|---|---|
| Zimby | 1 | 1 |
| Zombie | 2 | 3 |
| Thug | 3 | 2 |
| King | 1 + thugs in play | 4 |
Creature Movement
| Zimbies in Column | Maximum Tiles per Mojo |
|---|---|
| 2 or fewer | 4 tiles per 1 mojo |
| 3 - 4 | 2 tiles per 1 mojo |
| 5 - 6 | 1 tile per 1 mojo |
| 7 - 8 | 1 tile per 2 mojo |
| 9 or more | 1 tile per 4 mojo |
Zombies move 2 tiles per 1 mojo and shamble 1d6 tiles. Thugs move 1d6 tiles (2d6 if the King is dead).
Scroll targets and use
- Shaman, creatures, and tiles: shaman, zimby column, zombie, thug column, King, tile.
- Scroll and scroll effect types: ritual, incantation, witchery (3 tile range, straight path, LOS required for witcheries).
- Tile position and witchery targets: tiles are adjacent to each other (orthogonally); a zimby casting a witchery can't target a creature if the path bends, can't target a creature out of range, and a creature in the path blocks LOS to creatures behind it.