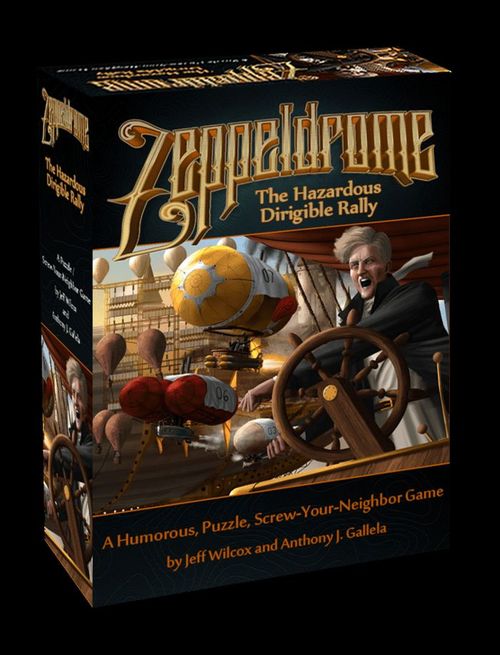
Zeppeldrome
Zeppeldrome Rulebook
Table of Contents
Table of Contents
The Goal
Be the first airship to land on a finish line space.
Game Materials
Beyond the game box and this rule book, this game comes with:
- 10 2-Sided Playing Board Sections
- 1 'Start' section, 2 'A's, 2 'B's, 2 'C's, 2 'D's, and 1 'Finish' section (We'll call boards A-D "Hazard Sections" in these rules.)
- Pieces for 4 players:
- 4 Dirigible tokens
- 4 Flight Plan covers in corresponding colors
- 4 Movement cubes in corresponding colors
- 70 Flight Plan Cards
- 8 Ballast Tokens
- 1 Chunk-Chunk Token
- 4 Old Folks Tokens
- 7 Lemming Tokens
- 20 Vector Chits
You supply:
- 1 Play surface
- 2-4 Players
- Clothes with deep pockets (see 'End of Game')
Game Preparation
Setting Up the Board
The board is different most every time you play. This is because the board is made up of sections that you choose randomly (or on purpose – you decide) to make up the board.
Start with the Start section. There is only one, but it is two-sided. Use the side with the dotted starting line.
Now randomly choose a section from the "A" sections. Connect the chosen A section with the Start section.
Continue this process with the "B," "C," and "D" sections, and then connect the Finish section to the end. Just like with the Start section, there is only one, and it is two-sided. Use the side with the checkered flags on it.
We recommend you do not use the empty Hazard sections ('A'-'D'). Note that some Hazard sections have additional set-up. See the Hazards portion of these rules for specific details.
Optional: Use fewer sections for a shorter game!
(The rulebook shows an example of a set-up board with the Start section, followed by the A Bit of Ballast; Slalom 2; Chunk-Chunk Machine; Tragic Lemming "Migration," and Finish sections.)
Next, choose a player to go first. That player is "in first place" at the start of the game. Set-up continues to the right beginning with the first player. Play goes in a different order each turn, so don't get used to doing things in this clockwise manner.
The term "in sequence" is often used in these rules. It refers to the players completing a task, one at a time, beginning with the player in first place and ending with the last-place player. There is more about that later, but that should cover you until then.
- In sequence, each player chooses one of the four Dirigibles (tokens), and its color-coordinated Flight Plan cover and Movement cube. Each player places their dirigible in the starting column (at the far left of the board.) The first-place player starts in the top-most space, the second just below, etc. All players place their corresponding Flight Plan cover and Movement cube in front of themselves.
- A player shuffles the Flight Plan cards, deals each player four cards (face-down) as their hand, and sets the remaining cards in a stack near the board with room for a discard pile. This stack becomes the draw pile. Each player may look at their cards.
A note about the Flight Plan cards: Each card has two sections, (1) a flight plan and (2) an action.
When deciding what card(s) to play in a given turn, you may want to look at each section and weigh their benefits. This is because when you play a card as a Flight Plan, the action section is ignored completely. And when you play a card as an Action, the flight plan section is similarly ignored completely. Each card is played either as one or the other.
Determining the Sequence (Who Is Leading Who)
The rules for determining who is in which position during this race are:
- The dirigible closest to the finish line is in the lead.
- If two or more zeppelins are in the same column (such as at the beginning of the game), then the highest airship is in the lead. (There are clouds at the "top" of the board and mountains at the "bottom" of the board. The "highest" dirigible is the one closest to the top.)
(The rulebook shows an example: Yellow is in the lead, then Blue, then Green, then Red.)
Game Play
Definitions
- Flight Plan Card – The card played at the start of the turn, showing your (hopeful) path for the turn.
- Vector Chit – The additional vectors played before and/or after your Flight Plan Card, adding to your path for the turn.
- Flight Plan – The combination of your Flight Plan Card and your Vector Chits.
The turn consists of these steps:
- Choose Your Flight Plan
- Reveal Flight Plans
- Use the Flight Plan Cover
- Play Action Cards
- Move Hazards
- Movement
- Discard Unwanted Cards
- Get Cards
Turn Steps
-
Choose Your Flight Plan: Each player chooses one Zeppeldrome card from their hand and plays it face-down in front of them. This card shows the movement (the vectors in the upper 2/3 of the card) you dirigiblers hope to complete this turn. (We'll call cards played in this way "Flight Plan Cards.")
-
Reveal Flight Plans: All players turn over the Flight Plan Cards they played this turn at the same time. The Flight Plan Cards are left on the table, face-up, in front of each player. Note: there is also the option to leave the Flight Plan "deactivated"/face-down. In which case the Flight Plan is a single move, in any direction, chosen at the time of movement. See the Deactivated Flight Plans section for details.
-
Use the Flight Plan Cover: Each player covers the Action Section of their Flight Plan with their Flight Plan Cover. This is to make it clear to everyone, as cards are played later in the turn, which card is, indeed, your Flight Plan Card for the turn.
-
Playing Action Cards: In sequence, each player may play the Action portion of the cards in their hand on any player (including themselves). (We'll call cards played in this way "Action Cards.") Players play Action Cards like so:
- a. In sequence, each player plays one card or passes (declines to play an Action Card this round).
- b. Re-assess who the first-place player is. Action Cards may move an airship during this step. The movement may change the "in sequence" sequence of players for the next round of playing Action Cards, and for movement later in the turn. This is fine.
If at least one player played an Action Card in the last round, begin another round of playing Action Cards with the first player. (In all rounds, players may play an Action Card even if they passed in the previous round.)
If all players pass during a round, move on to the next step.
Details on what the different Action Cards do when they are played can be found later in the rules.
Start at step 1 again for the next turn! (Unless someone has won the game, of course.)
Deactivated Flight Plans
No good options in your flight plan cards? You'll notice, on the back of your cards, that there is a single, any-direction vector. When you play your Flight Plan Card for the turn, rather than turning it over when the other players do, you may leave your card face-down and declare that you're "Deactivating" your Flight Plan Card and will only be moving one space in any direction (you choose when it's time for you to move that vector).
Vector Chits and other cards can still be played on you and your Flight Plan (by you or by others), and any card that changes your Flight Plan Card still affects your Flight Plan Card.
Another way a Flight Plan card may be deactivated is via Action Cards. When an Action says to "deactivate" your Flight Plan Card, you turn over your Flight Plan Card and are left with just that one move-any-direction vector.
If the Action deactivates the Flight Plan (does not say it is only affecting the card) then the Flight Plan Card is turned face down, and all Vector chits are discarded.
Movement
The flight plan section of a card shows the options for movement that turn. You can see by the arrows and paths on the cards that some cards have lots of options, while others have only a few – or just one.
When picking a card to play, it's important to note the available paths on the card, and to realize that once you move along a path, you need to follow that path until the path ends. Here's how that works:
- The Movement Cube helps keep track of which vector you're on. Each time you move, you (1) use the Movement Cube on your Flight Plan (chits and card) to show which one of the presented next vectors you are attempting to move, and then (2) you move your dirigible on the board.
- You might have Vector Chits played to the left of your Flight Plan Card. If you do, then you must attempt to move your dirigible in each of those vectors, in order, from left to right, as you move your Movement Cube toward your Flight Plan Card.
- When you move your last, left-hand Vector Chit vector, you remove your Movement Cube from the Chit to show that you've moved, and then you place your Movement Cube on the picture of a Zeppelin on your Flight Plan Card.
- Once your movement cube is placed on your Flight Plan Card, each arrow leading out of that space is vector option for you.
Types of Vectors
-
If the arrow is solid, then it is a normal vector and there is no cost to move that vector.
-
If the arrow is open, then it is an optional vector, and if you want to move that vector you must discard a card from your hand to "pay" for that move. If you do not have a card in your hand to spend, then you cannot take that vector. That vector, and any vectors after it on the Flight Plan Card (optional or not) are not available for you to move.
-
If you don't have any Vector Chits to the right of your Flight Plan Card, then when you've moved your last Flight Plan Card vector, you remove your Movement Cube from the card and discard the card and any Vector Chits.
-
If you do have Vector Chits to the right of your Flight Plan Card, then when you've moved your last Flight Plan Card vector, remove the Movement Cube and place it on the left-most Vector Chit of the ones played to the right of the Flight Plan Card. When you move your last Vector Chit, you'll remove your Movement Cube. Discard your Flight Plan Card and any Vector Chits.
Remember that you must continue moving if you have any solid-arrow options coming from your current vector.
Things Get in the Way! (Bouncing)
If you are blocked from moving into the space attempted, then you "bounce": you stay in the space you are currently in. (i.e. Your Movement Cube moves along the Flight Plan, but your dirigible does not move this one vector on the board.) If you bounce, you still continue on attempting to complete the rest of your Flight Plan. Your movement does not end at a bounce!
Can you choose to move to a Vector that's blocked as part of your strategy? Yes! You don't have to follow open paths – you just need to follow the arrows on your Flight Plan Card and follow any Vector Chits that have been played on you that turn.
Example of Moving
(The rulebook's example shows the red player, who has no Vector Chits, placing the Movement Cube in the dirigible on the Flight Plan Card, with the board shown after this step. The red player then has a choice of going down, if he pays for it by discarding a card from his hand, or going forward. He chooses the latter, and moves his Movement Cube forward along the path. For the first move, the red player moves his Cube following the arrow, and moves his Dirigible like so. Then he moves his dirigible straight forward on the board. The example diagrams are not reproduced here.)
Hazard Sections
The Hazard Sections, marked "a"-"d," have things printed on them that get in the way of a nice, straight shot to the finish line. Each section's hazard gives it the name along the top edge of the board. Sometimes the hazards are static, other times they move in a regulated way (usually by the last place player).
a Section Boards
A Bit of Ballast
Extra setup info: Place Ballast Tokens on each of the nine marked spaces.
Description: When a dirigible lands on space containing a Ballast Token, the player may (but does not have to) collect the Ballast Token, placing it near them for later use. If they do so, then they immediately move their dirigible down one space, if possible. They can collect another ballast token right away if there is one in the new space (and move down again, if possible).
Using a Ballast Token: Just before or just after the player moves a vector during movement, that player may drop (discard) a Ballast Token to move their dirigible one space directly up. Multiple tokens may be dropped at the same time, with the dirigible moving up one space per token dropped.
Inspiration Point
Description: While on this board, when any player fills their hand to four cards at the end of a turn, they then get to draw one additional card to their hand.
Slalom 1
Extra setup info: When using this hazard, the starting positions for the players are, from top to bottom: Yellow, Blue, Red, and finally Green at the lowest spot.
Description: A Dirigible may only land on a hoop gate of its own color. The Dirigible may land on the space by going straight or diagonally onto it, either forwards or backwards. Hoop gates of other players block movement.
b Section Boards
Headwinds
Description: Dirigibles are not allowed to move (they bounce) a straight forward vector when they start in the Headwinds and are moving to a space in the Headwinds. (Up-Forward and Down-Forward are still fine to move.) Bounces do not mean the space is a "blocking obstacle."
Slalom 2
Description: Same rules for moving through the hoop gates as for Slalom 1. The three spaces are blocked for movement of all players. (There are no set-up rules like there are with Slalom 1. The source prints "Slalmon 1" here; corrected to "Slalom 1".)
c Section Boards
Chunk-Chunk Machine (CCM)
Extra setup info: Place the Chunk-Chunk Token on a CCM space (at the bottom of the board), with the arrow pointing to the other CCM space. The last-place player decides which space.
Description: The image the arrow points to shows which spaces are open for this turn. Spaces with the other symbol are blocked for the turn. All players can freely move through all open spaces and are blocked from moving onto all closed spaces.
Players may find themselves starting movement on a closed space. This is okay. A player can move onto any adjoining open space during movement, but is blocked from moving to any adjoining closed space (diagonal movement).
Player control: During step 5 of each game turn (after Action Cards, before Movement), the last-place player may change which symbol shows an open space by placing the CCM Token on the now-closed symbol, and pointing the arrow at the now-open symbol.
Obscuring Fog
Description: When on an Obscuring Fog space and moving to an Obscuring Fog space, a dirigible cannot use diagonal movement. Straight forward, straight back, straight up, and straight down are all fine. If a vector would normally move a dirigible diagonally, the dirigible bounces instead. That bounce does not mean the space is a "blocking obstacle."
Ravenous Fans
Description: If you land on a space showing your dirigible's color, then you may immediately move an extra vector in any direction.
If you land on a space of a different color, you must immediately move your Movement Cube one more vector along your chosen path (effectively causing you to lose one vector this movement.) If you have no more verticals in your Flight Plan (if moving on to this space was your last move for the turn), then you are safe and there is no effect.
(Note: "verticals" is printed as is; it appears to mean the remaining vectors in the Flight Plan.)
d Section Boards
Four Old Folks Looking for the Farmer's Market
Extra setup info: Place Old Folks Tokens on each of the four marked spaces.
Description: Old Folks Tokens block players from entering the space they occupy. Old Folks Tokens cannot enter spaces occupied by players. Old Folks Tokens count as obstacles that block movement.
Player control: During step 5 of each game turn (after Action Cards, before Movement), the last-place player may move any or all of the Old Folks by moving their Token(s) to any adjoining open space.
Additional movement limitations: Old Folks don't really like each other, and will not move to any space where they will be in a non-diagonal space next to two or more other Old Folks. (A group of two Old Folks orthogonal to each other is fine, just not a group of three or more.)
Press Boxes
Description: Press Boxes are obstacles that block movement onto their spaces.
Tragic Lemming "Migration"
Extra setup info: Place Lemming Tokens on each of the five marked spaces. The two remaining Lemming Tokens are placed near the board.
Description: The wildly flapping Lemmings block players from entering the spaces they occupy. Lemmings cannot enter spaces occupied by players. Lemmings count as obstacles that block movement.
Player control: During step 5 of each game turn (after Action Cards, before Movement), the last-place player must move at least one (but may move any number) of the Lemmings on the board straight down one space. (The poor Lemmings do get tired and thus can't flap quite as quickly.)
Any Lemming failing off the bottom of the board (they aren't blocked by the bottom edge) plummet to their doom and their chit is removed from the board and placed near the board for later use.
The player may also have one or more new Lemming(s) drop onto the board from the top. They can fall into any open space at the top of this board. Note: Each column has a "Maximum Lemming Limit" – this is the maximum quantity of doomed Lemmings that can occupy the column.
Action Cards
All Action Cards can be played on any player. Some are clearly bad and should be played on your opponents, while others are clearly good and should be played on you. BUT almost all cards, depending on the game situation, can be used strategically on anyone.
There are many, varied Action cards available to you, but they only come in five, different flavors:
- Cards that add Vector Chits,
- Cards that move a Dirigible,
- Cards that subtract Vector Chits,
- Cards that affect a Flight Plan Card,
- Cards that do none of the above.
Note that the player who plays the Action Card makes any decisions for, and pays any cost for, that card.
1: Cards That Add Vector Chits
Cards that add Vector Chits to a flight plan have the image of one or more chits, each with one certain vector presented, or the image of one or more chits with arrows going all directions. This second type of card means the player of the card can choose which direction of chit they play.
The card may tell you to play the chit(s) before or after a Flight Plan by showing the chits placed next to a symbol with an FP in it. In these cases, you must play the chit(s) in the order they are printed on the card, either directly to the left of the Flight Plan (in front), or directly to the right of the Flight Plan (behind). (Remember that a previously-played Vector Chits are now part of the Flight Plan.)
If there are multiple Vector Chits images on the card, then all Vector Chits, in the order they are printed on the card, are put into play.
Often there are a few options with the word "OR" between them. This means the player playing the card must choose between the choices on the card.
Sometimes the arrow in the image is open like an optional movement. This means the player playing the card may play this optional vector after discarding a different card from their.
2: Cards That Move Dirigibles
A bang (!) on a card means the action is taken right as the card is played rather than later during the movement steps of the turn. So a card showing a vector chit with a down arrow preceded by a bang means the player can move a dirigible down – though dirigibles have the same movement limitations as normal (i.e. a dirigible can't move onto a blocked space, etc).
3: Cards That Remove Vector Chits
Sometimes there is a red box with an "X." This means you remove a Vector Chit from the Flight Plan of player you play it on. (If the player has no Vector Chits, then just discard this card when you play it.)
(The rulebook shows examples: one card shows a choice, where the player decides which Flight Plan to play it on (their own or another player's), and then either adds any Vector Chit before the target player's Flight Plan, or any Vector Chit after the target player's Flight Plan. Another card shows bangs, where the player decides which player to play the card on – either themselves or another player – and then immediately moves that player's dirigible down (if possible), and then immediately back-down (if possible).)
4: Cards That Affect a Flight Plan Card
Some Action Cards specifically affect a player's Flight Plan Card. Usually they "deactivate" the Flight Plan Card, which causes it to be turned face down – and the now the player's Flight Plan Card gives the player the one-vector-any-direction movement.
5: Cards That Do None of the Above
There are some cards in the deck that do not fall under any of the categories above. These cards have their rules right on them and do what they say they do.
End of Game
As soon as one dirigible reaches a space on finish line, the game is over.
The winner is declared Zeppelbach Extraordinaire (Honorary), is doused with the traditional flaming Stivis Rum (or the sports drink of their choice), and is given as much pizza as the winner can shove into his or her pockets. Congratulations!