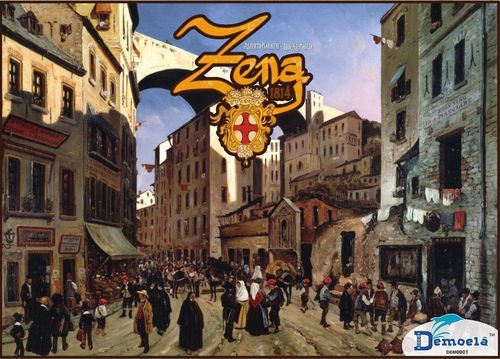
Zena 1814
Zena 1814 Rulebook
Table of Contents
Table of Contents
Note
All of the areas on the game board represent real buildings that existed in Genoa in 1814—the centers of city life, where important trade and the affairs of state took place.
The coins used in the game are patterned after real coins from that period. To be strictly accurate, we should have used the 2, 4, and 10 Soldi coins that circulated in those months, but for game play reasons we have divided those values in half.
All of the illustrations on the cards and the box cover are taken from real paintings.
Game Components
- 1 Game board showing the city of Genoa
- 20 Wooden pawns - 4 for each family (1 Lord, 1 Lady, 2 Heirs)
- 4 Wooden Score Markers - 1 for each family
- 50 Influence cubes (10 for each family)
- 56 Coins in three denominations: 16 worth 5 Soldi, 18 worth 2 Soldi, 22 worth 1 Soldo
- 110 Cards, including: 9 Event cards, 1 First Player card, 5 Family cards, 27 Goal cards, 60 Action cards, 8 Fort cards
- 1 Die
Beginners and Advanced Players
This game can be played in two different ways: Beginner and Advanced. For your first game, we recommend that you use the Beginner Rules. All rules that apply to both games are printed in black. Rules that only apply to the Advanced Rules are printed in blue (marked "[Advanced]" here).
The Game Board
The game board shows a view of the city as seen from the sea. The six most important sites in the city are highlighted so they can be used as game "Areas": [Advanced] Old Town Streets, Cathedral, Palace, Bank, Port [Advanced] and Fort. Below the City there is the Score Track.
At the beginning of the game, place the board in the middle of the table, showing the Beginner or Advanced side, depending on which rules you are using.
Goal of the Game
The players move their pawns around the Areas on the board and take actions to earn money (Coins), cards, and Prestige Points. The family that has the most Prestige Points at the end of the 8th Round wins the game!
Setting Up the Game
- Each player chooses a color and takes the Family card, the 4 pawns (1 Lord, 1 Lady, 2 Heirs), and the 10 Influence cubes of that color. Place your Score Marker on the "0" space of the Score Track.
- Shuffle the Event cards and remove one card: Return it to the box without looking at it. Place the other eight cards near the game board, face down.
- Remove all the Old Town Streets cards from the Action card deck and return them to the box. [Advanced] Leave these cards in the deck if playing the Advanced Rules. Shuffle the deck and place it near the game board, face down. Deal each player six cards. If all the players drawn by a player have a cost of 5 or more, he can choose to discard all of them and draw other 6. [Advanced] Deal each player 10 cards instead if using the Advanced Rules.
- Return all the Fort cards to the box. They are not used in the Beginner Rules. [Advanced] If using the Advanced Rules, shuffle the Fort cards and place them face down near the game board.
- Return all the Goal cards to the box. They are not used in the Beginner Rules. [Advanced] If using the Advanced Rules, shuffle the Goal cards and place them face down near the game board.
- Give each player two Coins.
- Randomly determine the first player and give him or her the First Player card. [Advanced] Skip this step if you are playing with the Advanced Rules - the first player will be determined during the Placement Round.
Round 0: The Placement Round
When playing with the Beginner Rules, your pawns are placed randomly. Each player draws and reveals the top card of the Action Deck and places one of his or her Heirs on the Area shown on that card. Then, place your other Heir, followed by your Lady, and finally your Lord, each in a separate Area, following the order below:
- Cathedral
- Palace
- Bank
- Port
Example: Paul has revealed a Palace card. He places 1 Heir on the Palace, 1 Heir on the Bank, his Lady on the Port, and his Lord on the Cathedral.
[Advanced] When playing with the Advanced Rules, you choose where to place your pawns.
[Advanced] PLAYING HINT: Because this is a very tactical decision that can affect the play of the game, we strongly recommend that you play the Beginner Rules at least once before trying the Advanced Rules. That way, you will be familiar with how the cards and Areas work.
[Advanced] In the Advanced Rules, you receive 10 cards (instead of 6). You CANNOT look at your cards until ALL players have drawn their 10 cards! Once all players have their cards, they all simultaneously look at their cards. As quickly as you can, choose FOUR OF YOUR CARDS to place face down in front of you, and place one of your pawns on each of those four cards. Once all players have placed their pawns, the cards are flipped over. Each pawn is placed on the Area shown on its card.
[Advanced] THE FOUR CARDS USED TO PLACE YOUR PAWNS ARE THEN SHUFFLED BACK INTO THE ACTION DECK. YOUR OTHER SIX CARDS FORM YOUR STARTING HAND.
[Advanced] The FIRST PLAYER to finish placing his or her pawns on their cards takes the First Player card and gives it to the player of his or her choice (which could be him- or herself).
Playing the Game
The game is played over eight game rounds. Each round is divided into four phases:
- Event
- Actions
- Resolution
- End of Round
[Advanced] Important: Any time these rules state that you must draw or discard a card, you may choose to draw or discard either an Action card or a Goal Card. Your hand of cards can include both kinds of cards.
Phase 1: Event
Turn over the top Event card. The Event card shows how many coins all players receive as Income. The Event card may also list a bonus or penalty to the payout on some cards (see Phase 3: Resolution), [Advanced] and it may require that the players reveal a Fort card.
Each player immediately receives the indicated income. If the card affects the amount of coins given by Bank or Port cards, place the card near that Area - it will affect those cards during the Resolution Phase. [Advanced] If the Event says to reveal a Fort card, turn over the top Fort card immediately.
(Event card diagram labels: Income; Reveal a Fort card; Effect in Resolution Phase.)
Phase 2: Actions
Starting with the first player and going clockwise, each player takes a turn. On your turn, you may perform any or all of following actions in the order listed:
- Move one pawn to any Area;
- Promote one card in an Area with one of your pawns;
- Influence cards in Areas with your pawns; and/or;
- Pass the turn.
Action 1: Move a Figure
On your turn, you may move one of your pawns to any Area on the game board. There are no restrictions or costs for moving a pawn.
Action 2: Promote a Card
Promoting and influencing cards is the key to the game: each Influence cube you place will allow you to draw cards, collect Coins, or earn Prestige Points. These benefits are collected during Phase 3: Resolution, later in the round.
You may play, or "promote" a card from your hand if you have at least one pawn in the Area shown on the card. It does not matter which pawn is located in that Area.
To promote a card, you must first pay the number of Coins shown in the top left corner of the card. Then, place the card face up near the game board, close to the Area shown on the card, and place one of your Influence Cubes in the top left space. You are now the "Promoter" of that card.
Cards are always placed outside the game board, with all cards that match the same Area placed together. The first card played in an Area is always on the left, with cards for that Area played later forming a row to the right - so the newest card played is always at the right end of the row.
There is no limit to the number of cards that can be played in a given Area each round.
After you promote a card, all the other players who have at least one pawn in that Area, in turn order starting with the first player, may immediately influence that card. In order to influence a card, you must pay the number of Coins shown on the top empty space on the left side of the card and place your Influence cube on that space.
Each time a player influences a card, the Promoter of that card immediately receives the bonus shown next to the space that player places an Influence cube on.
Exception: Dieroll cards work a little differently. See "Types of Cards".
NOTE: In this way, players can influence cards even when it is not their turn! [Advanced] Fort cards can also be influenced this way when they appear as the result of an Event card.
Action 3: Influence Cards
You may influence as many cards as you wish, as long as there are empty spaces on the cards and you have enough Coins to pay the required costs. You can only influence a card that is in the same Area as one of your pawns.
IMPORTANT: You can never have more than one Influence cube of your color on a given card. You are also limited to the number of Influence cubes you can use at one time: if you run out of cubes, you may remove one from any other card in order to place it on a new card. If you do, any Influence cubes below your cube are moved up to fill the empty space. If you remove the last cube from a card, that card is discarded from play.
Example Turn: The turn order is John, George, Paul, and Ringo. It's Paul's turn. He moves one of his Heirs from the Palace to the Fort. His Lord is in the Bank Area, so he can promote this card.
He pays 4 Coins to the supply and places 1 Influence cube on the top space. He is now the card's Promoter. John's Lady and George's Lord are also in the Bank Area, so they can both influence the card. John has the first chance, since he plays before George in the turn order. He spends 2 Coins and places his cube in the second space. As the Promoter, Paul immediately gains 1 Prestige Point, moving his marker up on the Score Track. George could now spend 1 Coin to fill the last space on the card, but he decides not to.
Paul's Lady is in the Port Area, where John played a card previously. He decides to influence that card, then passes the turn.
Paul's turn is now over, and it's Ringo's turn. He would like to influence the card Paul just played, but he has no pawns at the Bank. So, he begins his turn by moving one of his Heirs to that Area, then he influences the last space on Paul's card by spending 1 Coin—and Paul immediately draws 1 card [Advanced] (which could be an Action card or Goal card).
[Advanced] Fort cards: The cards belonging to the Fort Area are all in a separate deck and they can never be in a player's hand. They can appear at the beginning of a Round as result of an Event card. They can be influenced like other cards.
Action 4: Pass the Turn
If you did not move any of your pawns (Action 1) and you did not promote or influence any cards this turn (Actions 2 and 3), you may either take one Coin or draw one card from the supply (i.e., you may take a Coin or card if you completely skip every other kind of action on your turn).
Once you have completed all of the actions you want to take, your turn ends and play passes to the player on your left.
Summary of the Action Phase
When it is your turn, you may:
- Move one pawn to any Area, if you wish; THEN
- Promote one Card in any Area where you have at least one pawn (paying the cost and placing a cube on the top space of the card), if you wish; AND THEN
- Place cubes on cards previously played by other players [Advanced] (or by the Event deck, at the Fort) in Areas where you have at least one pawn, if you wish.
If you do not move a pawn or place any cubes, you receive one Coin or one Card, your choice.
When it is not your turn, you may:
Place a cube on a card just promoted by another player in an Area where you have at least one pawn (this is done in turn order, starting with the holder of the First Player card and going clockwise).
There can only be one cube per color on each card.
Phase 3: Resolution
After all players have finished their turn in the Action Phase, the Resolution Phase begins. During this phase, all cards in play are resolved and income is awarded for control of Areas.
- [Advanced] Old Town Streets
- Cathedral
- Palace
- Bank
- Port
- [Advanced] Fort
The three steps below must be followed to resolve each Area, before moving on to the next (i.e., all steps are applied to the Old Town Streets, then you start again with the first step at the Cathedral, and so on).
Step 1: Resolve Card Effects
All of the cards in play for the area are checked and their effects are applied. The oldest cards are always resolved first (so, going from left to right). The effects of each card are the same for all players who have an Influence cube on that card (including the card's Promoter). If more than one player has a cube on the same card, they are resolved in order, from the top to the bottom (i.e., the Promoter first). [Advanced] Note: It's important to follow this rule, because when players get to draw cards, they can choose to draw from the Action deck or the Goal deck, as long as there are cards to draw.
See "Types of Cards" for more information on resolving card effects.
Important: Some event cards affect the number of Coins given out by Port or Bank cards. This effect is applied to all the cards in that Area: Temporary, Permanent, Dieroll, [Advanced] and any Sollevaçioin pilotæ cards that have been moved to that Area.
Step 2: Remove Excess Cards
After all the cards in an Area have been resolved, some cards in that Area may be removed from play:
- Remove all Temporary cards (see "Types of Cards"); THEN
- Reduce the number of cards in that Area to a maximum of three cards by removing the oldest Permanent or Dieroll cards there (i.e., from the left first).
All Influence cubes on the removed cards are returned to their owners.
Step 3: Determine Area Control
Finally, the players compare the value of their pawns in the Area to see which player has "control" of that Area. Each pawn is worth a number of Control Points, as listed below:
- The Lord is worth 5 Control Points;
- The Lady is worth 3 Control Points (but see below);
- Each Heir is worth 2 Control Points.
Note: Due to disagreeable but historically true reasons, women could not directly influence events in most areas of society. So, if a Lady is alone in an Area (i.e., without a matching Lord or Heir), she cannot control the area. [Advanced] The only exception is the Old Town Streets: a Lady may control this Area even if she does not have another pawn with her.
The player with the most Control Points at the location controls that location and receives the income listed below. If there is a tie, no one has control of that location.
- [Advanced] The Old Town Streets: 2 Cards and 1 Coin
- The Cathedral: 1 Card and 2 Coins
- The Palace: You may spend 1 Coin to score 2 Prestige Points
- The Bank: 3 Coins
- The Port: 1 Prestige Point and 1 Coin
- [Advanced] The Fort: 1 Prestige Point and 1 Card.
Example: It's time to resolve the Bank. There is only this one card in this Area, with Paul's, John's, and Ringo's Influence cubes on it: Each of them earns 2 Coins. This card is a Permanent card, so it stays where it is. There are four pawns in the Bank Area: Paul's Heir, John's Lady, George's Lord, and Ringo's Heir. Since George has the most Control Points, he gets the income and receives 3 Coins. Moving on to the Port Area: There are no cards here, so we go straight to determining who has Control. There are two pawns here: Paul's Lady and John's Heir. Paul has the most Control Points, but he can't control an Area with just a Lady - so no one controls the Area or gets the income.
Phase 4: End of Round
Once all Areas have been resolved, the round ends. At this point:
- All players that have more than six cards in hand must discard down to six. Discarded cards are placed face down at the bottom of the deck they were drawn from.
Note: Your "hand" includes all Action cards and Goal cards you have put together! At the end of each round, you must discard down to six in total. Be careful choosing which ones you want to keep!
- The first player passes the First Player card to the player on his or her right. That player will act first in the next round.
Types of Cards
There are three types of Action cards: Temporary, Permanent, and Dieroll cards. The type of card affects how you must handle it during Phase 3: Resolution.
Temporary Cards
These cards are resolved only once, paying out the rewards shown during the Resolution Phase of the same game round in which they were played. They are then removed from the game.
Permanent Cards
These cards pay out the reward shown every round until they are removed because the Area has more than three cards in the Resolution Phase, all Influence cubes on the card have been removed, or the card is destroyed by a failed Fort card.
Dieroll Cards
These special Bank and Port cards represent risky business ventures, either a Bank Investment or a dangerous Trade Route. These cards do not always pay out rewards during the Resolution Phase. Instead, you must roll the die to see what happens.
[Advanced] All Fort cards are also Dieroll cards (see below).
Unlike other cards, when a player influences a Dieroll card, the Promoter does not receive an immediate reward. Instead, each influencing player increases the odds of success by adding +1 to the result of the die roll. Since each card can be influenced only twice, the highest bonus is +2.
Dieroll cards are resolved during Phase 3: Resolution (like other cards) by following these steps:
[Advanced] First, each player who has an Influence cube on the card may spend Coins to improve the chances of success. Each Coin spent adds +1 to the result of the die roll. The Promoter is the first player who must decide whether or not to spend any Coins, followed by the other players in the order of their cubes on the card, from top to bottom.
Then, the Promoter rolls the die:
- If the result is 1, 2, or 3, the venture fails! The card is removed from the game, and the cubes on it return to their owners, who don't earn anything!
- [Advanced] A Fort card that fails also destroys the oldest card in the Area marked on the Fort card - see below.
- If the result is 4 or 5, nothing happens. The card remains in play, and will be resolved again during the next Resolution Phase.
- If the result is 6 or more, the venture is a success! All players with an Influence cube on the card receive the reward listed. Then, the card is removed from play and the cubes are returned to the players.
Example: It's time to resolve a Bank Investment Dieroll card. Paul is the card's Promoter, and John also has an Influence cube here. Paul decides to spend 2 Coins, and John spends 1. Paul rolls the die and gets a "3", which would normally mean that the venture has failed. But, he adds +1 for John's Influence cube and another +3 for the Coins they spent. The final result is 7, which means the venture was a success!
Fort Cards
[Advanced] In addition to acting as a Dieroll card, there are three special rules that apply to all Fort cards:
- [Advanced] If a Fort card results in a failure when resolved, it is returned to the bottom of the Fort deck. If it results in a success, it is instead set aside in a "Battles Won" pile.
- [Advanced] If a Fort card has no Influence cubes on it during the Resolution Phase, it automatically results in a failure, with all the normal consequences.
- [Advanced] When a Fort card results in a failure, it also destroys the oldest card in the Area shown on the Fort card - it is discarded from play and the cubes on it are returned to their owners.
(Example Fort card: If this card is a success, each player with an Influence cube on it gets 2 Prestige Points. If this card is a failure, the oldest card at the Palace and at the Cathedral are destroyed.)
End of the Game
The game ends after the end of the 8th Round. You can keep track of the rounds by the cards in the Event deck: the last card will be revealed at the beginning of the last round.
At this point, there is a final chance to score points, as follows:
- Each player earns 1 Prestige Point for every 5 Coins they have left.
- [Advanced] Each player earns the Prestige Points for any completed Goal cards they hold. (Don't forget to discard down to six cards during the last round!)
The player with the most Prestige Points wins the game! If there is a tie, the tied player with the most money wins.
Advanced Rules for 2 or 3 Players
[Advanced] When playing the Advanced Rules with two or three players, each player can place up to two Influence cubes on each card, on different spaces. The costs of playing each Influence cube must be paid as normal, and each cube awards the bonuses on the card.
[Advanced] These cubes can be placed at the same time or over different rounds, as the players wish. It is also possible to place both cubes when it is not your turn, if a card appears in an Area where you have a pawn.
[Advanced] If two or more players have pawns on the Fort when a Fort card is revealed, they choose whether to place Influence cubes in turn order: The first player may play one or two cubes, followed by the player on his or her left, and so on (if there are empty spaces left).
[Advanced] All other rules apply as normal.
Example: In a three-player game, Paul plays this card. He must place 1 Influence cube on the top space. He could then play another cube in the second space. If he does, he must pay 4 + 2 = 6 Coins. He gains 1 Prestige Point (for the cube on the second space) and will receive 4 Coins during Phase 3: Resolution.
Card Almanac
Symbols used on the cards:
- Temporary card (hourglass icon); all the players (icon)
- Permanent card; effect applies to the card's Promoter; play another round
- Dieroll card; control point; gain coins
- Pass a card in the direction shown; gain victory points; draw card
Special Card Clarifications
Manezzi (Manipulation): When this card is resolved in phase 3: Resolution, the Promoter removes the cube from the card and places it under any pawn he or she owns. That figure is worth +1 Control Point.
Sollevaçioin pilotæ (Rigged Clever Ruse): The first time this card is resolved in phase 3: Resolution, the Promoter moves it to any other Area that is not the Fort. Note that this card is permanent, so it will count against the three card limit in its new Area. If this card is moved to the Bank or Port, it is affected by events that modify the value of Bank and Port cards, and counts towards the Relaçioin co-a compagnìa card bonus.
Relaçioin co-a compagnìa (Relationship with the Corporate Partnership): This card awards from 0 to 2 Prestige Points when it resolves in phase 3: Resolution: Each player who has an Influence cube on this card earns one Prestige Point if they have at least one Influence cube on a Port card and/or one Prestige Point if they have at least one Influence cube on a Bank card. This can include Permanent, Dieroll, and Temporary cards, as well as any Sollevaçioin pilotæ cards that have been moved to the Bank or Port Areas.
Festa a-o Paxo (Party at the Palace): First, the Promoter scores one Prestige Point. Then, in turn order, each player draws one card. You may draw an Action or Goal card, your choice. After the cards are drawn, each player must choose one card from their hand to pass to the player on their right. You can pass an Action or Goal card, your choice.
Goal Cards
Dagghe Abbretio (Grab Everything): At the end of the game, you score 1 Prestige Point if you hold one of these cards. You score 4 Prestige Points if you hold two of these cards. If you have three of these cards, you score nine Prestige Points, with four cards 16 points, and if you have all five cards, 25 points.
Contentase (Humble Desires): If you hold this card at the end of the game, you score five Prestige Points if you do not control any Areas.
Invexendase (Working Without a Plan): If you hold this card at the end of the game, you score three Prestige Points if you control at least one Area (anywhere on the board).
Sensa Poia (Without Fear): If you hold this card at the end of the game, you score one Prestige Point for each Fort card in the Battles Won pile. It does not matter whether you participated in those battles or not.
Area control goal cards (illustrated by a fan of cards, one per Area; two copies of each exist): If you hold this card at the end of the game, you score five Prestige Points if you control the Area indicated. You score 10 Prestige Points if you hold both copies of this card.
Note: The normal rules for control apply: If there is a tie for Control Points, you don't control the Area. A Lady by herself cannot control the Cathedral, Palace, Bank, Port, or Fort, even if she has the most Control Points.
Permanent card count goal cards (illustrated by a fan of cards, one per Area): If you hold this card at the end of the game, you score one Prestige Point for each Permanent card in the Area indicated, including any Sollevaçioin pilotæ cards that have been moved there. You do not need to have Influence cubes on those cards.