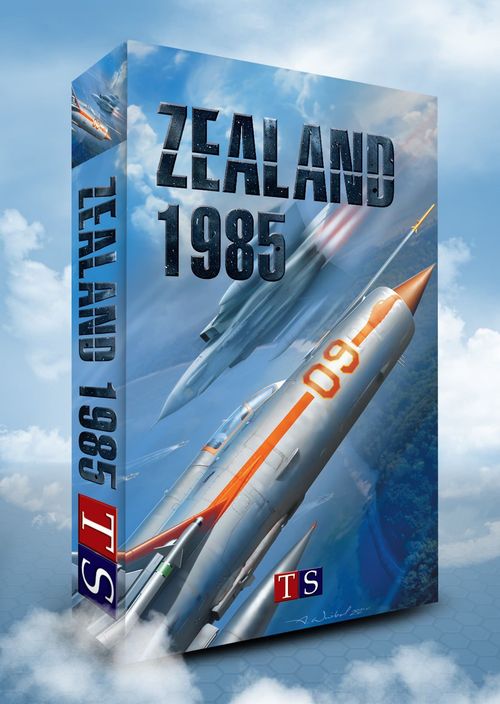
Zealand 1985
Zealand 1985 Rulebook
Table of Contents
Table of Contents
- 2.0 Components
- 3.0 Phases and Turns
- 4.0 Movement
- 5.0 Stacking
- 6.0 Zone of Control
- 7.0 Combat
- 8.0 Artillery
- 9.0 Fortifications
- 10.0 Air Forces
- 11.0 Headquarters
- 12.0 Tactical Concentration
- 13.0 Strategic Movement
- 14.0 Supply
- 15.0 Initial Set Up and Reinforcements
- 16.0 Destroying and Building Bridges
- 17.0 Special Forces (SPEC)
- 18.0 Disorganization
- 19.0 Masking
- 20.0 Electronic Warfare (EW)
- 21.0 Tactical Missiles and MLRS
- 21.0 Combat Helicopters (CH)
- 22.0 Nuclear Hits (NH)
- 23.0 Sea Landing
- 24.0 Air Landing
- Terrain Influence Table
- Combat Results Table
- Air and Artillery Tables
- Scenarios
2.0 Components
2.1 Board
100x70 cm board covers of the Zealand and Bornhol Idlands. Map shows all the characteristic elements of the terrain, forests, towns, cities and rivers. To make movement easier to manage, map was covered with hex net. Each hex has it's own, special number. Every hex covers about 3000 meters of the real terrain. There are also tracks for air units and special forces printed on the sides of the board, along with turn tracks.
2.2 Counters
2.2.1 There are two types of counters. Unit's counters and auxiliary counters (all non-units counters.)
2.2.2 All motorized, mechanized and armored units are called "mechanized" for the movement purpose, however, movement table differs between motorized (wheeled) and tracked ones. Numbers in parenthesis are always covering wheeled units.
2.2.3 Each unit counter shows all its characteristics relevant for the game play. At the top there is unit name/number (on the left) and unit's alignment (division, corps or army) name/number (on the right). All names and numbers are reflecting real existing units. Size of the units is marked with a sign in the middle left side of the counter: I – company, II – battalion, III – regiment, X – brigade, XX – division.
2.2.4 In the middle there is unit size and icon representing unit's type. At the bottom there are Strength Points (in case of artillery units there are two values) and Movement Points values.
2.3.5 Most counters in the game are printed on two sides. If unit has full strength printed on the top side of a counter and lowered strength on the reverse then it has 2 Combat Efficiency Levels. Unit counter that is printed just on top side has 1 CEL.
2.3.6 Strength of the units is expressed with Strength Points, showing unit's effectiveness in both attack and defense.
2.3.7 Attack's strength is artillery's effectiveness to perform bombardment and to support attacks of the allied units.
2.3.8 Defense's strength is artillery's effectiveness in support of the defense of the allied units.
2.3.9 Movement ability is expressed in Movement Points, showing unit's ability to perform a moment in the Movement Phase. Unit pays a number of Movement Points to enter a hex, according to the Terrain Table.
Counter key (printed on the rules sheet): SP – strength points; PR – movement points; CEL – Combat Efficiency Levels; ZOC – zone of control; D – disorganization; U – fortification.
3.0 Phases and Turns
3.1 General rules
3.1.1 Game play is divided into turns. Every turn allows or obliges players to perform certain actions (movement, attack, supply check etc.).
3.1.2 All actions in a turn are grouped into phases. There is twenty total phases for each turn. Every phase allows for given set of actions only. Performing an action outside proper phase is prohibited.
3.1.3 Each turn is finished after all Phases have been completed.
3.1.4 Players cannot change order of phases. A phase can be omitted if there are no mandatory actions and both players choose not to perform voluntary ones.
3.1.5 After turn has been completed, players move Turn counter by one position and start over a new turn.
3.1.6 One turn represents 1 day of a battle.
3.1.7 Every scenarios has information which side has an initiative. Side with an initiative performs its actions first (Player A). Non-intiative player is called Player B.
3.2 Phases
3.2.1 Full turn contains following phases:
- Phase 1 – Air Phase. Both players receive air forces reinforcements. Next, they assign secretly a number of the Air Points to the Air Advantage combat. Player B does the same. Air Advantage is resolved. If player A won air advantage (or none gain it), he may perform his air missions.
- Phase 2 – Artillery Barrage of Player A. If scenario allows, Player A can perform artillery barrage on enemy units.
- Phase 3 – Movement of Player A. Player A can move his units or build field fortifications. His reinforcements can enter the map. Instead of movement units can be selected for Strategic Movement (by covering them with "Strategic Movement" marker). Player A may use his SPEC unit to destroy objects.
- Phase 4 – Attack of Player A. Player A performs obligatory and voluntary attacks. Order of combat is chosen by Player A, but Phase can end only when all mandatory attacks are made.
- Phase 5 – Strategic Movement of Player A. All Player's A units that are covered with "Strategic Movement" marker can move.
- Phase 6 – Supply Phase of Player A. Player A checks if his units are supplied or not. Player B can use his SPEC units to disrupt Player A's supply routes.
- Phase 7 – Air Phase. Player B may perform his air missions, if possible.
- Phase 8 – Artillery Barrage of Player B. Analogous to Phase 2.
- Phase 9 – Movement of Player B. Analogous to Phase 3.
- Phase 10 – Attack of Player B. Analogous to Phase 4.
3.2.2 Because of the identity of the phases 1, 2, 3, 4, 5, 6 and phases 7, 8, 9, 10, 11, 12, in the further parts of the rules phases 1 and 7 will be called air phases, phases 2 and 8 – barrage phases, 3 and 9 – movement phases, 4 and 10 – combat phases, 5 and 11 – strategic movement phases and finally, 6 and 12 – supply phases.
4.0 Movement
4.1 Basic rules
4.1.1 Players can move their units during Movement Phases (regular movement – Phases 3 and 9, strategic movement – Phases 5 and 11), and Combat Phases (pursuit and retreat – Phases 4 and 10).
4.1.2 Retreat and Pursuit has additional limitations – see [8.6] and [8.7].
4.1.3 Order of units to be moved during any Movement Phase is Player's choice.
4.1.4 Unit cannot "overleap" a hex during movement. There must be continuous path of hexes between units start hex and unit's target hex.
4.1.5 Players units' movement and/or maneuvers during Movement Phases are limited by each unit's MPs.
4.1.6 Unit does not need to use all its Mps, but any "saved" MPs do not carry over to next turn.
4.1.7 Unit cannot pass its MPs to other units.
4.1.8 Unit cannot enter hex occupied by enemy units.
4.1.9 Any number of units can move through a hex (exception: entering the board – 16.1.5).
4.1.10 Unit can move through a hex occupied by friendly units regardless of stacking limits.
4.1.11 Cost of entering a hex for a unit depends on unit type and terrain on the hex. See Terrain Influence Table (page 12).
4.1.12 Terrain costs are cumulative.
Example: Belgian BB 5/7 battalion on the hex 4030 moves into hex 3930. It is mechanized, wheeled unit. It'd be pay 3 MP to cross small river, and 6 MP to enter 6101 (3 MP because of the forest, 3 MP because of the hills).
4.1.13 Unit may always move one hex, even if total cost of movement on such a hex would be higher than unit's total MP. Units can never enter hexes that are prohibited for them. Example:
a) Mechanized unit starts movement phase with 7 MPs. Unit can always enter adjacent hex, even if cumulative cost is higher than 7. If cost of entering adjacent hex would be 9 Mps unit still can enter the hex.
b) Infantry unit out of supply (normally having 4 MPs) starts Movement Phase with 2 MPs. If cost of entering adjacent hex is 3 MPs the unit can still enter the hex without increasing its OoS level. Note: The intention of the rule is that unit is always able to move by at least 1 hex.
4.1.14 Mechanized units on the mountain roads can't move through the hexes occupied by another mechanized units. Such unit must end its movement on the hex with another unit and can't move any further. Infantry units may move freely.
4.1.15 Mountain units pays 1 MP less that other infantry units while moving on hills and mountains hexes.
4.2 Airborne and airmobile movement
4.2.1 Airdrop
4.2.11 Units marked as airborne infantry may enter the board via airdrop.
4.2.12 Only player who has air advantage may perform airdrop.
4.2.13 To perform airdrop, player places his airborne unit on the hex which is not: - in the enemy ZOC - Forest, Mountain or City
4.2.14 Unit that performed airdrop, can move in the same phase, but it's MP number is halved.
4.2.15 If none of the players has aid advantage, make 1D6 roll for every unit that makes airdrop. Result 5 or 6 means loss of 1 CEL.
4.2.2 Airmobile Movement
4.2.21 Units marked as airmobile, may perform airmobile movement.
4.2.22 Airmobile movement can be performed even if player hasn't air advantage.
4.2.23 To perform airmobile movement, player has to spend 1 Combat Helicopter point for each CEL of the unit that makes such a movement.
4.2.24 Units that are performing airmobile movement, may move 20 hexes, but they cannot start or end their movement in the enemy ZOC.
4.2.25 If during airmobile movement units moves through the hex with enemy unit, make a D6 roll. 5 – movement is aborted, unit returns on its starting hex. 6 – just like 5, but unit also loses 1 CEL. In both cases, 1 Combat Helicopter point is lost. This roll is made for every hex with enemy unit.
5.0 Stacking
5.1.1 After the end of any phase there cannot be more than 4 CELs on one hex.
5.1.2 Each Headquarter is counted as 1 CEL for stacking limit.
5.1.3 Order of the units in the stack is not important.
Example: Two full strength (2 CELs each, 4 CELs in total) units can occupy one hex or one unit (2 CELs) with one weakened unit (1 CEL) and HQ (1 CEL).
6.0 Zone of Control
Zone of Control reflects unit's ability to influence its surroundings which denies enemy to move freely through such area.
6.1 Basic rules
6.1.1 ZoC spans onto unit's all adjacent hexes.
6.1.2 All regular units have ZoC.
6.1.3 ZoC does not extend through big rivers.
6.1.4 ZoC does not extend on terrain impassable for unit of given type.
Example: Mechanized units ZoC do not influence adjacent swamp and mountain hexes. They don't have ZoC on such hexes. German unit has it's ZoC on the 5703, 5704, 5605 and 5504 hexes only.
6.1.5 There can be any number of ZoCs on one hex (both friendly and enemy). Many ZoCs on one hex means only that this hex is influenced by many units.
6.1.6 ZoC gives player hex control. If there are many ZOCs on one hex, such hex is controlled by none.
6.2 Movement Influence
6.2.1 Unit that enters enemy ZoC must stop (cannot use its MPs in this Movement Phase any more).
6.2.2 Entering enemy ZoC does not cost additional MPs.
6.2.3 Moving in ZoC of single unit is possible only during pursuit.
6.2.4 During Movement Phase a unit can leave enemy ZoC and enter other (or reenter the same) enemy ZoC.
6.2.5 Unit can move directly from one enemy ZoC into different enemy's ZoC.
6.2.6 Leaving enemy ZoC cost 1 MP.
7.0 Combat
7.1 General rules
Direct combat between units is resolved during Combat Phase. In this phase units can be attacked by regular units supported by HQs, aircraft, helicopters and artillery. Air attacks can be performed in Air Phase (by aircraft and helicopter).
7.1.1 Unit can fight only once during Combat Phase.
7.1.2 Regular unit can attack enemy units on adjacent hex only.
7.1.3 Unit in enemy ZoC must attack unless it is in fortifications (see 7.1.11 and 7.2.5).
7.1.4 Enemy unit having attacking Player's units in its ZoC must be attacked.
7.1.5 For single combat either attacker or defender must be on one hex.
Example:
a) American armored battalion enters ZoC of German infantry unit. In nearest Combat Phase American unit must attack (but not necessarily mentioned German infantry) and German unit must be attacked (but not necessarily by American armor).
b) Soviet mechanized brigade enters hex adjacent to British infantry which is on mountain hex. Soviet ZoC does not extend onto swamps but since Soviets are in ZoC, the infantry must be attacked. Alternately – British infantry would not need to attack Soviets as its ZoC does not reach them.
c) Unit A has 3 enemy units (1, 2 and 3) on 3 adjacent hexes in its ZoC. Units 2 and 3 are fortified, while unit 1 is not. Unit 1 is in ZoC of another unit B. In this case unit 1 must attack (8.1.3) which means that both units A and B must be attacked (8.1.4). Following options are possible: Unit 1 attacks both units A and B. Then units 2 and 3 cannot participate in attack (because either side of a combat must be on one hex). Unit 1 attacks unit B only – then there must be an attack made on unit A made by either unit 2 or 3 (or both) even though they are fortified.
7.1.6 Attacking Player chooses order of the attacks.
7.1.7 Attacking Player chooses when Combat Phase finishes (decides on voluntary attacks), but not sooner than 8.1.3 and 8.1.4 are satisfied.
7.1.8 Player owning the units decides which of his units take losses inflicted during combat (remembering about 7.16).
7.1.9 Attack on HQ which is alone on hex is always resolved at maximum Combat Ratio (rightmost column) in COMBAT TABLE. HQ cannot retreat in such combat and suffers loses according to 8.3.7.
7.2 Combat ratio
8.2.1 Combat Ratio (CR) is column in Combat Table where combat result is to be looked up after 2 dice (2D6) roll.
7.2.2 CR is calculated as follows:
- Attacking Player units' SPs are divided by defending Player units' SPs which, after rounding (see [1.7]), yields initial combat ratio.
- Initial combat ratio is modified by both Players' Combat Modifiers (see [8.3]) in order to calculate final combat ratio. Attacker always applies his Combat Modifiers first.
Example: Two French infantry units, having 4 SPs each, attack Soviet mechanized unit with 5 SPs. Total attacker's strength is 8. Total defender's strength is 5. Combat ratio is 1.6:1 and, after rounding, 2:1.
7.3 Combat Modifiers
7.3.1 Combat Modifier (CM) is column shift applied on initial CR in order to obtain its final value. Both attacking and defending units can gain CMs through various factors, like terrain, fortifications, EWR, unit's special abilities and tactical concentration.
7.3.2 Defender's CMs lower initial Combat Ratio (shift initial CR column in Combat Table to the left) while attacker's CMs increase initial Combat Ratio (shift initial CR column in Combat Table to the right).
7.3.3 Maximum and minimum Combat Ratio from Combat Table can never be higher than 10:1 or 1:4.
Example:
a) Attacker units' total strength is 8 and they have 3 combat modifiers. Defending units' total strength is 3 and they have 1 combat modifier. Initial combat ration is 8:3 => 2.67:1 => 3:1. After attacker's CMs are applied combat ratio increases to 6:1. Finally, defender's CMs are applied and so final combat ratio is set to 5:1.
b) Attacker units' total strength is 18 and they have 7 combat modifiers. Defending unit strength is 4 and it has 2 combat modifiers. Initial combat ration is 5:1. After attacker CMs are applied combat ratio is 13:1. Combat Ratio cannot exceed maximum from COMBAT table (10:1) therefore it is reduced to 10:1. After defender's CMs are applied, combat ratio is set to 8:1.
7.3.4 Players must use all combat modifiers gained from terrain, fortifications and tactical concentration. Usage of unit's special abilities and EWR (see [20.0] and [13.0]) is voluntary.
7.4 Rounding
7.4.1 Any integer number's division is rounded up.
Example:
a) If unit with strength of 1 SP should have it halved, its strength is still counted as 1.
b) 5 divided by 2 is 2.5. After rounding it is 3.
5.4.2 For combat ratio calculations any initial CR below .5 is to be rounded down and any result above or equal to .5 is to be rounded up.
Example:
a) Attacker has 3 SPs while defender has 2 SPs. Combat Ratio is 3:2 => 1.5:1 => 2:1.
b) Combat Ratio 6.45:1 is to be rounded to 6:1, while 6.6:1 is to be rounded to 7:1.
7.5 Combat Procedure
7.5.1 Combat procedure contains following steps:
a) Attacker selects attacking unit(s) and their target(s). b) Both sides total SPs and combat modifiers are counted. c) Combat ratio is calculated. d) Combat modifiers are applied. e) Two dice (2D6) are rolled. f) Intersection of final combat ratio column with row respective to dice roll provides combat result. It should be applied in following order: loss of SPs, than retreats and pursuits if any. g) Any rolls for disorganization are made (see [18.0]).
Example: German armored division attacks 2 British Infantry battalions that are in the forest (not fortified). German total strength is 17 SPs. British total strength is 8 SPs. Germans have 1 CM for Tactical Concentration and 1 CM for one star modifier (2 CMs in total). Brits have 1 CM for forest. For this combat initial combat ratio is 17:8 => 2:1. Final combat ration must include both Players' CMs which makes it 3:1. If combat result is -1/B2 then Germans must lose 1 CEL (in unit(s) that used star modifier) and Brits must choose one of the following options: – lose 2 CEL and does not retreat. – lose 1 CEL and retreat by 1 hex. – retreat by 2 hexes (1 disorganization test must be made).
7.5.2 Combat Results:
- A1, A2, A3... – Attacker retreats 1, 2 or 3 hexes. With result A2 and higher roll/s for disorganization are made.
- B1, B2, B3... – Defender retreats 1, 2 or 3 hexes. With result B2 and higher roll/s for disorganization are made.
- A-1, -2... – Attacker suffer -1, -2 CEL/s loss (units with stars first, if stars modifiers were used).
- B-1, -2 – Defender suffer -1/-2 CEL/s loss (units with stars first, if stars modifiers were used).
- D – Defender is disorganized. – roll for disorganization for every attacking stack.
- A2-2 – Attacker retreats two hexes and suffers 2 CEL loses (units with stars first, if stars modifiers were used).
7.6 Retreat
7.6.1 Unit retreat when a combat result is Bx or Ax (x marks number of hexes for unit to retreat).
7.6.2 Unit retreat by given number of hexes from hex it was on when combat started.
7.6.3 During retreat unit cannot enter enemy ZoC, impassable terrain or leave the map.
7.6.4 Unit can retreat through hexes in enemy ZoC if they are occupied by friendly unit(s). For each hex of such retreat unit loses additional 1 CEL.
Example: British unit has no choice but to retreat through friendly unit, since all other retreat routes are N/A. Because of that, British unit must additionally lose 1 CEL.
7.6.5 During retreat unit can cross big river only through bridge.
7.6.6 Unit cannot finish retreat on hex where it would cause exceeding stacking limit. Unit can retreat through such hexes.
7.6.7 Unit can choose not to retreat – each hex of such sustained retreat cost 1 CEL reduced from units that do not retreat by required number of hexes.
Example: Combat result is B3. Player has 4 options: withdraw by 3 hexes – withdraw by 2 hexes and suffer additional loss of 1 CEL – withdraw by 1 hex and suffer additional loss of 2 CELs – keep its position and lose 3 CELs.
7.6.8 Additional losses due to sustained retreat are taken regardless on number of hexes units occupied before the combat.
Example: Russian guard division is attacked by 3 American armored battalions (from 3 different hexes). If attacking Americans receive combat result A1 and American Player wants to keep positions, he must suffer loss of 1 CEL from any of 3 units that took part in the attack. If American Player does not want to lose 1 CEL he must withdraw all 3 units by 1 hex. American Player may also leave some units (e.g. 2 of 3 attacking) and withdraw the rest. In this case he must suffer loss of 1 CEL from unit(s) that remained on the position(s).
7.6.9 Retreat obliges Player to conduct disorganization test(s). Player must make test for each (except the first one) hex of his retreat path.
Example:
a) Attacker received combat result A2 and retreated by 2 hexes. It must make 1 disorganization test. b) Defender received combat result B4 and retreated by 3 hexes (suffering one CEL lose to not retreat 4 hexes). He must take two 2 disorganization tests. c) Result B3 result and retreat by 1 hex does not require making disorganization test.
7.6.10 If unit performed retreat, its counter should be rotated by 90° to remember about it. Units that retreated can't build Field Fortifications in their next Movement Phase.
7.7 Pursuit
7.7.1 If enemy units retreated as a result of a combat, then opposing units can pursuit. Note: Defender can also pursuit – if attacker retreats after unsuccessful assault (result Ax).
7.7.2 Pursuit must be made through retreat path. Unit may move one hex off the retreat path, but it has to stop right after that.
7.7.3 If several units retreated through different paths then pursuing Player can choose any one of them.
7.7.4 First hex of any pursuit must be the hex emptied by retreating unit(s).
7.7.5 Enemy ZoCs are ignored during pursuit.
7.7.6 Pursuing units can move number of hexes not greater than length of retreat path.
Example: Defending German Regiment received combat result B4. It retreated by 3 hexes. In this situation pursuit can be made by up to 3 hexes and first hex must be the one emptied by defender.
7.7.7 Pursuit is not limited by MPs unit has but it cannot enter impassable terrain or leave the map.
7.7.8 Pursuing unit must stop after it crosses big river.
7.7.9 Artillery units that supported attack/defense cannot pursuit.
7.7.10 If enemy unit was eliminated in combat then victorious units can enter emptied hex and move on any adjacent hex (all movement limitations, especially influence of enemy ZoCs, apply in this case).
7.8 Terrain Influence
7.8.1 Terrain effect on combat is described in TERRAIN EFFECT table.
7.8.2 Terrain influence on combat is cumulative.
Example: If defender is in forest (+1 CM) and is attacked through the river (+1 CM) then defending Player gains +2 CMs for this fight.
7.8.3 If defender fights on multiple hexes the one with most SPs is counted for any CMs gained by defender.
7.8.4 Rivers and/or streams influence combat only when more than half of SPs of attacking units assault through this obstacle.
7.8 Stars
7.81 Some units have white stars between their combat/movement factors (armored/mechanized) or on the left side (infantry units).
7.82 Stars reflect the higher quality of the units, superior training and better equipment.
7.83 Each star provides +1 shift for the combat result table.
7.84 Stars do not provide any CMs against fortified units.
7.85 No more than three stars may affect the combat result on each side.
Example: Four German units (all with stars) are attacking one American unit (with star). Total star modifier is +two for Germans (since only three stars can be used in a single combat by each side).
7.86 If units with stars are involved in a given combat and player that controls them suffers casualties, a unit with a star has to be first to lose at least one CEL.
8.0 Artillery
8.1 General rules
8.1.1 Artillery (as well as air units) can fight indirectly by supporting friendly regular units' attacks or defenses from remote hex(es).
8.1.2 Towed artillery units has 1 CEL only. Self propelled, rocket and MLRS artillery units have 2 CELs.
8.1.3 Maximum range of the artillery fire is 10 hexes (Tactical missiles – see [21.1]).
8.1.4 Towed artillery units can't participate in pursuit.
8.1.5 Artillery units don't have ZoC.
8.1.6 Motorized artillery unit can be eliminated if during a movement or pursuit enemy unit that has ZOC enters a hex where such artillery is. Unit pays 1 additional MP (2 MP if artillery unit is fortified).
8.1.7 Self propelled artillery units can't be destroyed in the way described in 8.1.6.
8.2 Ranged attacks
8.2.1 During a combat phase, Attacker's artillery can fire directly to enemy units on remote hexes – in this case offensive SPs are used.
8.2.2 Procedure of a ranged attack is as follows:
a) Player declares number of units participating in the attack and selects target (one hex) that must be within range of all attacking units. b) Player sums total SPs of attacking artillery units and subtracts doubled terrain modifier of the defender. c) Player rolls 2 dice (2D6). d) Result is looked up in ARTILLERY FIRE table.
8.2.3 Ranged attack cannot be made on adjacent hexes.
8.2.4 Ranged attacks can be supported by air units.
8.2.5 Unit that is target of a ranged attack cannot be attacked directly in the same Combat Phase. If they must be attacked (e.g. due to [8.1.3]) then ranged attack cannot be made.
8.2.6 Artillery that was target of a ranged attack, after applying its result, can in the same phase support defense of friendly regular units. Example: Artillery unit was attacked by enemy artillery ranged fire. As a result artillery unit was disorganized. The unit can support defense of friendly units in the same Combat Phase using half of its defensive SPs.
8.2.7 Artillery can target objects (in this case also on adjacent hexes). Attack procedure is analogous to that in 9.2.2 (but no terrain modifiers are accounted for) and result is looked up in ATTACKS ON OBJECTS table.
8.3 Attacker's support
8.3.1 Units that are attacking can be supported by one or more friendly artillery units. In such a case, artillery's attacking strength is added to the attacking units' strength.
8.3.2 At last one of the units that are target of the attack has to be in range of all artillery units.
8.3.3 Attacking player has to chose all the artillery units that are supporting such attack before defender chooses his artillery support.
8.3.4 Artillery unit can support only one attack per phase.
8.4 Defender's support
8.4.1 Artillery units can support defense of the friendly units during combat phase.
8.4.2 Artillery may support defense only if it's not in the enemy ZOC. If it is in the enemy ZOC, it can support only a defense of the units that are in the same hex as such artillery unit.
8.4.3 When artillery supports defense of the friendly units, it adds its defensive strength to the defending units' strength.
8.4.4 Unit that is supported, has to be in range of the artillery that supports its' defense.
8.4.5 Defense can be supported by one or more artillery units, but defending unit has to be in range of all these artillery units.
8.4.6 If several units are attacked during single combat, just one of them has to be in range of artillery to gain a support.
8.4.7 Defender declares which of his artillery units are about to support his defense after attacker's declaration of the number of artillery units that are supporting his attack. After both declarations are made, it is not allowed to change it.
8.4.8 Artillery unit can support only one defense per phase.
8.4.9 Artillery unit that supported defense is not influenced by the combat's result if it's not on the same hex as defending unit.
8.5 Direct Combat
8.5.1 Artillery unit which is in the enemy ZoC, may only support defense units sharing their hex with such artillery unit. In such a case, artillery uses it's Attack/Defense strength normally.
8.5.2 If artillery unit is alone on the hex (or with other artillery units/HQs) it fights using 1 SP only.
8.5.3 While participating in direct combat, artillery undergoes all the results of the combat.
8.6 Artillery's movement
8.6.1 Every towed artillery unit has icon of gun on front side of the counter (combat setup) and icon of truck on the back side of the counter (transport setup).
8.6.2 Towed artillery can move only when it's in the transport formation (exception – see [9.6.7]).
8.6.3 Towed artillery may change its setup with a cost of 1 MP.
8.6.4 After changing its setup, towed artillery may continue its movement.
8.6.5 Unit may participate in combat only in the combat setup.
8.6.6 Every towed artillery moved like motorized unit.
8.6.7 Towed artillery can move one hex without changing its setup.
8.6.8 If forced to retreat, towed artillery instantly changes its setup into transport.
8.6.9 Self propelled artillery moves like any other units (wheeled or tracked).
9.0 Fortifications
9.1 General rules
9.1.1 Field Fortifications (FF) are marked by putting respective auxiliary counter under the unit on the hex.
9.1.2 FF are built in Movement Phase by a regular unit that:
a) will not be moved AND b) didn't retreat in last Combat Phase (it is allowed to sustain retreat and take loses).
9.1.3 Unit that retreated and is unable to leave enemy ZoC can NOT build FF.
9.1.4 Building FF cost all MPs unit had at the beginning of Movement Phase.
9.1.5 FF is removed from the map if there is no unit on the hex at the end of the phase.
9.1.6 In the same movement phase one unit may leave Field Fortifications and another one may enter such a hex. In such situation Field Fortifications counter is not removed.
9.1.7 FF is removed when enemy unit enters the hex. The same FF cannot be used by opposite Players.
9.1.8 FF can be rebuilt on the same hex by both sides.
9.1.9 FF can be built on any terrain except swamps.
9.2 Field Fortifications and combat
9.2.1 Unit that defends in FF gains CM +1 or +2 if in city or town.
Example: British mechanized unit (2 SP) in FF is attacked by two Russian mechanized brigades (12 SP). Initial combat ratio is 4:1, but because of the FF, final combat ratio is 3:1.
9.2.2 FF is cumulative with terrain modifiers, i.e. unit in the FF in the forest gains +2 CM (+1 for the FF and +1 for the forest).
9.2.3 Units on hex with FF do not need to attack (see 8.1.3).
10.0 Air Forces
10.1 General rules
10.1.1 Air forces in the game is represented by the certain value of SP. Initial number of the available air forces SPs is mentioned at the footnotes for every scenario.
10.1.2 Each scenario card tells how many air forces SP player has at start. If there is not such a number, player starts with 0 air forces SP (although he may receive some as reinforcements).
10.1.3 Each player may assign a number of his air forces SP into air advantage combat. Before any other action in the air phase is made, both players make a roll and add the result to the number of their air advantage SP spent in this phase. If one of the players gets result bigger than two, he has an air advantage. If there is a draw or difference of one, none has air advantage. Side that lost in air advantage roll, loses half (rounded up) of air forces SP used. If none has air advantage, both sides suffer loses.
Examples:
- It is player A's air phase. He has total 12 air forces SP. He spends 3 of these into air advantage and keeps remaining 9 for air missions. Player B has 8 SP, he spends 4 of these into air advantage and keeps remaining 4 for air missions.
- Player A chooses to use 2 SP for air advantage and 2 SP for missions. Player B chooses 3 for air advantage and 4 SP for missions. Both players reveal this simultaneously and make a rolls. Player A rolls 5 and Player B rolls 2. Player A wins air advantage (7 is higher than 5 and there is +2 difference). Player B loses 2 SP permanently (3/2, rounded up=2) and can't perform air missions till the next air phase, although his 4 SP are considered as spent in this turn.
10.1.4 A Player with air superiority may use his air forces to perform all the air missions while his opponent may use combat helicopters only. If no player has air superiority, both players may use their air forces to perform air missions, although the number of points used to resolve each mission is halved (rounded up).
Example: Player A wants to use his air forces SP to destroy a bridge. In this turn none gained air superiority. He sends 4 SP, but because of the 10.1.4 he checks result it in the 1-2 colums instead of 4-5.
10.1.5 To mark available, spent and lost air forces SP, use air forces counters.
10.1.6 Place a counter with an aircraft to mark available air forces SP. Slide it up and down to mark losses and reinforcements. Use a counter with a nationality marker to mark air forces SP used in the turn.
10.1.7 After the end of each turn, nationality markers are removed from air tracks, even if not all air forces SP were spent.
Example: At the beginning of the turn the American Player (Player A) has 6 air forces SP. He gains +2 because of the reinforcements, so air forces counter is moved to 8. It is the air phase. He notes secretly that he wants to use 3 of them for air superiority. After resolving air superiority, he places counter with a star on the air track on 3 (since he used 3 SP on air superiority). He lost in the air superiority, so he has to lose 2 SP. He moves air forces counter into 6 to mark it.
10.1.8 The number of the air forces SP can never be higher that the top number of the air forces track.
10.2 Anti air artillery
10.2.1 After declaring any air mission and number of SP used, player makes 1D6 to check possible losses of his air forces SP sent on this mission:
Germans, Russians and their allies:
- 1-2 – 1 SP lost
- 3-4 – 2 SP lost
- 5 – 3 SP lost
- 6 – No loses
Allies:
- 1 – 1 SP lost
- 2 – 2 SP lost
- 3 – 3 SP lost
- 4-6 – No loses
Remaining air forces SP may perform their mission.
10.2.2 Player can't lose more SP that he is using. If 2 SP were chosen to use on mission, no more that 2 SP can be lost because of the AA fire.
10.3 Air Missions
10.3.1 Single air mission may only be performed on the one, chosen hex.
10.3.2 Players may choose which of their air forces SP are spent on the ground attack missions, bombers missions or combat support missions.
10.3.3 There is no limit of the air points used in one mission. Example: German player has 12 SP of air forces to use for missions. He can use all of them for the single mission or divide for several missions.
10.3.4 Player may choose between following air missions:
- bomber missions
- ground attack missions
10.4 Bomber missions
10.4.1 During bomber missions air forces may perform two kinds of tasks: – destroying object – attacking units. To find the result of the bomber missions, check "Destroying objects" and "Bomber attacks" tables.
10.4.2 For the bomber attacks on the units, CM of the terrain is doubled.
Example: 10 SP of the bomber air forces attacks units which is on the hills (+1) with forest (+1). Initially, result of the attack would be find in 9-10 verse of the Bomber Attacks Table, but because of the modifiers [(1+1)x2)=4, it'd find in the 5-6 verse instead.
10.5 Ground attack missions
10.5.1 Ground attack air forces may perform four kinds of missions:
- support attacks
- support defense
- attack enemy units
- attack bridges
10.5.2 Ground attack air forces may also cooperate with artillery units in their attacks against enemy units. In such a case, add air forces SP to the artillery's SP and check the result in the artillery fire table.
10.5.3 To support attack/defense, add air force's SP to the SP of the attacking/defending unit. When supporting defense, air forces used SP are halved.
Example: French infantry battalion (2 SP) defends against German armored battalion (6 SP). None of the players has air advantage. German player uses 2 SP of the air forces to support his attack, so his total SP is 8. Allied player uses 4 SP to support defense, so his total SP is 4.
10.5.4 Ground attack air forces may perform their own attacks against enemy units. In such a case, terrain CM is double, just like at 10.4.2. Results are find in the Ground Attack Air Attacks Table.
11.0 Headquarters
11.1 General Rules
11.1.1 HQ counter does not have ZoC.
11.1.2 HQ counter has 12 MPs and is moves like mechanized (wheeled) units.
11.1.3 HQ counter can enter hexes inaccessible for mechanized units (swamps, mountains) for cost of 5 MPs.
11.1.4 HQ has 1 CEL.
11.2 Combat Influence
12.2.1 If all units in given combat are within friendly HQ range, then Player can add (if defending) or subtract (if attacking) 1 from dice roll for combat result (see 5.2.1 pt. e)).
11.2.2 HQ range is 10 hexes.
11.2.3 HQ influence is not cumulative – Players cannot add/subtract more than 1 from dice roll.
11.2.4 Both attacking and defending player
11.3 Direct combat
11.3.1 HQ has no ZoC so it can't attack.
11.3.2 If attacked alone, result is find in 10:1 column of the combat table.
11.3.3 If stack suffered losses, player may choose to eliminate HQ instead of the CEL of any other unit.
11.3.4 HQ can be eliminate if enemy unit enters hex occupied by the HQ and pays 1 additional MP. It can be also eliminated during pursuit. In such a case, unit can't move any further after destroying enemy's HQ.
11.3.5 Elimination of the enemy HQ gives player +5 EW (20.1).
12.0 Tactical Concentration
12.1 General rules
12.1.1 Tactical concentration expresses an advantage of the using units of the same division/brigade that trained together before.
12.1.2 If three Russian units of the same division or three units of the same brigade of any other nationality participate in same combat (in attack or defense), player gains +1 combat results table shift for his favor.
12.1.3 There is no need for units to be on the same hex.
12.1.4 Tactical concentration is cumulative, if there are six units of the two brigades used in the same combat, player gains +2 CM.
12.1.5 Artillery units count to total number of the units used as well, even if they just support combat from the distant hex.
13.0 Strategic Movement
13.1 Basic Rules
Strategic movement allows Player to relocate his units after all attacks were made therefore he can exploit any gaps that was created as a result of combats.
13.1.1 Strategic Movement Phase (Phases 5 and 11) allows Player to move his units after Combat Phase.
13.1.2 Strategic Movement (SM) can be made by units that were not activated during their Movement Phase and did not fight during their Combat Phase.
13.1.3 All movement rules (see [4.0]) apply to Strategic Movement.
13.1.4 Units that are chosen to be moved in Strategic Movement are marked with "Strategic Movement" counter during Movement Phase.
13.2 Detailed Rules
13.2.1 Units that are in enemy ZoC cannot make SM.
14.2.2 Units cannot enter enemy ZoC during SM.
14.0 Supply
14.1 General Rules
14.1.1 Line of Supply (LoS) is a path of hexes connecting a unit with Supply Base.
14.1.2 LoS for unit is checked in Player's Supply Phase.
14.1.3 Each unit traces its LoS independently from other units. LoS of a unit is not limited in any way by LoSes of other friendly units.
14.1.4 Supply Bases are defined for each scenario (they are usually map edge, a town or given HQ unit).
14.1.5 LoS can be traced through roads without range limits.
14.1.6 LoS can be traced through off-road hexes for distance allowed by supply MPs limit.
14.1.7 Number of off-road supply MPs is specific for each nation:
- Allies, Germans: 12 MPs
- Russians: 10 MPs
14.1.8 In order to provide supplies LoS must "reach" unit's hex (starting from a road hex). It is done by spending supply MPs – they are spent analogously to wheeled units movement rules (e.g. LoS cannot be traced through swamps or mountains).
14.1.9 Supply MPs are not spent for tracing off-road LoS between friendly units on adjacent hexes.
14.1.10 LoS cannot be traced through enemy units and/or their ZoCs unless the hex is occupied by friendly regular unit.
14.1.11 For LoS tracing it is assumed that all enemy units and all enemy towns have ZoC (excluding artillery in transport setup and HQs).
Example: Line of Supply is traced from eastern edge of the map to units of German infantry. Due to presence of enemy units blocking the roads Germans must trace supply line partially through off-road hexes. The limit of 12 MPs German Player can use allows him to reach 231 battalion, but not 3/31 battalion. Line of supply goes as following: 6413, 6313 (no MP are paid, since these two are road hexes), 6214 (3 MP), 6113 (3 MP), 6013 (3 MP). After spending 9 MP (of the maximum 12), it reaches 231 Battalion. To reach 3/31 battalion, player would need much more MP, since both 5812 and 5711 are hills/forest hexes (5 MP each for motorized units).
14.2 Out of Supply
14.2.1 Unit's that are unable to trace LoS during Player's Supply Phase are considered Out of Supply (OoS) and covered with counter marking OoS level equal to 1.
14.2.2 OoS units have their movement and attack strength halved (they still have full strength in defense).
14.2.3 Player, by increasing OoS level of unit by 1, can:
- move unit using its full MPs limit
- attack using unit's full strength
Example: If Player moves unit which is out of supply, using its full Movement Points limit and then attack using units full strength that OoS level of this unit is increased by 2.
14.2.4 Unit's OoS level is increased by 1 when:
- unit is successfully attacked by enemy (result Dx)
- unit's attack fails (defender does not obtain Dx result)
Example: If OoS unit moves with full Movement Points limit, and then unsuccessfully attacks using its full strength then its OoS level increases by 3. If in subsequent Combat Phase unit is successfully attacked by enemy than its OoS level increases additionally by 1.
14.2.5 OoS modifications are made just after the action (movement or combat) which changes it.
14.2.6 Each OoS unit undergoes surrender procedure during Supply Phase. Surrender procedure is taken before increasing OoS number.
Surrender Procedure: Player rolls 1D6. If a result is smaller than OoS level, then unit is removed from the board. Every unit (not stack) undergoes surrender procedure separately. Rolling 6 always means that unit remains on the board.
14.2.7 If OoS unit regains supply (Player can trace LoS to the unit at the beginning of Supply Phase) then OoS counter is removed.
14.2.8 Unit which OoS level is 0 or less regains all its base combat statistics (SPs and MPs).
Example: It will take 2 Turns with full supply for unit with OoS equal to 5 to regain full combat abilities.
15.0 Initial Set Up and Reinforcements
15.1 Reinforcements
15.1.1 During the game players receive reinforcements. There can be new units, more air forces and combat helicopters SP, EW points or Special Forces. All information about the number of the reinforcements and time of their entry are in the Reinforcements Calendar at each scenario.
15.1.2 New units enter the game during Player's movement phase.
15.1.3 Reinforcements enter the game from the zones of entry marked on the board or just from given sides of the board.
15.1.4 Reinforcements may enter the board as stacks.
15.1.5 If more than one unit enters the board from the same hex, each fourth and further unit pays additional 1 MP for entering the board.
Example: Five units enter the board from same hex. 1, 2, 3 may move normally, while 4 and 5 will pay 1 MP for entering the board.
16.1.6 While entering the board, all the rules about movement are in effect.
15.2 Reinforcements' Transfer
15.2.1 There is possibility to transfer upcoming reinforcements in case if:
- entry zone is capture by enemy
- entry zone is in the ZoC of the enemy units
- player wants his reinforcements to enter his units from other zone
In such a case unit may enter the board from another entry zone, spending 1/2 of it's MP.
15.2.2 Player may also decide to delay reinforcements. In such a case he declares when his units are entering the game.
15.2.3 Unit may also voluntary leave the board (in it's Movement Phase only) through friendly entry zone/side of the board. In such a case, it may return in the next turn via any available entry zone at the cost of 1/2 MP.
15.3 Air forces reinforcements
15.3.1 Air forces SP and Combat Helicopters SP are added to the player's available SPs at the beginning of the first Air Phase in every turn.
15.3.2 Air forces SP can't be delayed or transferred in any way.
16.0 Destroying and Building Bridges
16.1 Bridges on rivers (small)
16.1.1 Bridge on the river can be destroyed if a unit with ZOC adjacent to the bridge declares it's destruction and spends 1 MP. Put the destroyed bridge counter on such a bridge.
16.1.2 A Bridge on a minor river can be rebuilt if there are no enemy units on any side of the bridge and a unit with ZOC spends 3 MP. Remove the destroyed bridge counter.
16.1.3 It is not allowed to build new bridges, only to rebuild destroyed ones.
16.1.4 Bridges can be also destroyed by air forces, artillery, combat helicopters and Special Forces.
16.2 Bridges on major rivers
16.2.1 Bridges on major rivers can be destroyed if a unit with ZOC that stands on the one side of the bridge declares its destruction and spends 1 MP. Put the destroyed bridge counter on such a bridge.
16.2.2 Bridges on major rivers can be rebuilt if there are no enemy units on any side of the bridge and a HQ is adjacent to the bridge. In the next turn, at the beginning of player's Movement Phase, destroyed bridge counter is removed. If an enemy unit enters the hex on the other side of the bridge before this action is finished, the reconstruction of the bridge is canceled.
16.2.3 It is possible to build new bridges on major rivers in the same procedure as 15.2.2.
16.2.3 Bridges on major rivers can be destroyed by air forces, artillery, combat helicopters and Special Forces.
17.0 Special Forces (SPEC)
17.1 General rules
17.1.1 At the beginning of each scenario, every player has certain number of SPEC units.
17.1.2 The Reinforcements calendar states how many SPEC units player has in a given turn.
Example: In turn 4 player has 3 SPEC units. In turn 5, the number is reduced to 3. If the player has still 4 units, he has to remove 1.
17.1.2 SPEC units are placed on the board when player decides to use them:
- to attack enemy HQs or coordinate artillery fire, SPEC units are placed on board in the combat phase
- to destroy an installation, SPEC units are placed on board in the player's movement phase
- to disrupt enemy supply route, SPEC units are placed on board at the beginning of the enemy movement phase
17.2 Special Forces missions
17.2.1 Special forces may:
- A. Destroy bridges
- B. Attack HQ
- C. Disrupt supply routes
- D. Coordinate attacks
17.2.2 Destroying bridges (bridges of every kind).
17.2.2.1 SPEC counter is placed on the hex with the installation player wishes to destroy. D6 roll is made: 4-6 – Object destroyed, 1-3 – No effect.
17.2.22 Subtract 1 from the result if object is in the enemy ZOC or is on hex occupied by the enemy units.
Example: A Russian SPEC unit tries to destroy a bridge. There is an American unit on one side of the bridge. The Russian player rolled a 4. There is a -1 modifier because of the enemy unit's ZOC. Final result is 3 which means that mission was a failure.
17.2.3 Attacking an HQ.
17.2.31 SPEC counter is placed on the hex with enemy HQ that player wants to attack. 2D6 roll is made:
- 11-12 – HQ destroyed
- 10-8 – HQ successfully disrupted. It cannot move nor support any of its units in this turn. Place "Disorganization" counter on this HQ.
- 7-2 – No effect
17.2.4 Disrupting Supply Routes.
17.2.41 Player places SPEC counter on a hex not occupied by enemy units. The Enemy player cannot trace supply routes through such a hex in this turn.
17.2.5 Coordination of Attacks.
17.2.51 Players places SPEC counter on a target hex. A single air or artillery attack on such a hex gets +2 additional SP.
17.3 Special forces after action
17.3.1 After any of the actions mentioned above, the player rolls a D6:
- 1-3 – SPEC unit is eliminated
- 4-6 – SPEC unit is placed in the After Action box with After Action side up. In the next day SPEC counter is flipped onto its normal side and in the next day it can be used again.
Example: A USA SPEC unit performed a mission on December 15. After resolving a mission, player makes a roll. He rolled 6, which means that unit survived. It will be available to use again on December 17.
18.0 Disorganization
18.1 General rules
18.1.1 A Unit becomes disorganized during combat (direct combat, artillery attack or air attack) in three cases:
- the combat result includes an automatic disorganization (e.g. result D3D means that defender retreats by 3 hexes and becomes disorganized)
- the attacking Player fails disorganization test (marked by black dot in given combat result table).
- defender fails disorganization test after retreat.
18.1.2 Disorganization test requires Player to roll 2 dice (2D6). If result is higher or equal than the unit's morale, then it becomes disorganized.
18.1.3 Player makes separate rolls for every stack.
Example: Three British mechanized battalions attacked one German battalions. British units are in different hexes. The attacker gets an attack result including a black dot. He has to make a disorganization test for each battalion separately, because each is in a different hex. If all British battalions had been in one hex, only one disorganization test would need to be made, but it would affect all of the units in the stack.
18.1.4 Artillery can only be disorganized if it fights in a hex adjacent to the enemy.
Example: Artillery unit supported an infantry attack from the distance of 2 hexes. If the attacking units becomes disorganized as a result of the attack, the supporting artillery does not. If the artillery unit supporting the attack had been in a hex adjacent to the enemy units being attacked than it would be disorganized together with the other combat units.
18.2 Disorganized units
18.2.1 Disorganized units are covered with a "D" counter. It has its strength (both in attack and defense) halved.
18.2.2 In order to reorganize the unit must remain inactive during full turn. It cannot move nor fight or be target of any kind of attack.
Example:
a) A Unit became disorganized during combat. If unit remains inactive until end of its next Combat Phase then it regains full strength (for the following turn). In order to do this unit cannot move, attack or be attacked. b) A Unit became disorganized as a result of air attack (phase 7). If unit does not move, attack and is not attacked than it regains full strength at the end of phase 7 next turn.
18.2.3 Disorganized units are covered with disorganization marker with a symbol of their nationality.
19.0 Masking
19.1.1 At the beginning of the game, all units/stacks are covered with masking counters, so the other player cannot see what is there.
19.1.2 Masking counter is removed when unit is in the ZOC of the enemy unit.
19.1.3 Units the Field Fortifications have their masking counters removed only when attacking or being attacked.
19.1.4 Units attacked by artillery or air forces keep their masking counters removed.
20.0 Electronic Warfare (EW)
20.1 The Initial number of electronic warfare (EW) modifier is described in every scenario.
20.2 The Electronic Warfare modifier works as a combat results table shift. Player can't use more than 2 EW points in a single action.
Example: Russian player has 20 EW points. He can use them freely during the entire scenario, but no more than 2 per single action. He uses 2 of them to support his attack. To mark it, Russian player places EW 2 on one of his units.
20.3 The destruction of an enemy HQ increases the player's EW points by 5.
20.4 EW points can be used in both attack and defense.
20.5 If EW points are used to support artillery/air attacks, every EW one point spent allows the player the use the next row on the relevant table.
Example: German artillery fires with 6 SP. German player spends 1 EW and thanks to that he looks for the result in the 9-12 row instead of 6-8.
20.6 Each spent EW point is lost permanently.
20.7 Player may receive new EW points as reinforcements.
21.0 Tactical Missiles and MLRS
21.1 Tactical missile artillery can target any units on the board.
21.2 When it comes to combat support and artillery attacks, all artillery rules apply.
21.3 Once per day, a MLRS unit of each side may perform a thermobaric attack. Place "Thermobaric" marker on such a unit. It's attack's strength is doubled.
21.4 Thermobaric attacks cannot be used against enemy units that have any of the firing player's units in their ZOC.
21.5 Only supplied units may perform thermobaric attack.
21.0 Combat Helicopters (CH)
(Heading as printed; the sub-sections below are numbered 22.x and 23.x in the original.)
23.1 Combat helicopters are used in the same way as ground attack air forces.
22.2 The number of available Combat helicopters SPs is given in the scenarios.
22.3 A Player does not have to declare a number of the CH he plans to use in the turn, he can use them every time he wants.
22.4 If player does not have air superiority, his CH strength is halved during every action.
Example: Player doesn't have air superiority. He uses 4 SP of CH to support attack. Because of rule 22.5, total strength of the supporting CH is 2.
22.5 To mark the number of Combat helicopters used in a given combat, move a helicopter marker on the Combat Helicopters track on the board. Each nation has its own track.
Example: Player has 20 SP of the Combat Helicopters. He declares to use 5 of them to support one of his attacks. The Marker is moved from 20 to 15 on the CH track.
22.6 Available, lost and used combat helicopters SP are marked in the same way as air forces SP.
22.7 Before resolving any action that includes Combat Helicopters, a D6 roll is made to check the effect of air defenses:
Russians, Germans and their allies:
- 1 – 1 SP lost
- 2-3 – 2 SP lost
- 4-5 – 3 SP lost
- 6 – No losses
Allies:
- 1 – 1 SP lost
- 2 – 2 SP lost
- 3 – 3 SP lost
- 4-6 – No Losses
Losses should be instantly marked on the CH track on the board. Losses are subtracted from the total of the CH used in mission.
23.8 Remaining CH may perform their action.
Example: a Player has 10 CH SP. He attacks with 5 SP and loses 2 SP. In the next day he receives +3 SP of CH reinforcements, so he can use 11 SP of CH that day.
22.9 Combat helicopters can be used to transport airmobile units (see 4.2.2.1).
22.10 The number of Combat helicopter SPs can never be bigger than the top one of the CH track.
Example: The American player has 18 SP of the CH. In the air phase he receives 3 SP of CH as reinforcements. Since his maximum number is 20, he gets only 2 SP.
Extended example of combat
It is Player A (German)'s combat phase. All German units have American units in their Zone of Control and none of the German units is fortified, so all German units have to attack enemies in their ZoCs. The German player decides to perform following attacks:
- 393/37 and 411/41 against 1/4
- 6/12 and 231/23, supported by the 325 Artillery against 1/37
He decides to resolve attack 1 as first. German total SP is 13. German player has an air superiority, he decides to use 3 SP (of total 8) of the Combat Helicopters to support his attack. He marks it, sliding used CH marker down to 5. He rolls for AA and gets 1 (-1 SP). He slides down his CH marker to seven, marking 1 SP lost permanently. So his total SP is now 15. American unit has 3 SP, The American player decides to support his attack with 2 SP of CH (of total 6). He slides down the used CH marker to 4 and rolls for AA. He gets 5, so his CHs suffer no losses. Because he does not have Air Superiority, his CH strength is halved, so he gains 1 additional SP. Final odds are 15 to 4, so the 4:1 column in the Combat table is used as the initial combat ratio.
Modifiers come next. German units are in range of their HQ (+1, 5:1), and both of them have stars (+2, 7:1). The American unit has a star (+1, 6:1) and is a forest hex (+1, 5:1). So the final odds are 5:1. German player rolls 2D6 and gets 4 and 5, which gives 9. 9 in the 5:1 means dot/B2-1. American unit loses 1 CEL (its counter is flipped into 2-9 side) and retreats two hexes, into hex 2326. The German units may perform pursuit and they both move onto hex 2426. Finally, disorganization rolls are made. 1 rolls is made for American unit (because B2 result) and it's 3 and 4, so American battalion is not disorganized. Next, we make a roll for German units, because of the black dot. Since German units were in different hexes, for each of them a separate roll is made. German player rolls 2 and 6 for 393/37 (nothing) and 2 and 1 for 411/41 – this battalion is disorganized and covered a with D counter.
The second combat is resolved. German units have 12 SP (3, 3 and 6 from artillery). The German player decide to use 3 SPs of Combat Helicopters, and slides the "used" counter down to 2 and rolls for possible losses. He rolls 3, so all 3 SP are lost. He slides CH marker down to 4, marking his permanent losses. He declares that he is not using any more of his support. American player declares to spent 2 EW points (all he has and the maximum number he can use in a single combat) to support his defense.
There is 12:3, so the initial odds are 4:1. Germans have HQ in range (+1, 5:1) and one of their units has a star (+1, 6:1). The American unit has a star (+1, 5:1), 2 EW (+2, 3:1) and terrain modifier, because of the minor river (+1, 2:1). If the German unit which is not attacking through the river had been stronger than the one attacking through the river, then this modifier wouldn't be used. The German player rolls 2D6 and gets 1 and 1. In the 2:1 column of the Combat Table it is -1/B3D. So one German unit suffers one loss – because unit 231/23 used star, it is first to the suffer losses and its counter is flipped on the 2-5 side. The American unit retreat 3 hexes (2324, 2225 and 2125) and is automatically disorganized because of the "D" result. 231/23 pursues into the 2225 hex), while 6/12 moves into 2424 and then into 2423. Because that last hex is not a part of the rout trail of the American unit, the German battalion stops there. Artillery is not participating in pursuit, since it wasn't involved in the direct combat.
22.0 Nuclear Hits (NH)
22.1 The player representing the Polish side can use up to 4 nuclear hits. They are carried by medium-range missiles. NH are used at the beginning of Phase 1 – the Air Phase.
Procedure:
- The player places the NH token on the hex of his choice. All units in this hex are considered destroyed.
- For each infantry unit in the adjacent hex (both friendly and enemy), roll a die: 1 – no effect, 2-4 – loss of 1 CEL, 5-6 – unit destroyed.
- For each mechanized unit in the adjacent hex (both friendly and enemy), roll a die: 1-3 – no effect, 4-5 – loss of 1 CEL, 6 – unit destroyed.
22.2 The NH token remains on the map (face down) for the rest of the game, and each unit that moves through that hex or its ZoC must roll a die:
- Mechanized units: 1-4 – no effect, 5 – loss of 1 CEL, 6 – 1 CEL loss and stop movement.
- Other units: 1-2 – no effect, 3-4 – loss of 1 CEL, 5-6 – 1 CEL loss and stop movement.
23.0 Sea Landing
Procedure: At the beginning of the game, the troops of the Warsaw Pact (UW) have a fleet of landing ships with a carrying capacity of 8 CEL each. This means that 8 CEL of units can be transported on one landing ship. The number of landing ships is specified in each scenario. Sea Landing occurs during the Movement Phase.
23.1 The player places his units on the landing ship counter.
23.2 He places such a stack in the Cx zones (landing channels, marked on the map).
23.3 A roll is made for crossing sea mines: 1, 2 – no effect; 3, 4 – loss of 1 point; 5, 6 – loss of 2 points.
23.4 A roll is made for Allied surface-to-water missile strikes: 1, 2 – no effect; 3, 4 – loss of 1 point; 5, 6 – loss of 2 points.
23.5 A roll is made for Allied air strikes (but only if Allied player has air advantage on that day): 1, 2 – no effect; 3, 4 – loss of 1 point; 5, 6 – loss of 2 points.
23.6 A roll is made for Danish torpedo strikes: 1, 2 – no effect; 3, 4 – loss of 1 point; 5, 6 – loss of 2 points.
If landing ship loses from 3 to 6 points, the landing ship counter is flipped and removed from the map. The next day it can be used with a reduced capacity of 4. If landing ship loses more than 6 points, it is eliminated.
Transported troops suffer CEL losses equal to the number of the lost points. I.e., if there were 4 points, this is the amount of CELs that should be reduced from the transported troops. This can be done in two ways (to be decided by the player):
A. Classic (reduce one CEL from each counter). B. Replacing the unit's counter with a new, weaker one.
23.7 Landing forces are placed on the shore hexes (of a given Cx channel, e.g. C1, C2, etc.). They can use 1/2 MP on that turn.
The procedure is repeated for each landing ship counter.
Landing ships with a strength of 4 with a loss of 3 or 4 points are considered destroyed together with the transported troops.
24.0 Air Landing
It is carried out by the eight battle groups (units with parachute icon on counter).
Procedure:
- The player places his airborne units on the chosen hexes.
- A roll is made to pass through the enemy anti-air artillery fire: 1, 2 – no effect; 3, 4 – loss of 1 CEL; 5, 6 – loss of 2 CELs.
- A roll is made for Allied fighters (but only if allied player has air advantage on that day): 1, 2 – no effect; 3, 4 – loss of 1 CEL; 5, 6 – loss of 2 CELs.
The procedure is repeated for each unit. After landing, an airborne unit can move using 1/2 MP.
Terrain Influence Table
Printed as "Terrain influent for movement and combat" on page 13 of the original.
| Terrain | Movement: mechanized (tracked) | Movement: mechanized (wheeled) | Movement: non-mechanized | Combat influence |
|---|---|---|---|---|
| Clear | 1 | 2 | 1 | – |
| River | +2 | +3 | +1 | +1 |
| Forest | 3 (both mechanized columns) | 2 | +1 | |
| City | 2 (both mechanized columns) | 2 | +3 | |
| Town | 2 (both mechanized columns) | 2 | +2 |
Column key: the printed table shades the mechanized columns as tracked (blue, left) and wheeled (red, right); the left-hand mechanized column is tracked, the right-hand is wheeled.
Combat Results Table
Rows are 2 x D6 rolls; columns are the final combat ratio. ● is printed as "Roll for D" (a disorganization roll, see 7.5.1 g and 18.1).
| 2 x D6 | 1:4 | 1:3 | 1:2 | 1:1 | 2:1 | 3:1 | 4:1 | 5:1 | 6:1 | 7:1 | 8:1 | 9:1 | 10:1 |
|---|---|---|---|---|---|---|---|---|---|---|---|---|---|
| 2 | -1/-1D | -1/B1D | -1/B1D | -1/B2D | -1/B3D | -1/B3D | -1/B3D | -1/B4D | -1/B4D | -1/B4D | -1/B4D | -1/B5D | -1/B5D |
| 3 | -1/- | -1/B1 |
Printed notes: Modifications: terrain, HQ, tactical concentration, units' abilities.
Examples printed with the table:
- -1 / -1 => both Players lose 1 SP
- D2 -1 => defender must retreat by 2 hexes and loses 1 SP
- -1 / D2 -1 => attacker loses 1 SP, defender retreats by 2 hexes and loses 1 SP
- -1 / D4D => attacker loses 1 SP, defender retreats by 4 hexes and disorganize
- A1D => attacker retreats by 1 hex and disorganize
- ● Roll for D
Disorganization box (printed): roll 2 x D6; for "All units" the printed entries are 2-3, 11-12. Rule 18.1.2 states that a unit is disorganized if the roll is higher or equal to its morale; the printed box is reproduced as found.
Air losses (printed):
| Roll | Russians and allies | Allies |
|---|---|---|
| 1 | lost 1 CEL | lost 1 CEL |
| 2, 3 | lost 2 CEL | lost 2 CEL |
| 4, 5 | lost 3 CEL | lost 3 CEL |
| 6 | – | – |
Note: the air-loss box above is printed as a separate table and is not the same as the anti-air loss table in 10.2.1 or 22.7, which is reproduced as printed in those sections.
Air and Artillery Tables
Each table is read with the SPs used as the row and 2 x D6 roll as the column. Key printed beneath every table: "-1" – player loses 1 CEL; "D" – units on hex are disorganized; "•" – disorganization test (Artillery Fire only). Doubled defender's terrain modifiers must be subtracted from air SPs used.
Bomber Attack
| SPs used | 2 | 3 | 4 | 5 | 6 | 7 | 8 | 9 | 10 | 11 | 12 |
|---|---|---|---|---|---|---|---|---|---|---|---|
| 1-2 | -1 | -1 | - | - | - | - | - | - | - | D | -1 |
| 3-4 | -1 | -1 | D | - | - | - | (blank) |
Tactical Air Attack
| SPs used | 2 | 3 | 4 | 5 | 6 | 7 | 8 | 9 | 10 | 11 | 12 |
|---|---|---|---|---|---|---|---|---|---|---|---|
| 1-2 | - | - | - | - | - | - | - | - | - | - | -1 |
| 3-4 | -1 | - | - | - | - | - | - |
Artillery Fire
| SPs used | 2 | 3 | 4 | 5 | 6 | 7 | 8 | 9 | 10 | 11 | 12 |
|---|---|---|---|---|---|---|---|---|---|---|---|
| 1-2 | -1 | - | - | - | - | - | - | - | - | - | • |
| 3-4 | -1 | D | • | - | - | - | - |
Attack on Objects
Z – object destroyed.
| SPs used | 2 | 3 | 4 | 5 | 6 | 7 | 8 | 9 | 10 | 11 | 12 |
|---|---|---|---|---|---|---|---|---|---|---|---|
| 1-2 | Z | - | - | - | - | - | - | - | - | - | - |
| 3-4 | Z | Z | - | - | - | - | - |
Scenarios
The original prints three scenarios in this order: Bornholm, Dawn, Dawn 5. Scenario footnotes refer to the scenarios as "Zorza" and "Zorza 5" (the Dawn and Dawn 5 names as headed in the original). Narrative background is omitted. Unit order of battle, hex set-up lists and reinforcement calendars are printed on the scenario maps and are not reproduced here.
Bornholm
Victory conditions (printed, Soviet side then Danish side):
- Soviets: for destroying all Allied units by the end of D+2 – 12 VP; by the end of D+3 – 8 VP; by the end of D+4 – 2 VP. For each airborne battalion used – -1 VP.
- Danes: instant victory if there is at least one Allied unit on the board at the beginning of D+5.
Footnotes (printed):
- This scenario should be played first, before "Dawn" or "Dawn 5" scenarios.
- Playing time: 4 days (D + 2 to D + 5).
- Initiative: Soviets.
- Supply: N/A.
- The losses of the Soviet 336th Brigade should be included in the Zorza scenario.
- The Danes are fortified.
- If both players agree, Allied player may set up Danes freely.
- Warsaw Pact player decides if he wants to utilize Sea Landing (rule 23.0).
- Rule 23.5 should be included in the scenario. Do not include rules 23.3, 23.4 and 23.6.
Dawn
Victory conditions (printed):
- Warsaw Pact: for destroying a Danish unit – 1 VP; for controlling a city hex – 2 VP; for each Soviet unit used – -1 VP; for each German unit used – -2 VP.
- Poles (printed as "Dunes"): for destroying an enemy unit – 1 VP.
Footnotes (printed):
- Playing time: 7 days (from D + 3 to D + 9).
- Initiative: Poles.
- Supply: N/A.
- Should be played AFTER the Bornholm Scenario.
- The losses of the Soviet 336th Brigade from the "Bornholm" scenario should be included in the "Dawn" scenario.
- The Danes are fortified.
- If both players agree, Allied player may set up Danes freely.
- Warsaw Pact player decides about loading his units into the ships (Sea Landing 23.0).
Dawn 5
Victory conditions (printed, same wording as Dawn):
- Warsaw Pact: for destroying a Danish unit – 1 VP; for controlling a city hex – 2 VP; for each Soviet unit used – -1 VP; for each German unit used – -2 VP.
- Poles (printed as "Dunes"): for destroying an enemy unit – 1 VP.
Footnotes (printed):
- Playing time: 7 days (D + 1 to D + 9).
- On day D, Poles may perform 4 Nuclear Hits.
- Initiative: Poles.
- Supply: N/A.
- The losses of the Soviet 336th Brigade from the "Bornholm" scenario should be included in the "Dawn" scenario.
- The Danes are fortified.
- If both players agree, Allied player may set up Danes freely.
- Warsaw Pact player decides about loading his units into the ships (Sea Landing 23.0).
- Both scenarios "Zorza" and "Zorza 5" use the same reinforcements table.
- The Disorganization Levels in this scenario are: Danes 9-12, Poles and Soviets 10-12, Germans 9-12.