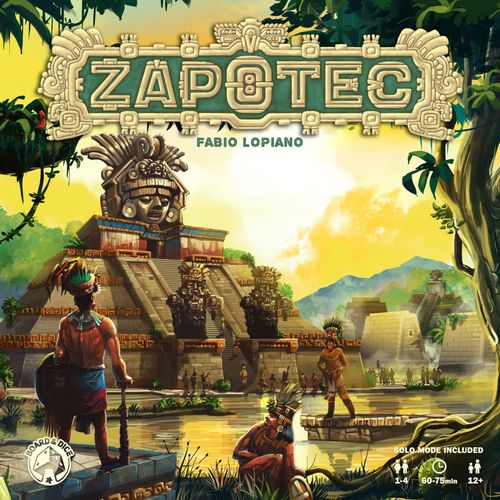
Zapotec
Zapotec Rulebook
Table of Contents
Table of Contents
Pronunciation Guide
- Zapotec — za·puh·tek — /ˈzʌpətek/
- Oaxaca — wa·ha·ka — /wʌˈhʌkʌ/
- Monte Albán — mon·te al·ban — /mɔnte ʌlˈβʌn/
- Cocijo — ko·si·ho — /kɔˈsɪhɔ/
Component List
- 1 main board
- 4 player boards
- 45 Building tiles (15 Villages, 15 Cornfields, 15 Temples)
- 4 Palace tiles
- 36 Trade tiles (12 from each of 3 levels)
- 9 Scoring tiles
- 15 Wood tokens
- 15 Brick tokens
- 15 Stone tokens
- 15 Corn tokens
- 15 Gold tokens
- 15 Priest tokens
- 27 Action cards (numbered 1–27)
- 10 Ritual cards
- 27 Cocijobot cards (solo mode only)
- 4 Reference cards
- Components in 4 player colors:
- 36 Houses (9 per player)
- 20 discs (5 per player)
- 12 small Pyramid pieces (3 per player)
- 8 medium Pyramid pieces (2 per player)
- 4 large Pyramid pieces (1 per player)
Components Overview and Game Setup
1. Prepare the main board and resources
Place the main board in the middle of the table. Separate the resources — Wood, Brick, Stone, Gold, Corn, and Priests into piles and place them within easy reach of all players.
The board is divided into three regions (Etla, Ocotlan and Mitla), each with its own symbol. Each region is further divided into three sections with different terrain types: Plains on the outside (brown), Hills in the middle (grey) and Forests toward the center (green).
Each of these nine sections has 5 spaces with 3 types of buildings (Temples, Villages, and Cornfields). Some of these spaces are marked with "3+" or "4", meaning that those spaces will be in play only for games with at least that number of players.
2. Place the Building Tiles on the main board
Sort the 45 basic Building tiles by type (i.e. 15 Temple tiles, 15 Cornfield tiles, 15 Village tiles).
If playing with 3 players, remove all tiles marked with "4" on their backs. If playing with 2 players, remove all tiles marked with "3+" or "4" on their backs. Removed tiles should be returned to the game box — they will not be used during the game.
Place all remaining tiles randomly on the matching spaces on the board face up (the resource side should be visible). If playing with 3 players, leave all building spaces marked with "4" empty. If playing with 2 players, leave all building spaces marked with "3+" or "4" empty.
3. Prepare Trade Tile stacks
Separate the Trade tiles into three stacks depending on their level (1, 2 or 3). Shuffle each stack and place it face down on the matching space on the board. Then reveal the top three tiles of each stack and place them face up on the three spaces beneath each stack.
4. Place Scoring Tiles on the board
Randomly draw a number of scoring tiles equal to the number of players plus one (3/4/5 scoring tiles with 2/3/4 players). Place the selected tiles in their holding area on the left hand side of the board. Remove any unused scoring tiles from the game by returning them to the box.
5. Prepare the Action Deck
Shuffle all Action cards and place one face up on the scoring space of the main board. Draw a number of cards equal to the number of players plus one (3/4/5 cards with 2/3/4 players) and place them face up in a row next to the board, creating the Offer. Place 4 cards face down to form a small deck next to the row of face-up cards. Then,
- If playing with 2 players, deal 6 Action cards to each player, and remove the remaining 7 cards from the game by returning them to the box.
- If playing with 3 players, deal 5 Action cards to each player, and remove the remaining 3 cards from the game by returning them to the box.
- If playing with 4 players, deal 4 Action cards to each player, and remove the remaining card from the game by returning it to the box.
6. Prepare the Ritual Deck
Shuffle the Ritual cards, draw three and place them face up in a row next to the main board. Remove the remaining cards from the game by returning them to the box.
7. Distribute Player Pieces
Each player receives the following pieces in their player color:
- 9 Houses,
- 5 discs,
- 6 Pyramid pieces,
plus 1 player board and 1 Palace tile which should be placed on its dedicated space on the player board.
Each player also receives 1 Wood, 1 Brick and 1 Stone. Each player also places one of their discs on the 0 space of the Scoring track and another disc in the lowest (bottom) space of the Sacrifice track. The remaining 3 discs should be kept near their player board.
Game Concepts
Resources
In Zapotec, there are three basic resources (Wood, Stone, Brick) and three advanced resources (Corn, Gold, Priests). Players spend basic resources to expand their presence on the board with their buildings and, at the same time, develop their economy. Advanced resources are used to gain Trade tiles, advance on the Sacrifice track, and claim Ritual cards. A combination of basic and advanced resources is required to build Pyramids.
Buildings
There are three types of buildings. Each building type costs two basic resources and provides one advanced resource and one variable basic resource:
- Cornfield — costs 1 Wood and 1 Stone; provides Corn and one of three basic resources,
- Temple — costs 1 Brick and 1 Stone; provides Priest and one of three basic resources,
- Village — costs 1 Brick and 1 Wood; provides Gold and one of three basic resources.
Buildings are constructed on building spaces on the board. Each building space has three distinct properties:
- The type of building that can be constructed there (Cornfield, Temple or Village);
- A type of terrain (Plains, Hills, Forest);
- A region: Etla in the top left corner, Ocotlan in the bottom left corner, and Mitla in the bottom right corner. Each region is represented by a god (an Owl for Etla, the Rain Goddess for Ocotlan, and a Bat for Mitla).
Building Tiles
At the beginning of the game, each available building space on the main board contains a Building tile matching the building type.
When players build a building, they resolve the following steps in order:
- Take the Building tile that was on the selected space.
- Place one of their Houses on a matching building space on the main board.
- Place the Building tile on one of the nine building spaces forming the resource grid on their player board.
Players are only allowed to place new Building tiles on empty spaces of the resource grid on their player board. Stacking or overbuilding is not allowed. Once placed, a Building tile is never moved.
Playing the Game
The game consists of five rounds. Each round consists of two phases. The first phase is conducted simultaneously by all players while the second phase is divided into two steps carried out individually by each player, in turn order.
- Phase 1: Select Card
- Phase 2: Income and Actions (in turn order)
- Step A: Income
- Step B: Actions:
- Capital Actions step
- Buy Trade tiles
- Build Pyramid level
- Perform a Ritual
- Sacrifice
- Construction step
- Turn Scoring step
- Draw Card step
- Capital Actions step
Phase 1: Select Card
All players simultaneously pick one card from their hand and place it face down in front of them.
The resource printed at the top of the card determines the row or column to activate on the resource grid to collect income.
The icon in the middle of the card matches one of the nine properties of the building spaces on the map (one of three building types, one of three regions, or one of three terrain types). On their turn, players may only build on spaces that match that icon.
The number at the bottom of the card will dictate the turn order for the round when the card is played.
Phase 2: Income and Actions
After every player has selected their card for the round, all players reveal cards and establish turn order. The player with the lowest number will go first, followed by the player with the next higher number and so on. Then, in this turn order they will collect income (step A) and carry out Actions (step B).
Step A: Income
To collect income:
- Observe the basic resource type that corresponds to a row and a column on your player board.
- Pick the row or the column with the matching resource symbol.
- Collect all income from the column or row selected: for each icon in that row or column including the resource icon above or next to it, collect one resource of the depicted type.
Example: The player has chosen a 'Wood' card and may gain resources corresponding to either the middle row or the middle column. They pick the middle row, and collect (left to right): 1 Wood; 1 Stone and 1 Gold from the Village tile; and 1 Brick and 1 Priest from the Temple tile.
Step B: Actions
After collecting income, the active player will start their Action step.
The active player may perform any number of Capital Actions, followed by any number of Building Actions.
Capital Actions step
Any number of Capital Actions can be performed in a turn. All Capital Actions must be taken before starting Building Actions.
Trade Action
With a Trade Action, the active player spends Gold to acquire available (face-up) Trade tiles.
Each tile costs 1, 2 or 3 Gold (depending on which section on the board it belongs). Trade tiles come in three categories:
- The tiles from the top row cost 1 Gold and provide resources immediately after buying. Flip them right after use and place next to your player board.
- The tiles from the middle row cost 2 Gold and provide a special ability that can be performed once per round. This ability is available immediately upon purchase. Once used, flip the tile face down (and flip it back face up at the start of next round).
- The tiles from the bottom row cost 3 Gold and provide a more powerful ability that, depending on the tile, could be performed immediately, once per round, or could be a permanent ability.
A player may purchase only 1 Trade tile from each row (1, 2 and 3 Gold) per round. At the end of the active player's turn, Trade tiles are replenished: new tiles are revealed from their respective stacks to replace the tiles which were purchased.
Detailed descriptions of all Trade tiles are available in the Appendix at the end of these rules.
Pyramid Action
With this action a player spends 1 Priest, 1 Wood, 1 Brick and 1 Stone to build one level of a Pyramid. Each Pyramid level is represented by one plastic piece in that player's color.
To build a Pyramid level, a player must select either an empty available Pyramid space, or an unfinished Pyramid that comprises of one or two pyramid levels:
- If you build a level of a Pyramid on an empty space, start by selecting one of the available Scoring tiles on display. Put it next to your chosen Pyramid space, and then place the largest Pyramid piece in your color still available to you on that space.
- Alternatively, if you decide to contribute to an existing incomplete Pyramid, place a new level on top of it (the new level must be exactly one size smaller than the current top piece).
A Pyramid is completed when no more pieces can be added to it (its top piece is the smallest Pyramid level). A finished Pyramid may comprise of one, two or three pieces:
- A small Pyramid is completed with a single piece, but it can be built only by a player who has already used all their large and medium pieces on other Pyramids.
- A medium Pyramid requires a medium size piece and a small size piece.
- A large Pyramid requires three pieces, one of each size.
At the end of the game, Pyramids will award points for buildings matching that Pyramid Scoring tile (see End Game Scoring section).
Each player may only build one level of the same Pyramid per round. However, within the same round, a player is allowed to contribute to more than one Pyramid, or for different players to add a level each to the same Pyramid. A single Pyramid can (and usually will) be made of Pyramid levels of different colors!
Ritual Action
Players that have already built at least one Pyramid level can perform a Ritual. When performing a Ritual, a player spends 1 Priest and places one of their discs on 1 chosen Ritual card on display, observing the following rules:
- They may not place a disc on a Ritual card which already has a disc of their player color.
- They may place a disc on a Ritual card which has discs belonging to other players but they must pay 1 Gold per each opponent disc already on the Ritual card (this Gold is spent normally — not paid to the disc owners).
- The number of Ritual cards a player can have a disc on is limited by the number of Pyramid pieces they have built (but no more than three). The location of Pyramid pieces does not matter, only the total number of pieces built.
At the end of the game, each player that placed a disc on a Ritual card will gain victory points according to the scoring conditions from that Ritual card.
Sacrifice Action
With the Sacrifice Action, a player advances on the Sacrifice track (located on the right side of the main board). To perform this Action, the player:
- Spends exactly one Priest and between 1 and 5 Corn.
- Moves their disc one step up per Corn spent.
- As they move their disc, they collect the bonus depicted on each step. If they advance multiple steps, they gain all bonuses depicted on each step they advance.
If there are any other discs on the space the player lands on, they place their disc on the top of them.
Some steps of the Sacrifice track award points immediately, some provide one basic resource of your choice, and some provide permanent discounts for Trade tiles and Ritual cards. The discounts and special abilities work as follows:
- The third step offers a discount of 1 Gold for level 2 Trade tiles.
- The sixth step offers a discount of 2 Gold for level 3 Trade tiles.
- The ninth step allows you to place discs on Ritual cards without spending Priests (but still paying Gold for each opponent disc already present).
- The eleventh step allows you to immediately place a disc on a Ritual card at no cost (this Ritual is completely independent from Pyramid levels built before or after this step is reached).
Effectively, reaching the sixth step means that Trade tiles of any level can be now bought for 1 Gold each. Note that the discounts never drop the price of a Trade tile below 1 Gold.
Construction step
After performing any number of Capital Actions, the active player may spend basic resources to build any number of buildings.
In order to build, you must pay the resource cost of a building. Each building type requires different resource types, as follows:
- Village: 1 Brick and 1 Wood
- Temple: 1 Brick and 1 Stone
- Field: 1 Wood and 1 Stone
- Palace: 1 Wood, 1 Brick and 1 Stone
Next, select a space for your building. It must be one with a building tile (so unoccupied by a House or a Palace) and it must be a space allowed by your Action card:
- If an Action card depicts a type of building, you can only build that type (but you can choose any region and terrain type for every building you can build).
- If an Action card depicts a region or terrain type, your chosen space must be located in that region (you can choose any terrain type) or on that terrain type (but you can choose any region). However, you can build different types of buildings in this round, as long as you can afford them.
If you are unable to fulfill the conditions above, you are not allowed to build. If you meet the conditions, replace the selected tile with one of your Houses, and place the tile on any empty space of the resource grid on your player board. If the tile placed covers a space with an advanced resource, you also immediately gain that resource. This only happens the first time the resource is covered.
Example: The player played the depicted card and has 2 Bricks, 1 Wood, and 1 Stone. They build a Temple (for 1 Brick and 1 Stone) and a Village (for 1 Wood and 1 Brick). They place the two houses on a Temple spot and a Village spot in the Mitla region, and place the corresponding tiles on their player board. They decide to place them on the Wood row, and, by covering the Gold space, also immediately gain 1 Gold.
Building the Palace
Once during the game, you can build your Palace. Unlike regular buildings, the Palace costs one of each basic resource: 1 Wood, 1 Brick and 1 Stone.
Like other buildings, the Palace can only be built on a building space that matches the Action card.
When building the Palace, place your Palace tile on the main board and put one of your Houses on top of it. Take the Building tile from that space and place it face down on the palace space on your player board (so that the building type of the space that was used is clearly visible). This tile does not go to the resource grid. The Palace does not produce resources but it counts as two Houses for all scoring purposes.
Example: The player spends 1 Brick, 1 Stone and 1 Wood to build their Palace. Since they played a 'Cornfield' card, they build it on a matching building space and place the Building tile, face down, on the Palace space of their player board.
Turn Scoring step
After the Construction step, you score 2 Victory Points for each House you have on the main board that matches the Property (middle) section of current round's bonus card (the Action card face up in the bonus space of the main board).
Note: All your Houses on the main board count toward scoring, not just those built in the current round. Also, your Palace counts as two Houses, hence it scores 4 Victory Points if it matches the current Round's bonus card.
Draw Card step
Finally, pick one of the face-up Action cards in the Offer and add it to your hand. Thus, you will end your round with the same number of cards you started with. Skip this step during the last round.
End of the Round Cleanup
After the last player has taken their turn, the remaining Action card is moved to the Round's bonus space on the main board. If there are any cards already in the bonus space, place this card face-up on top of the stack. This Action card is now the bonus card for the next round.
Collect all the Action cards that were played this round, add the top card from the deck and place them in the Offer (there will be one more than the number of players).
Skip this step in the last round of the game.
End of the Game
After 5 rounds, additional Victory Points are scored before the game ends:
Sacrifice Track
The top three players on the Sacrifice track gain respectively 9, 6 and 3 points.
Ties are broken in favour of the player whose disc is closest to the bottom of the stack on the tied space (i.e. who got there first).
Note: Only players that moved on the Sacrifice track by at least one space are eligible for points there.
Rituals
Players score the Ritual cards on which they have placed their discs during the game. For any cards that score points based on Houses, Palaces count as two Houses.
Pyramids
Finally each Pyramid is scored:
- Each Pyramid has a corresponding scoring tile.
- Players that contributed to a Pyramid gain points for each of their Houses matching the scoring tile. Each Pyramid piece awards 1 point per House to its owner.
- For Pyramid scoring purposes, a Palace will count as two Houses.
- If the Pyramid is complete, each Pyramid piece awards a bonus of 5 points to its owner.
Example: Orange and Purple have built one Pyramid piece each in the Pyramid with the Forest scoring tile. They gain one point for each House they have built on the Forest. Because the Pyramid has not been completed, they do not get the 5-point bonus.
Orange has also built two Pyramid pieces of the Pyramid with the Temple scoring tile. Blue has built one Pyramid piece there. Orange gains 2 points per Temple they have built, while Blue gains 1 point per Temple. Since the Pyramid is complete, Orange gains a bonus of 10 points and Blue a bonus of 5 points.
Finally, Purple has built two Pyramid pieces of the Pyramid for Etla, completing this Pyramid. They gain 2 points per House in the Etla region and a bonus of 10 points.
Winner
The winner is the player with the most Victory Points at the end of the game. In case of a tie, the player whose disc is ahead on the Sacrifice track wins (with the disc closer to the bottom of the stack on the same space breaking the tie). In the unlikely event of there still being a tie (which can happen if none of the tied players moved up the Sacrifice track), the tied players share the victory.
Solo Mode
It is possible to play Zapotec alone, against Cocijobot, an automated opponent named after the Rain God of the Zapotec people.
In the rules below, "you" refers to the lone human player, while "Cocijobot" or "it" refers to the automated opponent.
Setup
When playing solo, the main board setup is the same as for 2 players (use all spaces except those marked with 3+ or 4), but place only two cards face up in the Offer (to select from at the end of your Actions turn), then draw 6 cards into your hand and place a small face-down deck of 6 cards next to the two cards face-up. Return the remaining Action cards to the box.
Place only three Trade tiles per type face up on the board, and put the remaining ones in the box (there will be exactly nine tiles in play).
After picking your own player board and setting it up normally, pick another color for Cocijobot, place its discs normally (one on the 0 space of the score track, the other at the bottom of the sacrifice track), and place its 9 Houses, its Palace, its three remaining discs and its 6 Pyramid pieces next to its board.
Shuffle the Cocijobot deck (all 27 cards) and place it next to the board, face down.
Gameplay
The gameplay follows the same steps as in the multiplayer game, with a few exceptions.
After you select your Action card, reveal the top card of the Cocijobot deck: it will show three large icons. A Building type, a Terrain type and a Region, and a number at the bottom along with a smaller icon. If the number on that card is equal or lower than that on your Action card, Cocijobot will perform its actions first, otherwise you will go first.
Note: the numbers on the Cocijobot deck can be repeated and tend to be on average lower than those on the main Action cards deck.
Note also that the back of each Cocijobot card provides a hint to one of the icons that could be on the front. For high numbered cards, that hint is intentionally misleading.
The rest of your turn proceeds as usual (Income step, Capital Actions step, Construction step, Turn Scoring step). During your Draw Card step, pick one of the two Action cards from the Offer to add to your hand and use the other one as next round's bonus card. Then (if it was one of the first four rounds) draw 2 new Action cards from the deck to form next round's Offer. Cocijobot ignores the Offer.
Cocijobot's turn
During Cocijobot's turn (before or after you perform your actions, depending on the numbers on its card), it will:
- Build 1 House, if possible, matching the three icons on its card at once (there is exactly one space on the board for each combination).
- It will also build a House, if possible, matching two of those icons plus the icon for this round's bonus card.
- If Cocijobot already built a Pyramid level (see below), it will build one more House matching two of the icons on its card plus the scoring tile of the Pyramid.
Example: With this card, assuming the current round's bonus card shows 'Plains', Cocijobot will place 1 House on the temple/Mitla/forest space and 1 on the temple/plains/Mitla space. If Cocijobot has also built a level on the Pyramid with a scoring tile showing 'Etla', it will place 1 House on the temple/forest/Etla space. If any of these options are not possible, because they were already built by you or Cocijobot, it will simply skip them.
Rules for Cocijobot's Palace placement:
If one of the spaces built by Cocijobot matches both one of its Pyramids scoring tiles and the current round's bonus card, it will place its Palace instead of a regular building (assuming its Palace hasn't been placed yet). Otherwise, if this is the last round (or the last round for which Cocijobot still has house pieces left) and one of the spaces matches either the Pyramid or the current round's bonus card, and Cocijobot has not placed its Palace yet, it will place it now (so that it matches the Pyramid if possible, otherwise the bonus card).
Place the tiles from the spaces next to Cocijobot's pieces, with the Building type facing up.
Depending on the Building type, there will also be a Capital action symbol at the bottom of the card (Sacrifice for Cornfields, Trade for Villages, and Pyramid for Temples). After resolving Construction (as outlined above, even if Cocijobot couldn't place any Houses), perform the Capital action shown on the card, as described below.
If this turn Cocijobot could not build any buildings (i.e. because the spaces were already taken by either you or it, or because Cocijobot already built all 9 Houses), flip one more card and execute the Capital action on it as well as the one on the original card.
This means that Cocijobot might execute up to two Capital actions per turn.
After performing the Capital action(s), score Cocijobot's Houses according to the current round's bonus card same as you would score your own.
Sacrifice
Advance Cocijobot's disc by one space on the Sacrifice track for each Cornfield tile it has collected so far.
- Cocijobot will score the Victory Points along the track.
- If Cocijobot reaches the third or sixth space it will immediately get the leftmost Trade tile from the second or third row respectively at no cost.
- If Cocijobot reaches the eighth space (i.e. the third free resource), it will immediately build a Pyramid level (see rules governing Pyramid levels below).
- If Cocijobot reaches the ninth and the eleventh space, it will place a disc on the leftmost ritual card that doesn't have its disc yet.
Trade
Cocijobot will select one of the three rows according to the criteria below, and take the leftmost tile still available from that row. If the row is already empty, it will pick the next best row with at least a tile.
The row is picked as follows:
- If Cocijobot has collected four or more Village tiles, or if it has reached the sixth step on the Sacrifice track, it will pick the third row.
- If Cocijobot has collected three Village tiles, or if it has reached the third step on the Sacrifice track, it will take the leftmost tile from the second row.
- Otherwise it will take the leftmost tile from the first row.
Trade tiles have no effect on Cocijobot, but at the end of the game they will score Victory Points for it.
Pyramid
If Cocijobot has not built any Pyramid levels yet, it will try to start a new Pyramid, otherwise it will add a level to the one it already started. If that Pyramid is already complete, Cocijobot will place its disc onto the first Ritual card still without its disc (from left to right).
Note: Cocijobot will not contribute to more than one Pyramid.
When starting a new Pyramid, Cocijobot will choose the best scoring tile as follows:
- It will pick the scoring tile that matches most Houses for Cocijobot.
- In case of a tie it will pick the one that matches the least Houses for you.
- If there is still a tie it will pick the topmost scoring tile.
If you have already started both Pyramids, Cocijobot will contribute to one of them, following the same criteria above for the associated scoring tile.
Solo End Game Scoring
The game ends after five rounds, same as in the multiplayer game. You will score the same as you do with the multiplayer rules, but Cocijobot will score as follows:
Sacrifice track: If Cocijobot has advanced at least one step on the Sacrifice track, it will score as usual (9 points if it's first, 6 points if it's second). If it did not advance on the Sacrifice track during the game, Cocijobot still scores 3 points.
Trade Tiles: Each Trade tile gained by Cocijobot scores 3 Victory Points per line on its back (level 1 tiles score 3 Victory Points, level 2 tiles score 6 Victory Points and level 3 tiles score 9 Victory Points).
Rituals: Each Ritual card scores 10 Victory Points for Cocijobot if it has only its own disc, but only 6 points if it also has yours. You score the printed condition normally.
Pyramids: Any completed Pyramids that Cocijobot contributed to score as normal. Cocijobot gains the 5-point bonus from all its Pyramid pieces, regardless of Pyramids being complete.
Adjusting difficulty
To make the game easier: every time Cocijobot fails to build during the Construction Phase because your House is already there, you gain 2 Victory Points.
To make the game harder: every time Cocijobot fails to build during Construction for any reason, it gains 2 Victory Points. (Therefore, if it only places 1 House, it will gain 4 Victory Points for the other two houses it could not build that round.)
Appendix: Trade Tiles
- Z01, Z02: Flip this tile face down to gain 1 Wood and 1 Corn.
- Z03, Z04: Flip this tile face down to gain 1 Brick and 1 Corn.
- Z05, Z06: Flip this tile face down to gain 1 Stone and 1 Corn.
- Z07, Z08: Flip this tile face down to gain 1 Wood and 1 Brick.
- Z09, Z10: Flip this tile face down to gain 1 Brick and 1 Stone.
- Z11, Z12: Flip this tile face down to gain 1 Stone and 1 Wood.
- Z13: Flip this tile face down and pay 1 Brick to gain 2 Stone. At the end of your turn, flip this tile face up.
- Z14: Flip this tile face down and pay 1 Stone to gain 2 Wood. At the end of your turn, flip this tile face up.
- Z15: Flip this tile face down and pay 1 Wood to gain 2 Brick. At the end of your turn, flip this tile face up.
- Z16: Flip this tile face down and pay 1 Brick to gain 2 Wood. At the end of your turn, flip this tile face up.
- Z17: Flip this tile face down and pay 1 Stone to gain 2 Brick. At the end of your turn, flip this tile face up.
- Z18: Flip this tile face down and pay 1 Wood to gain 2 Stone. At the end of your turn, flip this tile face up.
Appendix: Ritual Cards
- 6 VP for sets of three buildings with same type and different region. Max 18 VP.
- 6 VP for sets of three buildings with same terrain and different region. Max 18 VP.
- 6 VP for sets of three buildings with same type and different terrain. Max 18 VP.
- 6 VP for sets of three buildings with same region and different terrain. Max 18 VP.
- 6 VP for sets of three buildings with same region and different type. Max 18 VP.
- 6 VP for sets of three buildings with same terrain and different type. Max 18 VP.
- 3 VP for each Pyramid level built. Max 12 VP.
- 1 VP for each basic resource and 2 VP for each advanced resource. Max 12 VP.
- 1 VP for each step on the Sacrifice track. Max 12 VP.
- 1/2/3 VP for each Trade tile of level 1/2/3. Max 12 VP.
Note: Remember that each Palace will count as two Houses for Ritual cards that award points to sets of buildings. For example, a player that builds their Palace on the Plains, then two Houses on the Forest and two Houses on the Hills, will have two sets of three buildings on different terrain.