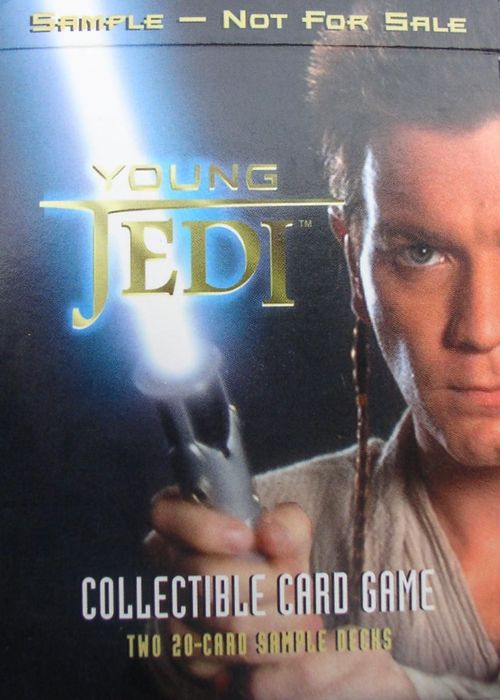
Young Jedi: Collectible Card Game
Young Jedi: Collectible Card Game Rulebook
Table of Contents
Table of Contents
Collecting & Trading
Between 1999 and 2001, the Young Jedi Collectible Card Game was available at toy stores, card and comic shops, game stores and bookstores. The cards came in 60-card Starter Sets, 11-card Booster Packs, 18-card Reflections Packs, 132-card Collector's Boxes, and 45- or 47-card Enhanced Booster Boxes.
There were 599 unique cards printed for the Young Jedi Collectible Card Game. But not all cards appeared in the packs with the same frequency. Some were ultra rare, others rare, and still others uncommon and common. A complete set of the card game has 4 ultra rare, 156 rare, 160 uncommon, 190 common cards, and 59 premium and promotional cards. Plus, there are 30 different exclusive cards found only in Starter Sets.
In addition, there are 54 special diffraction foil which could be found in Menace of Darth Maul, The Jedi Council, and Battle of Naboo Booster Packs and 60 diffraction foil cards available from Booster Packs of Reflections. There were also 23 diffraction foil cards available as Tournament prizes from 1999 until 2001. All together, there were 137 diffraction foil cards of varying rarities available for Young Jedi.
The ease of collecting the cards (including the foils) of the first three expansions (Menace of Darth Maul, The Jedi Council and Battle of Naboo) was canceled out by the limited availability of the cards from the last three expansions (Duel of the Fates, Reflections and Boonta Eve Podrace). The diffraction foil cards from Reflections remain some of the most difficult cards to acquire in any Star Wars-themed card game.
- Starter Sets – Each 60-card Starter Set included a rulebook, a 30-card Light Side starter deck and a 30-card Dark Side starter deck. Each Starter Set contained the same configuration of 60 cards.
- Booster Packs – Each Booster Pack contained 1 rare, 3 uncommon and 7 common cards, mixed between the Light Side and the Dark Side. On average, about on in every nine Booster Packs included a special diffraction foil card. Foil cards also had different rarities (ultra-rare, super-rare and very rare) and were harder to find than regular rares.
- Reflections Booster Packs – Each Reflections Booster Pack contained 1 special diffraction foil card, 2 premium cards exclusive to the Reflections series, and 15 random cards from previous expansions of all rarities, possibly including more diffraction foils.
- Collector's Boxes – Each Collector's Box included a card list, 12 Booster Packs and a card storage box designed to hold 450 cards.
- Enhanced Booster Boxes – The Enhanced Menace of Darth Maul Booster Box included 1 unique premium card and four Menace of Darth Maul 11-card Booster Packs (45 cards in all!). The Enhanced Battle of Naboo Booster Box included 3 unique premium cards and four Battle of Naboo 11-card Booster Packs (47 cards in all!).
Card Types
There are seven types of cards in the Young Jedi Collectible Card Game. All cards include collector's information, including the expansion's icon, a rarity icon, and a collector's number, in the bottom-right corner. They also all include deck-building dots in the bottom-right corner beside the collector's information. All cards except Objectives have a destiny number in the top-right corner. All cards except Locations have a small icon of the card's image in the top-left corner. Specific features are discussed below:
- Character cards represent important and background characters from Star Wars: Episode I. All character cards include the card's cost, its power, any location bonuses, and its damage if lost. Most character also have a lore, although some have additional actions instead, at the bottom of the card. Characters with location bonuses on Tatooine are yellow, while those for Coruscant are purple and those for Naboo are green.
- Weapon cards are black-colored cards that represent powerful devices that your characters can use in battle, such as lightsabers, blasters and Podracers. A weapon card may have up to three actions that can be chosen from when used in a battle. Most Weapon cards also have a lore at the bottom of the card.
- Battle cards are red-colored cards that aid players in battle. They include one action described in the center box as well as a lore at the bottom.
- Effect cards are purple-colored cards that can be used until a planet is conquered. Like They include one action described in the center box and include lore at the bottom.
- Starship cards are black-colored cards that can represent either transports or starfighters. They depict on the right side column the starship's power and damage, and either lore or game text can be found at the bottom of the card. Starfighters also have a Watto's Chance Cube depicted beneath the power number.
- Location cards are horizontally-oriented cards representing important locations in Star Wars: Episode I. They never have any additional features.
- Objective cards are orange-colored cards that represent goals for the game. They have a smaller picture than other cards and just have one large field of text in the middle. Objective cards have no lore.
Your First Game
Right now, you are a young Jedi in training. Using 30-card Light Side and Dark Side starter decks from a Young Jedi Starter Set, you'll be battling on only one planet. Once your training is complete, you can begin building and playing with your own 60-card decks and battling on three different planets!
Your Goal
You have three ways to win the game:
- Planet Victory: You win if you take control of the planet.
- Deck Victory: You win if your opponent's deck runs out of cards before yours does.
- Podrace Victory: You win if you win the Boonta Eve Podrace.
No matter which way you win, your opponent is bantha poodoo!
Getting Started
For your fist game, you will be playing the Dark Side of the Force. Take the 30-card Dark Side deck (with the red Darth Maul card backs) from your Starter Set, and give the 30-card Light Side deck (with the blue Obi-Wan Kenobi card backs) to your opponent.
- Take one of the following locations from your deck and put it face up in the middle of the table. This is the "starting location" for your game. The starting location depends on which Starter Set your are using for your first game:
- Menace of Darth Maul: Tatooine • Desert Landing Site
- The Jedi Council: Coruscant • Galactic Senate
- Battle of Naboo: Naboo • Theed Palace
Locations are where all the action takes place – where all the characters come into play and battle each other.
- Shuffle your remaining cards and put them face down on the table to make your draw deck. (Your opponent does the same.) Each player draws 6 cards from the top of his own deck to make a starting "hand." (Don't let your opponent see which cards you have in your hand.)
Now, the game should look something line this:
- You will take the first turn of the game. (Later on, we'll talk about a more exciting way to decide who goes first in the game.)
What To Do On Your Turn
Each of your turns has three steps (in this order):
- Deploy (play Character, Weapon, Starship, Effect and Location cards).
- Battle (attack your opponent's characters)
- Even Up (draw or discard until you have 6 cards in your hand).
You don't have to do the first two steps if you don't want to, but you always have to Even Up. After you Even Up, your turn is over and your opponent then takes his turn.
Now let's take a closer look at the three steps.
1. Deploy
You've probably noticed that Character, Weapon and Effect cards have a little picture of the character or weapon in the top left corner of the card. See how most of them also have a row of silver bars under the picture? We call them "counters," and they tell you how much it costs to put that card into play. Each turn, you get to put up to six counters into play.
You can put out as many characters, weapons and effects as you want, as long as all together they don't have more than six counters. On your next turn you can put out six more counters, and so on. For example, you could play:
- three battle droids (2+2+2=6 counters); or
- Darth Maul plus a Blaster (6+0=6); or
- two battle droids plus two Blaster Rifles (2+2+1+1=6).
(It's okay to put out less than six counters in a turn if you want to.)
Place your deployed cards next to each other on your side of the Location card, so both players can see how many cards you've deployed.
The Hidden Cards Rule
On your first turn of the game, the Character, Weapon and Effect cards you deploy must be hidden (placed face down). Starships are placed face-up in the Hyperspace pile (see "Starships and Evacuation"). Hidden cards are concealed from your opponent for one turn. (You may not use the game text of any hidden cards until they are turned face up.) Hidden cards are not present at the location for any purpose other than uniqueness. They do not participate in battles or duels.
At the start of your second turn of the game, you have to turn those hidden cards face up (and all the cards you deploy to that planet after that will be face up). Your opponent will do the same thing: deploy cards face down on his first turn, and reveal them at the start of his second turn. This gives both players a couple of turns to deploy cards before any battles can break out.
The diagram on the previous page shows what the game might look like at the start of your second turn – just before you turn up your hidden cards.
Deploying Locations
The action takes place at only one location at a time, but you can change the scene by using different Location cards. (Some of your characters fight better at certain locations.)
When you want to change the scene during your deploy step, just deploy a different location from your hand and place it on top of the one on the table, covering it up. (Locations have no counters, so this doesn't go against your limit of six.) When you change the scene on a planet, this represents all of your (and your opponent's) characters and weapons moving from the old location to a new one.
Your deck must include one Location card each for the planets Tatooine, Coruscant, and Naboo, but when you change a Location card, you cannot change the planet. (Later on, we'll talk about how to change which planet you are playing on.)
2. Battle
Now we're getting to the really fun stuff! On each of your turns you may declare one battle at a location if you and your opponent both have characters face up there (hidden cards cannot battle). You don't have to declare a battle if you don't want to.
Before the fighting starts, temporarily put your hand face down on the table, away from the draw deck. Then pick up all your characters on Naboo. (If you have any weapons there you will pick those up, too – but for right now let's assume you don't have any weapons on Naboo.)
Now, you're going to make a "battle plan" for your characters. (Your opponent picks up his own cards and makes his own battle plan at the same time.) Each battle is made up of a series of individual fights between two opposing characters, so you must put your cards in the order you want them to fight. This is called a "battle plan." The card you put at the left of your battle plan will be the card that fights first; the one at the right end will fight last.
When your battle plan is finished, close up the cards into a pile and put the pile face down on the table. When your opponent also has his battle plan ready, it's time to battle!
Both players turn up the first character in their battle plan (the one on top of the pile). These two characters fight each their using their Power.
Location Bonuses
Look at the Power number on your Character card. See those three little pictures just below the word POWER? Each of them matches a different Location card. If the Character card has one or more red Power bonus dots for the location where that character is fighting, you get to add the number of dots to that character's Power!
For example, when this battle droid is fighting at the Naboo location that matches the middle picture on his card (it's the Battle Plains), he adds a location bonus of 2 to his Power number, for a total Power of 4.
Who Wins This Fight?
The fighting characters compare their Power numbers (plus location bonuses) to see who wins.
- If your character has more total Power, you win the fight! Your character stays at the location (move it over to make room for your next character to fight), and your opponent's character is defeated. He must place that character face up in a discard pile next to his draw deck. Your opponent also takes damage to his draw deck for that character's loss. The Damage number on the defeated character's card shows how many cards your opponent must discard from the top of his draw deck.
- If your opponent's character has more total Power, his character stays at the location and your own character is defeated; place your character in a discard pile next to your draw deck. Also, you must discard a number of cards from the top of your draw deck equal to your character's Damage number.
- If both characters have the same total Power, they both stay at the location. Neither of them is defeated, and nobody has to discard any cards from the draw deck.
The diagram on the next page shows what the table might look like if you won the first fight.
After the first fight is over, you each turn up your next character from your battle plan and they fight each other in the same way: compare their Power numbers (plus any location bonuses); the player who loses the fight has to discard his character and take Damage to his draw deck.
Keep turning up characters to fight each other until one player's battle plan runs out of characters.
At that point, if you (the attacker) have any "leftover" characters that didn't fight your opponent's characters, each one of them "breaks through the battle line." Your opponent must discard one card from the top of his draw deck for each of your "breakthrough" characters.
You can't hit your opponent with breakthrough unless you are the attacker! (This is an advantage of attacking.)
Now the battle is over. Return your surviving Character cards (if any) to your side of the Location card, and pick up your hand. It's time to Even Up, but before we get to that, let's see how the battle would have worked if you'd had some Weapon cards.
Using Weapon Cards in Your Battle Plan
Weapon cards include powerful stuff for your characters to use in battle, like lightsabers, blasters and Podracers. A weapon adds to the Power of the character who uses it.
- When you're picking up your characters to make a battle plan, pick up the Weapon cards there, too.
- After you've put your characters in the order you want, put each Weapon card to the left of the character you want to use it.
- Although you can use lots of weapons in battle, you can use only one Weapon card in each fight.
- When you turn over a Weapon card from your battle plan during a fight, immediately turn over your next card (which must be a character). The weapon will add to that character's Power in this fight.
For example, the battle starts and your opponent turns over a character who has Power 4. You turn over a Blaster Rifle and (since this is not a character) you immediately turn over your next card to show who is using it; let's say it's a character who has Power 2. Normally the opponent's character would defeat your character (4 to 2). But since your character has the Blaster Rifle, he has a chance to win this fight!
The Weapon cards in your starter deck can work with any character, and they add a random number to your character's Power (This represents the unpredictable result of a weapon in battle. A blaster show might hit its target, or it might miss; a Podracer might help a character out-maneuver the enemy, or it might not.)
See that small picture of Watto's chance cube with a question mark on it? It means you draw destiny to find out how much Power you are going to add. Here's how you draw destiny:
- Draw the top card from your draw deck, and put it face up on the table. (This is called your "destiny card.")
- Look at the larger picture of Watto's chance cube in the upper-right corner of your destiny card. Read the white number on the front of the cube, and say it out loud to your opponent.
- It doesn't matter what kind of card you draw for destiny (a character, a Battle card, whatever)…you only need to look at the destiny number on the chance cube.
- Add that destiny number to your character's Power.
Suppose your destiny card has a 3 on Watto's chance cube. This is added to your character's Power of 2 to give him a total Power of 5 for this fight. Your opponent's character still has a Power of 4 (since he had no weapon to provide him with a destiny draw), so your character wins the fight!
Put your destiny card in your hand. (Remember, your hand is temporarily sitting face-down on the table, so just set the destiny card on top of it.)
Of course, if your opponent's character is also using a weapon, then both players will be drawing their own destiny cards. If a character is defeated when using a weapon, discard the weapon along with the character.
If you have too many Weapon cards for your characters to use them all (or if there are weapons that you don't want to use in the current battle for some reason), just place the extra ones at the right end of your battle plan. Since there is no character to come up "after" those Weapon cards, they will not be used in the battle (and they won't be lost if any of your characters are defeated).
Adding Battle Cards to Your Battle Plan
Like weapons, Battle cards also insert into your battle plan and can help your characters defeat their enemies. The difference is that Battle cards come from your hand as a surprise!
- When a battle is declared, look in your hand to see if you have any Battle cards you want to use in fights in that battle. Before you put your hand down on the table, take out those Battle cards and place them (face down) on the table next to your characters and weapons. Don't show your opponent the Battle cards you are using – they're a secret! – but you do have to say how many Battle cards you are adding to your battle plan. (The attacker does this first, then the defender.)
- When you make your battle plan, put each Battle card to the left of the character you want to use it, just like you do with weapons.
- You can use only one Battle card in each fight. If you are using a Battle card and a Weapon card in the same fight, put the Battle card to the left of the Weapon card.
- Each Battle card is discarded after you use it.
A Last Word About Battle
Battle is an optional part of your turn; you don't have to declare a battle if you don't want to. (But if your opponent declares a battle during his turn, you must defend yourself.)
3. Even Up
This is the last step of your turn. After you deploy (or decide not to) and then battle (or decide not to), you always have to bring your hand back to six cards. This means that if you hold less than six, you must draw cards from your draw deck until you have six in your hand. If you hold more than six, you must discard cards from your hand until you get down to six.
Before you draw cards to Even Up, you may discard any Location cards from your hand if you want to.
Recycling Your Entire Hand
Before you draw cards to Even Up, you may discard your entire hand if you want to. You then Even Up by drawing six new cards. This can be helpful when you've got cards in your hand that you can't use right now.
Controlling the Planet
At the end of either player's turn, if you have one or more characters face up on the current planet and your opponent has no characters there, you win control of the planet! (You can't win control of a planet while your opponent has hidden cards there.)
You can only take control of a planet at the end of either player's turn. So if you declare a battle and knock all of your opponent's characters off a planet during battle, remember to finish your turn before you claim control of the planet.
In the starter game, controlling the first planet means you win the game! In the full game, to win you have to control two planets. So, now that you've got the basics, let's learn how the full game works.
The Full Game
Once you've started to expand your Young Jedi card collection, you'll want to build full, 60-card decks so you can play on all three planets – Tatooine, Coruscant and Naboo. (You and your opponent will each need your own 60-card deck, from opposite sides of the Force.)
The easiest way to make your first 60-card decks is use two Starter Sets combined together. You can use two copies of the same Starter Sets, or two Starter Sets from different expansions – they are all designed to mix and match. This means that any two Starter Set packages together can make a 60-card Light Site deck and a 60-card Dark Side deck that are legal and balanced.
Starting the Game
In the full game, the Dark Side player does not always go first. Instead, both players shuffle their decks, then each player draws destiny. The player who draws the higher number gets to go first. (If the two destiny numbers are the same, each player draws destiny again.)
If you are the player who goes first, you also get to choose which planet and which location to start with. Take any Location card from your deck and put it on the table as the starting location. Both players then shuffle their decks again (including the destiny cards that decided who goes first) and draw six cards to make their hands.
On to the Second Planet!
Gaining control of the first planet is a major victory, but the game is not over yet! In the full game, you need to control two planets for a Planet Victory. (Of course, you still win with a Deck Victory if your opponent's draw deck runs out of cards or a Podrace Victory if you win the Boonta Eve Podrace.)
When a player has been controlled at the end of either player's turn, it is time to move on to the next planet. Move the controlled planet over to the side of the table, and move the characters and weapons that are still on that planet with it. That planets is no longer the focus of the game (you cannot deploy characters, weapons, effects or locations there, or battle there any more). The characters and weapons remaining there are temporarily "stranded" (until a starship evacuates them; we'll talk about this later).
If you are the player who just lost the planet, you get to choose the next planet location. (You must choose a planet that has not yet been in play. For example, if Naboo was just controlled, look for the Coruscant or Tatooine location of your choice.) You can look for the Location card in your discard pile, your draw deck and/or your hand (usually it's best to take it from your discard pile if you can). If you look through your draw deck, you must shuffle it afterwards.
When you've picked the location you want, put it face up in the middle of the table. Now, you take the first turn at this location. It doesn't matter who took the turn before that – whenever you lose a planet, you always choose the next planet and take the next turn.
The Hidden Cards rule applies at each new planet. (If you deploy any characters, weapons or effects on your first turn there, you must deploy them face down as hidden cards; remember to turn them face up at the start of your new turn. This also applies to your opponent's first turn on that planet.)
On to the Third Planet!
If you control the first two planets, you win the game! But if you and your opponent each control one planet, the game will go on to the third and final planet for the tie-breaker. This works just like before: the player who lost the second planet chooses the starting location for the third one, and also takes the first turn there. And again, don't forget the Hidden Cards rule.
Surrender
If you think you are losing a planet and you don't want to suffer any more losses there, you can surrender that planet at the end of your turn (after you Even Up your hand). When this happens, your opponent wins control of the planet just as if he had defeated your last character there; the only difference is that any characters and weapons you have there will also be stranded on that planet when it gets moved to the side of the table.
Starships and Evacuation
Because your characters and weapons stranded on a planet can't battle there, you will probably want to remove them from that planet. Transport starships can pick up all your Character and Weapon cards at a planet and evacuate them from there (back to your draw deck).1
Hyperspace
During your Deploy step, starships may be placed in the "Hyperspace" pile. Each player has his own Hyperspace pile, which is simply a holding area for your starships. Hyperspace is not related to any planet. Either player may look through any Hyperspace pile at any time. Starships are never deployed face down. You may start your Hyperspace pile on your first turn. Since starships have no counters, placing starships doesn't go against your limit of six.
Starship battles happen only when a player decides to attempt an evacuation. You can try to evacuate your cards only during the Deploy step of your turn. When you decide to begin an evacuation, you must use all starships from your Hyperspace pile. You must have at least one transport to attempt an evacuation. However, additional starships (including other transports) may fight in the upcoming space battle.
You may attempt an evacuation only at a planet where you have at least one Weapon or Character card. All of your cards there must be evacuated at the same time (there are no "partial evacuations").
Your opponent may then add starships from his hand to his Hyperspace pile, and then must use all of them if he chooses to intercept (including his transports). If you opponent chooses to intercept, a space battle begins at the location of the evacuation.
Starship Battle Plans
Both players pick up their starships and make a battle plan. Battle cards may be inserted from your hand into the battle plan as usual. Some of the Battle cards in Duel of the Fates give a power bonus to your starfighters or transports, or allow them to "fight together." The intercepting player is the attacker, and must declare how many Battle cards he is using first, then the evacuating player (who is the defender).
The starship battle proceeds much like a character battle, with starfighters drawing destiny and adding to their power. Defeated starships are discarded, and the owner must take DAMAGE. However, there is no breakthrough in a starship battle.
All of the starships that survive the battle are placed back into their owner's Hyperspace piles. If one or more of the defender's transports in the battle survived, then the evacuation is successful: the characters and weapons from the evacuated planet are shuffled back into the owner's draw deck. In addition, the transporting player randomly selects one of his surviving transports. It is shuffled into the deck along with the characters and weapons that it transported. If none of the defender's transports survived, then those characters and weapons are discarded. (Conceptually, they were aboard one of the destroyed transports.)
You can evacuate your cards from any planet (even the current planet, if you really want to try to get cards back into your draw deck). But you can't use a transport where you have no face-up cards to be evacuated.
Sidebar – Battle of Naboo evacuation rules: The Battle of Naboo rules were designed using a simpler, albeit less intuitive, mechanic. You can try to evacuate your cards only during the Deploy step of your turn. First, play a Transport starship from your hand to the planet you want to evacuate (starships have no counters, so this doesn't go against your limit of six). Next, take all your characters and weapons on that planet and stack them under the Transport (this represents the starship picking up your cards by landing on the planet, or by sending down a shuttle).
Now, your opponent gets a chance to intercept your Transport. If he has a Starfighter card in his hand, he can play it to the table. This starts a starship battle!
In a starship battle, you compare the Power numbers of your Transport and his Starfighter. Your opponent gets to draw destiny to add to his Starfighter's Power, because his Starfighter has a small chance cube beneath its Power number. Your Transport does not have this small chance cube, so you do not add a destiny draw to your Power. (The small chance cube is an easy way to tell the difference between Transports and Starfighters at a glance.)
Only Transports are large enough to perform evacuations, and only Starfighters are maneuverable enough to draw destiny.
- If his Starfighter has more total Power, your Transport is destroyed; discard your Transport and all the characters and weapons stacked underneath it. (You also have to discard cards from your draw deck equal to your Transport's Damage number, but characters' Damage numbers are ignored while they are being carried aboard a transport.)
- If your Transport has more Power, your opponent's Starfighter is destroyed; it is discarded (and your opponent must discard cards equal to its Damage number).
- If the Power totals are the same, both ships survive.
If your Transport survives the battle (or if your opponent didn't try to intercept it), your characters and weapons stacked underneath it have been successfully evacuated. Shuffle them back into your draw deck, where you can draw them again!
Finally, any starships that didn't get destroyed in the starship battle now "fly away" (discard them, but take no Damage).
More About Weapon and Battle Cards
Many of the Weapon cards use a combination of red Power bonus dots and chance cubes to add Power. Whenever you use one of those weapons, it's easiest to add the Power bonus from the dots first, then draw destiny. (There are also a few Battle cards that use small chance cubes to add Power.)
What if you make a mistake? A Battle card must be discarded if it doesn't come just before a character (or that character's weapon), doesn't work with that character, or doesn't work in the current situation. A Weapon card must be ignored (but not discarded) if it doesn't come just before a character or doesn't work with that character.
Sometimes you might want to put one or more Battle cards in your battle plan even if you know they won't work. This is one way to get rid of Battle cards you don't need right now, so that at the end of the turn you can draw another card.
"Fight Together"
Some Battle cards say they let two or three characters "fight together." When you add one of those Battle cards to your battle plan, put it to the left of the group of characters it works with. (You may have one Weapon card after the Battle card, if the weapon works with the first character in the group.)
During the fighting, when you turn up that Battle card, instead of turning up cards until you get one character, you turn up cards until you get the group of characters. The characters in that group fight like they were one big character:
- Add all of their Power numbers together (including any location bonuses); then add the Power bonuses from the Battle card and the Weapon card (if any).
- If you have more total Power than your opponent, you opponent's character is defeated.
- If you have less total Power, all of your characters that were fighting together are defeated – and you suffer Damage to you draw deck for each of them (unless the Battle card says that only of them is defeated).
What if you make a mistake? For example, suppose you didn't use the right kinds of characters or the right number of characters needed by the Battle card. Or maybe you included more than one weapon or more than one Battle card before the characters. If a mistake like this happens, just discard the first Battle card and put the cards that came after it back on top of your battle plan (in the original order). Then continue with your battle plan normally.
Lightsaber Dueling
Your powerful Jedi and Sith characters can fight in epic duels just like the lightsaber battles you saw in Star Wars Episode I: The Phantom Menace!
You may initiate only one duel during each of your turns. The duel takes place on the current planet during your Battle step, before that turn's battle there, if any. (It does not replace the battle.) You may initiate a duel at the current location if a player has at least one dueling character there.2
A duel is considered to be a fight so you can use game text like, "Adds power bonus if Qui-Gon has fought this turn," or "Adds power bonus when fighting any Jedi."
What is a dueling character?
A dueling character is defined as a character who is able to fight with a lightsaber. This includes Obi-Wan Kenobi, Qui-Gon Jinn and all other Jedi characters for the Light Side (but not Anakin…he is not a Jedi yet). Their Dark Side dueling opponents include Darth Maul, Darth Sidious and Aurra Sing.
Who fights in the duel?
When you initiate a duel, choose one of your dueling characters and a lightsaber Weapon card there usable by that character. Then you choose one of your opponent's characters at the current location to defend. That character does not have to be a dueling character. If your opponent has a dueling character at the same location, then your opponent may choose that character to defend instead.3 The defender may choose one Weapon card usable by the defending character (it doesn't have to be a lightsaber).
Only one Character card is chosen from each side, even if there is more than one card in play for that character's stack.
Draw your dueling hand!
Put your hand down on the table, away from your draw deck. Total up the power of your character, using all available power bonus dots (including bonuses for location and weapon). However, don't draw destiny to add power to the weapon like you would in a battle.
First Exception: When Anakin Skywalker has to fight in a duel, draw destiny for his power first. Add in all his bonus dots, if applicable. Take the card drawn for destiny into hand before placing your hand down on the table and drawing your dueling hand.4
Second Exception: When a character printed with 0 DAMAGE has to fight in a duel, that character is simply discarded. (Sorry, Artoo.) Dueling hands are not drawn. That duel is over immediately.5
Then draw a number of cards equal to that total power number to make your dueling hand. Your opponent does the same. If you can't draw enough cards to make your dueling hand from your draw deck, you'll just have to make do with as many as you have.
The cards you use when dueling are still considered to be part of draw deck. (If you draw the last card from your draw deck to make your dueling hand, you don't lose the game due to a deck victory.)
How is the duel fought?
Players take turns making attacks and blocks. If you initiated the duel, you attack first. Play a card from your dueling hand face up on the table. Its destiny number represents your attack. Make a separate dueling pile of the cards you play from your dueling hand.
You opponent can block that attack by playing any card from his dueling hand (to his dueling pile) that has the same Destiny number as your attack card. If you opponent plays a block, then that card becomes his attack card. You now have to block that attack with a card from your dueling hand.
If he doesn't have a card to block with (or simply chooses not to block), then your attack scores a hit. Place a hit token on his character. You can mark a hit with a coin, bead, die or any other kind of token. After he marks the hit, then he gets to play the next attack.
Players alternate making attacks and blocks until one of the characters is defeated or both players run out of cards in their dueling hands.
How does special dueling game text work?
Some of the Battle cards in Duel of the Fates have special dueling game text. If you're building a deck with lots of dueling characters and their lightsabers, you'll want to include some of these special Battle cards.
If your dueling character is using the lightsaber, then when the card that scores a hit has special dueling game text, you do what the card says. The special text begins with the phrase, "When dueling…" It lets you add cards to your dueling hand, or do some extra hits, or have some other benefit.
Passing in a duel
During a duel, when it is your turn to play a non-blocking attack, you may declare a "pass". This passes the action back to your opponent, who may either pass or play an attack. Once a player has passed, they may only block for the remainder of the duel (they must continue to pass), and they may not initiate a battle for the remainder of the turn. If both players pass, the duel ends with neither player being defeated. If there is a tie, neither player takes damage. Otherwise, apply the damage rule as found below.
Note: Blocks that a passing character plays will still deal damage as normal if they hit their opponent.
How does a character get defeated in a duel?
If the number of hits a Character card has taken equals or exceeds the printed DAMAGE number on that character's card, then that character is defeated. Discard the Character card and the Weapon card the character was using (if any). Also, the Character card's owner must take damage. But don't take that damage just yet!
Each player takes his own dueling hand cards (including the ones played to his dueling pile) and reshuffles them all back into his draw deck. Now, the loser of the duel (if any) must take damage equal to their printed damage (after modifiers have been applied) minus the number of hits they scored on their opponent in the duel. If there is game text that reduces or adds to that character's damage (on an Effect card or Character card, for example), apply that game text now. Remove remaining hit tokens on the winning character (if any).
What happens if neither character is defeated?
If the duel ended because both players ran out of cards in their dueling hands, then the player with the most hit tokens on his dueling character must now take damage to his draw deck equal to the number of those hit tokens minus the hits they scored. If there's a tie, then neither player takes damage. Then remove all remaining hit tokens.
When the duel is over, the Battle step continues. Any cards (characters or weapons) that participated in a duel may also participate in a battle this turn.
Dueling Text
Any character that successfully hits their opponent with a card that contains dueling text during a duel may utilize that dueling text, even without a lightsaber.
Example: Mace Windu: Jedi Councilor duels Aurra Sing: Trophy Collector. Since the light side already controls Coruscant, Mace draws 10 cards for his dueling hand. Aurra is weaponless so she draws 7 cards. Mace leads off with a destiny 2 card, A Powerful Opponent. Aurra has no destiny 2 cards in her hand so she takes 2 hits and declares Pass. Since she passed, she does not attack, and Mace plays an attack. This time he plays a destiny 4 card. Aurra has a 4, and blocks that attack with the card, To The Death. Mace has no more destiny 4 cards and takes a hit, Aurra discards To The Death to do 2 extra hits to Mace. Mace strikes with a destiny 2 card, which Aurra cannot block, delivering the final blow. Aurra is defeated and normally would deal 3 damage, but since she scored 3 hits on Mace, she reduces her damage by 3. Result: Aurra is defeated, but because she fought so valiantly, she takes no damage.
Another Example: Aurra Sing, Bounty Hunter using her stolen lightsaber, duels a Bravo Pilot from Duel of the Fates with no weapon. They are on Naboo, the Pilot is on site, and the Bravo Squadron Effect is in play. Aurra draws 7 cards, the Pilot draws 6. Aurra leads with a 4, the pilot blocks, Aurra responds, the Pilot is out of 4's and is hit. He passes, so it is Aurra's turn again . She leads with a 3, the pilot blocks. Aurra blocks with another 3, and the Pilot is ready with a 3, so Aurra is hit. Angry now, Aurra lashes out with a 5, the Pilot blocks, Aurra blocks, the Pilot blocks, Aurra blocks with her last card, the Pilot blocks with his last card, scoring a hit on Aurra. The Duel ends in a draw. Aurra has 2 hits on her, the Pilot one hit. Aurra takes one damage, her two hits minus the one hit she scored on the Bravo Pilot. Since she did not pass, Aurra can now get her revenge by initiating a battle.
Effect Cards
Effect cards have game text like a Battle card and they also have counters like a Character or Weapon card. These cards have a yellow deck-building dot, just the same as Battle cards.
When either player puts the first location into play on a new planet, each of you may get one Effect from your respective draw decks, show it to your opponent, place it in your hand, and reshuffle your draw deck. The player who put the new location into play gets his Effect and shows it to his opponent first. This rule applies both at the start of the game (right after both players draw their starting hands) and when either player takes control of a planet. You may look through your starting hand before you decide to get an Effect. If you get an Effect from your draw deck, you'll start the game with seven cards in your hand instead of six.
You may deploy an Effect card at any time during your Deploy step (even as part of your hidden cards). Just like a Character or Weapon card, the counters on your Effect card use up some of your six counters for that turn.
Some Effect cards (such as Sando Aqua Monster) increase the number of counters you may put into play each turn. You can start to use that benefit right away. (But if you placed it face down because of the Hidden Cards rule, you have to wait until it is turned face up before using it.)
An Effect card is deployed only on the current planet. Place your Effect card near the location card in play on your side of the table. Each player may have only one Effect card deployed at a time.
Effect cards are discarded when the current planet is controlled or surrendered.
Some Effect cards give a bonus to the Power of your characters fighting in battle. If your characters fight together because of a Battle card, each of those characters will receive the bonus.
Objective Cards
You may have only one Objective in your card deck, and it counts against the 60-card limit. Objective cards are Wild Cards with three white dots in the yellow, purple and orange positions; you decide whether you'll be leaving out a Battle card, a Weapon card, or a Location/Starship card when you build your deck. Your Objective card has no deploy counters, and no destiny number (since it never goes into your draw deck and can't be drawn for destiny).
Play your Objective card when the game begins (before you draw destiny to see who goes first), and it stays in play for the entire game. Your Objective is not an Effect card, so it doesn't count against your one Effect per planet. If both players start the game with same Objective card in play, just place them side by side (they're not stackable or unique).
Boonta Eve Classic
You may deploy one Podracer pilot and one Podracer Weapon card to your Boonta Eve Classic Objective card, using your deploy counters to pay for them as usual. These cards are in play so (for example) if Anakin is at your Objective card, you can't play him to a Location at the same time. You may only have one copy of the character and the weapon card on the Objective for the entire game. Cards at your Objective are always face up (never hidden). During your Deploy Step, when you deploy a Podracer pilot here, you may deploy a matching Podracer Weapon card from your draw deck (and vice versa).
A matching Podracer Weapon card has the character's name in its card title. For example, Sebulba's Podracer is the matching Podracer Weapon card for any version of the Sebulba stackable character. Note that all versions of the two stackable characters Anakin Skywalker and Sebulba are Podracer pilots, whether this characteristic is in the card's subtitle or not.
Lap Cards
When you have a Podracer pilot and his matching Podracer Weapon card at the Objective during your Deploy Step, you may play lap cards to your Podracing pile. You must start your Podracing pile with a card with a destiny number of 1, then play a card with destiny 2, and so on up to 6. You may not play Location cards as lap cards. You do not have to use any of your counters to play lap cards to the Podracing pile.
Lap cards are not in play (so you don't have to worry about stackable cards played as lap cards). Refer only to their destiny numbers. However, these cards remain a part of your draw deck, so you may lose them for damage or draw them to Even Up, but only if your draw deck is already exhausted. Use them in the reverse order of playing them (so a 5 is used before a 4, and so on).
When you play one complete sequence from 1 to 6, you finish one lap. Place a lap token on your Objective card, and then shuffle those six cards back into your draw deck. If you finish a lap and still have some Thrust available, you can use the remaining Thrust to start the next lap. When you finish three laps (place the third lap token) your opponent must immediately place the remaining cards in his draw deck into his discard pile, and you win the game!
Podracing Characteristics
Each of your Podracer pilots has three characteristics, as listed below.
- Thrust - The maximum number of lap cards that pilot may play to his Podracing pile each Deploy Step, equal to the number of Thrust tokens on that pilot. All Podracer pilots begin with a Thrust of 0. Before you Thrust in each of your Deploy Steps (including the turn you deploy the pilots), place a Thrust token on your Podracer pilot, You may only Thrust once per each of your Deploy Steps.
- Handling - Each Podracer pilot has a Handling number, which means that you may play any card with that destiny number as a handling card, to represent any number needed in a lap sequence. You may play no more than two cards as handling cards in a completed lap. The Handling number for each Podracer pilot is the last digit in the collector number on his card.
- Refuel - Each Podracer pilot has a Refuel number, and you may draw up to that number of cards in your Deploy Step. Your pilot's Refuel number is equal to on half his current Thrust, rounded up. You must Thrust first in the same Deploy Step before you can Refuel. Once you have Refueled, you may not Thrust again in the same Deploy step.
Poor Ben Quadrinaros gets a 0 for handling, which he can't use. ("Ooh, there goes Quadrinaros' power coupling") Ratts Tyerell gets a 6, which he can't use either, but that's what he gets for recklessly boosting through the Boonta tunnels.
You must perform all of your Podracing actions (thrust, lap cards, refuel, etc.) before performing any other actions in your Deploy Step.
Game Concepts
Character Cards with Game Text
A few special character cards have game text instead of lore. This feature gives each of these character cards an exciting new ability.
Some of the these cards use "subtitles" to refer to specific examples of characters. For example, game text that says, "…if Mace Windu, Jedi Master is present" refers only to the Menace of Darth Maul version of Mace Windu, not versions from other expansions.
Deploying cards from your draw deck
Some cards have game text like this: "When he deploys, you may deploy one blaster rifle here from your draw deck." Here's how that works:
- You may deploy only one copy of the named card each time a card with that game text deploys.
- If you deploy a card from your draw deck, you must still use up some of your counters to pay for it, unless the game text tells you otherwise. (Sometimes the game text will say you can deploy the card "for free" or at a reduced number of counters.)
- When you're done searching through your draw deck for the specified card, you must reshuffle that deck.
- Also, if you didn't deploy that card from your draw deck (because you didn't find one or you couldn't because the cost is greater than the counters you have remaining or you changed your mind), then you must take 1 DAMAGE as a penalty after you reshuffle. (You don't have to show your opponent the cards in your draw deck to verify this.)
Remember, you can't use the game text of a hidden card until that card is turned face up. So if you deploy that has this kind of game text as a hidden card, you can't use that game text.
"Present"
If a card says present, at this location, here, or anything to that effect, it needs to be able to see the card in question. This means that the card has to be face-up at the time.
"Once Per"
If a card has text that is "Once per turn/phase/etc." it can be performed once for each card you have that contains that text. If a card has text that is "Once per game" it can only be performed once per game, no matter how many copies you play.
Face up
Some cards have text that grants a bonus to other characters, etc. To use these bonuses or text, they must be face up. This means that they have to have already fought in order to use the text.
For example, if you have a Galactic Delegate, and you'd like to have him add his power bonus to your senators, he has to be face-up to do so (so he'll probably have to go early in the battle plan).
"Other"
If a card refers to an "other" card, it cannot modify any version of it's own persona.
Jedi Masters & Bounty Hunters
All Jedi are Jedi Masters EXCEPT Ki-Adi Mundi and Obi-Wan Kenobi. All versions of Aurra Sing are considered bounty hunters.
Diamond Cards
Some cards represent people and things in the Star Wars universe that there are lots of: battle droids, blasters, Gungans and so on. You can tell these cards by the diamond symbol in the card title.
You may have as many copies of these cards in play as you want, even at different planets; each copy of the card represents a different individual character or weapon. For example, you might have four copies of the Battle Droid: Office, Defense Division card in play, and each of them represents a different battle droid in the Star Wars universe.
Stackable Cards
Cards without the diamond symbol represent people and things that there is only one of in the universe, such as Darth Maul, Jar Jar Binks and Mace Windu's Lightsaber. Naturally, each of these characters and weapons can only be in one place at a time. For example, if Obi-Wan is stranded on the first planet, you can't deploy another Obi-Wan Kenobi card to a different planet. (This is why Transport ships are so important – they can get Obi-Wan off of that planet!)
Even though these characters and weapons are limited to one planet at a time, there is way that you can use extra copies of these cards in play. See how the little icon in the top left corner of your Obi-Wan Kenobi card looks like a stack of icons? This tells you that Obi-Wan is stackable, which means you can build a pile of Obi-Wan Kenobi cards on one planet to make Obi-Wan stronger in battle!
When you have an Obi-Wan Kenobi card in play at the current planet and a second Obi-Wan Kenobi card in your card, you can deploy the second card to your "Obi-Wan stack." (Each card costs its normal number of counters.)
This doesn't mean you have two Obi-Wans. Instead, it means that your Obi-Wan can now fight twice in each battle, because he will come up twice in your battle hand. For example, the first Obi-Wan card in your battle plan comes up and defeats an opposing character. Then, the second Obi-Wan card takes on the next challenger! This represents how a character in the movie takes on several opponents during the same battle – he swings his lightsaber at the first character, then immediately moves to strike another character with his fist, all in a blur. Stackable characters let you do the same thing in the game!
When you make a battle plan, you can put your Character cards in any order you like. In other words, Obi-Wan does not have to make all of his strikes in a row – he can strike, then let some other characters fight, then strike again! If Obi-Wan loses one of his fights, discard that Character card as usual (and take Damage to your draw deck), then continue with the battle normally. (Don't discard other Obi-Wan Kenobi cards in your battle plan unless Obi-Wan also loses those fights.) Because Obi-Wan lost one or more of his fights in this battle, he won't be able to strike as many times in the next battle.
When the last card in your Obi-Wan stack is defeated, Obi-Wan has been driven from the planet. But you can deploy more Obi-Wan cards later if you want to.
Many of the stackable characters in the game have more than one Character card across the different Young Jedi expansion sets. Each version of the character has a different location bonus, giving each card its own special strength, depending on where you are battling.
These different versions allow you to fine-tune your decks so you have the bonuses you want for the locations where you plan to battle. (You can stack them in any combination you like.)
Are you wondering if Padmé and the Queen go in the same character stack? No, they don't. Because the Queen is often represented by one of the other handmaidens, they are treated as two different characters stacks.
Some battle cards let two Character cards from the same stack "add together." This works just like the "fight together" cards, but instead of two different characters fighting together, this represents the same character making two strikes in a single fight (like Darth Maul attacking Obi-Wan both with a Sith Lightsaber and with a flying kick to the chest).
Deck Construction
Starter decks have already been built for you, so you can start playing the game right out of the box. However, Young Jedi is even more fun when you build your won decks from the many cards available to collect, play and trade.
You can build lots of different kinds of decks, and you can include your favorite characters and things from the movie. Each new deck you build might be all about Obi-Wan, Qui-Gon and lightsabers; or Jar Jar and other Gungans; or battle droids, Neimoidians and blasters; or Trade Federation tanks; or the Queen and her handmaidens; or Darth Maul and Darth Sidious; or whatever else you can imagine!
Making your own 60-card deck is fun and easy. First, expand your collection with Starter Sets, Booster Packs or Collector's Boxes. (You will probably want to collect all the cards in the Young Jedi Collectible Card Game. This is a lot easier if you trade with your friends for the cards you don't have yet.)
Then, choose 60 cards from your collection that you want in your deck. There are two rules to follow that will make sure your deck has everything you need:
- The 6-by-10 rule; and
- The three-planet rule.
The 6-By-10 Rule
Notice how every card has a colored deck-building dot in the lower right corner of the card. There are six different colors: red, orange, blue, yellow, green and purple. When you build your deck, you must have exactly ten cards for each deck-building dot color. Ten red-dot cards, ten orange-dot cards and so on. So basically, you just pick your ten favorite cards for each dot color. Simple!
You may not have more than 5 cards with any one card title in any one deck construction dot, including Wild Cards. Subtitles are ignored for deck construction.
Wild Cards
A wild card has two or more white deck-building dots. The position of each white dot indicates a dot color that wild cards can be used for. A wild card with six white dots can go into ANY dot color! However, you can only put ONE wild card in each dot color. Thus, you can have up to six wild cards in your deck if you like. (They don't all have to be copies of the same card.)
If you go with the maximum of six wild cards, then each of your six dot colors will have nine cards of the appropriate color plus one wild card as the tenth card in that color. It's easy to check a deck for proper construction. Just make piles by dot color and then fill in with one wild card per pile to make ten each.
Semi-Wild Cards
These are Wild Cards that also have a regular deck building dot. If they are placed in a deck slot that uses the Wild Card color, they fill the Wild Card slot for that color. If they are placed in a slot that has a non-Wild Card dot, they are used normally.
Example: In your red-dot deck construction color, you may have up to 5 Qui-Gon Jinn cards. If you decide to place a "Qui-Gon Jinn: Jedi Protector" (Wild Card) in your red-dot deck construction color, you may only have 4 red-dot Qui-Gon Jinn cards in that color.
Another Example: You are building a Trade Federation Tank deck. Looking at your red-dot construction color, you decide to use 5 (the maximum) "Trade Federation Tank: Armored Division" cards. In your blue-dot construction color, you decide to use 4 "Trade Federation Tank: Assault Division" cards, and one "Trade Federation Tank: Assault Leader" (Wild Card). You may also include your normal Wild Card tanks in the other deck construction colors as per the Wild Card rules, as long as the total number of cards in each color with the same card title does not exceed 5.
Every starter deck has five cards for each dot color. This is why any two 30-card starter decks (from the same side of the Force) can be put together to make a legal 60-card deck!
The Three-Planet Rule
When choosing your ten purple-dot cards, you must have at least one Location card for each of the three planets – Tatooine, Coruscant and Naboo.
What if you make a mistake?
Each player must have a legal deck to play the game. If you discover during play that a player's deck is not legal, then that player loses that game. But it's easy to fix that deck and play again right away!
Armed & Dangerous Cards
Armed & Dangerous cards are a combination of a character and a weapon on a single character card. The weapon may not be targeted as an individual card. This means that the Multi Troop Transport on the P-59, Destroyer Droid Commander & Multi Troop Transport card cannot be targeted by Pounded Unto Death. Jedi Force Push still works on the Multi Troop Transport because it targets a weapon, not a weapon CARD. Armed & Dangerous cards cannot have their attached weapon's cost reduced by ANY means. You must always pay the full cost for the weapon portion of their card.
Double Impact Cards
Double Impact cards are two miniature Battle and/or Effect cards placed side-by-side on a single card. For all intent and purposes, a Double Impact card is treated as a single card when building a deck. It only takes one position in your card deck but counts as two cards when playing. When you play a Double Impact card, choose which of the two depicted cards you wish to use and follow the directions written on it then discard it.
Combo Battle Cards
Combo Battle Cards play just like a normal Battle card except they combine the effects of two different Battle Cards.
Virtual Cards
Virtual cards represent changes to a previously-printed card approved by the Star Wars Customizable Card Game Player's Committee. They are hand-printed and cut then placed in a card sleeve with the original card. The virtual card must match the specified card number, and cannot be used with any Armed & Dangerous, Double Impact, or Combo Battle cards, unless otherwise specified. Virtual Cards can not be used in sealed decks.
Since Virtual Cards share their card names with the original versions of the cards, they will still count against the deck building color limit.
Virtual Cards are numbered according to the original card that they are to be used with. For example, JC-42 is Jedi Council card number 42.
Here are the abbreviations for each expansion:
- DM (Menace of Darth Maul)
- JC (Jedi Council)
- BN (Battle of Naboo)
- DF (Duel of the Fates)
- RF (Reflections)
- BP (Boonta Eve Podrace)
Collector's Information
Each card is designed to help you keep track of your collection. Each expansion set has its own expansion set icon:
- Menace of Darth Maul (1999) – Darth Maul icon
- The Jedi Council (2000) – Mace Windu icon
- Battle of Naboo (2000) – Queen Amidala icon
- Duel of the Fates (2001) – Obi-Wan Kenobi icon
- Boonta Eve Podrace (2001) – Sebulba icon
- Reflections (2001) – Ann & Tann Gella icon
- Promotionals (2000 – 2001) – R2-D2 icon
Each card, except Double Impact cards, has its own card number. Diffraction Foil cards have a number beginning with "F," premium cards begin with "P," Armed & Dangerous cards begin with an "A", and Combo Battle Cards begin with "C."
Each card's rarity is indicated by a symbol:
- Six-point star – Ultra-Rare
- Five-point star – Rare
- Four-point – Uncommon
- Three-point star – Common
The 30 cards that are exclusive to Starter Sets have no rarity icon.
Footnotes
-
The Original Starship Rules changed in the Duel of the Fates expansion to allow for more interaction in space. The Battle of Naboo rules were designed using a simpler, albeit less intuitive, mechanic (see the sidebar below). ↩
-
The Original Dueling Rules, from the Duel of the Fates expansion, required both characters to have a dueling character. Rules changed on May 10, 2001. ↩
-
Printed rules stated: "Then you choose one of your opponent's dueling characters at the same location to defend." Originally, no option was given to choose a non-dueling character. Added to rules on May 10, 2001. ↩
-
Added to rules on May 10, 2001. ↩
-
Added to rules on May 10, 2001. ↩