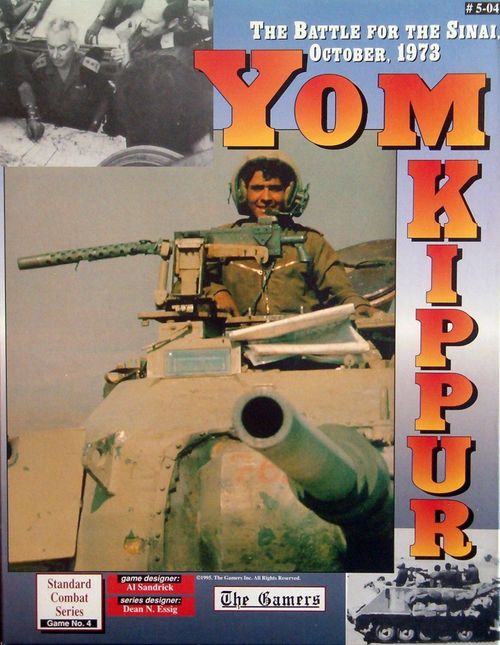
Yom Kippur: The Battle for the Sinai, October, 1973
Yom Kippur: The Battle for the Sinai, October, 1973 Rulebook
Table of Contents
Table of Contents
- Introduction
- 1.0 General Special Rules
- 1.1 Scale
- 1.2 Turn Sequence
- Special Unit Explanations
- 1.3 Stacking
- 1.4 Units
- 1.5 Engineers & HQ Units and Combat
- 1.6 Supply
- 1.7 Out of Supply Effects
- 1.8 Artillery and Barrage Attacks
- 1.9 Disorganized Units (DG)
- 1.10 SAMs
- 1.11 Airmobile Movement
- 1.12 Air Units
- 1.13 The Suez Canal
- 1.14 Bridges
- 1.15 Cease-fire, Victory, and Ending the Game
- 2.0 Israeli Special Rules
- 3.0 Egyptian Special Rules
- 4.0 Scenarios
- 4.1 The Historical Battle for the Suez
- 4.1a (Variant) Historical Egyptian Placement
- 4.1b (Variant) Exploitation Forces On-Line
- 4.2 Pearl Harbor Revisited
- 4.3 End of the Third Temple
- 4.4 Shovach Yomin (Pigeon Loft)
- 4.5 The Israeli Counterattack — The Debacle of October 8th
- 4.6 The Israeli Counterattack — The Crossing into Africa and the War's End
- Developer's and Player's Notes
- Charts and Tables
- Errata
Introduction
Yom Kippur is the 4th game in the Standard Combat Series and portrays the Sinai front during the 1973 Arab-Israeli War.
Map Note: In the cases of both Sand Dune and Rough terrain types, if any of the symbol is in the hex in question, that hex is of that terrain type.
Scenario Note: In all cases, these special rules apply fully to all scenarios.
1.0 General Special Rules
1.1 Scale
Each turn is two days (except for turn 1, which is only one day), each hex is 2 miles, and unit's range in size from company through brigade.
1.2 Turn Sequence
Pre-Turn
- Egyptian Pre-Game Barrage Phase (1st Turn Only)
- Air Unit Reset (Both sides)
- Air Unit SAM Suppression Allocation (Israeli Player Only)
Egyptian Turn
- Exploitation Reserve Release Check Phase (3.4: Turn 2 and after, success on roll of 9 or more.)
- Movement Phase
- Barrage Phase
- Combat Phase
- Supply Phase
- Bridging Phase
- Exploitation Phase
- Tank Step Replacement Phase (3.7)
- Clean Up Phase (Remove DG markers from Egyptian units)
Israeli Turn
- Movement Phase
- Barrage Phase
- Combat Phase
- Supply Phase
- Bridging Phase
- Exploitation Phase
- Tank Recovery Phase (2.3: Turn 2 and after.)
- Clean Up Phase (Remove DG markers from Israeli units, remove all Air Units from the SAM Suppression Box)
Game Turn End
- Cease-fire Check Phase
- Game Turn Marker Advance
Special Unit Explanations
- Israeli HQ — carries an HQ name (e.g. Sharon), unit size, nationality flag, and a bracketed Supply Range number followed by a combat/movement value string.
- Supply Range — the bracketed number on an HQ counter (e.g. [14]) is its supply range.
- Egyptian HQ — unit size and nationality flag.
- Artillery Unit — carries a bracketed Barrage Strength (e.g. (6)) followed by its combat/movement value string.
- Barrage Strength — the bracketed number on an artillery counter.
- Typical Israeli Pure Armor Unit — shows unit designation (e.g. Task Force A, Nir's Brigade) and full combat/movement values (e.g. 6-4-12).
- Typical Egyptian Pure Armor Unit — shows unit designation (e.g. 3rd Brigade, 4th Division) and full combat/movement values (e.g. 8-4-9).
Unit symbols used on the counters: Regular Infantry, Static Unit, Airmobile Infantry, Airborne Infantry, Commando, Mechanized Infantry, Regular Artillery, Rocket Artillery, Armored Artillery, Amphibious Armor, Jeep Recon, Armored Recon, Bar Lev Fort, Engineer, Bridge, SAM, Israeli Air Unit, Egyptian Air Unit.
Markers: Bridge Captured by the Israelis, Bridge Captured by the Egyptians, Disorganized (DG), Out of Supply, Step Loss.
1.3 Stacking
Up to six steps can stack in a hex. An engineer unit deployed as a bridge does not count for stacking.
1.4 Units
1.4a Infantry Units and Mech Units. The following are "Infantry" units:
- Infantry (pure infantry, not Mech Inf, etc.)
- Commando
- Airborne
- Airmobile
- Static Units
- SAMs
Consider all other units to be Mechanized.
Swamps. Only Infantry units (as per the above) can enter Swamp hexes that do not contain a road. Mech units (of any type) can only enter Swamp hexes along roads. Destroy them if forced to retreat into or through non-Road Swamp hexes. Remember, units cannot attack hexes into which they cannot move.
1.4b Exploit Capable Units. Units with a yellow bar across the bottom are Exploitation capable.
1.4c Step Losses. Most units have one or two steps. The first loss is represented by flipping the unit, or removing a one step unit. The second loss destroys a two step unit. The three step Egyptian infantry units show losses in the following way — flip the unit on the first loss; place a step loss marker under the unit for the second loss; destroy the unit on the third loss. A flipped Egyptian 3-step unit with a step loss marker is a one step unit for stacking.
1.5 Engineers & HQ Units and Combat
If an HQ or Engineer Unit is stacked with units making an attack or defense, shift one column on the Combat Table in that side's favor. The HQ or Engineer qualifies as participating in the combat and can advance after combat. Both sides can use this ability (and have them cancel each other out). You can apply these shifts in overruns and by HQs and Engineers on a different side of the Canal than the combat they are assisting.
A side can get no more than one column shift it its favor when using this rule — regardless of the number of HQs and Engineers (or the combination of the two) involved.
1.6 Supply
1.6a HQs are "supplied" if you can trace as per SCS rule 12.1 from the appropriate map edge to the unit; east for the Israelis and west for the Egyptians. This path can be of any length. Only supplied HQs can supply units.
1.6b Units are in supply if they are at or within a friendly HQ's range (counting from the HQ to the unit). An HQ successfully traces to a unit if the MP count can make it into a hex adjacent to the unit — the trace need not make it all the way into the unit's hex. A trace made into a hex adjacent to friendly units is successful regardless of terrain — but is blocked if the hex contains a non-negated EZOC. HQs can supply any friendly unit.
1.6c Egyptian units west of the Suez Canal are automatically supplied if they can trace a path of any length from the west map edge to the unit as per SCS rule 12.1. Furthermore, the "adjacent is good enough" rule in 1.6b applies here as well — Egyptian units are normally in supply adjacent to the Suez Canal on the eastern bank. This is the only case where a unit can trace directly from a map edge to be supplied.
1.6d Bar Lev Fort units are always supplied. Bar Lev forts do not require any supply trace.
1.6e No unit, except Israeli Bar Lev Forts, and Egyptians as per 1.6c, can be supplied without the use of a supplied friendly HQ.
1.7 Out of Supply Effects
Attack, Defense, Movement, and Barrage strengths are x1/2. No airmobile movement is possible. SAM ranges are unaffected.
1.8 Artillery and Barrage Attacks
1.8a Artillery units have a Barrage Strength listed on their counter in parenthesis. Artillery units can conduct barrage attacks against hexes at or within their 4-hex range. The two rocket artillery units (the Israeli "Rckt" unit and the Egyptian "FROG" unit) have ranges of 10 hexes. Resolve barrage attacks in the player's Barrage Phase.
1.8b An artillery unit cannot conduct more than one barrage attack per phase and cannot split its fires. A hex can have only one Barrage Attack made against it in a single phase. Any number of artillery units and Air Units can engage in a single Barrage Attack.
1.8c Make barrage attacks against enemy hexes using the Barrage Table. The possible results of a barrage attack from the Barrage Table are: No Result, Disorganized (DG), and step loss. Step loss results also automatically DG the target stack. Apply only those shifts or modifications listed under the table. Only the target hex's terrain can affect Barrage Attacks. Terrain (even the Suez Canal) has no effect on the ability of a unit to qualify as "adjacent" for modification purposes.
1.8d Units cannot advance into hexes that no longer contain enemy units due to a Barrage result — even if the player intended to attack the hex in the Combat Phase.
1.8e When a hex has a step loss applied to it by a Barrage, the owning player can select any unit in the stack to take the required step losses. The selected unit need not be the strongest (as in combat) and the player is not required to distribute the losses (if more than one).
1.9 Disorganized Units (DG)
Units become DG only as a result of the Barrage Table. When the Barrage Table gives a DG result, mark all units in the target hex with a DG Marker. Non-DG units can move through or stack with DG units with no effect.
1.9a Effects of DG. Units which are DG suffer the following: their Attack strength (or Barrage Strength), Defense strength, and Movement Allowance are each x1/2. DG units cannot conduct overruns or airmobile movement. DG units no longer have any ZOC. A DG unit loses any Exploitation Capability it might have had. DG has no effect on supply ranges & other supply matters, SAM effectiveness, and engineer/HQ combat effects (other than their actual combat strength). There is no additional effect for multiple DG results — a unit DG in the pre-game Barrage Phase and later DG again during the regular Barrage Phase would suffer no additional effect.
1.9b Recovery of DGs. During his Clean Up Phase, the phasing player removes all DG markers from his units. Being Out of Supply does not affect the ability to recover from DG status.
1.10 SAMs
These are SA-2/SA-6, and Hawk missile units. All SAMs have a SAM Range of 12 hexes. Terrain has no effect on SAM Ranges. Airmobile movement cannot be used at or within an enemy SAM Range. Israeli Air Units can function at or within an Egyptian SAM Range, but only through the application of SAM Suppression (see 1.12c). Egyptian Air Units can never function at or within the Israeli Hawk unit's SAM Range. Multiple SAMs give no additional effect.
1.10a SAM units behave like any other unit. DG results have no effect on SAM ranges or effects.
1.10b Egyptian SAM units must remain on the west side of the Suez Canal — they cannot cross the canal to the Israeli side (exception: see 3.8). The Israeli Hawk unit can cross the canal as desired.
1.10c Players must identify the location of SAM units to the enemy on demand. When a SAM is in a stack of units, it can be the top counter (to make finding them easy), but the enemy can always look under the SAM unit (or top marker, to include constructed bridges) to see the first non-SAM, non-marker unit in every stack.
1.11 Airmobile Movement
Starting from a unit's current hex, airmobile movement allows the unit to move up to 25 hexes per phase. Ignore terrain for airmobile movement — every hex counts as 1. Ignore enemy units and EZOCs for airmobile movement, but never end such movement in an enemy unit's hex (taking off or landing in an EZOC is allowed). Note: No unit may use both regular and airmobile movement in one phase, and no Out of Supply or DG units can use airmobile movement. You cannot conduct airmobile movement in an enemy SAM range — SAM Suppression never allows this.
1.11a Units can only conduct airmobile movement in their regular Movement Phase — never in the Exploitation Phase.
1.11b The Israeli player can use airmobile movement to carry four steps of infantry-type units. The Israeli capability is available every turn.
1.11c The Egyptian player can move his two Airmobile Brigades plus 4 steps of Commando or Airborne units by airmobile movement on Turn 1. On Turn 2, he can only move the Airmobile Brigades. Thereafter, the Egyptian player has no airmobile capability at all.
Design Note: Historically, the Israeli Air Force shredded the Egyptian helicopter fleet soon after it regained its balance. The degrading Egyptian airmobile capability reflects this destruction.
1.11d A player can use his airmobile capability each turn it is available. Each turn he uses it, he can do so with the same or different units.
1.11e No unit in this game (regardless of honorifics) is capable of conducting an actual parachute airborne insertion — only helicopter air mobility is allowed.
1.12 Air Units
Each player has one or more Air Units to use each turn. Place the number of Air Units available to each player (according to the Turn Record Track) into each player's Air Units Available Box. These Air Units are available that turn only and you cannot save them from turn to turn. Remove any remaining Air Units from the Air Units Available Box during the Turn End Phase. You can use them in any of a number of different phases in each turn, but each Air Unit can only be used once.
1.12a Each Air Unit expended shifts a ground combat one column in the owning player's favor. Use any number of the available Air Units to affect a single combat. Air Units can affect either attacks or defenses. Subtract the Air Units used by the defender from those used by the attacker and shift the final odds column that number — left if negative, right if positive. Shifts beyond the table's available columns have no additional effect; use the last available table column in these cases.
The defender identifies any use of Air Units FIRST (before the attacker does so and before determining the odds).
1.12b Air Units can attack alone or with artillery during the player's Barrage Phase. More than one Air Unit can affect a single barrage.
- Each Egyptian Air Unit gives 5 barrage points.
- Each Israeli Air Unit gives 12 barrage points.
1.12c SAM Suppression. The Israeli player (only) can attempt to use his Air Units within the Egyptian SAM ranges by using SAM Suppression. During the Pre-Turn Air Unit SAM Suppression Allocation Phase, the Israeli player can allocate any number of the available Air Units to SAM Suppression by placing them into the SAM Suppression Box.
Air Units so allocated are unavailable for any other Air Unit functions.
After placing Air Units in the SAM Suppression Box, roll one die on the SAM Suppression Table. The result will be the number of Air Units the Israeli player can move from the Air Units Available Box (NOT the SAM Suppression Box!) to the SAM Zone Box. Make this roll on the SAM Suppression Table even if no Air Units are directly allocated to SAM Suppression (some aircraft managed to sneak in anyway...) and there is no additional effect for allocating more than 3 Air Units to SAM Suppression.
Remove all Air Units from the SAM Suppression Box during the Turn End Phase.
Air Units in the SAM Zone Box can function inside the range of Egyptian SAM units — those still in the Air Units Available Box cannot. SAM Zone Box Air Units can be freely used outside the SAM Zones as well. Air Units in the SAM Zone Box can make Barrage attacks against SAM units in order to attempt to kill them (DGs have no effect on SAM abilities).
1.13 The Suez Canal
1.13a Only infantry-type units can cross the canal unaided. The unit must begin the phase adjacent to the canal, expend all of its MA to cross the canal, and move no further that phase. The hex entered cannot contain an enemy unit or EZOC (remember that enemy units with an Attack Strength of less than 1 do not have an EZOC).
1.13b Infantry-type units can attack across the Canal (with terrain penalties); other units can attack only through bridged hexsides. Advance after combat (for those able to attack across the canal) is allowed.
1.13c Egyptian HQ and SAM units cannot cross the Suez Canal to the Israeli side (exception: see 3.8). The Israeli Hawk unit can cross the canal as desired.
1.13d Regardless of the location of a bridge, there is never a case when a bridge connects two road hexes and allows movement over the canal using road movement rates. Always cross the bridge and pay the regular (non-road) cost of the hex entered.
1.14 Bridges
Engineer units can build bridges. To cross a canal or river via a bridge costs no additional MPs — it negates the MP cost of the feature. Friendly Bridges do not reduce the terrain effect on combat of the feature — but, in the case of the Suez Canal, they can allow units to attack which could not do so otherwise. Each engineer unit can build one bridge at a time (and must take it down and reconstruct it again to build one elsewhere).
1.14a An engineer unit can convert into a bridge during any friendly Bridging Phase. When an engineer unit builds a bridge, flip the engineer to its bridge side and place the counter so the arrow on the counter identifies the hexside it bridges. Any number of engineers can convert into bridges (or vice versa) in a single turn. An Engineer unit used to gain a shift in combat (rule 1.5) cannot switch to a bridge in that turn.
1.14b The bridge can revert back to an engineer unit during any friendly Bridging Phase. To do so, flip the bridge so the unit's engineer side is face-up and place it into either hex belonging to the bridged hexside. EZOCs and DGs have no effect on the conversion of a bridge back into an engineer unit.
1.14c Bridges CAN be built across hexsides into hexes that contain enemy units or EZOCs. Bridges can only be built across directly east-west hexsides — they cannot be built "at an angle."
1.14d Bridges are essentially game markers — they have no movement, combat abilities, or step size. They remain so until converted back into engineers. You can never attack bridges with combat or barrages.
1.14e To capture a bridge, a friendly unit must move across the bridge (meaning that both hexes the bridge connects are free of enemy units). The bridge is then captured. Replace the original bridge/engineer unit counter with a Captured Bridge marker of the appropriate color. After capture, a bridge can never revert into an engineer — even if recaptured by the original owner (in that case, convert it to a Captured Bridge marker of the original side).
1.14f At the beginning of his Movement Phase (before any units move), a player can destroy any of his bridges (original or captured) by removing the bridge from the game. Once destroyed, a bridge can never come back into play. (See 1.14b for a better way to take up friendly bridges.)
1.14g Bridges cannot be built in hexes marked with a "No Bridge" symbol or its arrows, nor can they be built in the Gulf of Suez south of the mouth of the canal (south of hex 4.18).
1.15 Cease-fire, Victory, and Ending the Game
The Turn Record Track contains a Cease-fire Die Roll for each turn (NA means it is not possible). During the Cease-fire Check Phase, roll two dice. If the roll is equal to or greater than the turn's Cease-fire Die Roll, a Cease-fire is imposed by the superpowers and the war (to include the game) ends (see also Ignoring the Cease-fire, 1.15b). Total the VPs available to each side and determine the victor.
- Victory Points are awarded for the following: 1 Victory Point to each side having one or more Supplied mechanized units on the enemy side of the canal AND 1 VP per Victory Point Hex (as marked on the map) under friendly control.¹
¹ Control being defined as last side to occupy the hex if not currently occupied.
Subtract the Egyptian VP Total from the Israeli VP Total and compare the result to the following:
| Differential | Victory |
|---|---|
| +5 or More | Israeli Major |
| +2 to +4 | Israeli Minor |
| +1 to -1 | Draw |
| -2 to -4 | Egyptian Minor |
| -5 or More | Egyptian Major |
1.15a When the game ends, determine the victor at the conclusion of the last turn of play.
1.15b Ignoring a Cease-fire. Either player can announce that he is going to Ignore the Cease-fire after a successful Cease-fire roll — the Israeli player must announce whether he is going to ignore the Cease-fire first. Ignoring a Cease-Fire costs the player who announces he is doing so 2 VPs. Continue the game if either player announces his intention to ignore a Cease-fire. Play continues normally (including further Cease-fire dice rolls).
If a second Cease-fire roll is successful, you can also ignore it using the procedure above (including the VP cost). However, should either player ignore the second Cease-fire (regardless of who ignored the first one), 1.15c automatically goes into effect and play proceeds until turn 12 without further Cease-Fire dice rolls.
1.15c Superpower Intervention. When a second Cease-fire is ignored, both Superpower forces arrive in their entirety on the next turn. The Soviets back the Egyptians and enter via hex 27.35. The US backs the Israelis and enters via Entry Hex B. All forces of a Superpower enter on the same turn.
There is no restriction regarding the operations of the Superpower forces against each other. However, the first player that attacks enemy Superpower units with his own Superpower units initiates World War III and loses 2 VPs.
1.15d Superpower Restrictions. The units of a Superpower employed by a player behave as do any of the other units of that player's side (they can stack, attack, and defend together freely) with no restrictions on mixing units or special rules except for the following:
- Superpower units can only be supplied by their own HQ.
- The Soviet 21st Separate Airmobile Brigade can conduct Airmobile Movement every turn.
- Superpower Armor units cannot be rebuilt.
- The Soviet HQ is not confined by rule 3.5a.
2.0 Israeli Special Rules
2.1 The Bar-Lev Forts
The game has a number of Bar Lev Fort units. These are exempt from supply considerations — they are always supplied. Bar Lev forts must take retreat results as losses. In all other ways, Bar Lev Forts are just like any other Israeli units — to include normal terrain effects.
Design Note: One might wonder at first why there are no shifts on the Barrage Table or some sort of Combat Table modifications for being a Bar Lev Fort or by being in a Fort's hex. These effects are integrated into each Fort's normal ratings — remember, each fort unit represents a number of 40 man strong points — but the Fort unit has the defense ability of an Egyptian Infantry Brigade and almost as many steps! Not bad for what amounts to a dug in rifle company, and that is the benefit they have for being forts...
2.2 The PCB Bridge
Any Israeli armored unit can generate the PCB bridge in the following manner:
At any time during either the Movement or Exploitation Phases, an Israeli armored unit must move through the hex containing the Eastern end of any PCB road and along the PCB road to the Canal. Place the PCB Bridge in position at the end of the PCB road as a bridge in the direction of the PCB Arrow on the map. The unit making the PCB cannot conduct any overrun attacks or enter any EZOCs while moving along the PCB road. The PCB Bridge is functional the moment of construction — and can be used in that same phase. The PCB Bridge cannot be built into a hex containing any Egyptian unit.
Movement along the PCB Road by the armor unit costs the normal MPs per hex for moving along a road — EXCEPT the unit generating the PCB Bridge cannot cross the Canal in the same phase that it puts up the bridge.
The PCB Bridge capability is available from the beginning of the game in all scenarios and the Egyptian player cannot destroy the stored bridges to prevent their use. The Israeli player can generate only one bridge in this manner and once emplaced, he can never remove or relocate it.
Design Note: The above sequence literally represents the hooking up of the prepositioned PCB Bridge (stored in a bunker at the end of its PCB road) to a number of tanks. The tanks then tow the bridge into position along the road and launch it into the canal: a very rapid method of emplacing a bridge — provided the prepositioned bridge and road infrastructure exist where and when needed.
2.3 Tank Recovery
Beginning with Turn 2, the Israeli player rolls on his Tank Recovery Table during each Israeli Tank Recovery Phase. Recover the number of steps of Armor equal to the result. Recover only steps from pure armor units. You must use recovered steps in the turn you received them. Place units being rebuilt from the Dead Pile on or adjacent to any supplied Israeli HQ (neither the HQ nor the recovery hex can be in an EZOC). HQs which are DG can recover Tank steps normally. HQs West of the Suez Canal cannot recover steps.
If no Israeli HQ is available that fulfills the above, then you cannot recover any steps.
2.4 The Gonan Brigade
No it is not an error that the Gonan Brigade units are adorned with a T-55 silhouette instead of the M-60 — this unit was equipped with captured Arab equipment from the Six Day War.
2.5 Israeli Bridging Restrictions
Historically, the Israelis could build exactly two bridges in addition to the PCB bridge. Therefore, the Israeli player can only have one of his engineer units function as a bridge at any one time. One engineer can become a bridge in the same phase as another stops being a bridge.
3.0 Egyptian Special Rules
3.1 Egyptian Exploitation Capabilities
Whenever an Egyptian Exploit Capable unit loses a step and flips, it also loses its Exploit Capability. (The same occurs to US units.) You can recover this capability using the Tank Step Replacements, see 3.7.
3.2 The Pre-Game Barrage Phase
The Egyptian player has a special Barrage Phase before Turn 1. Each Egyptian artillery unit can fire at any target in range. Artillery units can combine to make these attacks. You cannot use Air Units in this phase.
3.3 The GHQ Reserve
The GHQ reserve represents a force used to screen Cairo. Place these units in the GHQ Holding Box until they are released. While in the Holding Box, these units are exempt from supply concerns (they are always supplied); they cannot engage in combat or barrage of any sort (as attacker or defender); and no unit can move into the holding box that was not assigned to it by the set up. Release them at the beginning of the first Egyptian player turn after an Israeli ground unit enters or attacks a hex west of the Suez Canal. When released, these units enter play as reinforcements anywhere along the west map edge — together or spread out as desired. Release of the GHQ Reserve automatically releases the Exploitation Reserve (below) if that force has not already been released.
3.4 The Exploitation Reserves
The Egyptian high command kept a strong armored force in reserve to exploit the situation generated by the assault crossing of the canal. Historically, these forces were not released until the Syrian army called for help and the Egyptians unwillingly executed an attack to help relieve the pressure on them. These units must be kept in the Exploitation Reserve Holding Box until released. When released, these units enter play as reinforcements anywhere along the west map edge — together or spread out as desired.
The Exploitation Reserve is released based on a die roll (2 dice) made by the Egyptian player at the beginning of his player turn. Beginning on turn 2, the Egyptian player rolls two dice each turn until the Exploitation Reserve is released. A roll of 9 or more releases the reserve. Furthermore, the Exploitation Reserve is automatically released when the GHQ Reserve is released.
3.5 Specialized Egyptian Unit Restrictions and Capabilities
3.5a HQs and the Canal. The Egyptian Army HQs can never cross the Suez Canal to the Israeli (east) side. They must always operate from the west bank. The canal (given bridges) does not limit the supply trace counts of Egyptian HQs — in other words, the HQ is stuck west of the canal, but that does not limit its ability to supply units east of it.
3.5b The 130th Amphibious Brigade. These units can cross the Suez Canal for +2 MPs or any lake hex at a cost of 3 MPs. These units can never end their movement in a lake hex.
3.6 First Use of ATGMs
On turns 1, 2, and 3 (only), the following is in effect.
IF, Israeli pure armor units (OR pure armor units in conjunction with other units) AND Egyptian Leg, Mech, Airborne, Airmobile, or Commando Infantry units are involved in a combat (regardless of which is the attacker and which is the defender) and the Combat Result that applies to the Israeli player contains a Star of David (✡)...
...then, one step of Israeli armor must be destroyed in addition to whatever the rest of the combat result requires.
This step can be from any Israeli armor unit (it need not be from the strongest, it can be a weak one) and this step cannot be used to satisfy the "strongest unit must die first" requirement of the combat result (SCS 8.0b). The Israeli player chooses the unit to lose.
Design Note: It may seem odd to add to the losses of Israeli armor units on the defense because of the Saggers (a strictly defensive weapon), so some explanation is in order. By doctrine, Israeli armor units would trip all over themselves to launch a rapid counterattack to any attack made against them. Israeli armor commanders are taught that "to sit still is to die" and all their considerable combat experience has convinced them of the validity of this tactic. Until this theory was shaken in the first days of the war, the Israeli armor commanders would immediately bolt into a counterattack when confronted by an Egyptian assault — thereby opening the door for extra Sagger losses.
3.7 Tank Step Replacements
Each scenario gives the Egyptian player a number of Tank Step Replacements. Place this number of Step Loss Markers into the Egyptian Tank Steps Available Box on the map and use them to keep track of the remaining steps available as they are used. He can use these to replace step losses in his pure Armor units during the Egyptian Tank Replacement Phase each turn. These steps are all those available to the Egyptian player for the duration of the game — once used, they can never be used again. No unit can replace steps while in an EZOC, while DG or while Out of Supply.
Dead units cannot come back into play using these replacement steps.
The Egyptian player is free to use all, some or none of his available replacement steps in a single turn.
Design Note: These replacement steps represent new tanks being issued to the units at the front, not recovered or repaired tanks as is the case for the Israelis. Yes, the best use of these steps is to recover the first lost step from really good Egyptian armor units to bring back their Exploit Capability!
3.8 Schnell Abdul (Optional)
For a price of 2 VPs, the Egyptian player can free himself from the requirement for his HQs and SAMs to remain west of the Suez. Pay the above VPs to the Israeli player before the game begins and ignore rules 1.10b and 3.5a.
4.0 Scenarios
4.0a The Israeli player always sets up first.
4.0b Unless specifically stated otherwise the following are true: The Israeli player can never set up units west of the Suez Canal. The Egyptian player can never set up units east of the Suez Canal. Determine victory using 1.15.
4.0c Egyptian forces designated as setting up on either side of the Army Boundary Line CAN set up on that line as well.
4.1 The Historical Battle for the Suez
First Turn: 1 Last Turn: Turn 12 or when a Cease-fire is accepted — whichever happens first.
Israeli Information:
Set Up:
Anywhere along the Lateral Road (48.15 through 10.11): Reshef Arm Bde (A, B)
Anywhere along the Artillery Road (51.24 through 10.14): Pinchas Inf Bde (A, B)
Anywhere West of the Artillery Road (51.24 through 10.14) (inclusive): Static Units (1, 2, 3, 4)
w/i 5 22.04: South Corps HQ, Hawk Bn, Engineer Bns (1, 2, 3), Rckt Bn, Arty Bdes (1, 2, 3), Jeep Recon Co, HaSini Recon Bn 17.01: Shom Arm Bde (A) 10.01: Shom Arm Bde (B), Arty Bde (A) 23.20: Mend Recon Bn 27.14: Mend Div HQ w/i 5 50.19: Alush Inf Bde (A, B, C) 50.01: Amir Arm Bde (A, B)
Bar Lev Forts: One each per Bar Lev Fort Symbol printed on the map, or for more historical precision: 4.18: Masrek 5.17: Nisan 9.17: Mafzeah 15.17: Lituf 19.21: Botzer 22.22: Lakekan 22.23: Matzmd 29.24: Purkan 32.23: Nozel 38.23: Mfrkt 42.23: Milano 44.23: Ktuba 49.24: Drora 51.24: Lhtznt 55.24: Orkal 54.19: Budapst
Reinforcements:
Turn 2: Entry Area A: Adan Div HQ, Adan Recon Bn, Nir Arm Bde (A, B), Rami Mech Bde (A, B), Karen Arm Bde (A, B), Fedale Mech Bde (A, B), Arty Bde (B, C) Entry Area B: Sharon Div HQ, Sharon Recon Bn, Erez Arm Bde (A, B), Raviv Arm Bde (A, B), Ivan Recon Bn, Biro Mech Bde (A, B), Arty Bde (D) Entry Area C: Yairi Abn Bde (A, B, C), 23 Abn Bde (A, B, C)
Turn 3: Entry Area A: Barom Arm Bde (A, B), Peled Mech Bde (A, B), Shakd Inf Task Force, Haruv Inf Task Force, Gonen Arm Bde (A, B, C), Baru Mech Bn, Arty Bde (E) Entry Area B: Arty Bde (4), Matt Abn Bde (A, B, C)
Turn 5: Entry Area A: Yaya Abn Task Force, Yossi Abn Task Force, Arty Bn (5) On any Israeli HQ (EZOCs and supply status do not matter): Shun Inf Task Force, Schmk Inf Task Force
Turn 6: Entry Area A, B, or C: Berg Mech Bde (A, B), Revel Mech Bde (A, B)
Turn 7: Entry Area A, B, or C: Chert Mech Bde (A, B)
Egyptian Information:
Tank Replacement Steps Available: 5
Set Up:
59.25 and/or 58.23 (yes, across the canal): 18 Inf Div (135 Inf Bde), Commando Bde (130)
Anywhere North of the Army Boundary: 2 Inf Div (4, 120 Inf Bde, 117 Mech Bde) 16 Inf Div (16, 112 Inf Bde, 3 Mech Bde) 18 Inf Div (134 Inf Bde, 136 Mech Bde) 21 Tank Div (14 Arm Bde) 23 Mech Div (24 Arm Bde) 2 Army HQ 90 Mech Bde 182 Abn Bde 129 Commando Bde 15 Arm Bde Arty Bdes (47, 57, 62, 78, 79) Engineer Bns (1-9, 2-9, 3-9)
Anywhere South of the Army Boundary: 4 Tank Div (3 Arm Bde) 7 Inf Div (11, 12 Inf Bde, 8 Mech Bde) 19 Inf Div (5, 7 Inf Bde, 2 Mech Bde) PLO Inf Bde Kuwaiti Inf Bn 3 Army HQ 130 Amphib Bde (A, B) 130 Mech Bde Engineer Bns (1-109, 2-109) 127 Commando Bde 25 Arm Bde Arty Bdes (53, 55, 60)
Anywhere West of the Suez Canal: Commando Bdes (128, 131, 132, 134) 140 Abn Bde Airmobile Bdes (150, 160) Arty Bdes (39, 63) 8x SAMs Frog Arty Bde
GHQ Reserves (in GHQ Holding Box): GHQ HQ 3 Mech Div (10, 114 Mech Bde, 23 Arm Bde, Recon Bn) Ind Arm Bde Nasser Arm Bde Pres. Gd Arm Bde Morocco Inf Bde
Exploitation Reserve (in Exploitation Reserve Holding Box): 21 Tank Div (18 Mech Bde, 1 Arm Bde, Recon Bn) 23 Mech Div (116, 118 Mech Bde, Recon Bn) 4 Tank Div (6 Mech Bde, 2, 6 Arm Bde, Recon Bn) 6 Mech Div (1, 113 Mech Bde, 22 Arm Bde, Recon Bn)
4.1a (Variant) Historical Egyptian Placement
This variant gives the historical Egyptian locations. It can be used by those who want a more rigid historical set up or who want a guide to use in their first games while they get a handle on the correct way to position their assault troops. Use the Israeli information from 4.1.
20.25: Kuwait Inf Bn 18.24: PLO Inf Bde 16.20: 130 Amphib Bde (A, B)
59.25 and/or 58.23 (yes, across the canal): 18 Inf Div (135 Inf Bde) Commando Bde (130)
The following MUST be west of the canal. w/i 3 39.25: 18 Inf Div (134 Inf Bde, 136 Mech Bde), 15 Arm Bde w/i 3 32.25: 2 Inf Div (4, 120 Inf Bde, 117 Mech Bde), 23 Mech Div (24 Arm Bde) w/i 3 25.25: 16 Inf Div (16, 112 Inf Bde, 3 Mech Bde), 21 Tank Div (14 Arm Bde) w/i 3 14.18: 7 Inf Div (11, 12 Inf Bde, 8 Mech Bde), 25 Arm Bde w/i 3 10.18: 19 Inf Div (5, 7 Inf Bde, 2 Mech Bde), 4 Tank Div (3 Arm Bde)
Anywhere North of the Army Boundary: 2 Army HQ 90 Mech Bde 182 Abn Bde 129 Commando Bde Arty Bdes (47, 57, 62, 78, 79) Engineer Bns (1-9, 2-9, 3-9)
Anywhere South of the Army Boundary: 3 Army HQ 130 Mech Bde Engineer Bns (1-109, 2-109) 127 Commando Bde Arty Bdes (53, 55, 60)
Anywhere West of the Suez Canal: Commando Bdes (128, 131, 132, 134) 140 Abn Bde Airmobile Bdes (150, 160) Arty Bdes (39, 63) 8x SAMs Frog Arty Bde
GHQ Reserves (in GHQ Holding Box): GHQ HQ 3 Mech Div (10, 114 Mech Bde, 23 Arm Bde, Recon Bn) Ind Arm Bde Nasser Arm Bde Pres. Gd Arm Bde Morocco Inf Bde
Exploitation Reserve (in Exploitation Reserve Holding Box): 21 Tank Div (18 Mech Bde, 1 Arm Bde, Recon Bn) 23 Mech Div (116, 118 Mech Bde, Recon Bn) 4 Tank Div (6 Mech Bde, 2, 6 Arm Bde, Recon Bn) 6 Mech Div (1, 113 Mech Bde, 22 Arm Bde, Recon Bn)
4.1b (Variant) Exploitation Forces On-Line
This variant pulls the balance of the game well toward the Egyptian player, use it to adjust the balance to compensate for players of differing skill or to see what might have been.
Do not use rule 3.4 — all Exploitation Reserves are available at start. Alter the set up in 4.1, 4.1a, 4.2, 4.3, or 4.4 to include the following:
Anywhere west of the Suez Canal: 21 Tank Div (18 Mech Bde, 1 Arm Bde, Recon Bn) 23 Mech Div (116, 118 Mech Bde, Recon Bn) 4 Tank Div (6 Mech Bde, 2, 6 Arm Bde, Recon Bn) 6 Mech Div (1, 113 Mech Bde, 22 Arm Bde, Recon Bn)
Exploitation Reserve (in Exploitation Reserve Holding Box): None
4.2 Pearl Harbor Revisited
The IDF was aware of the size and scope of the Arab deployment on Israel's borders; however, senior IDF Intelligence officers evaluated the threat of war as being very low. With a growing hostile force on it's borders the IDF instituted a low-level alert amongst divisional commanders and also moved Col. Gabi Amir's armored brigade to the Sinai and the 7th Armored Brigade to the Golan. These precautions proved crucial in halting the Arab advance. This scenario explores what might have happened if Amir's Brigade was not deployed in the initial phases of the war, and if Israel's reinforcements were slightly delayed.
First Turn: 1 Last Turn: Turn 12 or when a Cease-fire is accepted — whichever happens first.
Israeli Information:
Set Up:
Anywhere along the Lateral Road (48.15 through 10.11): Reshef Arm Bde (A, B)
Anywhere along the Artillery Road (51.24 through 10.14): Pinchas Inf Bde (A, B)
Anywhere West of the Artillery Road (51.24 through 10.14) (inclusive): Static Units (1, 2, 3, 4)
w/i 5 22.04: South Corps HQ, Hawk Bn, Engineer Bns (1, 2, 3), Rckt Bn, Arty Bdes (1, 2, 3), Jeep Recon Co, HaSini Recon Bn 17.01: Shom Arm Bde (A) 10.01: Shom Arm Bde (B), Arty Bde (A) 23.20: Mend Recon Bn 27.14: Mend Div HQ w/i 5 50.19: Alush Inf Bde (A, B, C)
Bar Lev Forts: One each per Bar Lev Fort Symbol printed on the map, or for more historical precision: 4.18: Masrek 5.17: Nisan 9.17: Mafzeah 15.17: Lituf 19.21: Botzer 22.22: Lakekan 22.23: Matzmd 29.24: Purkan 32.23: Nozel 38.23: Mfrkt 42.23: Milano 44.23: Ktuba 49.24: Drora 51.24: Lhtznt 55.24: Orkal 54.19: Budapst
Reinforcements:
Turn 2: Entry Area A: Adan Div HQ, Adan Recon Bn, Nir Arm Bde (A, B), Rami Mech Bde (A,B), Karen Arm Bde (A, B), Amir Arm Bde (A, B), Arty Bde (B, C) Entry Area B: Sharon Div HQ, Sharon Recon Bn, Raviv Arm Bde (A, B), Erez Arm Bde (A, B), Arty Bde (D) Entry Area C: 23 Abn Bde (A, B, C)
Turn 3: Entry Area A: Barom Arm Bde (A, B), Peled Mech Bde (A, B) Force, Gonen Arm Bde (A, B, C), Fedale Mech Bde (A, B), Baru Mech Bn, Arty Bde (E), Ivan Recon Bn Entry Area B: Arty Bde (4), Matt Abn Bde (A, B, C) Entry Area C: Yairi Abn Bde (A, B, C)
Turn 5: Entry Area A: Yaya Abn Task Force, Yossi Abn Task Force, Arty Bn (5), Shakd Inf Task Force, Haruv Inf Task On any Israeli HQ (EZOCs and supply status do not matter): Shun Inf Task Force, Schmk Inf Task Force
Turn 6: Entry Area A, B, or C: Berg Mech Bde (A, B), Biro Mech Bde (A, B), Revel Mech Bde (A, B)
Turn 7: Entry Area A, B, or C: Chert Mech Bde (A, B)
Egyptian Information:
Tank Replacement Steps Available: 5
Set Up:
59.25 and/or 58.23 (yes, across the canal): 18 Inf Div (135 Inf Bde) Commando Bde (130)
Anywhere North of the Army Boundary: 2 Inf Div (4, 120 Inf Bde, 117 Mech Bde) 16 Inf Div (16, 112 Inf Bde, 3 Mech Bde) 18 Inf Div (134 Inf Bde, 136 Mech Bde) 21 Tank Div (14 Arm Bde) 23 Mech Div (24 Arm Bde) 2 Army HQ 90 Mech Bde 182 Abn Bde 129 Commando Bde 15 Arm Bde Arty Bdes (47, 57, 62, 78, 79) Engineer Bns (1-9, 2-9, 3-9)
Anywhere South of the Army Boundary: 4 Tank Div (3 Arm Bde) 7 Inf Div (11, 12 Inf Bde, 8 Mech Bde) 19 Inf Div (5, 7 Inf Bde, 2 Mech Bde) PLO Inf Bde Kuwaiti Inf Bn 3 Army HQ 130 Amphib Bde (A, B) 130 Mech Bde Engineer Bns (1-109, 2-109) 127 Commando Bde 25 Arm Bde Arty Bdes (53, 55, 60)
Anywhere West of the Suez Canal: Commando Bdes (128, 131, 132, 134) 140 Abn Bde Airmobile Bdes (150, 160) Arty Bdes (39, 63) 8x SAMs Frog Arty Bde
GHQ Reserves (in GHQ Holding Box): GHQ HQ 3 Mech Div (10, 114 Mech Bde, 23 Arm Bde, Recon Bn) Ind Arm Bde Nasser Arm Bde Pres. Gd Arm Bde Morocco Inf Bde
Exploitation Reserve (in Exploitation Reserve Holding Box): 21 Tank Div (18 Mech Bde, 1 Arm Bde, Recon Bn) 23 Mech Div (116, 118 Mech Bde, Recon Bn) 4 Tank Div (6 Mech Bde, 2, 6 Arm Bde, Recon Bn) 6 Mech Div (1, 113 Mech Bde, 22 Arm Bde, Recon Bn)
4.3 End of the Third Temple
On Friday October 5th, Prime Minister Golda Meir held a meeting of the cabinet to discuss the military situation along Israel's borders. Assured by senior IDF Intelligence Officers that the Arab armies posed no immediate threat, the cabinet meeting broke up without taking any steps toward mobilization.
At 0605 Saturday morning, the Yom Kippur calm was punctured by the wail of air raid sirens. Arab air forces had launched a preemptive attack on Israeli air bases which destroyed 40% of the IDF's air arm on the ground. Further air strikes (which included numerous Scud missile strikes with chemical weapons) destroyed IDF command and control facilities killing many senior IDF officers. Terrorist attacks killed numerous government and military officials. These attacks crippled the IDF's command network.
At 0630, the Arab ground forces launched their onslaught. While the reservists managed to arrive at their mobilization sites, the confused IDF command structure failed to issue them timely orders or to provide transportation to the battle areas. The reserves remained completely paralyzed throughout the day.
On the Golan front, the 188th and 7th Armored Brigades first stretched and then broke. Disorganized troops streamed back toward Israel choking the reinforcement routes. Sensing that a great victory was at hand, the Kingdom of Jordan entered the war on Sunday morning. Jordan's entry further diverted resources to man the new "Central Front." By Sunday evening, the Syrians controlled the Golan Heights and were preparing to enter Galilee the next morning.
On Monday morning, the IDF forces defending Jerusalem reported that Jordanian and Iraqi forces were encircling the city. Israeli units in the Sinai were ordered to withdraw to El Arish to shorten their supply lines. In Galilee, Peled's Division engaged the Syrians and was soundly defeated by Sagger ATGM teams. Syrian artillery began shelling Haifa at 1430 hours.
At 1600, Defense Minister Moshe Dayan entered the Prime Minister's office and announced "This is the end of the Third Temple; we are beaten. We must immediately initiate Operation Babylon. General Peled is at Airforce Headquarters awaiting the go command." A shaken Prime Minister looked at her Defense Minister and asked "Is there no other way?" Dayan responded "Golda, I wish there were." The Prime Minister gave an almost imperceptible nod and with a shaking hand reached for the phone.
First Turn: 1 Last Turn: Turn 12 or when a Cease-fire is accepted — whichever happens first.
Special Rules:
A. Air Units. There are no Israeli Air Units in this scenario. The Egyptian player has 4 Air Units available every turn.
B. Chemical Munitions. All Egyptian artillery has Double its normal Barrage Strength for turns 1, 2 and 3.
C. Airmobile Capabilities. The Egyptian player has the regular first turn airmobile lift capability on every turn.
Israeli Information:
Set Up:
Anywhere along the Lateral Road (48.15 through 10.11): Reshef Arm Bde (A, B)
Anywhere along the Artillery Road (51.24 through 10.14): Pinchas Inf Bde (A, B)
Anywhere West of the Artillery Road (51.24 through 10.14) (inclusive): Static Units (1, 2, 3, 4)
w/i 5 22.04: South Corps HQ, Hawk Bn, Engineer Bns (1, 2, 3), Rckt Bn, Arty Bdes (1, 2, 3), Jeep Recon Co, HaSini Recon Bn 17.01: Shom Arm Bde (A) 10.01: Shom Arm Bde (B), Arty Bde (A) 23.20: Mend Recon Bn 27.14: Mend Div HQ w/i 5 50.19: Alush Inf Bde (A, B, C)
Bar Lev Forts: One each per Bar Lev Fort Symbol printed on the map, or for more historical precision: 4.18: Masrek 5.17: Nisan 9.17: Mafzeah 15.17: Lituf 19.21: Botzer 22.22: Lakekan 22.23: Matzmd 29.24: Purkan 32.23: Nozel 38.23: Mfrkt 42.23: Milano 44.23: Ktuba 49.24: Drora 51.24: Lhtznt 55.24: Orkal 54.19: Budapst
Reinforcements:
Turn 2: Entry Area A: Amir Arm Bde (A, B), Adan Div HQ, Adan Recon Bn, Nir Arm Bde (A, B), Rami Mech Bde (A,B), Arty Bde (B) Entry Area B: Erez Arm Bde (A, B), Sharon Div HQ, Sharon Recon Bn, Raviv Arm Bde (A, B)
Turn 3: Entry Area A: Barom Arm Bde (A, B), Peled Mech Bde (A, B) Force, Gonen Arm Bde (A, B, C), Fedale Mech Bde (A, B), Baru Mech Bn, Karen Arm Bde (A, B), Arty Bde (C, E) Entry Area B: Reshef Arm Bde (A), Matt Abn Bde (A, B, C), Arty Bde (4, D) Entry Area C: 23 Abn Bde (A, B, C), Yairi Abn Bde (A, B, C)
Turn 4: Entry Area A: Ivan Recon Bn
Turn 6: Entry Area A: Yaya Abn Task Force, Yossi Abn Task Force, Arty Bn (5), Shakd Inf Task Force, Haruv Inf Task On any Israeli HQ (EZOCs and supply status do not matter): Shun Inf Task Force, Schmk Inf Task Force
Turn 7: Entry Area A, B, or C: Berg Mech Bde (A, B), Biro Mech Bde (A, B), Revel Mech Bde (A, B)
Turn 8: Entry Area A, B, or C: Chert Mech Bde (A, B)
Egyptian Information:
Tank Replacement Steps Available: 5
Set Up:
59.25 and/or 58.23 (yes, across the canal): 18 Inf Div (135 Inf Bde) Commando Bde (130)
Anywhere North of the Army Boundary: 2 Inf Div (4, 120 Inf Bde, 117 Mech Bde) 16 Inf Div (16, 112 Inf Bde, 3 Mech Bde) 18 Inf Div (134 Inf Bde, 136 Mech Bde) 21 Tank Div (14 Arm Bde) 23 Mech Div (24 Arm Bde) 2 Army HQ 90 Mech Bde 182 Abn Bde 129 Commando Bde 15 Arm Bde Arty Bdes (47, 57, 62, 78, 79) Engineer Bns (1-9, 2-9, 3-9)
Anywhere South of the Army Boundary: 4 Tank Div (3 Arm Bde) 7 Inf Div (11, 12 Inf Bde, 8 Mech Bde) 19 Inf Div (5, 7 Inf Bde, 2 Mech Bde) PLO Inf Bde Kuwaiti Inf Bn 3 Army HQ 130 Amphib Bde (A, B) 130 Mech Bde Engineer Bns (1-109, 2-109) 127 Commando Bde 25 Arm Bde Arty Bdes (53, 55, 60)
Anywhere West of the Suez Canal: Commando Bdes (128, 131, 132, 134) 140 Abn Bde Airmobile Bdes (150, 160) Arty Bdes (39, 63) 8x SAMs Frog Arty Bde
GHQ Reserves (in GHQ Holding Box): GHQ HQ 3 Mech Div (10, 114 Mech Bde, 23 Arm Bde, Recon Bn) Ind Arm Bde Nasser Arm Bde Pres. Gd Arm Bde Morocco Inf Bde
Exploitation Reserve (in Exploitation Reserve Holding Box): None
4.4 Shovach Yomin (Pigeon Loft)
This scenario explores what effect the Israeli plan (code-named Shovach Yomin) for reinforcement of the Bar-Lev positions would have had on the Egyptian crossing. Of all the variants, this scenario was historically the most likely. Israeli intelligence knew at 0600 hours that war would break out, but the IDF high command refused to allow Shovach Yomin to be put into effect until it was too late to have an impact on the Egyptian offensive.
First Turn: 1 Last Turn: Turn 12 or when a Cease-fire is accepted — whichever happens first.
Israeli Information:
Set Up:
Anywhere East of the Suez Canal: Reshef Arm Bde (A, B) Pinchas Inf Bde (A, B) Amir Arm Bde (A, B) Engineer Bns (1, 2, 3) Rckt Bn Arty Bdes (A, 1, 2, 3) Jeep Recon Co HaSini Recon Bn Shom Arm Bde (A, B) Mend Div HQ Mend Recon Bn
Anywhere West of the Artillery Road (51.24 through 10.14) (inclusive): Static Units (1, 2, 3, 4)
w/i 5 22.04: South Corps HQ, Hawk Bn w/i 5 50.19: Alush Inf Bde (A, B, C)
Bar Lev Forts: One each per Bar Lev Fort Symbol printed on the map, or for more historical precision: 4.18: Masrek 5.17: Nisan 9.17: Mafzeah 15.17: Lituf 19.21: Botzer 22.22: Lakekan 22.23: Matzmd 29.24: Purkan 32.23: Nozel 38.23: Mfrkt 42.23: Milano 44.23: Ktuba 49.24: Drora 51.24: Lhtznt 55.24: Orkal 54.19: Budapst
Reinforcements:
Turn 2: Entry Area A: Adan Div HQ, Adan Recon Bn, Nir Arm Bde (A, B), Rami Mech Bde (A,B), Karen Arm Bde (A, B), Fedale Mech Bde (A, B), Arty Bde (B, C) Entry Area B: Sharon Div HQ, Sharon Recon Bn, Erez Arm Bde (A, B), Raviv Arm Bde (A, B), Reshef Arm Bde (A), Ivan Recon Bn, Biro Mech Bde (A, B), Arty Bde (D), Arty Bn (5) Entry Area C: Yairi Abn Bde (A, B, C), 23 Abn Bde (A, B, C)
Turn 3: Entry Area A: Barom Arm Bde (A, B), Peled Mech Bde (A, B), Shakd Inf Task Force, Haruv Inf Task Force, Gonen Arm Bde (A, B, C), Baru Mech Bn, Arty Bde (E) Entry Area B: Arty Bde (4), Matt Abn Bde (A, B, C)
Turn 5: Entry Area A: Yaya Abn Task Force, Yossi Abn Task Force On any Israeli HQ (EZOCs and supply status do not matter): Shun Inf Task Force, Schmk Inf Task Force
Turn 6: Entry Area A, B, or C: Berg Mech Bde (A, B), Revel Mech Bde (A, B)
Turn 7: Entry Area A, B, or C: Chert Mech Bde (A, B)
Egyptian Information:
Tank Replacement Steps Available: 5
Set Up:
59.25 and/or 58.23 (yes, across the canal): 18 Inf Div (135 Inf Bde) Commando Bde (130)
Anywhere North of the Army Boundary: 2 Inf Div (4, 120 Inf Bde, 117 Mech Bde) 16 Inf Div (16, 112 Inf Bde, 3 Mech Bde) 18 Inf Div (134 Inf Bde, 136 Mech Bde) 21 Tank Div (14 Arm Bde) 23 Mech Div (24 Arm Bde) 2 Army HQ 90 Mech Bde 182 Abn Bde 129 Commando Bde 15 Arm Bde Arty Bdes (47, 57, 62, 78, 79) Engineer Bns (1-9, 2-9, 3-9)
Anywhere South of the Army Boundary: 4 Tank Div (3 Arm Bde) 7 Inf Div (11, 12 Inf Bde, 8 Mech Bde) 19 Inf Div (5, 7 Inf Bde, 2 Mech Bde) PLO Inf Bde Kuwaiti Inf Bn 3 Army HQ 130 Amphib Bde (A, B) 130 Mech Bde Engineer Bns (1-109, 2-109) 127 Commando Bde 25 Arm Bde Arty Bdes (53, 55, 60)
Anywhere West of the Suez Canal: Commando Bdes (128, 131, 132, 134) 140 Abn Bde Airmobile Bdes (150, 160) Arty Bdes (39, 63) 8x SAMs Frog Arty Bde
GHQ Reserves (in GHQ Holding Box): GHQ HQ 3 Mech Div (10, 114 Mech Bde, 23 Arm Bde, Recon Bn) Ind Arm Bde Nasser Arm Bde Pres. Gd Arm Bde Morocco Inf Bde
Exploitation Reserve (in Exploitation Reserve Holding Box): 21 Tank Div (18 Mech Bde, 1 Arm Bde, Recon Bn) 23 Mech Div (116, 118 Mech Bde, Recon Bn) 4 Tank Div (6 Mech Bde, 2, 6 Arm Bde, Recon Bn) 6 Mech Div (1, 113 Mech Bde, 22 Arm Bde, Recon Bn)
4.5 The Israeli Counterattack — The Debacle of October 8th
This scenario allows players a look at the greatest fiasco in the IDF's history. An unsupported armor attack against the Egyptian lodgment made on October 8th ended in disaster with recriminations all around. An episode which remains controversial in Israel still today — more than 20 years after the event.
First Turn: 2 Last Turn: 3
Israeli Information:
Dead Units: Erez Arm Bde (B) Rami Mech Bde (B) Raviv Arm Bde (A) Reshef Arm Bde (A) Shom Arm Bde (A) Static Unit (1) Bar Lev Forts (Botzer, Matzmd, Drora, Ktuba, Lakekan, Lhtznt, Latuf, Mfrkt, Milano, Nozel, Orkal)
Set Up: 54.19: Bar Lev Fort (Budapst), Alush Inf Bde (C) 48.17: Alush Inf Bde (B) 46.21: Alush Inf Bde (A) 46.20: Rami Mech Bde (A) 44.18: Adan Recon Bn, Amir Arm Bde (B) 46.16: Adan Div HQ, Engineer Bn (1), Arty Bde (1) 48.16: Arty Bde (2) 43.18: Nir Arm Bde (A, B) 39.18: Static Unit (2) 33.18: Static Unit (3) 33.17: Static Unit (4) 29.24: Bar Lev Fort (Purkan) 30.14: HaSini Recon Bn 29.15: Reshef Arm Bde (B) 28.15: Sharon Recon Bn 27.15: Erez Arm Bde (A), Shom Arm Bde (B) w/i 2 27.14: Sharon Div HQ, Arty Bde (A, D), Hawk Bn, Rckt Bn 26.07: Jeep Recon Co, Engineer Bn (2) 22.12: Pinchas Inf Bde (A) 20.12: Pinchas Inf Bde (B) 17.12: Mend Recon Bn 16.10: Mend Div HQ, Arty Bde (3), Engineer Bn (3) 16.11: Biro Mech Bde (A) 14.11: Biro Mech Bde (B) 11.12: Ivan Recon Bn 9.11: Raviv Arm Bde (B) 9.03: South Corps HQ, Arty Bde (B) 9.17: Bar Lev Fort (Mafzeah) 5.17: Bar Lev Fort (Nisan) 4.18: Bar Lev Fort (Masrek)
Reinforcements:
Turn 2 Entry Area A: Amir Arm Bde (A), Karen Arm Bde (A, B), Fedale Mech Bde (A, B), Arty Bde (C) Entry Area C: 23 Abn Bde (A, B, C), Yairi Abn Bde (A, B, C)
Turn 3 Entry Area A: Barom Arm Bde (A, B), Gonen Arm Bde (A, B, C), Peled Mech Bde (A, B), Baru Mech Bn, Haruv Inf Task Force, Shakd Inf Task Force, Arty Bde (E) Entry Area B: Arty Bde (4), Matt Abn Bde (A, B, C)
Egyptian Information:
Tank Replacement Steps Available: 2
Dead Units: 21 Tank Div (14 Arm Bde) 182 Abn Bde 150 Airmobile Bde
Set Up: 51.28: 1x SAM 43.28: 1x SAM 39.29: 1x SAM 32.28: 1x SAM 26.28: 1x SAM 17.24: 1x SAM 16.20: 1x SAM 12.21: 1x SAM 54.20: 131 Commando Bde, 128 Commando Bde 55.21: 18 Inf Div (135 Inf Bde, less one step) 47.22: 129 Commando Bde 47.21: 18 Inf Div (134 Inf Bde) 45.22: 18 Inf Div (136 Mech Bde) 43.23: Arty Bde (79) 45.21: 15 Arm Bde 39.25: Arty Bde (FROG) 41.21: 90 Mech Bde 39.21: 2 Inf Div (4 Inf Bde) 38.20: 2 Inf Div (117 Mech Bde) 39.23: Arty Bde (62) 42.24: Engineer Bn (2-9, Bridge Emplaced), Arty Bde (57), 2 Army HQ 37.21: 2 Inf Div (120 Inf Bde) 36.20: 134 Commando Bde 35.21: 23 Mech Div (24 Arm Bde) 32.24: Engineer Bn (1-9, Bridge Emplaced) 32.23: Arty Bde (63) 33.21: 140 Abn Bde 29.25: Arty Bde (39) 28.25: PLO Inf Bde 31.20: 16 Inf Div (112 Inf Bde) 29.21: 16 Inf Div (3 Mech Bde) 27.20: 160 Airmobile Bde 24.24: Engineer Bn (3-9, Bridge Emplaced) 20.25: Kuwaiti Inf Bn 22.21: Arty Bde (47) 24.20: 16 Inf Div (16 Inf Bde) 25.18: 130 Amphib Bde (A) 23.17: 130 Amphib Bde (B) 21.20: Arty Bde (60) 23.20: 4 Tank Div (3 Arm Bde) 18.14: 19 Inf Div (2 Mech Bde) 17.16: Arty Bde (55) 17.14: 19 Inf Div (5 Inf Bde) 16.14: 19 Inf Div (7 Inf Bde) 15.15: 130 Commando Bde 13.15: 25 Arm Bde 14.14: 127 Commando Bde 14.15: Arty Bde (78), Engineer Bn (2-109) 11.15: 132 Commando Bde, Arty Bde (53) 10.15: 7 Inf Div (8 Mech Bde) 10.16: 7 Inf Div (12 Inf Bde) 13.18: 3 Army HQ, 130 Mech Bde, Engineer Bn (1-109, Bridge Emplaced) 10.17: 7 Inf Div (11 Inf Bde)
GHQ Reserves (in GHQ Holding Box): GHQ HQ 3 Mech Div (10, 114 Mech Bde, 23 Arm Bde, Recon Bn) Ind Arm Bde Nasser Arm Bde Pres. Gd Arm Bde Morocco Inf Bde
Exploitation Reserve (in Exploitation Reserve Holding Box): 21 Tank Div (18 Mech Bde, 1 Arm Bde, Recon Bn) 23 Mech Div (116, 118 Mech Bde, Recon Bn) 4 Tank Div (6 Mech Bde, 2, 6 Arm Bde, Recon Bn) 6 Mech Div (1, 113 Mech Bde, 22 Arm Bde, Recon Bn)
Victory
The Israeli player wins if friendly supplied units occupy two or more of the following hexes at the end of play: 44.21, 24.20, and 10.15. The Egyptian player wins if occupies with supplied units two or more of these hexes.
4.6 The Israeli Counterattack — The Crossing into Africa and the War's End
This scenario allows players a look at the Israeli Suez crossing and the 'end game' of the 1973 war in the Sinai.
First Turn: 6 Last Turn: Turn 12 or when a Cease-fire is accepted — whichever happens first.
Israeli Information:
Dead Units: Rami Mech Bde (B) Shom Arm Bde (A) Nir Arm Bde (A) Static Unit (1) Bar Lev Forts (Botzer, Matzmd, Drora, Ktuba, Lakekan, Lhtznt, Latuf, Mfrkt, Milano, Nozel, Orkal, Purkan)
Set Up: 54.19: Bar Lev Fort (Budapst), Alush Inf Bde (C) 50.17: Yaya Abn Task Force 48.16: Arty Bn (5) 48.17: Alush Inf Bde (B), Arty Bde (2) 46.19: Alush Inf Bde (A) 45.19: Rami Mech Bde (A) 44.18: Yossi Abn Task Force 43.18: Peled Mech Bde (A, B) 42.18: Static Unit (4), Yairi Abn Bde (C) 41.15: Karen Arm Bde (A, B) 40.15: Arty Bde (1), Engineer Bn (1) 40.14: Adan Div HQ, Adan Recon Bn 39.15: Amir Arm Bde (A, B), Arty Bde (C) 39.18: Static Unit (2), Yairi Abn Bde (B) 37.15: Gonen Arm Bde (A, B, C) 33.18: Static Unit (3), Yairi Abn Bde (A) 27.17: Jeep Recon Co 29.15: HaSini Recon Bn, Nir Arm Bde (B), Engineer Bn (2) 28.15: Pinchas Inf Bde (A) 28.14: Arty Bde (4, E) 27.12: Hawk Bn, Arty Bn (Rckt) 27.16: Pinchas Inf Bde (B) 27.15: Shom Arm Bde (B) 27.14: Sharon Div HQ, Sharon Recon Bn 26.14: Haruv Inf Task Force 25.17: Raviv Arm Bde (A, B) 23.18: Reshef Arm Bde (A, B) 22.16: Arty Bde (A, D) 22.17: Matt Abn Bde (A, B, C) 22.18: Erez Arm Bde (A, B) 21.17: Shun, Schmk, Shakd Inf Task Force 20.15: Baru Mech Bn 18.13: Mend Recon Bn 17.13: Biro Mech Bde (A) 16.12: Biro Mech Bde (B) 16.10: Mend Div HQ, Arty Bde (3), Engineer Bn (3) 14.12: Barom Arm Bde (B) 13.13: Barom Arm Bde (A) 11.12: Ivan Recon Bn w/i 2 9.12: Fedale Mech Bde (A, B) 9.14: 23 Abn Bde (C) 9.15: 23 Abn Bde (A) 9.16: 23 Abn Bde (B) 9.03: South Corps HQ, Arty Bde (B) 9.17: Bar Lev Fort (Mafzeah) 5.17: Bar Lev Fort (Nisan) 4.18: Bar Lev Fort (Masrek)
Reinforcements:
Turn 6: Entry Area A, B, or C: Berg Mech Bde (A, B), Revel Mech Bde (A, B)
Turn 7: Entry Area A, B, or C: Chert Mech Bde (A, B)
Egyptian Information:
Tank Replacement Steps Available: 1
Dead Units: 21 Tank Div (14 Arm Bde) 182 Abn Bde 150 Airmobile Bde 131 Commando Bde
Set Up: 51.28: 1x SAM 43.28: 1x SAM 39.29: 1x SAM 32.28: 1x SAM 26.28: 1x SAM 17.24: 1x SAM 16.20: 1x SAM 12.21: 1x SAM 54.20: 128 Commando Bde 47.21: 129 Commando Bde 46.21: 18 Inf Div (135 Inf Bde, less one step) 45.21: 18 Inf Div (136 Mech Bde) 44.20: 18 Inf Div (134 Inf Bde) 44.21: Arty Bde (79) 43.21: 15 Arm Bde 41.21: 90 Mech Bde 42.24: 2 Army HQ, Arty Bde (57), Engineer Bn (2-9, Bridge Emplaced) 39.21: 2 Inf Div (4 Inf Bde) 38.20: 2 Inf Div (117 Mech Bde) 38.21: Arty Bde (62) 39.25: Arty Bde (FROG) 37.21: 2 Inf Div (120 Inf Bde) 36.20: 134 Commando Bde 35.21: 23 Mech Div (24 Arm Bde) 34.19: 23 Mech Div (118 Mech Bde, Recon Bn) 34.20: 23 Mech Div (116 Mech Bde) 33.20: 21 Tank Div (1 Arm Bde, Recon Bn) 33.21: Arty Bde (39, 63) 32.19: 21 Tank Div (18 Mech Bde) 32.20: 140 Abn Bde 31.20: 16 Inf Div (112 Inf Bde) 32.24: Engineer Bn (1-9, Bridge Emplaced) 29.21: 16 Inf Div (3 Mech Bde) 29.25: PLO Inf Bde 27.20: 160 Airmobile Bde 24.20: 16 Inf Div (16 Inf Bde) 24.24: Engineer Bn (3-9, Bridge Emplaced) 25.18: 130 Amphib Bde (A) 21.20: 130 Amphib Bde (B) 23.20: 4 Tank Div (3 Arm Bde) 22.21: Arty Bde (47) 20.25: Kuwait Inf Bn 17.17: 7 Inf Div (12 Inf Bde) 17.16: 7 Inf Div (11 Inf Bde) 16.15: 7 Inf Div (8 Mech Bde) 16.17: Arty Bde (60) 15.17: Arty Bde (55) 15.15: 130 Commando Bde 14.14: 127 Commando Bde 14.15: Engineer Bn (2-109), Arty Bn (78) 13.15: 25 Arm Bde 13.18: 3 Army HQ, Engineer Bn (1-109, Bridge Emplaced), 130 Mech Bde 13.17: 6 Mech Div (1, 113 Mech Bde) 12.16: 6 Mech Div (22 Arm Bde, Recon Bn) 11.15: 132 Commando Bde, Arty Bde (53) 11.16: 4 Tank Div (2, 6 Arm Bde) 11.17: 4 Tank Div (6 Mech Bde, Recon Bn) 10.15: 19 Inf Div (5 Inf Bde) 10.16: 19 Inf Div (2 Mech Bde) 10.17: 19 Inf Div (7 Inf Bde)
GHQ Reserves (in GHQ Holding Box): GHQ HQ 3 Mech Div (10, 114 Mech Bde, 23 Arm Bde, Recon Bn) Ind Arm Bde Nasser Arm Bde Pres. Gd Arm Bde Morocco Inf Bde
Exploitation Reserve (in Exploitation Reserve Holding Box): None. These have been released.
Developer's and Player's Notes
This game has a long history of its own. Al Sandrick submitted this game to us long before Stalingrad Pocket came out. The original version had its own "series" rules, AM, PM and Night turns, many more units, and a single map rotated 90 degrees from the current layout. It was an elaborate piece of work. I suggested to him that it might be a good candidate for the SCS and proceeded to rewrite the rules to fit that series. Hundreds of playtest hours and at least three complete rules rewrites generated what you see here.
There have been numerous changes to Al's original design which I will attempt to explain here. Among them were the consolidation of turns and units, the cease-fire system, and the map's rotation.
Al's original game consisted of an enormous number of turns (three per day). Aside from the simple matter of taking too long to play, this feature had some annoying effects. Among them was the war of attrition the Israelis would wage — the game seemed to go on forever and the Israelis had nothing but time on their hands. As a result, they would slowly destroy the Egyptian army. By the end of the game, there were usually none left. Furthermore, the number of turns gave the Israeli player too strong a feeling of security — he had plenty of time to work with, so why hurry? The current turn length places a large amount of pressure on the Israelis. Time is very limited and there is much to do.
The Israeli army was much more broken down in Al's original OB. Each brigade came with its own artillery battalion, recon units and the like. These were consolidated into the two task force units in most brigades now (the artillery was consolidated into the artillery brigades). This change gave the Israelis a tough, formidable, yet fragile army. It also eliminated a feeling the Arab player had in early tests of facing the "Blue Wall" whereby his few forces would fight what appeared to be an endless stream of Israelis. Even now, there appears to be quite a few Israelis on the map, but they are very fragile (most are one step units). A properly handled Egyptian attrition offensive against the Israelis will keep them in line. The result was the correct feeling of mild panic on the part of the Israelis in the early turns.
The cease-fire system went through a number of gyrations on its way to its final form. The goal was to encourage the player who felt that with just a few more turns he could turn a limited defeat or victory into a really major success to ignore a cease-fire in order to go for all the marbles. A player already losing badly will have nothing to gain by ignoring a cease-fire (unless letting your own whipping go on a bit longer is a plus in your book...). One who has already won a big victory will not want to water it down by spending the VPs needed to blow off a cease-fire — unless he wants to mop up the map with your guys after he has already won (in that case feel free to get up and end the game and his sick fun...). Most games do not end up blowing off both cease-fires (and therefore causing the Superpowers to enter) — but it is there if players really want to punch the envelope.
The map was rotated 90 degrees on the insistence of Don Nesbitt. This makes the actual play area use more of the map (less wastage) and it increases the tactical feel of what is going on.
The loss of exploit capability when flipped (US and Egyptian units) shows the fragility of these units nicely. As exploit units, these units lose their combat effectiveness with that first step loss.
I originally thought I would include extensive "how to play" player's notes with this game, but have decided not to do so. The reason is that I play both sides in very specific ways which suit my temperament and I didn't want players automatically adopting the same techniques which might not be right for them. Instead, I have opted to list the following guidelines and allow players to invent their own ways of implementing them:
Both:
- Remember, overruns are not allowed in Rough, Sand Dune, and Swamp hexes.
- Don't forget to look at the Barrage Table modifiers — especially the one about spotting units.
- Do a quick VP tally and check the Victory conditions before blowing off a cease-fire. Don't let the cost surprise you.
- Control of the roads through the Sand Dunes is critical.
- In addition to the units that normally do not have ZOCs (those with attack strengths of less than one), keep in mind that DG units do not have ZOCs and therefore do not inhibit the abilities of units in adjacent hexes to function during the Exploit Phase or conduct overruns.
Israelis:
- Use your artillery, and at all costs, don't lose it!
- Avoid getting into a stand up slugging match with the Egyptians until you are ready to make the transition into a canal crossing operation.
- Time is critical...you do not have lots of it and you must do quite a few things to win.
- Remember, your Hawk is a critical asset — no Egyptian air unit can make it under its umbrella.
- Play the SAM Suppression Table — don't overuse Sam Suppression as the air units dedicated to it are useless for any other tasks, you must strike a balance.
- Use your Engineers to gain the CRT column shift they give, don't use your HQs for this purpose unless you have to — running the IDF without HQs (because they have been lost in combat) has been tried and it doesn't work. While you are at it, garrison your HQs!
- When you're eyeing the idea of blowing off a second cease-fire, take a good look at the Soviet and US units first — remember, you come out on the shorter end of the stick.
- Toward the end of the game, you'll have little or no armored units in the dead pile (thanks to the Tank Recovery Table). Don't let this table make you flagrant with lives and remember, many Israeli units can't come back.
- You must do a canal crossing to win...but don't begin the operation until you are ready for it.
Egyptians:
- Use the terrain to your advantage...keep the places you must garrison to a minimum by using it.
- Use your airmobile capability while you have the chance.
- Garrison the hexes west of the canal where each PCB road ends — the alternative is to watch an Israeli crossing operation develop on the fly and you will have no time to react. Even a SAM will do.
- Stay under your SAM umbrella — you don't want the IDF's airforce in a position to use all its power.
- Don't put up too many bridges. Two will usually do the trick. Extra bridges invite Israeli capture attempts and keep you from using your engineers to gain combat shifts.
- Your artillery is vulnerable and slow. Protect it and keep it in 18 Barrage Point groups. It is hard to keep it in the fight, but if the Israeli stands his ground, pull it up and pound him.
- Make good use of your airforce during the first turns (when you actually have some). Later, try to use it as best you can but don't expect too much.
- Use your tank replacement steps wisely and remember, you can't rebuild dead units — so try to pull damaged ones out for refitting before they are killed.
- While the Israelis will get most of their armor back (due to Tank Recovery), non-armor units you kill are gone for good — keep that in mind.
Charts and Tables
Combat Results Table
Notes: A—Attacker Result. D—Defender Result. #—Step Loss. r#—Retreat Hexes. ✡—Sagger Loss possibly required, see 3.6 if turn 3 or earlier.
| Odds | Dice 2 | Dice 3 | Dice 4 | Dice 5 | Dice 6 | Dice 7 | Dice 8 | Dice 9 | Dice 10 | Dice 11 | Dice 12 |
|---|---|---|---|---|---|---|---|---|---|---|---|
| 1:4 | A2r1✡ | A1r1✡ | A1r1✡ | A1✡ | A1✡ | A1✡ | A1✡ | A1✡Dr1 | A1✡Dr1✡ | A1✡Dr1✡ | A✡D2r2✡ |
| 1:3 | A1r1✡ | A1r1✡ | A1✡ | A1✡ | A1✡ | A1✡ |
Terrain Effects Chart
| Type | MP Cost | Combat |
|---|---|---|
| Open | 1 | NE |
| Rough | 3 | D x2 |
| Sand Dune | 4 | D x2 |
| Swamp | All (but see 1.4a) | D x2 |
| Sea | P | P |
| City | 1/2 | D x3 |
| Road, PCB Road | 1/2 | NE |
| Suez Canal | All (inf), P (other) | A x1/4 |
| Minor Canal | +3 |
Errata
5-04 Yom Kippur (10 Jan 96)
-
The Egyptian Bridges cannot be set up emplaced unless the scenario specifically calls for them to be set up that way. In other words, the campaign scenarios never begin with the Egyptian Engineers already on their Bridge sides.
-
Reshef Arm A should not appear as a reinforcement in scenario 4.4 — it begins play on the map.
-
The Israeli Hawk Bn cannot be airmobiled.