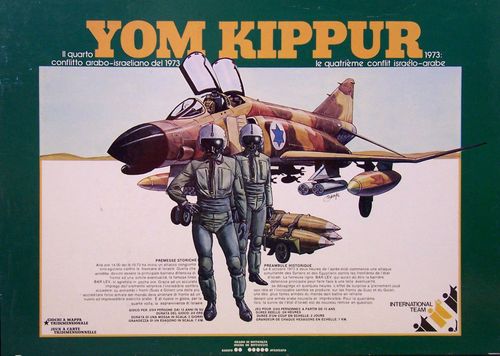
Yom Kippur
Yom Kippur Rulebook
Table of Contents
Table of Contents
Components
Note: the component counts below are as printed in the French source. The source's unit-by-unit breakdown is partly garbled in its text layer, so only the printed totals are given here.
- 2 map boards, in relief (see the end of the page in the source)
- 2 troop deployment charts
- 7 combat resolution tables
- 1 six-sided die
- 236 counters, distributed as follows:
- 87 Egyptian counters
- 85 Israeli counters
- 40 Syrian counters
- 17 Iraqi counters
- 2 Palestinian counters
- 2 Jordanian counters
- 2 Moroccan counters
- 1 Sudanese counter
- markers, as printed in the source: 12 markers, 8 further markers, and 1 turn marker (the time marker)
Introduction
Yom Kippur (Y.K.) is a simulation of the 4th Arab-Israeli conflict. Y.K. is based on in-depth historical research, which allows players to better understand the "why" and the "how" of the events that took place in the Middle East in October 1973.
To satisfy both beginners and wargame experts, the rules are set at two levels of difficulty.
The basic level is played on a single map (Sinai) and uses only some of the units engaged in the conflict, together with simplified tables and rules. All elements of the basic game are marked "Base". The counter positions are strictly faithful to history and begin from the moment the Egyptian troops have crossed the Suez Canal. Once players have fully assimilated the basic rules, they can move on to a more complex and detailed game and simulate the war in its entirety, including the Golan front. For this they use both maps and all remaining counters. In this game the assumptions on which the conflict was based are historical, while the developments depend on the players. For example, the Arab player may place his bridges across the canal in positions different from reality, while the Israeli player may dispose his reserves as he sees fit.
Finally, the simulation of the air conflict is deliberately superficial in the basic rules, to make them easier to learn; it is much more detailed in the advanced rules, giving the game a particularly careful representation of this aspect of the war.
Use of the Game Components
In the basic game, players use:
a) only the Sinai map; b) the pre-cut counters marked "Base"; c) the land combat tables; d) the first part of the rules.
Preparing the Three-Dimensional Map
The three-dimensional map is built by first fitting together the two first-level pieces (plains). The upper levels (mountains and peaks) are then placed on top of them, possibly glued, matching the letters printed on the white part of the first level with the letters on the upper levels (A with A, B with B, and so on). These letters serve no further purpose in the game.
The Basic Game
A) The Map
The map represents the area where the fighting took place between Israelis and Egyptians. A hexagonal grid is printed on the map; it is used to place units and regulate movement. Different terrain types are shown on the map:
- Light hexes: plain terrain.
- Yellow hexes: desert.
- Brown hexes: hills (first level).
- Blue hexes: sea or lake.
- Sides of blue hexes: canal.
The map also shows roads, towns, passes, fortified camps, the strongpoints of the Israeli Bar Lev defence line, and the starting positions of the units. All these indications (described in the map legend) affect movement and combat, as we will see below.
B) The Calendar
The map also prints a calendar. Players move the small time marker along it at the end of each turn. It also shows the reserve entry sequence for the period in question, the moment when the US electronic countermeasures in favour of Israel come into operation, and the replacements for both players.
Reinforcements that enter play according to the force sheet begin their movement from any road hex along the edges of the map. Players choose the access roads. Naturally, the Israelis enter from the east edge and the Egyptians from the west edge.
C) The Counters
Counters represent the units engaged in the conflict, generally at brigade level.
The values printed on the counters correspond to:
- the unit type;
- the unit level;
- the combat factor (C.F.);
- the movement factor (M.F.).
Other counters represent:
a. bridges; b. aircraft; c. the time marker; d. "shock" counters; e. strongpoints (fortins); f. SAM units (Surface-to-Air Missiles).
D) Setting Up the Game
Once the map is in place, the Israeli player sits on the east side and the Egyptian player on the west side. Players place units on the map according to the indications of the force sheet. Counters must be placed with the face showing the higher (darker) combat factor facing up at the start of the first turn. Players must observe the unit stacking rules (see that chapter).
In particular:
Israel. The Israeli player places his units in the hexes bearing the same symbols as the counters. He then places the strongpoints corresponding to the white symbols on the map.
Egypt. The Egyptian player places the bridges in the hexes where their symbols appear on the map. The SAM units are placed in any hexes west of the canal, except hexes containing a canal side. The units making up the 21st and 4th Armoured Divisions are placed in the hexes bearing their symbol. The artillery units are placed anywhere west of the canal in hexes having a canal side. All other units are placed east of the canal, at a maximum distance of 2 hexes from the canal. Aircraft are kept off the map.
Note: In the basic game, the first Egyptian turn (the crossing of the canal) is considered already played. During this turn, only the Israeli player's turn is therefore to be carried out.
E) Playing the Game
Y.K. is played in a series of successive turns. Each turn corresponds in reality to 2 days. Each turn is subdivided into two player turns (one Israeli player turn and one Egyptian player turn). The first player turn always belongs to the Egyptian player.
The sequence of activities making up a turn is as follows (each is explained in detail in the following chapters):
- Egyptian player turn
- 1a) Placement of aircraft, paratroop drops, movement of helicopter-borne commandos (air phase);
- 1b) entry of the reserves scheduled for this turn and movement of the land units (movement phase);
- 1c) execution of air bombardments;
- 1d) execution of land combats caused by movement (combat phase).
- Israeli player turn
- 2a) Placement of aircraft, paratroop drops, helicopter movements (air phase);
- 2b) entry of the reserves scheduled during this turn and movement of land units (first movement phase);
- 2c) execution of air bombardments;
- 2d) execution of land combats created by movement (combat phase);
- 2e) second movement of Israeli units, at the end of which there is no attack by the Israelis (second movement phase).
- Movement of the small time marker along the calendar.
F) Movement of Units: General Rules
During each movement phase, players may move all their units on the map. They may move each unit (provided it has an M.F.) a number of hexes not exceeding its M.F. Players are not obliged to move all their units: they may move all of them, only some, or none at all. Movement may be made in any direction, not necessarily in a straight line.
No combat may take place before the player declares that he has finished all the moves he wished to make (exception: see airborne troops).
Players may move their units over and through friendly units, whereas it is forbidden to do so over or through enemy units.
The M.F. cannot be transferred from one unit to another, nor carried over from one turn to the next.
Note: THE DIE IS USED ONLY TO RESOLVE COMBATS. IT IS NEVER USED DURING MOVEMENT.
G) Movement of Units: Special Rules
1) Stacking
Players may place at most two brigades in the same hex. SAM units, bridges, aircraft, shock counters and strongpoints do not count towards stacking.
Units may pass (without stopping) through hexes already at the stacking limit.
2) Movement over Terrain
Entering hexes of different terrain types does not have the same "cost" in movement points. No unit may "spend" more than its own M.F. to move, but every unit always has the right, in all cases, to move at least one hex (unless that hex is impassable under the rules).
The movement costs of the different terrains are as follows:
- PLAIN TERRAIN = 1 movement point (for any hex that includes at least partly this terrain type) (see the figure in the source);
- HILL TERRAIN = 2 movement points;
- DESERT TERRAIN = 2 movement points;
- MARSHY TERRAIN = 2 movement points.
Unless special rules provide otherwise, it is generally forbidden to move across the sides of hexes that are canal, sea or lake.
3) Movement along Roads
In general, passing from one hex to another by following a road costs only half a movement point.
3) Movement along Roads (continued)
Roads cancel all other movement point costs.
A movement carried out entirely on road (that is, never entering or leaving the road network off-road) costs only 1/3 of the movement points. Such a movement is called "COLUMN" movement. Movement on roads cannot be used in zones controlled by the enemy (see section H).
Column movement cannot be used by the Israelis during their second movement phase of a turn.
4) Crossing the Canal
a) All Egyptian units cross the canal only on bridges. Movement onto a bridge costs 2 movement points.
b) Israeli units cross bridges under the same rules as the Egyptians. In addition, during their first movement phase they may leave a hex having a canal side and move into an adjacent hex on the other side of the canal; in this case they use their whole M.F.
If this destination hex is adjacent to enemy units, the Israeli player must attack them. In this case the combat factor of the attackers is halved (rounded up). If the combat result calls for the reduction or retreat of the Israeli counters, these are eliminated.
5) Movement across Lakes and the Red Sea
a) Apart from the marine brigade (drawing shown in the source), no Egyptian unit may enter such hexes. The marines use 1 movement point for each such hex traversed. They may combine land and naval movement. These units may end their movement in a lake or sea hex. They also have the right to retreat through or into lake or sea hexes.
b) All Israeli units that begin their first movement phase on a shore of the Red Sea or of a lake may move through them, using 1 movement point for each water hex, because they are equipped with rafts (red lines mark the limits of the sea, the lakes and the canal). It is forbidden to end this movement in the water.
It is also forbidden to make this type of movement during the second movement phase.
At the end of the movement, units must stop as soon as they touch land. If they are then adjacent to enemy units, they must attack them with their combat factors halved (rounded up). A combat result calling for a reduction or a retreat results in the elimination of these units.
H) Zone of Control (Z.C.)
The 6 hexes surrounding each unit form its zone of control (figure in the source). The zone of control does not apply in lake or sea hexes, nor across canal hex sides.
Strongpoints, SAM units, bridges, aircraft and artillery units have no Z.C.
-
If Arab units enter an Israeli Z.C. during their movement, they must stop there. This rule admits no exception, even if friendly units are already in the enemy's Z.C. A unit that begins its own movement phase in an enemy Z.C. may leave it, but must of course stop as soon as it enters a new Z.C.
-
Israeli units are not constrained by Arab Z.C.s during their own movement. They may therefore cross them freely (they may not, however, use road movement).
-
If, as a result of combat, units must retreat through an enemy Z.C. that is also a Z.C. of friendly units (contested Z.C.s), the retreat is impossible and the counters concerned instead suffer a reduction result. The only exception to this rule is passing through or stacking with friendly units (figure in the source).
THESE PROVISIONS APPLY TO BOTH OPPONENTS.
I) Combat: General Rules
- Combat takes place between units located in adjacent hexes (exception: see artillery).
During the combat phase of its player turn (see 1d and 2d), each player may resolve the combats created during the movement phase, one by one, in the order he prefers. The units of the player whose turn it is are called the attackers during the combat, regardless of the general strategic situation.
Units located in hexes adjacent to enemy units are not obliged to attack (exception: see airborne troops); if they do attack, they must respect the following rules:
a) all units present in the hex must attack;
b) all adjacent enemy units must be attacked (unless they are already engaged against other friendly units) (figure in the source).
Two units stacked in the same hex may attack two or more enemies placed in different hexes, with separate odds (figure in the source). It is permitted to attack several enemies with a single unit provided the odds do not fall below 1 to 3.
Two stacked units always defend together by adding their combat factors.
- Combats are resolved by adding the combat factors of the attacker (including artillery), then adding the combat factors of the defender (with any modifications due to terrain, and taking into account defensive artillery). The players then compare the two totals as a ratio. The ratio is always rounded in favour of the defender.
EXAMPLES OF RATIOS:
- Attacker 10, defender 5: ratio 2-1
- Attacker 15, defender 7: ratio 2-1
- Attacker 19, defender 10: ratio 1-1
- Attacker 5, defender 14: ratio 1-3
Note: It is forbidden to attack at a ratio lower than 1-3. Ratios above 6-1 are treated as equal to 6-1, but 1 point is added to the die result for each point of ratio above 6. EXAMPLE: 8-1 = 6-1 (+2 to the die result).
- On the table for the attacker (Israel or Egypt), the players find the combat result at the intersection of the line representing the force ratio and the result of a die roll.
The result thus found is applied immediately.
The results are:
- "-" = nothing happens;
- AE or DE = the Attacker or the Defender is eliminated;
- AR or DR = the Attacker or the Defender is reduced (the player concerned turns the counter to its lighter side);
- A1, 2, 3, or D1, 2, 3 = the Attacker or the Defender must retreat 1, 2 or 3 hexes.
As a general rule, no unit may attack or be attacked more than once during the same turn (exception: see airborne troops).
A reduction result simulates the losses in equipment and men of units that have suffered a defeat (shown in the game by turning the counters concerned to their lighter side, which bears lower values).
A further reduction of a unit already reduced automatically results in its elimination.
A retreat result is applied following the rules below:
a) a unit may not pass twice through the same hex during its retreat;
b) it must end its retreat at the distance in hexes specified by the combat result, counting from the starting hex;
c) a retreating unit may not pass through the Z.C. of an enemy unit, unless it passes through or stops on friendly units;
d) the final position of the retreating unit must not violate the stacking rules;
e) if at the end of its retreat a unit finds itself stacked with a unit that subsequently attacks, it does not add its value to that unit's in calculating the ratio, but shares whatever fate befalls that unit;
f) if a unit required to retreat cannot do so, the "retreat" result becomes a "reduction" result.
Players may always voluntarily reduce their units instead of retreating them, but the reverse is not true;
g) if the defender has been eliminated or has retreated, the attacking units may, at the end of the combat, advance into the hex vacated by the enemy. Only units that took direct part in the attack in question may make this move. Z.C.s have no influence on this type of movement. This movement does not exclude a possible later movement during Israel's second movement phase.
J) Combat: Effects of Terrain
Terrain has a wide variety of effects on combat:
-
Canal It is forbidden to attack across canal hex sides (exception: see artillery).
-
Plain and desert terrain No effect on combat.
-
Hill The DEFENSIVE combat value of a unit placed on such hexes increases by 2 points. This advantage is fixed, whether it concerns a single unit or 2 stacked units.
-
Towns The DEFENSIVE combat value of units situated in a town increases by 1 point. Here too the increase is given for the hex and therefore does not depend on the number of units.
-
Fortified camps They give an increase of 2 points in defence to EACH unit located in them.
-
Marshes They double the defensive combat factor of EACH unit located in them (including strongpoints). Units attacking from a marsh hex have their combat factor halved (rounded up). The two modifications may be cumulative if a unit attacks from a marsh hex a unit that is also defending in a marsh hex.
K) Capture of Bridges
To take a bridge, it is sufficient to have, during the combat phase, a unit in a hex adjacent to that bridge. There must not, however, be enemy units on that bridge; if there are, these units must be eliminated or forced to retreat as the result of a combat. At the end of the combat phase the bridge is removed.
L) Artillery
Artillery brigades move and defend (if attacked directly) like all other units.
They may also support friendly units with their fire during the combat phase, both in attack and in defence. The range of artillery is 3 hexes and its fire value is equal to 2 C.F.
Reduced artillery units have a fire value of 1 C.F., without any reduction in range. They may fire over friendly units and over any type of terrain. Artillery units may only attack in support of other units in combat. Negative combat results do not apply to artillery units intervening in support. The number of units that may fire on the same hex is unlimited; however, no unit may fire more than once during each combat phase.
Artillery units must use their whole C.F. on a single target hex. If an artillery unit is attacked, it cannot perform a support mission but must defend with its own C.F.
Artillery units have no Z.C.
- Supporting bombardment in attack
Each player carries this out during his own combat phase. The target hex is the one in which the enemy unit is located. The player concerned announces which artillery units will fire in support of the attack he is conducting and adds their C.F. to the total of the attacking units.
- Supporting bombardment in defence
It is carried out during the combat phase of the opponent. The target hex is the one in which his own attacked unit is located. The player concerned, after receiving the declaration from his opponent of the total of his C.F. (units + artillery), decides whether or not to use his own artillery in defensive support on his hex.
M) SAM
- SAM units belong exclusively to the Arab player. They are placed at the start of the game in accordance with the following rules:
a) two SAM units may never be stacked together;
b) SAM units must initially be at least 1 hex away, to the west of the canal. The range of each SAM is 5 hexes. Their main mission is to reduce the effectiveness of Israeli bombers and to protect friendly aircraft, which suffer no losses when they are within their range (see aviation).
They also have an influence on paratroop drops and on the movement of helicopter-borne troops (see these sections).
- Moving SAM units involves the following operations:
a) during its movement phase the player covers the SAM units he wishes to move with the "SAM MOV" counter (reverse side of the "SHOCK" counters). The units in question may not fire during this turn;
b) from the following turn these units may move like all others with M.F. = 3. They may not fire during this turn either;
c) once they have arrived at their destination, after one or more movement phases, the SAMs are placed at their combat posts by removing the "SAM MOV" counter; they still may not fire during this turn;
d) SAM units, finally ready, may again act normally.
- If SAM units are attacked by land units, they defend normally with their own C.F.; in this case a retreat result is equivalent to a reduction result. SAM units may not attack and have no Z.C. If the attack comes from enemy aviation, the SAM suffers the bombing like all other units and may defend itself during this turn only by rolling a die:
a) die result 2, 3, 4, 5: the enemy aircraft withdraws without carrying out its mission;
b) die result 6: the enemy aircraft is reduced but still attempts the bombing;
c) die result 1: the aircraft bombs without suffering any damage.
Protection between SAM units is always permitted.
Note: Reduced SAM units subtract one point from the die result.
-
Reduced SAM units are active only at 50% of their potential (rounded up). Thus, if an Israeli aircraft attacks a hex under the protection of a single SAM unit, that unit acts normally. If it attacks under the protection of 2 reduced SAMs, only one acts normally. One undamaged SAM and 3 reduced SAMs are equivalent to 3 SAMs.
-
After the 5th game turn, the U.S.A. comes to the aid of Israel with its advanced electronic technology (see the calendar). Thus all SAMs from the 6th turn onward are considered reduced, even if they have not actually been touched. SAMs that are already reduced at this point in the game suffer no further damage.
N) Aviation
Note: In the basic game, players use the counters without a letter.
-
Aircraft units serve to bomb enemy units. They are placed during the air phase, before the movement phase. During each game turn, players may place only one aircraft counter per hex. Only one unit per hex may be attacked (if there are two stacked units, the player concerned must declare which one he wishes to bomb).
-
During the bombing execution phase, the player rolls a die for each aircraft placed. The results differ according to the air force:
a) Arab aviation. Against armoured or mechanised units, a result of 6 means a reduction; any other result has no effect. Against other unit types, it is the results 5 and 6 that cause a reduction. Whatever the number of aircraft placed during a turn, if at least 1 Arab aircraft bombs a hex outside the protection range of the SAMs, the Egyptian air force loses 1 aircraft. The aircraft lost is removed from the game at the end of the Egyptian player turn.
b) Israeli aviation. Bombing is carried out using the Israeli combat table, in the column for the 3-1 ratio. Results D2 or D3 mean "shock" for the unit hit, on which the special counter is placed; this unit may not move voluntarily during its next game turn. The other results are applied normally. Result D1 is equivalent to "nothing happens".
For each SAM unit whose range (5 hexes) covers the bombed hex, the players look up the result of the attack by shifting one column to the left from the 3-1 ratio.
Example: If the bombed hex is protected by 1 SAM unit, the 2-1 column is used. If it is protected by 3 SAMs, the 1-2 column is used.
Reduced Israeli aircraft check their results starting from the base column 2-1 (reductions may only occur for missed attacks against SAMs).
Any negative results do not apply against aircraft that are bombing.
Note: Bombing of bridges is forbidden in the basic game.
O) Airborne Troops
- Paratroopers
Paratroop units may be used in two different ways:
- enter play normally by the land access routes. In this case the Israeli player uses the mechanised paratroop counters. The Egyptian player uses the infantry paratroop counters;
- remain off the map. In this case they may be dropped during later game turns as infantry on any hex that is not directly occupied by enemy units.
The risks of the drop are simulated by a die roll. If it is an Israeli unit, it is eliminated if the result is 1; if it is an Egyptian unit, it is eliminated if the result is 1 or 2. This operation is carried out for each unit dropped.
The die result is modified by the following factors:
- SAM: -1 for the Israelis, or +1 for the Egyptians, for each SAM unit whose range covers the drop hex;
- two units dropped into the same hex: -1 to the die result.
Units dropped into hexes adjacent to enemy units may immediately attack them (without waiting for the combat phase), but without support from other units and with a C.F. halved (rounded up).
They may also attack them during the normal combat phase, with or without support from other units, but always with a C.F. halved. Players may use only one of the two possibilities during their turn, but one of them must be attempted.
During the turn in which they are dropped, paratroopers may not carry out the movement phase.
- Helicopter-borne troops
Arab commando units may move by helicopter (M.F. = 10, regardless of terrain type or Z.C.s). Helicopters may not fly over enemy units. Helicopter-borne units may also be shot down in flight, in the same way as paratroopers. As regards SAM protection, the major risk prevails (that is, for example, if even a single hex is traversed outside their protection, the modifying factor +1 cannot be used).
Helicopter-borne units must also attack adjacent units mandatorily, following the rules already set out for paratroopers.
Israeli paratroopers that entered by land as mechanised units may also use this system, running the same risks. In this case the counters are replaced by "paratroop-infantry" counters, and they remain as such until the end of the game.
Note: It is forbidden to add air movement and land movement together.
P) Strongpoints (Fortins)
The positions where the Bar-Lev line strongpoints are placed are shown on the map.
Note: In the basic game only the strongpoints corresponding to the small white symbols are placed on the map. The others are considered already captured during the first phase of the Egyptian attack.
Strongpoints have neither M.F. nor Z.C. For them, any retreat result counts as a reduction result, while a reduction result counts as elimination.
Reduction is applied only in the case of air bombing.
Units placed in strongpoints have their C.F. increased only in defence. This applies in the case of two stacked units, for which the sum of their C.F. plus the C.F. of the strongpoint is taken into account.
The BUDAPEST strongpoint on the Sinai map must be considered white.
Q) Recovery Points
From the 6th game turn onward, both belligerents receive economic aid from friendly countries.
This aid is counted in points, each of which corresponds to one C.F. to be recovered. Benefiting from this recovery may be either units still present on the battlefield but reduced (which thus become whole again), or units previously eliminated (which re-enter play by the normal access routes).
Recovering a destroyed aircraft costs 2 points for the Arab player and 4 points for the Israeli player, respectively.
Recovering a reduced aircraft costs 2 points for the Israeli player.
The points in question number 10 for Israel and 5 for Egypt.
Points may be used from the 6th game turn onward, but they need not be used during that turn.
Recovery points may not be applied to reduced or destroyed SAM units or strongpoints.
Example of recovery by Israel:
- 1 reduced tank brigade = 3 points (the difference between the C.F. of the normal unit and the reduced unit);
- 1 eliminated paratroop brigade = 4 points (non-mechanised brigade);
- 1 reduced aircraft = 2 points.
TOTAL: 3 + 4 + 2 = 9 (the remaining point cannot be used, since on its own it does not allow the recovery of a unit).
R) Conditions of Victory
At the end of the 9th game turn, the player who has accumulated the greatest number of victory points wins the game. These points are obtained as follows:
- Israel
- 2 points for each undamaged strongpoint;
- 1 point for each reduced strongpoint;
- 5 points for each unit west of the canal (dropped paratroop units count only if there are also land units);
- 2 points for each Egyptian bridge destroyed.
- Egypt
- 10 points for each pass (col) where undamaged or reduced Egyptian units are located (paratroopers and commandos do not count);
- 1 point for each unit (undamaged or reduced) that has exited during the game along the coastal road towards Israel (units that have exited no longer re-enter play);
- 1 point for each Israeli land or air unit eliminated, even if it is recovered later (strongpoints do not count).
In addition, the Egyptians lose 1 point for each unit below the minimum number needed to compose an army (16) east of the canal. For example, if at the end of the game Egypt has 15 units east of the canal, it loses 1 point. Units that have exited along the coastal road are not counted in this calculation.
Advanced Game
Use of the Game Components
In the advanced game, players use:
a) both the Sinai and the Golan maps; b) all counters remaining in addition to those already used in the basic game (except the aircraft counters of the basic game); c) all the tables of the game (including those of the basic game); d) all the rules set out in the rulebook.
The basic game is designed for 2 players.
The advanced game may be played by:
a) 2 players, as in the basic game; b) 3 players (2 Arab players each control one of the two fronts); c) 4 players (2 Arab players and 2 Israeli players, each controlling one of the fronts).
To simulate the situation of the war more realistically, it is advised to play 3-player advanced games.
This distribution of forces represents more concretely the division between the Arab commands, as opposed to the single command of Israel.
A) The Map
The map represents the area where the fighting took place between Israelis and Syrians. In addition to the terrain types already examined in the basic game, players will find on the map:
- dark brown hexes - impassable mountains (second level);
- sides of blue hexes - river;
- sides of grey hexes - lava;
- sides of black hexes - Syrian fortified lines.
The borders between nations, the kibbutzim and the bridges over the Jordan are also shown.
All these elements, which will affect movement and combat, are also described in the map legend.
B) The Counters
In the "advanced" game all the counters of the game are used, except the aircraft counters of the basic game. The new aircraft counters bear the following markings: I (interceptor), B (bomber), IB (fighter-bomber).
Other counters represent helicopters. The C.F. of these counters is shown on the "aircraft values" table.
C) Preparing the Game
The players place on the maps the units called for by the force sheet for the 1st game turn. The indications printed on the Sinai map relating to the basic game are not taken into account.
Israelis:
- Sinai: more than 5 hexes west of the canal.
- Golan: 2 infantry units at Kiriat Shmonen (printed "Kiriat Schmonen" in the source), and the rest at the player's choice, but always inside his borders.
The units located at Kiriat Shmonen may not move until one of the two following events has occurred:
- the Arab player enters Lebanon;
- the Arab player crosses to the west of the Jordan.
The two reserve units are not placed on the map but enter play when the player wishes during the first Israeli movement phase of the 1st game turn.
All strongpoints are set up.
Arabs:
- EGYPT: the SAM units in any hex situated west of the canal and not having a canal side. The units of the 2nd Army north of the road shown in red. The units of the 3rd Army south of the road shown in red.
- SYRIA: the SAM units in the hexes situated east of the second fortified line. All other units in the hexes bearing the symbol of their division.
D) Playing the Game
In the "advanced" game each game turn is also divided into two player turns: an ARAB turn and an ISRAELI turn. The first player turn always belongs to the Arab player. The subdivision of a game turn, when playing with the advanced rules, is as follows:
- Arab turn
- 1a) Arab air phase with Israeli interceptions;
- 1b) placement of bridges over the canal;
- 1c) entry of reserves and movement of land units;
- 1d) combat phase.
- Israeli turn
- 2a) Israeli air phase and Arab interceptions;
- 2b) entry of reserves and movement of land units;
- 2c) combat phase;
- 2d) second movement phase.
- Movement of the time marker along the calendar.
Note: During the Arab air phase of the first game turn, the Israeli player may not launch his interceptors.
E) Placing Bridges over the Canal
In the basic game the bridges were fixed. In the advanced game, by contrast, they must be placed at the start of the game and may be moved afterwards. During the bridge placement phase the Egyptian player may install or remove any bridges he wishes, provided he respects the following limitations:
-
the hex in question must not be occupied by enemy units;
-
nor may it be located in an enemy Z.C.;
-
for bridge placement the prohibition extends to the Z.C.s of allied counters; in this case, the strongpoints also have Z.C.s;
-
the counters representing bridges are placed in hexes having a canal side, situated east of the canal (figure in the source);
-
it is forbidden to place bridges and to move across the sides of red hexes.
F) Movement of Units
All the rules of the basic game remain valid; however, because of the addition of new terrain types, the special rules are more numerous.
- Stacking
Helicopters do not count in the calculation of troop stacking.
- Movement over terrain
The "costs" of the new terrain types are as follows:
- MOUNTAIN TERRAIN - impassable;
- RIVER HEX SIDE - the whole M.F.;
- LAVA HEX SIDE - impassable.
3) Movement across Rivers
River hex sides may be crossed on bridges without any penalty. They may also be crossed at any point by using fords, provided the unit begins the game turn on a hex adjacent to the river and uses its whole M.F. to cross it.
4) Movement in Lebanese Territory
The Arab player may move freely in Lebanese territory. The Israeli player may not enter Lebanon unless the Arab player has already done so.
5) Movement in Jordanian Territory
The Israeli player may in no case move or retreat into hexes located in Jordan. The Arab player may not voluntarily enter hexes of Jordanian territory. He may, however, if no other possibility exists, retreat into Jordan following an unfavourable combat. In that case he must leave Jordanian territory during the next movement phase, failing which the unit is eliminated.
G) Zone of Control
All the rules of the basic game remain valid. Zones of control also do not extend beyond the river. Helicopters have no Z.C. and are not restricted in their movement by enemy Z.C.s.
H) Reserves and Off-Map Movements
Arab reserve units enter normally on their home map, as in the basic game. Israeli reserves enter from the game turn on which they are available, distributed between the two maps as the player prefers. He is not obliged to bring them in at that turn. Moreover, if he judges it useful, he may transfer counters from one map to the other under the following conditions:
-
the unit concerned leaves the map on which it was located, following the normal movement rules;
-
from the following game turn the unit may enter the other map or return to the same map.
I) Combat: General Rules
For helicopters, a retreat or reduction result is equivalent to elimination.
J) Combat: Influence of Terrain
-
River The C.F. of the attacker is halved (rounded up).
-
Fortified lines 2 points must be subtracted from the C.F. of units attacking across a fortified-line hex side.
-
Kibbutzim 1 point of C.F. must be added to the total strength of the units defending in them. The increase is given to the hex and not to the individual units.
K) Air Phase
The following rules completely replace the basic rules concerning the use of aircraft, helicopters, paratroops and SAM units. The scheme of the two air phases is as follows:
Arab air phase
- Placement of the Arab participants in raids (paratroops, helicopters, bombers and interceptors);
- checking of the reconnaissance of the above units by the Israelis;
- placement of Israeli interceptors and fighter-bombers;
- air combat;
- SAM fire;
- Arab bombing.
Israeli air phase
- Placement of the Israeli units taking part in raids (paratroops, helicopters, bombers, fighter-bombers and interceptors);
- checking of the reconnaissance of the above Israeli units by the Arabs;
- placement of Arab interceptors;
- SAM fire;
- air combat;
- Israeli bombing.
At the end of the air phase all aircraft (I, B and IB) are removed from the map.
Note: During the Arab air phase of the first game turn, the Israeli player may not use his interceptors.
Placement of raid participants. A maximum of 3 raid unit counters may be placed in the same hex, of which only 2 may be paratroops or commandos. During the air phase, for stacking calculations, commandos or paratroops carried by helicopter count as only one counter.
a) Paratroops. They may be dropped on any hex of the map, provided that hex is not occupied by enemy units and is not impassable under the rules.
Israeli paratroops may be dropped on either map, whereas the Egyptians may only be used on the map representing the canal zone.
Instead of being dropped, paratroops may enter the map normally as land units, as in the basic game. Only in this case does the Israeli player use the mechanised paratroop counters.
Units dropped into hexes adjacent to enemy units may attack them immediately during the air phase, without the support of other units, with their C.F. halved (rounded up).
They may also wait for the combat phase and attack with or without the support of other units, but always with C.F. halved. These two possibilities are mutually exclusive, but one of them must be carried out.
During the turn in which they are dropped, paratroops do not carry out the movement phase. If they are attacked during the air phase by enemy interceptors, their C.F. (defensive only) is shown on the "aircraft values" table.
Paratroops may also be transported by helicopter (see this paragraph).
b) Helicopters. They may carry paratroops or commandos, departing from the hex where they are located or passing through it, and setting them down in any hex along their route.
A helicopter may not carry more than one unit during each turn. Mechanised paratroop units may not be helicopter-borne in this form. If a player wishes to transport them by helicopter, the counter representing them must be replaced by a paratroop-infantry counter; this unit remains as such until the end of the game.
Helicopter-borne units may not move during the movement phase of the turn in which they were transferred by air.
Helicopters use their M.F. (10) at the rate of one movement point for each hex traversed, whatever the type of terrain overflown (even if it is impassable for movement on the ground).
They may move without penalty through enemy Z.C.s, but may not fly directly over enemy units, on pain of immediate elimination. During the air phase, land units share the fate of the helicopters that carry them if the latter are attacked.
The C.F. of helicopters (defensive only) used during this phase is shown on the "aircraft values" table. During the land combat phase helicopters use the C.F. printed on the counter (0); if they are attacked alone, they are therefore automatically eliminated. If they are stacked with other units, they share their fate (recall that for them retreat or reduction results are equivalent to elimination).
Helicopters have no Z.C.
c) Bombers. They may be placed on any hex. Their mission is to bomb enemy units, strongpoints or bridges if they escape the enemy's reaction.
d) Interceptors. Their mission, during this part of the air phase, is to escort their bombers, helicopters or paratroops, to prevent them from being shot down by enemy interceptors.
e) Fighter-bombers. During each turn they may be used either as bombers or as interceptors. This choice is communicated to the opponent when they are placed on the map.
Reconnaissance check. For each hex containing enemy raid units, the interested player rolls a die to check whether these units have been spotted. If there are 3 units in the same hex, they are automatically spotted; if there are 2 units, they are spotted if the die gives 1, 2, 3 or 4; if there is only one unit, it is spotted if the die gives 1 or 2.
Once again, paratroops or commandos carried by helicopter count as a single counter.
Placement of interceptors. Players may place up to 3 interceptors in each hex where enemy raid units are located, provided these units have previously been spotted. During this part of the air phase, the Israeli player may use his fighter-bombers as interceptors.
SAM. Note: As you can see in the scheme of the air phase, the firing of SAMs takes place before air combat only during the Israeli air phase. During the Arab air phase, by contrast, combat precedes the firing of the SAMs.
SAM units automatically spot any enemy raid unit located within their range (5 hexes). They may fire only once during each turn at a hex containing enemy raid units or interceptors.
Once the target hex has been designated, the Egyptian player declares which combination of units in the hex is targeted and which are not; then he rolls a die. The result of the operation is checked on the "SAM table", according to the die result and the number of units taken as targets.
The result thus found is applied immediately to the units taken as targets.
A SAM unit attacked by bombers must fire against them in its own defence. If it is attacked by land units, it defends normally using its C.F. SAM units may not attack and have no Z.C. They may be moved by following the procedure explained in the basic game.
Reduced SAM units subtract 1 point from the die result.
From the 6th game turn onward, all SAM units subtract 1 point from the die result because of the electronic countermeasures adopted by Israel.
Note: These two subtractions may be cumulative: thus, from the 6th game turn onward, reduced SAM units subtract 2 points from the die result.
Air combat. Combat takes place between the interceptors and the raid units. For calculating force ratios, the C.F. printed on the "aircraft values" table must be used. The value of reduced aircraft is calculated by halving their C.F. (rounded up).
It is not obligatory to attack all opponents. It is permitted to attack several counters with a single counter, provided the ratio does not fall below 1-3. It is also possible to attack several opponents with several counters while calculating only a single ratio. Any ratio above 4-1 is treated as equal to 4-1.
A counter may not be attacked more than once during one combat.
Note: The C.F. of helicopters and paratroops is defensive only.
Four different types of combat may arise, depending on whether the raid units are:
a) helicopter-borne paratroops; b) bombers; c) helicopter-borne paratroops escorted by interceptors; d) bombers escorted by interceptors.
a) The player who controls the interceptors declares which combats he wishes to conduct, calculates the force ratios and rolls a die; he then consults the table applicable to him (Arab or Israeli air combat table). The possible results are the following:
- "-" = no effect;
- D = elimination;
- R = reduction (for helicopters R = D); the transported units or the paratroops dropped are reduced;
- A = repulsed (the mission has failed and the units are returned to the positions they occupied at the start of the air phase, without suffering damage. They may not move during the following movement phase).
b) The procedure for interceptors is analogous to that set out above in point a). In addition, the player who controls the bombers may in turn impose one or more combats against the interceptors using his combat factors.
Note: These combats must be considered simultaneous; the results of the attack by the interceptors are therefore applied only after the bombers have had the opportunity to react.
c) In this case, before being able to attack the helicopter-borne paratroops, the interceptors must engage the escort interceptors in combat. Combats between interceptors are considered simultaneous: the results are therefore applied only after the escort has had the opportunity to react. At this point, the interceptors still present (that is, neither eliminated nor repulsed) may decide one or more combats against the helicopter-borne paratroops, following the rules set out in point a).
d) The procedure is analogous to that set out in point c), with the sole difference that the possible attack against the bombers follows the rules set out in point b).
Bombing. The bombers that are still on their objective (that is, neither eliminated nor repulsed) may at this stage carry out the attack.
The player who controls the bombers must indicate which counter he wishes to hit among those located in the overflown hex.
The result of the action is checked on the "bombing" table.
Reduced aircraft must subtract 1 point from the die result.
The table gives different results according to the type of objective and the nationality of the attacking aircraft.
The possible results are the following:
- "-" = no effect;
- AR = the attacking aircraft is reduced and the result of the bombing is nil;
- D = the objective is eliminated;
- R = the objective is reduced (if it is a bridge, it is eliminated);
- S = the objective is immobilised for 1 turn (place the "shock" counter on it).
EXAMPLE
7th game turn, Israeli player turn.
The Israeli player places on a hex within the range of a Syrian SAM 1 paratroop unit carried by 1 helicopter and 1 IB, which he declares he will use as an I.
The Arab player rolls 1 die to check whether the raid units have been spotted; the result is 3. As the raid units correspond to 2 counters, they are therefore identified; the Arab player then has the possibility of attacking them with his own interceptors.
He decides to attack with 2 interceptors, placing them in the hex where the raid units are located.
It is at this point that the SAM firing takes place.
The Arab player designates the IB as the target and rolls the die, consulting the "SAM" table.
The objective consists of a single counter, and the die result is 5 (-1 = 4, since the players are in the 7th game turn and the Israelis therefore have effective electronic countermeasures).
The result of the combat is "R": the IB is therefore reduced and the counter representing it must be turned over.
Air combat may then take place. The players decide how they intend to conduct the engagement. The Arab player decides to attack the IB at a force ratio of 2-1. The Israeli player decides to attack the two interceptors at once, at a force ratio of 1-2. Each player proceeds to check the result of the combat.
The Arab player obtains a 3 on the die; result "-", that is, "nothing happens". The Israeli player obtains a 4 on the die, which results in the reduction of the two Arab interceptors.
The Arab interceptors may then attack the helicopter-borne paratroops. They do so at a force ratio of 4-1 and obtain a 3 on the die, which corresponds to result "A": the paratroops and the helicopter are repulsed and are therefore returned to the positions they occupied at the start of the air phase, without being able to move during the following land phase.
At the end of the air phase the Israeli IB and the Syrian I are removed from the map.
L) Recovery Points
The rules for using recovery points are those already set out for the basic game.
The only differences are the following:
- ISRAEL has 20 points and the ARABS 10 points;
- the cost of aircraft is equal to their C.F. (the IB costs the same as the I).
M) Conditions of Victory
At the end of the 9th game turn, the side that has accumulated the greatest number of victory points wins the game.
The victory points are:
Israel
- 20 points for the occupation of Damascus;
- 5 points for any other occupied Syrian city;
- 5 points for each unit located west of the Suez Canal (paratroops do not count if they are the only units west of the canal);
- 2 points for each Egyptian bridge destroyed;
- 2 points for each undamaged strongpoint;
- 1 point for each reduced strongpoint.
Arabs
- 10 points for each occupied pass (unless occupied by paratroops or commandos);
- 10 points for each occupied Israeli town;
- 2 points if the Syrian strongpoint is still undamaged;
- 1 point if the Syrian strongpoint is reduced;
- 1 point for each Egyptian unit that has exited towards Israel by the coastal road (units thus exited may no longer re-enter the map);
- 1 point for each Israeli land or air unit eliminated (even if it was subsequently recovered); strongpoints and helicopters do not count.
Note: The Israeli player automatically loses the game if during any turn none of his land units is on one of the two maps.
The Arabs must have the equivalent of one army east of the canal (16 counters); they therefore lose 1 point for each unit below 16 east of the canal.