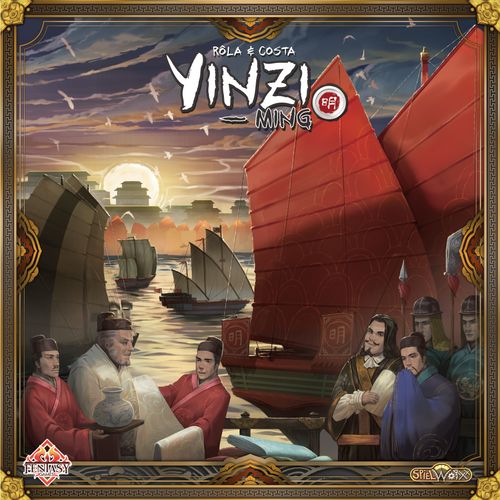
Yinzi: Ming
Yinzi: Ming Rulebook
Table of Contents
Table of Contents
Game Components
- 1 Rulebook
- 1 Game Board
- Merchants: 4 merchants (1 player = 1 merchant)
- Overseers: 92 overseers (23 per player color)
- Peasants: 72 peasants (18 per player color)
- Ambassadors: 8 tokens (2 per player color)
- Resources: 14 Wood tokens, 8 Stone tokens
- Silver – Yínzi: 25 Silver ingots
- Copper - Sapeques: 56 Copper coins
- Misfortune tiles: 16 tiles
- Goods: 32 goods (8 per player color)
- Local Market Tiles: 8 Local Market tiles
- Crop Tiles: 30 Crop Tiles (5 Maize, 5 Cotton, 5 Ramie, 5 Sugarcane, 5 Bamboo, 5 Tea)
- Player Boards: 4 Player Boards (1 per color, representing their ledger)
- Ship Tiles: 18 tiles (12 bound for Asian destinations, 6 bound for European destinations)
- Silk Road Caravan Tiles: 20 Silk Road Caravan tiles
- Order Cards: 48 cards (12 per player color)
- Corruption Aids: 4 aids tiles (1 per player)
- Final Scoring Pad
- Cotton Bag: 1 bag for storing the Crop Tiles
- Workshops: 16 Workshop tiles (4 for each type of good: Paper, Porcelain, Refined Sugar, Silk)
- Die: 1 six-sided die (D6)
- Ratio Marker: 1 Copper/Silver ratio indicator
- Player Aids: 4 aids (1 per player)
Glossary of Terms
Provinces: There are 4 provinces (Huguang, Jiangxi, Nanzhili, Zhejiang), each containing 1 Local Market and several Fields. Two of them (Huguang and Jiangxi) also contain 2 Salt Mines.
Fields: Represented by square spaces, whether empty or occupied. Fields may hold Crops or Workshops.
Crops: There are two categories of Crops:
- Food Crops: Rice and Fruits are present at the start of the game, and Maize can be added from the Crop Display.
- Commercial Crops: Cotton, Sugarcane, Ramie, Bamboo, and Tea, also available in the Crop Display.
Empty Field: A Field is considered empty if no Peasant is working the Crop on it. A Crop may be present in the Field, but if it is not being worked by a Peasant, the Field is still considered empty.
Salt Mine: Salt Mines are present on the Game Board but are not Fields. They cannot hold Crops or Workshops, but Peasants can work there to extract Salt, which can be sold at the Market or exported.
Workshops: Workshops are built on empty Fields.
Goods: There are 4 types of Goods: Silk, Porcelain, Refined Sugar, and Paper. They are produced in Workshops by Peasants of the same color as the Workshop, who are recruited from Local Markets.
Game Board Terms
- Materials Market
- Imperial Palace
- Trade Port
- Turn Order Track & Bonus
- Administration (Corrupt Administration)
- Negotiation
- Foreign Markets
- Crop Display
- Fields
- Local Market
- Exchange Rate
- Caravanserai
- Transport Capacity
- Port
- Artisan Quarter
- Silk Road Caravan
- Rural Exodus
- Open Sea
Game Setup
-
Place the Board in the center of the table.
-
Set up the Local Markets:
- With 2 players: Use the provinces of Huguang (grey), Jiangxi (white), and Nanzhili (black). The province of Zhejiang (brown) is not available. Players cannot build Workshops or plant Crops there.
- With 3 players: Use the provinces of Huguang (grey), Jiangxi (white), and Zhejiang (brown). The province of Nanzhili (black) is not available. Players cannot build Workshops or plant Crops there.
- With 4 players: All provinces are available.
-
Set up the Local Markets (ships):
- With 2 players: Return 4 Asia-bound ships to the box.
- With 3 players: Return 2 Asia-bound ships to the box.
- With 4 players: Keep all the ships.
Set aside the 6 Europe-bound ships, then shuffle the 12 Asia-bound ships.
-
Reveal Ships at the Port and in the Open Sea. Reveal 2 / 3 / 4 ships depending on the number of players, and place them in the Trade Port. Then shuffle all remaining ships (both Europe- and Asia-bound) and reveal 2 of them — these are the incoming ships in the Open Sea. Form a face-down stack with the rest of the ships and place it in the Ship Display.
-
Prepare the Crop Display. Set aside the 5 Maize Crop tiles. Shuffle the remaining Crop tiles in the Cotton Bag. Reveal 6 Crop tiles and place them in the Crop Display. Then return the 5 Maize tiles to the bag, shuffle again — this becomes the draw pile for upcoming Crops.
-
Reveal Silk Road Caravans. Reveal 2 / 3 / 4 Silk Road Caravan tiles depending on the number of players, and place them at the City Gates. Then form a face-down stack with the remaining Caravan tiles and place it in the Caravan Display.
Player Setup
-
Each player chooses a color and takes the corresponding game components:
- 1 Merchant
- 23 Overseers
- 18 Peasants
- 4 Copper coins
- 1 Wood or 1 Stone
- 12 Order Cards
The components of any unused player colors are returned to the box and will not be used during the game.
-
Reveal 3 Order Cards. Each player places the number of Overseers indicated on the lower part of their Order Cards.
-
Determine Turn Order. Randomly determine the players' turn order and place them on the Turn Order Track using their numbered markers.
-
Place Administrator Tokens. Each player places 1 Administrator token on space "1" of the Transport Capacity track, and 1 Administrator token on the Ship in the Negotiation Track.
-
Sort the Workshops. Separate the Workshops by color. Remove from the game (back to the box) any Workshops belonging to unused player colors, one of each of the four Goods types (Porcelain, Refined Sugar, Silk, and Paper).
-
Reveal Workshops. Shuffle the Workshops of the active player colors, then reveal a number of Workshops equal to the number of players. It is possible for multiple Workshops of the same color to be revealed.
-
Choose a Workshop. In reverse turn order, each player chooses one Workshop and places it on an empty Field of their choice, following placement rules. Then, place a Foreman from your personal supply onto the designated space on the Workshop to mark ownership.
-
Once all players have chosen a Workshop, reveal a new set of Workshops, again equal to the number of players in the game.
Order Cards
An Order Card is used in two ways:
- Send Overseers to the City — All Overseers at the bottom of the card will be sent to one, and only one, action district of the main City board. Here, the action will be performed 2 times (using 2 Overseers), for example.
- Issue a Command — Under one action slot of your personal board, you will perform the action as many times as the number of bars shown on the card (1, 2, or 3). Each of these uses can be performed in any order. Both actions will be used during the round.
Turn Sequence Overview
Yínzi: Ming is played over 4 game rounds. In each round, a player uses 3 Order Cards to carry out 6 Directives: 3 Directives to Issue a Command, and 3 Directives to Send Overseers to the City.
A game round in Yínzi: Ming always unfolds in the following order:
Determine the Copper/Silver Ratio — Exchange rates shift, and the value of Silver fluctuates. This round, buying or selling Copper coins or Silver ingots will be more or less expensive.
Choose a Bonus and Determine Turn Order — A little help is always welcome, choosing a Merchant Bonus gives you three advantages: you receive a bonus for the current round, you may purchase the Crop linked to that bonus, and your turn order is set according to your position on the Bonus Track.
Carry Out Your Directives — Set your strategy in motion and expand your influence across the empire by giving 6 Directives to your Overseers. Remember, every choice is crucial. Don't make a misstep!
Regulation — Nothing comes for free. You must feed and pay your Overseers, and verify that the expeditions in the Caravanserai Quarter were properly managed. You may also face the effects of natural disasters.
Maintenance — It's time to set everything back in order. Your Overseers return to receive new Directives, and fresh Caravan Orders arrive at your gates.
Key Game Concept
Overseers are what enable players to take action. They are the ones carrying out your Commands and moving through the City Quarters.
Their action cycle: they go from your Personal Supply, to a City Quarter or Command reinforcement, and eventually return to your Personal Supply (via the Rural Exodus, or by resting at the end of the round).
Peasants allow players to work Crops and Salt Mines, sell at Rural Markets, and produce Goods in the players' Workshops. Their action cycle: they go from your Personal Supply onto a Crop or Salt Mine, then to a Local Market, then into a Workshop, and eventually goods produced there are exported — the ship then sets sail.
Detailed Turn Structure
A game round is divided into several phases.
Phase A: Determine the Copper/Silver Ratio
Determine the exchange rate between Copper coins and Silver. Roll one die to adjust the Copper/Silver ratio:
- If the result is higher than the current ratio, increase it by 1.
- If the result is lower, decrease the ratio by 1.
- If the result is equal, the ratio remains unchanged.
At any time, you may exchange Copper for Silver or Silver for Copper, according to the current ratio.
Example: Elliot (yellow) is first in the turn order. He chooses the 4th Bonus and places his Merchant on it. Elliot may purchase Tea for 2 Copper. Elliot places his Tea Crop on an empty Field of his choice, along with 2 Peasants on the Tea Crop. Then each player does the same. The turn order is now Blue, Red, Yellow, Green, and will remain so until the next Bonus selection round.
Phase B: Choose a Bonus and Determine Turn Order
Choose a Bonus. In the current turn order, each player chooses one available Bonus by placing their Merchant token on it. Immediately after selecting a Bonus, that player may purchase the Crop shown in front of it by paying its cost (1, 2, or 3 Copper), then place it on a free Field of their choice along with 2 of their Peasants. Once all players have chosen a Bonus, slide the remaining Crops upward to fill any empty spaces. Then, draw new Crops at random and place them on the newly available spaces in the Crop Display.
Determine Turn Order. The position of each player's chosen Bonus now determines the new turn order. The player on the topmost Bonus goes first, followed by the one below, and so on — this will be the order in which players Carry Out their Directives with their Overseers.
Merchant Bonuses
- Smooth Talker — Gain 1 additional Copper for each sale, including for High Demand bonuses.
- Rotten to the Core — Immediately place 1 Overseer on an available Corruption slot.
- Navigator — Immediately advance your Ambassador by 1 space on the Transport Capacity track.
- Food for All — All your Overseers are fed for free this round — you do not need to use Peasants on Food Crops.
- Payday — All your Overseers are paid for free this round — no Silver required.
- Builder — Immediately and freely build or upgrade 1 Workshop.
Phase C: Carry Out Your Directives
Each player, in turn, gives one Directive to their Overseers: Issue a Command or Send Overseer to the City.
Important Rules:
- Issue a Command: Each "Issue a Command" action may only be placed once per round under a specific space on your Personal Board. Once an action has been used for a given space, it cannot be used again until the next round.
- Send Overseers to the City: Each City Quarter may only host one presence per player. If a player is already present in a quarter, they cannot send additional Overseers to that same quarter until the next round.
- Action Limit: Whether Issuing a Command or Sending Overseers to the City, you may perform a maximum of 4 actions per Order Card (including Reinforcements using additional Overseers).
- Strategic Flexibility: You may use each Order Card in either order — first Issue a Command, then Send Overseers to the City, or vice versa — depending on your strategy. Be sure to optimize the timing of your actions while anticipating the moves of other players.
However, be warned! Nothing comes for free… but we'll get to that later.
Issue a Command
To Issue a Command, place your Order Card under one of the spaces on your Personal Board. The number of lines (1, 2, or 3) indicates how many times you may repeat the chosen action. You may also assign Overseers from your personal supply to reinforce the action and increase the number of times it is performed — up to a maximum of 4 total actions (e.g., 1 line + up to 3 Overseers).
Example: Narguiza (red) chooses to perform the second action on her Personal Board. She slides an Order Card with 2 Commands underneath that action slot. Wanting to strengthen the action, Narguiza assigns 1 Overseer from her personal supply to the dedicated reinforcement space. She now has 3 actions available to perform.
You may issue the following Commands:
- Increase Transport Capacity
- Deploy Peasants
- Sell at Local Markets
- Build or Upgrade a Workshop
- Bribe the Administration
Important Reminder: You may repeat the following actions up to 4 times maximum, depending on the strength of the Command (1, 2, or 3 lines on the Order Card), and by reinforcing it with additional Overseers from your personal supply (up to 3 Overseers max).
1. Increase Transport Capacity
With the acquisition of larger and better-equipped junks, players can travel greater distances, meeting the needs of local markets, the growing demand for labor in the city, and goods for export.
Each player's Transport Capacity is determined by the position of their Ambassador on the Transport Capacity Track, and it can never be reduced, except in the event of an optional natural disaster. Transport Capacity determines how many borders a player may cross when moving Peasants or Goods between provinces and toward the Port during a round.
This capacity is cumulative over the course of a round, up to the player's limit. If a player has used up all their Transport Capacity, they can no longer move between provinces — but may still move freely within a single province.
To increase your Transport Capacity, follow these steps:
- Spend 1 Command Action
- Pay 1 Wood token
- Advance 1 space on the Transport Capacity Track
Movements that require Transport Capacity include:
- Selling at the Local Market: moving Peasants to the Markets
- Producing Goods: moving Peasants from Markets to Workshops
- Supplying Ships: moving Peasants working Tea, Salt, or Goods to the Port
Each border crossed consumes 1 Transport Capacity point, but does not affect the position of the Ambassador on the Transport Capacity Track. Each player has a maximum capacity per round, based on the position of their Ambassador.
To increase this limit, players may use the "Increase Transport Capacity" Command action. This allows them to move more Peasants or Goods along the Yangtze River.
At the end of the game, during the Final Scoring phase, you gain 2 Wealth points for each level reached on the Transport Capacity Track.
2. Deploy Your Peasants
You may perform 3 different actions with this same Command.
To deploy Peasants to an existing Crop or Salt Mine, follow these steps:
- Spend 1 Command Action
- Place 2 Peasants in an empty Rice, Maize, or Salt Mine Crop, OR place 1 Peasant in an empty Exploitation Crop (Bamboo, Ramie, Sugarcane, Cotton, or Tea), or an empty Fruit Crop.
To clear a new Field, only once per round, follow these steps:
- Spend 1 Command Action
- Choose any Crop from the Crop Display and pay its cost (1, 2, or 3 Copper)
- Place the Crop in an empty Field with 2 of your Peasants
Example: Narguiza issues a Command with a value of 3. First, she chooses to purchase a Sugarcane Crop for 1 Copper. She places it on an empty Field along with 2 of her Peasants. This action, clearing a new Field, can only be performed once per round. Next, with her second action, Narguiza orders the extraction of Salt from a Salt Mine. She sends 2 Peasants to work there. Finally, for her third action, she activates an empty Tea Crop by placing 1 Peasant on it. In this way, Narguiza makes efficient use of all 3 actions from her Order Card, distributing her Peasants between new resource development and field management.
3. Sell at Local Markets
Players can sell the output of their Peasants at Local Markets to generate income.
To sell at a Local Market, follow these steps:
- Spend 1 Command Action
- Select a Peasant working in a Plantation or Salt Mine
- Choose a Local Market where the good will be sold (check your available Transport Capacity)
- Gain 2 Copper
High Demand: A Local Market may have a high demand for two types of Exploitations. The Copper coin indicates this with arrows. A player can respond to this high demand by sending one of their peasants from an appropriate Exploitation and placing the peasant on the coin. The player receives 1 additional Copper for this sale. The High Demand is then considered fulfilled, but it is still possible to sell to the two Exploitations shown to the left and right of the coin. When the peasant on the Copper coin later leaves to work in a Manufacture, the High Demand is renewed for one of the two possible Exploitations.
Note: Salt is never in High Demand.
Once the sale is completed, the peasant remains at the Local Market, ready to work in a Manufacture of their color. When the peasant is used to produce in a Manufacture, they leave the Local Market, opening up a new opportunity for another peasant and renewing demand at that Local Market.
To move, the peasant uses their player's Transport Capacity. The player must have enough Transport Capacity to reach the destination. No Transport Capacity is required if the Local Market is located in the same Province as the exploitation.
Only Exploitations and Salt can be sold at Local Markets.
Example: Narguiza plays an Order Card and issues a Command to sell at Local Markets. This Command allows her to perform 3 actions, but Narguiza wants to make 4 sales. To do so, she assigns 1 Overseer to reinforce the action, reaching the maximum allowed of 4 sales. With her first 3 actions, Narguiza sells: 1 Sugarcane fulfilling a High Demand, 1 additional Sugarcane, and 1 Cotton at the Local Market of Huguang. Since all of these sales take place within the same province, no Transport Capacity is required. With her fourth and final action, Narguiza moves 1 Cotton to the Local Market of the neighboring province, Nanzhili, where High Demand for Cotton is also present. She uses 1 Transport Capacity to carry out this action. For all her sales, Narguiza earns a total of 10 Copper: 7 Copper (3 + 2 + 2) for the Sugarcane and Cotton sales in Huguang, and 3 Copper for the High Demand Cotton sale in Nanzhili.
4. Construct or Upgrade a Manufacture
The high demand from Asia and Europe for high-quality goods produced in China encourages merchants to invest in and build more specialized Workshops for Porcelain, Silk, Paper, and Refined Sugar. Drawn by better working conditions than in the fields, Peasants migrate en masse to cities and Workshops, developing a variety of craft skills.
Peasants who have sold goods (from Plantations or Salt Mines) will now use their skills to work in Workshops matching their color, regardless of ownership. They no longer belong to the player of their original color.
To build or upgrade a Workshop, follow these steps:
- Spend 1 Command Action
- Pay 1 Stone
- Choose one of the face-up Workshops from the available supply
- Place the Workshop in any province of your choice, on an empty Field
- Place 1 Overseer from your personal supply on the Workshop. This marks your ownership and indicates that the Workshop is currently at Level I
To upgrade one of your Workshops:
- Spend 1 Command Action
- Pay: 3 Copper to upgrade to Level II, or 5 Copper to upgrade to Level III
- Add another Overseer of your color to the Workshop
Workshops must be upgraded step by step (Level I → II → III), paying the required cost at each stage.
At the end of your turn, refill the face-up Workshop display, revealing as many new Workshops as there are players.
Note: Workshops earn Wealth Points during final scoring: 1 point for Level I, 3 points for Level II, 5 points for Level III. Don't let other players gain a monopoly over Workshop construction!
Example: The current construction offer includes 2 yellow Workshops (Porcelain and Silk), 1 green Workshop (Paper), and 1 blue Workshop (Refined Sugar). Narguiza decides to build a Porcelain Workshop, anticipating strong export demand for this type of good. She pays 1 Stone from her supply to fund the construction and places the yellow Workshop on an empty Field in the province of her choice. To mark ownership and indicate the Workshop's level, she places one of her Overseers on the dedicated space of the Workshop, confirming that it belongs to her and is currently at Level I. In addition, Narguiza wants to upgrade one of her Level I Workshops. She spends 2 Command Actions and pays 8 Copper to upgrade from Level I to Level III: 3 Copper to reach Level II, and 5 Copper to reach Level III. She places 2 additional Overseers on her Workshop to indicate that it is now at Level III.
5. Bribe the Administration
Players can take advantage of their privileged status to gain certain benefits. They send Overseers to occupy spaces within the corrupt administration. But beware — these spots are highly contested and limited: only one Overseer per space, except for Food Surplus (see details below).
To bribe the administration, follow these steps:
- Spend 1 Command Action
- Place one of your Overseers on an available Corruption space
Using the Corrupt Administration: A player may activate one or more Overseers placed on Corruption spaces at any time during their turn or during the Maintenance Phase to gain the associated benefit. To activate an Overseer: simply remove it from its space, and gain the bonus immediately. Return the Overseer to your personal supply. No Transport Capacity is required to activate or use an Overseer on the Corruption board. After all… it's corruption!
Example: The administration is already heavily corrupted by Elliot (yellow) and Taméris (green). Narguiza, who already has Overseers in place, wishes to increase her presence. She orders 2 of her Overseers to take positions on Mass Production and the Trade Track. To reduce the strain on her Food Crops and Silver reserves due to too many active Overseers, Narguiza decides to activate the Overseer she previously placed on Shrewd Merchant. Thanks to this activation, she gains one Crop Sale action. She sends one of her Peasants to sell Sugarcane at a Local Market with High Demand, earning 3 Copper. Narguiza is already present on Food Surplus, so she could not have placed another Overseer there.
Corruption in Detail
Corruption is widespread throughout the empire, and beyond. Each player may benefit from the effects of a Corruption action at any time during their turn or during the Maintenance Phase.
- Imperial Favor — Activate this Overseer to provide assistance to your Overseers already placed in the Imperial Palace.
- Mass Production — Activate this Overseer to provide assistance to your Overseers already placed in the Artisan Quarter, Trade Port, or Materials Market.
- Additional Recruitment — Activate this Overseer to provide assistance to your Overseers already placed in the Caravanserai.
- Grand Administrator — Retrieve this Overseer and increase your presence by 2 in the Caravanserai during Phase C – Administration: Check Escort.
- Mass Exodus — Retrieve this Overseer and move up to 2 Overseers from the Imperial Palace Quarter to the City's Exodus Area.
- Workforce — Retrieve this Overseer and gain 1 neutral Peasant. This Peasant must be immediately assigned to any Workshop, regardless of its color.
- Personal Caravan — Retrieve this Overseer and draw 3 Silk Road Caravan tiles at random. Keep 1 face-up in front of you, and shuffle the other 2 back into the Caravan pile. You may fulfill this Caravan's demand at any time during your turn or at the end of the game. (Note: Steppe Mongol and Natural Disaster icons on this Caravan have no effect.)
- Overexploitation — Retrieve this Overseer and gain 1 Stone or 1 Wood.
- Exceptional Harvest — Retrieve this Overseer and purchase 1 Crop from the Crop Display, paying its normal cost.
- Shrewd Merchant — Retrieve this Overseer and send 1 of your Peasants from a field to sell at a Local Market. You may benefit from Merchant Bonus effects.
Send Overseers to the City
To Send Overseers to the City, take all the Overseers shown on the selected Order Card and place them in one City Quarter. The number of Overseers you place determines how many actions you may perform in that Quarter.
You may reinforce this action with Overseers from the Rural Exodus area, up to a maximum of 4 actions in total. For example: 2 Overseers from the Order Card + up to 2 from the Rural Exodus.
During a turn, all Overseers from a single Order Card must be placed in the same Quarter to perform its associated action.
You may send Overseers to the following City Quarters:
- Materials Market: Purchase Wood or Stone
- Imperial Palace: Fulfill a Request from the Emperor
- Artisan Quarter: Produce Goods in Workshops
- Trade Port: Export Goods
- Caravanserai: Supply and Escort Silk Road Caravans
Example: On her next turn, Narguiza wants to produce resources and decides to take action in the City. She sends 3 Overseers to the Materials Market. She could have reinforced the action by using her Overseer currently in the Rural Exodus area, but she chooses to leave it there for now.
Important Reminder: You may repeat the following actions up to 4 times maximum, depending on the number of Overseers sent to the City (1, 2, or 3 from the Order Card), and reinforce them with additional Overseers from the Rural Exodus — up to a total of 4 Overseers per action.
1. Materials Market — Buy Wood or Stone
Merchants need Wood and Stone to build Junks and Manufactories.
To acquire Resources, follow these steps:
- Send your Overseers to the Materials Market.
- Pay 1 Copper per Overseer.
- Receive 1 Wood or 1 Stone.
Example: Elliot (yellow) needs both Stone and Wood for his upcoming actions. He uses the Overseers from one of his Order Cards to obtain materials. Elliot pays 2 Copper to the general supply and chooses to take 1 Wood and 1 Stone, which he adds to his personal supply.
2. Artisan Quarter — Produce in Workshops
Refined Sugar, Paper, luxurious Silk fabrics, and fine Porcelain are all produced in players' Workshops.
Each Workshop has a single owner, but any player may produce there by paying 1 Silver to the owner. On their turn, a player may only produce once in a given Workshop, but may produce in multiple different Workshops. A Workshop may store a number of Goods equal to its level: Level I 1 Good / Level II 2 Goods / Level III 3 Goods.
To produce Goods, follow these steps:
-
Send your Overseers to the Artisan Quarter to produce Goods, depending on the level of the chosen Workshop:
- Level I: 2 Overseers
- Level II: 1 Overseer
- Level III: 1 Overseer
-
Move Peasants matching the Workshop's color from Local Markets to the Workshop where you want to produce:
- Level I: 1 Peasant required
- Level II: 1 Peasant required
- Level III: 1 or 2 Peasants required
Make sure you have enough Transport Capacity to move Peasants if the Workshop is in another province.
-
Add Goods of your color to the Workshop where you produced:
- Level I: 1 Good produced
- Level II: 1 Good produced
- Level III: 1 or 2 Goods produced
Example: Taméris (green) activates a Level II red Workshop owned by Elliot (yellow). She pays him 1 Silver for the use of his Workshop. Then, she transports 1 red Artisan from the Local Market to the red Workshop. Since the Workshop is in the same province, no Transport Capacity is required. (The red Artisan is returned to the red player's supply.)
3. Trade Port — Export Goods
Players seek to acquire the much-needed Silver that China lacks, by exporting their products via foreign ships arriving at the coast.
To transport Goods, Tea, or Salt to the coastal ships, players must use the Transport Capacity of their junks.
Load the Ships. Ships come from 6 different nations and have either 2 or 3 cargo slots: 2 slots for ships from Asia, 3 slots for ships from Europe.
To load a ship, follow these steps:
- Send your Overseers to the Trade Port
- Place a Good or a Peasant from the requested Crop onto a matching slot on the ship
- Gain 1 Silver
Note: Goods or Peasants placed on a ship can no longer be moved or sold until the ship departs.
Set Sail. When all slots on a ship are filled, the ship immediately sets sail toward its destination. It is then immediately replaced by the top ship from the Open Sea.
If this departure interrupts ongoing actions at the Trade Port, complete the current sequence of actions with the departing ship first, then continue with remaining actions using the new ship that has arrived.
Example: On her turn, Taméris (green) sends 3 Overseers to the Trade Port Quarter. With her first action, she exports 1 Porcelain Good, which completes the loading of a ship. That ship immediately sets sail. Taméris produces 1 Porcelain and adds 1 of her green Goods to Elliot's Workshop. This Porcelain belongs to Taméris, and she alone will decide how to use it. Taméris pauses her turn. She still has 2 actions remaining, which she will resume after resolving the ship's departure phase.
All Goods on the departing ship are placed in the Foreign Market corresponding to the ship's destination, grouped together on the first available space. Peasants, on the other hand, are returned to their player's personal supply. At the end of the game, during the Final Scoring phase, each Good in the Foreign Market will grant Wealth Points based on its position: 1st shipment, 2nd shipment, and 3rd shipment for Asia-bound destinations.
Example: Once completed by Taméris, the ship sets sail to deliver its cargo to its country of origin. All Goods on board are placed in the first available space of that country's section on the Foreign Market. These 2 Goods will each be worth 3 Wealth Points at the end of the game.
Ambassador Negotiations. By doing so, the player is sending an Ambassador to negotiate in the ship's destination country. They advance their Ambassador by 1 space on the Trade Track. At the end of the game, during the Final Scoring Phase, each player multiplies their position on the Trade Track by the number of distinct destinations where they have exported at least one Good.
Example: Elliot (yellow) sends 2 Overseers from a 2/2 Order Card to the Trade Port Quarter, and reinforces the action with 1 additional Overseer from the Rural Exodus. He now has 3 actions available at the Trade Port. For his first action, Elliot places 1 Porcelain Good from Nanzhili onto the Portuguese ship, which already contains 1 Peasant (Tea) from Taméris (green). Then, for his second action, he loads 1 of his 2 Paper Goods from a Workshop located in the Zhejiang province onto the same Portuguese ship. The 2 Goods from Elliot on the Portuguese ship are transferred to the Foreign Market and placed on the first available demand slot. Each of these Goods will be worth 4 Wealth Points at the end of the game. The Peasant from Taméris is returned to her personal supply. Taméris and Elliot, having both contributed to loading the ship, are eligible to send an Ambassador for negotiations. However, since Elliot does not have an Overseer placed on the Corrupt Administration space for Europe, he misses the opportunity to increase his commercial influence. Taméris, on the other hand, discards her Overseer from the corresponding Corruption slot and advances her Ambassador by 1 space on the Trade Track. Finally, Elliot notices that Taméris has 1 Paper Good ready for export in her Workshop located in Nanzhili, but that there is only one export demand remaining for this type of Good. To gain an advantage, Elliot cunningly decides to export Salt to fulfill the last Paper demand. For all his loaded goods, Elliot receives a total of 3 Silver. To transport these goods, Elliot uses a total of 3 Transport Capacity: 1 border for the Porcelain, 1 border for the Paper, and 2 borders for the Salt. With a Transport Capacity of 5, he is able to complete all the deliveries without any difficulty.
4. Imperial Palace — Fulfill a Request from the Emperor
A player may send Overseers to the Imperial Palace Quarter to fulfill one of the Emperor's Requests. A player may not occupy more than one Request slot in the Imperial Palace at the same time.
Maintaining the grandeur of the Palace requires the aid of players. Each Imperial Request grants a bonus and may only be fulfilled by one player at a time, except for Palace Maintenance, which can be fulfilled by all players, but only once each.
To fulfill an Imperial Request, follow these steps:
- Choose the Request you wish to fulfill
- Send the required number of Overseers to the corresponding space in the Imperial Palace
- Gain the associated bonus and receive 2 Copper
- Palace Maintenance: Send 1 Overseer to the Imperial Palace. Gain 1 Copper.
- Establish New Trade Routes: Send 2 Overseers (if the space is empty; only one player allowed). Draw 3 Silk Road Caravans, keep 1 face up in front of you, and place the other 2 on the bottom of the Caravan pile. War and Natural Disaster symbols on this Caravan have no effect. At any time during your turn, you may fulfill this Caravan's demand.
- Build an Irrigation Canal: Send 3 Overseers (if the space is empty; only one player allowed). Advance 1 space on the Transport Capacity Track.
- Build Bridges: Send 4 Overseers (if the space is empty; only one player allowed). Build or upgrade a Workshop for free.
5. Caravanserai
The Caravanserai Quarter serves two distinct purposes:
- Supply goods or Peasants required by a Silk Road Caravan. This action is resolved immediately when you place your Overseers in the Quarter.
- Organize the escort of the caravans. This action is resolved later, during the Regulation Phase.
These two objectives are independent of each other and follow separate resolution steps during the game.
To supply or escort caravans, follow these steps:
- Place your Overseers on the leftmost available space of the Caravanserai
- Fulfill the demand of a Silk Road Caravan, if you are able and willing
- Immediately receive the reward shown on the Caravan (Copper or Silver)
Caravans may request various types of goods: Crops, Salt, or Manufactured Goods. No Transport Capacity is required to fulfill these demands.
To fulfill a Caravan's request, the player simply places the matching Peasants or Goods directly onto the Caravan. This claims ownership of that Caravan, and no other player may add to it afterward.
Note: Silk Road Caravan demands are color-specific, meaning they refer to Peasants or Goods produced by the matching player. This makes it easy to identify who completed which Caravan during the Regulation Phase.
During the Regulation Phase, check the escort strength of each Caravan. The player who contributed the most Overseers receives the Wealth Points shown on the Caravan. In case of a tie, the player who placed their Overseers first has the advantage.
Example: Narguiza (red) is the first to send an Overseer to the Caravanserai Quarter. She places her Overseer on the leftmost available space in the Quarter. Her goal is to fulfill the demand of a caravan requesting a Silk Good before the other players. She places 1 Silk Good from one of her Workshops onto the Caravan. Since the Caravan is in the City, no Transport Capacity is required. The Caravan is now complete and can no longer be claimed by other players. Narguiza immediately receives 3 Copper as a reward for fulfilling the Caravan's demand. During the Regulation Phase, she will retrieve the Caravan tile face-down, and it will be worth 3 Wealth Points at the end of the game. Seeing opportunities slipping away, Taméris also decides to fulfill a Caravan demand. She sends an Overseer to the second available space in the Caravanserai Quarter. Taméris fulfills a Caravan request by placing 2 of her Peasants from her fields—one from Rice and one from Fruit—onto a Caravan requiring those goods. She immediately earns 2 Copper and will retrieve the Caravan tile during the Regulation Phase. Elliot, more calculating, focuses instead on organizing the escort. Noticing that the Steppe Mongols have a strength of 5, he decides to challenge Narguiza's dominance over the escort. He sends 3 Overseers to the Caravanserai, increasing the total number of Overseers in the Quarter to 5, matching the Mongol threat. Elliot is unable to fulfill any Caravan requests and therefore completes none, but thanks to his strategy, he becomes the player with the highest escort presence at the Caravanserai. During the Regulation Phase, Elliot will be able to claim the 4 Wealth Points for organizing the escort, instead of only 2 points, which would have been awarded if the Steppe Mongols had remained the dominant force. See the escort resolution details in the Regulation Phase section.
6. Rural Exodus
This is the Quarter where players send their undecided Overseers, those who've strayed off course, hesitating between the city and a return to the fields.
When an Overseer does not find a clear assignment from their player, they head back toward the countryside. During the Maintenance Phase, the Overseer moves into the city, arriving at the City Port, where they become available to reinforce future actions taken by other Overseers. There is no limit to the number of Overseers that can be present in the Rural Exodus area, but be warned: you'll still have to feed and pay them during upkeep.
Example 1: Narguiza still has a 1/3 Order Card, but her plans didn't unfold as expected. She sends 2 Overseers to the Artisan Quarter. However, the third Overseer is unable to perform any action — the necessary Peasants are no longer available in the Local Markets. Feeling neglected and without a task, the Overseer wanders back to the countryside, joining the Rural Exodus.
Example 2: During the Maintenance Phase, the Overseer realizes that great things can still be achieved, and chooses to return to the flourishing City. After all, a setback can become an opportunity. The Overseer is now available to Narguiza once again and will be ready to take on new actions in the next round.
Using an Overseer in the Rural Exodus Quarter:
- Once an Overseer is present in the city side of the Rural Exodus area, they can be used to reinforce an action in a City Quarter.
- An Overseer from the Rural Exodus cannot perform a City action on their own; they can only support an existing action initiated via an Order Card.
Note: An Overseer still belongs to their player, and won't forget to demand food during the Maintenance Phase, even when stationed in the Rural Exodus. Versatile, but not foolish.
Phase D: Regulation Phase
The Regulation Phase consists of five steps.
D1. Feed the Overseers
After all players have carried out their 6 Directives, it's time to feed your Overseers for their hard work. Each player counts the total number of Overseers they have:
- in the City Quarters
- assigned to Corruption spaces
- supervising production in their own Workshops
Based on this total, the player must feed their Overseers by discarding Peasants assigned to Rice, Fruit, or Maize crops — or by using effects from Corrupt Administration bonuses.
- 3-5 Overseers: Pay 1 food
- 6-8 Overseers: Pay 2 food
- 9-12 Overseers: Pay 3 food
- 12+ Overseers: Pay 4 food
If a player cannot fully feed their Overseers, they are punished with misfortune that will follow them until the end of the game: for each missing food, the player takes 1 Misfortune tile.
Example: Taméris currently has: 2 Workshops (Level I and Level II), 3 Overseers to feed, 2 Overseers at the Caravanserai (1 active + 1 on the escort reward), 3 Overseers in the Artisan Quarter, 2 Overseers at the Imperial Palace, 2 Overseers in the Corrupt Administration. That's a total of 9 Overseers in the City, and 11 Overseers to feed overall. According to the feeding table, 9–12 Overseers: Taméris must pay 3 Food. She feeds her Overseers using Peasants assigned to Rice, Maize, or Fruit fields. Additionally, she can activate her Overseer on the "Opulence" space in the Corrupt Administration to gain 2 Rice, which covers the required Food when combined with at least 1 more from her fields. Taméris successfully feeds all her Overseers with no penalty.
D2. Check Escort Status
The escort is provided by the Overseers assigned to the Caravanserai Quarter. (See the Caravanserai section for full details on how this works.)
This step is used to validate the escort effort organized by the players to ensure the safe passage of Silk Road Caravans.
The player with the highest number of Overseers in the Caravanserai at the end of the round gains the Wealth Points shown on the Escort Bonus token. In case of a tie, the advantage goes to the player who placed their Overseers first.
Anatomy of a Caravan: each Caravan shows a Steppe Mongol Value, Natural Disaster symbols (optional rule), the Goods to fulfill for the Caravan, and an immediate Copper gain plus Wealth during final scoring.
Expedition Conditions:
- Sufficient Escort: If the total number of Overseers assigned to the Caravanserai by all players is equal to or greater than the combined Steppe Mongol values, the escort is considered successful. The player who assigned the most Overseers places one of their Overseers on the "4 Wealth Points" space.
- Insufficient Escort: If the total number of Overseers is less than the Steppe Mongol value, the escort is considered insufficient. The player with the most Overseers still places one of them on the "2 Wealth Points" space.
- In Case of a Tie: The player who placed their Overseers first (furthest to the left on the escort track) wins the tie and receives the reward.
Note: Whether the escort is successful or not, the Overseer placed on the Wealth Points space (4 or 2) becomes permanently assigned to the Caravanserai Quarter and must still be fed like any other Overseer. All other Overseers return to their player's personal supply.
Example: The total number of Steppe Mongol symbols is 5. Elliot (yellow), Narguiza (red), and Taméris (green) have placed a combined total of 5 Overseers in the Caravanserai Quarter, ensuring a successful escort. Since Elliot was the first to arrive and contributed the most Overseers (3), he claims the escort reward by placing 1 Overseer on the "4 Wealth Points" space of the Caravanserai. Narguiza and Taméris return their Overseers to their personal supply. Elliot earns 4 Wealth Points for the Escort, as he placed more Overseers than Narguiza or Taméris. Elliot leaves one of his Overseers on the space corresponding to the 4 Wealth Points reward. Taméris and Narguiza gain nothing for this escort. All remaining Overseers are returned to their respective players' personal supplies.
D3. Natural Disasters (Optional Rule)
To make the game more realistic and challenging, you may choose to activate the Natural Disasters rule.
Disaster Activation. There are 6 Silk Road Caravans marked with a Natural Disaster symbol (2 Caravans for each type of disaster: Fire, Flood, Drought).
- If one or more active Caravans show any of these symbols, the corresponding disasters occur.
- If multiple different disasters appear in the same round, apply the effects of each.
- If the same disaster symbol appears twice in a single round, apply its effect only once.
Types of Natural Disasters:
- Fire — In turn order, each player must lose 1 level on one of their Workshops: the player removes one Overseer of their choice from any of their Workshops. If a Workshop no longer has any Overseers, it remains on the board, but is considered inactive. It may be reclaimed later by another player using the "Build a Workshop" action and paying the associated cost. If the Workshop contained a Good, it is removed from the game. For Level II or III Workshops containing Goods from multiple players, and now exceeding capacity after the level drop, the Workshop owner decides which Good is removed to comply with the new capacity limit.
- Flood — Each player loses 1 level of Transport Capacity. Move the player's Ambassador one space backward on the Transport Capacity track. A player cannot go below 1: if their marker is already on "1", it remains unchanged. This penalty reflects the damage caused by flooding to infrastructure such as roads, bridges, and canals.
- Drought — In turn order, each player loses 1 Peasant in every province where they have any present, whether on fields or crops. For each province where a player has Peasants, they must remove 1 Peasant of their choice. If a player has no Peasants in a given province, they lose nothing in that province. This simulates the devastating effects of drought on agricultural labor and food production across the empire.
D4. Validate Caravan Loading
Caravan loading is based on the Overseers sent to the Caravanserai Quarter. (See the Caravanserai section above for more details.) Now, players may validate the Caravans they fulfilled during this round.
Each player retrieves the Silk Road Caravan tile for which they fulfilled the demand (identified by the Peasants or Goods placed on the Caravan). These Caravan tiles are placed face down in front of the player. They will grant Wealth Points during final scoring.
Example: Narguiza (red) has loaded a Good matching the demand of a Silk Road Caravan. She now returns the Good to her personal supply, and places the Caravan tile face down in front of her for final scoring. Taméris (green) fulfilled a different demand by loading two of her Peasants, taken from her fields, onto another Silk Road Caravan. She now returns the two Peasants to her personal supply, and keeps the completed Caravan tile face down for final scoring. Elliot (yellow) did not fulfill any Caravan request this round, so he does not collect any Caravan tile. Once all loadings are validated, each player takes the Silk Road Caravan they have completed. These Caravan tiles are kept face down in front of them for final scoring.
D5. Pay the Overseers
After feeding your Overseers, it's time to pay them for their labor.
Wages Calculation. Add together:
- The total number of action lines (stripes) shown on all Order Cards used to Issue Commands this round, plus
- The number of extra Overseers assigned from your personal supply to reinforce those actions.
This gives you the total number of Overseers involved in executing Orders:
- 3-5 Overseers: Pay 0 Silver
- 6-8 Overseers: Pay 1 Silver
- 9-12 Overseers: Pay 2 Silver
- 13+ Overseers: Pay 3 Silver
If a player cannot pay the required amount in Silver: they receive 1 Misfortune tile for each Silver not paid. These penalties remain until the end of the game.
Example: Each player adds up the value of the Orders used (e.g., 3 + 1 + 1) and the number of additional Overseers assigned from their personal supply (1 + 2 + 1). In this example, Narguiza has mobilized a total of 9 Overseers. She must therefore pay 2 Silver to compensate them. This is not an optimized use of resources.
Phase E: Maintenance Phase
Preparing for the next round. During the Maintenance Phase, complete the following steps to get ready for the next round:
1. Rest Overseers
All Overseers used by players to reinforce Orders on their personal boards, as well as those placed in the City Quarters, return to their player's personal supply, except for those still located in Rural Exodus, who will return later in this phase.
2. Refresh Board Elements
Discard all remaining Silk Road Caravans and Culture tiles from the board. Then, replace them with new tiles drawn from their respective supplies:
- Draw and reveal new Caravan tiles to fill the display.
- Draw and reveal new Culture tiles for the Culture Market. This ensures that fresh opportunities are available for all players in the next round.
3. Return of the Overseers
Move all Overseers currently located in the Rural Exodus, Fields area to the City area. These Overseers will be available to support or reinforce actions during the next round.
4. Refresh Order Cards
- Each player discards the 3 Order Cards used during the round. These cards are removed from the game and will not be used again for the rest of the game.
- Then, draw and reveal 3 new Order Cards.
- Immediately place the indicated number of Overseers from your personal supply onto each card, as shown in the bottom section of the card.
5. Update Turn Order
Place the merchants' figures on the Turn Order track according to the new turn order determined during the previous Bonus Selection phase.
Example: Taméris (green) is first. Narguiza (red) is second. Elliot (yellow) is third. Philippe (blue) is fourth. This turn order will be used at the start of the next round, allowing the players to choose their bonuses in this sequence.
End of the Game & Final Scoring
The game ends after the fourth round.
Before final scoring, players have one last opportunity to fulfill any Silk Road Caravan tiles they have kept face up in front of them, for example, if they received an extra Caravan from an Imperial Palace action and did not complete it during the game.
Use the score pad to tally up each player's Wealth Points.
Yangtze Transport Capacity. Earn 2 Wealth Points for each level of Transport Capacity reached. The maximum level is 6, which gives a total of 12 Wealth Points.
Workshops.
- Gain 1 Wealth Point for each Level I Workshop you own.
- Gain 3 Wealth Points for each Level II Workshop.
- Gain 5 Wealth Points for each Level III Workshop.
Goods. All Goods you have produced but that are still located in a Workshop or on a ship in the port each earn 1 Wealth Point.
Foreign Markets — Exported Goods. Add up the Wealth Points from all your Goods delivered to the Asian and European Markets, based on their position on the Foreign Market boards.
Ambassador Track (Negotiation). According to your Ambassador's Negotiation level, gain 1 / 2 / 3 / 4 Wealth Points per different destination you've delivered Goods to. (A destination is counted if you delivered at least one Good there.) With a Negotiation level of 4 and 6 different destinations, you can earn up to 24 Wealth Points.
Example — Exported Goods, Narguiza's Scoring:
Asia: Japan — 2 Goods: 2 × 3 = 6 Wealth Points. Korea — 1 Good: 3 Wealth Points. Brunei — 1 Good: 2 Wealth Points. Total Asia: 11 Wealth Points.
Europe: Netherlands — Goods on 2 different ships: (1 × 4) + (2 × 3) = 10 Wealth Points. Spain — 1 Good: 4 Wealth Points. Total Europe: 14 Wealth Points.
Negotiation: Narguiza's ambassador has reached level 3 on the Negotiation track. She has exported to 5 out of the 6 possible destinations (she did not export to Portugal). She therefore earns 5 × 3 = 15 Wealth Points thanks to her Ambassador.
Total Scoring: Wealth Points from Exported Goods: 12 (Asia) + 14 (Europe) = 26 Points. Wealth Points from Ambassador Bonus: 15 Points. Narguiza earns a total of 41 Wealth Points from her exports and Ambassador influence.
Caravan Escort Bonus. Gain Wealth Points based on your Overseers present at the Caravanserai.
Example: Narguiza (red) and Elliot (yellow) each gain 4 Wealth Points, while Taméris (green) gains 2 Wealth Points.
Silk Road Caravans. Add the Wealth Points from completed Silk Road Caravans. Uncompleted caravans do not grant any points.
Bribe the Administration. The player with the most Overseers in the Corrupt Administration gains 4 Wealth Points. In case of a tie, each tied player gains 2 points instead.
Example: Narguiza (red) and Elliot (yellow) do not gain any Wealth Points. Taméris (green) gains 4 Wealth Points, as she has 3 Overseers present in the Corrupt Administration.
Silver (Yínzi). Players convert their Copper coins into Silver bars according to the current exchange rate. Then, each player earns 1 Wealth Point for each Silver bar in their possession.
Misfortune Tiles. Lose 2 Wealth Points for each Misfortune tile.
Winner: The player with the most Wealth Points wins the game. In the event of a tie, the player who is furthest ahead in the turn order during the final round claims victory.
Historical Context
The Historical Reality
The Ming dynasty reigned over China from 1368 to 1644, marking the last imperial rule under Han Chinese leadership. It rose from the ashes of the Mongol-led Yuan dynasty, only to eventually fall with the capture of Beijing by the rebel forces of Li Zicheng—a fleeting victory, as the Manchu Qing dynasty swiftly supplanted him. Yet, loyalist bastions of Ming resistance persisted in the southern provinces until as late as 1662, resisting the tide of dynastic change.
At the dawn of this new order stood Emperor Hongwu (1368–1398), a man of humble origins whose vision for China was one of rural self-sufficiency, a kingdom of peasants shielded from the pull of urban commerce. Despite his initial intent to insulate the countryside from the mercantile world, his sweeping agricultural reforms and the reconstruction of the empire's infrastructure sparked an unforeseen transformation. Grain surpluses began to flow along newly strengthened roads and canals. The cities flourished, not only in population but in economic vigor, as large workshops and manufactories emerged, powered by the hands of thousands.
In this new world, the lower gentry, long guided by Confucian restraint, found themselves drawn into a culture of consumption and civic ambition. Over time, they merged with the rising merchant elite, who, in turn, embraced the cultural codes and bureaucratic functions of the nobility. The social order, once rigid and hierarchic, began to stir with movement and exchange.
The Emergence of Commercial Plantations
Under the Ming dynasty, commercial plantations flourished, producing regionally adapted crops on a vast scale—tea, fruits, natural pigments, and other agricultural goods that fed both domestic markets and, increasingly, international demand. These regional models of specialization would endure into the following Qing dynasty, shaping the agrarian fabric of China for generations.
The Columbian Exchange, that sweeping interchange between the Old and New Worlds, brought new crops to Chinese soil, notably maize, enriching the diversity of cultivation. At the same time, specialized agricultural zones emerged, focused not on self-sufficiency but on market-oriented production, linking farmers more directly to systems of trade and profit.
This transformation rippled through society. Many peasants left the land, drawn to cities and towns where they took up work as artisans, feeding the growth of a new urban labor force. The agricultural prosperity of the era supported an extraordinary demographic expansion: by the late Ming period, China's population had soared to between 160 and 200 million souls, a testament to both the fertility of the land and the shifting rhythms of imperial life.
Rural Markets in the Ming Dynasty
Ming-era agriculture stands apart from that of previous dynasties through the emergence of vast, high-value agricultural zones, and the increasing use of innovative farming tools, including those powered by hydraulic systems. These advancements led to significant agricultural surpluses, which became the cornerstone of the rural economy. While rice remained the primary staple, a growing variety of crops were now cultivated at large scale.
Faced with a soaring population and a shortage of fertile land, many farmers turned to cash crops, grown specifically for trade. This shift gave rise to specialized rural markets, where barter and exchange were common. At the same time, urban–rural markets began to appear, fueled by landowners residing in cities and professional merchants purchasing in bulk to supply growing urban demand.
A third type of marketplace, the national market, expanded significantly under the Ming, building on foundations laid during the Song dynasty. These markets supported the circulation of goods not just within provincial boundaries but across the entire empire, and even beyond its borders. Increasingly, Ming farmers were no longer growing simply for survival, but for commerce, producing goods with the intention of selling into a larger economy.
Commerce and Investment
During the Ming dynasty, China engaged in flourishing trade with Europe and Japan. Historian Joseph Needham estimates that over 300 million taels of silver, equivalent to more than 190 billion USD today, flowed into the Chinese economy through these exchanges. This prosperity was underpinned by a network of infrastructure projects, roads, bridges, and canals, built by the Ming government.
Wealthy merchant clans such as the Huai and Jin rose to prominence, some amassing fortunes exceeding 30 million taels. The boundary between merchant elites and the aristocracy began to blur, as merchants gained influence and status, often at the expense of the imperial administration.
China soon became a central hub in global trade. Despite formal embargoes, trade with Japan continued through intermediaries, Chinese smugglers, Southeast Asian ports, and Portuguese traders. Unable to offer goods China desired, European nations paid in silver, primarily sourced from Spanish, controlled mines in Mexico, Peru, and Potosí (Bolivia). Between 1500 and 1800, these mines produced around 80% of the world's silver, with nearly a third ending up in China.
The Manila Galleon Trade became a vital lifeline for the Spanish Empire and settlers in the Philippines. Until 1593, multiple ships regularly sailed between China and the archipelago. Merchants from Fujian sold luxury goods, silk, porcelain, lacquerware, spices, and ivory, to the Spanish, alongside rare wares from across Asia, including India and Japan.
By the 16th century, trade with the Portuguese, Spanish, and Dutch had energized the Ming economy. China actively participated in the Columbian Exchange, reshaping diets and global markets. The influx of foreign silver led to the abandonment of paper money, as silver ingots became the standard currency of serious exchange.
The Time of Calamities
In the Ming dynasty's final century, the Little Ice Age triggered crop failures, natural disasters, and epidemics, while political instability deepened. The slow collapse of the state apparatus paved the way for the dynasty's eventual fall.
Starting in the 16th century, urban trades and commerce surged. Uprooted peasants sought livelihood in cities, while rural capital shifted into emerging commercial ventures. Thriving workshops evolved into proto-industrial enterprises, employing hundreds of laborers, mostly impoverished day workers. Only the most skilled earned stable wages.
Some industries achieved near-industrial scale, becoming economic pillars in their regions: porcelain in Jingdezhen and Dehua, cotton weaving in Songjiang (with 200,000 workers around 1600), silk in Suzhou, and iron foundries in Cixian. This economic dynamism gave rise to a class of powerful entrepreneurs, bankers, and shipping magnates.
The growing divide between a wealthy capitalist elite and an underpaid urban workforce has led some historians, especially from Marxist traditions, to identify this era as the beginning of capitalism's early sprouts in China.
Silver: A Source of Stability and Desire
For daily trade, the Chinese used copper coins (sapèques). Paper money, introduced early in the Ming period, was abandoned after 1520 due to lack of trust. The state's chaotic monetary policy failed to standardize value across the empire, and counterfeit coins (up to 75% by 1600) flooded circulation. Yet with the rise of salaries, taxes in coin, and market transactions, money became indispensable.
From the 16th century onward, international trade brought in large amounts of silver, mostly in weighed ingots. Silver thus replaced copper as the main reference for large transactions.
In its worldview, imperial China saw itself as the center of the civilized world, engaging with foreign powers only through tribute diplomacy. Ports and land borders were tightly controlled, guarded by customs officials and garrisons, symbolized by the Great Wall.
In practice, however, frontiers were porous. Smuggling, often entwined with piracy and banditry, flourished, challenging the image of a closed Ming empire.
Controlling the Empire
The Ming military was structured around regional commands aligned with administrative provinces. Garrisons, especially in the north (around Beijing) and the southwest frontier, were manned by hereditary military families, exempt from corvée labor and supported by state-run agricultural colonies.
Over time, desertions and lineage extinction weakened this system. To compensate, the state increasingly hired mercenaries, who were more expensive but not bound to continuous service. By the dynasty's end, garrisons mixed hereditary soldiers with hired troops.
Borderlands weren't solely military zones; they were also centers of cross-cultural trade. From the north, China imported horses, furs, and ginseng, while exporting grain, tea, textiles, porcelain, and tools to steppe peoples.
Since the Tang dynasty, long-distance trade routes linked China to the Middle East via India and Southeast Asia, with Chinese ceramics remaining highly prized for their exceptional quality.
The Dawn of Capitalism
During the Ming dynasty, investment capital increasingly left agriculture, favoring entrepreneurial ventures. Continuing a shift that began under the Song, investors poured money into commercial and artisanal enterprises, seeking higher returns. Many Chinese thinkers regard this period as the moment when "capitalist seedlings" began to sprout—setting the stage for economic transformation centuries ahead.