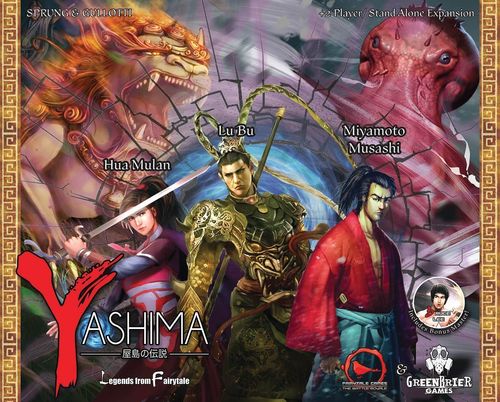
Yashima: Legends from Fairytale
Yashima: Legends from Fairytale Rulebook
Table of Contents
Table of Contents
- Game Components
- Master & Kami Battle Card Details
- Master Deck Card Setup
- Attack Pattern Example
- Game objective
- Setting up the Game
- Key Concepts
- Status Tokens
- Round Overview
- Battle Phase
- Tome Actions
- Combat Actions
- Restoration and Winning the Game
- Yashima Attack Action Breakdown
- Masters
- Kami
- Glossary
- Glossary Continued
Game Components
- (1) Double-sided relic board
- (3) Double-sided terrain boards
- (4) Double-sided action tokens
Kami
- (24) Akkorokamui kami battle cards
- (26) Foo Dog kami battle cards
Lu Bu
- (10) Lu Bu battle cards
- (5) Lu Bu double-sided tome cards
- (1) Lu Bu double-sided avatar card
- (1) Lu Bu avatar abilities card
- (1) Lu Bu miniature
- (8) SHOCK status tokens
Mulan
- (10) Mulan battle cards
- (5) Mulan double-sided tome cards
- (1) Mulan double-sided avatar card
- (1) Mulan avatar abilities card
- (1) Mulan miniature
Musashi
- (10) Musashi battle cards
- (5) Musashi double-sided tome cards
- (1) Musashi double-sided avatar card
- (1) Musashi avatar abilities card
- (1) Musashi miniature
- (6) WIND status tokens
Bruce Lee
- (10) Bruce Lee battle cards
- (5) Bruce Lee double-sided tome cards
- (1) Bruce Lee double-sided avatar card
- (1) Bruce Lee avatar abilities card
- (1) Bruce Lee avatar token*
- (6) CHI status tokens
*Bruce miniature sold with Dragon Tides.
Other
- (3) Splice Point Tokens (Teleport)
- Additional Player tokens: (2) BURN | (2) FROST | (4) PLAGUE | (2) PLANT/SEED | (2) RANCOR
Master & Kami Battle Card Details
Avatar Card Details
- Master Name
- Game Text
- Starting Karma Value
- Hand Size
- Move Speed
- Status Effects
- Adapt Ability
- Status Icon
Master & Kami Battle Card Details
- Card Name
- Master/Kami Name
- Karma Value
- Attack Value
- Attack Pattern
- Game text
- Defense, Quick Effect or Status Symbol
Tome Card Details
- Card Name
- Karma Cost
- Game Text
- Torn-off Page Game Text (IMPRINT/EQUIP cards)
- Page Number
- EQUIP, IMPRINT, Quick Effect symbol (if any)
Master Deck Card Setup
Player Setup
- Avatar card
- EQUIP
- Tome deck
- Hand
- Life total
- Battle deck
- Karma pool
- Discard pile
- Initiative/FOCUS
- USE
- IMPRINT
- EXERT / LOSE
- DISCARD / LOSE
- Quick Effect: This effect does not require a combat or tome action.
- DESTROY: Return card to its owner's tome.
- USE: Place card underneath battle deck.
- LOSE: Place card from hand or top of battle deck on top of your discard pile.
- DISCARD: Place card from hand into discard pile.
- EXERT: Place top card of battle deck in discard pile.
- HEAL: Place top card of your discard pile underneath your battle deck.
- FOCUS: Place top card of battle deck in karma pool.
- IMPRINT: To IMPRINT, pay the cost, then place that card face-up at the bottom of your battle deck. IMPRINT cards only trigger when revealed on top of the deck, then return to the bottom of the deck.
- EQUIP: To EQUIP a card, pay the cost, remove the card from your tome, and place it beneath your avatar card. Once you EQUIP, you can use the equipped effect.
Attack Pattern Example
- Attack pattern
- Lu Bu's facing position
- Targets (Musashi is targeted)
- Mulan is unaffected
Game objective
You are a kami master, an elite warrior with the ability to bind your soul to the kami, the spirit guardians of nature. You are locked in battle with opposing kami masters in a test of strength. If at the end of the turn all your opponents have been restored, you win!
Setting up the Game
Note: If you have more than one set of Yashima, or expansions, more players can be added! Any player may combine any master with any kami from any set! Try mixing and matching to taste.
Playing a Team Game
For a team-based game, make sure teams have the same number of players. During setup, players of the same team sit across from each other, not adjacent to each other. Gameplay proceeds as normal, with the winning team being the last one with a master who hasn't restored. Be careful! Just as some of your own abilities and attacks can damage your master, you can damage your teammates with your attacks.
Starting the Game
- Starting with the oldest player and proceeding to the left, each player chooses a board, kami master, and a kami; gathering all cards, tokens and miniatures associated with that master and kami.
- Separate your master's avatar card, tome cards, and battle cards. Shuffle your kami's battle cards together with your master's battle cards and place them face down in front of you. This is your battle deck.
- Arrange your tome cards in page-order (the tome cover card on left, page 1 on right, and when you turn page 1 over page 2 and 3 will be face up) next to your battle deck.
- With the relic board in the center of the table, place your chosen board. Your board can be flipped or rotated any way you choose, as long as one of its sides is adjacent to the relic board. The next player must place their board adjacent to the previous player's board as well as the relic board.
- If you were the last to place your board, you are the first to place your miniature. Place it on any blank space with any facing on the board you placed. Place miniatures in the opposite order than players placed boards.
- Place a number of cards equal to your starting karma value (as seen on your avatar card) from the top of your battle deck, face-up in front of you. Ignore all FATE effects during the setup of the game. This is your karma pool.
- From your battle deck, draw a number of cards equal to your hand size (as seen on your avatar card). With that, you're ready to play! Begin the game with the first destiny phase.
Key Concepts
In Yashima, card text supersedes game rules. In any instance where the rules and a card directly conflict, the card text should be followed. Before you begin playing for the first time, it's important to understand the following keywords.
The Circle of Life
In Yashima, a player's life total is the combined total of cards in their battle deck and hand. Cards in a player's discard pile and karma pool are NOT a part of their life total. The following keywords describe where these cards go when damage is taken or healed.
- USE: Place this card on the bottom of your battle deck, face down. "USE" is a keyword, not to be confused with the common word, "use". When you USE cards it does not change your life total.
- LOSE: Place cards, one at a time, from the top of your battle deck or hand equal to the amount you LOSE, face-up into your discard pile. Whenever you take damage, you LOSE cards equal to the damage.
- DISCARD: Place a card from your hand into your discard pile. Unlike LOSE, you cannot DISCARD from your battle deck.
- EXERT: Place the top card of your battle deck face up into your discard pile. Unlike LOSE, you cannot EXERT from your hand.
- EXHAUSTED: If you have no cards in your battle deck, you are considered EXHAUSTED and you cannot EXERT. Any effect that forces you to EXERT does not, but all other game text of the effect is performed if possible. You are unable to play any actions or effects that would require you to EXERT.
- HEAL: Place the top card of your discard pile on the bottom of your battle deck, face down. If you have no cards in your discard pile, you cannot HEAL.
The Karmic Cycle
Battle cards also represent karma, the power to influence the natural world. Karma is kept face-up in an area in front of you called your karma pool. You begin the game with cards in your karma pool, and you place one card into your karma pool each round for initiative. The only value that matters on the cards in your karma pool is karma; cards in your karma pool cannot be used for attacks, defenese, or other abilities (except for FATE). Instead, you may USE cards in your karma pool to pay for karma abilities.
- FATE: Indicated by a special karma icon, these battle cards have an effect that triggers when this card is placed into your karma pool. This effect is NOT optional.
Other Concepts
-
ADAPT: Found on kami battle cards, the ADAPT keyword means that the given card gains your master's ADAPT ability, seen on their avatar abilities card. In this way, kami battle decks adapt depending on the master they're paired with. Some effects reference cards with specific keywords. In the case of an ADAPT card that gains a keyword ability, it is treated as if that card had the keyword printed on it.
For example, Bruce Lee's avatar ability refers to a COUNTER card, and considers all his ADAPT cards as being "COUNTER cards".
-
DESTROY: When you DESTROY equipment, return it to its owner's tome.
-
ENDURE: This effect triggers when you LOSE this card from your battle deck. Endure is indicated by a special border on the card. Losing this card from your hand or karma pool will not trigger this effect. Like FATE, ENDURE is a keyword prefix that adds to the given keyword's game text. Unlike FATE, this effect is optional.
-
EQUIP: Tome cards with this keyword can be converted into powerful artifacts, enhancing your master! To EQUIP a card, pay the karma cost, remove the card from your tome, and place it beneath your avatar card. Once equipped, you can use the effect below the torn half of the page. You cannot play the effects below the torn half of the page until after it is equipped to your master.
-
ICONS: Some cards have icons on them similar to status effects, but may not have status tokens (an example is "BLEED"). These icons are used to draw attention to the card and its effects. These icons do not necessarily mean that a status token is placed, so carefully read the card text and glossary entry to determine the full effects of the card.
-
IMPRINT: If found on a tome card, you may not play the effect listed below the torn half of the page until after you IMPRINT this tome card. To IMPRINT, pay the karma cost on the tome card, then place that card face-up at the bottom of your battle deck. When the imprinted card is revealed on top of your battle deck, first trigger its effect, then place the imprinted card face-up on the bottom of your battle deck. If there are no face-down battle cards beneath this card when revealed, its effects don't apply, and it instead returns to its owner's tome.
Terrain
The board is marked with different terrain types that may affect actions or effects. Some expansions include additional terrain tokens that you may place during setup to customize your boards. Note that any FOCUS performed outside of a specific focus tome action will NOT cause terrain effects to trigger.
- ARDUOUS TERRAIN: Masters must spend two speed to enter arduous terrain. If a master has one or fewer speed remaining, they cannot enter arduous terrain.
- REJUVENATING TERRAIN: If a master uses their tome action to FOCUS while occupying rejuvenating terrain, they may HEAL.
- DEADLY TERRAIN: Masters must EXERT to enter deadly terrain. If a master is unable to EXERT, they cannot enter deadly terrain.
- SLICK TERRAIN: If you would end a move on or relocate to slick terrain, you must relocate to an adjacent unoccupied legal space.
- RELIC TERRAIN: Relic terrain is solid terrain, with one additional rule - if a master uses their tome action to FOCUS while adjacent to this terrain, they may turn any master's tome up to two pages.
- SOLID TERRAIN: Masters cannot enter, be forced to enter, nor end their turn on solid terrain spaces. Solid terrain can still have a status.
- ROAD TERRAIN: The first road terrain a master enters during their move action costs no speed to enter. If you have no movement left, you may still enter your first road terrain.
- SPLICE POINT TERRAIN: If you would end a move or relocate to splice point terrain, you must relocate to an unoccupied legal space that is adjacent to any other splice point terrain.
Status Tokens
The source table groups each token under the set that introduces it: Core, Icy Peaks, Deep Woods, Fairytale and Desert.
- BLIND (Core): Only masters may have BLIND status. A master cannot have more than one instance of BLIND status. During the initiative step, if a master with BLIND status reveals a karma of 5 or higher, they remove BLIND status. Masters with BLIND status have SPEED -1.
- BURN (Core): A master or space cannot have more than one instance of BURN status. During the initiative step, if a master with BURN status reveals a karma of 5 or higher, they remove BURN status. Otherwise they take 1 damage. When a master without BURN status enters a space that has the BURN status, remove the BURN status from that space and place it on that master.
- RANCOR (Core): Only masters may have RANCOR status. A master cannot have more than one instance of RANCOR status. On your first turn of a round, if you have RANCOR status, remove RANCOR status. Fury Attacks are +2 against targets with rancor status.
- SPIRIT (Core): Only masters can have SPIRIT status. A master cannot have more than one instance of SPIRIT status. Masters with SPIRIT status gain HAND +1 and SPEED +1.
- SARU (Icy Peaks; or the Mitsuo miniature token): Only unoccupied non-solid spaces can gain SARU status. Mitsuo can have only one SARU status in play at a time. At the beginning of the game and whenever SARU status is removed, Mitsuo chooses a space adjacent to himself to gain SARU status. When Mitsuo takes a move action, he may remove SARU status from its current space to have a space up to 4 spaces away gain SARU status. At the end of every turn, masters adjacent to SARU status, excluding Mitsuo, must turn and face it.
- FROST (Icy Peaks): A master or space cannot have more than one instance of FROST status. During the initiative step, a master with FROST status may pay 4 karma to remove FROST status. A master with FROST status is EXHAUSTED. A space with FROST status is deadly terrain in addition to its other types.
- PLAGUE (Deep Woods): Only masters can have PLAGUE status. A master cannot have more than one instance of PLAGUE status. At the start of each turn, if the top card of your discard pile is a PLAGUE card, place it into your karma pool, and each master with PLAGUE status takes one damage.
Round Overview
Once setup is complete, the game begins! Gameplay consists of rounds. Rounds are split into two phases: the destiny phase and the battle phase.
Destiny Phase
In the destiny phase, players prepare their hands, action tokens, and karma pools for the next wave of combat. All players carry out the three steps of the destiny phase simultaneously.
1. Destiny Step
Plan which actions will be available to all players in the battle phase.
Action tokens have two sides: move and attack. Starting with a move action, followed by an attack action, place a token into the action pool for each player still in the game. Next, each player takes one unused action token, and selects a move or attack action in secret. Then all players simultaneously reveal their tokens by placing them into the action pool.
For example, in a three-player game, there are two default move tokens and one default attack token in every destiny step. Then each player adds one token by choice. So, there will be twice as many tokens in the action pool as there are players in the game.
Hint: If you chose a specific action during the destiny step, that doesn't guarantee that you will take that action during the battle phase. Learn to use this to your advantage!
2. Reconcile Step
Replace the cards in your hand.
In this step, you may place any number of cards from your hand face down beneath your battle deck, in any order you choose. Then draw cards, one at a time, up to or below your hand size value. Once you draw, you cannot place any more cards beneath your battle deck.
3. Initiative Step
Replenish your karma pool and determine who goes first in combat.
Place the top card of your battle deck face up into your karma pool. The player who reveals the card with the highest karma value wins the initiative, meaning they go first in the upcoming battle phase.
If there is a tie for the highest karma value, compare the attack values. If there is still a tie, the tied players reveal an additional card and once again compare karma values followed by attack values. This is repeated as necessary, until a single player wins initiative. The extra cards revealed during a tiebreaker are added to your karma pool, just like the first.
An EXHAUSTED player (a player with no battle deck remaining) has a karma value of 0. In the rare case that all players are EXHAUSTED, the player who won initiative last round wins the initiative by default.
Note: Look for any FATE cards- these cards have special effects that activate when they enter your karma pool!
Some statuses, like BLIND and BURN, might be removed from your master during the initiative step. When you meet the conditions for removing a status, you must remove that status from your master.
Battle Phase
The battle phase begins with the player who won initiative in the destiny phase. During your turn, you may take one tome action and one combat action. You may take your tome and combat actions in any order, however, you cannot do both at the same time- you must finish one before you start the other. Once you've completed your actions, play proceeds to the left. In a typical round, each player will take two turns, since there are two action tokens per player. Once the action pool is empty, the round is over and a new round begins starting with the destiny phase.
Tome Actions
You may perform only one of the following three things when you make a tome action on your turn:
- FOCUS: Place the top card of your battle deck into your karma pool, face up. This action will also trigger some terrain effects. Note that any FOCUS performed outside of this specific focus tome action will NOT cause terrain effects to trigger.
- DELVE: Turn one page in your tome. To turn forward, flip the right-hand tome card face down onto the left-hand card, just like reading a book. You may also turn backward. Note that the tome cover card for your tome also counts as a card in your tome, and may be used to open and close your tome. You cannot flip your tome from back to front (you can't go from page 8 to the cover) or vice versa.
- Karma Ability: You may play one karma ability, indicated by the karma cost next to the game text. These abilities can be found on your tome cards, your avatar card, or on cards equipped to your master. Karma abilities are not to be confused with the karma value found at the top of battle cards or on your avatar card's stats, nor are they the same as attack effects. To play a karma ability, pay the karma cost and then follow the instructions on the card. To pay the cost of a karma ability, USE the fewest number of cards from your karma pool with a combined karma value equal to or greater than the cost listed. Any karma spent beyond the cost of the effect is lost and cannot be applied to any other effect.
Note that some cards show a 0 cost - this indicates that you don't USE any cards in your karma pool to pay for it, however, it may have alternative costs associated with it, and it still uses your tome action.
When using a karma ability from your tome, you may only play an ability currently face up on your tome cards. (You may look at other pages in your tome at any time for reference, as long as you put them back.) Note that IMPRINT and EQUIP tome cards have a torn-off page. Any karma ability below the page tear cannot be activated while the card is in your tome.
Combat Actions
A combat action is either a move or an attack.
To make a combat action, you must first take the appropriate action token from the action pool. This is where planning during the destiny step pays off. If you wanted to attack, but there are no attack tokens left in the action pool, you're out of luck.
You may choose not to use a combat action, however you must still remove an action token from the action pool before your turn is completed.
Each master targeted by an attack may respond with one defensive card from their hand, in turn order. Look for cards in your hand with a shield icon to quickly find a defense card. Depending on the defense keyword, a successful defense may prevent some or all damage, or even inflict damage on the attacker! If the targeted master does not defend, the attack causes them to LOSE life equal to the ATK value. A master is considered hit by an attack if they take damage after defenses resolve.
Unless otherwise noted, you cannot play a defense card in response to an effect, whether it is an effect that resolves after an attack or from a karma ability. You may only play a defense card in response to being targeted by the attack pattern on a battle card.
Many battle cards include game text. Unless otherwise stated, these effects occur after the attack (and all defenses) completely resolve. If a card has multiple effects, they resolve (one at a time) in the order in which they appear on the card (starting at the top). You may also perform attacks even if they don't target another master, simply to perform the effects of the card. Unlike FATE effects, attack effects are optional.
Attack Action
Attack: Take an attack action from the action pool. Choose a battle card from your hand as your attack, reveal it and USE it. There is no karma cost for making an attack. Before making an attack, you may rotate your miniature to face any direction.
Each battle card has an attack pattern indicating in red all the spaces it targets, relative to your miniature and the direction it faces. The green hex indicates where your master is, and the direction they face is always towards the top of the card.
Move Action
Move: Take a move action from the action pool. You may move your master a number of spaces up to your speed value, or choose not to move. In addition, you may rotate your master to face any of the six directions of the hexagon grid. You many not move through or end in spaces occupied by another master.
Combat Movement: If your master is in a space adjacent to an opposing master, to move to a space that is not adjacent to an opposing master, you must EXERT as an additional cost. This is called combat movement. You can be locked in combat with multiple masters, meaning you must EXERT for each master you move away from. When you are EXHAUSTED (no remaining cards in battle deck), you cannot move away from an opposing master. You may still move around them. Some abilities, like FEINT, mention "relocating" (distinct from DODGE which mentions "moving"). Relocating won't cause combat movement - allowing you to change location, even while EXHAUSTED.
Restoration and Winning the Game
If at the end of any turn all of your opponents are restored (or have no life remaining and will soon restore), you or your team wins!
If you have no life remaining (no cards in hand AND battle deck) you will soon enter restoration. Skip each turn you would have for the remainder of the current round. Other players will take action tokens instead of you. Damage beyond what it took to bring you into restoration does not carry over. You cannot take any additional damage during the current round until after you restore. Note that while waiting to restore, your space is still occupied and adjacent opposing masters must still EXERT to move away from you and cannot move into your space.
At the end of the round, you must do the following, in order:
- Discard all cards in your karma pool.
- Remove any number of statuses from yourself.
- Remove any number of equipment cards from yourself, returning them to their owner's tome and keep the remaining equipped.
- Shuffle your discard pile to create your new battle deck.
- Flip your avatar card to the restored side.
- Place a number of cards equal to your restored karma value from the top of your battle deck face-up into your karma pool.
- Draw cards up to your restored hand size.
Do not turn any pages in your tome deck during restoration.
Once restored, you may continue playing as before, using the abilities and values on your restored avatar card. This is your opportunity to bring other players down with you!
Later in the game, if you again have no more remaining cards in your battle deck and hand, and have already entered restoration, you are killed! When this happens, you remove your miniature from the board. You are out of the game.
If all masters have restored (or will soon) at the end of any turn, the game is a tie!
Yashima Attack Action Breakdown
An attack action in Yashima can get confusing due to the number of different abilities and effects that interact. So, let's break it down here, plain and simple. These are the official tournament play rules for combat in Yashima. When something states to resolve, it means to complete all game text instructions of that particular effect. Remember, any effect or card text that would contradict these rules overrides them!
In its simplest terms, think of an attack action like a sandwich:
- Turn player plays an attack.
- Targeted players play and resolve defenses.
- Attack is resolved.
In detail, here's the breakdown of all the steps to an attack:
- Turn player plays an attack
- 1.1. Remove Attack Token: Turn player removes an attack token from the action pool.
- 1.1.1. If an attack token isn't present in the action pool, you cannot attack unless that attack doesn't require an attack action to be played.
- 1.1.2. If an attack states that you don't need to spend or use an attack token to play it, you will not remove an attack action from the action pool, and instead skip this step.
- 1.2. Rotate: Turn player may rotate to face any direction.
- 1.2.1. The turn player may rotate their miniature to face any of the six different directions within their current space.
- 1.2.2. The turn player may also choose to not rotate their miniature.
- 1.3. Reveal Attack: Turn player reveals a battle card from hand.
- 1.3.1. This turn player is referred to as being the "attacker" and the battle card being played is referred to as being the "attack".
- 1.3.2. The attack does not require a master or space to be targeted in order to play it.
- 1.3.3. The attacker must announce any effects that are being added to the attack, especially those that are not written on the card itself.
- 1.3.4. Attacker keeps the attack revealed on the table so all players can reference its effects and attack pattern until attack is resolved.
- 1.4. Resolve Attack Changes: Apply all modifiers that change the attack itself.
- 1.4.1. Resolve any effects that change the attack pattern of the attack.
- 1.1. Remove Attack Token: Turn player removes an attack token from the action pool.
Masters
The character backstory fiction on the Masters pages is omitted here; the "Play as..." guidance printed under each master is kept.
Lu Bu
Play Lu Bu if you want relentless attacking power! Dance with danger by sending your allies into restoration faster, then crush anyone who tries to defend. Annihilate your foes by shocking the life right out of their hands!
Hua Mulan
Play Mulan if you want to pit your opponents' own decks against them! Imprint your cards as traps in their decks and bleed their abilities dry!
Miyamoto Musashi
Play Musashi if you want to use your unmatched agility to move and attack on the same turn, or cripple your foes with a double attack.
Bruce Lee
Play as Bruce Lee to master the one inch punch to catch your opponent in a surprising direct attack and counter your opponent's attacks, turning their offense into yours!
Kami
Akkorokamui
The flavour text describing the Akkorokamui is omitted.
- Abilities: DRAW, WEAKEN
- Defense: OCCUPY, CLASH
- Deck: 24
- Average Karma/Attack: 4/5
Foo Dog
The flavour text describing the Foo Dog is omitted.
- Abilities: EMPOWER, SPIRITUAL LINK
- Defense: SPIRIT SHIELD, BARRIER
- Deck: 26
- Average Karma/Attack: 5/4
Kami Strength Comparison Chart
| Kami | Set | Life Total | Avg. Karma | Avg. Atk | Keyword | Defense |
|---|---|---|---|---|---|---|
| Dragon | Core | 20 | 6 | 3 | Delve, Empower | Dodge, Riposte |
| Phoenix | Core | 23 | 5 | 4 | Ambush, Dash | Clash, Dodge |
| Tiger | Core | 25 | 4 | 5 | Draw, Empower | Block, Clash |
| Tortoise | Core | 30 |
Glossary
- ACTION: Tome actions include FOCUS, DELVE, and karma ability. Combat actions include attack actions and move actions. Some actions, such as playing a karma ability or an attack action, may generate a separate effect. All other actions and effects must be fully resolved before beginning a new action.
- ADAPT: This card gains all keywords and game text of your master's ADAPT ability. Your master's ADAPT ability can be found on their avatar abilities card. See "Other Concepts" for additional details.
- AMBUSH: +1 ATK and SWIFT against each target that faces opposite to your master. Targets in the attack pattern that are not facing opposite treat this as a normal attack.
- BARRIER: LOSE this card to prevent 1 damage for each card in your karma pool.
- BLAZE: Each hit master and up to 2 unoccupied targeted spaces gain BURN status.
- BLEED: Choose one hit master to IMPRINT this card. While this card is imprinted it has "IMPRINT - EXERT". When this imprinted card is revealed on top of a battle deck, that player must EXERT, then place this card face-up on the bottom of the same battle deck. If there are no face-down battle cards beneath this imprinted card when it is revealed, ignore its effects and return it face-down to the bottom of its owner's battle deck.
- BLIND: Each hit master gains BLIND status.
- BLOCK: USE this card, prevent 3 damage. See "Defense Effect" in the glossary for additional details.
- BOOKMARK: Turn to any page in your tome.
- BURST: Remove all SEED statuses from a master. They take 2 damage for each SEED status removed this way.
Glossary Continued
- FOCUS: Place the top card of your battle deck into your karma pool, face up. Any FOCUS performed outside of a specific focus tome action will NOT cause terrain effects to trigger.
- FROSTBITE: Each hit master and up to 2 unoccupied targeted spaces gain FROST status.
- FURY: Relocate each hit master one space in any direction. Relocate each hit master, in any order you choose, to any unoccupied legal space that is adjacent to them.
- GROW: Relocate any PLANT status to an unoccupied space adjacent to you.
- GUST: Gain WIND status.
- HEAL: Place the top card of your discard pile on the bottom of your battle deck, face down. If you have no cards in your discard pile, you cannot HEAL.
- HIT: Dealt one or more damage by this attack. If all damage from the attack is prevented, you are not hit. If damage only comes from a separate effect, even those generated by the same attack, you are not considered hit by the attack.
- ICEBREAKER: When you LOSE this card from your battle deck, prevent all further loss of life. You cannot HEAL this card. For example, if you were dealt 5 damage, and the second card you LOSE from your battle deck is an ICEBREAKER card, you would not take the remaining 3 damage. This card cannot be healed, but may return to your deck upon restoration. If a card with ICEBREAKER is on top of your discard pile when an effect would cause you to HEAL, you don't instead.
- IMPRINT: Remove this card from your tome and place it face-up beneath your battle deck. See "Other Concepts" for additional details.