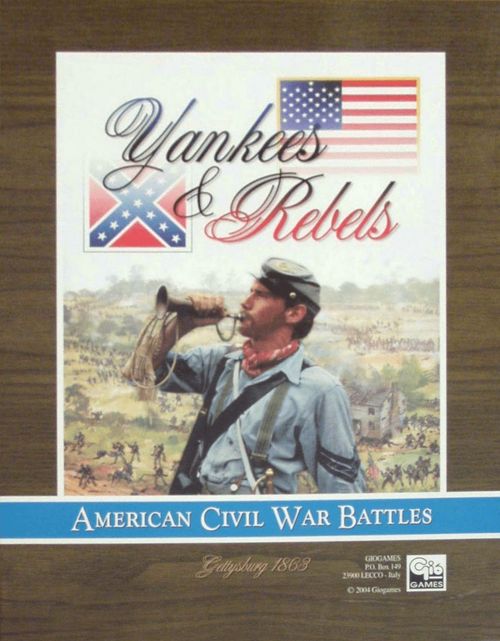
Yankees & Rebels
Yankees & Rebels Rulebook
Table of Contents
Table of Contents
1.0 Components
Game contents:
- 1 map 67x49,5 cm printed on both sides.
- 4 sheets of counters (units and game markers).
- 2 die-cut sheets with labels for dice and corps.
- 180 die-cut terrain hexes.
- 8 special dice (5 white - 3 black).
- 80 plastic stands (50 blue, 30 red).
- 150 plastic chips (70 blue, 60 red, 20 black).
- 1 Rulebook.
1.1 Combat Units
Each counter must be cut, folded and inserted in a round (infantry) or oval (cavalry and artillery) plastic stand (blue for Union units, red for Confederate ones). To simulate the personnel strength of the infantry, some plastic chips are placed under the plastic stand of the unit.
The number on the lower centre of each counter back is the "Combat Factor" (CF), which indicates the total number of steps of the unit (stand+chips). This is the number of losses the unit can sustain before being eliminated.
Example: an infantry unit has 4 steps. They are indicated with three plastic chips and the fourth represented by the counter stand.
The illustration on the counter represents an infantry soldier. On the back of the counter are also indicated the movement allowance (M#), the training level (Conscripts, Veteran or Elite) and for artillery the fire value depending on target distance.
Normally a unit will roll as many dice as it has steps (chips plus stand).
Exception: artillery units have a fixed fire value depending on the range to the target. The number of dice is marked on the counter.
Example: F3/2/1/1. Roll 3 dice if target is adjacent, 2 dice if two hex range, 1 die at three and four hex range.
Note: Units for the Gettysburg scenario also have the divisional and corps affiliation indicated on the counters. On the "Clear" units a banner with the controlling corps number will be inserted laterally on the counter.
1.2 Dice preparation
The game includes five white dice and three black ones. These dice have to be prepared by sticking the appropriate label on them.
Activation/Combat Dice (white): Stick on two sides the image with two flags, on the other sides the image of the Union flag, the Confederate flag, the bugle and the command symbol (hat).
Combat Effects dice (black): On three sides stick the loss symbol (cross); on two sides the forced back symbol (arrow) and on the last side the no effect symbol (save).
1.3 Corps Indicators
Stick the corps and flag symbols on the black chips.
1.4 The Battlefield
The hex map shows the Gettysburg battlefield. Each hex has an alphanumeric code in it. For the Gettysburg scenario each hex represents approximately 400 metres and each turn an hour. Infantry units are divisions, cavalry units are brigades and artillery units are battalions.
1.5 Terrain
The map shows the important terrain features of the battlefield. The movement cost of each terrain type and its effect on Line of Sight and combat are indicated on the "Terrain Effects Table".
2.0 Sequence of Play
A Game Turn ends when ALL the markers are extracted from the container, or it ends immediately when all units on the map and reinforcements units of that current turn were activated.
Place in a container all the "Corps Indicators" of the units on the map (and of those who must enter in that turn), and the two counters with an army flag.
Each Turn is subdivided in rounds. During each Round:
- Draw randomly a marker from the container.
- Roll the dice to determine what units will move in the round. The CSA player rolls 5 dice; the US player 4.
- If the dice show the enemy flag an enemy units will be moved by the controlling player in an adjacent hex without moving adjacent to the enemy.
- Move a unit or a stack (if the roll show the command symbol) one at time.
- If moving adjacent to an enemy unit check if that unit performs reaction fire.
- Combat (simultaneous in case of reaction fire).
- Combat Effects: Roll the dice and check eventual losses and retreats.
Repeat the steps from 4 to 7 until all activated units are done; then begin again from step 1.
When all indicators are drawn from the container put back all the corps indicators into the container, place the reinforcements, move the Game Turn marker one space and begin a new turn.
Note: The number of activation dice to roll is linked to the number of corps involved in the battle so as to balance the number of units activated.
3.0 Rounds
Once a Corps Indicator has been extracted the player who own that corps rolls the activation dice. If the army flag is extracted, roll the activation dice and move any units that haven't already been activated in that turn.
The activation dice rolled have this effects:
- Bugle: Any one unit can retreat a maximum of three hexes from the enemy units; or a unit can try to recover lost steps in it if it isn't adjacent to enemy units and is located in a hex with terrain that affords cover or is not in line of sight: roll two (2) dice for conscripts, three (3) for veterans, four (4) for élite. For each bugle result the unit recovers a step (chip) until it reaches the maximum strength indicated on the counter. These actions must be performed before conducting other movements or combat actions with still unactivated units during the turn.
- If you roll 2 bugles, you can retreat a unit and then try to rally it.
- Unit recovering steps cannot perform other action in the TURN, but can react to enemy units moving adjacent to them.
- Command symbol (hat): Units stacked in the same hex can move or fight together. At least one unit in the hex must be of the activated corps or both units must be of the cavalry or artillery reserve. Or: 1 reserve cavalry or artillery unit (with the same reserve symbol on the counter) can move, attack or fire.
- Two flags (double flag): 1 Unit of the activated corps can move and/or fight.
- Friendly flag: If a friendly flag (single friendly flag) is rolled, a friendly unit of the activated corps can move and/or fight.
- Enemy flag: If an enemy flag (single enemy flag) is rolled an enemy unit can be moved by the enemy player in an adjacent hex without moving adjacent to the enemy.
4.0 Movement
Each unit has a movement allowance marked on the counter. The number (M#), represents the total amount of Movement Points (MP) the unit has.
- Infantry = 2 MPs + combat
- Cavalry = 4 MPs + combat
- Artillery = 2 MPs or fire
- Horse Artillery = 3 MPs + fire
Each terrain type has an associated cost in term of MPs as indicated on the terrain table on map. Some terrain types stop movement once entered (wooded hill or urban hexes). Unit who enter into a hex that cost 2MPs cannot fight in the same round. Modifier for crossing stream hexside is cumulative with hex terrain.
Movement on road hexes costs only 1/2 MP per hex. Road movement is a "strategic" movement and the unit performing it can't fight after concluding movement.
Important: Cavalry cannot enter in the wooded broken hill hexagons.
On the Gettysburg map, artillery units cannot enter on hex B7 (Round Tops) and D8 (Devil's Den).
IMPORTANT: once a unit has been activated rotate the counter to show the adversary the back of the counter.
4.1 Stacking
In each hex there can be only two units and of these two units ONLY ONE can be an infantry unit.
4.2 Zone of Control (ZoC)
Each unit projects a zone of control on the 6 hexes surrounding it. A unit must stop when it enters into an hex adjacent to an enemy unit. A unit already in an enemy ZoC can move, but it cannot move directly from one ZoC to another ZoC or end movement in an enemy ZoC.
4.3 Reaction Fire
If a unit moves adjacent to an enemy units these units can react and fight. To test if the enemy unit can react roll the combat dice.
- Roll two (2) dice for conscripts.
- Roll three (3) dice for veterans.
- Roll four (4) Dice for élite.
If at least one flag (single friendly flag), belonging to the reactive player is rolled the reactive player will have the opportunity to fight back during the contemporary combat.
All enemy units contacted can react. More than one reaction fire can be triggered in the same round. Reaction fire cancels the normal activation. Rotate the counter showing to the enemy the back of the unit.
4.31 Cavalry Evasion
Instead of performing reaction fire as indicated in 4.3, Cavalry units can avoid combat withdrawing up to the entire movement (1-4 MPs).
Roll the dice normally for the reaction fire and then declare if the unit fires or evade.
5.0 Combat
Combat or fire is allowed in all directions. Infantry and cavalry units can fight after movement only with adjacent units.
An artillery unit can fire OR move; not both. Artillery fire can reach units in a range of four hexes from the firer (F3/2/1/1).
Exception: horse artillery units can move 3 MP and then fire.
5.1 Line of Sight (LoS)
For an artillery unit to fire at a target at more than one hex it is necessary that the intervening hexes aren't blocked. The Line of Sight is considered blocked if the straight line connecting the center of the firer and target hex cross a hex with a friendly or enemy unit or terrain that blocks LoS.
If the line passes exactly on the border between two hexes the LoS is blocked only if both hexes contain blocking terrain or units.
5.2 Hills
Level 1 hills are at a level higher than the remaining terrain (level 0) and allow artillery fire over blocking hexes at lower level. Wooded or broken hills are considered level 2 terrains.
Note: Fire and combat against targets on the same elevation of the firer aren't modified.
5.21 Cemetery Hill (N5)
Infantry and Cavalry units that attack enemy units in this hex roll two dice less than their normal totals. Units in this hex ignore retreat results.
5.3 Combat Resolution
Roll a number of Combat Dice equal to the steps (or fire value for artillery) of the firing units. A hit is scored for each result that shows the attacker flag (including the double flag).
5.4 Combat Effects
For each hit sustained roll one Black Die.
- For each result with the Cross the target unit loses a step.
- For each result that shows the arrow the target unit must retreat one hex. When retreating, the unit must move away from the enemy and cannot move adjacent to other enemy units. Exceptions: units in the Entrenchments hex, treat retreat results as "save" (no effect).
- For a save result the unit doesn't incur any effect.
If a hex contains 2 units and they are fired, the larger unit (more Combat Factor "CF" left), take hits. If tie, defender choose.
If a unit is forced to retreat, all stack must retreat.
5.41 Advance
If following an attack an infantry unit clears the target hex (via elimination of the defenders or retreats) it CAN occupy the vacated position (cavalry is FORCED to occupy the position after a victorious combat).
That movement can generate reaction fire from other enemy units if the advancing units move adjacent to them.
5.42 Retreats
A unit forced to retreat must enter one of the three hexes on its rear based on the direction of the attack. (A diagram shows the enemy unit, the retreating unit and the three rear hexes.)
The retreating hex cannot be in an enemy ZoC, cannot be occupied by enemy units and the retreat must not violate stacking limits. If there isn't a valid hex on which to retreat, the unit will instead lose a step for each hex of retreat forfeited.
6.0 Corps Integrity (Optional)
Unit of the same corps MUST BE within 2 hexes from each other at the end of the turn.
If they enter the map from different areas or are forced to retreat to a position where they are more than two hexes distant in their next activation their movement will have to bring them closer to other units of their same corps.
7.0 Reinforcements
Reinforcing units are indicated for each scenario. If there aren't units of their corps already on the map put their corps indicator in the cup on their turn of entry. When their corps indicator is extracted the reinforcing units will enter (if activated), on the map expending 1/2 MP in their first hex (indicated on the scenario instructions).
7.1 Night Turn
On scenarios involving two or more days there is a night turn. In a night turn units will move automatically without needing to be activated expending the usual 1/2 MP in the indicated hex. The player without initiative will move first (Federal player at Gettysburg).
Units entering in a night turn have their MP doubled for the turn.
Units entering in a night turn aren't allowed to move adjacent to enemy units.
Friendly units already adjacent to enemy units that occupy protective terrain (hill, woods, built up Areas) are forced to retreat one hex.
If both units are in the open both are forced to retreat.
If both are in protective terrain they are free to remain in the hex or withdraw in a hex not in enemy ZoC.
8.0 Victory Conditions
Some hex have a red circle on them with a number.
- Hex "D6" (Little Round Top): = 5VPs
- Hex "I1" (US EAST Entry Area): = 5VPs
- Hex "N5" (Cemetery Hill): = 3VPs
- Hex "N3" (Culp's Hill): = 3VPs
- Hex "A5" (US SOUTH Entry Area): = 3VPs
- Hex "I5" (Cemetery Ridge): = 1VP
- Hex "K6" (Cemetery Ridge): = 1VP
- Hex "L6" (Cemetery Ridge): = 1VP
- Hex "M6" (Cemetery Ridge): = 1VP
- Hex "G9" (Peach Orchard): = 1VP
That is the number of Victory Points (VPs) that the CONFEDERATE PLAYER gains if he controls these hexes at the end of the day.
In addition each player gains a number of VP equal to the step value of the eliminated enemy units. The player with the most Victory Points is the winner.
8.1 Scenarios
The battle of Gettysburg lasted three days. The players can re-fight the entire battle or three separate scenarios beginning from the first day (1st July) the second or the third.
Historical unit placements and strength are indicated for each scenario.
8.2 Short Scenario
At the end of the first day the Confederate player wins if he has at least 10 VPs more than the Union player. With a difference from 4 to 9 VPs the game is a draw and in any the other instances it is a Union victory.
Scenarios
Unit type: I Infantry, C Cavalry, A Artillery, HA Horse Artillery (a few entries are printed F, FI or AC in the original). CF = unit Combat Factor (stand+chips). CR = Cavalry Reserve, AR = Artillery Reserve. "Hex" is the starting hex (on map) or the entry hex.
Scenario 1: The 3 days of Gettysburg, July 1st-3rd, 1863
July 1st, 1863 - h. 08 am - Union units on map
| Corp | Unit name | Type | Hex | CF |
|---|---|---|---|---|
| (not printed) | Wadsworth | I | G9 | 4 |
| CR | Gamble | C | R10 | 2 |
| CR | Devin | C | S10 | 2 |
Union units entry (July 1st)
| Time | Corp | Unit name | Type | Entry hex | CF |
|---|---|---|---|---|---|
| h. 09 am | I° | Robinson | I | A12 | 3 |
| h. 09 am | I° | Doubleday | I | A12 | 4 |
| h. 09 am | I° | Wainwright | A | A12 | 2 |
| h. 10 am | XI° | Barlow | I | A12 | 3 |
| h. 10 am |
Short Scenario: check for victory conditions.
Campaign scenario: follow night turn and next day.
Night Turn (MPs x 2), is not allowed move adjacent to enemy units (see 7.1).
| Corp | Unit name | Type | Entry hex | CF |
|---|---|---|---|---|
| II° | Caldwell | I | A5 | 3 |
| II° | Gibbon | I | A5 | 3 |
| II° | Hays | I | A5 | 4 |
| II° | Hazard | A | A5 | 2 |
| V° | Barnes | I | A5 | 3 |
| V° |
Union units entry, July 2nd, 1863
| Time | Corp | Unit name | Type | Entry hex | CF |
|---|---|---|---|---|---|
| h. 09 am | CR | Robertson | AC | A5 | 2 |
| h. 10 am | AR | Mc Gilvery | A | I1 | 2 |
| h. 10 am | AR | Taft | A | I1 | 2 |
| h. 10 am | AR | Huntigton | A | I1 | 2 |
| h. 10 am |
Night Turn (MPs x 2), is not allowed move adjacent to enemy units (see 7.1): CR Huey, C, I1, CF 2.
July 3rd, 1863: h. 13, CR Merrit, C, A5, CF 2.
July 1st, 1863 - h. 08 am - Confederate units on map: none
Confederate units entry
| Time | Corp | Unit name | Type | Entry hex | CF |
|---|---|---|---|---|---|
| h. 08 am | III° | Heth | I | V13 | 6 |
| h. 10 am | III° | Mc Intosh | A | V13 | 2 |
| h. 10 am | III° | Pegram | A | V13 | 2 |
| h. 11 am | III° | Pender | I | V13 | 6 |
| h. 13 |
Night Turn (MPs x 2), is not allowed move adjacent to enemy units (see 7.1):
| Corp | Unit name | Type | Entry hex | CF |
|---|---|---|---|---|
| I° | Mc Laws | I | V13 | 6 |
| I° | Hood | I | V13 | 6 |
July 2nd, 1863:
| Time | Corp | Unit name | Type | Entry hex | CF |
|---|---|---|---|---|---|
| h. 08 am | I° | Alexander | A | V13 | 2 |
| h. 08 am | I° | Eshelman | A | V13 | 2 |
| h. 14 | CR | Hampton | C | V5 | 2 |
| h. 14 | CR | Beckham | A | V5 | 2 |
| h. 14 |
July 3rd, 1863:
| Time | Corp | Unit name | Type | Entry hex | CF |
|---|---|---|---|---|---|
| h. 11 am | CR | Imboden | C | V13 | 2 |
| h. 14 | CR | Jones | C | V13 | 2 |
| h. 14 | CR | Robertson | C | V13 | 2 |
Scenario 2: July 2nd, 1863
h. 08 am - Union units on map
| Corp | Unit name | Type | Hex | CF |
|---|---|---|---|---|
| I° | Wadsworth | I | N3 | 3 |
| I° | Doubleday | I | M6 | 3 |
| I° | Wainwright | A | L6 | 1 |
| II° | Caldwell | I | G5 | 3 |
| II° | Gibbon | I | H5 | 3 |
| II° |
Eliminated units: Robinson (Infantry), Barlow (Infantry), Schurz (Infantry).
h. 08 am - Confederate units on map
| Corp | Unit name | Type | Hex | CF |
|---|---|---|---|---|
| I° | Mc Laws | I | V13 | 6 |
| I° | Hood | I | T10 | 6 |
| II° | Early | I | R3 | 6 |
| II° | Rodes | I | R5 | 4 |
| II° | Johnson | I | R2 | 6 |
| II° |
Reinforcements
| Time | Corp | Unit name | Type | Entry hex | CF |
|---|---|---|---|---|---|
| h. 08 am | I° | Alexander | A | V13 | 2 |
| h. 08 am | I° | Eshelman | A | V13 | 2 |
| h. 09 am | CR | Robertson | HA | A5 | 2 |
| h. 10 am | AR | Mc Gilvery | A | I1 | 2 |
| h. 10 am |
Night Turn (MPs x 2), is not allowed move adjacent to enemy units (see 7.1): CR Huey, C, I1, CF 2.
July 3rd 1863: h. 11 am, CR Imboden, C, V13, CF 2; h. 13, CR Merrit, C, A5, CF 2; h. 14, CR Jones, C, V13, CF 2, and CR Robertson, C, V13, CF 2.
Suggestion: If you prefer, not to put the plastic chip under Artillery and cavalry stands. When an Artillery or Cavalry unit takes a hit, insert a banner laterally showing on the left side the N°1.
For Confederate units with a total of 6 combat factor (CF), put 1 black chips under the stand. This represent 5 CFs.
Scenario 3: July 3st, 1863
h. 08 am - Union units on map
| Corp | Unit name | Type | Hex | CF |
|---|---|---|---|---|
| I° | Doubleday | I | L6 | 3 |
| I° | Wainwright | A | L6 | 1 |
| II° | Caldwell | I | G6 | 2 |
| II° | Gibbon | I | H6 | 3 |
| II° | Hays | F | I5 | 4 |
| II° |
Eliminated units: Wadsworth (Infantry), Robinson (Infantry), Birney (Infantry), Barlow (Infantry), Schurz (Infantry), Ransom (Artillery).
h. 08 am - Confederate units on map
| Corp | Unit name | Type | Hex | CF |
|---|---|---|---|---|
| I° | Mc Laws | I | G9 | 4 |
| I° | Pickett | I | T9 | 5 |
| I° | Hood | I | E10 | 4 |
| I° | Alexander | A | F10 | 2 |
| I° | Eshelman | A | H10 | 2 |
| II° |
Reinforcements
| Time | Corp | Unit name | Type | Entry hex | CF |
|---|---|---|---|---|---|
| h. 11 am | CR | Imboden | C | V13 | 2 |
| h. 13 | CR | Merrit | C | A5 | 2 |
| h. 14 | CR | Jones | C | V13 | 2 |
| h. 14 | CR | Robertson | C | V13 | 2 |
Tables Legend
Terrain effects: LoS = Line of Sight; MPs = number of Movement Points required to enter; the dice malus entry gives the number of dice subtracted when attacking this hex. (The terrain table itself and the Union corps badges I° to XXV° are printed as graphics.)
Unit Type: I Infantry; C Cavalry; A Artillery; HA Horse Artillery. CF = Unit Combat Factor (stand+chips). CR = Cavalry Reserve; AR = Artillery Reserve.