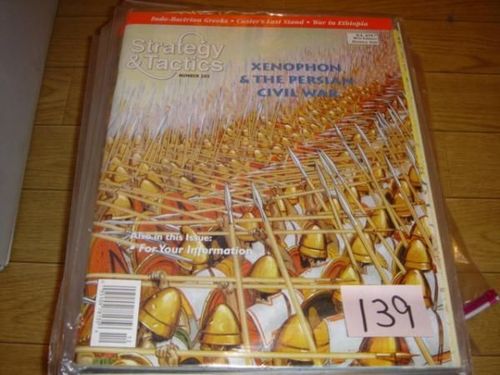
Xenophon: 10,000 Against Persia
Xenophon: 10,000 Against Persia Rulebook
Table of Contents
Table of Contents
- Components and Summary
- Errata
- Sequence of Play
- Control of Satrapies
- Random Events Phase
- Random Events Table
- Revolt Table
- Stratagem Chits and Stratagem Phase
- Diplomacy Phase
- Treasury Phase
- Recruit Phase
- Levy Phase
- Operations Phase
- Operations
- Supply Phase
- Other Rules
- Optional Rules
- Scenarios
- Disband Table
- Stratagem Chits (40 total)
- Diplomacy Table
- Operations Points
- Pillage Table
- Colonization Operations Table
- Combat Results Tables
- Treasury Points Chart
- Unit and City Summary Rosters
Components and Summary
Components: 280 counters, 1 map, 17-page rulebook.
Summary: 2-player game simulating the rise of the Persian Civil War of 401-387 BC. The Empire player controls the forces of the Persia, its allies and client states. The Rebel player controls a shifting coalition of insurgent forces.
Counters
- 219 Combat units and leaders:
- All double-sided (except 20 Empire and 20 Rebel single-sided leader/guard units). Purple side = Empire control, red side = Rebel control.
- Two numeric ratings: Combat Strength (CS) and Operations Value (OV).
- 1 blank
- 40 Stratagem Chits (including the one blank chit)
- 20 Markers
Map
- Hex grid, with 34 named Satrapies and 54 named cities.
- Colchis includes the Crimea; Cilicia includes Cyprus; Ionia includes Rhodes, Crete and 5 unnamed Aegean Sea islands.
- The 54 cities include: 44 ordinary cities, 7 Treasury Cities (Memphis, Tyre, Athens, Byzantion, Sardis, Halikarnassos, Merv); & 3 Capital Cities (Ekbatana, Susa, Persepolis).
Abbreviations
| Abbreviation | Meaning | Abbreviation | Meaning | Abbreviation | Meaning |
|---|---|---|---|---|---|
| CRT | Combat Results Table | OP | Operations Points | VP | Victory Points |
| CS[P] | Combat Strength [Points] | OV | Operations Value | ZOC | Zone Of Control |
| DRM | Die Roll Modifier | TEC | Terrain Effects Chart | ||
| EZOC | Enemy Zone Of Control | TP | Treasury Points (i.e. $) |
Scale and Note
Scale: 1 hex = 80km across. 1 unit = 1600-6400 troops + officers, followers, baggage etc.
NOTE (as printed): Red text indicates rules changes from earlier 'Charlemagne' game (S&T189, Jan/Feb 1998). All tables/charts have also changed, but are shown in black for better printing. (The colour coding is not reproduced here.)
Errata
Printed as the errata block of the community rules file.
Counters:
- Egypt should have 1 Phalanx (8-16) and 2 Light units (4-24), not 3 Phalanxes.
- Lydia should have 1 more Militia (2-8); make one of the Egyptian Militia units a Lydia militia unit.
- All Hyrkanian units should have a blue stripe.
Map:
- Change 'Region Control Chart' to 'Satrapy Control Chart'.
- Ignore City symbols in 2808 & 2243.
- Taxila (2443) should have grey outline.
- TEC: Roads (movement) negate other terrain in hex; A road crossing a river is a bridge; ZOCs cost 0, not 1 to enter.
Rules:
- Leader and Supreme leader symbols should be reversed, as should the Siege and Supply Train symbols.
- Any type of unit may be levied, inc. fleets.
- Fleets and land units can move as a single Force along coastal hexes via either land movement or sea movement.
- Leaders do count for pillage.
- When a city has been pillaged, it still counts as a city for purposes of occupation of all cities in a Satrapy (e.g. Diplomacy) and for Victory Points.
- Treasury Chart: Elephants cost 5 to recruit and 1 to maintain.
Sequence of Play
- Rebel Player Turn
- a. Random Events phase (roll on Random Events Table)
- b. Stratagem phase (receive Chits)
- c. Diplomacy phase (attempt to change Satrapy control)
- d. Treasury phase (collect income; maintain troops)
- e. Recruit phase (purchase new units)
- f. Levy phase (levy new units)
- g. Operations phase (move units and have combat)
- h. Supply phase (all units check supply).
- Empire Player Turn
- a. Random Events phase
- b. Stratagem phase
- c. Diplomacy phase
- d. Treasury phase
- e. Recruit phase
- f. Levy phase
- g. Operations phase
- h. Supply phase.
- Turn End (end game, or move Turn marker)
Control of Satrapies
- The 34 Satrapies (and thus the units thereof) can be in one of three control states: Empire-controlled, Rebel-controlled, or Neutral.
- At game-start, 15 Satrapies are Empire-controlled, 8 Rebel controlled and the other 11 Neutral.
- Control is tracked by markers on the Satrapy Control Chart.
- Satrapies change control via Random Events ('Satrapy Resists' & 'Revolt'), or Diplomacy. Neutral Satrapies may also become player-controlled if the other player attacks the neutral Satrapy's units, or attempts to pillage/colonize one of its hexes.
- When player-controlled, a Satrapy's units are turned friendly-side up (purple for Empire, red for Rebel).
- A player controlling a Satrapy may levy/recruit that Satrapy's units, and conduct Operations (move, attack) with them.
- When neutral, a Satrapy's units are turned Rebel side up, but rotated 180° [or place blank chits/coins on neutral units].
- Neutral Satrapies do not collect/spend income, levy/recruit units, nor do their units conduct operations.
- Neutral units do not have ZOC.
- Player-controlled units may freely enter and traverse neutral Satrapies without violating their neutrality.
- Player-controlled units may not enter hexes containing neutral units.
- Player-controlled units may occupy Cities and Colony Markers in neutral Satrapies, and gain all the benefits therefrom, without violating the Satrapy's neutrality.
- The instant one player attacks a neutral Satrapy's units, or attempts to pillage/colonize one of its hexes, the Satrapy immediately becomes controlled by the other player (flip/rotate its on-map units to show the new control, and change the Satrapy Control Chart accordingly).
- When a Satrapy becomes neutral:
- all units of the Satrapy that are inside the Satrapy remain in place;
Control vs. Occupation
- Control is a status of Satrapies. Occupation is a status of hexes.
- Control of a Satrapy allows a player to levy/recruit and use that Satrapy's units.
- Occupation of hexes allows a player to collect income (from Cities/colonies), and gain defensive terrain benefits in battle.
- A player may occupy hexes in a Satrapy with or without controlling it, and may control the Satrapy with or without occupying any of its hexes.
- Control of a Satrapy is not lost simply by failure to occupy any of its hexes.
- Occupation of all Cities/Colonies in a Satrapy assists in attempts to gain control of the Satrapy via Diplomacy.
Random Events Phase
- On his friendly Random Events phase, the player rolls 2d6 (a tens die and a units die, e.g. 1 and 3 = 13) on the Random Events Table, and implements the result.
Revolt
- Represents Satrapies asserting their independence, or becoming hostile to the Empires.
- When a Revolt random event occurs, for each of the Satrapies named in the event, roll 1d6 on the Revolt Table, applying any relevant DRMs.
- Each Satrapy may independently remain in its current control status, revert to neutrality, or change from neutral to Rebel control.
Random Events Table
| 2d6 | Event |
|---|---|
| 11-13 | Leader Arises. Phasing player receives any 1 available leader (not Supreme Leader). Place with any other friendly unit on the map. |
| 14 | Troops Rally. Phasing player receives any 1 unit (not a leader) of a controlled Satrapy. Place with any other friendly unit on the map. |
| 15-16 | Attrition. Phasing player eliminates 1d6 friendly units from map (player's choice). If the roll was even, the losses must include a friendly Leader or Supreme Leader, if present. |
| 21-22 | Mediterranean War. Phasing player may not tax, purchase or levy units this turn in: Sparta, Athens, Illyria, Thessaly, Macedon, Thrace, Ionia, Egypt, Libya. |
| 23 | Plague. 1) Roll 1d6 per Satrapy: 1-5 = no effect; 6 = plague. For each plagued Satrapy: A) Roll 1d6 for each unit (friendly, neutral & enemy): 1-2 = eliminated; 3-6 = no effect. B) Roll 1d6 for each unpillaged City/Colony: 1-2 = place Pillage marker in City/remove Colony; 3-6 = no effect. 2) Both players roll 1d6 each, and discard that many Chits (chosen randomly). |
| 24-26 | Dissent in High Office. Phasing player discards half (round up) of Chits held (choose randomly). |
For Revolts, roll on Revolt Table.
Revolt Table
Roll 1d6 for each indicated Satrapy.
DRM:
- -1 if Satrapy has any Pillaged markers
- +1 if phasing player has ≥1 friendly occupied Colony in Satrapy.
| Roll | Result |
|---|---|
| 1-2 | Revolt. (If neutral, becomes Rebel-controlled; if player-controlled, becomes Neutral). |
| 3-6 | No effect. |
Stratagem Chits and Stratagem Phase
- During set-up, place all Chits in a cup (the pool).
- Players gain Chits as follows:
- at game start (Rebel draws 6, Empire draws 2).
- during the friendly Stratagem Phase, the player draws:
- 1 if his Supreme Leader occupies a Capital City.
- during the friendly Treasury Phase, a player may purchase Chits for $2 each.
- during the Operations Phase, certain combat results award 1 or 2 Chits to the victor.
- Players may hold up to 15 Chits.
- Chits may be returned to the pool without effect at any time.
- The Stratagem Table details when each Chit may be played (see Stratagem Chits, below).
- Played Chits are returned immediately to the pool.
- Each player may play any number of Chits in a turn. There is no cost in OP to play chits.
- Chits may be lost by:
- Certain Random Events
- Death of a player's Supreme Leader
- Chits to be lost are randomly selected from those currently held, and returned to the pool.
Diplomacy Phase
- The phasing player may play Agent Chits to attempt to gain control of neutral or enemy-controlled Satrapies.
- Any number of attempts may be made in a turn, including multiple attempts against a single Satrapy, as long as ≥1 Agent Chit is spent for each attempt.
Diplomacy Procedure
-
The phasing player designates a Satrapy.
-
The phasing player must play ≥1 Agent Chit(s).
-
The non-phasing player may play Agent Chits to cancel the phasing player's Chits on a 1:1 basis.
-
Either player may play Treachery Chits to cancel Agent or Treachery Chits on a 1:1 basis.
-
The number of uncancelled phasing Agent chits (which may be ≤0) is the column of the Diplomacy Table to use.
-
Apply relevant column-shift modifiers (there are no DRMs).
-
Roll 1d6 on the determined column and apply the result.
-
All played Chits are returned to the pool.
-
Some specific Chits (Expedition, Great King, Hellenistic League) count as 2 or 3 Agent Chits in some circumstances. They are cancelled by Treachery Chits on a 1 chit:1 chit basis, and by other Agent chits on a 1 Agent:1 Agent basis.
-
Neither player needs to occupy the Satrapy to make or defend against Diplomacy attempts there. The non-phasing player can defend against Diplomacy attempts into both neutral and his own controlled Satrapies.
Treasury Phase
- Players gain TP (i.e. $) via taxation. TP are used to buy units, Chits and markers.
- Record running totals of $ for each player secretly on paper (or make a $ track and keep $ public).
- Each player gains $ during his friendly Taxation Phase:
- $3 per unpillaged friendly-occupied Treasury City.
- $2 per unpillaged friendly-occupied Capital City.
- $1 per unpillaged friendly-occupied ordinary City/Colony.
- $0 per pillaged Treasury/Capital/ordinary City.
- Unexpended $ are accumulated from turn to turn.
- The phasing player may expend $ during his friendly Taxation Phase:
- $2 per Chit purchased.
- $5 to remove a Pillage marker from a printed City hex.
- $3 to remove a Pillage marker from a non-City hex.
- $1-$2 to maintain certain combat units.
- $ may also be spent in the Levy Phase to purchase units.
- All units except leaders, supply trains, militia and barbarian hordes must be maintained for $1 or $2 per unit. If unable/unwilling to pay for a unit, roll 1d6 (with DRMs) on Disband Table. Unit may stay loyal, disband, or mutiny.
Recruit Phase
- The phasing player recruits (i.e. purchases) new units in the Satrapies he controls.
- $6 per Fleet, Siege train
- $4 per Phalanx, Supply train
- $3 per Barbarian horde, Cavalry
- $2 per Light Troops
- $1 per Militia
- Recruited units are placed 1 per friendly-occupied City/Colony (printed or marker), in their own Satrapy.
- Recruited fleets are placed in their own Satrapy and only on a friendly-occupied port city or coastal Colony [Coastal colonies are always ports].
- Satrapies with no printed Cities will require a Colonization Operation before recruited units can be bought there.
- Players may not recruit more units of any type for a Satrapy than exist in the counter mix.
Guards
- Each player has a pool of Guard and Supply units, with no Satrapy name.
- Guard/Supply units are never levied, only recruited.
- Recruited Guard/Supply units are placed, 1 per hex, on any friendly Leader occupying an unpillaged City/Colony.
- Placement limits: 1 Siege Train &/or 1 Supply Train may be placed in a friendly-leader occupied City/Colony, in addition to the 1 Guard (or other) purchased unit that may be placed.
Levy Phase
- The phasing player receives new units for free (via levy) in the Satrapies he controls.
- In each such Satrapy, he may levy up to a number of units up to the Levy Value given on the Satrapy Control Chart (see the Unit & City Summary Roster, below).
- Any unit type (except Leaders, who are received via Chit draws) may be levied.
- Levied units are placed 1 per empty or friendly-occupied hex in their own Satrapy. They may not be placed in pillaged hexes, EZOC, enemy or neutral-occupied hexes, or outside their own Satrapy.
- Levied fleets are placed in their own Satrapy and only on a coastal/port hex.
- If there are insufficient legal hexes in their Satrapy in which to place them, excess levied units are lost that turn. (They do not accumulate off-board!)
- Players may not levy more units for a Satrapy than exist in the counter mix.
- Apart from the cost of recruiting them, there is no difference between levied (free) and recruited (purchased) units once in play.
- Neutral Satrapies never levy units.
- Note: It is important that recruiting is done first to prevent a player levying a unit in a vacant city, and then recruiting a second unit there (because the levied unit changes the city from empty to friendly-occupied). Players may wish to work out which units they will levy, put them aside, then recruit from the remainder of off-board units, before then placing the already-selected levied units.
Operations Phase
Forces
- A Force is a group of units conducting Operations together.
- There may be more than one (friendly) Force per hex.
Stacking
- Maximum of 10 units per hex (inc. leaders & supply; ignore markers).
- Friendly, enemy and neutral units may never stack together.
- Either player may stack together units from different Satrapies.
- Units may never be placed, moved or retreated in excess of the stacking limit (eliminate any units that cause overstacking).
ZOC
- Definition: the 6 hexes surrounding a player-controlled unit.
- Neutral units do not have ZOC. The instant a Satrapy becomes/ceases to be player-controlled, its units gain/lose ZOC.
- Land unit ZOCs do not extend into all-sea hexes or across all-sea hexsides.
- Fleet unit ZOCs do not extend into all-land hexes or across all-land hexsides.
- Fleet EZOCs do not block movement of land units; land unit EZOCs do not block fleet movement.
- Land units embarked on fleets have no ZOC.
- ZOCs extend into hexes occupied by enemy/neutral units.
- ZOCs never extend into Cities/Colonies occupied by enemy/neutral units.
Effects
- Levied/purchased units may not be placed into hexes in EZOC.
- A Force must cease movement when it enters an EZOC. It can continue moving only if it eliminates/retreats the enemy units exerting that EZOC.
- A Force may never move directly from one EZOC to another (exception: a Force beginning its Operations in EZOC may exit, but not directly into an adjacent EZOC).
- The presence of ZOC/EZOC does not mandate or affect combat.
- A Force may not retreat into an EZOC (if no other retreat path, it is eliminated instead).
- A Force may not pillage or colonize if in EZOC.
Operations
- During the friendly Operations Phase, the phasing player conducts Operations with each of his Forces in turn. Operations allow a Force to move, attack, colonize, and pillage.
- A Force may move/attack/colonize/pillage any number of times, in any order, until its OP are used up or the player chooses to stop.
For each Force in turn:
- Designate the Force to conduct Operations.
- The Force's OP = the OV of its lowest-OV unit + 1d6 (2x1d6 if the Force has a Leader, 3x1d6 if the leader is Xenophon).
- For Naval transportation, use the OV of the fleet, not the transported land units.
- The Force spends OP to move, attack, colonize or pillage.
- Track OP for the Force on the Operations Track.
- Unspent OP may not be accumulated nor transferred to another Force.
Movement Operations
- Forces pay OP to enter adjacent hexes (see Terrain Effects Chart).
- +2 OP to cross a River/Lake.
- +4 to cross a Strait at a crossing arrow (cannot cross directly into EZOC).
- 1 OP to enter a Pass hex from either end, 3 OP from Rough hexes.
- 1/2 OP to move along road (ignore other hex/hexside terrain).
- Forces may never enter hexes containing enemy/neutral units.
- Land units may not enter all-sea hexes or cross all-sea hexsides unless moving by Naval Transport.
- Fleets may not enter all-land hexes nor cross all-land hexsides.
- A Force must stop movement upon entering EZOC (but if beginning Operations in an EZOC, may exit to non-EZOC hex).
- A Force may not move directly from EZOC to EZOC.
- A Force may not pick up units as it moves. It may drop off units, which may not conduct further Operations that Phase.
- A Force may enter a neutral Satrapy without violating the Satrapy's neutrality.
Forced March
- Forced March Chits allow a Force that has already conducted Operations to conduct further Operations.
- After playing the Chit but before rolling for the Force's new OP, roll 1d: 1-3 = eliminate 1 unit in the force; 4-6 = no loss.
- Forced March Chits may be played at any time during the Operations Phase (i.e. move a Force normally, move another normally, play Forced March on the first Force to move it again, then move a third Force normally).
- Forced March may be used to reorganize Forces (i.e. normal operations are used to move two Forces into the same hex, then a Forced March Chit is played to allow the new combined Force to move off together).
- There is no limit to the number of Forced March chits that can be played on a Force in a single Operations Phase.
Combat Operations
- Attacking is always voluntary.
- Each attack costs 2 OP.
- Only the Force currently conducting Operations may attack.
- A Force may only attack units in one adjacent hex per attack.
- All units in the attacked hex must be attacked together.
- All units in the Force must attack (but some may be 'dropped off' in the hex prior to attacking).
- Attacks cannot be made into hexes or across hexsides prohibited to the Force to move.
For each battle:
- Phasing player spends 2 OP and declares which hex is under attack.
- Defender may withdraw or stand. To withdraw:
- Each player rolls 1d6 and adds it to the OV of any 1 unit in his Force. If defender's total is higher, he may withdraw.
- All defending units withdraw or stand together (exception: if a hex has fleets (perhaps with embarked land units) and also disembarked land units, the fleet (and any embarked units) and the disembarked land units attempt make their attempt and withdrawal rolls as a single Force, but if successful, may withdraw as separate Forces).
- Withdrawing Force rolls 1d6 & must withdraw that many hexes (no OP cost), without entering the same hex twice (except: a Force withdrawing into a City/Colony hex may ignore the remainder of its withdrawal roll).
- May not withdraw into: enemy/neutral occupied hex, EZOC, across River (except via Road), into rough hex (except Passes), or prohibited terrain.
- Attacking Force does not regain its 2 OP but may continue to conduct Operations if it has OP remaining (and may move adjacent to, and attack, withdrawn Force).
- If defender stands, attacker determines CRT to use:
- Attacker may always choose Engagement CRT.
- If ≥50% attacking units (not CSP) are Cavalry, Light Troops or Fleets, may use Skirmish CRT.
- If ≥50% attacking units (not CSP) are Phalanx, AND ≥50% of remainder are Cavalry, Light Troops or Fleets, may use Combined Arms CRT.
- Ignore Leaders, Siege Trains and Supply Trains when determining CRT.
- Determine combat odds:
- Total CS of all attacking units (inc. leaders).
- Total CS of all defending units (inc. leaders).
- Each side may increase its strength in multiples, once each for Leaders, Military Advantage Chit, terrain (defender only), & Siege Train (attacker only). (i.e. 1 modifier = CS doubled, 2 = CS tripled, 3 = CS quadrupled).
Retreats
- Affected player must retreat given # of hexes (1 or 1d6).
- Units in Cities/Colonies may ignore retreat results. Units retreating into an empty or friendly-occupied City/Colony may ignore further retreat requirements.
- A phasing Force that retreats may continue to conduct Operations if it has OP remaining.
Colonisation Operations
- Colonization places a Colony marker in a Force's hex.
- Cannot Colonize in or adjacent to existing City/Colony, or in a pillaged or Desert hex, or in EZOC.
- To colonize:
- Spend 4 OP.
- Determine colonisation points of force (+1 if in Clear hex. +2 per leader/phalanx/cavalry/light troops/barbarian/militia).
- Roll 1d6 on that column of Colonisation Table.
- Place Colony marker in force's hex if successful.
- Colonies act as regular Cities.
- Colonies in coastal hexes count as ports.
- Colonies are removed if their hexes are Pillaged.
- Players may make more Colony markers if needed.
Pillage Operations
- A Force may Pillage any unpillaged, non-sea hex it occupies in order to destroy its City or its Colony marker, and reduce its FV to 0.
- The hex cannot be in EZOC.
- Spend 2 OP and roll 1d6 on Pillage Table using column of the # units (inc. leaders) in the Force (ignore Supply & Siege trains). There are no DRMs.
- Place a Pillage marker if successful.
- Pillage reduces FV of the hex, and all adjacent non-City/Colony hexes, to 0.
Removing Pillage Markers
- During the friendly Treasury Phase, a player may pay $5/$3 to remove a pillage marker from a friendly-occupied City/non-City hex. The removal restores the FV of the hex, and any printed City/port symbol.
- Removal of pillage markers does not restore destroyed Colony markers (these must be separately recolonized).
Naval Operations
- Fleets may only enter coastal and all-sea hexes.
- Coastal Cities without anchor symbols are not ports.
- Fleets may never enter all-land hexes or cross all-land hexsides.
- Fleets otherwise conduct operations like land units.
- Fleets in a hex prevent enemy units entering it; enemy units in a hex prevent friendly fleets entering it.
- Fleet EZOCs do not block land unit movement; land unit EZOCs do not block fleet movement.
- Land units embarked on fleets have no ZOC themselves.
- Fleets and any transported units must check supply in the Supply Phase as normal. Note that as see hexes have FV=0, a Supply Train must be expended to supply fleets (and any transported units) remaining at sea.
Naval Transport
- Fleets may transport friendly land units. Both fleet and land units must start Operations in the same coastal hex/port. The fleet(s) picks up the land units and moves (place land units under fleet(s)).
- Each fleet can carry 3 land units (inc. leaders).
- Units using naval transport use the fleet's OV.
- There is no OP cost to embark/disembark.
- A Force starting naval transport in a port pays 1 OP per sea/coastal hex entered.
- A Force starting naval transport in a non-port coastal hex pays 2 OP per sea/coastal hex entered.
- Fleets and any embarked units count against stacking & forage limits.
- During the fleet(s)' Operations, embarked units may disembark if in a coast hex or port (place land units on top of fleet). The disembarked units are considered 'dropped off' and may not conduct further Operations. The fleet(s) may continue their Operations.
- A Force may stay embarked on a fleet (even at sea) at the end of Operations.
Naval Combat
- Naval combat is conducted exactly as for land units (see above), except as modified below.
- Fleets may attack and be attacked by enemy fleet units in adjacent all-sea/coastal/port hexes.
- Fleets may conduct Pillage in coastal/port hexes.
- Fleets in coastal hexes may attack/be attacked by enemy land units in adjacent hexes.
- Fleets in all-sea hexes may attack enemy land units/fleets in adjacent coastal hexes; but enemy land units in coastal hexes may not attack fleets in adjacent all-sea hexes.
- Embarked land units attack/defend as part of the fleet's Force, whether against enemy fleets &/or land units.
Supply Phase
- During the friendly Supply Phase, friendly units must successfully forage, or expend a Supply Train to remain in supply. Units out of supply are eliminated.
- Each hex has a Forage Value (FV) equal to the number of units (including Leaders) it can feed. Units in excess of this number can all be supplied if a Supply Train in the hex is eliminated. Otherwise excess units are eliminated (do not use the Disband Table!).
- Neutral units never check supply.
- Pillaged hexes, and any adjacent non-City/Colony hexes, have FV=0.
- Desert hexes have FV = 0, but can always supply one unit of their own Satrapy.
Other Rules
Leaders
- Leaders (beyond those in the initial setup) are received via Random Event (immediate placement) or play of a 'Leader Arises' Chit (during friendly Levy Phase).
- Leaders are placed in any friendly-occupied hex (even in EZOC).
- Leaders are treated as combat units (so do count for pillage, and against naval transport capacity, stacking and forage limits).
- The presence of a leader doubles the OP die roll for a Force (triples for Xenophon).
- The presence of a leader adds his own CS to a Force, and gives that force a CS multiple modifier of 1.
- Leaders are eliminated just like other combat units, but return to play via Random Events/'Leader Arises' Chits only (not via levy/purchase).
- Leaders do not belong to any particular Satrapy, so never Revolt or become neutral.
Supreme Leaders
- Each player may have 1 Supreme Leader, determined by the Scenario.
- If the Supreme Leader occupies a Capital City during the Stratagem Phase, the player draws 1 Chit for free.
- If the Supreme Leader is eliminated for any reason, the player immediately discards all his current Chits (but may pick more normally afterwards).
- An eliminated Supreme Leader is replaced by playing a 'Successor' Chit.
Xenophon
- A Rebel force containing Xenophon triples (not doubles) its OP roll.
- If eliminated, Xenophon may not be replaced.
- 1-3 = Charlemagne escapes to the nearest friendly Force.
- 4-6 = Charlemagne is killed & removed permanently from the game).
- Leaders do not belong to any particular Satrapy, and do not defect as a result of Vassalage. For purposes of a Satrapy turning Neutral due to Vassalage/Revolt, treat leaders as combat units of a different Satrapy (i.e. eliminate the Satrapy's units stacked with the leader if the Satrapy turns Neutral).
Editor's note on this transcription: the printed Xenophon paragraph above (the Charlemagne die-roll lines and the reference to Vassalage) is reproduced exactly as it appears in the community file. These lines are carried over from the earlier Charlemagne game (S&T189) and are not corrected here; the file gives no separate ruling for them.
Intelligence / Fog of War
- A player may freely examine enemy and neutral Forces at any time.
- A player may examine the opponent's Chits and $ by playing the 'King's Eye' Chit.
- A player may voluntarily reveal his Chits or $ at any time.
- [Option: Treasury totals ($) may instead be tracked openly (by making a Treasury Track).]
Negotiations
- Players may negotiate with each other at any time.
- They may agree to:
- restore a controlled Satrapy to neutrality;
- trade $ or Chits;
- move units out of Cities/Colonies/Satrapies in the current turn;
- not initiate combat in the current turn;
- end the game immediately (and calculate Victory Points);
- anything else that does not violate the rules.
- Agreements should be in writing. If broken, the violator rolls 1d6 and loses that many Chits at random. If he does not hold enough Chits, his opponent picks the remaining number of Chits for himself from the pool.
Victory
- At the end of the game, each player totals his VP. The higher total wins.
Empire VP:
- +3 per Capital City occupied by an Empire Force
- +2 per Treasury City occupied by an Empire Force
- +1 per other City/Colony occupied by an Empire Force
- +Levy Value of each Satrapy controlled by the Empire.
- +5 if Rebel Supreme Leader not on map at end of game.
Rebel VP:
- +2 per Capital City occupied by a Rebel Force
- +3 per Treasury City occupied by a Rebel Force
- +1 per other City/Colony occupied by a Rebel Force
- +Levy Value of each Satrapy controlled by the Rebel.
- +10 if Empire Supreme Leader not on map at end of game.
The difference between the players' VP totals determines level of victory:
| Difference | Result |
|---|---|
| 0 | Draw |
| 1-20 | Marginal victory |
| 21-40 | Regional victory |
| 41+ | Imperial victory |
Optional Rules
Use any or all.
Personal Combat
- During combat, if both Forces have a leader, either player may declare a personal combat, after the defender has decided to stand, but before odds determination. The opponent may refuse (but may not then use a leader multiplier when calculating his CS that combat).
- Each player chooses 1 leader in his Force, & rolls 1d6 (Cyrus: +1 DRM).
- If both players have their Supreme Leaders present, and one player chooses his for the personal combat, then the other player must do likewise, or be unable to use his any leader multiplier when calculating his CS that combat).
- High roller wins; loser's leader is killed. If tied, neither Leader is killed.
- The initial combat is then continued normally.
Reaction
- The non-phasing player may conduct Operations via Reaction, by playing a 'Forced March' Chit.
- After the phasing player completes Operations with a Force, the non-phasing player may play a 'Forced March' Chit and declare a 'Reaction'. This allows him to conduct Operations with any one Force of his own. There is no unit elimination roll as there is with normal phasing play of 'Forced March'.
- Each non-phasing Force may conduct only one Reaction per Turn (if a Reaction is used to combine two Forces, that new Force may not conduct any further Reaction).
Public Works
- A player may build any number of Public Works markers in occupied Cities/Colonies during the friendly Recruiting Phase.
- Can never have more than one Public Works marker in a hex.
- To build Public Works:
- Spend $5 & place marker in any occupied City/Colony.
- Public Works increases the tax value of the City/Colony by $1.
- If all Cities & Colonies in a Region have Public Works, this provides a DRM for Revolt rolls in that Region.
- Friendly occupied Public Works provide VP at game-end.
- Public Works are removed if their hexes are Pillaged.
- Players may make more Public Works markers if needed.
Reduced Levy Values
- The full Levy Value of a Satrapy is only used when there are enemy units within its borders. At other times (e.g. Satrapy not yet invaded/enemy has moved out/been eliminated) the Levy Value is reduced by 1. E.g. Scythia has Levy Value = 2 (as per Satrapy Control Chart) if there are any enemy units within its borders, but only = 1 if the units were eliminated/moved out, etc. Satrapies with full Levy Value = 1 (i.e. reduced to 0 if no enemies within) may still levy 1 unit on even numbered turns.
- (This rule reduces the sometimes considerable replacements in the game; full Levy Value only occurs in response to a local invasion. This rule can also be used in Charlemagne.)
Scenarios
Scenario 1: Cyrus' Revolt (Short Game)
- Length: 7 turns (401 BC - 395 BC)
- Chit pool: place all chits & leaders (except Charlemagne) in a cup.
- Play order: Rebel is First Player, Empire is Second Player.
- Set up order: 1) Rebel, 2) neutrals (set up by Rebel), 3) Empire.
Unit key (as printed): A = Field army, F = Fleet, M = Militia, N = Nomad horde, W = Warrior array. Place units anywhere in Satrapy of same name, with ≥1/City. May not stack in excess of a hex's FV.
Empire
- Treasury: $40
- Chits: 2
- Initial control: 15: Alarodia, Armenia, Syria, Assyria-Babylonia, Hyrkania, Media, Elam, Persis, Parthia, Drangiana, Sogdiana, Bactria, Gandara, Parikania, Persian India.
- Leaders:
- Artaxerxes: in Persepolis (Persis), Sus (Elam) or Ekbatana (Media).
- Tissaphernes, Abrokomas: in any other Empire-controlled cities, but in different Satrapies.
- Guard: 3C: in any friendly Satrapies, one unit per Satrapy.
- Other Units:
| Satrapy | Units | Satrapy | Units | Satrapy | Units |
|---|---|---|---|---|---|
| Alarodia | 1M, 1L | Armenia | 2M, 1C | Syria | 3M, 1L |
| Assyria-Babylonia | 3M, 1L | Hyrkania | 1M, 1C | Media | 2M, 1C |
| Elam | 1M, 1C | Persis | 2M, 1C | Parthia | 1M, 1C |
| Drangiana | 2M | Sogdiana | 2M, 1C | Bactria | 2M, 1C |
Neutral
- Initial neutrals: 11: Scythia, Illyria, Macedon, Thessaly, Athens, Thrace, Colchis, Arabia, Sakans, Massagetai, Greater India.
- Units:
| Satrapy | Units | Satrapy | Units | Satrapy | Units |
|---|---|---|---|---|---|
| Scythia | 2C | Illyria | 1M, 1P | Macedon | 1M, 1P |
| Thessaly | 2M, 1P | Athens | 1M, 1P | Thrace | 2M, 1P, 1L |
| Colchis | 1C | Arabia | 1M, 1L | Sakans | 2C |
| Massagetai | 2C | Greater India | 4M, 2L, 1E |
Rebel
- Treasury: $10
- Chits: 6
- Initial control: 8: Sparta, Libya, Egypt, Ionia, Lydia, Phrygia, Tibarene, Cilicia.
- Leaders: Cyrus, Ariaos: in Sardis (Lydia).
- Guard: 3P, 1L: in Sardis (Lydia).
- Other Units:
| Satrapy | Units | Satrapy | Units | Satrapy | Units |
|---|---|---|---|---|---|
| Sparta | 1M, 2P, 1F | Libya | 1M, 1L | Egypt | 4M, 1L, 2F |
| Phrygia | 2M, 1C, 1F | Tibarene | 2M, 1P, 1F | Cilicia | 3M, 1F |
| Lydia | 1M, 1L | Ionia | 3M, 1P, 1L, 1F |
Scenario 2: The King's War (Long Game)
- Length: 15 turns (401 BC - 387 BC)
- Setup as for Scenario 1.
Disband Table
Roll 1d6 per disbanding unit:
- (Fleets: Fleets check once for themselves and any/all units aboard them. Disband/mutiny affects units aboard as well).
- DRM: +1 Friendly leader(s) in hex
| Roll | Result |
|---|---|
| 1-2 | Mutiny: Remove unit from map. If hex unpillaged place Pillage marker (not in all-sea hexes); if hex pillaged, enemy player draws 1 Chit from pool. |
| 3-5 | Disband: Remove for map. |
| 6+ | Loyal: Unit remains in play at no cost this turn. |
Stratagem Chits (40 total)
- Agent (12). Play during Diplomacy Phase. Each Agent Chit counts as '1' for that player when determining the Diplomacy differential.
- Anabasis (1). Play the instant your Supreme Leader is eliminated (but before discarding all Chits due to his death).
- A) Recruit any available Leader (except the Supreme Leader) and place on any friendly Force.
- B) After returning all Chits (except Anabasis) to the pool, draw 1d6 Chits.
- C) Return Anabasis Chit to pool.
- Consult Oracles (1). Play after any one die roll. Ignore that die roll and roll again (both dice for Events).
- Currency Reform (1). Play during friendly Treasury Phase. Gain $1 extra per friendly occupied unpillaged City/Colony.
- Empire Mobilizes (1). Playable once, by Empire only (Rebel player may retain it if picked). Play during friendly Levy Phase. Receive 1d6 units in addition to normal levy, 1 per Satrapy from any controlled Satrapies. Units are placed per normal Levy rules. Once played, remove Chit from game.
- Expedition (1). Play during Diplomacy Phase. Counts as 2 Agent Chits for one Diplomacy attempt involving Libya, Scythia, Colchis, Sakans, Massagetai or Greater India.
- Forced March (4). Play during friendly or enemy Operations Phase.
- A) During friendly phase, allows a Force which has already conducted Operations to conduct Operations again. Nominate Force & roll 1d6: 1-3 = eliminate 1 unit from Force; 4-6 = no loss. Then conduct extra Operations with it.
- B) During enemy phase, allows a non-phasing Force to conduct Reaction Operations.
Diplomacy Table
- Phasing player must play ≥1 Chit worth ≥1 Agent.
- Differential = (# phasing player's Agent Chits) - (# non-phasing player's Agent Chits)
Modifiers:
- +1 Phasing player's Supreme Leader occupies a Capital City.
- +1 Phasing player occupies all Cities/Colonies in the Satrapy.
- +1 Rebel player making attempt on Sparta, Athens, Illyria, Thessaly, Macedon, Thrace, Ionia, Libya, Egypt, Arabia, Scythia, Colchis, Sakans, Massagetai.
- +1 Empire player making attempt on Persis, Media or Elam.
- ±# [for certain Chits]
| Die roll | ≤0 | 1 | 2 | 3 | 4 | ≥5 |
|---|---|---|---|---|---|---|
| 1 | 2R | R | R | R | R | R |
| 2 | R | R | -- | -- | D1 | D1 |
| 3 | -- | -- | D1 | D1 | D2 | D2 |
| 4 | -- | D1 | D2 |
- -- = no effect
- 2R = Reaction. Non-phasing player draws 2 Chits from pool.
- R = Reaction. Non-phasing player draws 1 Chit from pool.
- D1 = Phasing player may examine non-phasing player's Chits or his Treasury total.
- D2 = Implement D1 result, or, if Satrapy is neutral, phasing players gains control of it; if enemy-controlled it becomes neutral.
- D3 = Implement D1 result, or, phasing player gains control of Satrapy whether neutral or enemy-controlled, or, phasing player may attempt to assassinate enemy Leader/Supreme Leader (choose leader, roll 1d6: 1-2 Supreme leader eliminated; 1-3 = regular Leader eliminated; other results = nonphasing player draws 1 chit from pool).
Operations Points
- 1d6 (2x1d6 for leaders, 3x1d6 for Xenophon) + lowest OV of all units in stack.
- Movement: see TEC
- Battle: 2
- Pillage: 2*
- Colonization: 4*
- *= not in EZOC
Pillage Table
Total # units (ignore Supply/Siege trains)
| Die roll | 1 | 2-3 | 4-5 | 6+ |
|---|---|---|---|---|
| 1 | R | R | R | R |
| 2 | -- | R | R | P+R |
| 3 | -- | -- | P+R | P+R |
| 4 | -- | P | P | P+R |
| 5 | P | P | P | P |
| 6 |
- -- = no effect.
- R = Reaction. Non-phasing player picks 1 Chit from pool.
- P = Pillage. Remove any Colony marker in hex. Place Pillage marker in hex. Gain $1 if hex is Colony/regular City, $(1d6) if Treasury/Capital City.
Pillage effects:
- Until Pillage marker is removed:
- Ignore printed Cities (treat as clear).
- Ignore any port in the hex (treat as coast).
- FV of hex is 0 (if was non-city, FV of all adjacent non-city hexes is also 0 (but not across all-sea hexsides).
- Cannot build Colony in hex.
Colonization Operations Table
Colonization total:
- +2 per leader, phalanx, cavalry, light troop, barbarian or militia unit in Force.
- +1 if force is in clear hex.
| Die roll | 1 | 2 | 3-4 | 5-6 | 7+ |
|---|---|---|---|---|---|
| 1 | R | R | R | R | R |
| 2 | -- | -- | R | R | C+R |
| 3 | -- | -- | -- | C | C+R |
| 4 | -- | -- | C | C | C |
| 5 | -- |
- -- = no effect
- R = Reaction. Non-phasing player draws 1 Chit from pool.
- C = Colonization. Place Colony marker in hex; remove 1 unit in colonizing Force.
Colony effects:
- Colonies act as printed cities.
- Coastal colonies are ports.
- Colony eliminated if hex pillaged.
Combat Results Tables
Engagement
(Attacker may always choose this CRT.)
| Die roll | ≤1:3 | 1:2 | 1:1 | 3:2 | 2:1 | 3:1 | ≥4:1 |
|---|---|---|---|---|---|---|---|
| 1 | AZ | AZ | AZ | AD | AR | AR | AR |
| 2 | AZ | AZ | AD | AR | DR | DR | DR |
| 3 | AZ | AD | AR | DR | DR | DR | DR |
Skirmish
(Used when ≥50% attacking units are Cavalry/Light Troops/Fleets.)
| Die roll | ≤1:3 | 1:2 | 1:1 | 3:2 | 2:1 | 3:1 | ≥4:1 |
|---|---|---|---|---|---|---|---|
| 1 | AD | AD | AD | AM | -- | -- | -- |
| 2 | AD | AD | AM | -- | -- | DM | DM |
| 3 | AD | AM | -- | -- | DM | DM | DM |
Combined Arms
(Used when ≥50% attacking units are Phalanx; ≥50% remainder are Cavalry/Light Troops/Fleets.)
| Die roll | ≤1:3 | 1:2 | 1:1 | 3:2 | 2:1 | 3:1 | ≥4:1 |
|---|---|---|---|---|---|---|---|
| 1 | AZ | AZ | AZ | AD | DR | DR | DR |
| 2 | AZ | AZ | AD | DR | DR | DD | DD |
| 3 | AZ | AD | DR | DR | DD | DD | DD |
(The source tables shade some cells in grey; the shading carries no printed meaning and is not reproduced.)
Results:
-
AZ: Attacker annihilated.
- Eliminate all attacking units.
- Defender draws 2 chits from pool.
-
AM: Attacker ambushed.
- Eliminate 1 attacking unit.
-
AR: Attacker withdraws.
- Attacking force retreats 1 hex.
-
AD: Attacker defeated.
- Eliminate at least half the attacking SP.
- Surviving attackers retreat 1d6 hexes.
- Defender draws 1 chit from pool.
-
DZ: Defender annihilated.
- Eliminate all defender units.
- Attacker draws 2 chits from pool.
-
DM: Defender ambushed.
- Eliminate 1 defender unit.
Retreats:
- Owner conducts retreats.
- Units cannot retreat into enemy/neutral occupied hexes; into EZOC; in excess of stacking limits; across a river (except via road); or into terrain prohibited to them.
- If can't retreat, then eliminated instead.
- Retreat into neutral Satrapies does not violate their neutrality.
- Units in City/Colony hexes may ignore retreat results.
- Units retreating into City/Colony hexes may halt.
- Retreats do not cost OP, & are counted in terms of hexes not OP.
CS Multipliers:
- Leaders
- Terrain (defender)
- Military Advantage Chit
- Siege Train (attacker, if defender has terrain multiplier)
1 multiplier = CSx2; 2 multipliers = CSx3; 3 multipliers = CSx4.
Treasury Points Chart
Income:
- +$3 per friendly-occupied Treasury City
- +$2 per friendly-occupied Capital City
- +$1 per friendly-occupied regular City/Colony
| Unit | Recruit cost | Maintain cost |
|---|---|---|
| Phalanx | 4 | 1 |
| Barbarian Horde | 3 | 0 |
| Cavalry | 3 | 1 |
| Light Troops | 2 | 1 |
| Militia | 1 | 0 |
| Elephant | 5 | 1 |
| Siege Train | 6 | 1 |
| Supply Train | 4 | 0 |
| Fleet | 6 |
| Other expenditure | Cost |
|---|---|
| Chit | 2 |
| Colony marker | **** |
| Remove Pillage marker from City | 5 |
| Remove Pillage marker from non-City hexes | 3 |
- * Levied units cost $0.
- ** May maintain free 1 unit/hex in home Satrapy.
- *** Receive only via Chit draws/Random Events.
- **** Placed only via Colonization Operation.
Unit and City Summary Rosters
Initial control is shown by the colour of each Satrapy's Levy Value box in the printed roster: Empire (purple), Rebel (red), Neutral (white).
| Satrapy | Levy Value | Initial control | Phalanx | Cavalry | Light Troops | Militia | Barbarian Horde | Elephant | Fleet | Total units | Regular Cities | Treasury Cities | Capital Cities | Total Cities |
|---|---|---|---|---|---|---|---|---|---|---|---|---|---|---|
| Alarodia | 1 | Empire | - | - | 1 | 2 | - | - | - | 3 | 1 | - | - | 1 |
Other units:
| Force | Phalanx | Cavalry | Light Troops | Siege Train | Supply Train | Supreme Leader | Leaders |
|---|---|---|---|---|---|---|---|
| Empire guard | 2 | 4 | 2 | 2 | 5 | 1: Artaxerxes | 4: Konon, Tissaphernes, Agesilaos, Satrap |
| Rebel guard | 4 | 2 | 2 | 2 | 5 | 1: Cyrus | 4: Xenophon, Archon, Ariaos, Abrokomas |
Other counters:
- 40 Stratagem chits: 12 Agent, 4 Treachery, 4 Forced March, 4 Military Advantage, 2 Leader Arises, 14 others (1 ea.).
- 16 Pillage/Colony or Colony/Public Works markers.
- 4 other markers: Operations Pts, Battle, Year, Phase.
- 1 blank.
- 280 TOTAL
Transcription note: the community file ends with a separate one-page satrapy marker sheet (a fan-made marker sheet with a "v.1" credit line). It is not rules text and is not reproduced. Its colour coding differs from the roster for Alarodia and Persian India; this transcription follows the roster and the Scenario 1 initial-control list, which both place those two Satrapies under Empire control.