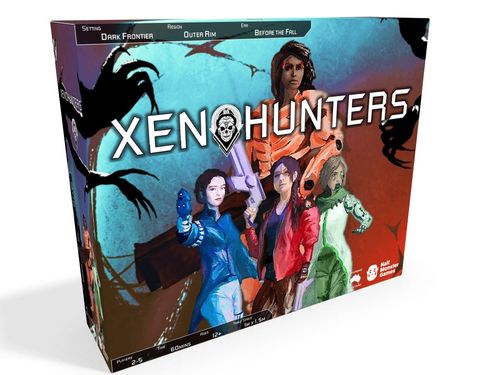
Xenohunters
Xenohunters Rulebook
Table of Contents
Table of Contents
Background
// Transmission Incoming //>
We need your help…
It's the 36th century, and the world's citizens live in station colonies throughout the galactic rim. However, colonies living on the outer galactic rim are going dark and have become uncontactable.
The galactic council has summoned the special forces team to investigate the stations.
The galactic population has no idea what is happening, but you, the special forces of the Galactic Union, know very well: this is another outbreak of flesh-eating xenos, creatures that harvest living flesh to birth vile monsters.
The only way to stop this advancing tide of evil is with the liberal application of fire. The best way to do so: detonate the fusion reactors at the heart of every station. As elite operatives of the galaxy, your mission is clear: board the stations, destroy the reactors, and kill the aliens. Good luck.
Warp ends in 3, 2, 1…
Draft note: "To see a Xenohunters teaching video, go to www. XXXXX" (website address placeholder in the draft).
Mission
If you are a Xenohunter, you work with other Xenohunters to prevent the Alien from reaching more colonies. This is best achieved by triggering the Reactor on the Station with an explosive, engulfing the Station in flames.
If you are the Alien, kill every Xenohunter and turn them into your Hybrid Spawn. If the reactor is destroyed, make sure you escape on the Starship in order to reach another colony and continue to spread your Hybrid Spawn.
Components
- 2 x Mission Boards (Missions 001 to 004)
- 5 x Character screens
- 5 x Character tokens
- 48 Equipment cards
- 12 x Military Equipment Cards
- 12 x Engineering Equipment Cards
- 12 x Medical Equipment Cards
- 12 x Scientist Equipment Cards
- 5 x Hidden Movement grids
- 5 x Hidden Movement cubes
- 15 x Hybrid Spawn tokens (3 in 5 colours)
- 4 x Hybrid Spawn Information Cards
- 6 x Alien Egg markers
- 3 x Bomb marker
- 8 x Destroy markers
- 12 x Sealed markers
- 24 x Health Damage markers
Roles
Xenohunters
Each Xenohunter has strengths and weaknesses your team will need to consider as you battle the Alien and destroy the reactor.
- Warlord the Captain
- Armature the Scientist
- Ironclad the Engineer
- Caduceus the Doctor
Draft note: each character's photo and stats are shown as images in the draft ("PHOTO & THEIR STATS").
Xenos
The Alien and their Hybrid Spawn have strengths and weaknesses you will need to consider as you track down and attack the Xenohunters.
- The Alien
- Hybrid Spawn: Hybrid Spawn are hybrid creatures, using the DNA harvested by the Alien to blend into the population of a species.
Set-Up
-
Decide/Allocate roles. Players decide who is the Alien. Remaining players divide the Xenohunters amongst themselves.
Tip: If introducing a new player to an experienced group, it is recommended they play Armature or Hybrid Spawn, while more experienced players control multiple Xenohunters.
Example: 3 players: 1 person plays as the Alien, 1 person plays as Armature and Ironclad, 1 person plays as Caduceus and Warlord.
-
Set out the board and pieces. Place the board within easy reach of all players, with the mission you want to play face-up.
Lay out Health Damage markers, Sealed markers, Destroyed markers, Bomb markers and Alien Egg markers in piles near the edge of the board.
-
Divide the Equipment cards. Place the Equipment cards face down in four piles (divided by colour) near the board, and shuffle each pile/deck.
-
Create player spaces. Hand out a Hidden Movement grid for each character, and place the corresponding Character Screens in a position which blocks the view of the Hidden Movement grid from other players. Give every player a Hidden Movement cube.
Draft note: set-up images are not reproduced in the text.
Starting Positions
Deal each Xenohunter Equipment cards of their corresponding colour. The number you are dealt will correspond to the mission number.
- Mission 001: 1 Equipment card
- Mission 002: 2 Equipment cards
- Mission 003: 3 Equipment cards
- Mission 004: 4 Equipment cards
Place the Hybrid Spawn tokens on the 'In the Vents' section of the board. The mission number will dictate how many eggs the Alien places on the board at the beginning of the game. These eggs can be placed anywhere on the Station (including in the Ducts), but not on the Starship.
- Mission 001: 1 egg
- Mission 002: 2 eggs
- Mission 003: 3 eggs
- Mission 004: 4 eggs
Tip: Intelligent aliens will avoid placing the eggs near the entrance to the Starship.
Place the Xenohunter Character tokens on their corresponding coloured space in the starship.
The Alien token can remain in the Ducts, as they start the game hidden.
Gameplay
Draft note: the vent icons and rummage icons are shown as images next to the relevant text in the draft.
Players take turns in rounds.
The Xenohunters use their turns to kill the Alien and all Hybrid Spawn. This is most easily achieved by blowing up the reactor. The Xenohunters must draw a 'Bomb' card and 'Detonate' card from the Equipment decks to successfully blow up the reactor.
On the Xenos turn, the Alien and Hybrid Spawn aim to track down and kill the Xenohunters.
Turn Sequence
The Xenohunters take their turns at the beginning of each round. The players can use their Xenohunters actions at any time, and in any order they choose.
Example: Armature uses one action, then Warlord uses two actions, then Armature uses another action.
The Alien and each Hybrid Spawn then take their turns. The Xenos can use the Alien and each Hybrid Spawn's actions at any time, and in any order they choose.
Example: The Alien uses two actions, then a Hybrid Spawn uses one action, then the Alien uses another action.
Actions
Xenohunters
Each Xenohunter can take up to 2 actions per turn.
- Melee Strike: If hidden, reveal your location on the board. Roll to aim an attack against an adjacent enemy. If successful, you deal 1 damage to the target.
- Sneak: Move your character token your Speed through adjacent spaces. If hidden, move the Hidden Movement cube to the relevant space. If on the board and not in view of another player, remove your character token from the mission board and move on the Hidden Movement grid.
- Sprint: Move twice your speed, but you must reveal your location by placing your Character token on the mission board.
- Shove: You shove them 1 square directly away from you, into an empty space. You move into the vacated square. If there is no empty space, they cannot be shoved.
- Rummage: When in the same space as a Rummage Icon, draw the corresponding colour from the Equipment deck. If the icon is not the same colour as your character, you must roll the dice. If you roll a 1 or 2, you make noise as you rummage and must reveal your character token on the board.
- Use Equipment: Discard a Equipment card from your hand, and follow the instructions on the card.
- Warp: When on the Warp Console icon, you hit the warp button, instantly locking the airlock and sending the starship into the beyond. All players on the Starship are also warped away. This ends the game.
Alien
The Alien can take up to 3 actions per turn.
- Claw, Bite, Maul: If hidden, reveal your location on the board. Roll to aim an attack against an adjacent enemy. If successful, you deal 3 damage to the target.
- Sneak: Move your character token your Speed through adjacent spaces. If hidden, move the Hidden Movement cube to the relevant space. If on the board and not in view of another player, remove your character token from the mission board and move on the Hidden Movement grid.
- Sprint: Move twice your speed, but you must reveal your location by placing your Character token on the mission board.
- Enter or Exit Vent: When in the same space as a Vent icon, move your token onto the Ducts of your Hidden Movement grid, or move from the Ducts section of your Hidden Movement grid, to any Vent icon on the board.
- Shove: You shove them 1 square directly away from you, into an empty space. You move into the vacated square. If there is no empty space, they cannot be shoved.
- Sense: Choose one hidden Xenohunter to verbally tell you their current location. If you are visible and they are within your line of sight, they must also reveal their character token on the board.
- Lay Egg: Place one of your Egg tokens on the board, adjacent to your current space. You can lay a maximum of 6 eggs. Eggs cannot be laid on Reactor or Starship spaces.
- Hatch: If you have died, use this action on your next turn to replace any Alien Egg marker on the board with your character token. You can use your remaining actions after this action has resolved.
Hybrid Spawn
Each Hybrid Spawn can take up to 2 actions per turn.
- Bite and Maim: Roll to aim an attack against an adjacent enemy. If successful, you deal 1 damage to the target.
- Scuttle: You can move your Speed. You hiss too much to hide.
- Shove: You shove them 1 square directly away from you, into an empty space. You move into the vacated square. If there is no empty space, they cannot be shoved.
- Enter or Exit Vent: When in the same space as a Vent icon, move your token onto the Ducts of your Hidden Movement grid, or move from the Ducts section of your Hidden Movement grid, to any Vent icon on the board.
- Hatch: Hybrid Spawn token replaces the Alien Egg marker on the board. If more than one Hybrid Spawn is hatching from the egg, they are placed on adjacent squares.
Movement
Your Speed dictates up to how many squares you can move through within an action.
Players can move forward, backwards, left and right - but not diagonally.
Hidden and Visible Movement
A character's movement can occur on the board (visible to other players) or the Hidden Movement grid (hidden to other players). By remaining hidden, you have the advantage of hiding your strategy from the enemy team. However, events such as attacking or sprinting cause noise - revealing your location on the board.
If you can draw a line from one player square to an enemy player square - you are still in view and cannot return to hidden.
Vent Movement
Vents allow for quick movement/teleportation across the board. However, they are covered in Alien mucus which is poisonous to humans. Therefore, only Aliens and Hybrid Spawn can use the vents to move.
Rummaging
Draft note: rummage icons and equipment card icons are shown as images in the draft.
Rummaging allows the Xenohunters to collect specialised equipment. When a Xenohunter lands on a Rummage icon, you draw the matching Equipment card type. If the Rummage icon is not the same colour as the character, you must roll the dice. If you roll a 1 or 2, you make noise as you rummage and must reveal your character token on the board.
Xenohunters can only carry a number of Equipment cards equal to the character's Carry Limit.
Xenos cannot rummange for, move, or interact with any equipment.
Each deck has multiple equipment types. Below are some of the equipment that can be drawn, including cards with critical abilities for the game.
- Military Equipment Cards: Draw these cards to collect weapons, armour, and grenades that can be used to directly combat the Alien menace.
- Engineering Equipment: Draw these cards to collect equipment that allow you to alter the station itself. This deck includes the following equipment:
- Bomb: Discard to place a Bomb token in on any adjacent space, or Reactor. A separate detonator card must be used to cause this bomb to explode. If a Bomb is placed on a door, both rooms connected to the Door will be affected by the Bomb. A Bomb cannot be moved once it has been placed, as it is drilled into place.
- Detonator: Discard to cause one placed Bomb to explode. This destroys everything in the room, including characters, up until the doors. This space can never be reentered. Place 'Explosion' tokens in all spaces affected.
- Seal: Discard to place a 'Sealed' token on an adjacent Door or Vent. If on a door, this prevents any player moving through the Door, or entering the space. If on a Vent, this prevents any player entering the Ducts via that Vent, or entering the space.
- Note: In the case of a Reactor bomb, seals do not stop the explosion from (the sentence breaks off here in the draft)
- Edge case: Cannot place SEAL on a space if an enemy/ally is in it. If an enemy/ally is in the space, they must automatically reveal themselves on the board. This 'Sealed' action is cancelled, and can be used for something else.
- Medical Equipment: Draw these cards to collect supplies which replenish the health and strengthen the abilities of the team. This deck includes the following equipment:
- Medical Jelly: Discard to use Medical Jelly so you may move into a Vent when on a Vent icon. Exiting the Vents uses one of your actions. You can exit to any Vent space. You can exit the Vents on any of your turns. You can use any of your equipment in the Vents. Once you exit the Vents, you cannot reenter unless you find another of these cards.
Loud and Sneaky Equipment
Each piece of Equipment is 'Sneaky' or 'Loud'.
- When using Equipment with the 'Sneaky' symbol, if hidden, you remain hidden.
- When using Equipment with the 'Loud' symbol, if hidden, you must place your character token in the space you are using the equipment.
Swapping or Giving Equipment
If passing through the same space (when hidden) or an adjacent space (when visible) as another ally player, you can give them as much equipment as you like, up to their carry limit, without spending any actions.
Attacking/Combat
Your Aim dictates the minimum number you need to roll on the die to successfully hit.
For a melee attack, you must be adjacent to your enemy. For weapons drawn from the military deck, you can use the equipment if you can draw a line from your character's square to the enemy player's square.
If you are attacking, you must reveal your character on the board.
If an attack attempt is made on a space you are in, you must reveal your character on the board.
If the hit is successful, the hit player places Health Damage markers next to their screen to track how much health is lost.
Charge/Shove
You shove them 1 square directly away from you, into an empty space. You move into the vacated square. If there is no empty space, they cannot be shoved.
Characters cannot be shoved diagonally.
Characters cannot be shoved into a destroyed room.
- Edge Case #1: Contented Space. Draft note: "?? More info on contended spots?"
- Edge Case #2: Sealed Doorways. Draft note: "WHEN TWO ALLIED PLAYERS REVEALED, HOW TO DICTATE WHERE EACH ONE MOVES"
Bombing the Reactor
Reactors are at the heart of every station. A Bomb placed and Detonated on a Reactor triggers a successive explosion; the fires blast through doorways each turn until the entire Station is engulfed in flames.
-
To place a Bomb token on the reactor, a player must discard a Bomb card (drawn from the Engineering Deck - see Equipment card section) when in an adjacent space to the Reactor.
-
A player must then discard a Detonator card (drawn from the Engineering Deck - see equipment card section), and indicate the Reactor Bomb is exploding. The room the Reactor is in is immediately destroyed - a Destroyed token is placed on the room.
Note: If a second Bomb is in the same room as a Detonated Bomb, both are considered destroyed. However, this does not cause a bigger explosion.
-
From then on, at the end of every Alien turn place a Destroyed token on all adjacent Station rooms connected by doors. This kills anyone or anything in the room immediately.
-
Continue the adjacent explosions until the entire Station and the Starship is destroyed, or until the Starship is flown away.
- Edge Case #3: Bombing the reactor room, not the reactor itself. If a Bomb is placed and Detonated on a space in a room with a Reactor, but not ON the reactor, the Reactor does not explode. The room is completely destroyed. The successive explosions are not triggered, and the room cannot be entered for the rest of the game.
Player Death
Xenohunters
If a Xenohunter's health reaches 0, or they are in a room with an Explosive, they die. They must remove their character from the board, and discard all equipment cards to the bottom of their corresponding decks.
They can then choose to play as Hybrid Spawn with the same colour of the character that died. If a Xenohunter's colour is already in play, they can swap the Hybrid Spawn token with another colour that is not in use. A Xenohunter death gives the Alien 3 additional Hybrid Spawn.
- Draft note: "HOW DO WE DECIDE WHICH HYBRID SPAWN COLOURS ARE SELECTED AT THE START?"
- Draft note: "IF YOU ARE A PLAYER WITH 2 CHARACTERS, BUT STILL HAVE 1, DO YOU PLAY AS SPAWN? Alien gets control, until all your characters die - then you get both sets of spawn"
- Draft note: "IF PLAYER KILLED BY EXPLOSION, NOT BY ALIEN, ARE NEW SPAWN CREATED? Yes"
The Alien
If the Alien's health reaches 0, or they are in a room with an Explosive, they die. If there are no eggs on the board, the Alien cannot reappear.
Hybrid Spawn
If the Hybrid Spawn's health reaches 0, or they are in a room with an Explosive, they die. If there are no eggs on the board, they cannot reappear.
End of Game
The game ends when the Station and Starship explode, when the Starship warps away, when all Xenos are killed, or when all Xenohunters are killed.
Xenohunters Goal
Xenohunters win if all Xenos are killed.
Each mission also offers three achievement medals for the Xenohunters, each medal increasing in difficulty. To win the second medal, earlier medal achievements must also be met. The medal achievements are located at the top of the board. Each mission's medal achievements vary.
Mission 001: Distress Call's achievement levels are below:
- Bronze - Destroy the Reactor. The reactor is destroyed, engulfing the ship in flames - but no Xenohunter warps away on the starship.
- Silver - Warp Away. The reactor is destroyed, engulfing the ship in flames and at least one Xenohunter warps away without any Xenos on the starship.
- Gold - All Xenohunters survive. The reactor is destroyed, engulfing the ship in flames and all Xenohunters warp away without any Xenos on the starship.
Red Block Graphics
- Extermination Victory (can be done on all missions): Kill every organism on the ship, eggs, spawn the alien.
- Hunter Run: Massacring every mission.
- Extinction Run: Every mission killed.
Draft note: the Red Block graphics are reproduced as printed; the draft gives no further explanation of these victories.
Campaign Mode
Draft note: "CAMPAIGN MODE: IF XENOHUNTER DIES IN A MISSION ON A RUN, DOES NOT COME BACK."
Draft note: "Campaign/Codex cards (get on website)"
Xenos Win
Xenos win if all the Xenohunters are killed.
If you are killed as a Xenohunter, you return as Hybrid Spawn. Your new goal is to help the Alien succeed at all costs. You win if they win.
If the Reactor is destroyed, the Xenos still have a slim chance of victory. Xenos can win by ensuring at least one Xeno is on the Starship when the Xenohunters warp away. This allows them to spread their Hybrid Spawn on a new colony.
Final Mission
Final Mission: MUST kill alien, duke it out on a starship.
Note: The fourth mission has no warp console. This is intentional. This is a final last stand mission, from which the Xenohunters are expected to win or not return.
Draft note: "IF DOING NARRATIVE/SUCCESSIVE MISSIONS - ARE THEIR MULTIPLE ALIENS??"
Regular Questions
The draft includes the following question and answer list. Answers marked XXX are unfinished in the draft.
- Is more than one player allowed to stand on one square at a time? No - XXX
- Can Xenohunters talk to each other? Yes - but be mindful the alien is listening in.
- Can alien eggs be laid in the vents? Yes.
- Why can't Xenohunters use vents? Alien gunk.
- Is it dangerous for the Alien when she surfaces? XXXX
- Is the Alien visible when hatched? Yes.
- Can other Spawn hatch from the egg simultaneously to the Alien? Yes.
- If an ex-Xenohunter player is controlling a Hybrid Spawn, do they decide when they hatch/use an egg? With permission from the Alien. And where they are placed? They choose.
Draft note: the draft's "Feedback, Questions & Suggestions From Reviewers" page is a blank template (reviewer name and feedback fields left as "XXX") and is omitted here.
Changes to be Made
Draft note: "Move task to 'Change Log' once completed."
Equipment Cards
- Update descriptions and add cards (see Equipment Card excel document in 'Elise - Rules' folder)
- Equipment Cards to have card type text on back of card e.g. 'Military'
- Change all default symbols on the backs of cards
- Make badges/hologram/vibe
- Make military more futurisitc weapon - not sword
- Combine Vent and Door Seal Cards to one card - called Hydraulic Seal?
Mission Boards
All Mission Boards:
- Add texture to Station background
- With increasing Mission number, blend in and add more 'Alien Gunk' texture
- Add texture to Starship background (be very different, more steel/sleek compared to Station background)
- 'Vent space' given title 'Ducts' - change text to 'Place organisms here if revealed while in the ducts'
- Mission Title block - Add 'Red' pop up that says 'X Xeno eggs detected')
- Mission 001: 1 egg
- Mission 002: 2 egg
- Mission 003: 3 egg
- Mission 004: 4 egg
- Mission Title block - Add 'Green' pop up that says 'X Equipment per Xenohunter assigned'
- Mission 001: 1 Equipment Card
- Mission 002: 2 Equipment Card
- Mission 003: 3 Equipment Card
- Mission 004: 4 Equipment Card
Mission 001:
- Add B15 square and make 'airlock' space
- Change background to be brighter/galaxy style
- C6 is labelled incorrectly - adjust to C7
Mission 003:
- Change text to 'Armature starts this mission in J14'
- Add Reactor to B15 & B16
Mission 004:
- Mission 004: Doors are missing
- Ship Cannons on Mission 004 to be made more obvious
- Add Reactor to C12 & C13, and to H14 & H15
Tokens
- Add '6' HP indicator to Sealed Cards
- Add '1' HP indicator to Alien Eggs
- Have token and standing version of Hybrid Spawn
Character Dividers
- Updated stats (make sure it is the same on the front and the back)
- Soldier: 2+, 8, 5, 5
- Ironclad: 5+, 9, 6, 4
- Scientist: 4+, 5, 4, 5
- Medic: 5+, 4, 4, 6
- Change from 'Soldier' to 'Captain' for Warlord
- Change Xenohunter icon to be higher contrast (more white)
- Adjust Spawn Aim to 3+
- Add glow border/soft edge to all Xenohunter character images
- Alien Divider gradients more extreme, bit more neon pink
- Also remove yellow eyes from design
- Hybrid Spawn Dividers - each to have purple/with a blend of the other Xenohunter colours (to represent the combining with the 'Xenohunter' DNA)
- Purple + red
- Purple + blue
- Purple + green
- Purple + orange
Hidden Movement Grid
- 'Vent space' given title 'Ducts' - change text to 'Place organisms here if in the ducts'
- Can't sneak into airlocks, or onto the ship, airlock can be sealed (seals that apply to vents and doors, apply to airlock)
- Airlock spaces into numbered, but do have a door
Change Log
Draft note: "Highlight the task with your colour if you made the change." The draft lists three contributors here; their names are omitted.
Mission Boards
- 001: Add B15 square and make it airlock space
- 001: Change C6 to C7
- 003: Changed game to mission in Armature starting text
- 003: Added reactor
Character Cards
- Change Caduceus to Ironclad on the Engineer character card
- Updated stats
- Change Soldier to Captain for Warlord