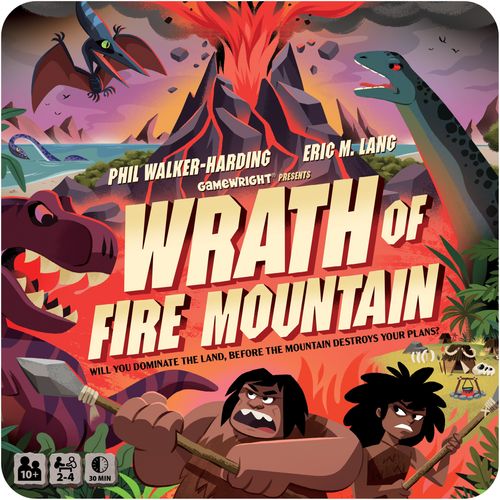
Wrath of Fire Mountain
Wrath of Fire Mountain Rulebook
Table of Contents
Table of Contents
- Contents
- Setup
- How to Play
- 1. Roll Dice
- 2. Place and/or Move Pieces
- Volcano: You must place a cave person on the volcano.
- Cave: You may place a cave person or dinosaur on the cave tile.
- Hut: You may place a cave person or dinosaur on the hut tile.
- Foot: You may move a cave person or dinosaur on the map.
- Egg: You may place a cave person on the egg space on the tracker board, preparing to hatch a dinosaur and add it to your supply.
- Hatching a Dinosaur
- 3. Check for Tremors
- 4. Check for Eruptions
- Game End
- Dinosaur Field Guide
- A Word from Gamewright
Contents
- 7 dice
- 44 cave people (4 colored sets of 11)
- 16 dinosaur figures (2 of each type)
- 16 bases (4 of each player color, to mark dinosaur figures)
- 3 volcano map tiles (for 2, 3, or 4 player games)
- 1 volcano base
- 16 dinosaur cards (2 of each type)
- 15 map tiles: 5 grass tiles, 5 jungle tiles, 3 lagoons, 1 cave and 1 hut
- 4 reference cards (1 indicates starting player)
- 1 tracker board
Setup
-
Find the volcano tile that corresponds to the number of players in the game. Return the other 2 volcano tiles to the box, they will not be used.
-
Create the map by placing the map tiles in a 4x4 grid. The volcano tile is placed on top of the volcano base in the position shown. After your first game, you may choose to set up the map with a random 4x4 grid.
-
Place the tracker board nearby.
-
Each player chooses one set of 11 cave people and 4 bases of that color and places it in front of them. This is called their supply.
-
Each player places one of their cave people on the 0 space of the tracker board. This is where the players keep track of their score. Note the point target for your game, based on the number of players:
- 2 players: 24 points
- 3 players: 20 points
- 4 players: 18 points
-
Find the following dinosaur cards: Pteranodon, Brontosaurus, Triceratops, Tyrannosaurus. Place one pair of 2 dinosaur cards, on each of the 4 different dinosaur pen spaces.
Suggestion: For your second game, swap out 1 or these dinosaurs with a new one to see how the game changes! After that, you can choose to use any 4 dinosaurs in your game.
-
Below each dinosaur card pair, place the 2 corresponding dinosaur figures. Leave all the unused dinosaurs in the box.
-
Place 5 dice near the board. Leave 2 in the box, they are only used when the Titanosaur is in the game.
-
Randomly choose someone to be the start player. They take the reference card that says "start player". Everyone else takes 1 of the other reference cards. These remind players of the rules during the game.
Now, you're ready to play!
How to Play
Players take turns moving clockwise around the table. On your turn, follow these steps in this order:
- Roll dice
- Place and/or move pieces
- Check for TREMORS!
- Check for ERUPTIONS!
Use your tribe to collect the most points.
Points are scored by having the most pieces in a region of land. A region is a connected group of grass tiles, or a connected group of jungle tiles. The bigger the region, the more points you will score.
On your turn roll the dice to determine how to:
- Move and place your pieces on the map!
- Hatch dinosaurs and add them to your tribe!
- Place cave people on Fire Mountain to earn favor from the fire mountain and change the layout of the map!
...Or make the volcano erupt to trigger the end of an era and score points!
1. Roll Dice
Take the 5 dice and roll them up to 3 times. The faces that are showing after your rolls will determine how you can place and move your pieces this turn.
- First, you must roll all the dice.
- Second, you may re-roll any number of dice.
- Third, you may re-roll any number of dice again. On roll 3 you are allowed to re-roll dice that you chose not to re-roll on roll 2.
Example: Roll 1: player decides to save 2 eggs. Roll 2: player decides to save 1 volcano and 1 foot. Roll 3: player decides to re-roll both saved eggs from roll 1.
2. Place and/or Move Pieces
Now spend the dice you rolled to place and/or move your pieces, as described in this step. After spending a die, set it aside so you remember you have spent it.
- You may take actions in any order.
- All actions are optional except the Volcano action.
Volcano: You must place a cave person on the volcano.
Worship Fire Mountain! Try and be the lead worshiper so you can shift the map.
- Take 1 cave person from your supply and place it on any empty space on the volcano tile.
- Unlike the other actions, placing on the volcano is mandatory. If you have to place in the volcano and you have no cave people in your supply, you must move any 1 of your cave people from a map tile or the tracker board onto the volcano.
- If you rolled multiple volcanoes, you must take this action for each volcano rolled.
- If there aren't any empty spaces left on the volcano, then dice showing volcanoes do nothing.
- You may not place a dinosaur on the volcano (except the Stegosaurus - explained later).
Cave: You may place a cave person or dinosaur on the cave tile.
Place a piece on the map so it's ready to move around!
- Take 1 cave person or dinosaur from your supply and place it on the cave tile.
- If you rolled multiple caves, you may take this action for each cave rolled.
- If your supply is empty, you may move 1 of your pieces to the cave tile from the tracker board or a different map tile (but not from the volcano).
- There is no limit to the number of pieces that may be on the cave tile.
Hut: You may place a cave person or dinosaur on the hut tile.
Place a piece on the map so it's ready to move around!
- Take 1 cave person or dinosaur from your supply and place it on the hut tile.
- If you rolled multiple huts, you may take this action for each hut rolled.
- If your supply is empty, you may move 1 of your pieces to the hut tile from the tracker board or a different map tile (but not from the volcano).
- There is no limit to the number of pieces that may be on the hut tile.
Foot: You may move a cave person or dinosaur on the map.
Move your pieces around the map to have the most in a region!
- Choose 1 of your cave people or dinosaurs that is on the map. Move it to an adjacent tile.
- You may only move up, down, left, or right - not diagonally.
- If you rolled multiple feet, you may take this action up to the number of foot icons rolled. You may move multiple pieces, or 1 piece multiple times.
There are some restrictions on how you can move:
- You may move through a lagoon tile but may not finish your turn with a piece on a lagoon. That is, you may move onto a lagoon tile, but must move off it in the same turn.
- You may not move onto or through the volcano tile.
- You may not move a piece off the volcano tile.
- There is no limit to the number of pieces that may be on any grass or jungle tile.
- When moving, you never "wrap around" the edges of the map. That is, you may not move off the map onto a tile on the opposite edge of the map.
Egg: You may place a cave person on the egg space on the tracker board, preparing to hatch a dinosaur and add it to your supply.
Save up cave people to hatch a dinosaur into your tribe and use its special power!
- Take 1 cave person from your supply and place it on the egg space on the tracker board.
- If you rolled multiple eggs, you may take this action up to the number of egg icons rolled.
- If your supply is empty, you may move 1 of your pieces to the egg space from a map tile (but not from the volcano).
Hatching a Dinosaur
You may also choose to hatch 1 dinosaur, as follows:
- Choose 1 dinosaur figure on the tracker board that has an egg cost equal to or less than the number of your cave people on the egg space. The egg cost is shown on the bottom of the card.
- Move the dinosaur you chose to your supply, fitting it onto 1 of your bases. Take a copy of the dinosaur card from the tracker board and put it in front of you.
- You now own it for the rest of the game. Place it and move it on the map like a cave person, and use its special power as written on the dinosaur card.
- You may only recruit 1 dinosaur per turn.
- If you have no bases left (4), you can no longer recruit dinosaurs.
- After hatching a dinosaur you must return all your cave people from the egg space to your supply. Even if you hatched a dinosaur with a cost lower than the number of your cave people, all of them are returned to the supply.
Note: If none of your dice show an egg but you have the required cave people on the egg space, you may still choose to hatch a dinosaur at any time on your turn. Follow the usual 'Hatching a Dinosaur' rules above.
3. Check for Tremors
Check the volcano to see if you can shift the map.
After you finish placing and/or moving your pieces, check to see if you are the lead worshiper. You are the lead worshiper if you are occupying the most (or tied for the most) spaces on the volcano tile. If this is the case, you may choose to cause a TREMOR and move map tiles as follows:
- Push the volcano tile 1 space in any direction, pushing all the tiles in its row or column 1 space in the same direction.
- Next, the map "wraps around". Take the tile jutting out from the map's grid and place it in the now empty space in the map.
- All of the pieces on any map tile that is moved stay on that map tile.
- The volcano itself can also "wrap around" the map when pushed. For example, if you move the volcano down from the bottom row, it moves to the top row of that column, pushing the tiles in that column downwards.
4. Check for Eruptions
Eruptions trigger the end of an era and scoring!
To finish your turn, check to see if every space on the volcano tile is occupied. If not, your turn is over.
If the volcano is full, then an ERUPTION happens and it is the end of the era. This means the map is scored as follows:
Score the Volcano
- The player with the most cave people in the volcano scores 3 points. If multiple players are tied for the most, they all score 3 points.
- Every other player with at least 1 cave person in the volcano scores 1 point.
- All players who score, move their cave person on the tracker board accordingly!
- All cave people in the volcano are now returned to their owners' supplies.
Score Regions
Each region on the map is now scored. A region is a group of grass tiles or a group of jungle tiles that are connected (diagonal connections do not count). Regions do not "wrap around" the edge of the map.
- The player(s) with the highest total (or tied for the highest total) of cave people and dinosaurs in a region scores points equal to the number of tiles in that region.
- The player(s) who score move their score cave person on the tracker board accordingly.
- The player(s) who score return all their cave people and dinosaurs in the region to their supply.
- Any cave people and dinosaurs belonging to non-scoring players remain in the region.
- The volcano, cave, hut, and lagoon tiles are not scored.
Note: It works best if the player whose turn it is assesses each region 1 at a time, and returns the scoring pieces to their owners' supplies for them.
Game End
When at least 1 player reaches the points target, then the game is over as soon as all the regions have been scored. The player with the most points wins!
In the case of a tie, the winner is the tied player who is furthest away (in turn order) from the start player.
Dinosaur Field Guide
Titanosaur (egg cost: 5)
So powerful you roll more dice!
When you hatch a Titanosaur, gain an extra die for the rest of the game.
When you hatch a Titanosaur, take 1 of the extra dice from the box. For the rest of the game, you roll this die along with the other 5 on your turn. This means you have more dice to take actions with.
- If you own both Titanosaurs, you roll 2 extra dice on your turn.
- A Titanosaur counts as 1 piece when scoring its region.
Brontosaurus (egg cost: 3)
So big it counts for three!
Counts as 3 pieces when scoring a grass or jungle region.
When scoring a region, a Brontosaurus counts as being 3 pieces when determining who has the most pieces in the region.
Example: The Brontosaurus counts as 3, so the blue player has a total of 5 pieces in this jungle region - and the majority of pieces in the region (5-4). Blue scores 2 points!
Stegosaurus (egg cost: 3)
Lord of the Volcano!
May be placed on the volcano. When there you may always cause a tremor on your turn.
When you take a volcano action, you may place a Stegosaurus on the volcano. This is the only dinosaur that may be placed on the volcano. Place it on a space in the volcano as you would a cave person.
- At the end of every turn when your Stegosaurus is on the volcano, you may cause a tremor whether or not you are the lead worshiper.
- If 2 different players have Stegosauruses in the volcano, they can both cause tremors on their turn. (If 1 player has 2 Stegosauruses in the volcano, they still cause just 1 tremor on their turn).
- Stegosauruses are treated the same as a cave person on the volcano tile - they occupy 1 space and count towards determining lead worshiper and an eruption.
- Stegosauruses can also be placed on the map as usual, and count as 1 piece in a region scoring.
- If you are taking a Volcano action and have no cave people in your supply but you do have a Stegosaurus in your supply, you may move a Stegosaurus to the volcano instead of moving a cave person from elsewhere.
Example: The blue player has a Stegosaurus on the volcano and causes a tremor even though they do not have the most worshippers.
Ankylosaur (egg cost: 3)
Loves its native habitat so much you score extra!
If you absolutely win Ankylosaurs' region (no ties), gain 2 bonus points.
If you win a region that has your Ankylosaurus in it, and you are not tied with any other player, you score the usual points for that region plus an extra 2 points.
- If you own 2 Ankylosauruses and they are both in the same winning region, you score an extra 4 points.
- An Ankylosaur counts as 1 piece when scoring its region.
Example: The blue player has a majority in this grass region with an Ankylosaurus and so scores 3 points for the region plus an extra 2 points for the Ankylosaur.
Pteranodon (egg cost: 2)
Can fly anywhere!
When you move the Pteranodon, it may move to any grass or jungle tile.
When taking a foot action, a Pteranodon can be moved to ANY grass or jungle tile on the whole map, not just those tiles adjacent to it.
- Like all dinosaurs and cave people, the Pteranodon must be placed on the cave or hut tile before it can be moved around the map.
- An Pteranodon counts as 1 piece when scoring its region.
Plesiosaur (egg cost: 2)
Can swim in Lagoons!
Can finish a turn on lagoon tiles, which score for you like grass or jungle regions.
Unlike all other pieces, at the end of your turn, a Plesiosaur may finish on a lagoon tile. If there are any Plesiosaurus on the map when an eruption happens, score all regions of water exactly as you would a grass or jungle region.
- Plesiosaurs are worth 1 piece when scoring a lagoon, grass or jungle region.
Example: The blue player has a Plesiosaur in this Lagoon region scoring them 2 points.
Triceratops (egg cost: 3)
So scary, cave people forget to score!
When scoring the Triceratops' region, all cave people in it are ignored.
When scoring a region with a Triceratops, all cave people in that region are ignored during the scoring. This includes the cave people belonging to the player who owns the Triceratops.
- Other dinosaurs in the Triceratops' region do count towards scoring.
- All cave people in the Triceratops' region remain in the region after scoring.
- A Triceratops counts as 1 piece when scoring its region.
Example: The blue player's Triceratops cancels out all cave people in this grass region (including their own) scoring them 3 points.
Tyrannosaurus (egg cost: 4)
Eats an enemy every step of the way!
After moving into a grass or jungle tile, remove any 1 enemy cave person from that tile and return it to its owner's supply.
After the Tyrannosaurus moves into a grass or jungle tile, you may choose any 1 cave person on that tile belonging to an opponent and return it to their supply.
- If you move the Tyrannosaurus more than once in a turn, it may remove a cave person after each move.
- The Tyrannosaurus may double-back onto a tile it has already been on in a turn and eat another cave person there.
- The Tyrannosaurus can not eat cave people on the cave or hut tiles.
- The Tyrannosaurus can not eat dinosaurs.
- A Tyrannosaurus counts as 1 piece when scoring its region.
A Word from Gamewright
Here at Gamewright, we often ponder the question - what would the world have been like if people and dinosaurs lived at the same time? Phil Walker-Harding and Eric Lang figured it would be ruled by a primordial volcano that shifts the land beneath their feet... obviously!
All kidding aside, these two fantastic designers came to us with a vision of a fun, simple strategy game where the board is forever changing and tribes of cave people explore and dominate the land alongside their dinosaur companions. So roll the dice and choose your actions well and always remember to beware the Wrath of Fire Mountain!
Game by Phil Walker-Harding & Eric M. Lang
Artwork by Chris Lee, Graphic Design by Mitch Morris
No dinosaurs were harmed in the making of this game.
© 2024 Gamewright, a division of Ceaco, Inc. All rights reserved.