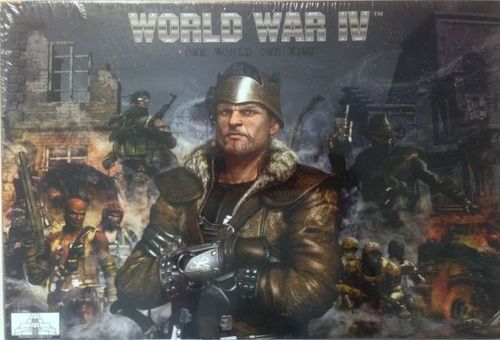
World War IV: One World, One King
World War IV: One World, One King Rulebook
Table of Contents
Table of Contents
Rules of Play
"Once the game is over, the King and Pawn go back in the same box." — Italian Proverb
The Game: World War IV
World War IV: One World, One King is an epic strategy board game intended for 3 to 5 players ages 14 and up. Players test their strategies, diplomacy and luck as they vie for Kingship over the entire world of the 32nd century!
Players win when all opposing kings are eliminated or by capturing all 5 capitals.
Going on the offensive is more important than an impenetrable defense because the broken terrain will not sustain a large military force that sits in one place. Random natural disasters and inventions affect players by chance, so a static game of hoarding resources will turn into a matter of pure luck in the end. Aggressive play is rewarded with opportunities to land a knock-out punch on your opponent's capital city or king. This keeps the game dynamic and suspenseful. If your men aren't starving on the front lines then you aren't using enough force to win! This is the cold reality of World War IV.
While competitive, the objective of the game is to have fun, ensure all other players have fun and to create a different gaming experience every time. Your ultimate goal is to conquer the world...but it's the pursuit of that goal that is important. (Actually ruling the world would be a real chore with a lot of responsibilities if you really think about it!)
What's in the Box
Each game box of World War IV: One World, One King contains:
- This Rulebook
- Dice (5 White, 5 Black)
- Map Board
- Over 400 plastic playing pieces
- 5 Quick Reference / Arena of Battle Cards
- A deck of 40 Random Event Cards
- Counters and Money Tracking Cards
- Unit Counters
- Random Event Counters
- Fort Counters
General Rules & Terminology
The rules for playing World War IV are based around a few simple concepts:
Each player represents a nation in 32nd century earth. You play the part of that nation's king, ordering your loyal subjects to move about the land and conquer new territory for your empire.
Colored playing pieces represent your armies. Each playing piece represents more than one person in order to scale the game down to a tabletop.
Dice are rolled to add the effect of randomness as your armies meet resistance conquering new lands. Any "dice" referenced are standard 6-sided dice. These are referred to as a "d6."
Getting Started
The best way to learn the rules is to quickly scan over this rulebook, set up a game and then read each step as you go through the first turn or two.
Map
The game is played with playing pieces on a map board. The map is organized into map spaces. Some of these spaces are land and some are water. The map looks different than 21st century earth resulting from a mini Ice Age caused by nuclear war followed by several major natural disasters.
Each map space borders other spaces. Some islands may only border one water space. Some land spaces may border multiple land and water spaces. Some map spaces refer to a space on another map edge. These referenced spaces are shown with darkened map artwork to clarify how borders interact from one map edge to another.
Every land space has a box with a C and F value written inside. (The printed C symbol is the game's money, written as C throughout this transcription; the printed F is the space's Food value.) If a small island or dot on the map does not have a box like this then it is not a space of its own as far as the game is concerned. Any areas without a name displayed do not count as legitimate map spaces.
Units
A "unit" is a reference to a playing piece. Playing pieces often represent more than one individual, typically an entire battalion, squadron or fleet.
Playing Areas
Each player should have enough table space for rolling dice and for their Quick Reference Cards, Money Tracking Cards and playing pieces.
There should also be a general playing area set aside for the deck of Random Event Cards.
Pick Your Color
If all of the players agree who should play which nation then take all of the playing pieces of their nation's color into their playing area. See NATIONAL IDENTITY on page 14.
If players cannot agree on which nations to play then roll dice to decide who plays each color.
Player Diplomacy
Players may form alliances, non-aggression treaties or any other political ploys they can imagine, but all of these agreements are non-binding.
Game money may be exchanged as part of these agreements. Units, forts and cards cannot be exchanged. You may choose to share the effects of your Innovation Cards with any number of other players.
Remember, in the end there will be only one King. The throne may not be shared!
Setting Up
To save space, before the game begins place the starting units and Fort Counters on the designated spaces. Unit Counters may be stacked under a playing piece to represent multiple units. White counters represent one unit and black counters represent three. (For example, India begins the game with eight Militia units represented by two black counters, one white counter and one Militia piece on top.) Enough counters are provided to account for barbarian units. Active players may start the game with or without stacking counters. Starting unit positions are shown both graphically on the map board and in Table 1, STARTING UNITS:
Table 1: Starting Units
| Space | Unit Color | Starting Units |
|---|---|---|
| Antillesia | Red | 2 Militia |
| Argentine Sea | Red | 1 Destroyer, 1 Frigate |
| Brazil | Red | Fort, 1 Artillery, 4 Soldiers |
| Central America | Red | 3 Militia |
| Falkland | Red | 1 Militia |
| Lower Andean States | Red | 3 Militia |
| Mexico | Red | 1 Artillery, 2 Militia |
| Panama Canal | Red | 1 Destroyer, 1 Frigate |
Table 1: Starting Units (continued)
| Space | Unit Color | Starting Units |
|---|---|---|
| Alaska | Grey | 1 Militia |
| Arabia | Grey | Fort, 1 Artillery, 1 Cavalry |
| Arafura | Grey | 1 Militia |
| Balkans | Grey | 4 Militia |
| Bay of Bengal | Grey | 1 Destroyer |
| Belorussia | Grey | 2 Militia |
| Caribbean Sea | Grey | 1 Destroyer |
| Caribbean South America | Grey | 4 Militia |
| Chaco |
National Identity
Each nation is differentiated by playing piece color and has a Capital City.
Table 2: Nation Colors & Capitals
| Nation-State | Color | Capital | Balance of Powers |
|---|---|---|---|
| Imperio de Sangre | Red | Buenos Aires | Recommended 3-Player Game |
| Sun Dynasty | Yellow | Nanjing | Recommended 3-Player Game |
| African Coalition | Green | Nairobi | Recommended 3-Player Game |
| North Atlantic Kingdoms | Blue | London | Recommended as 4th Player |
| Persian Empire | Purple | Shiraz | Recommended as 5th Player |
Treat units on the map that belong to nations not represented by a player as Barbarian units. The kings of those realms have decided not to participate in a war of global expansion.
Barbarians
There are many barbarian lands around the world. These may be territories ruled by local despots, divided by several warlords, regions of anarchy or the remnants of ancient republics and democracies. Barbarian playing pieces are colored GREY. Playing pieces of any other color are also treated like Barbarians if not represented by an active player.
Barbarian units do not move. They never have any turn sequences of their own so they are not affected by any food shortages. Barbarians never Withdraw from combat. Random Event Cards that destroy units in effected spaces can destroy Barbarian units and Forts.
When a player invades a space with Barbarian units then another player or neutral observer represents the Barbarians by rolling dice and making casualty decisions.
Forts
Forts symbolize infrastructure. Forts are represented on the map by a Fort Counter. There may be only 1 Fort per map space. Forts may not be built on map spaces with Cities.
Production Center: Map spaces that have a Fort are eligible for deploying units as described in the Deploy Units sequence rules. Your Forts also produce C1 per turn.
Fortifications: Kill Casualties assigned to units defending a Fort are reduced to Rout Casualties.
Pillaged Forts: Forts can be destroyed by invaders during battle. Invaders could choose to destroy a Fort that survives a successful invasion. In either case the destroyed Fort is Pillaged. Units in a map space that have Pillaged a Fort do not have to roll to Support the Troops that turn.
Captured Forts: Forts in spaces that are successfully invaded (and are not Pillaged) are captured. Replace captured Forts with a Fort of the Invader's color.
Cities
Indestructible Fort: A City has the same game effects as a Fort except that the City can never be destroyed by any means. A City is still considered pillaged if successfully invaded. A City can Control a space, allow units to deploy, produces C1 each turn and protects defending units by reducing Kill Casualties to Rout Casualties. If you do not Control at least one City then you may not collect any income during your turn.
Capital: If a player Controls a space with another player's Capital City then that City's nation loses the secrets of its technology. The player associated with the Capital City (see Table 2: NATION COLORS & CAPITALS) must surrender all Innovation Cards to the General Knowledge area.
Random Event Cards
Cards are used to introduce the effects of nature, politics and technology to the game. One deck of cards is used by all players in the game. When setting the game up, shuffle the deck of Random Event Cards and place it off to one side of the Map Board.
For details on when to draw and play Random Event Cards see the rules for the Random Event sequence of play. When a Random Event Card is played, follow the instructions on the card.
Once a card is played it may be helpful to keep the card in your playing area for the duration of the effects of the card. After the effect has expired place the card in a discard pile to one side of the deck of cards.
Counters are included to represent natural disaster results of some random event cards. These counters can be placed on the Map Board to indicate the locations of these events.
Innovation Cards: Random Event Cards with the word "Innovation" work a bit differently than other cards.
If you draw an Innovation Card keep it in your playing area. The card only applies to you, not to any of your opponents, while it is in your playing area.
At the beginning of your turn you will roll a d6 for each Innovation Card in your playing area. On a roll of 1, 2, or 3 move the card to a General Knowledge area beside the playing card deck. All RED, YELLOW, GREEN, BLUE and PURPLE units gain the effects of Innovation Cards in the General Knowledge area. This represents the reverse engineering efforts of all warring nations. GREY units do not gain the benefits of General Knowledge.
Example of a Random Event Card (Tsunami): A player draws the Tsunami card. The card instructs the player to roll a d6 and the result is a 4, indicating the Java Sea. The card affects the space as detailed, plus all spaces that border it. Both land and water spaces are affected. Water spaces obviously ignore any references to money or food produced.
The printed card reads: "Affects a random space and all spaces that border the space rolled on a d6: 1=Arabian Sea, 2=South China Sea, 3=Philippine Sea, 4=Java Sea, 5=Bay of Bengal, 6=Aegean Sea. Affected spaces produce no Food until the start of your next turn. Units may not move out of affected land spaces until the end of your next turn."
For this example the following spaces would be affected: Java Sea, Sumatra, Western Australia, Queensland, Arafura, Philippine Sea, Tasman Sea, Bay of Bengal, and the Indian Ocean.
Per the card's description these spaces will not produce any food for any player until the start of the card-drawing player's next turn. Units would not be able to move out of the affected land spaces until the end of the card-drawing player's next turn...units in the water spaces are specifically intended to ignore this movement restriction on the card. However, note that naval units can move onto land during their turn but are then forced to move back into the water later during their turn. Because no units are allowed to move out of Sumatra, for example, due to the tsunami all naval units are forbidden to move into Sumatra because they would then be forced to move back out of that space later in the turn.
Quick Reference Card
A Quick Reference Card is included for easy reference to unit costs and abilities. The back of the card indicates an "Arena of Battle." Some map spaces become very crowded with combat. You may want to move all the pieces from the map space into the Arena to keep better track of attack and casualty results. This would also be a good opportunity to use one playing piece per unit instead of stacking counters to represent multiple units. You do not have to use the Arena, it is simply included to aid organization of larger battles.
Unit Profiles
Each unit type acts differently according to its attributes and advantages. This may represent better equipment or training in combat or a completely different type of role in the game.
When a unit is involved in a combat it uses the Rout and Kill values listed in Table 3: UNIT PROFILES. See the rules for Combat for more details.
Table 3: Unit Profiles
| Unit | Move | Attack Roll Needed to Rout | Attack Roll Needed to Kill | Unit Advantages |
|---|---|---|---|---|
| Armor | 1 | 3 | 4, 5 or 6 | Breakdown, Control, Tank, Turret |
| Artillery | 1 | 3 or 4 | 5 or 6 | Bombardment, Control, Entrench |
| Bomber | 3 | - | 4, 5 or 6 | Bombardment, Control, Flight |
| Cavalry | 2 | 3 or 4 | 5 or 6 | Charge! Control, Scout |
| Destroyer | 2 | - | 4, 5 or 6 |
Unit Descriptions
Units listed in TABLE 3: UNIT PROFILES have advantages with effects detailed below. Unit Advantages take precedence over the normal rules listed for all units in the game.
Armor
Breakdown: Damaged vehicles tend to break down in combat. If an Armor unit rolls a 1 when it attempts to Rally then it is destroyed.
Control: Armor units let you Control the land space where they are located during the Control Lands sequence, but require food to support during the Support the Troops sequence.
Tank: Casualty results of Killed count as a Routed Casualty when applied to an Armor unit. If a Routed Armor unit is assigned another Rout or Kill Casualty then it is destroyed.
Turret: Armor units may make their attacks even if the unit is Routed.
Artillery
Bombardment: Artillery units attack during the Bombardment Attacks step of each combat round instead of the Regular Attacks step. Artillery units may direct their attacks toward a Fort instead of attacking enemy units in the space.
Control: Artillery units let you Control the land space where they are located during the Control Lands sequence, but require food to support during the Support the Troops sequence.
Entrench: Artillery units get to attack first when defending a space. Attacks and casualty results are resolved before other units get to attack during the Bombardment Attacks step.
Bomber
Bombardment: Bomber units attack during the Bombardment Attacks step of each combat round instead of the Regular Attacks step. Bombers may direct their attacks toward a Fort instead of attacking enemy units in the space.
Control: Bomber units let you Control the land space where they are located during the Control Lands sequence, but require food to support during the Support the Troops sequence.
Flight: Bombers have the following additional rules:
- Movement: Bombers may move over water spaces as well as land.
- Movement, Support: Bombers may end their movement on a water space, but remember that water spaces do not provide any resources to support units! Treat all water spaces as having F = 0 to support Bombers.
- Movement: Bombers ignore any movement restrictions caused by Random Event Cards for the spaces that they fly over. Bombers must obey movement restrictions of Random Event Cards for spaces where the Bomber begins or ends its movement.
- Movement: Bombers do not have to stop moving because they move into a space with an enemy unit with the Control advantage.
- Movement, Combat: Bombers must stop their movement if they move into a space with an enemy Bomber and may not Withdraw through such spaces.
- Combat: Bombers gain no benefits from defending a Fort or City.
- Combat: Invading Bombers must Withdraw from combat during the Maneuver step of the 2nd round of combat, using the rules to Withdraw for Bombers detailed below.
- Combat: Bombers may choose which units take Casualties from their attacks.
- Combat: Rout Casualties may not be assigned to a Bomber.
- Combat: Killed Casualties that are assigned to a Bomber only Rout the Bomber and do not destroy it.
Cavalry
Charge! Cavalry units attack first during the Regular Attacks step in combat.
Control: Cavalry units let you Control the land space where they are located during the Control Lands sequence, but require food to support during the Support the Troops sequence.
Scout: Cavalry units ignore any movement restrictions caused by Random Event Cards.
Destroyer
Bombardment: Destroyer units attack during the Bombardment Attacks step of each combat round instead of the Regular Attacks step. Destroyers may direct their attacks toward a Fort instead of attacking enemy units in the space.
Ship: Destroyer units (and Frigate units, described below) have the following additional rules:
- Deployment, Support: Ships are deployed on land spaces with a Fort or City just like a land unit. During the Support the Troops sequence all of your ships are moved from land spaces to uncontested, adjacent water spaces. Note that ships do not have the Control advantage, so they do not count towards the food limit to Support the Troops. However, ships do count towards the food limit for deploying units, just like every other unit.
- Movement: Ships normally move to adjacent water spaces instead of moving on land. Ships may move onto a land space but will be returned to the water during the Support the Troops sequence. Ships that move onto a land space end their movement for the turn.
- Movement: Ships must stop their movement if they enter a water space containing units of a different color.
- Combat (Water): Ships may not voluntarily Withdraw when fighting in a water space.
- Combat (Land): Ships that become Routed when invading a land space may not attempt to Rally and are forced to Withdraw back to sea. Move the ship back into the water space from which it invaded the land space.
- Combat (All): Invading Ships are forced to Withdraw from combat during the Maneuver step of the 2nd round of combat. Move the ship back into the water space from which it invaded.
Frigate
Ship: Same as the Ship rules for the Destroyer unit above.
Transport: Frigates have the following additional rules:
- Random Event: Random Event Cards that roll dice for units in a space only require a d6 roll for the Frigate, not each unit onboard.
- Movement: Some land units may move aboard a Frigate instead of moving to an adjacent space. The Frigate must be located in an adjacent water space. This boarding move may take place in the middle of the Frigate's movement.
- Transport: Transport capacity is limited by up to 2 of any of the following units: Militia, Soldier, Cavalry or Artillery or any combination thereof. Alternatively, a Frigate may carry 1 Armor unit. Any number of King and Spy units may be transported and do not count towards the transport capacity.
- Transport: If a Frigate has moved onto land then any number of units onboard may disembark onto that land space. Units are only allowed to move from the Frigate to the space where the Frigate has made landfall, so units with extra movement may not move to an additional space. Disembarking does not count towards the land units' maximum movement, so any unit may board and disembark on the same turn.
- Transport, Support: Land units aboard Frigates do not have to roll to Support the Troops.
- Combat, Transport: Land units may not participate in combat while onboard a Frigate.
- Combat, Transport: When your Frigate Withdraws from combat on land, your land units may Withdraw from the combat by boarding the Frigate, up to the transport capacity limits described above.
- Combat, Random Event, Transport: If a Frigate is destroyed then all units aboard are also destroyed, including any King that may be aboard!
King
Command: Your King unit lets you Control the land space where it is located during the Control Lands sequence. Kings not require food to support during the Support the Troops sequence.
Crown: If you lose your King at any time you are eliminated from the game! Your units will then act as Barbarians. If you lose your King during combat then you are eliminated from the game at the end of the combat round. If the King was leading an invasion of a foreign land then the invading units continue to fight on and avenge their slain King.
Leadership: Kings still attack while Routed. This represents the King's leadership keeping some other unit from becoming Routed. Kings Rally automatically instead of rolling dice to Rally.
Royal Guard: Certain unit advantages allow players to select an opponent's unit to be Killed or Routed during combat. Kings may never be selected in this way, although transports carrying Kings are still vulnerable. If a King rolls a 1 on a Support the Troops roll or is destroyed by a Random Event Card then you may choose another one of your units in the same space to remove instead of the King. (Note that your King does not require food to support, but may still roll during the Support the Troops sequence. See the notes for SPIES & SANDWICHES to explain.)
Militia
Control: Militia units let you Control the land space where they are located during the Control Lands sequence, but require food to support during the Support the Troops sequence.
Soldier
Control: Soldier units let you Control the land space where they are located during the Control Lands sequence, but require food to support during the Support the Troops sequence.
Entrench: Soldier units get to attack first when defending a space. Attacks and casualty results are resolved before other units get to attack during the Regular Attacks step.
Spy
Assassin: Spies may attempt assassinations. See the rules for the Assassination sequence.
Reconnaissance: If you have any Spies present in a space during a combat then they may affect that combat as described in the rules for Combat: Every combat round you may assign one of the Casualty results that you have rolled to a specific target for each Spy you have present in the map space.
Undercover: Spies do not participate directly in combat. They may not be routed, killed or selected as a unit in any combat. Spies may not Withdraw from combat. For all intents and purposes spies are invisible to the combat itself. They may end their turn in a space controlled by another player or barbarians without initiating a combat. Spies do not have to stop their movement when they enter a space with an enemy unit with the Control advantage.
A Note About Spies
Mastering the use of your Spy units is a key to success in World War IV, which you will want to keep in mind as you read through the rules for playing a game turn.
The ability to decide which of your opponent's units suffer Casualties can easily mean the difference between victory and defeat. If you have two Spies in a space with a combat then you will be able to "double rout" expensive units and destroy them. If your opponent has a Spy performing Reconnaissance in a combat then you will want to assign Casualties to your own units very carefully, because the opposing Spy can let a late Rout Casualty finish off one of your expensive artillery pieces or cavalry!
As if the Spy isn't dangerous enough already, you must also keep track of how many enemy Spies are within three spaces of your King...or risk assassination! World War IV: One World, One King is different from other global strategy games in that capturing territory and resources is not your primary objective. Your main goal is to defeat the other kings, like a multi-player game of chess with multiple ways to achieve "Checkmate!" Your Spies fight a war in the shadows that is just as important as the war on the battlefield. An assassin's bullet can end your king's reign just as effectively as a column of tanks!
Order of Play
Each game turn represents an arbitrary length of time from about three weeks to about three months. This is enough time to deploy new armies of recruits, gather harvests, march significant distances and fight battles.
After setting up the Map Board all players roll dice to see who gets to take the first turn. Order of play then proceeds by color: RED, YELLOW, GREEN, BLUE, PURPLE then back to RED.
Each player's turn consists of a sequence of play. Follow the description of each sequence to progress through your turn. There are nine sequences which must be taken in order 1-9 each turn.
Player Turn Sequence:
- Random Event
- Control Lands
- Collect Income
- Movement
- Assassination
- Purchase Units
- Deploy Units
- Combat
- Support the Troops
1. Random Event
Roll a d6 for each Innovation Card in your playing area. On a roll of 1, 2, or 3 move the card to a General Knowledge area beside the playing card deck. All RED, YELLOW, GREEN, BLUE and PURPLE units now gain the effects of these Innovation Cards.
Draw a Random Event Card and play the effects immediately. The complete rules for Random Event Cards are on page 15.
Atomic Weapons: If the deck of Random Event Cards is drawn out and you must draw another card from the deck then check to see if your nation has discovered the secret of forging atomic weapons. Roll one d6 for each City you control. If any dice rolled is a 6 then your nation has invented atomic weapons first and you win the game! If all of your dice rolled are 1's then the war ends in a cold war standoff. All active players must share the world equally and the game ends in a draw.
2. Control Lands
This sequence requires no action, it is simply a timing point in your player turn that determines which lands you Control. For this turn, you Control every space where you have a Fort, a City, or at least one unit is present from the following list:
- Armor
- Artillery
- Bomber
- Cavalry
- King
- Militia
- Soldier
The above units have the Control advantage listed in their unit profiles, except the King who has the similar Command advantage.
If you do not Control the space at this point in your turn you do not Control the space for the entire turn. If you Control all 5 Cities at this point in your turn then you win the game!
3. Collect Income
Gain C equal to the value listed for each space you control. Gain 1 additional C for each Fort and City you Control. Track the amount of money you make each turn with your Money Tracking Card and C counters.
If you do not Control at least one City then you may not collect any income. Skip this sequence of play and proceed to Sequence 4: MOVEMENT.
4. Movement
Your units may move to an adjacent space during the Movement sequence of your player turn. Some units may move more than 1 space each turn as indicated in their unit profile, most notably the Cavalry unit. A unit must stop its movement if it enters a space with an opposing unit that has the Control advantage (unless it has an exception due to a Unit Advantage.)
Most units may move to adjacent land spaces, but not move across water. There are exceptions to this rule for units that move on (or over) water. See the rules for Destroyers, Frigates and Bombers for further details.
Certain land units may move onboard transports that are in an adjacent water space. This is done instead of moving to an adjacent space. See the Frigate rules for more details.
Ships may move to an adjacent water space or move onto a land space. (Ships that move onto land will be moved back into a water space during the Support the Troops sequence.) When a ship moves onto a land space it must stop, it may not continue to move to an additional space in the Movement sequence. See the Ship and Transport Unit Advantage rules for more details.
Border Clarifications:
- Central America is a single land space, so land units count as being on both sides of the water. You must Control Central America to move ships between the Caribbean Sea and the Panama Canal.
- Anatolia is also a single land space where land units count as being on both sides of the water. You must Control Anatolia to move ships between the Aegean Sea and Black Sea.
- The Bay of Biscay borders the Mediterranean Sea. Iberia does not border Mauretania.
- Egypt borders Syria for land units. The Aegean Sea borders the Red Sea for water units. Abyssinia borders Arabia for land units. The Arabian Sea borders the Red Sea for water units.
5. Assassination
You may attempt to Assassinate a foreign or Barbarian Spy or King in the same map space as any of your Spy units.
Each of your Spies may attempt to kill one Spy per turn in the same space as your Spy. Roll a d6 for every Spy in the space attempting an assassination: on a roll of 1 or less your Spy is killed. On a roll of 4 or higher you choose an enemy Spy to be killed. If you do not Control the space where you are attempting an assassination of a Spy then subtract 1 from your die roll.
Once all assassination attempts on Spies are complete you may attempt to assassinate a King if there are no Spies of the same color as the King left in that map space. Roll a d6 for each of your Spies in the space: any roll of 6 kills the target King! No modifiers add or subtract to the 6 needed to kill a King.
6. Purchase Units
Pay C costs for placing units and Forts in your playing space.
Table 4: Unit & Fort Costs
| Unit or Fort | Cost |
|---|---|
| Militia | C1 |
| Spy | C2 |
| Soldier | C3 |
| Frigate | C4 |
| Cavalry | C5 |
| Artillery | C6 |
| Fort | C7 |
| Armor | C8 |
| Destroyer | C9 |
| Bomber | C10 |
If you do not spend all of your C then any excess will remain in your possession and carry over to your next turn.
7. Deploy Units
Deploy your purchased units on any space that you Control and that has a City or Fort. The number of units that you can place on a map space is limited to one unit per Food value "F" of the space. Ships are deployed on land and will be moved into the water during the Support the Troops sequence.
After all of your purchased units are deployed, place any purchased Forts onto map spaces that you Control with a unit that has the Control advantage present. This will prevent you from buying a Fort and using it to deploy other units in the same turn.
When deploying units, remember that you only have Control of a space if you have Control of it in the Control Lands sequence earlier in your turn.
8. Combat
You must fight a combat when any of your units, except Spy units, end their movement in a map space occupied by units of a different color. The player that moved units into the space is the Invader. The units that were already present in the space are the Defenders.
All combat is resolved in all spaces during this player turn sequence. The Invader gets to decide the order in which combats are fought.
Each round of combat is fought in 4 combat steps:
- Bombardment Attacks
- Regular Attacks
- Rally
- Maneuver
Attacks: Make your attacks by rolling one d6 for each attacking unit. If a d6 roll is high enough then it may cause a Casualty. See Table 3: UNIT PROFILES or refer to a Quick Reference Card to see what each unit type must roll to cause a Casualty.
Attacks occur simultaneously in each step of the combat round.
Some units get to "attack first" in a combat step. Those units resolve their attacks and casualty results before other units get to attack. If both sides have units that can "attack first" then all of those attacks are resolved simultaneously before other units get to attack.
A Note About Timing: Theoretically speaking, some attacks occur simultaneously. From a practical standpoint this is not possible. Someone will roll their dice first. This is resolved by having both players roll their dice to determine Casualty results before either player assigns any of those Casualty results. The Defender then assigns Casualty results to his units first.
Assign Casualties: The player who suffers Casualties assigns Casualty results to his units. There are exceptions to this rule, for example Bombers may decide which unit suffers Casualties from their attacks. All Casualties are assigned one at a time, allowing the other player an opportunity to interrupt with Reconnaissance at any time.
Assign all Kill Casualties first.
Excess Casualties "stack", so if an un-routed unit is assigned two Rout Casualties the first Casualty causes the unit to become Routed and the second Rout Casualty finishes off the unit.
Overkill: Casualties may not be assigned to a unit beyond what is necessary to destroy it.
Reconnaissance: Every combat round you may assign one of the Casualty results that you have rolled to a specific target for each Spy you have present in the map space. You can use your Spy to "interrupt" your opponent's Casualty assignments, so it is important to assign Casualties one at a time!
Routed Units: Units that suffer a Rout Casualty become Routed and are placed off to one side of the combat. Units that are Routed do not get to attack but are still present in the combat. If a Routed unit is assigned another Casualty then the unit is destroyed. Units that are Routed have a chance to rally during the Rally step of each combat round.
Killed Units: Units that suffer Kill Casualties are destroyed. Remove the playing piece from the map.
Example of assigning Casualties: A blue player has 2 Militia in a combat against a red Artillery and Cavalry. There is a red Spy in the space.
The red Artillery attacks first because it has the Bombardment advantage and causes a Rout Casualty by rolling a 4 on a d6. The blue player selects a Militia to become Routed.
The red Cavalry attacks next because it has the Charge advantage and rolls a 6 for a Kill. The red player can use his Spy to apply the Kill to the Militia who is not already Routed, destroying that Militia.
(The printed example includes a diagram showing the Routed Militia, the Killed Militia and the Spy; it is not reproduced here.)
Combat Round
1. Bombardment Attacks
Artillery, Bombers and Destroyers attack during the Bombardment Attacks step of each combat round.
Some units are able to "attack first" during combat. If an Artillery, Bomber or Destroyer unit is allowed to attack first then it does so during the Bombardment Attacks step. Resolve all Casualties from these attacks before any other units roll dice. If both sides have units that "attack first" then all of those attacks occur simultaneously.
Bombardment Attacks may be directed at Forts. The Invader decides how many of his Bombardment units are attacking defending units or the Fort before rolling any attack dice. A Kill Casualty destroys a Fort. Ignore Rout Casualties directed at Forts.
2. Regular Attacks
Units that did not attack during the Bombardment Attacks Step now get to attack.
3. Rally
Units that are Routed must attempt to Rally. Both players roll a d6 for each of their Routed units. They are no longer Routed on a roll of 4, 5 or 6. See individual unit rules for exceptions to these Rally rules.
4. Maneuver
At the end of each combat round any player may elect to Withdraw any number of units. Those units are moved out of the contested space to an adjacent space that player Controls. Units may not Withdraw into spaces where there is an unresolved combat. If there are no eligible spaces then units may not Withdraw. You may Withdraw units after winning a combat, effectively redeploying your army after a victory.
If either side has no units left following the Maneuver step then the combat ends. Otherwise another combat round begins. Go to Step 1, Bombardment Attacks.
Example of a Combat: A blue player moves 1 Armor, 1 Artillery, 4 Militia and 1 Spy into a red space with a Fort, 1 Artillery, 3 Cavalry and 1 Spy.
Combat Round 1:
- Bombardment Attacks: Red Artillery attacks first and rolls a 5 (Kill), the blue player selects his Armor to take the Kill because it reduces the result to a Rout, so the blue Armor is Routed. Blue Artillery then attacks and rolls a 4 (Rout), the red player selects one of his Cavalry to be Routed.
- Regular Attacks: The two red Cavalry that can attack go first and roll a 1 and 3, good enough for 1 Rout Casualty. The red player uses his Spy to assign the Rout to the blue Armor that is already Routed, destroying the blue Armor. Blue player attacks with 4 Militia and rolls a 1, 3, 4 and 5 (2 Routs). The blue player uses his Spy to assign 1 Rout to the Routed red Cavalry, destroying it, and the red player chooses another Cavalry to suffer the second Rout Casualty.
- Rally: The red player rolls a 4 to successfully Rally his Routed Cavalry.
- Maneuver: No units Withdraw.
Combat Round 2:
- Bombardment Attacks: Red Artillery rolls a 6 and uses his Spy to assign the Kill to the blue Artillery.
- Regular Attacks: Two red Cavalry roll a 5 and 6, Killing 2 blue Militia. The two remaining blue Militia roll a 2 and 3 (no Casualties.)
- Rally: There are no Routed units to Rally.
- Maneuver: Blue player Withdraws his 2 Militia to an adjacent space he controls. The blue Spy was not officially part of the combat, so it must stay in red territory. The combat ends because there are no blue units left in the map space except for the Spy.
9. Support the Troops
Each land space that you Control has a Food value "F". This is the number of units that food, water and supplies in that map space can support each turn. If there are more units with the Control advantage in a land map space than the Food value "F" then roll a d6 for every unit in that space: the unit is destroyed on a roll of 1. This represents the local resources in the region being spread too thin resulting in desertion, starvation and infighting.
All units in the space must roll even if they are not controlling units. Even Spies and Kings must roll if there are not enough resources to support the controlling units in the same space. If you roll a 1 for a King then you may choose another unit in the same space to remove instead of the King.
Spies & Sandwiches: The rules to Support the Troops can seem confusing at first when referring to all the rules about units with the Control advantage. But this rule exists for a reason. For example, the playing piece for the Spy unit represents just one spy, while a playing piece for a Soldier unit represents an entire legion of your best troops. If there are two or three Spy units in a map space then that has no considerable effect on the supplies supporting all of the Soldiers present. (A Spy only needs a sandwich.) But if there are too many Soldiers present and food, water and supplies are spread too thin then the Spies will still be affected by the shortage. (A Spy still needs to find a sandwich!)
See the rules for Forts and Cities to see how armies can Pillage to avoid rolling dice to Support the Troops.
To end the Support the Troops sequence, move any ships that are on land into the water space from which they moved onto land. Ships that were deployed on land spaces must move into an adjacent water space that does not contain units of a different color. If ships are unable to do this then they are destroyed.
Your turn ends once all the ships are in the water and play proceeds to the next player.
Victory!
The game ends as soon as any of the following conditions occurs:
Last King Standing: If there is only one active player left on the map at any time then that player wins the game.
World Rule: If any player Controls all 5 spaces on the map with a City during their Control Lands turn sequence, then that player wins the game.
Atomic Weapons: If the deck of Random Event Cards is drawn out and you must draw another card from the deck then check to see if your nation has discovered the secret of forging atomic weapons. Roll one d6 for each City you control. If any dice rolled is a 6 then your nation has invented atomic weapons first and you win the game! If all of your dice rolled are 1's then the war ends in a cold war standoff: All active players must share the world equally and the game ends in a draw.
Defeat!
You are eliminated from the game if your king is destroyed, just like a game of chess. Your units now act as Barbarians. Shuffle your Innovation Cards back into the Random Event Card deck. (Innovation Cards are described in the rules for Random Event Cards.)
Optional Rules: Alternate Set-Up
You may want to explore different set-up conditions, capital cities or any other changes imaginable. This is encouraged! However, there are some considerations to keep in mind.
The barbarian lands do more than separate the borders of most global powers. These map spaces are also very helpful to new players as they explore the rules of the game, providing a buffer between more experienced players for the first couple of turns. More experienced players may wish to speed up the initial turns of the game in exchange for this initial border isolation. This can be accomplished by starting the game with colored playing pieces instead of grey pieces in some map spaces.
You could also cover up the Capital symbols with Forts and place new starting Capitals to represent different nations rising to power to battle for the future Earth.
Free Build: You may want to represent nations that have built up a more sizeable military before World War IV starts. This can be accomplished by having each player spend a bonus C20 on units to deploy before the first player's Turn 1 begins, using the normal Deploy Units rules.
Keep using your imagination and remember that there is no "wrong" way to play the game!
Good Luck!
In every game of chance the roll of the dice may deny you victory in the end or help you defeat impossible odds. So don't give up, don't take defeat personally and good luck!
Quick Reference Sheet
The printed Quick Reference Sheet (page 28 of the rulebook) restates the Unit Profiles, Unit & Fort Costs and Turn Sequence above. Its contents, as printed:
Player Turn Order: Red → Yellow → Green → Blue → Purple → (back to Red)
Turn Sequence:
- Random Event
- Control Lands
- Collect Income
- Movement
- Assassination
- Purchase Units
- Deploy Units
- Combat
- Bombardment Attacks
- Regular Attacks
- Rally
- Maneuver
- Support the Troops