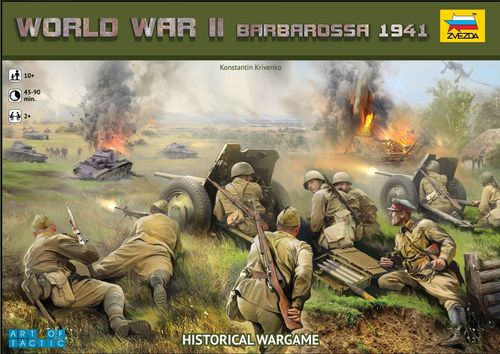
World War II: Barbarossa 1941
World War II: Barbarossa 1941 Rulebook
Table of Contents
Table of Contents
Introduction
WORLD WAR II: Barbarossa 1941 uses the Art of Tactic system. This system has a unique style that sets it apart from other table-top strategy games: the players do not take turns moving their playing pieces on the board. Instead, both players secretly give orders to their troops. Then the orders are executed at the same time! You don't have to wait while your opponent thinks things over and makes his move. Both players are constantly in play!
The rules are easy to learn because all the information you need about every unit is shown on its matching card, which is used in the game. Every order you can issue to a unit is shown, along with the characteristics and stats that the unit uses in battle.
The game is played on a board marked with hexagon-shaped spaces called "hexes." Each hex is marked with a certain type of terrain, and is assigned a number that you will use to give orders to your troops.
In this starter set, you will find eight different scenarios. Each scenario focuses on one small part of the great struggle on the "Eastern Front" of World War II. But in reality, there is no limit to the scenarios you can play. You can design your own scenarios, or find them on our official website: www.art-of-tactic.com.
WORLD WAR II: Barbarossa 1941 is only part of the Art of Tactic system. This is your launching point into a more extensive war. You can purchase additional units, some that are in this starter set and some that are completely new. And you don't need any special rules for your new units: all their abilities and options are printed right on the Unit Cards!
Preparation for Play
Before you can begin the game, you will need to carefully separate the pieces from the frame and assemble the units as shown in the diagrams.
When you are ready, choose a scenario to play. Each scenario lists the objectives and units for both sides. It also shows a map of the battleground. Set up the game board and units as shown in the scenario diagram. After your first few games, you can even design your own scenarios!
These rules assume that you are playing with two players. Each player commands one of the two armies: the Germans or the Soviets. If more than two are playing, the units of one or both armies are divided among the players, in any manner they agree on. Regardless of the number of players in each army, they always fight as a team: Germans against Soviets.
Units and Unit Cards
Before you can command your army in battle, you will need to understand a few basics. Your army is made of "units." Each unit is represented on the game board by a model, and has a matching Unit Card with all the abilities, characteristics, and available orders for that unit.
Diagram 1: A unit and its matching Unit Card.
The Unit Card: The Front Side of a Card
The front side of a Unit Card shows all of the abilities and characteristics of the unit (numbered 1 to 10 in the diagram: 1 Unit Type, 2 Unit Symbol, 3 Unit Size, 4 Fortitude, 5 Defense Value, 6 Unit Abilities, 7 Unit Status, 8 Ammunition Supply, 9 Unit Cost, 10 Orders).
1. Unit Type
The symbol in this box tells you which type of unit it represents. Different types of units are affected by terrain and enemy attacks in different ways.
There are eight different types of units in the game: Infantry, Artillery, Vehicles, Armored vehicles, Light tanks, Medium tanks, Heavy tanks, Combat Aircraft.
When a unit model is assembled, a numbered flag is placed on the base. You must write the number from the flag in the Unit Type Box on the matching Unit Card, so it is always clear which card belongs to which unit.
2. Unit Symbol
The Unit Symbol helps you match a model to the correct Unit Card.
3. Unit Size
This shows the maximum size for a unit. All units begin the game full size. When this unit suffers a casualty, one symbol in this row is crossed out (see "Fire Tests"). When the last symbol is crossed out, the unit has been destroyed and the unit model is removed from the game board.
Diagram 2: This unit has suffered one casualty. If another casualty is inflicted on this unit, it will be destroyed.
4. Fortitude
Each unit is given a numeric value to represent the unit's overall fighting spirit: it's training, the experience of the unit commander, and the ability of the soldiers to work together. This value is called "Fortitude." A unit's Fortitude Value tells you how the unit reacts to stressful situations (see "Fortitude Tests").
- The unit's starting Fortitude Value.
- The dice you must roll to make a Fortitude Test for the unit.
- The amount of Fortitude lost each time the unit suffers a casualty.
- Current Fortitude Box: when the unit loses Fortitude, write the new value in this box.
A unit receives a bonus to its Fortitude Value if it is located near a headquarters unit (see "Unit Abilities").
5. Defense Value
Each unit has a Defense Value. This number represents the ability of the unit to avoid taking damage when an enemy attacks. It includes not only defensive equipment (such as tank armor), but also the level of training and preparation the unit has. For example, a unit of T-34 tanks with an ordinary crew will have a lower Defense Value than a unit of identical tanks with a highly trained elite Guards crew.
- The unit's base Defense Value.
- Current Defense Box: if the unit's defense value is reduced, write the new value in this box.
Defense Value is used to determine if the unit suffers casualties when it is attacked (see "Fire Tests"). Each time a unit is hit by enemy fire, the current Defense Value goes down one. When it has a Defense Value of zero when it is hit, the unit suffers a casualty instead.
Important: The Current Defense Value of all units returns to the base Defense Value at the start of each turn. Some types of orders, battlefield fortifications, and terrain types can increase (or decrease) a unit's Defense Value. Add (or subtract) all these modifiers to the unit's current Defense Value.
6. Unit Abilities
Some units have one or more special abilities that they can use on the battlefield. Complete rules for these abilities can be found in the "Unit Abilities" section of the rules.
7. Unit Status
Conditions on the battlefield can cause a unit to assume a special Status. For example, an infantry unit may mount a transport to gain the Mounted Status, or a unit might be pinned by enemy fire and gain the Suppressed Status. When a unit assumes a new Status, mark the matching Status Box on the Unit Card. When the unit no longer has that Status, remove the mark from the box.
A unit normally remains in the marked Status until its Status changes again.
A unit's Status may change some of its abilities, such as Defense Value or Firepower.
8. Ammunition Supply
The row of ammunition icons at the bottom of the Unit Card shows the maximum amount of ammo the unit can carry. Units begin the game with the full, maximum amount of ammunition.
Each icon shown on the card is one Ammunition Point. Many orders require a unit to spend one or more Ammunition Points (see "Orders"). When a unit executes one of these orders, you must mark off the correct number of Ammunition Points listed in the order description.
If a unit does not have any Ammunition Points left, it cannot make any attacks (including in Close Combat).
If a unit receives additional ammunition, erase the marks on the card to show the Ammunition Points received. Some units also have a limited supply of special ammunition, such as smoke. This supply is also shown on the Unit Card.
9. Unit Cost
This value shows the relative power of a unit in the game. You must spend a number of "Force Points" equal to this value in order to add the unit to your army. Many scenarios allow you to choose your own forces for the battle, by giving you Force Points to purchase your units.
10. Firepower and Accuracy
(Diagram labels: 1 Target Types, 2 Firepower Chart, 3 Range Diagram.)
1 - Target Types. Few units carry weapons that can harm every enemy unit. Each type of enemy that can be damaged by the unit when it attacks is shown on this chart. A unit cannot attack an enemy of a type not shown on the Unit Card. A unit type marked with an army icon can only be attacked in Close Combat.
In the example above, this unit can fire on infantry and unarmored vehicles normally. It can attack armored vehicles only in close combat, and it cannot attack any type of tank or airplane.
2 - Firepower Chart. When a unit attacks, you must determine how much Firepower the unit can bring to bear. Firepower is the number of dice you roll when the unit attacks an enemy. The chart on the Unit Card shows the Firepower the unit will use when it attacks each type of enemy unit. The first column of the chart shows the Firepower if the unit is at full strength. If the unit suffers casualties, it uses the other columns on the chart. Shift one column to the right for each casualty suffered.
In the example above, this unit would roll 10 dice when attacking an enemy infantry unit, if it was still at full strength. If the unit has suffered one casualty (i.e., one of the Unit Size symbols is crossed off), it would roll only 6 dice. A larger unit with a size of 3 would have 3 columns on the Firepower chart. The left column is used when the unit is at full strength, the middle if the unit has suffered only 1 casualty, and the right column used if two casualties have been lost.
3 - Range Diagram. This diagram shows how far a unit can attack an enemy, and how accurate the unit is at different ranges. The army symbol in the first space of the diagram shows the hex where the unit is located when it fires. The value in this space is only used in Close Combat.
The number in each space on the diagram is the Accuracy of the unit when it attacks an enemy at this range. In order to hit the enemy, you must roll the Accuracy or less on the dice when you attack (see "Fire Tests"). In the example above, only dice that show the number "1" when rolled will hit.
The die icon below the first space on the Range Diagram shows the Close Combat Ability of the unit. This is the number of dice the unit rolls when it fights the enemy hand-to-hand (see "Close Combat").
Some units, often Artillery, cannot effectively attack enemies that are too close. If an "x" appears in a hex on the Range Diagram, you cannot attack any enemy units at that range.
Note: When a unit fires from a higher elevation, its maximum range increases (see "Terrain").
The Back Side of a Card
The back of each Unit Card shows the unit type and symbol (just like the front). Beneath these symbols are a series of "Order Boxes" that show every order you can issue to this unit. You can only give an order to a unit if the right kind of Order Box is on the back of the Unit Card. Detailed descriptions of every order can be found in the "Orders" section, starting on page 7.
The Course of the Battle
A game of WORLD WAR II: Barbarossa 1941 is played over a series of turns. The number of turns played is determined by the scenario chosen before the game begins. Each turn is divided into two phases: the Planning Phase and the Execution Phase. The two phases must be completed in order. A phase is complete when all players have completed all their actions for that phase. No player can begin taking actions for the Execution Phase until all players have completed the Planning Phase.
When the Execution Phase is complete, the game turn ends and the next turn begins with a new Planning Phase.
The Planning Phase: Issuing Orders to Units
All players must secretly give orders to all of their units. Do not reveal your orders to your opponent during this phase! You may only issue one order to each unit during a turn.
To issue an order, mark the Order Box on the back of the Unit Card that matches the order you want the unit to carry out. Some orders also require you to write in additional information, such as the target of an attack. After you have written the unit's orders, place the card on the table front side up.
When all players have issued orders to all their units, the Planning Phase ends.
The Execution Phase: Carrying Out Orders
The players must now turn over all their Unit Cards to reveal the back sides, so their opponents can see all the orders given. After this moment, no orders can be cancelled or replaced!
All units now execute their orders, following the steps listed below. All units with the first order ("Defend") execute their orders before any units with the second order ("Suppression Fire") execute theirs, and so on. Orders of the same type always occur at the same time. To simplify play, the players may complete their orders by taking turns, but the effects of these actions are always considered to be simultaneous.
Example: Two opposing units are both issued "Open Fire" orders against each other. Since both attacks occur at the same time, any damage either unit suffers will not reduce its Firepower until after both attacks have been completed.
Execution Phase Sequence
The Execution Phase is divided into 12 steps. Each step must be completed before the next step begins:
- Order - Defend: All units with Defend Orders take actions.
- Order - Suppression Fire: All units with Suppression Fire Orders take actions.
- Order - Open Fire: All units with Open Fire Orders take actions.
- Fortitude Tests: Any units that suffered casualties due to enemy fire must make Fortitude Tests.
- Air Missions: Air units launch missions and air-to-air combat is resolved.
- Order - Assault: All units with Assault Orders take actions.
- Fortitude Tests: Any units that suffered casualties in Close Combat must make Fortitude Tests.
- Order - Ambush: All units with Ambush Orders take actions.
- Order - Special Orders: Any Special Orders are resolved.
- Order - Move Out: All units with Movement Orders take actions.
- Fortitude Tests: Any units that need to make final Fortitude Tests do so now.
- Update Status: Mark Time Boxes and remove marks from Order Boxes. Suppressed units check for recovery.
Rules of Engagement
These general rules apply at all times during the game, and cover how unit actions are resolved during the Execution Phase:
Fire Tests
When a unit attacks an enemy, it must make a Fire Test. Follow these steps:
- Determine Line of Sight and range to target.
- Determine the type of target.
- Determine the Firepower of the attacking unit (the number of dice to roll as shown on the Unit Card).
- Roll the dice.
- Compare the dice roll to the Accuracy value shown on the unit's Range Diagram, based on the range to the target.
- Remove any dice that roll higher than the Accuracy.
- The remaining dice are "hits."
- Reduce the Defense Value of the target unit one point for each hit, until it reaches zero.
- Any remaining hits inflict casualties (mark off one Unit Size icon for each remaining hit).
Note: If several units shoot at the same target, all hits are added together. Roll and count all hits before you reduce the unit's Defense Value and/or inflict casualties.
Important: At the beginning of each turn, the Defense Value of all units returns to its full value, but any casualties suffered are permanent!
Diagram 3: The Soviet T-26 tank platoon has opened fire on a German Pz. II tank platoon moving across an open field. The Fire Test follows these steps:
- The German Pz. II tank platoon is two hexes away from the Soviet tanks, so the range is 2.
- The Unit Type of the target unit is a light tank, so the players use the Firepower Value from the fourth row of the chart.
- Since the tank platoon is at full strength, it will roll 7 dice.
- The Soviet player rolls the dice. The values on the dice are: 1, 1, 2, 4, 4, 5 and 5.
- The Range Diagram gives an Accuracy of 2 for a target two hexes away.
- All dice that rolled higher than 2 are discarded. This leaves 3 dice (1, 1, and 2).
- Since there are 3 dice left, the tanks have scored 3 hits.
- The current Defense Value of the German Pz. II tank platoon is 2 (the number in the helmet). 2 of the 3 hits reduce this value to zero, so a 0 is written in the Current Defense Value Box.
- The third hit inflicts one casualty: cross off one of the German Pz. II tank platoon icons in the Unit Size section of the Unit Card.
Line of Sight
In order to fire on an enemy unit, you must be able to see the target. This is called "Line of Sight."
The Line of Sight is an imaginary straight line running from the center of the firing unit's hex to the center of the hex where the enemy target is located. In order to see the target, the Line of Sight cannot pass through any hexes showing terrain that blocks Line of Sight, such as buildings or hills. The terrain descriptions show which hexes block Line of Sight.
It is recommended that you use a piece of string or a similar straight object stretched between the centers of the two hexes to determine if a unit can see the target.
Diagram 4: This German machinegun unit is surrounded by a number of enemies. The white arrows show where the Line of Sight is clear (and they can fire on the enemy). The black arrows show where the Line of Sight is blocked by the terrain (they cannot fire at those units). If the Line of Sight passes along the edge of two hexes with blocking terrain, that Line of Sight is blocked.
Kill Zones
Some units have a limited area where its guns can fire. This is called a "Kill Zone," and it is shown on the Unit Card as a Unit Ability.
The Kill Zone is a cone of hexes emerging from the "front" of the unit on the gameboard. The unit can only fire on an enemy if it is located in a hex that is part of the Kill Zone. The unit cannot fire into any hexes that are outside of the Kill Zone.
If a unit shows a Kill Zone Ability on its Unit Card, that unit must be positioned on the game board "facing" one side of the hex where the unit is located. This determines the direction of the unit's Kill Zone.
Diagram 5: This machinegun unit has a limited Kill Zone. It can only shoot at units in front of it. The unit must be pointed towards a single side of its hex. The unit's Kill Zone (the colored hexes in the diagram) begins from this front hex side.
Note: If a unit does not have the Kill Zone Ability, this unit does not have a Kill Zone, and can fire on the enemy in all directions.
Flanks and Rear
(Diagram legend: Flanks, Rear, Sector of fire.)
The hex side directly opposite the one the unit is facing is the unit's "rear." All other sides are "flanks." If a unit is assaulted by an enemy coming from the rear or one of its flanks, the unit must pass a Fortitude Test before the Close Combat begins or it becomes suppressed. Also, if a unit is assaulted from the flanks or rear, it does not receive any defensive benefit from trenches.
Any unit that does not have the Kill Zone Ability is assumed to be facing in all directions at once. It does not have any flanks or rear, and all assaults attack the unit's "front." If a unit with a Kill Zone shares a hex with a unit that has no Kill Zones, the second unit is assumed to be "covering" the first unit's flanks and rear. Neither unit needs to make Fortitude Tests during an assault, and the Close Combat follows the normal rules.
Firing On a Group of Units
Due to the high concentration of targets, if three or more enemy units are located in the same hex when a unit attacks them, it is possible to hit more than one enemy unit at the same time, but only if they are the same type of unit (for example, multiple infantry units). Follow these steps when firing on a group of enemy units:
- Choose one unit as the primary target.
- Carry out a Fire Test against that target.
- When you reach step 6, take half of the dice set aside (rounded up). These dice are the Firepower value for a free attack on the next target unit (of the same type as the primary target).
- Carry out a Fire Test on the next unit (using these dice).
- When you reach step 6 of this Fire Test, again take half of the dice set aside, and use them for a free attack on the next target unit.
- And so on, until all units of that type have been fired upon, or you run out of dice that miss the current target unit. If you roll only one die on an attack, whatever the result of the roll is (hit or miss), this is the last free attack. Do not continue attacking other units in this hex.
Example: A Soviet machinegun fires on a hex occupied by four German infantry units with a Firepower of 10. The Soviets resolve an attack against the first unit and roll 6 hits, setting aside 4 dice. After that attack against this primary target is complete, the Soviet player takes half of the dice set aside (2 dice) and rolls an attack against another German unit. This time he rolls 0 hits and sets aside both dice. He now makes a third attack against a different German unit, but only using half the set aside dice (1 die). Regardless of whether he hits or misses with the third attack, he will not be able to make a free attack against the last German unit.
Close Combat
Close Combat is a fight between enemy units that occupy the same hex. A unit can only enter an enemy's hex and start Close Combat if it has the Assault Order. The defending unit does not have to be given the Assault Order to fight back.
Important: Units that have no ammunition cannot fire in Close Combat!
A unit defending against an assault chooses which of the assaulting units to attack during Close Combat.
You must follow these steps to resolve Close Combat:
- Each unit involved in the Close Combat must expend one Ammunition Point.
- Each unit in the Close Combat makes a Fire Test against the enemy unit.
- If there are enemy units together in a hex at the end of the turn, they are said to be "engaged" in Close Combat. On the next turn, these units cannot be given any new orders except Assault. Units that are engaged must continue to fight in Close Combat during future turns, during Step 6 (Assault).
Mark the Unit Cards of all units that are engaged, and the number for the enemy unit to be attacked.
Units in Close Combat
Units in Close Combat cannot be the target of fire, even by enemy units with Ambush or Defend Orders. Units in Close Combat can be the target of an Assault Order.
Infantry units can only attack armored units (Light, Medium, or Heavy Tanks) during Close Combat if the hex has Open Woodlands, Village, or City terrain.
If a Light, Medium, or Heavy Tank unit with the Tank Panic ability attacks an infantry unit in Close Combat, the infantry unit must pass a Fortitude Test before the Close Combat begins, or the infantry becomes suppressed.
Artillery units in Close Combat only roll one die for each unmarked Unit Size icon on the Unit Card (even if the artillery unit does not show the Close Combat die symbol).
Retreating from Close Combat
Units in Close Combat can retreat from the fight. You must give the unit a movement order.
Units can only retreat into an adjacent hex. When a unit retreats, the enemy unit makes its Close Combat Fire Test normally. The retreating unit does not make a Close Combat Fire Test on the turn that it retreats.
If a retreating unit suffers casualties it must make a Fortitude Test. If the unit fails the test, it still retreats to the adjacent hex, but it becomes suppressed (mark the Suppressed Status Box).
Counterassault
It is possible that two enemy units will both be ordered to assault each other on the same turn. Both units make the charge move normally until they are in adjacent hexes. Then each unit rolls one die. The unit with the higher result moves into the enemy's hex and the Close Combat is resolved (re-roll if there is a tie).
Fortitude Tests
Soldiers are not robots. As human beings, they are affected by fear, panic, and a strong will to survive, even on the battlefield. These instincts are depicted in the game by Fortitude Tests. There are a number of cases where a unit will have to make a Fortitude Test:
- When the unit is the target of Suppression Fire.
- When the unit suffers casualties.
- When an armor unit assaults the unit and causes Tank Panic.
- When the unit is the target of aerial bombardment.
- When the unit is assaulted from the rear or flank.
To make a Fortitude Test, the player rolls 2 dice. If the total value on the dice is less than or equal to the unit's current Fortitude value, the unit passes. Otherwise, the unit fails the test.
Example: The German Sd.Kfz. 251/1 halftrack unit has suffered one casualty from enemy fire, so it must make a Fortitude Test. The German player rolls 2 dice and adds the results together. The current Fortitude of the unit is 7. If the result of the roll is 7 or less, the unit passes. If the total is 8 or more, the unit fails.
Failing a Fortitude Test
If a unit fails a Fortitude Test for any reason, it immediately becomes "suppressed."
(Diagram: 1 - Suppressed Status Box; 2 - Fortitude Box flag.)
- When a unit fails a Fortitude Test, mark the Suppressed Status Box.
- If a suppressed unit is in Close Combat, the Accuracy value for its Fire Test is the value shown in the Suppressed Status Box instead of the value in the Range Diagram.
Follow these steps when a unit fails a Fortitude Test:
- Mark the Suppressed Status box on the Unit Card.
- All orders for that unit are immediately cancelled for the rest of the turn (remove the marks in the Order Boxes).
- Any bonus to the unit's Defense Value (from orders, terrain, battlefield fortifications, etc.) is lost.
As long as the unit is still suppressed, it cannot make any normal attacks. It can still defend itself in Close Combat if an enemy assaults it, but the accuracy of the Fire Test is reduced to the value shown in the Suppressed Status Box on the Unit Card.
At the start of the next turn (before the Planning Phase):
- Mark the flag in the Fortitude Box of the Unit Card.
- That unit cannot be given any orders this turn.
At the end of the Execution Phase (during Step 12), all units that have a mark on the Fortitude Box flag must make a Fortitude Test. If the unit passes, it is no longer suppressed: erase the marks from the Fortitude Box and the Suppressed Status Box. If the unit fails the test, it remains suppressed for another turn.
Hidden Units
Any unit with a mark in the Ambush Status Box is said to be "hidden." Hidden units cannot be the target of any Open Fire, Suppression Fire, or Assault Orders.
Units that can fire at a hex (such as artillery) can fire into a hex occupied by a hidden unit, and it makes a Fire Test against the hidden unit normally.
An enemy unit can "detect" the hidden unit if it is in an adjacent hex. Some units have the Spy Special Order on its Unit Card. These units can detect hidden units from farther away. If a unit is detected, it is no longer hidden: return the unit model to the map and remove the mark from the Ambush Status Box.
If an enemy unit has orders to move into or through a hex occupied by a hidden unit, it must stop moving in the hex adjacent to the hidden unit, and the hidden unit is automatically detected.
Firing While Hidden
During Step 8 of the Execution Phase (Ambush), a hidden unit can fire on any enemy unit moving within the Kill Zone (this is very similar to units with the Defend Order). If several enemy units are moving in the Kill Zone, you must choose which single enemy unit to fire on.
The ambushing unit must expend one Ammunition Point in order to attack. The ambushing unit makes a normal Fire Test when attacking, with a +1 bonus to Firepower.
If the target unit is hit (even if it suffers no casualties), it must make a Fortitude Test. If it succeeds, it must continue moving. If it fails the test, it gains the suppressed status and cannot move any further this turn.
If a hidden unit fires, it is automatically revealed: return the unit model to the board and remove the mark from the Ambush Status Box.
Time Boxes
Some orders can be executed almost instantly, such as firing a weapon. But others require a lot more time to complete. These longer orders have a number of Time Boxes in the Order Box.
An order that has Time Boxes is not completed immediately when it is first resolved in the Execution Phase. Instead, during Step 12 one of the Time Boxes for that order is marked. When the last Time Box is marked, the unit has completed the order.
If a Unit is given an order with Time Boxes, you can interrupt its action during a later turn by removing all marks from that Order Box (including all Time Boxes) and issuing a new order to that unit. But, any progress the unit made towards completing the order is lost. If you later want to attempt that order again, the unit will have to start over (with all Time Boxes empty).
Orders
During the Planning Phase, you will assign orders to each of your units. These orders will determine how the unit will act during the Execution Phase. Each unit can be assigned only one order per turn.
Defend
This order instructs a unit to defend an area of the battlefield. If any enemy unit moves in the area, the defending unit will attack. The defending unit can only fire once during the Execution Phase.
A Unit with the Defend Order must expend one Ammunition Point.
(Diagram: 1 - mark the Order Box; 2 - Defense Value bonus; 3, 4, 5 - see below.)
- Mark the Order Box to show that this unit has been ordered to defend.
- A unit with the Defend Order increases its Defense Value by the number shown.
- A unit with the Defend Order receives a Kill Zone (if it did not have one already).
- Write the hex number for the hex the unit will be facing (this determines where the Kill Zone will be).
- Write the maximum range you want the unit to fire (up to the unit's normal maximum range) - the unit will only attack if an enemy unit approaches to within this distance.
During Step 10 of the Execution Phase ("Move Out"), the defending unit can attack any enemy unit that moves inside the defender's Kill Zone, up to the maximum range chosen in the order. The defending unit makes a Fire Test as normal. If there are several enemy units with orders to move in the Kill Zone, you must choose which single enemy unit to attack.
If the target unit is hit (even if it suffers no casualties), it must make a Fortitude Test. If it succeeds, it must continue moving. If it fails the test, it gains the suppressed status and cannot move any further this turn.
Diagram 6: This Soviet infantry unit has been ordered to defend this section of the battlefield. It now has a limited Kill Zone (the colored hexes on the map). When the German truck in the Kill Zone moves during Step 10 of the Execution Phase, the Soviets will automatically open fire.
Suppression Fire
This order instructs a unit to attack an enemy unit in the hope of forcing the enemy to "take cover." If the attack succeeds, the enemy will be too disorganized to execute its orders this turn.
A Unit with the Suppression Fire Order must expend three Ammunition Points.
- Mark the Order Box to show that this unit has been ordered to suppress the enemy.
- Write the flag number of the enemy unit that will be the target of the attack.
You can only give this order to a unit if there is an enemy unit in Line of Sight and within range.
The firing unit increases its Firepower by one half (multiply by 1.5). Then, make a Fire Test as normal.
After firing, the target unit must make a Fortitude Test, even if it did not suffer any casualties. If it succeeds, there is no additional effect, but if it fails, then the unit cannot execute any orders for the rest of the turn (including any Open Fire orders).
Note: Losses are not applied until all players have completed all Suppression Fire Orders. This means that it is possible for two units to make Suppression Fire attacks against each other at the same time.
Diagram 7: This German mortar team has been ordered to lay suppression fire on the Soviet infantry across the field. The normal Firepower for the mortar team against infantry is 8, so the German player rolls 12 dice: 8 x 1.5 = 12.
After the attack is rolled, the Soviets must pass a Fortitude Test (even if they suffer no casualties) or lose their orders for the turn.
Open Fire
This order instructs a unit to attack an enemy unit.
A Unit with the Open Fire Order must expend one Ammunition Point.
- Mark the Order Box to show that this unit has been ordered to attack the enemy.
- Write the flag number of the enemy unit that will be the target of the attack.
You can only give this order to a unit if there is an enemy unit in Line of Sight and within range.
The attacking unit makes a Fire Test against the target unit.
Note: Losses are not applied until all players have completed all Open Fire Orders. This means that it is possible for two units to make Open Fire attacks against each other at the same time.
Diagram 8: A Soviet infantry unit has been ordered to open fire on a German Sturmpioniere unit. Since the target is infantry, the Soviet player will roll 10 dice in the attack. If the Sturmpioniere have also been ordered to open fire, they will make their attack simultaneously with the Soviet attack.
Smoke Screens
A smoke screen is a special kind of attack that some units (usually artillery) can make. Smoke screen attacks are made at the same time as Open Fire orders.
A Unit with the Smoke Screen Order must expend one point of Smoke Ammunition.
- Mark the Order Box to show that this unit has been ordered to create a smoke screen.
- Write the number of the hex that will be the target of the attack.
In order to make a Smoke Screen, you must have an "observer." An observer is any friendly unit that has Line of Sight to the target hex.
A unit with the Smoke Screen Order does not make a Fire Test. Instead, a Smoke marker is placed on the target hex, and on one additional adjacent hex of the firing player's choice.
Any units in a hex marked with a Smoke marker cannot execute any orders for the rest of the turn. This unit also cannot be given any orders next turn.
Units cannot move through a hex with a Smoke marker. Any unit ordered to enter such a hex does not move.
A Smoke marker blocks Line of Sight for all units.
The Smoke marker is removed from the board at the end of the following turn (Step 12).
Assault
Only units with Assault Orders can enter a hex occupied by enemy units. Use this order to have your unit enter Close Combat with the enemy.
- Mark the Order Box to show that this unit has been ordered to assault the enemy.
- Write the flag number of the enemy unit that will be the target of the attack.
- Charge Distance: This is the maximum number of hexes the unit can move before the assault.
- Charge Route: Write the hexes your unit will move through to reach the enemy hex. The hex where the assault will take place must be listed last.
See "Close Combat" for an explanation of how the assault combat is resolved.
When you give a unit Assault Orders, you must write down the exact path the unit will take.
Ambush
The Ambush Order allows you to command troops to hide so the enemy does not know their exact location.
- Mark the Order Box to show that this unit has been ordered to create an ambush.
- A unit with the Ambush Order increases its Defense Value by the number shown.
- A unit with the Ambush Order receives a Kill Zone (if it did not have one already).
- Write the number of the hex the unit will be facing (this determines where the Kill Zone will be).
- Write the maximum range you want the unit to fire (up to the unit's normal maximum range) - the unit will only attack if an enemy unit approaches to within this distance.
- Write the number of the hex that the unit occupies.
When you give a unit the Ambush Order, you must mark the Ambush Status Box on the Unit Card. Remove the unit model from the gameboard and place it on the Unit Card. The unit is still in the game, but it is now hidden from view. The unit can stay hidden (and keep the ambush status) as long as you wish, simply by giving the unit the Ambush Order every turn.
Armored Vehicles, Light Tanks, Medium Tanks, and Heavy Tanks need two turns to execute an Ambush Order. The unit gains the ambush status only after the second turn, during Step 9 (Special Orders).
If you issue any other order to a hidden unit (including movement), the unit is no longer hidden. Remove the mark from the Ambush Status Box.
Special Orders
Special Orders are usually available only to certain units. You can only assign a Special Order to a unit if that order appears on the Unit Card.
Deploy
Some units, such as artillery, need time to prepare their weapons before they will be able to attack the enemy. These units must execute a Deploy Order before they can fire their weapons.
- Mark the Order Box to show that this unit has been ordered to deploy.
- Write the number of the hex the unit will move to when it deploys (this can be the hex the unit currently occupies or an adjacent hex).
- Time Boxes: at the end of each turn, place a mark in one of these boxes. When all boxes are full, the unit has finished the Deploy Order.
Note: If a unit has Deploy as an order option, you cannot issue any attack orders (Defend, Suppression Fire, Open Fire, or Ambush) to that unit until it has completed the Deploy Order. If you later issue Withdraw Orders to the unit, it can no longer execute any attack orders (until the unit again completes a Deploy Order).
Withdraw
Some units, such as artillery, cannot move quickly from one firing position to another. Before this type of unit can move, it must execute a Withdraw Order.
- Mark the Order Box to show that this unit has been ordered to withdraw.
- Write the number of the hex the unit will move to when it withdraws (this can be the hex the unit currently occupies or an adjacent hex).
- Time Boxes: at the end of each turn, place a mark in one of these boxes. When all boxes are full, the unit has finished the Withdraw Order.
Note: If a unit has Withdraw as an order option, you cannot issue any movement orders to that unit until it has completed the Withdraw Order. If you later issue Deploy Orders to the unit, it can no longer execute movement orders (until the unit again completes a Withdraw Order).
Change Kill Zone
Any unit which is not in a trench that has a Kill Zone can use this order to change facing so that the Kill Zone covers a different part of the battlefield.
- Mark the Order Box to show that this unit has been ordered to change its Kill Zone.
- Write the number of the hex the unit will now be facing (this will determine where the new Kill Zone is).
Artillery does not have to execute a Withdraw Order before it can change Kill Zones.
Join Up
This order instructs your units in the same hex to join together. This can be done to reinforce a damaged unit.
- Mark the Order Box on both units to show that they have been ordered to join together.
You can only give the Join Up Order to units that are in the same hex. Only units of the same type (i.e., Infantry, etc.) can be joined. The total current size of both units cannot be higher than the starting size of one unit of this type.
Remove the model for one of the joining units from the gameboard, and remove its Unit Card from the game. Add the current size of the removed unit to the current size of the unit that remains on the board (erase the correct number of casualty marks). Also, recalculate the Fortitude for the new unit, based on its new size.
Diagram 9: Two damaged Soviet infantry units are sharing a village hex when they are given the Join Up Order. Unit 2 has a current size of 3, and Unit 4 has a current size of 2. Since their combined size is not higher than Unit 2's starting size (5), the units can join together. Unit 4 is removed from the game, and its size is added to Unit 2 (the two casualties marked on Unit 2's card are erased). Since Unit 2 is now at full strength, its Fortitude also returns to the starting value (8).
Place Land Mines
Land mines are used to prevent the enemy from moving through part of the battlefield. Engineer units can place land mines in the hex they occupy.
- Mark the Order Box to show that this unit has been ordered to place land mines.
- Time Boxes: at the end of each turn, place a mark in one of these boxes. When all boxes are full, the minefield is complete.
Only engineer units can place land mines. The mines must be placed in the hex the engineers currently occupy. It takes time to place land mines. The Order Box shows a number of Time Boxes. Each turn, one of these boxes is marked. When the last box is filled, you must fill out a Minefield Card:
- Force Point Cost (if you want your engineers to have mines, you must pay this cost at the beginning of the scenario).
- Fake Minefield Box: mark this box when placing a fake minefield.
- Anti-Tank Mines: mark this box when placing anti-tank mines.
- Anti-Infantry Mines: mark this box when placing anti-infantry mines.
- Minefield Location: write the hex number where the mines are placed in this box.
When you place a minefield, you must decide if the mines are designed to destroy vehicles or infantry, or if you want to bluff your opponent by placing a fake minefield.
Each engineer unit only has enough mines to place land mines in one hex during the entire game. But, the engineers can place any number of fake minefields. When placing fake mines, check the Fake Minefield Box on the matching Minefield Card.
Mine Detonation
If any unit that is not an engineer enters or moves through a hex with a minefield, the unit must immediately stop moving (any leftover movement is lost). Then the Minefield Card for that hex is turned over. It is assumed that the mines explode and cause damage to the moving unit. After the mine attack, the minefield remains in play, and can affect other units that enter that hex.
When an engineer unit moves into a hex with a minefield, it also must stop moving. The minefield card is turned over, but the mines do not detonate.
If it is a fake minefield, there is no further effect, and the Minefield Card is discarded. If it is not a fake, the minefield makes a normal Fire Test against the unit when it detonates. The minefield card shows the Firepower and Accuracy values for the minefield Fire Test:
| Target Type (1) | Anti-Infantry mines (4) | Anti-Tank mines (4) |
|---|---|---|
| Infantry | 4 | - |
| Artillery | 4 | 2 |
| Vehicles | 3 | 10 |
| Armored vehicles | - | 8 |
| Light tanks | - | 7 |
| Medium tanks | - | 6 |
| Heavy tanks | - | 5 |
(Example card: Accuracy (3) is 2; Force Point Cost 10 on the example Minefield Card.)
- Target Type: find the icon for the unit that moved into the minefield to determine the Firepower values.
- Firepower: The number of dice rolled for the Fire Test.
- Accuracy: You must roll this value or less on a die to score a hit in the Fire Test.
- Mine Type: The type of mine (anti-tank or anti-infantry) determines which column you use on the chart. Some types of units cannot be affected by some minefields. Tanks, for example, are immune to anti-infantry mines.
If a unit begins movement in a mined hex, it can only move one hex that turn (regardless of the orders received) and it detonates the mines again before it leaves.
Note: Mines don't care who you are. Any unit that enters a minefield - friend or foe - is in danger from the mines!
Detecting Mines
An engineer unit can detect the presence of enemy minefields. If an engineer unit has orders to move into a hex with your minefield, you must inform your opponent. The engineer unit stops moving (any other movement is lost) and the Minefield Card is turned over (and discarded if it is a fake). The mines do not detonate. On the next turn, the engineer unit can be given the Clear Mines Order. If an engineer unit in a minefield hex is given any other type of order, the mines detonate and attack the engineer unit normally.
Clear Mines
An engineer unit can remove mines from the battlefield, making the area safe to enter again.
- Mark the Order Box to show that this unit has been ordered to clear land mines.
- Time Boxes: at the end of each turn, place a mark in one of these boxes. When all boxes are full, the minefield is removed.
This order can only be given to an engineer unit in the same hex as a minefield. Clearing mines takes time. The Order Box shows a number of Time Boxes. Each turn, one of these boxes is marked. When the last box is full, the minefield is removed from the board (discard the Minefield Card).
If the engineer unit is given any other order before the last box is full, the mines detonate (and attack the engineer unit).
Set Charges
Engineers can use explosives to destroy structures on the battlefield.
- Mark the Order Box to show that this unit has been ordered to set charges.
- Time Boxes: at the end of each turn, place a mark in one of these boxes. When all boxes are full, the charges explode.
Only engineer units can set charges. The engineer must be in the same hex as the structure you want to destroy. The following types of structures can be destroyed in this way:
- Bridges
- Pontoon Bridges
- Permanent Fire Positions (such as bunkers)
It takes time to set charges. The Order Box shows a number of Time Boxes. Each turn, one of these boxes is marked. When the last box is filled, the charges explode. When the charges explode, the structure is automatically destroyed. Any units inside the structure are also destroyed. Remove the structure and any units inside it from the game.
Each engineer unit only has enough explosives to set charges once during the entire game.
Towing
Some units, such as artillery, cannot move around the battlefield on their own. They must be towed by transport units.
- Mark the Order Box to show that this unit has been ordered to tow another unit.
- Mark the Towed Status Box on the unit being towed.
A unit that is being towed cannot be given any orders. The transporting unit must be given all movement orders for the pair.
Only a unit that has withdrawn can be towed by another unit. Units that have deployed cannot be towed. Both the transport and the towed unit must be in the same hex when the Towing Order is given. Remove the towed unit model from the gameboard and place it on the towing unit's card to show which unit is being towed.
When you want to stop towing a unit, give the Deploy Order to the towed unit.
If the transport unit suffers casualties, the units being towed must also suffer the same number of casualties. The unit being towed suffers casualties even if the Unit Size of the transport unit is greater.
The Defence Value of the unit being towed has no effect on these casualties.
The Fortitude Test for suffering casualties is made only by the transport unit, but the results of the test also affect units being towed.
Example: The motorized convoy Zis-5, numbering 5 trucks, is towing a 45mm gun platoon with Unit Size 2. The enemy attacks the convoy, and the motorized unit suffers 1 casualty. The Unit Size of the convoy is reduced by 1. Since the convoy suffered 1 casualty, the gun platoon being towed also suffers 1 casualty (despite having a Defense Value of 1).
Though both units have suffered casualties, only the transport unit makes a Fortitude Test. The convoy fails the Fortitude Test and becomes suppressed. The 45mm gun platoon is also suppressed (and is no longer being towed - return the model to the game board). Any future Fortitude Tests are made separately for each unit.
Note: All reinforcement units with ability "Towing" can enter the battlefield only in Towed Status and only with a transport unit which will tow it.
Remove Barbed Wire
Engineer units can remove barbed wire from the battlefield.
- Mark the Order Box to show that this unit has been ordered to remove barbed wire.
The unit must be in the same hex as the barbed wire, or in an adjacent hex if the barbed wire is placed on the shared edge between two hexes.
During Step 8 of the Execution Phase, remove the barbed wire model from the gameboard.
Remove Anti-tank Barriers
Engineer units can remove anti-tank barriers from the battlefield.
- Mark the Order Box to show that this unit has been ordered to remove anti-tank barriers.
- Time Boxes: at the end of each turn, place a mark in one of these boxes. When all boxes are full, the barrier is removed.
The unit must be in the same hex as the anti-tank barrier, or in an adjacent hex if the anti-tank barrier is placed on the shared edge between two hexes. It takes time to remove anti-tank barriers. The Order Box shows a number of Time Boxes. Each turn, one of these boxes is marked. When the last box is filled, the barrier is removed from the gameboard.
Set Up Pontoon Bridge
Engineers can set up a pontoon bridge to cross a river on the battlefield.
- Mark the Order Box to show that this unit has been ordered to set up a pontoon bridge.
- Time Boxes: at the end of each turn, place a mark in one of these boxes. When all boxes are full, the bridge is complete.
- Manpower Requirement: You must give this order to at least this many units to set up the pontoon bridge.
You can only give this order to a unit that is in a hex adjacent to a river. You must assign this order to a number of units equal to the Manpower Requirement. All participating units must be adjacent to the hex where the bridge is being built.
It takes time to set up a pontoon bridge. The Order Box shows a number of Time Boxes. Each turn, one of these boxes is marked. When the last box is filled, the pontoon bridge is placed on the gameboard, crossing over the river.
Receive Supplies
Soldiers need ammunition to fight the enemy. Transport vehicles can carry extra ammunition to re-supply units in the field.
- Mark the Order Box to show that this unit has been ordered to receive supplies.
- Time Boxes: at the end of each turn, place a mark in one of these boxes. When all boxes are full, the unit is re-supplied.
A unit can only receive supplies if it is in the same hex as a friendly transport vehicle. You must issue this order to both the unit receiving supplies and the transport unit that will deliver the ammunition.
It takes time to receive supplies. The Order Box shows a number of Time Boxes. Each turn, one of these boxes is marked. When the last box is filled, the unit receives its ammunition. Erase the marks from the Unit Card's Ammunition Supply, then mark off an equal number of Ammunition Points from the transport unit. You do not have to take all the ammunition you can. You may choose to erase fewer marks from the Unit Card to save the Ammunition Points on the transport for a different unit to use later.
A unit cannot take more Ammunition than the points shown on the Unit Card.
Multiple units can receive supplies from the same transport unit at the same time, if they are all in the same hex.
Load Supplies
You can load Ammunition onto a transport unit so other units can receive those supplies.
- Mark the Order Box to show that this unit has been ordered to load supplies.
- Time Boxes: at the end of each turn, place a mark in one of these boxes. When all boxes are full, the supplies are loaded.
If a transport unit has space (i.e., some of its Ammunition Points have been marked off), you can re-load the transport unit. The transport must be in a hex on your edge of the gameboard. The scenario you are playing will tell you which hex the transport must be in. Take the transport unit model off the gameboard and place it on the matching Unit Card.
It takes time to load supplies on a transport. The Order Box shows a number of Time Boxes. Each turn, one of these boxes is marked. When the last box is filled, the unit receives its ammunition. Erase the marks from the Ammunition Supply of the Unit Card. Then, place the transport unit on any full hex on your edge of the gameboard.
If a transport unit suffers casualties, the amount of ammunition it can carry is also reduced. When the unit suffers a casualty, divide the current number of Ammunition Points on the Unit Card by the Unit Size. This tells you how many Ammunition Points are carried on each vehicle that turn. You must cross off that many Ammunition Points for each casualty suffered. Each mine counts as two Ammunition Points.
Example: The Opel Blitz motorized convoy has a Unit Size of 6 (it has 6 trucks), and is transporting 30 Ammunition Points and 3 mines. The Ammunition Points for each truck is 6: 30+2+2+2 = 36; 36/6 = 6.
Dig In
A unit can dig trenches on the battlefield to protect itself from enemy fire.
- Mark the Order Box to show that this unit has been ordered to dig in.
- Write the number of the hex the unit will now be facing (this will determine the direction the trenches will face).
- Time Boxes: at the end of each turn, place a mark in one of these boxes. When all boxes are full, the trench is complete.
- Manpower Requirement: You must give this order to at least this many units to dig trenches. The units must all be in the same hex.
A unit can only dig trenches in the hex the unit is in. You must choose which direction the trenches will face when you give the order.
It takes time to dig in. The Order Box shows a number of Time Boxes. Each turn, one of these boxes is marked. When the last box is filled, the trenches are complete. Place the trench model on the gameboard.
A unit is dangerously exposed to enemy fire when it digs in. The Defense Value of all units with the Dig In Order is reduced to zero, regardless of the terrain.
Clear a Path
An engineer unit can cut an opening through a forest to allow heavy equipment to pass through.
- Mark the Order Box to show that this unit has been ordered to clear a path.
- Time Boxes: at the end of each turn, place a mark in one of these boxes. When all boxes are full, the new path is complete.
You can only give this order to a unit that is in a forest hex. It takes time to clear a path. The Order Box shows a number of Time Boxes. Each turn, one of these boxes is marked. When the last box is filled, the path is complete. Place a Forest Path Tile on the hex. Units of both sides can now use the forest path to move through this hex.
Move Out
Movement orders are used to move units or groups of units around the battlefield. When you give a movement order to a unit, you must write down the exact path the unit will follow when it moves, on the Unit Card. During Step 10 of the Execution Phase, all units with movement orders will take their actions.
All units with movement orders move one hex at a time, following the route written on the Unit Card. Once all moving units have moved one hex, all units that still have moves to make move a second hex, and so on.
Encounters
During movement, enemy units cannot end up in the same space (that requires an Assault Order). If enemy units attempt to enter the same hex, they have an "encounter." To determine where these encounters occur, all units with movement orders must move one hex at a time: All units move one hex, then all units move a second hex, etc.
If the paths of enemy units cross, both units must stop in the last space they occupied before entering the same hex.
If the paths of enemy units meet, the units stop moving in adjacent hexes.
Group Cards
A group card represents a number of units that are moving together:
- Group Number
- Unit numbers for vehicle units in the group (maximum 3 units).
- Unit numbers for infantry and artillery units in the group (maximum 6 units).
If you have multiple units in the same hex, you can combine them into a single group to make it easy to move them on the gameboard. Remove all the unit models from the hex and place them on the Group Card. Place the matching group flag on the gameboard in that hex. Use the Group Card to record which units are included in the group.
Units can be added to or removed from a Group Card at any time. Simply add or remove the unit flag numbers from the Group Card, and move the unit model to or from the gameboard.
Each group can include a maximum of three vehicle units and six infantry or artillery units.
When a unit is part of a group, you must still give orders to the unit individually. You cannot give orders to the entire group as a whole.
An entire group can never be the target of an attack. The attacker must choose a specific unit that is part of that group instead. If the enemy assaults a unit in a group, all units in that group take part in the Close Combat, but the assaulting enemy only inflicts damage on the unit which was the target of the assault.
Movement Orders
Different types of units can be given different movement orders. Each type of movement order has its own rules:
Careful Movement
In order to avoid exposing themselves to enemy fire, soldiers prefer to use as much cover as they can when they move. This causes the unit to move more slowly.
- Mark the Order Box to show that this unit has been ordered to move carefully.
- Move Distance: This is the maximum number of hexes the unit can move in one turn.
- Defense Value increases: the defense value of the unit increases by the value shown.
When you give a unit Careful Movement Orders, you must write down the exact path the unit will take.
March
Units can be given a March Order to move quickly along a road, through villages and towns, or across an open plain.
- Mark the Order Box to show that this unit has been ordered to move.
- Move Distance: This is the maximum number of hexes the unit can move in one turn.
When you give a unit March Orders, you must write down the exact path the unit will take.
The route you choose can only include hexes that follow a road, village and town hexes, and/or hexes that show open plains. You cannot order a march movement through any other type of terrain.
If you give a unit March Orders, and all of the movement follows the route of a road (including bridges) as it is printed on the gameboard, the unit can move further than normal. The number of extra spaces the unit can move is determined by the type of unit:
| Unit | Bonus |
|---|---|
| Infantry | +1 Hex |
| Trucks | +3 Hexes |
| Armored Cars | +2 Hexes |
| Light Tanks | +2 Hexes |
| Medium Tanks | +2 Hexes |
| Heavy Tanks | +1 Hex |
If a unit with March Orders moves only along a road or through a town, it receives the bonus movement listed. You only need to write down the first and last hexes of the route moved.
Diagram 10: This T-34 unit has received March Orders and is moving along the road. After it completes the normal movement, the unit will continue moving along the road for two additional hexes. (Legend: normal movement; bonus road movement.)
Wait
A unit may remain in the same hex for the full turn without moving or performing any actions.
- Mark the Order Box to show that this unit has been ordered to wait.
Fire and Movement
Some vehicles, such as tanks, can be ordered to fire on the enemy while moving.
A Unit with the Fire and Movement Order must expend one Ammunition Point.
- Mark the Order Box to show that this unit has been ordered to move and fire.
- Move Distance: This is the maximum number of hexes the unit can move in one turn.
- Write the flag number of the target unit in this box.
When you give a Fire and Movement order to a unit, you must choose a target enemy unit that is in Line of Sight when the order is given.
The attack requires a normal Fire Test. But, because the unit is moving, the Firepower is reduced by the amount shown on the Unit Card.
The attack is made during Step 10 of the Execution Phase. When you give a unit Fire and Movement Orders, you must write down the exact path the unit will take. The hex that the moving unit will fire from must be underlined on the movement chart.
Board Transports
Some units have the ability to board transports, such as trucks, to move across the battlefield more quickly.
- Mark the Order Box to show that this unit has been ordered to board transports.
- Write the flag number of the transport unit in this box.
A unit can only board a transport that is in the same hex. You must give this order to both units.
When a unit boards a transport, remove the unit model from the board and place it on the transport unit's card. Mark the Transported Status Box on the Unit Card.
As long as a unit is on board a transport vehicle, it cannot be given any orders. Only the transport unit can be given orders each turn.
A transport unit can only carry so many men, but they can come from several units. The total combined size of all units being transported cannot be greater than the Unit Size of the transport unit.
If the transport unit suffers casualties, the units on board must also suffer the same number of casualties. You choose which of your units suffers the casualties.
Diagram 11: The motorized convoy Zis-5, numbering four trucks, is transporting a mortar platoon and a machinegun platoon. The Unit Size of each platoon is 2, so the convoy can carry both at the same time.
The enemy attacks the convoy, and destroys two trucks (i.e., the motorized unit suffers 2 casualties). Two trucks are marked off of the Unit Size on the convoy Unit Card. The units being transported must also suffer 2 casualties. The owner of the convoy chooses which units take damage: he can assign both casualties to the mortar platoon, both to the machineguns, or 1 to each.
Debark From Transports
Units that are on board a transport vehicle can leave the vehicle with this order.
- Mark the Order Box to show that this unit has been ordered to debark from the transports.
You must give this order to both units. Take the unit model for the units being transported and place them on the same hex as the transport unit. Erase the marks from the Transported Status Box of all units that debark from transports.
Combat Aircraft
Air power can have a huge impact on the battlefield. In the game, all combat aircraft follow these special rules:
Air Units
The back side of an air unit's card shows a series of "Preparation Boxes," each marked with a Roman numeral (I, II, III, IV). The preparation boxes are used when the unit is at the airfield getting ready to launch a new mission against the enemy.
There are also symbols for the orders that can be given to the unit. Like other units, air units can only be given orders which are on the back side of the Unit Card.
Before the Battle
At the start of the game, do not place air units on the game board. Instead, place them on the matching Unit Cards. These cards represent the airfield that the air units will use during the game. All air units begin the game in "standby mode," so a mark should be made in the Standby Preparation Box on the back of the Unit Card (the box with the Roman numeral IV).
Preparations at the Airfield
Air units at the airfield must be prepared before they can launch a new mission. Whenever an air unit returns to the airfield, take the model off the game board and return it to the card. Place a mark in the Landed Preparation Box on the Unit Card (Roman numeral I).
In Step 12 of the Execution Phase, place a mark in the next Preparation Box on the Unit Card (Roman numeral II). This is the only action that the air unit can take that turn. Repeat this process at the end of each turn.
You can only add one mark to a Preparation Box each turn, and you must place the marks in the correct order as shown on the card. The Standby Preparation Box is always the last box marked. You can only give orders to an air unit if the Standby Preparation Box is marked.
- I - Landed Box: this box is marked when the air unit leaves the game board.
- II - Refueling Box: this box is marked at the end of the first turn.
- III - Rearmed Box: this box is marked at the end of the second turn.
- IV - Standby Box: this box is marked at the end of the third turn.
If there is a mark in the Standby Box, the air unit can be given orders normally. This means that the air unit will need to spend at least two full turns at the airfield before it will be ready to launch a new mission.
Air Missions
Air units can perform a variety of missions, depending on the orders they are given (see below). All air missions are resolved during Step 5 of the Execution Phase (Air Missions). Air Missions are divided into four steps:
1 - Launch Aircraft. Only air units in Standby Mode are eligible for missions. When an air unit is sent on a mission, you must mark the Mission Box on the Unit Card.
When the air unit is launched, you must place the unit model on the board. You can place your air unit model on any partial hex on any side of the game board (you do not have to place them on your edge of the board - it is assumed that the aircraft are fast enough to fly over the battlefield from any direction).
You should place the matching Unit Card near the air unit model, as a reminder of what mission that unit is attempting.
2 - Plot Flight Path. Each Air Mission has a target hex. It may be the center of a patrol area, or a target for a bombing run. You must imagine a straight line from the partial hex the air unit occupies and the target hex. This straight line is called the Flight Path.
3 - Approach. Once the Flight Path has been determined, the air unit moves across the gameboard, space-by-space, until it reaches the target hex. The air unit must follow a straight Flight Path.
If the Flight Path runs through the anti-aircraft Range of any enemy anti-aircraft artillery that has been given the Defend Order, the artillery unit gets to shoot at the air unit. The artillery makes a normal Fire Test when the air unit first enters a hex within range.
Attacking an area occupied by anti-aircraft artillery is exceptionally dangerous. If an anti-aircraft unit with the Defend Order is the target of an Air Mission, or if it occupies the target hex for the mission, the artillery gets to attack the incoming air unit twice: once when it first enters range, and again when it reaches the target hex.
Also, if the Flight Path passes through an area of the game board that is protected by an air unit with the Combat Air Patrol Order, the defending unit will be able to attack the moving air unit when it first enters the patrol zone.
Note: If the Flight Path passes along the edge of the artillery shooting range or patrol zone, the air unit is still attacked by the defending unit.
Diagram 12: The Soviet anti-aircraft artillery has been given the Defend Order when the German Stuka flies overhead. If the Stuka Flight Path follows any of the black and red arrows, the artillery will be able to attack. If the Stuka takes the white Flight Path, it will not enter the artillery's range and the Soviets won't be able to attack.
See "Air-to-Air Combat" for an explanation of how combat between air units is resolved.
If an air unit suffers any casualties, the unit must make a Fortitude Test. If it succeeds, the unit continues its mission. But if it fails, the unit must immediately abort its mission and return to the airfield. The Flight Path has no effect on an air unit returning to the airfield, and defending units cannot attack the retreating air unit.
4 - Resolve Air Mission. Once the air unit has reached the target hex, it can complete its mission (see below). After the mission is complete, the air unit model remains on the target hex until the following turn. During Step 5 of the next Execution Phase, the air unit must return to the airfield. There is no Flight Path for this move, and the enemy cannot attack the retreating unit.
Exception: An air unit with the Intercept Order executes its order and attacks enemy aircraft before aircraft on the gameboard return to the airfield.
When an air unit returns to the airfield, for any reason, place a mark in the Landed Box of the Unit Card.
Important: You can only issue orders to an air unit (to begin a mission) if you have an HQ unit on the gameboard. The HQ unit must not have the Suppressed Status Box marked on its Unit Card. Most air missions require you to choose a target hex for the mission. You can only choose a target hex that is in Line of Sight of at least one of your ground units (any unit will do).
Air-to-Air Combat
Air-to-air combat takes place between opposing air units during Step 5 of the Execution Phase (after all air units have moved onto the board, but before any return to the airfield). The air units involved in the combat will continue fighting until one side or the other is eliminated or forced to return to the airfield.
Air-to-air combat takes place when:
- An air unit is given Intercept Orders.
- An enemy air unit enters the Patrol Radius of a unit with Combat Air Patrol Orders.
- If the area covered by the Patrol Radius of opposing air units overlap.
Air-to-air combat takes place after any anti-aircraft artillery is done shooting (and losses are applied).
- Mark the Air-to-Air Combat Status Box when the air unit enters combat.
- Write the number of the enemy air unit in this box.
- Write the hex number where the air-to-air combat takes place.
- Time Boxes: mark one of these boxes after each round of air-to-air combat.
Note: If an air unit is attacked by an enemy air unit, the air-to-air combat cancels its orders for the turn.
Follow these steps to resolve a round of air-to-air combat:
- The air units involved in the combat are paired off, one on one, into separate "duels." The unit with the highest Fortitude value chooses which enemy unit to fight first. If there is a tie, the right to choose is decided by rolling dice. All fighters must be engaged before any bombers, reconnaissance, or transport planes can be attacked. If you have more fighters than your opponent, you can assign your extra fighters to attack these air units. If all enemy air units have been assigned to duels, you may use your remaining fighters to "double up" on enemy units.
- Each air unit in every duel makes a Fire Test, following the same rules as ground forces in Close Combat. All attacks are simultaneous, so the effects are not applied until all units have fired.
- If an air unit suffers any casualties, it must make a Fortitude Test as normal. Headquarters units do not affect the Fortitude of air units. If the unit fails the test, it must immediately abandon its mission and return to the airfield.
- If an air unit survives the round of combat, place a mark in a Time Box on that Unit Card. If all of the Time Boxes on the Unit Card are full, the unit is low on fuel and must immediately abandon its mission and return to the airfield.
- If air units from both sides survive the round of combat, you must immediately resolve another round (starting from step 1 again). If one side (or both) are completely eliminated or forced to return to the airfield, the air-to-air combat in that hex ends.
- Each air unit involved in air-to-air combat must expend one Ammunition Point.
Once all air-to-air combat triggered by the current move is complete, the next movement step can begin.
The total duration of an air unit's mission, including any rounds of air-to-air combat and turns spent on patrol, escort, or reconnaissance duty, cannot exceed the maximum number of Time Boxes shown on the air Unit Card. If a unit reaches the maximum duration of its flight, it must immediately leave combat and return to the airfield.
Air Unit Orders
Bombing Run (Air Strike)
This order instructs the air unit to attack the enemy's ground forces.
- Mark the Order Box to show that this unit has been ordered to make an airstrike.
- Write the number of the hex that will be the target of the attack.
In order to make an Air Strike, you must have an "observer." An observer is any friendly unit that has Line of Sight to the target unit.
During Step 6 of the Execution Phase (the Assault step), the air unit attacks all units in the target hex.
Counterfire
Units that are attacked by an air unit making a bombing run can attempt to shoot the aircraft down, but only if they have been given the Defend Order. Any Counterfire against an air unit making a bombing run is made at the same time as the air unit's attack. This process is identical to Close Combat between ground units. Losses are not applied until all units have completed their assault attacks.
Intercept
This order instructs the air unit to attempt to shoot down an enemy air unit.
- Mark the Order Box to show that this unit has been ordered to intercept enemy aircraft.
- Write the flag number of the enemy air unit that will be the target of the attack.
- Time Boxes: mark one of these boxes off after each round of air-to-air combat.
Air-to-air combat is fought during Step 5 of the Execution Phase. See "Air-to-Air Combat" for a complete description. The air unit continues to carry out this order until it wins or loses the air-to-air combat, or until all of the Time Boxes are full (and the unit must return to the airfield).
Reconnaissance
Reconnaissance missions are used to locate and identify enemy units that are hidden on the battlefield, and to help guide artillery fire against them.
- Mark the Order Box to show that this unit has been ordered to fly a reconnaissance mission.
- Write the number of the hex that will be the center of the search area.
- Surveillance Zone: the maximum area the reconnaissance aircraft can see on the battlefield.
- Search Radius: the distance the reconnaissance aircraft will search. Write the Search Radius you choose in this box (it cannot be more than the Surveillance Zone value). This will also determine the die roll that is needed to successfully locate hidden units.
- Flight Duration: write the number of turns the flight will last in this box.
- Time Boxes: at the end of each turn, place a mark in one of these boxes. When a number of boxes equal to the Flight Duration are full, the mission ends and the air unit returns to the airfield.
Reconnaissance missions offer two benefits:
- Locate hidden enemies: camouflaged enemy units (in Ambush Status) can be revealed.
- Artillery tracking: units that are out of Line of Sight of your artillery can be attacked if they are spotted by a reconnaissance airplane.
When you give this order, you must determine which hex will be the center of your air unit's search. During Step 5 of the Execution Phase, move the air unit to the target hex. You must also decide what the Search Radius will be. It cannot be more than the Surveillance Zone value of the air unit. The air unit will search all hexes that are within the chosen radius of the center hex you chose for the order. The smaller the Search Radius, the more effective the search will be. The chart to the right of the Order Box shows the number (or less) you must roll on one die in order to spot a hidden enemy unit. Find the column on the chart that matches the chosen Search Radius to determine which die value you need to roll.
Lastly, you must decide how long the flight will last. You cannot choose a higher value than the number of Time Boxes on the Reconnaissance Order Box. At the end of each turn, you must check one Time Box. When a number of boxes equal to the Flight Duration you chose have been marked, the air unit must return to the airfield.
Locate Hidden Enemies
During Step 5 of each Execution Phase, an air unit with the Reconnaissance Order will attempt to locate any hidden enemy units within its Search Radius. Roll one die and compare it to the Search Radius Chart. If you roll less than or equal to the value shown, the air unit has located the enemy. All enemy units with the Ambush Status in that part of the battlefield are revealed and must be placed on the game board.
Artillery Tracking
In addition to (or instead of) locating hidden enemies, an air unit on a reconnaissance mission can also "spot" enemy targets for your artillery. Normally, artillery cannot attack an enemy unit that is not in Line of Sight. Any enemy units that are in the Surveillance Zone of your reconnaissance unit can be targeted by your artillery, even if the artillery does not have Line of Sight.
Note: All enemies in the entire Surveillance Zone can be targeted by Artillery Tracking, even if they are outside of the Search Radius of the current mission.
Airborne Assault
Transport air units can be used to "airdrop" your forces anywhere on the battlefield. This requires the Airborne Assault Order.
- Mark the Order Box to show that this unit has been ordered to make an airborne assault.
- Write the number of the hex that will be the target of the attack.
In order to make an airborne assault, you must give this order to the transporting air unit and the paratrooper unit that will be aboard the airplane. As normal, only air units currently in standby mode can be given this order.
The Unit Size of the paratrooper unit cannot be larger than the size of the transport air unit. If the air unit suffers casualties, the paratrooper unit also suffers the same number of casualties automatically.
During Step 5 of the Execution Phase, move the transport air unit model to the target space. During Step 6, the Airborne Assault takes place, and the paratrooper unit is placed on the board.
Special rules for paratrooper units can be found in the expansion set that includes those units.
Combat Air Patrol ("CAP")
Fighter air units can be assigned to patrol a certain area of the battlefield and attempt to intercept and destroy any enemy aircraft that enter the area.
- Mark the Order Box to show that this unit has been ordered to fly a combat air patrol.
- Write the number of the hex that will be the center of the patrol area.
- Patrol Radius: the distance the air unit will patrol. Write the patrol radius you choose in this box.
- Flight Duration: write the number of turns the mission will last in this box.
- Maximum Flight Duration: you cannot choose a Flight Duration higher than this value.
- Time Boxes: at the end of each turn, place a mark in one of these boxes. When a number of boxes equal to the Flight Duration are full, the mission ends and the air unit returns to the airfield.
When you give this order, you must determine which hex will be the center of your air unit's patrol. During Step 5 of the Execution Phase, move the air unit to the hex marked. You must also decide what the Patrol Radius will be. The air unit will patrol all hexes within the chosen radius from the center hex you chose for the order.
Lastly, you must decide how long the mission will last. You cannot choose a higher value than the Maximum Flight Duration. At the end of each turn, you must check one Time Box. When a number of boxes equal to the Flight Duration you chose have been marked, the air unit must return to the airfield.
If any enemy air unit moves through or executes an order within the area being patrolled by your air unit, they will automatically fight air-to-air combat.
Airdrop Supplies
Your transport air unit can fly over the battlefield and drop supplies to your forces by parachute.
- Mark the Order Box to show that this unit has been ordered to airdrop supplies.
- Write the number of the hex where the delivery will take place.
When you give this order, you must mark the supplies you want loaded on the air unit. The number of cargo units cannot exceed the maximum cargo limit of the air unit. If the transport unit suffers casualties, part of the cargo is lost (as specified on the Unit Card).
During Step 5 of the Execution Phase, move the air unit to the hex marked on the order. During Step 9, place the cargo box models in the delivery hex.
Escort a Friendly Air Unit
Fighter aircraft can be assigned to protect more vulnerable aircraft with this order.
- Mark the Order Box to show that this unit has been ordered to escort friendly aircraft.
- Write the flag number of the friendly air unit that will be escorted.
- Time Boxes: at the end of each turn, place a mark in one of these boxes. When all boxes are full, the mission ends and the air unit returns to the airfield.
Escort air units always move exactly the same way as the unit being escorted. If the air units are in range of any enemy anti-aircraft artillery with the Defend Order, both the escort and the other air units are attacked at the same time (but the defending artillery still spends only one point of Ammunition).
If the escorted air unit is attacked by enemy air units with Combat Air Patrol or Intercept Orders, the escort unit fights in air-to-air combat with one of the enemy air units. If all enemy air units are engaged by escorts, the unit being escorted continues its mission unharmed.
The Flight Duration for the escort air unit cannot be more than the Flight Duration of the unit being escorted. When the escorted unit completes its mission, or when the end of the Flight Duration has been reached, the escort unit must also return to the airfield.
Unit Abilities
Many units have special abilities that they can use during the game, or special rules that apply in some cases. These abilities are part of the unit, and are shown in the Unit Abilities section of the Unit Card.
Tank Units
Tanks are large, heavily-armed and armored vehicles with treads that allow them to operate in a variety of terrain. Tanks fall into three categories: light, medium, and heavy. All tanks have this special ability:
Destroy Barbed Wire
Tanks are far too powerful to be slowed by simple barbed wire. When a tank unit passes over a hexside with barbed wire, the barbed wire is automatically destroyed and removed from the gameboard. The movement of the tank is not affected in any way.
Indirect Fire
Some units are equipped with powerful cannons that are able to fire explosive shells over obstacles and attack hidden enemies. If an enemy unit is not in Line of Sight, but is in the unit's Kill Zone, you can still fire at the enemy unit. The Firepower is reduced by the value shown on the Unit Card because of the difficulty of attacking a target that you cannot see.
In order to make an indirect fire attack, you must have an "observer." An observer is any friendly unit that has Line of Sight to the target unit.
You may only issue an indirect fire order if you have an HQ unit on the board, and the HQ does not have the Suppressed Status Box marked.
When you make an indirect fire attack, you must expend one Ammunition Point.
Fire On Location
This attack allows a unit to target an entire hex, instead of a specific enemy unit. When you give this order, you must write the exact hex number you wish to target. A separate Fire Test is made against each enemy unit in the target hex.
Some artillery can affect a large area with a single attack. These units will show two sets of Firepower Values on their Unit Cards. The first row shows the Firepower used against units in the target hex. The second row shows the Firepower used against any units in all hexes adjacent to the target hex.
Diagram 13: This Soviet rocket launcher fires a lot of ammunition very quickly. It can affect a large area of the battlefield. If an infantry unit is in the main target hex, the Soviets use a Firepower of 16. If that infantry unit was in an adjacent hex, the Soviet Firepower would only be 4.
General Staff HQ
This unit represents the presence of important officers and their staff on the battlefield. This valuable unit has these special abilities:
Concealment
The General Staff HQ begins the game concealed. Your opponent cannot target your concealed HQ unit until he finds it, following the normal rules for detecting a unit with the Ambush Status. Do not remove the HQ unit model from the board - while Concealment works much like the Ambush Status, it is not identical.
If your HQ unit has been detected, you can conceal it again on a future turn if it moves to any other hex.
If the hex your HQ occupies is attacked, the general staff HQ is affected just like any other unit that is part of a group in that hex.
Command Area
Each HQ unit has a Command Area shown on the Unit Card. This tells you how large of an area the HQ unit can affect.
Diagram 14: This HQ unit has a Command Area rating of 2. All units within two hexes of the HQ unit receive benefits. The affected hexes are highlighted in the illustration.
All of your units that are located in a hex that is within the Command Area can use any of the following special abilities:
Adjusting Fire
Once each turn, any artillery unit in the Command Area can re-roll all dice which failed to score a hit during any Fire Test.
You can only use this ability if the target of the artillery attack is also in Line of Sight of the HQ unit. The HQ unit must not have the Suppressed Status box marked in order to use this ability.
Note:
- The General Staff HQ must have Defend or Ambush Orders to use this ability.
- Adjusting Fire cannot be used by anti-aircraft weapons that are firing on enemy air units! However, an anti-aircraft unit can use Adjusting Fire if it is firing at ground units.
- Adjusting Fire can be used against only one target unit each turn.
- Artillery units with the Suppression Fire Order cannot use Adjusting Fire.
Fighting Spirit
All friendly units in the Command Area and in Line of Sight of the HQ unit receive a +2 bonus to their Fortitude.
Call Airstrikes
Air units can only take off from the airfield if there is a friendly HQ unit on the gameboard. The HQ unit must not have the Suppressed Status Box marked on its Unit Card. If your HQ unit is destroyed during the game, you cannot launch any more air missions.
The target hex of the air unit's mission must be within Line of Sight of any friendly unit.
Infantry Units
Infantry units are made up of groups of men fighting on foot. Some infantry units have this special rule:
Tank Panic
If a tank unit assaults an infantry unit with the Tank Panic ability, before the Close Combat begins, the infantry unit must pass a Fortitude Test (see "Fortitude Tests").
Installations and Fortifications
There are many different types of structures that can be encountered on the battlefield.
Bridge
Bridges are used to allow units to cross rivers. When a unit uses a March Order to cross a bridge, it can move farther than normal. The number of extra hexes the unit can move depends on the type of unit: infantry +1, trucks +3, armored cars +2, light tanks +2, medium tanks +2, heavy tanks +1.
Bridges can be destroyed by engineer units with the Set Charges Order, or by other units that can target installations with an attack.
Destroyed Bridge
If a bridge is destroyed, turn the bridge tile over to the destroyed side. A destroyed bridge cannot be used by a unit with the March Order. An engineer unit can repair a destroyed bridge, using the same rules as setting up a pontoon bridge.
Barbed Wire
The cost of 1 piece of barbed wire is 6 Force Points.
Barbed wire must be placed along one side of a hex. Trucks and infantry units cannot cross the hexside that is blocked by the barbed wire.
Dragon's Teeth
The cost of 1 piece of dragon's teeth is 7 Force Points.
Dragon's teeth must be placed along one side of a hex. Only infantry units can cross the hexside that is blocked by the dragon's teeth.
Trench
The cost of 1 trench piece is 5 Force Points.
Trenches must be placed along one side of a hex. Trenches cannot be removed during the game, but can be built using the Dig In Order.
Defense Value: +1
A unit can only occupy a trench if it has the Defend Order. When a unit occupies a trench, you must mark the Entrenched Status Box on the Unit Card:
- Mark the Entrenched Status Box to show that the unit has occupied the trench.
- Defense Value of the unit is increased by the value shown.
Artillery units can be given the Defend Order to occupy a trench only when they are deployed.
Artillery must execute the Withdraw Order before it can leave a trench.
Note: A unit in a trench receives a total of +2 to its Defense Value: +1 for the trench, and +1 for the Defend Order. The unit may also benefit from other terrain in the same hex.
When a unit occupies a trench, it gains a Kill Zone, flanks, and a rear facing.
If a unit in a trench is given any other type of order (besides Defend), it must leave the trench and lose all benefits.
Pillbox
The cost of 1 pillbox is 20 Force Points.
A pillbox is an armored building that infantry can use as a permanent fire position. Pillboxes cannot be built during the game. If you have a pillbox in the game, the scenario will tell you. A pillbox can be placed on any terrain hex that does not also contain a river.
Defense Value: +2
If a pillbox is destroyed during an attack, all units inside suffer casualties according to the normal rules.
If a pillbox is destroyed by an engineer unit, all units inside are also destroyed.
When attacking a pillbox, Fire Tests are made separately for the pillbox and any units inside the pillbox. You must score 2 hits to destroy the pillbox.
When a pillbox suffers the first hit, remove the flag from the model. When it suffers a second hit, it is destroyed (remove it from the board).
Up to two infantry units can occupy a pillbox. A unit can occupy a pillbox only if it has the Defend Order. You must write down the number of the pillbox on the Unit Card, then remove the unit model from the gameboard.
Note: A unit in a pillbox receives a total of +3 to its Defense Value: +2 for the pillbox, and +1 for the Defend Order. The unit may also benefit from other terrain in the same hex.
Units with Withdraw and Deploy orders cannot occupy a pillbox unless they are machinegun units. Machinegun units can occupy a pillbox just like regular infantry.
Units in a pillbox gain a Kill Zone as shown in the illustration.
If a unit in a pillbox is given any other type of order (besides Defend), it must leave the pillbox and lose all benefits.
One hex cannot have more than one pillbox.
Pontoon Bridge
A pontoon bridge is a light but sturdy bridge that can be assembled quickly during a battle.
Engineer units can set up pontoon bridges using the right order. When a pontoon bridge has been completed, it can be used by any unit. It is treated as an open plain space for movement purposes.
Pontoon bridges can be destroyed by engineer units with the Set Charges Order, or by other units that can target installations with an attack.
Terrain
The battlefields of World War II were not empty featureless open spaces. Clever use of the terrain on the battlefield could often be the difference between victory and defeat. In the game, each type of terrain has its own special rules:
Plain
Plain hexes are mostly open and have little cover.
Plain hexes do not block Line of Sight.
You cannot issue the Ambush order to any unit in a plains hex.
Infantry units on a plains hex cannot be ordered to assault armored vehicles or any type of tanks.
Brush
Brush hexes are generally flat, and have many small trees or shrubs that can be used for cover.
Brush hexes block Line of Sight.
Infantry and artillery units (only) can receive the Ambush Order in a brush hex.
Infantry units on a brush hex cannot be ordered to assault armored vehicles or any type of tanks.
Light Woods
Light woods hexes are areas with small or scattered trees.
Light woods hexes block Line of Sight.
All units in a light woods hex can receive Ambush Orders.
Trucks and armored vehicles cannot enter a light woods hex (unless following a road).
All tank units lose one hex of movement when entering a light woods hex (unless following a road). The minimum movement value for a tank unit moving through light woods is always one hex.
Forest
Forest hexes are densely covered with trees.
Forest hexes block Line of Sight.
Defense Value: +2.
Infantry units (only) can receive the Ambush order in a forest hex.
Only infantry units can enter a forest hex (unless following a road). The maximum movement speed for an infantry unit in a forest is one hex per turn.
Normal attacks are not allowed into or out of forest hexes. Only Close Combat and Bombing Runs are allowed. Units in a forest with the Defense Order [sic: as printed; presumably the Defend Order] can fire on air units normally.
Swamp
Swamp hexes are full of dangerous and difficult terrain such as bogs and marshes.
Swamp hexes do not block Line of Sight.
Only special units (like a recon squad or partisan group) can enter a swamp hex.
River
Rivers are deep, flowing bodies of water that block movement.
River hexes do not block Line of Sight.
Only special units (like a recon squad or river boat) can enter a river hex.
Engineer units can build a pontoon bridge across a river hex to allow units to cross.
Road
Roads are artificial level routes that allow units to travel quickly across the battlefield.
If a unit with the March Order is moving along a road (from road hex to road hex following the route of the road printed on the gameboard), it receives a bonus to its total movement for the turn: infantry +1, trucks +3, armored cars +2, light tanks +2, medium tanks +2, heavy tanks +1.
Roads can run through any type of terrain. Units that are not following the road must use all the normal rules for the rest of the terrain in that hex.
Diagram 15: This road runs through a forest hex. A unit moving along the road can move through this hex, even if it cannot normally enter a forest (such as a truck). The unit also receives the marching bonus for following the road. If a unit occupies this hex when it is attacked, it receives all the normal bonuses for being in a forest hex (such as +2 Defense Value).
Plowed Fields
Many battles take place in farmland. Plowed fields offer little cover, and the soft earth is difficult to maneuver across.
Plowed Fields hexes do not block Line of Sight.
You cannot issue the Ambush Order to any unit in a plowed fields hex.
Infantry units on a plowed fields hex cannot be ordered to assault armored vehicles or any type of tanks.
When a unit moves through a plowed field hex, it loses hexes of movement for the turn: Infantry -1, Trucks -2, Armored cars -1, Light tanks -1, Medium tanks -2, Heavy tanks -2. The minimum movement value for a unit moving through plowed fields is always one hex.
Village
A village is an area with a few buildings.
Village hexes block Line of Sight.
Defense Value for infantry: +2.
Defense Value for other units: +1.
Units moving through a village hex follow the rules for movement along roads.
Infantry units in a village hex receive a +1 bonus to their Accuracy in Close Combat against trucks, armored vehicles, and tanks.
Town
A town is a dense area of buildings.
Town hexes block Line of Sight.
Defense Value for infantry: +3.
Defense Value for other units: +2.
Units moving through a town hex follow the rules for movement along roads.
Infantry units in a town hex receive a +1 bonus to their Accuracy in Close Combat against trucks, armored vehicles, and tanks.
Hill
A hill is any part of a battlefield that is higher than the surrounding area. On the gameboard, hills are formed by stacking one or more hill tiles on a hex. The number of tiles in the stack determines the height of the hill in that hex.
All hill hexes block Line of Sight that passes through them, but see below.
The effect of a hill on movement is determined by how steep the slope is on that hexside. The slope for a hill hexside is found by subtracting the height of one hill hex from the adjacent hex.
Gentle Slope
Height difference = 1
When a unit moves up a gentle slope, it can only move 1 hex that turn.
Abrupt Slope
Height difference = 2
Only infantry units can move up or down an abrupt slope. When a unit moves up or down an abrupt slope, it can only move 1 hex that turn.
Steep Slope
Height difference = 3 or more
Only special units (like Gebirgsjager squads) can move up or down a steep slope.
Hills and Line of Sight
Any line of sight that passes through a hill hex that is higher than either the attacker or the target unit is blocked. If the firing unit is on a hill hex, the Line of Sight is blocked for one hex behind any terrain that blocks Line of Sight, but not any hexes farther away.
Diagram 16: When the infantry unit on the hill fires, it cannot see into the forest hex or the hex immediately behind the forest. But it can see over the forest to the road two hexes behind it.
Effect of Hills on Combat
If a unit on a hill is assaulted (or engaged in Close Combat), it gains a +1 bonus to its Defense Value.
If a unit assaults an enemy on a hill in Close Combat, it suffers a -1 penalty to Accuracy.
When a unit shoots from a hill hex to a non-hill hex, the unit's range increases by one hex:
- The normal Range Chart for a unit.
- The Range Chart for the same unit when firing from a hill.
The Accuracy of all attacks from a unit on a hill are shifted one space to the right on the unit's Range Chart.
Errata
Dear Players, text below contains information for units' cards that was changed:
| Unit | New Cost |
|---|---|
| Soviet machine gun team | 12 |
| German machine gun team | 13 |
| Soviet mortar team | 15 |
| German mortar team | 15 |
| Soviet anti-tank gun 53-K | 20 |
| Soviet tank T-26 | 23 |
| German tank Pz.kpfw II | 21 |