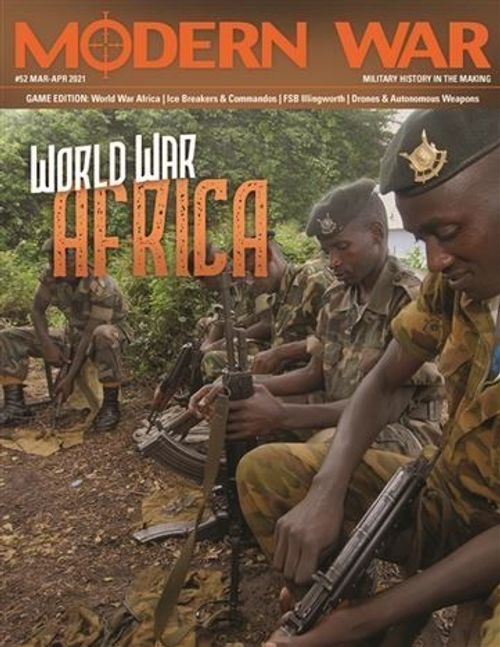
World War Africa: The Congo 1998-2001
World War Africa: The Congo 1998-2001 Rulebook
Table of Contents
Table of Contents
1.0 Introduction
World War Africa: The Congo, 1998–2001 is a simulation of the 2nd war fought over the Congo by two coalitions of African countries during the late 20th and early 21st centuries.
In the war of 1996–97, the corrupt regime of Joseph Mobutu was overthrown by a coalition of East African countries led by Rwanda. The country formerly known as Zaire was renamed Democratic Republic of Congo (DRC), and Mobutu was replaced by another Cold War era dinosaur, Laurent Kabila, at the helm of the huge, mineral-rich African country. One year later, however, Kabila's sponsors, particularly Rwanda, were not pleased. A number of issues including; the expulsion of Rwandan advisers from the DRC, Kabila recruiting Hutu combatants who had fled Rwanda, and the discrimination suffered by ethnic Tutsi in eastern DRC, moved Rwanda to try to remove Kabila from power. Supported by Uganda, Congolese rebels and the Tutsi minority in DRC, the Rwandans expected to win an easy victory, just as the year before. Kabila, however, was quickly supported by expeditionary forces of Zimbabwe and Angola, among other African countries, so overthrowing him turned out much harder than expected. The resulting conflict would involve about a dozen African countries and cost the lives of an estimated 5 million people, thus earning the name of "World War Africa", or "The Great African War".
1.1 Game Scale
Each hex on the map represents 100 kilometers from side to side. Each turn of play represents from one to three months, with 13 game turns (GT) covering the period from August 1998 to June 2001.
Ground units represent brigade, regiment and battalion sized formations. The combat aircraft units represent various numbers of sorties needed to accomplish missions over the course of a turn.
1.2 Sides
World War Africa is a two-player game. One player represents the rebels, and the other player represents various government forces. The rebel player controls a coalition of East African countries, namely Rwanda, Uganda and Burundi, and their local proxies: the MLC and the RDC. The government player controls the Congolese Armed Forces (FAC) and a coalition of African countries, including Angola, Zimbabwe and Chad, among others.
2.0 Components
The components to a complete game include these rules, one 22×34 inch map and one counter sheet containing 176 5/8-inch counters. Players will need to provide themselves with one or more six-sided dice (d6) to resolve combat and other random events during play.
Map Errata (red in the printed rules): a) Kitoma Airbase display should read Kitona Airbase. b) Players should ignore the line connecting the Zimbabwe Available Box with hex 1918.
Zimbabwe Activation Table (errata; see page 15 for the corrected table): a) Delete the limit note concerning Namibian forces at the bottom of the chart. b) The −2-die roll modifier should read Zimbabwe, not Angolan. c) The last −1 die roll modifier should read: If the Graft and Corruption event is pulled that turn.
2.1 The Game Map
There is a hexagonal grid superimposed over the map. This grid regulates the movement and combat of units. Each hexagon encompasses about 100 kilometers.
The Democratic Republic of Congo (DRC) (formerly Zaire) is the large country in the center of the map made up of regions with white borders, surrounded by other countries with red names.
2.2 Unit Counters
There are two types of cardboard counters: units, representing combat formations, and markers. The counter color scheme and faction abbreviation identify the unit's nationality.
Important: Unit type symbols for Government and Pro-Government Forces are white. Unit type symbols for Rebel Forces are red. There are five contingents (explained in 5.0) in the game.
DRC Government Forces (white unit type symbols):
- DRC Regular & Militia units (FAC): Dark Blue
- Rwandan Hutus (ALiR) and Burundian Hutus (FDD & CCR): Light Blue
- Ugandan Rebels & Lendu Forces (ADF, WNBF, Lendu): Dark Brown
- Zimbabwe (ZB): Gold
- Chad: Light Gold
- Angola (AN): Red
- Namibia (NA): Light Brown
Rebel Forces (red unit type symbols):
- Rwanda (Rw): Dark Green
- Uganda (UG): Black
- ANC and RDC: Purple
- MLC: Light Green
- Burundi (Bu): Dark Grey
Important: The back of all unit counters depict national flags used by that faction.
2.3 Counter Information
Each unit counter shows: the Nationality/Faction (colour and abbreviation); the Unit ID; the Size Symbol; the Type Symbol; the Attack Factor; the Defense Factor; and the Movement Allowance.
Unit Sizes: Unit sizes indicate the approximate functional size of combat units.
- II: Battalion
- III: Regiment
- X: Brigade
Unit Types: Infantry; Mechanized Infantry; Special Forces; Airborne; Militia; Armor.
Counter Abbreviations:
- ADF: Allied Democratic Forces. Islamic fundamentalists fighting the current Ugandan regime.
- ADR: Air Defense Regiment.
- Alb: Albatross.
- ALiR: Army for the Liberation of Rwanda (former Rwandan regular army and Interhamwe militia).
- ANC: Armée Nationale Congolaise is the military arm of the rebel forces and their Rwandan proxies.
- Apo: Apollo.
- CCR: Resistance Coordination Committee.
- CR: Commando Battalion.
- DRC: Democratic Republic of Congo.
- FAC: Forces Armées Congolaises (Congolese Armed Forces).
- FDD: Forces for the Defense of Democracy.
- HCU: High Command Unit (elite unit).
- Hor: Horizon.
- Lilo: Lilongwe.
2.4 Markers
Markers are provided as a mnemonic to track game information, provide events, and to provide on-map support for combat.
- Control Markers (3.1)
- Private Military Contractor Marker (7.9.1)
- Weapons Cache Markers (12.2)
- Random Event Markers (9.0)
- Contingent Activation Markers (5.0)
- Air Transport Marker (7.9)
- Helo Transport Marker (7.10)
- North Korean Military Advisors Marker (Foreign Advisors Event) (15.0)
- Rwandan Infiltrators Marker (8.10)
- Rwandan Air Defense Marker (12.3)
- Helicopter (Helo) & Air Support Markers (12.1)
- Contingent Replacement Point (RP) Markers (10.2)
- Game Turn (GT) Marker (4.0)
Note: Ignore the counter marking the GT marker as Government (front) and Rebel (back). See Sequence of Play 4.0.
3.0 Set-Up & Hex Control
Deploy on the map all starting Government and Rebel controlled units (3.2). All other units enter play as reinforcements during later game turns. Use the control markers provided to keep track of which side (DRC (i.e., government) or Rwanda (i.e., Rebel) controls important hexes (towns, resource towns and airfields). Players may make more control markers if needed (or use spare coins, etc.).
3.1 Hex Control
Keeping track of who controls each hex is important to trace supply and other game functions. A side controls a hex if a friendly unit occupies the hex, or if that side was the last to occupy the hex.
Important: Towns not occupied during set-up are uncontrolled until occupied by one side or the other.
3.2 Set Up
Set up instructions for each side are also provided on the back of the center player aid cards. Units must be set up in the order given by the bullet points below. If, due to previous die rolls, no more units of a given type are available to place, they are lost.
Important: Holding boxes for game functions are provided on pages 8 and 9 (player aid card pullout). Additional charts/tables not on the map are also provided there. Carefully remove those pages from the rules and then separate the two pages so that each player may utilize the appropriate holding boxes.
Government Set Up: The Government player sets up first.
- Deploy the FAC/PG infantry brigade (Bde) and up to two other FAC infantry Bdes at Kinshasa (1602).
- Roll one die (1d6) for each town or resource town in Orientale, North Kivu, and South Kivu. On a die roll (DR) of 4–6, select and deploy one of the following Rebel units:
- a) If the town is north of the equator line, select and deploy one MLC militia Bde in the town.
- b) If the town is south of the equator line, place one RDC militia Bde.
- Select and deploy one FAC (non-militia) Bde of any type in Isiro (2614) if not occupied by a rebel unit.
- Select and deploy one non-militia FAC Bde in each of the following towns: Lodja (1709), Matadi (1400), Mbuji-Mayi (1410), Bandundu (1803), Kolwezi (0712), Kananga (1408).
- Deploy five FAC militia Bdes in any of the towns listed above (including Isiro) not occupied by a rebel unit (no more than one in each town).
- Randomly pick and deploy five Rwandan Hutu (ALiR) and Burundian Hutu (FDD & CCR) infantry Bdes on or adjacent to non-rebel occupied towns in the following regions: Orientale; Kasai Orientale; North and South Kivu.
- Place all other Government & pro-government regular and militia units in the Government Units Available Box. The government player may recruit these units during later turns.
Rebel Set Up: The Rebel player sets up second.
- Place the Rw/221 and Rw/501 Inf Bdes in the Rebel Units Available Box.
- Randomly pick and deploy on and/or adjacent to Bukavu (1915) and/or Goma (2016), or in the Rebel Available Units Box all remaining Rwandan (Rw) infantry Bdes. Place 2 weapons caches in any of the above locations.
- Select two RDC militia Bdes, and randomly pick three ANC infantry Bdes. Deploy them within two hexes of Bukavu and Goma.
- Deploy on any hex adjacent to Bukavu (1915) the Burundi (Bu) infantry battalion (Btn).
- Deploy in Uganda the following units:
- The UG armor battalion (Btn) and two weapons caches.
- Two Ugandan infantry Bdes (randomly chosen).
- If available up to two MLC militia Bdes (randomly chosen).
- Place all Uganda and Rwanda Helicopter (Helo) transport markers in the Rebel Support Available Box.
- Place all other Rebel units in the Rebel Units Available Box. The rebel player may recruit these units during later turns.
Markers and Support Counters Setup
- Place the GT marker in the game turn 1 box on the Game Turn Record Track (GTRT).
- Place the following Resource Point (RP) markers on the Resource Point Track (GDT) as noted:
- Rwanda RP x1: Box 4
- Zimbabwe RP x1: Box 6
- Uganda RP x1: Box 6
- Angolan RP x1: Box 4
- DRC Gov. RP x1: Box 2
- Each player should place the North Korean Advisors, Infiltration, control, and support markers aside in a convenient place. These markers will be used throughout the game.
Event and Activation Marker Setup
- Place all 11 event markers in an opaque container. This is the Random Events Pool.
- Place the DRC Government, Angola, and Zimbabwe activation markers into one opaque container. This is the Activation Pool.
- Important: Do not put the Rwandan/RDC activation and the Ugandan/MLC activation markers in the pool during set-up; they automatically activate first on GT 1 (5.2).
4.0 Sequence of Play
Each GT is composed of three phases. Phases are further divided into segments that players must follow in strict order. Players conduct the Action Phase repeatedly until all activation markers have been drawn from the Activation Marker Pool.
Important: Prior to starting GT 1, the rebel player may choose to conduct the Kitona Coup (14.0).
Important: GT 1 begins with Phase 2, segment a) Activation Segment, following the strictures of 5.2.
1) Resources and Random Events Phase (Not on GT 1)
- a) Random Events Segment: The Government player picks at random one event marker from the Random Events Pool.
- b) Resource Points Segment: Both players determine the number of resource points (RP) they receive. Players will use RP to purchase reinforcements (10.0) during step 2.
- Certain random events markers (15.0) may alter the number of RP received.
Important: GT 1 always begins with the Rwandan/ANC activation, followed by the Ugandan/MLC activation (5.2).
2) Action Phase:
- a) Activation Segment: One player randomly draws one activation marker, activating the contingent corresponding to the marker drawn. See 5.0 Activations for more details and 5.2 for GT 1 special rules.
- b) Reinforcement Segment: The player controlling the newly activated contingent purchases reinforcements and deploys them on the map.
- Use RPs received to recruit new units or to fulfill various random event requirements.
- c) Movement Segment: The player who controls the active contingent may move any or all that contingent's units.
- d) Combat Segment: The player who controls the active contingent conducts all attacks as desired.
Important: Repeat the Action Phase by drawing another activation marker to activate the next contingent, purchasing reinforcements for it, then moving and attacking with its units. Continue to repeat the phase until all activation markers have been drawn and their respective contingents have had a turn to reinforce, move, and attack. The phase ends after the combat segment of the final activation marker has been drawn and the owning player has conducted that Action Phase.
3) End of Turn Phase.
After the last contingent has been activated and had its Action Phase, return all activation markers to the pool, then if the GT just completed was the last GT, check victory conditions and determine the winner.
Important: The Rebel player can also win at the end of any GT that he controls Kinshasa (hex 1602). See 13.2.
5.0 Activations
There are five contingents (made up of various countries and factions) in the game, three DRC Government or Pro-DRC, and two for the Rebels. Each contingent is represented by an activation marker. Each contingent within both sides activates at random. Place all five activation markers in one activation pool at the beginning of each GT (Exception: GT 1).
5.1 Activation Procedure
During the Action Phase either player may randomly draw an activation marker from the Activation Pool. Activation markers each activate one of the five contingents as follows:
Important: Each contingent contains units of more than one nationality.
DRC Government & Pro-DRC Forces (white unit type symbols): Three contingents as follows:
- DRC Regular & Militia units (FAC): Dark Blue. Rwandan Hutus (ALiR) and Burundian Hutus (FDD & CCR): Light Blue. Ugandan Rebels & Lendu forces (ADF, WNBF, Lendu): Dark Brown.
Important: The Government player will receive ADF, WNBF, and Lendu units by random event only (9.0 & 15.0).
-
Zimbabwe (ZB): Gold. Chad: Light Gold.
-
Angola (AN): Red. Namibia (NA): Light Brown.
Rebel Forces (red unit type symbols): Two contingents as follows:
-
Rwanda (Rw): Dark Green. ANC and RDC: Purple. Burundi (Bu): Dark Grey.
-
Uganda (UG): Black. MLC: Light Green.
5.2 Automatic Rwandan/Ugandan Activation GT 1
The Activation Phase of GT 1 begins automatically with the Rwandan/RDC activation marker. After the Rwandan/RDC activation is complete, proceed with the Uganda/MLC activation. Then players continue with the standard procedure for the remaining three activations in the pool for the remainder of GT 1.
5.3 Zimbabwe Activations
When a player draws the Zimbabwe activation marker, roll 1d6 on the Zimbabwe Activation Table.
- Active random events may modify the DR (15.0).
- Before rolling the dice, the Government player may expend one RP from the DRC RP total to modify the DR.
- If the modified DR is less than one, use the 1–2 line (Zimbabwe Activation Chart).
- The row corresponding to the modified die roll dictates the number of units of each type to activate that GT.
- If the number rolled is more than the number of land units on the map, additional available units can enter the map from the Zimbabwe Available Box as per 10.0, 10.1 and 10.2. The player may activate the Chadian unit with Zimbabwe units.
- If the number rolled is less than the number of land units currently on the map, the Government player must flip the number of units over (showing their flag side) equal to the difference. Those units cannot perform any movement nor may they attack. They do defend normally.
5.4 Angolan Activation
When a player draws the Angolan activation marker, follow the same procedure listed in 5.3, except use the Angola Activations Table. The Namibian unit may activate with Angolan units.
6.0 Stacking
Having more than one friendly unit in a hex at the same time is stacking. Stacking limits vary by terrain type and are listed on the TEC in terms of units. Each unit in the game, no matter its nominal organizational size, is one unit for stacking purposes.
6.1 When Stacking Applies
Stacking limitations apply for all units of both sides at the end of each Reinforcement, Movement and Combat Segment.
- A friendly unit or stack may never enter or stack in a hex containing an enemy unit or stack.
- Friendly units may move through hexes occupied by other friendly units at no extra cost.
- There is no limit on the number of friendly units that may pass through a single hex or cross a single hexside in one Movement Phase.
- If, however, at the end of any friendly or enemy Reinforcement, Movement or Combat Segment a hex is over-stacked, the owning player eliminates the excess units.
- Different contingents cannot stack together, at the end of any phase or segment.
Exception: DRC regular and militia units may stack with any other contingent on the Government side (2.2).
6.2 Free-Stacking Units
Air support and other markers have no stacking values. Players may add such markers to any hexes if the rules for their use require it.
6.3 Stack Movement
To move as a stack, units must begin their movement already stacked. There is no requirement for units to move together because they started the Movement Phase in the same hex. In such situations, players may move them together, individually, or in smaller sub-stacks.
6.4 Splitting Stacks
A moving stack may halt temporarily to allow a unit or sub-stack to split off and move away on a separate course.
- The units left behind in the original stack may then resume their own movement, even splitting off another unit.
- Once a unit or stack starts moving, players must complete a unit/stack's movement before moving another unit/stack.
6.5 Different Movement Allowances in a Stack
If units with different movement allowances (MA) are moving together in a stack, the stack must use the MA of the slowest unit. Players may drop off slower units.
7.0 Movement
Each unit has a movement allowance printed on it. A unit's MA is the number of movement points (MPs) a unit may expend in any one Movement Segment.
- Move units tracing a path of contiguous hexes through the hex grid. Do not skip hexes.
- Players cannot save a unit's MA from one GT to another, nor may any unit lend or give MA to another unit.
- A unit may use none, any or all its MA.
- No enemy movement takes place during the activation of a given contingent.
Important: If a unit attempts to expend more than one-half of its MA in any given Movement Segment, 7.7 applies.
7.1 Movement Restrictions
- Ugandan (UG) units may only move in or attack into the North Kivu, Bandundu, Orientale and Equateur regions of the DRC.
- Rwandan (Rw) units may only move in or attack into DRC hexes south of the 23xx hex row (i.e., the Equator).
7.2 Minimum Movement
All units may always move at least one hex per Movement Phase of their side. However, units may never enter prohibited hexes.
7.3 Terrain
To enter any given hex a unit must spend the number of MP designated by the TEC for the kind of terrain in it. When the TEC calls for an MP expenditure to cross a hexside such as a river, that cost is in addition to the cost for entering the hex.
TEC Errata: Lakes/lake hexsides were omitted from the TEC. Ground units may not cross lake hexsides.
7.3.1 Road Movement
A ground unit that moves from one road hex to an adjacent road hex along a road that connects the two hexes via their common hexside. Units moving along roads pay the road movement cost listed on the TEC.
7.4 Multiple Terrain Types
If there is more than one terrain type in a hex, use the highest single movement cost from among all the terrain involved.
Important: A hex may contain terrain that is allowed for the type unit but may also contain prohibited terrain for that type of unit (i.e., mechanized unit and swamp). In such a case the terrain is prohibited.
7.5 River Hexsides
Units pay the movement cost of a river hexside when crossing a river or lake hexside. That cost is in addition to the in-hex terrain cost of entering the next hex.
7.6 Riverine Transport
Non-armor/non-Mech units adjacent to navigable rivers (lakes are not navigable for the purpose of this rule) may use riverine transport to move to any other hex adjacent to a navigable river hex at no cost in MPs. No more than 1 unit per Movement Segment may use riverine transport.
River hexes to the west of the navigable river limit symbol on each river are navigable.
Important: A unit using riverine transport must start and end its movement adjacent to the navigable river. It cannot conduct any other movement.
Important: The below are the only navigable rivers: a) The Kasai River is navigable from Bandundu (1803) to hex 1407/1408. b) The river running along the Congo/Central African Republic is navigable from hex 1600 to 2605/2704. c) The Sankuri River is navigable from 1607 to 1110/1111.
7.7 Expending Excessive Movement Points
During their respective activation, units may normally expend up to one-half (after adjusting for supply) of their MA (rounded up).
- Prior to moving a stack of units (or single unit if in a hex alone), if the owning player desires to spend more than one-half of its MA, the owning player must roll 1d6 (roll once for a moving stack).
- On a DR of 1–2: double the movement cost of entering each subsequent hex.
- On a DR of 3–6: the movement cost of each subsequent hex remains the same.
Important: Apply a die roll modifier (DRM) of −1 on rainy season GTs.
Designer's Note: The Congo was (is) one of the worst-connected, most dysfunctional countries in Africa, which is the same as to say one of the most dysfunctional countries on Earth. It has almost no all-weather roads, and a large part of the country is swamp and rain forest. Even today, in peacetime, a truck may take three weeks to cover 1,000 km. During a civil war, it took much longer. Air and riverine transport are the only reliable means to move civilian and military personnel and cargo.
7.8 The Rainy Season
Rainy season GTs may affect transportation, combat and counterinsurgency operations.
- The Equator divides the country in two halves along the 22xx hex row.
- When the GTRT indicates Rainy Season: North, it means that it is the rainy season north of hex row 22xx.
- When the GTRT indicates Rainy Season South, it means that it is the rainy season on the 22xx hex row and southwards.
7.8.1 Effects of Rainy Season Turns
- Apply a −1 DRM to movement DRs (7.7).
- Terrain types may have different movement costs during the rainy and dry season (TEC).
Note: A player may choose non-road movement even if moving from one road hex to another.
Important: This DRM applies when attempting to intercept guerrillas in the Rwanda Box, if it is a Rainy Season South GT (7.11).
Designer's Note: The Congo's climate is extremely hot and humid, with very frequent and heavy rains north of the Equator (April–November). South of the Equator, the rainy season occurs from October–May.
7.9 Air Transport
During a contingent's Movement Segment, units of the active contingent may use air transport markers to move from one hex to another. Any marker that has the word Transport on it may do this.
- Units may combine ground movement and air transport during the same GT.
- Air transport expends one MP.
- Each air transport marker can transport one unit from one friendly controlled airfield to another friendly controlled airfield. After the transport, move the marker from the player's Support Available Box to the Used Box.
Exception: See 7.10 for restriction on helicopter transport.
- Rainy season turns do not affect air transport.
- Weapons caches count as one unit for air transport purposes.
- Contingents may only be air transported by specific contingent air transport.
- a) Zimbabwe air transport may transport Zimbabwe and DRC non-militia units.
- b) Rwanda air transport may transport Rwanda units.
- c) Angolan air transport may transport Angolan/Namibian and DRC non-militia units.
- d) PMC air transport may transport non-militia units from any contingent.
7.9.1 PMC Air Transport
Both sides may contract PMC air transport. Players must use PMC transport the game turn of purchase. If not used, they are removed from the Available Box and are available for re-purchase the next game turn.
- The procedure is the same for both sides.
- Before purchasing PMC air transport, roll 1d6 to determine the RP cost for the PMC transport.
- On a DR of 1–3: expend 1 RP for every PMC air transport marker purchased.
- On a DR of 4–6: expend 2 RPs for every PMC air transport marker purchased.
- The number of PMC air transport markers (three) is the maximum limit usable each GT.
- Place purchased PMC air transport markers in the appropriate side's Support Available Box until used, or the end of the game turn.
Designer's Note: PMC air fares may go up or down depending on demand, associated risks and other highly volatile factors.
7.10 Helicopter Transport
Helicopter transport is identical to air transport with the following exceptions:
- Only non-armor/non-mech units may use helicopter transport to move.
- Helicopter transport can transport one non-armor/non-mech unit from any non-enemy occupied hex to any other non-enemy occupied hex. Units may not embark nor land in an EZOC.
7.11 The Kitona & Rwanda Boxes
None of the countries surrounding the DRC are playable. However, players may send and/or operate units into the Kitona and Rwanda boxes.
Exception: See below for units entering and exiting the Rwanda Box. Units may not attack out of or into hexes within Rwanda.
Important: Hex 1918 is the Rwanda Box.
Kitona Box: If using special rule 14.0, the Rwandan player may airlift units into the Kitona Airbase Box or may move directly from hex 1400 to the box. Rwanda units in the Kitona box may enter the map through hex 1400 and operate normally. Units entering or exiting the box from/to hex 1400 expend one MP to enter or exit the Kitona Box.
Rwanda Holding Box: Rwandan (Rw), Rwandan Hutus (ALiR) and Burundian Hutus (FDD & CCR) units (only) may enter the box.
- a) Rwandan and Burundian Hutu units may enter normally into the box through from any adjacent hex in Rwanda. Rwandan units can be airlifted from the holding box (by helicopter or PMC air) to any Rebel controlled town on the map.
- b) Rwandan and Burundian Hutus units in South and North Kivu hexes (only) may try to enter the Rwanda Box during their respective Activation Phase. Roll 1d6 for each Hutu unit. Add +1 if it is within two hexes of a Rwanda border hexside. On a modified DR of 6, the unit has successfully entered Rwanda.
Example: One Hutu unit in hex 1714 tries to infiltrate Rwanda. Since it is more than two hexes from the Rwanda border, no modifiers apply. The GOV player rolls a 6, so the infiltration is successful. Place the Hutu unit in the Rwanda box. Any Rwandan units may try to intercept and destroy it during subsequent turns.
7.11.1 Rwandan Hutu Holding Box Combat
If both Hutu and Rwandan units are present in the Rwanda Box when activating Rwandan units, the Rwandan units can attempt to intercept and attack the Hutu units.
- The Rebel player must roll 1d6 before resolving the attack. Modify the DR as follows:
- +1: The Rebel player commits a helicopter support unit (12.1).
- −1: It is a rainy season (south) GT (7.8).
- Consult the COIN Table (on the map). There are two results; 'No Intercept' and 'Combat'.
- If the modified result is 'No Intercept': nothing happens, both sides remain in the box.
- If the modified result is 'Combat': the Rebel player must initiate combat. Resolve the combat normally using the procedures in 8.0. The terrain in the Rwanda Box is Savannah.
Important: The Government player earns VPs by having Hutu units in the Rwanda Box (13.0).
COIN Table (7.11.1) (Pullout 9):
| Die Roll | Result |
|---|---|
| ≤ 4 | No interception (nothing happens) |
| 5–7 | Combat (resolve combat normally) |
- +1 if the Rwandan force commits a Helicopter support unit.
- −1 on rainy season (South) turns.
8.0 Combat
Combat takes place between opposing units during the Combat Segment.
8.1 Combat & Multiple Defenders
A player may attack an enemy occupied hex in one Combat Segment with as many units as can be brought to bear from one, some or all the surrounding hexes. No more than one hex may be the object of a single attack.
8.2 Indivisibility of Units
No single unit may have its combat factor divided and used in more than one battle.
- No attacking unit may attack more than once per Combat Segment, and no defending unit may suffer an attack more than once per Combat Segment.
- During the Action Phase, a unit can may be the subject of an attack in each enemy contingent's Combat Segment.
- No defending unit may decline combat.
8.3 Attack Sequencing
There is no limit on the number of attacks each player may make during a Combat Segment. He need not declare all his attacks beforehand and he may resolve them in any order he wishes. He must resolve one attack before initiating another attack.
8.4 Stacks Attacking
Units stacked need not participate in the same attack. Units stacked in a hex might attack into one hex with part of the units while others attack different hexes, or do not attack at all.
8.5 Fog of War
Players may not look beneath the top unit of enemy stacks before resolving an attack. A player may not call off an attack once the odds are known.
8.6 Combat Procedure
Conduct each combat using the following procedures.
- Determine participating attacking units and designate the hex under attack.
Important: Units with an attack strength of zero may only attack if at least one unit with an attack strength of one or greater participates in the same attack.
- Attach air support (fixed wing, helicopter) and weapons caches (attacker first, defender second).
- Add the attack factors of the attacking units and their supporting units (air, helo).
- Add the defensive factors of the defending units.
- Calculate odds ratio by dividing attacking factors by defensive factors and rounding down as needed to obtain one of the ratios listed along the top of the Combat Results Table (CRT).
Example: 8 attacking factors versus 4 defending factors. 8/4 = 2, which means a 2/1 odds ratio.
- Using the column of the CRT corresponding to the ratio determined in step 5, apply any column shifts required by the terrain in the defender's hex or the hexsides between the attacking and defending units.
Example: If the defender is in a swamp hex, move one column leftward on the CRT.
- Roll 1d6 and apply any die roll modifiers.
- Cross-reference the result with the corresponding column ratio on the Combat Results Table (CRT).
- Apply results.
8.7 Combat Results
Results are listed as a #/#. The number to the left of the slash are the attacker's losses and the number to the right of the slash are the defender's losses.
- Each loss requires the elimination of one ground unit.
Example: 3/0 requires the attacker to eliminate 3 units while the defender takes no losses.
- Place eliminated units in the appropriate player's Eliminated Units Box. Players may rebuild their own eliminated units with RPs. Rebuilt units may enter play on later turns.
Important: There are no retreat results.
8.8 Combat Modifiers
See the TEC to determine the number of column shifts awarded for terrain.
Important: If a hex contains more than one terrain type the defender may choose the type of terrain to be used.
- Combat DRs are subject to modification.
- Die roll modifiers (DRMs) are cumulative.
- To receive the one left column shift for a river, all attacking units must be attacking across river hexsides.
Important: Units may not attack across prohibited hexsides.
8.9 Advance after Combat
If an attack eliminates all defending units, the attacking player may move any or all attacking units into the newly vacated hex. This movement does not cost MPs.
8.10 Rwandan Rebel Infiltration Markers
Rwandan units only may use the infiltration marker against DRC government forces.
- The Rebel player may use the infiltration marker any number of times during each Rwandan Combat Segment.
- When using the infiltration marker, attacking Rwandan forces may receive a DRM. Only one attacking unit need be Rwandan.
- Roll 1d6.
- On a DR of 1: the marker generates no die roll modifier.
- On a DR of 2–5: the marker adds a +1 DRM.
- On a DR of 6: the marker adds a +2 DRM to the Rwandan combat die roll. No more than 1 infiltration marker per combat. Use infiltration when attacking only (not on the defense).
Historical Note: During the two Congo Wars (1996–97 and 1998–2001) the Rwandans made extensive use of infiltration tactics. Their troops were adept at infiltrating enemy held towns, identifying key targets and reporting on the morale and deployment of the enemy, then attacking from within when the offensive started. This tactic was particularly effective against poorly trained militias.
9.0 Random Events
At the beginning of each GT (Exception: GT 1) the government player randomly draws one event marker from the pool and applies the result. Random events are always applied in the GT they are drawn. They cannot be held for use in a later GT. See the Random Events List at the end of the rules for a detailed explanation.
Important: Event markers may be returned to the pool and drawn again in a later turn; others are removed from the game the first time they are drawn.
10.0 Reinforcements
Reinforcements are units that enter the game after play has begun.
- Players may not purchase more units than those available in the counter mix.
- Use resource points (RPs) to purchase/build new units.
- Unspent RP may be accumulated from turn to turn.
Designer's Note: Accumulating RPs yields VPs for the Rebel player at the end of the game, so it is advisable to do so.
- The maximum RP a contingent can have at any given time is 13. Do not accumulate RP beyond this limit.
10.1 Purchasing Units
Government and Rebel eliminated units may return to play as reinforcements.
Exception: The Government player may not rebuild the Chadian, Namibian, WNBF, ADF and Lendu units (10.2.1). The Rebel player may not rebuild the Burundian unit.
- Players spend one RP for each combat unit, helicopter, air support or air transport marker.
- Rwandan Air Defense Regiment (ADR) and weapons cache markers cost 2 RP. See 7.9.1 for cost of purchasing PMC transport.
- The RP must come from the appropriate Contingent.
- Deploy units in accordance with the Reinforcements Deployment Chart.
- RP may purchase a unit in the force pool or purchase a weapons cache.
- Place support markers in their side's Support Available Box.
Important: Players may only place reinforcements in an EZOC if a friendly unit occupies the hex.
10.2 Replacement Points
During the Resources and Random Events Phase, determine the number of RP each contingent on each side will receive for that game turn.
Important: Players may carry over unspent RP from GT to GT.
- Contingents may receive additional RP (listed in 10.2.1 through 10.2.4).
- Then for each resource producing town controlled by that side (any contingent), the player will consult the Resource Points Chart (on the map) and roll 1d6.
- Modify the DR by the following DRMs and cross reference the modified DR with the number of RP received for that town. If the modified DR is less than one, use the one line; if it is greater than six use the six line.
- Presence of enemy units within two hexes of that town: −1.
- Graft and Corruption event played: See Event.
- Coltan Rush event: +3.
10.2.1 DRC Contingent
The Government player receives 4 RPs per turn (DRC Gov) in addition to those RPs generated by Government controlled towns.
- The player may use DRC Government RPs to recruit FAC, ALiR, FDD and CCR units.
- Randomly pick units. Create one group for FAC units and one for ALiR, FDD and CCR.
- A player may only rebuild one Hutu unit (Rwandan (ALiR) or Burundian (CCR, or FDD)) per GT. Hutu units can only be placed in towns controlled by a DRC contingent.
- Ugandan Rebels and Lendu forces (WNBF, ADF and Lendu) enter play via random event (only). The Government player may not rebuild these units if destroyed.
- RP may modify the activation die roll of Angolan and Zimbabwe forces (5.3 & 5.4).
10.2.2 Zimbabwe/Chad Contingent
- On GT 1, Zimbabwe (ZB) units received that turn may enter the DRC through hexes 0712 and/or 0714 (Lubumbashi). They can also use air transport capability to land at Kinshasa (1602).
Important: The DRC player can select the type of units arriving.
- On all other GTs, place Zimbabwe units in the Zimbabwe Available Box. They may enter the map through hexes 0712, 0713 or 0714.
- Zimbabwe receives one-half (round down) the total number of RP garnered by government control of resource producing towns in 10.2.
10.2.3 Angolan/Namibia Contingent
- On GT 1, Angolan (AN) units received that turn may enter the DRC through any Angolan non-lake border hex. They function normally.
- On all other GTs, place Angolan units in the Angolan Available Box. On the GT they are placed in the box (or any later GT), they may enter the DRC through any Angolan non-lake border hex. They may expend one-half of their printed MA. Angolan units may also enter at hex 1400, however they may not move beyond hex 1400 the game turn of arrival.
- Players may not rebuild the Namibian (NA) unit if destroyed. Once eliminated, it cannot return to play in any way.
- Angola receives one-half (round down) the total number of RP garnered by government control of resource producing towns in 10.2.
Example: It is GT 3. There are 4 Angolan land units on map. The GOV player rolls a 6 for Angolan activation, so they can deploy 6 land units. Place the two additional units in the Angola Available Box.
10.2.4 Rebel Contingents
Rebel forces follow the procedures outlined in 10.2 with the following exceptions.
- During the RP collection phase, the Rebel player rolls 1d6 for every RP producing town controlled by each individual contingent.
- The Rwanda contingent receives 2 additional RPs per GT.
- The Ugandan contingent receives 3 additional RPs per GT.
Example: The Uganda contingent controls the RP-producing town of Isiro (2614). The Rebel player rolls one die. No modifiers apply this turn. The die roll is 4, so Uganda receives that turn 2 RPs from Isiro, in addition to 3 RPs per turn.
- The Rebel player randomly selects all reinforcements from each contingent.
- ANC and RDC units arrive in any towns controlled by the Rwandan contingent.
Important: The player may not rebuild the Burundian unit.
11.0 Zones of Control & Supply
The zone of control (ZOC) of a unit is the six hexes surrounding the hex occupied by that unit.
- Every ground unit exerts a ZOC.
- Support units do not exert zones of control.
- Units entering an enemy zone of control (EZOC) must stop if the enemy unit is in a town. Otherwise, the unit may continue its normal movement, subject to normal terrain and weather restrictions.
- Units that begin their movement in an EZOC of an enemy unit in a town, may move directly from that EZOC into another hex containing an EZOC.
- Friendly units do not negate an EZOC.
Exception: Players may place reinforcements in EZOC, if occupied by a friendly unit.
11.1 When to Check Supply Status
Movement: Check the supply status of each unit/stack prior to moving the unit(s). If found out of supply, they are out of supply for the entire Movement Phase.
Combat: Check supply status prior to each combat (both attacker and defender).
11.2 Supply Lines & Sources
Units need to trace supply to a valid supply source to operate at full strength.
- Supply lines can be of any length.
- Players cannot trace supply through enemy units, EZOCs or hexes not located in the DRC.
- Contingents must trace supply to, or be in, hexes that are supply sources. See Supply Source Chart at end of rules.
Important: If an on-map location is a supply source, it must be friendly controlled (3.1).
Supply Source Chart (Pullouts 8 and 9):
| Contingent | Supply Source | Automatically in Supply if in: |
|---|---|---|
| DRC Government & Pro-DRC Forces: | ||
| 1) DRC Regular & Militia Units (FAC) | Kinshasa (1602) | n/a |
| Rwandan Hutus (ALiR) & Burundian Hutus (FDD & CCR) | Kinshasa (1602) | North Kivu & South Kivu |
| Ugandan Rebels & Lendu Forces (ADF, WNBF, Lendu) | Kinshasa (1602) | n/a |
| 2) Zimbabwe (ZB) & Chad | Hexes 0712 Through 0716 or any Hex in Zambia | n/a |
| 3) Angola (AN) & Namibia (NA) | Any Angolan Border Hexes | n/a |
| Rebel Forces: |
11.3 Out of Supply Effects
Units that are out of supply suffer the following effects:
- Halve all attack and defense factors (round down but never below one).
- Halve the movement allowance (round down but never below one).
12.0 Support Markers
The Government and Rebel players may use air, helicopter, ADR and weapons cache support counters to support their forces in combat. Players may only use a given support marker once per turn.
Important: Move used support units to their respective Support Used Box. They are available for purchase and return to the Support Available Box the next GT.
12.1 Helicopter & Air Support Units
Players must determine if they are going to use support units before determining the final combat odds. Helicopter and air support markers:
- Have an unlimited range, players may use them in any hex.
- Can only support units of their own Contingent.
- A player may use a maximum of two helicopter/air support markers in each combat.
- First the attacker, then the defender declares whether he will use support markers in each combat (this includes weapons cache markers).
- Helicopter and air support units add their combat factors to the supported units' total.
- The total helicopter and air unit support factors used for each side cannot be higher than the total of that side's ground combat factors.
Example: 1 air support unit (+2) and one helicopter support unit (+2) supports a stack totaling 3 defensive combat factors. Since the supporting units add to 4, the defenders can only use 3 defensive support factors.
Important: Players may use the Rwandan helicopter support unit to increase the chance of interception in the Hutu Holding Box (7.11.1). If used in this manner that GT it may not support possible resulting combat in the box.
12.2 Weapons Cache Markers
Weapons cache markers represent the stockpiling of ammunition and additional heavy weapons.
-
Unlike units or other markers, a player purchases and deploys weapons cache markers during the Reinforcement Segment of each activation. Each marker requires 2 RP.
-
Deploy these units using the Reinforcements Deployment Chart like any land unit.
-
Any contingent may purchase weapons cache markers. The markers can support any contingent a player stacks them with.
-
The number of weapons cache markers in the counter mix is the maximum number of cache markers that can be on the map at any one time.
-
Weapons cache markers cannot move by themselves. Players may transport them by using any ground combat unit, or by air/Helicopter transport. Each combat unit or air/helicopter transport may transport one weapons cache marker.
-
After declaring all other support marker use in a combat, the attacking and defending player may utilize a maximum of two weapons cache markers (each player) that are stacked with their respective forces.
-
Each weapons cache marker provides one die roll modifier to the owning side (+1 to the attacking side, −1 to the defending side).
-
If a player uses a weapons cache to support a combat, remove the cache and return it to the appropriate Used Support Available Box. It is available for repurchase by the owning player during the next GT.
-
If a combat result eliminates all units in a hex, the owning player removes all unused weapons caches in the hex.
-
If a combat unit enters a hex containing a weapons cache marker, the combat unit automatically captures the cache.
12.3 Rwandan Air Defense Regiment (ADR) Marker
The player may use the ADR unit to provide air cover for Rwandan units or stacks containing Rwandan and RDC units. Use the ADR exactly like an air support unit (12.1), with the following difference.
- When declared for use, the owning player rolls one die.
- If the result is 1 through 3, the ADR cancels one enemy helicopter or air support marker (Rebel player's choice).
- If the result is 4 through 6, the ADR cancels two enemy helicopter or air support markers. Return the markers to the Support Used Box.
13.0 How to Win
At the end of GT 13, tally the number of victory points achieved by the Rebel player.
- If the Rebel player has gained 12 or more VPs, he is the winner.
- If the Rebel player has gained 11–9 VPs, the game is a draw.
- Any other result is a Government victory.
13.1 Rebel Victory Points
The Rebel player receives victory points for the following:
- +1: For each Rebel controlled town or resource town within the DRC.
- +1: If there are four or fewer Hutu units on the map (not including the Rwanda box hex 1918).
- −1: If there are any Hutu units inside the Rwanda box (hex 1918).
- +1: If Rwanda has 10 or more RPs available at the end of the game.
- +1: If Uganda has 10 or more RPs available at the end of the game.
13.2 Kinshasa Automatic Victory
If the Rebel player controls Kinshasa (1602) at the end of any GT, the Rebel player is the winner.
14.0 The Kitona Coup
Prior to starting GT 1, the Rebel player may declare the Kitona Coup gamble.
- If the Rebel player conducts the coup, he may airlift one Rebel unit (from anywhere on the map) to the Kitona Airbase Box. To determine the result of the coup, the Rebel player rolls one die.
- a) If the result is 1 through 3: the Rebel player selects one RDC militia brigade and places it in the Kitona Airbase Box.
- b) If the result is 4 through 6: the Rebel player selects one ANC infantry brigade and places it in the Kitona Airbase Box.
- c) The Government player may not use the Kitona airfield if a Rebel unit is present in the box.
- The Rebel unit may move normally (during GT 1 or later) into hex 1400 and/or attack any DRC government units there. If moving to the hex, it can move no further that GT. The unit may use that hex as a supply source.
- DRC government units and their allies (Zimbabwe, Angola, other) may attack into Kitona from hex 1400. For defensive purposes, Kitona is savannah terrain.
Zimbabwe Activation Table
Corrected table, as referenced by the errata in 2.0.
| Die | Land units activated | Air/Helo support units activated | Transport Helos activated | Transport aircraft activated |
|---|---|---|---|---|
| 1–2 | 4 | 1/1 | 1 | 1 |
| 3–4 | 5 | 1/1 | 1 | 1 |
| 5–6 | 6 | 1/1 | 1 | 1 |
| 7 | 6 | 2/1 | 1 | 1 |
Die Roll Modifiers
- +1 if the Government player spends 1RP.
- −2 if the current Zimbabwe RP total is less than 4.
- −1 if the Corruption and Graft event is pulled that turn. (Printed as "Corruption and Graft" on this page; the 2.0 errata reads "Graft and Corruption". It is the same event.)
15.0 Random Events List
Chad Withdrawal: Chad decides to withdraw its expeditionary force.
- Ignore if pulled on GT 2. Return the chit to the pool and do not draw a replacement event marker.
- If pulled on GT 3 or after: immediately remove the Chad unit and the event marker from the game.
Coltan Rush: The nation/faction controlling Goma (2016) or Bukavu (1915) adds +3 to the RP die roll for each town this turn. Withdraw the event marker from the game.
Designer's Note: In 2000, the information technology bubble coincided with heightened demand for cell phones and the Christmas release of the Sony PlayStation console. Demand for tantalum, the processed form of coltan, had been rising steadily for years, but now the markets caught up in a buying frenzy.
Corruption and Graft: Immediately roll 1d6; the result affects the listed Contingent's RP DR (10.2) for each resource town this turn:
- 1–2: Zimbabwe receives a −1 DRM.
- 3: Angola receives a −1 DRM.
- 4: Rwanda receives a −1 DRM.
- 5: Uganda receives a −1 DRM.
- 6: Congo government receives a −1 DRM.
Return the event marker to the pool.
Designer's Note: This simulates military commanders on the spot running private enterprises to exploit local resources. Example: Salim Saleh, chief of staff of the Ugandan Army and half-brother of President Musseweni, who turned the Ugandan military intervention into a commercial enterprise, with near catastrophic consequences for the Ugandan war effort.
Foreign Advisers: The government player immediately receives the North Korea Military Advisers marker.
- During the Reinforcement Segment, the player may stack the marker with any FAC unit on the map.
- The marker awards a +1 DRM for any attack conducted by that unit.
- At the end of the GT remove the marker from play and place it in the Government Support Available Box.
- During any subsequent GT, the player may place the marker on any activated FAC unit during the Reinforcement Segment of the DRC Government Activation Phase.
- If the FAC unit that the foreign advisor marker is stacked with is eliminated for any reason, the marker is removed from the game.
Withdraw the event marker from the game.
Intervention of MLC in Central African Republic (CAR): Immediately add two RPs to the Ugandan/MLC total. Withdraw the event marker from the game.
Ituri Conflict: The Government player immediately receives the Lendu tribal militia unit and places it in any non-enemy occupied, non-town hex within 3 hexes of 2413. The unit operates normally on the GT of arrival.
Return the event marker to the pool. If drawn again, and the Lendu tribal militia unit has been previously eliminated, the player may again place it on the map. If the militia unit is on the map, ignore the event and return the marker to the pool, but do not draw a replacement event marker.
Designer's Note: This event simulates the outbreak of the Ituri conflict (still ongoing as of 2018) between the Hema and Lendu tribes in NE Congo. The conflict, although latent since the 1970s, was exacerbated by the perceived support of the Ugandan military to the Hema tribe, which led to reprisals from the Lendu tribal militias and a spiral of reprisals and counter-reprisals.
Libyan Support: The Libyan regime provides support to the MLC rebels. During the Ugandan/MLC Reinforcement Segment the rebel player may place one randomly picked MLC Inf Bde on the map at no cost. Withdraw the event marker from the game.
No Event: Nothing happens. Do not draw another chit this GT. Return the event marker to the pool.
Ugandan Rebels: The DRC government recruits various forces fighting the Ugandan government.
- Deploy the WNBF and ADF units on or adjacent to any DRC regular unit(s) on the map.
- These units may not be recruited. Once eliminated, they are gone for the remainder of the game.
- Withdraw the event marker from the game.
Ugandan-Rwandan Clash: If the event marker is drawn on GT 2, return it to the pool and do not draw a replacement event marker. If pulled on GT 3 or after: The Government player may designate any one Ugandan unit or stack of units to immediately attack any one adjacent Rwandan unit or stack. Resolve combat normally (MLC units stacked with Ugandan units may participate in the attack). If the Rwandan unit or stack occupies a town and is either eliminated or retreated, the town becomes controlled by the Ugandan forces and is eligible to count towards RP. Withdraw the event marker from the game if pulled on GT 3 or after.
UNITA Crushed: Play this event marker when rolling on the Angola Activation Table this GT (5.4). Apply a −1 DRM to the roll. Withdraw the event marker from the game.