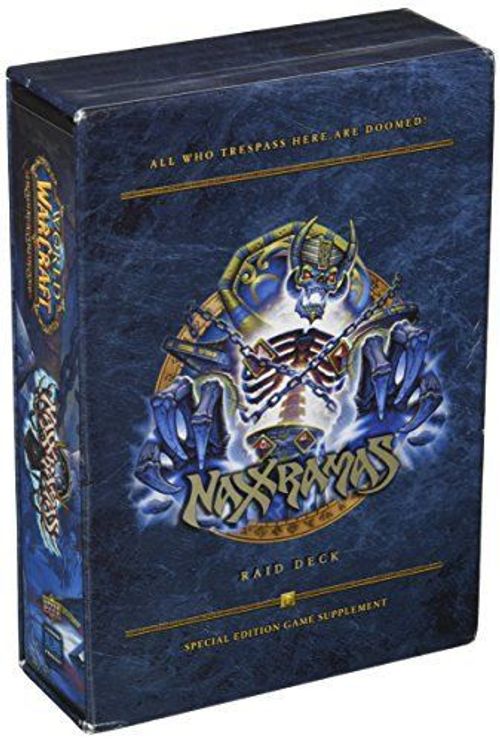
World of Warcraft Trading Card Game: Naxxramas Raid Deck
World of Warcraft Trading Card Game: Naxxramas Raid Deck Rulebook
Table of Contents
Table of Contents
What's in this Box?
- 52-card Main deck
- 20-card Event deck and 5-card Kel'Thuzad Event deck
- 4 two-sided Quarters and 1 two-sided Lair
- 25 two-sided Naxxramas tokens
- 15 two-sided Bosses
- 2 one-sided Mini-Bosses
- 1 cat
Object of the Game
For the Boss player, the object of the game is simple: destroy all those who dare challenge the might of the Lich King. A raider is destroyed if his or her hero takes fatal damage (damage greater than or equal to its health) or if that player has to draw a card from an empty deck.
For the raiders, the object of the game is to work together to defeat Naxxramas, culminating in the final encounter with Kel'Thuzad. Deal fatal damage to Kel'Thuzad, and the Boss player will be defeated!
Setup
Naxxramas is recommended for three raiders, but feel free to add one or two more to adjust the difficulty level. Each raider brings a deck and hero. If one or more raiders are Alliance, then none can be Horde, and vice versa. No other restrictions apply. For example, Traitor heroes can raid with non-Traitors, and Demon heroes can raid with non-Demons.
While of course you can use standard deckbuilding rules (60 card minimum, and no more than four of each card), the raid was designed and developed to battle against decks using the brand-new Dedicated Few rules (60 card minimum, and no more than one of each card).
The raiders choose one raider to be the raid leader. That raider remains the raid leader until the raid ends (even if his or her hero is destroyed). We suggest the raid leader sit in the middle or as close as possible to the middle of the raiders.
The following sequence occurs as the raid starts, as well as every time the raid "resets." See The Quarters for more information.
- Resetting the Raid: Any fallen raiders are resurrected. All raiders reset and shuffle their decks and turn their heroes face up. The Boss player resets and shuffles the Main deck and the 20-card Event deck, and sets aside the 5-card Kel'Thuzad Event deck. Keep these decks separate.
- To start the raid, the raid leader chooses a Quarter. After each Quarter is cleared, the raid leader can choose any uncleared Quarter or proceed directly to Frostwyrm Lair. The chosen Quarter or Lair card starts the next game in play, as do the first Boss listed on it and Mr. Bigglesworth.
- Unsure which Quarter to start with? For your first game, we recommend that you start with the Construct Quarter. In our humble opinion, we rate the Quarters in order of difficulty (from easiest to hardest): Construct Quarter, Arachnid Quarter, Plague Quarter, Military Quarter.
- Each player draws seven cards. The Boss player uses the Main deck. Each player (including the Boss player) may mulligan as usual.
- The Boss player goes first, and then play proceeds clockwise. The Boss player skips drawing a card during the first draw step.
Gameplay
- A hero or ally with Protector can protect any friendly character. A friendly character is controlled either by you or by another raider.
- If a raider's hero is destroyed, all of his or her cards are removed from the game. This includes abilities attached to other players' cards.
Raider Turn Sequence
Each raider's turn follows the phases and steps of a regular game, as shown in the diagram below:
- Start Phase: Ready Step, Draw Step.
- Action Phase: Play Cards, Use Powers, Place a Resource, Make Attacks.
- End Phase: Wrap-Up Step.
ACTION PHASE: The Boss player can't place a resource during the action phase. The rest of the Boss player's action phase plays like a regular game.
END PHASE: During the wrap-up step, the Boss player discards down to his or her maximum hand size of seven cards. (Each raider's maximum hand size is seven cards as usual.)
Boss Turn Sequence
The Boss player's turn sequence is as follows:
- Start Phase: Ready Step, Draw Step, Event Step.
- Action Phase: Play Cards, Use Powers, Make Attacks.
- End Phase: Wrap-Up Step.
START PHASE: The Boss player readies all of his or her cards as the ready step starts. As the draw step starts, the Boss player draws one card from the Main deck.
As each event step starts, the Boss player reveals the top card of the Event deck and adds it to the chain. As it resolves, it enters the Boss player's resource row. See Events for more information.
Events
As the raid starts or resets, the 20 Event cards are shuffled into the Event deck, and the 5 Kel'Thuzad Event cards are set aside. As part of Kel'Thuzad entering play, any cards remaining in the Event deck and graveyard are removed from the game, and the 5 Kel'Thuzad Event cards are shuffled into the Event deck.
An Event and A Kel'Thuzad Event (card images shown in the rulebook).
As each event step starts, the Boss player reveals the top card of the Event deck and adds it to the chain. Players can't interrupt Events. As an Event resolves, it enters the Boss player's resource row. Events enter play face down, and Kel'Thuzad Events enter face up. If the Event deck runs out of cards, skip the Event step.
Cards in the Boss player's resource row are resources whether face up or face down. If such a resource leaves play, it's put into the Event graveyard.
Tokens
When a Boss is destroyed, remove it from the game and, before putting the next Boss into play, destroy all Naxxramas tokens. (Mr. Bigglesworth is not a token, so he escapes unscathed.)
If a Naxxramas token leaves play, it returns to the pool of available tokens and can enter play again as a new token if the raid says to do so. If the raid says to put a token into play, but there are none available because they're all already in play, skip putting that token into play. Kel'Thuzad ally tokens are an exception to this rule (see Kel'Thuzad).
The following Bosses enter play with specific tokens: Grand Widow Faerlina, Loatheb, Thaddius, Instructor Razuvious, and The Four Horsemen. Each of these Bosses has the name of its associated token on its type line, followed by a number that tells you how many copies of that token enter play with that Boss.
For example, Grand Widow Faerlina enters play with two Naxxramas Worshippers. (Card images shown in the rulebook.)
Just like regular allies, ally tokens can't attack until they've been under the Boss player's control since the start of his or her most recent turn. Bosses are not allies, so they can attack immediately.
Marks
Three Bosses have associated Mark tokens: Loatheb's Mark (Fungal Creep), Sapphiron's Mark (Icebolt), and Kel'Thuzad's Mark (Frost Blast). Mark is a new card type. Marks are not abilities, and raiders can't interact directly with these cards in any way.
The Quarters
Naxxramas is divided into four Quarters and a final Lair, each of which is represented by a card that lists its associated Bosses in order. Raiders can't interact with these cards in any way.
While face up, each of the four Quarter cards has a power that negatively impacts a specific card type or strategy. However, as its final Boss is defeated, that Quarter becomes "cleared," and its card is turned face down to reveal a power that turns its negative into a positive until the end of the raid.
After each Quarter is cleared, the raid leader can choose any uncleared Quarter or proceed directly to Frostwyrm Lair. Each time the raiders enter a new Quarter, the raid "resets" and all players (including the Boss player as well as any fallen raiders) return their decks to their starting configurations (see Setup). The only cards that remain in play are face-down Quarters that have been cleared.
Entering Frostwyrm Lair does not reset the raid.
Heroic Mode
In Heroic Mode, up to three raiders must clear all four Quarters (in the order chosen by the raid leader) before entering Frostwyrm Lair. In addition, fallen raiders never resurrect in Heroic Mode.
The Arachnid Quarter
Within the Arachnid Quarter, the cultists are ready to give their lives for the master, as the legions of undead nerubians and the brood of Maexxna prepare to be unleashed.
The Arachnid Quarter hinders the use of abilities and special powers against its inhabitants by causing raiding heroes and allies to deal less non-combat damage. Once the Quarter has been defeated, raiding heroes and allies will become empowered and will be able to deal damage +1 for all non-combat damage that they would deal.
The Construct Quarter
Home to some of the most destructive and disgusting monstrosities that Azeroth has ever seen, the Construct Quarter is where the Scourge seek to perfect their colossal constructs of war.
The Construct Quarter lays waste to control decks with rage counters that flip each Boss face down after three turns, causing massive damage to raiders. Once this Quarter has been cleared, raiding heroes may turn face up every three turns, enabling them to use their flip powers multiple times.
The Plague Quarter
The vile and putrid Plague Quarter is where the servants of Kel'Thuzad seek new ways to spread the plague of undeath and provide the Scourge with an even greater supply of troops.
The filth and disease within The Plague Quarter cause raiding allies to become weak, giving them -1 / -1. Once the raiders manage to defeat this Quarter, however, all raiding allies will become stronger and gain a bonus of +1 / +1.
The Military Quarter
The Military Quarter is designed to create and train death knights to serve as the elite troops of the Scourge against the Horde and the Alliance. Here, the Four Horsemen await their master's call.
The Military Quarter punishes equipment and solo decks for trying to take on an army alone. Raiding weapons have -1 ATK and raiding armor have -1 Armor, but if you can manage to get through the Quarter, raiders will find their skills with equipment greatly increased, as raiding weapons gain +1 ATK and raiding armor gain +1 Armor. Below are the special rules for Gothik the Harvester and The Four Horsemen.
Gothik the Harvester
This encounter has its own set of rules (the "Gothik rules"). When Gothik enters play:
- If there are an even number of raiders, split the raid into two equal halves. The raiders to the left of the Boss player are Unrelenting, and the raiders to the right of the Boss player are Spectral.
- If there are an odd number of raiders, the middle raider is both Spectral and Unrelenting, the raiders to his or her left are Spectral, and the raiders to his or her right are Unrelenting.
The Boss player is both Spectral and Unrelenting. Each card is Spectral, Unrelenting, or both, depending on its controller. The only exceptions are cards with Spectral or Unrelenting in their names.
The most important rule is that Spectral players/cards can't interact with non-Spectral players/cards, and the same applies for Unrelenting players/cards.
For example:
- Spectral characters can't attack or damage non-Spectral characters.
- Spectral cards can't be targeted by non-Spectral players or affected by non-Spectral modifiers.
- A Spectral attachment stays attached to a non-Spectral host, but stops affecting it.
- Only Unrelenting Protectors can protect against Unrelenting attackers.
Each player remains Spectral, Unrelenting, or both until Gothik flips (when the last Spectral ally leaves the Boss player's control).
The Four Horsemen
This Boss card enters play with one copy of each of the following ally tokens face up (the gold-bordered side is the face-up side): Baron Rivendare, Sir Zeliek, Lady Blaumeux, and Thane Korth'azz. These ally tokens can't leave the Boss player's party until all of them have been dealt fatal damage.
At the start of the Boss player's turn, the raid leader chooses a Horseman to turn face down. Such a Horseman remains face down until all four have been destroyed.
Frostwyrm Lair
Raiders entering Frostwyrm Lair witness the full power of Sapphiron and Kel'Thuzad. It will take everything you've got to defeat these two mighty foes and claim victory over Naxxramas!
Entering Frostwyrm Lair does not reset the raid.
Frostwyrm Lair (Lair card, "Sapphiron — Kel'Thuzad"):
- When raiders enter Frostwyrm Lair, the Boss player shuffles his graveyard into his deck, then draws cards until he has seven.
- [icon] → Draw a card. (The card shows a small icon before the arrow; the icon is not legible enough at print resolution to name.)
- When Sapphiron is dealt damage, he deals 1 frost damage to its source.
- When Sapphiron is destroyed, flip this card.
Below are special rules for Kel'Thuzad.
Kel'Thuzad
As part of Kel'Thuzad entering play, any cards remaining in the Event deck and graveyard are removed from the game, and the five Kel'Thuzad Event cards are shuffled into the Event deck.
Kel'Thuzad enters play with three Kel'Thuzad ally tokens, chosen randomly from among Soldier of the Frozen Wastes, Soul Weaver, and Unstoppable Abomination. At the start of the next player's turn, three of the remaining six Kel'Thuzad ally tokens enter play (again chosen randomly), and at the start of the next player's turn, the final three Kel'Thuzad ally tokens enter play. Kel'Thuzad has Immune (see below) until all nine Kel'Thuzad allies have entered play.
Additional Boss Rules
The rulebook's page heading for this section reads "Additional Boss Rules"; its table of contents lists it as "Special Boss Rules."
- Each Boss can't be destroyed unless it has fatal damage or 0 health. The Boss player can't lose the game and the raiders can't win the game unless Kel'Thuzad is destroyed.
- The Boss player can't lose the game if the Main or Event deck runs out of cards. If that happens, the game simply continues.
- Some Bosses have the Immune keyword power. A Boss with Immune can't attack or be attacked, damaged, or targeted.