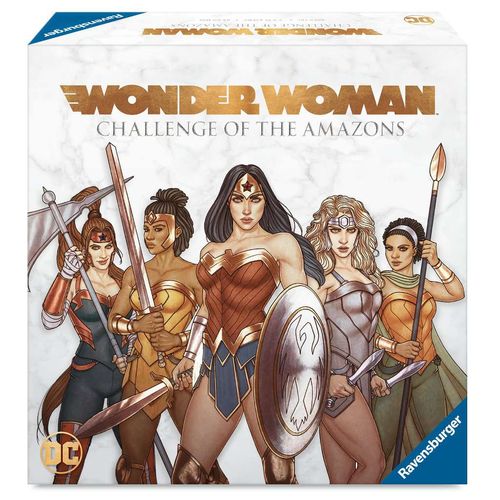
Wonder Woman: Challenge of the Amazons
Wonder Woman: Challenge of the Amazons Rulebook
Table of Contents
Table of Contents
Components
- 1 Game Board
- 5 Hero Mats
- 5 Hero Figures
- 60 Hero Cards
- 8 Relic Cards (same backs as Hero cards)
- 8 Relic Tokens
- 1 Sword of Hephaestus Card
- 4 Blessing Tokens
- 3 Enemy Mats (Circe, The Cheetah, Ares)
- 3 Enemy Movers
- 30 Circe Cards
- 30 The Cheetah Cards
- 30 Ares Cards
- 10 Reference Cards (5 of each)
- 18 Corrupted Amazons
- 18 Servants of War
- 18 Blockades
- 18 Warriors
- 20 Multiplier Tokens
- 2 Tracker Tokens
Box Contents (as printed on the back of the box): 1 Game Board, 5 Hero Figures, 5 Hero Mats, 60 Hero Cards, 18 Warrior Cubes, 8 Relic Cards, 8 Relic Tokens, 1 Sword of Hephaestus Card, 4 Blessing Tokens, 3 Enemy Movers, 3 Bases, 3 Enemy Mats, 90 Enemy Cards, 54 Obstacle Cubes, 20 Multiplier Tokens, 2 Tracker Tokens, 10 Reference Cards, Instructions.
Hero Setup
- Unfold the game board and familiarize yourself with the regions (spaces with names). As you set up and play, instructions and components will refer to these regions.
- Separate the cubes by color and place them next to the board to form a supply. Place the Multiplier tokens nearby.
- Each player chooses a Hero and takes their corresponding mat and figure. If Artemis is chosen, follow her setup instructions now.
- Take four random Relic cards and their corresponding Relic tokens. Return the unused Relic cards and tokens to the box—they will not be used this game.
- Shuffle the four Relic cards with the Hero cards to create the Hero deck. Place the deck face-down next to the board, leaving room for a discard pile.
- Place the four Relic tokens near the board.
- Place a Tracker token on the 20 at the top of the Defense track on the left side of the board.
- All players place their Hero figures in the Palace.
NOTE: If a player chooses Artemis, shuffle the eight Relic cards and deal two to that player. They choose one to keep, placing it face-up next to their Hero mat as a recovered Relic that they may use for the entire game. The other is shuffled with the remaining Relics before proceeding to Step 4 of Hero Setup.
Heroes
- Diana — During the Strategize phase: You may move one region.
- Mala — During the Strategize phase: You may deploy one Warrior to up to two different regions with Heroes.
- Nu'bia — During the Strategize phase: Draw two additional cards into your Battle Plan.
- Artemis — During Setup: Draw two Relics and choose one to keep.
- Philippus — During the Strategize phase: Draw an additional face-up Hero card.
Ares Setup
- Take Ares' mat and mover and place them near the board. Everything on the mat will be described in these instructions, but you can use the mat during the game for quick reference.
- Flip it to the side corresponding to the number of players in your game, as shown in the bottom-right corner of the mat. One side is for a 2- or 4-player game and the other side is for a 3- or 5-player game.
- Place a Tracker token on the Health track on the right side of the board—place it on 15 if there are 2 or 4 players or 17 if there are 3 or 5 players.
- Shuffle the Ares cards and place them in a deck face-down next to the board, leaving room for a discard pile.
- Place a Blessing token in each Monument and Temple region of the board and give one player the Sword of Hephaestus card. This player will need to travel around the island collecting Blessings before Ares can be defeated, as explained on page 11.
- Give each player an Ares Reference card and a Round Phases Reference card.
- Leave all remaining components in the box—they will not be used this game.
NOTE: Step 13 is specific to Ares. If you are playing against another enemy, skip this step.
How to Play
The game is played in rounds and each round consists of five phases, performed in this order:
- Start of Round – The enemy advances.
- Strategize Together – Discuss how to defend the island.
- Battle Begins – Choose three cards to play.
- Take Actions – Use your cards to take three actions.
- End of Round – The enemy attacks.
Play continues until Ares' Health is reduced to zero and the players win, or the Amazons' Defense is reduced to zero and the players lose, as explained on page 11.
Start of Round
At the start of each round, the enemy advances on Themyscira, deploying Obstacles and threatening the Amazons. You can use Ares' mat during the game for quick reference. At the end of each round, your Defense will be reduced based on what Obstacles still remain, as explained on page 11.
-
Draw the top card of Ares' deck and place the Ares mover in the region shown on the bottom of the card. Ignore the other text on the card and place it in the discard pile.
-
Deploy 2 Servants of War to Ares' region. In future rounds, if there are any Warriors in the region Ares was moved to, Ares corrupts them instead of deploying Servants of War. Replace each Warrior with a Corrupted Amazon.
-
Draw cards from the top of Ares' deck one at a time. Do what the card says, in order, before drawing another. Ignore the region shown on the bottom of the card. After you complete a card's effect, discard it.
- In a 2-player game, draw one card.
- In a 3-player game, draw two cards.
- In a 4- or 5-player game, draw three cards.
For clarifications on specific effects, see the Appendix on page 16.
If you ever need to draw a card from Ares' deck when it is empty, shuffle the discard pile to form a new deck.
DEPLOY: Whenever you are instructed to deploy an Obstacle (Corrupted Amazon, Servant of War, Blockade) or Warrior, take the indicated number and type of cubes from the supply and place them in the region(s) or on the road(s) specified. If you run out of a type of cube, replace groups on the board with Multiplier tokens. All cubes are considered unlimited.
REPLACE: Whenever you are instructed to replace Warriors in a region, you must replace each Warrior with the Obstacle specified. Return all Warriors to the supply and deploy the same number of Obstacles to the region.
NOTE: Only one Blockade can be on each road. If another would be deployed, ignore it.
Strategize Together
Now you may discuss your plan of attack and what each Hero may want to focus on this round. Because you can't make group tactical decisions when you are in the throes of battle, this is your chance to talk to the other Heroes and determine a plan.
- Deal two Hero cards face-up to each player. If Philippus is in the game, deal that player three cards face-up instead. As captain of the guard, Philippus is more adept at planning for battle.
- Deal three Hero cards face-down into each player's Battle Plan. If Nu'bia is in the game, deal that player five cards face-down instead. Nu'bia is especially revered by Queen Hippolyta for her combat instincts.
- Don't look at your face-down cards yet. In the next phase, you will look at all your cards and then choose three to play.
- You may freely discuss all face-up cards, the Obstacles on the board, and what each player may want to do with their actions this round.
- Don't forget to use your Hero ability! While they are optional, if you have not used it once Battle Begins, you cannot use it this round.
If you ever need to draw a card from the Hero deck when it is empty, shuffle the discard pile to form a new deck.
NOTE: If you are dealt a Relic, you must now choose whether to discover it or pass it by. (See Relics on page 12.)
TIP: In addition to attacking Ares to reduce his Health, you'll also want to remove Obstacles that could reduce your Defense. For example, at the end of each round, you lose 2 Defense for each Corrupted Amazon in the Palace. So if there are one or more Corrupted Amazons in the Palace, one or more Heroes may plan to focus on removing them this round.
Hero Cards
In the next phase, when Battle Begins, you'll choose three Hero cards and play them in the order you want to use them. Each Hero card can be used to take one action, using one of the Emblems: Wisdom, Vigor, Agility, Leadership.
Some cards have an ability written above the Emblems. You may use the ability in addition to the action you take. However, each card may only be doubled once. This is the case even if the card's Emblems are doubled by a Relic.
While each card shows multiple Emblems, giving you more flexibility to react in battle, you may only use one Emblem per card. Emblems can be used on the following actions, as shown on your Reference cards:
Basic Actions
- Spend Agility to move along a road to an adjacent region. You cannot move along a road with a Blockade.
- Spend Leadership when you are in a Command region to deploy a Warrior. Each Warrior in your region can be used to increase an Emblem by 1 when taking a Special Action. Warriors are a valuable asset in defeating Ares, as explained further on page 12.
Special Actions
- Spend Wisdom to remove Corrupted Amazons in your region. You need 3 Wisdom for each Corrupted Amazon.
- Spend Vigor to remove Servants of War in your region. You need 2 Vigor for each Servant of War.
- Spend Agility to remove a Blockade from a road connected to your region. You need 3 Agility for each Blockade.
- Spend 4 of any one Emblem when you are in Ares' region to deal 1 damage to him. Move the Tracker down his Health track for each damage you deal.
You may perform the same action multiple times, as long as you have enough of that Emblem. You may choose not to spend all of the Emblems if you don't wish to.
EXAMPLE: If you play Bold as your first action, you now have your choice of 4 Agility or 4 Leadership. However, your card's Emblems cannot be doubled again by another card.
EXAMPLE: Use 4 Vigor to remove 2 Servants of War from your region.
EXAMPLE: Use 3 Agility to move twice.
NOTE: Emblems cannot be saved for future actions. If you cannot or do not want to use an Emblem, it is ignored.
You may not use multiple Emblems on the same card.
EXAMPLE: You may not use 3 Wisdom and 2 Vigor to remove a Corrupted Amazon and a Servant of War.
You may not split your Emblem between multiple actions.
EXAMPLE: You may not use 4 Agility to remove a Blockade and move.
Round Phases Reference Card:
- Start of Round – Enemy Advances.
- Strategize Together – Deal Cards.
- Battle Begins – Play Cards.
- Take Actions: 1 Agility – Move (may bring Warriors with you). 1 Leadership – Deploy a Warrior (if you are in a Command region).
- End of Round – Enemy Attacks.
Teaming Up
Heroes can team up on Special Actions if they are in the same region. When performing the same Special Action using the same Emblem, all Heroes in that region may add their Emblems together.
EXAMPLE: Diana and Nu'bia are in the same region as Ares. They each have 2 Vigor on their card. They choose to team up in order to deal 1 damage to Ares, reducing his Health by 1.
Battle Begins
Once everyone agrees that they are done strategizing, each player picks up all their cards—their face-up cards and the cards in their Battle Plan—and simultaneously chooses three cards to play face-down as their actions. Actions will be performed in order from left to right, so consider what action you'll need to take first, such as moving to another region, in order to take the subsequent actions.
Players are not allowed to communicate in any way during this phase—the battle has begun and you can no longer strategize as a group. You can choose actions that will carry out the strategy you discussed together or determine a new plan that will make your team proud! Once you are finished, discard all your remaining cards face-up into the discard pile.
NOTE: If any of the cards in your Battle Plan are Relics, you must now decide whether to discover it or pass it by. (See Relics on page 12.)
Take Actions
Once all players have three cards face-down on their mat and have discarded the rest, it's time to take action! Players may freely communicate again and may also look at and discuss all played cards, even before that action is taken.
- All players flip the card for their first action face-up.
- Each player takes one action, using one Emblem on their card.
- Heroes may take actions in any order. Sometimes everyone can take their actions simultaneously, such as if all players are moving to a different region. Sometimes you will want another player to take their action before you take yours, such as if a player is removing a Blockade so you can move along that road. And sometimes you will want to team up on the same action, as described on page 9.
- Don't forget to use the special abilities that appear on the Hero cards. This ability can be used in addition to the action, and can greatly increase the power of the team's actions that round.
After all players have taken their first action, repeat this process for the second and third actions. After all three actions have been taken, discard those cards.
End of the Round
After the battle, Obstacles remaining on the board reduce Themyscira's defenses, as follows. Use Ares' mat during the game for quick reference.
- Lose 1 Defense for each region with at least one Servant of War.
- Lose 2 Defense for each Corrupted Amazon in the Palace.
- Lose 3 Defense for each region with 5 or more Obstacles. Blockades are not considered to be in a region.
Move the Tracker down the Defense track for each Defense you lose. If the Amazons' Defense is reduced to zero, the game ends and the players lose.
NOTE: Follow the End of Round instructions in order. It's possible that you'll lose Defense for the same region or Obstacle multiple times.
Defeating Ares
To win, you must reduce Ares' Health to zero. While any Hero or Heroes may damage him, even in the first round of the game, the Hero with the Sword of Hephaestus must deal the final point of damage, and only after the sword has been charged.
If Ares' Health would be reduced to zero before the charged Sword of Hephaestus is used, his Health returns to 1.
To charge the sword, the Hero with the Sword of Hephaestus card must visit each Monument and Temple. If that Hero ends an action in a region with a Blessing token, they take the token from the board and place it on the sword card. Once all four Blessings are on the card, the sword is charged and may be used to defeat Ares.
TIP: Just as you can perform the same action multiple times with one card, you can also deal damage to Ares multiple times in one action. While each point of damage requires 4 of the same Emblem, use Hero card abilities to double your Emblems and team up with other Heroes for more powerful attacks!
NOTE: The Hero with the charged sword may team up to deal the final point of damage. (See Teaming Up on page 9.)
Relics
Relics are powerful items that the Heroes can discover, recover, and then use for the rest of the game. Whenever you reveal a Relic card, whether face-up when you Strategize Together or when picking up your Battle Plan, you must immediately choose one of the following:
- DISCOVER THE RELIC – Place the matching Relic Token on the region indicated on the Relic card and place the card nearby. Do not draw a new card to replace it.
- PASS BY THE RELIC – Discard the Relic card into the discard pile and draw a new card to replace it. You might do this if the Relic would be discovered far away from where you're battling or you don't think it's helpful at that moment. There will be a chance to discover it later when the discard pile is reshuffled.
Any Hero may recover a Relic if they end their action in the same region as a Relic token. Relics cannot be given or traded, so be sure you want to keep and use the Relic before recovering it.
If you choose to recover a Relic, remove the token from the board and place the Relic card face-up in front of you, next to your Hero mat. You now have that Relic's ability for the rest of the game—there is no limit to the number of times it may be used.
NOTE: Discovered and recovered Relics are not discarded.
Warriors
NOTE: Mala's Hero ability can be used to deploy a Warrior to any region with at least one Hero, including herself. The regions do not need to be Command regions. However, her ability cannot be used to deploy two Warriors to the same region.
To get Warriors, you must be in a Command region and then take an action using the Leadership Emblem. Take that many Warriors from the supply and place them in your region. If you run out of Warriors, replace groups on the board with Multiplier tokens. Warriors are considered unlimited.
Warriors can be moved by any Hero moving out of their region. When moving, you may take any or all Warriors with you.
EXAMPLE: Use 4 Agility to move from the Monument to Zeus to the Library. You pick up 2 Warriors in the Barracks and drop them in the Square on your way.
TIP: Be careful keeping groups of Warriors on the board. Ares replaces Warriors with Corrupted Amazons, often in Command regions. You'll need to strategize when Warriors should be deployed, moved, and used in order to avoid them being corrupted.
Warriors can increase any Emblem spent to take a Special Action. After using Relic or Hero card abilities, you may use a Warrior in your region to increase your Emblem by 1. Return used Warriors to the supply. You may use any or all Warriors in your region.
NOTE: Warriors cannot be doubled by Relics or Hero card abilities.
EXAMPLE: Use 2 Wisdom, the Girdle of Gaea Relic, and 2 Warriors in your region to remove 2 Corrupted Amazons.
You may use Warriors to increase Emblems when teaming up.
EXAMPLE: Use 3 Vigor, 3 Vigor, and 2 Warriors in your region to deal 2 damage to Ares.
You may not use Warriors on Basic Actions.
EXAMPLE: You may not use 2 Agility and 2 Warriors to move four times.
You may not use Warriors as an Emblem that isn't on your Hero card.
EXAMPLE: You may not use 2 Wisdom and 2 Warriors to remove a Servant of War.
Other Enemies
Once you know how to play, you can choose to face a new enemy. This game comes with two other enemies to choose from, each presenting new obstacles and requiring new strategies to defeat, as explained in the following pages.
When fighting another enemy, you will use that enemy's cards and mat. Flip the mat to the side corresponding to the number of players and set the Health track to the number shown in the top-left corner. The rules of play are the same, but each enemy requires different Start of Round steps, End of Round effects, and Special Actions costs, as noted on their mat and reference cards.
The Cheetah
THE CHEETAH is trying to steal the Artifacts of the Gods to unlock the power of the Amazon's immortality. Her hunting parties will help her discover these artifacts, but Cheetah's lycanthrope minions will be wounding our fellow Amazons. We must protect these sacred objects and tend our wounded to thwart The Cheetah!
SPECIAL SETUP: Find the four Artifacts among The Cheetah's card and set them aside before shuffling her deck. In the first Start of Round, skip deploying a Lycanthrope since The Cheetah is not yet on the board.
- The Cheetah provides an additional way to lose the game. The players lose if she finds three Artifacts. Whenever you need to reshuffle The Cheetah's deck, she finds an Artifact. Choose a random Artifact and shuffle it into her deck. If you would need to add a third Artifact (the third time you would reshuffle her deck), then the players immediately lose.
- Hunting Parties will increase how quickly The Cheetah's deck is discarded, so you'll want to prioritize removing them. You can use either Vigor or Agility to remove Hunting Parties, but you cannot use a combination. You must still use only one Emblem when taking this Special Action, even when teaming up.
- The Cheetah is quick! After you attack her, she calls a Lycanthrope and then runs away. You can team up to increase the damage dealt before she moves. However, remember that you can only team up if you use the same Emblem, so plan your actions carefully to maximize your attacks before she flees.
The Cheetah's mat:
- Start of Game: Place the four Artifact cards next to The Cheetah's deck. Whenever you reshuffle The Cheetah's deck, she finds an Artifact. Shuffle a random Artifact card into her deck. If The Cheetah finds three Artifacts (the third time you would reshuffle her deck), the Heroes lose.
- Start of Round: Deploy 1 Lycanthrope to The Cheetah's region. Draw a card, ignoring its effect, and move The Cheetah to that region. Draw cards one by one and complete their effects: for 3 players draw 2 cards, for 5 players draw 3 cards.
- End of Round: Lose 1 Defense for each Wounded Amazon in Themyscira. Deploy 1 Wounded Amazon to each region with a Lycanthrope. Discard the top card of The Cheetah's deck for each Hunting Party in Themyscira.
- Obstacles: Wounded Amazon, Lycanthrope, Hunting Party.
- Health: 14 for a standard game. The bottom-right corner of the mat shows a recommended starting Health of 20 for a more difficult game (3- or 5-player side).
The Cheetah's Reference Card: 3 Wisdom – Remove a Wounded Amazon. 3 Vigor – Remove a Lycanthrope. 2 Vigor or Agility – Remove a Hunting Party. 4 of any one Emblem – Deal 1 damage to The Cheetah. After reducing The Cheetah's health, deploy 1 Lycanthrope to her region. Then draw a card, ignoring its effect, and move The Cheetah to that region.
Artifacts of the Gods:
- Artifact of Athena: Move The Cheetah to the Training Grounds. Deploy 4 Lycanthropes to that region.
- Artifact of Zeus: Move The Cheetah to the Palace. Deploy 4 Lycanthropes to that region.
- Artifact of Hermes: Remove The Cheetah from the board. She re-enters play when she is moved to a region.
- Artifact of Aphrodite: The Cheetah recovers 4 Health.
Circe
CIRCE is demonstrating her power by transforming Amazons into animals. We must counter her spell by collecting the Magic Beacons while also wrangling our polymorphed sisters so they cannot harm each other. We must separate the transformed Amazons and disrupt the magic ritual to defeat Circe!
SPECIAL SETUP: Place Circe's Magic Beacons around Themyscira—one Magic Beacon for each player. Draw a card from Circe's deck to determine each Beacon's region, then discard it.
- When you spend 3 Wisdom to remove Magic Beacons, you remove all the Beacons in that region, no matter how many there are.
- Instead of removing Wolves and Pigs, you must move them around the island. When you take a Special Action to move these Obstacles multiple times, you can choose to move an additional animal, move an animal an additional region away, or a combination.
- Remember that you cannot split your Emblem between multiple actions. Even though moving Wolves and Pigs both require Vigor, you must choose whether to use your action to move Wolves or to move Pigs. You cannot move both with one Hero card.
- Circe's Magic Beacons protect her, increasing how many of the same Emblem you'll need to damage her. For example, if there are two Magic Beacons in Themyscira, you'll need 10 of the same Emblem to deal 1 damage to her. Also, after reducing her Health, she'll summon more Beacons. Try to plan powerful attacks after you remove the Magic Beacons, to make the most of your hard work.
EXAMPLE: Use 4 Vigor and 2 Warriors to move 2 Wolves one region away, or to move 1 Wolf two regions away.
Circe's mat:
- Start of Game: Draw a card, ignoring its effect, and place a Magic Beacon in that region. Repeat for each Hero in the game.
- Start of Round: Draw a card, ignoring its effect, and move Circe to that region. Deploy 1 Wolf Amazon to that region. Draw cards one by one and complete their effects: for 3 players draw 2 cards, for 5 players draw 3 cards.
- End of Round: Lose 1 Defense for each region with a Wolf Amazon, not counting the first. Lose 3 Defense for each region with a Pig Amazon, not counting the first. Lose 3 Defense for each region with both a Wolf Amazon and a Pig Amazon.
- Obstacles: Magic Beacon, Wolf Amazon, Pig Amazon.
- Health: 12 for a standard game. The bottom-right corner of the mat shows a recommended starting Health of 15 for a more difficult game (3- or 5-player side).
Circe's Reference Card: 3 Wisdom – Remove Magic Beacons. 3 Vigor – Move a Wolf Amazon. 2 Vigor – Move a Pig Amazon. 4 of any one Emblem (costs 3 more for each Magic Beacon in Themyscira) – Deal 1 damage to Circe. After reducing Circe's health, draw a card, ignoring its effect, and place a Magic Beacon in that region. Repeat for each Hero in the game.
Increasing the Difficulty
If you'd like to increase the difficulty of an enemy, you can increase that enemy's Health during setup. In the bottom right corner of the enemy mat is a recommended starting Health for a more difficult game.
You can also increase your game's difficulty by not including certain Relics in the Hero deck. Before taking four random Relics during setup, consider removing the Sandals of Hermes when playing against Ares, the Bracers of Deflection when playing against The Cheetah, and the Lasso of Truth when playing against Circe.
Appendix
Heroes + Hero Cards
DIANA'S ABILITY: May be used before Mala's ability. Considered a move action. May use in combination with a Relic to move directly to a region. May pick up a Relic and/or Blessing after using.
DOUBLING: Each Hero card may only be doubled once. Card abilities that double another Hero's Emblems can only be applied during the same action. However, doubling occurs separately from spending the Emblems. Double the other Hero's Emblems just before they take their action, whether you have taken your action yet or not.
INSPIRING: Doubling can only be used before the Hero takes their action—you cannot use it on a Hero moving through your region.
PERSISTENT: Adds two cards face-down to your Battle Plan for the next round. If you play multiple Persistent cards in a round, add two cards for each one. No matter how many cards are already in your Battle Plan, always add three more during the Strategize phase (or five for Nu'bia).
TACTICAL: Doubles the Emblems of all cards that share the name of another card played for that action. May apply to its own Emblems if multiple Heroes played Tactical. May also apply to multiple card names, such as if two Heroes played Swift and two Heroes played Experienced.
Relics
BRACERS OF DEFLECTION: If an Obstacle would ever be deployed or a Warrior would ever be replaced in your region, ignore it. Cannot stop Enemies or Obstacles from moving into your region. Cannot deflect Blockades, which are deployed to roads.
LASSO OF TRUTH: Can only be used when spending Agility to move. Before taking your action, choose one type of Obstacle. When you move into or out of a region with that Obstacle, you may take any or all of them with you, in addition to any Warriors. The next time you take a move action, you may choose the same or a different type of Obstacle. Cannot be used on Blockades.
MOVING DIRECTLY: Ignores all Blockades. Can only be used by spending Agility to move, or with Diana's ability. However, your action is then over—you cannot move again until the next action.
Enemies
DAMAGE: You may deal more than one damage to an Enemy in one action. If the Enemy reacts after being damaged, reduce the Enemy's Health for that action before proceeding with their effects. For example, two Heroes in The Cheetah's region each have 4 Vigor and both of their cards are doubled. They team up to deal 4 damage in one action. Then before another Hero may take their action, a Lycanthrope is deployed and a card is drawn to move The Cheetah.
MOVING: An Enemy is still considered to have moved, even if they are moved to the same region they were already in. Proceed with the phase or card effects, including deploying Obstacles or replacing Warriors as instructed.
Ares
BLOCKADES: Only one can be on each road. If an additional would be deployed, ignore it. Only block Heroes from moving along a road—Obstacles and Enemies are not affected. Not considered to be in any region.
FORMIDABLE: After deploying Corrupted Amazons to Ares' region, move all Corrupted Amazons on the board toward the Palace, following the shortest possible path. If there are multiple shortest paths, choose one.
SWORD OF HEPHAESTUS: Only the Hero with the Sword can pick up Blessings. The Sword cannot be given or traded.
VOLATILE: If there are multiple closest Heroes, choose one. After replacing any Warriors, each Hero in Ares' region must move along a road to an adjacent region. Each affected Hero may choose where to move, but cannot move along a road with a Blockade.
The Cheetah
ARTIFACTS: Start the game outside of The Cheetah's deck. When you need to shuffle her discard pile to form a new deck, randomly add one Artifact. When you need to shuffle her discard pile again, randomly add an additional Artifact. When you need to shuffle the discard pile for a third time, the players lose the game. If an Artifact is discarded or drawn to refer to its region, ignore the card's effects, as normal.
ARTIFACT OF ATHENA: Move the Enemy Health Tracker 4 spaces back up the track, but do not exceed The Cheetah's starting Health.
ARTIFACT OF HERMES: Heroes cannot damage The Cheetah when she is not on the board. If a Start of Round or card effect would deploy an Obstacle to her region, ignore it. If a Start of Round or card effect would move her to a region, place The Cheetah back on the board in the region indicated.
CUNNING: When cards are discarded, ignore their effects.
HUNTING PARTIES: Use either Vigor or Agility to remove. You cannot use a combination.
Circe
ARCANE: To determine the region, draw a card and refer to the region shown on the bottom of the card. Ignore the card's effects and discard it.
MAGIC BEACONS: When using a Special Action to remove Magic Beacons, remove all Magic Beacons in your region. Each Magic Beacon in Themyscira adds 3 to the number of the same Emblem required to deal 1 damage to Circe. For example, 16 of the same Emblem is required to deal 1 damage if there are 4 Magic Beacons on the board.
PIG & WOLF AMAZONS: Cannot be removed. Move them in order to separate Pigs from Wolves and to contain them in as few regions as possible. Cannot move both with one Hero card.