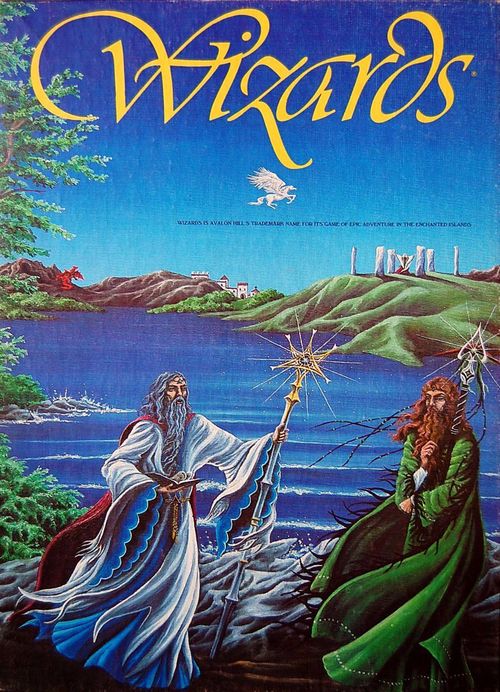
Wizards
Wizards Rulebook
Table of Contents
Table of Contents
- 1) Equipment
- 2) Object of the Game
- 3) The Set-Up
- 4) Random Spaces
- 5) Sequence of Play
- 6) The Movement Segment
- 7) Specific Encounters
- 8) Random Encounters
- 9) Tasks
- 10) Magical Orders
- 11) Magic Spells
- 12) Evil Attack
- 13) The Sacred Gems
- 14) Record Keeping
- Appendix A: The Solitaire Game
- Appendix B: The Partnership Game
- Appendix C: Territory Descriptions
- Appendix D: The High Wizards
- Designer's Notes
1) Equipment
- 1 Game Board
- 1 Record Board
- 18 Territory Tiles
- 98 Task Cards
- 49 Event Cards
- 14 Wizard Cards
- 7 Gem Cards
- 120 Task Markers
- 1 Thwart Marker
- 6 Playing Pieces
- 6 Playing Piece Bases
- 48 Demon Markers
- 14 Secret Wizard Markers
- 10 Boat Markers
- 7 Wizard Markers
- 6 Lair Time Markers
- 1 Dragon Marker
- 1 Day Marker
- 1 Completion Marker
- 2 Six Sided Dice
- 1 Record Sheet Pad
- 1 Rule Book
2) Object of the Game
The object of this game is to be the first to bring the SIX Sacred Gems to Rüktal in the Center of the Sacred Circle.
To achieve this goal, a player must enter one of the Magical Orders by meeting a High Wizard, a Master Sorcerer, or Rüktal, advance in the Order chosen, obtain the Sacred Gems from the High Wizards, and, ultimately, deliver them to Rüktal.
3) The Set-Up
Prepare for play by setting up the game as specified below:
3.1) Shuffle all Card Decks. When each has been shuffled, place the TASK CARDS, EVENT CARDS, and WIZARD CARDS in the appropriate boxes on the Record Board.
3.11) Take the shuffled GEM CARDS and place ONE, face down, in each box on the Record Board that is marked with the NAME of a High Wizard.
3.12) When the Gem Cards are in place, take the white Wizard Markers and place each one in the box that corresponds to the name that is on the marker (Ishkatar's marker in Ishkatar's box, etc.).
3.2) When all cards have been placed, each player rolls two dice. The player with the highest roll shuffles the TERRITORY TILES and deals them out, in a clockwise rotation, as evenly as possible.
3.21) After the tiles are dealt out, the players, starting with the player on the dealer's left, places them on the GAME BOARD one at a time. Placement continues in a clockwise rotation until all players have placed every tile that they possess.
3.22) In placing the tiles, each hexagon on the tile must FULLY COVER one Game Board Water hexagon. Tiles may not be placed such that they overlap each other.
3.23) Besides the restrictions listed in 3.22, tiles may be placed anywhere on the Game Board that the player desires. They also may be oriented at any angle that the player chooses, as long as the terrain side of the tile is face up and it is placed flat on the Game Board.
3.3) When all of the tiles are in place, the BOAT MARKERS are placed. One Boat Marker is placed next to each Common Town, Elven Dwelling, and Shrineheart Abbey that is adjacent to a Water space.
3.31) If the place where a Boat is to appear is adjacent to more than one Water space, place the Boat Marker in the Water space that is farthest clockwise towards land.
3.32) After all Boats have been placed, any unused Boat Markers are taken out of play.
3.4) Place the DRAGON MARKER in a random space of the DRAGON's LAIR tile. (See section 4 for determining random spaces.)
3.5) Place the DAY MARKER on the Calendar, located on the Record Board, at Day ONE.
3.6) Place the Completion Marker at ZERO on the Completion Track. At the same time, place the Thwart Marker in the Takeover box above this track.
3.7) PLAYERS – Each player, starting with the Dealer, determined in 3.2, now selects a Playing Piece with its corresponding color Task Markers, Lair Time Marker and a base for his Piece.
3.71) When all players have selected their equipment, each rolls to determine a random COMMON space that his Playing Piece will start in. (See section 4 for determining random spaces.) Each player assembles his Playing Piece by sliding the base onto the bottom of the Playing Piece and then places it in the space which he rolled.
3.72) When all players have been placed, the game begins. Players may start in the same Territory. They may NOT start in the same space in that Territory. If a second player rolls a space that is already occupied he must roll over for a new space.
3.73) Players do not start as members of a Magical Order. Until they join one of the Orders they may not undertake Tasks or gain points of any kind.
3.74) In all normal turns, the Dealer, determined in 3.2, moves first. Turns pass from him in a clockwise rotation. After all players have taken their turns in any given Day, he will be responsible for advancing the Day Marker on the Calendar before taking his next turn.
4) Random Spaces
In setting up, and throughout the game, it is necessary to place markers in random spaces and Territories. This is done in two steps as follows:
4.1) TERRITORY PLACEMENT – To determine which Territory an item must be placed in, two dice are generally rolled (depending on the requirements indicated in the table below). The WHITE die always indicates the type of Territory (Common, Elven, or Magic) the marker is placed in. The RED die always indicates which specific Territory (indicated by Roman Numerals on the Territory tiles).
The type of Territory that an item must be placed in will be indicated in one of the following ways:
| Listing | How to Place the Marker |
|---|---|
| COMMON | If a random COMMON space is indicated, roll ONLY the RED die. Place the marker in the Common Territory whose number matches the roll. All Common Territories are GOLD in color. |
| ELVEN | If a random ELVEN space is indicated, roll ONLY the RED die. Place the marker in the Elven Territory whose number matches the roll. All Elven Territories are GREEN in color. |
| MAGIC | If a random MAGIC space is indicated, roll ONLY the RED die. Place the marker in the Magic Territory whose number matches the roll. All Magic Territories are PURPLE in color. |
| COMMON OR ELVEN | If a random COMMON OR ELVEN space is indicated, roll TWO dice. If the WHITE die is a 1-3, the marker is placed in one of the Common Territories. If it is a 4-6, it is placed in one of the Elven Territories. The RED die indicates the specific Territory. |
| COMMON OR MAGIC | If a random COMMON OR MAGIC space is indicated, roll TWO dice. If the WHITE die is a 1-3, the marker is placed in one of the Common Territories. If it is a 4-6, it is placed in one of the Magic Territories. The RED die indicates the specific Territory. |
| ELVEN OR MAGIC | If a random ELVEN OR MAGIC space is indicated, roll TWO dice. If the WHITE die is a 1-3, the marker is placed in one of the Elven Territories. If it is a 4-6, it is placed in one of the Magic Territories. The RED die indicates the specific Territory. |
| RANDOM | If a RANDOM space is indicated, roll TWO dice. If the WHITE die is a 1 or 2, the marker is placed in one of the Common Territories. If it is a 3 or 4, it is placed in one of the Elven Territories. If it is a 5 or 6, it is placed in one of the Magic Territories. The RED die indicates the specific Territory. |
| SPECIFIC | When a specific Territory is named, the marker is placed in that Territory and no dice are rolled. |
| ANY | Whenever the word ANY appears, the player may place the marker in any space he desires, as long as that space is of the type specified. (EXAMPLE – ANY Mountain space.) |
4.2) THE EXACT SPACE – Once the Territory has been determined, the player must determine the exact space within that Territory in which the marker is to be placed. Each space in the Territory, except the Center space, is numbered from A1 to C6. To determine the exact space:
4.21) Roll TWO dice.
4.211) The WHITE die refers to the LETTER of the space: A roll of 1 or 2 corresponds to the letter A, 3 or 4 to B, and 5 or 6 to C.
4.212) The number of the RED die refers to the number of the space: 1-6.
4.22) When an exact space is specified, the marker is automatically placed in that space and the roll above is not taken. Likewise, if the word ANY appears, the player decides the space and the roll is not taken.
EXAMPLE – A Task Card reads, "Help the Centaur, Klor, in a random COMMON OR MAGIC space, return to a random ELVEN space." This card calls for the placement of two Task Markers. For the first, Common or Magic, a 5 is rolled on the White die. The marker is in a Magic Territory. A 1 is rolled on the Red die. It is on the Sacred Circle tile. On the roll to determine the exact space a 3 and 4 are rolled. Thus Klor is in space B4 on the Sacred Circle tile.
Next the space where he wishes to go is determined. On this card, ELVEN is specified. Only the Red die is rolled. In this case a 4 is rolled for the Territory, and then a 1 and 5 for the exact space. Klor must be taken to Green Grove, space A5, to complete the Task.
5) Sequence of Play
One DAY in the game is composed of ONE TURN taken by each player. Each turn is divided into two segments; Movement and Encounter.
5.1) MOVEMENT – In his movement segment, the player rolls TWO dice. The roll of the WHITE die yields the number of MOVEMENT POINTS that the player will have in the turn. The RED die tells him whether he will have a RANDOM ENCOUNTER after he moves, if he ends his turn on an eligible space. (For Movement Costs and other details, see section 6.)
5.2) ENCOUNTER – There are two types of Encounter, SPECIFIC and RANDOM. (The full parameters of these types of Encounter are covered in sections 7 and 8.)
5.21) If a player's roll, on the Red die in section 5.1, is a 1-3 he CAN have a Random Encounter on his turn. If it is a 4-6 he will NOT have one.
6) The Movement Segment
The following terrain costs, and special rules, are applied during movement:
| Type of Space | Movement Point Cost | Description/Special Rules |
|---|---|---|
| PLAINS | 1 | A land space that does NOT contain a picture in it. |
| WOODS | 2 | A land space that has a picture of trees in it. |
| MOUNTAINS | 2 | A land space that has a picture of mountains in it. |
| TOWNS and DWELLINGS | 1 | All structures, including Shrineheart Abbey, in Common or Elven territory. On entering any of these spaces, movement for the player's turn ends and a Specific Encounter results. |
| SPECIAL SPACES | 1 | High Hollow and the CENTER spaces of the following tiles: each Master Sorcerer's Tower, Hamdrel's Cottage, and the Dragon's Lair. On entering any of these spaces, movement for the player's turn ends and a Specific Encounter results. |
| WALLS | – | Thick barriers along hexsides. Walls are impassable for players that aren't flying or transporting. They may never be crossed except in this way. |
| THE STAR CREST | 1 | The Star Crest may not be entered unless the player has been directed to go there by a Task or Event Card, or is transported there in some way. |
| SACRED CIRCLE STONES | – | The number of the player's Movement Roll must equal the number of dots next to the stone that he is attempting to enter. He may check this roll against any stones which are ADJACENT to his space. If the attempt is not successful, he may still use the roll for normal movement. |
| SACRED CIRCLE CENTER | – | For a player to enter the Center of the Sacred Circle, he must be on a Sacred Circle Stone AND Rüktal must be present. If his Movement Roll is a 1-3, Rüktal is present and the player may enter. If it is a 4-6, he is not present. If the attempt is not successful, he may still use the roll for normal movement. |
| WATER-SWIMMING | ALL | A player may move ONE space by swimming. Entering the Water requires ALL Movement Points for that turn. The cost to exit the Water depends on the terrain that the player wishes to exit onto. The player may remain in the Water until he rolls a number that will allow him to go onto the land. He may not swim from one Water space into another. |
| BOARDING A BOAT | 1 | If a Boat Marker is located between two land spaces, (or other Boats), the player may use it as a bridge, as if it were a PLAINS space. A player may not MOVE a Boat on the same turn that he boards it. No more than one player may be in the same Boat at the same time. However, any number of Boats may be in the same space, and players may swim in spaces containing Boats, encountering other players swimming or in Boats in that space. |
7) Specific Encounters
When a player lands in a space which contains one of the following, a Specific Encounter results:
- a – His own Task Marker.
- b – A High Wizard or Secret Wizard Marker.
- c – Any of the CENTER spaces of the Magic Territories.
- d – High Hollow.
- e – The Star Crest.
- f – Shrineheart Abbey.
- g – Any Elven Dwelling.
- h – Any Common Town.
- i – Any other Player if both are Level ONE or higher.
- j – Any Demon Marker.
- k – The Dragon Marker.
7.1) A Random Encounter is NOT possible in a space where a Specific Encounter is called for. If a player rolls that he can have a Random Encounter, he will not have one if he enters a space that calls for a Specific Encounter.
7.2) All further movement in the player's turn is lost when he enters a Specific Encounter space.
7.3) SPECIFIC ENCOUNTER DESCRIPTIONS – The following sections detail what will occur when a player has a Specific Encounter:
7.31) TASK MARKERS – When a player lands on one of his own Task Markers, he will have a Specific Encounter, fulfilling that requirement of his Task. He removes the marker and places it on the corresponding Task Card to show that it is fulfilled. No player can have an encounter with any other player's Task Marker.
7.311) A player may only encounter, and fulfill, a Task Marker if he has completed all prerequisite parts of the Task. If he has not done so, the player will NOT encounter his Task Marker.
7.312) A player may choose to ignore any Task Marker, saving it for pickup at a later date. In this case, the space is treated as though it has no marker in it. This is the only type of encounter which may be deliberately avoided.
7.32) HIGH WIZARD – One of these wise and majestic Messengers of Light is encountered when a player's piece lands on a High Wizard or Secret Wizard Marker. These markers are put into play when the location of a High Wizard is revealed in some way. It remains on the Board until any player has an encounter with it. Whenever a High Wizard is encountered, his marker is returned to its appropriate box on the Record Board and any Wizard Cards drawn in revealing him are reshuffled into the Wizard Deck. Encounters with High Wizards are forbidden in the Center of the Sacred Circle.
When a High Wizard is encountered, he does ONE of the following things for a player (unless the player is in the Order of Wizards, see section 7.327):
7.321) INITIATE HIM – If the player has not, as yet, joined a Magical Order (or if he wishes to change Orders), the High Wizard offers him membership in the Order of Wizards. If the player accepts, he becomes an Apprentice and is assigned a Task by his new Mentor.
7.322) HEAL – If a player is Demon Dazed or Dragonbound, the High Wizard automatically cures the affliction. Nothing more may be done for a player on the turn he is healed, regardless of his Order.
7.323) FULFILL A TASK – If the player has a Task Card that instructs him to meet a High Wizard (and any prerequisites which exist have been met), this requirement is fulfilled by the High Wizard.
7.324) ASSIGN A TASK – The High Wizard gives the player a Task. Draw a Task Card.
7.325) PROMOTE HIM – If a player in the Order of Wizards has enough points to advance to the next higher Level, the High Wizard promotes him to that new Rank.
7.326) GIVE GEMS – If a player is at Rank FOUR in his Order, and has completed all his Mandatory Tasks, he may attempt to get a Sacred Gem from the High Wizard. When this attempt is made, the player rolls ONE die. If the roll is 1-5, the High Wizard gives him a Gem. If the roll is 6, he will not.
7.3261) If the High Wizard gives the player a Gem, he secretly looks at that High Wizard's Gem Card and records the type of Gem on his Record Sheet across from the name of the High Wizard. When this is done the Gem Card is returned, face down, to its place on the Record Board.
7.3262) If the player rolls a 6, he is not allowed to look at the High Wizard's Gem Card and does not receive a Gem.
7.3263) THE FALSE WIZARD – If the Gem Card reads FALSE WIZARD and the player's roll was 1-4, it means that the False Wizard has stolen all of the Sacred Gems that are in that player's possession at that time. If the player's roll was 5, the False Wizard fails to steal any Gems. On his Record Sheet, the player secretly records the identity of the False Wizard by writing FALSE across from the name of the High Wizard.
7.327) ORDER OF WIZARDS – If a player is a member of the Order of Wizards when he encounters a High Wizard, that High Wizard will do AS MANY of the items, 7.323, 7.324, 7.325 and 7.326, as possible for him EVERY time he encounters him.
7.33) RÜKTAL – The Druid High Priest is only encountered in the CENTER space of the Sacred Circle. When he is encountered, he does ONE of the following things for a player (unless the player is in the Order of Druids, see section 7.337):
7.331) INITIATE HIM – If the player has not, as yet, joined a Magical Order (or if he wishes to change Orders), Rüktal offers him membership in the Order of Druids. If the player accepts, he becomes an Apprentice and is assigned a Task by his new Mentor.
7.332) HEAL – If a player is Demon Dazed or Dragonbound, Rüktal automatically cures the affliction. Nothing more may be done for a player on the turn he is healed, regardless of his Order.
7.333) FULFILL A TASK – If the player has a Task Card that instructs him to meet Rüktal (and any prerequisites which exist have been met), this requirement is fulfilled by Rüktal.
7.334) ASSIGN A TASK – Rüktal gives the player a Task. Draw a Task Card.
7.335) PROMOTE HIM – If a player in the Order of Druids has enough points to advance to the next higher Rank, Rüktal promotes him to that new Rank.
7.336) RECEIVE GEMS – When a player has collected all SIX of the Sacred Gems, Rüktal will receive them from him. To give the Gems to Rüktal, the player must travel to the Center of the Sacred Circle.
7.337) ORDER OF DRUIDS – If a player is a member of the Order of Druids when he encounters Rüktal, Rüktal will do AS MANY of the items, 7.333, 7.334 and 7.335, as possible for him EVERY time he encounters him.
7.34) MASTER SORCERERS – These powerful Men are only encountered in the CENTER spaces of their Territory tiles. When a Master Sorcerer is encountered, he does ONE of the following things for a player (unless the player is in the Order of Sorcerers, see section 7.347):
7.341) INITIATE HIM – If the player has not, as yet, joined a Magical Order (or if he wishes to change Orders), the Master Sorcerer offers him membership in the Order of Sorcerers. If the player accepts, he becomes an Apprentice and is assigned a Task by his new Mentor.
7.342) HEAL – If a player is Demon Dazed or Dragonbound, the Master Sorcerer automatically cures the affliction. Nothing more may be done for a player on the turn he is healed, regardless of his Order.
7.343) FULFILL A TASK – If the player has a Task Card that instructs him to meet a Master Sorcerer (and any prerequisites which exist have been met), this requirement is fulfilled by the Master Sorcerer.
7.344) ASSIGN A TASK – The Master Sorcerer gives the player a Task. Draw a Task Card.
7.345) PROMOTE HIM – If a player in the Order of Sorcerers has enough points to advance to the next higher Rank, the Master Sorcerer promotes him to that new Rank.
7.346) SUMMON GEMS – If a player is at Level FOUR in the Order of Sorcerers, the Master Sorcerer aids him in the use of his Gem Summoning Spell. For details on the effect and use of this Spell, see section 11.232.
7.3461) Members of the Order of Sorcerers are not fully trusted by the High Wizards. When they encounter a High Wizard they will only have a chance to receive a Gem if they are in the company of a Master Sorcerer, Hamdrel, or another player who is at Level FOUR in the Order of Wizards or Druids. At no other time may a player in the Order of Sorcerers receive a Gem directly from a High Wizard.
7.347) ORDER OF SORCERERS – If a player is a member of the Order of Sorcerers when he encounters a Master Sorcerer, that Master Sorcerer will do AS MANY of the items, 7.343, 7.344, 7.345 and 7.346, as possible for him EVERY time he encounters him.
7.35) HAMDREL – Hamdrel, the Wise Woman, is only encountered in the CENTER space of her tile. When she is encountered, she does ONE of the following things for a player:
7.351) HEAL – If a player is Demon Dazed or Dragonbound, Hamdrel automatically cures the affliction.
7.352) FULFILL A TASK – If the player has a Task Card that instructs him to meet Hamdrel (and any prerequisites which exist have been met), this requirement is fulfilled by Hamdrel.
7.353) GIVE A GIFT – If she does neither of the above, Hamdrel gives the player a gift. To determine what the gift is, roll TWO dice, reading only the higher die, on the appropriate table below:
Player of Rank 1-3
| Roll | Gift |
|---|---|
| 1 or 2 | The player receives the roll of ONE die doubled in any type of points. |
| 3 or 4 | The player is assigned a Task. |
| 5 or 6 | Hamdrel reveals the location of a High Wizard. To determine which, draw Wizard Cards until one bearing the name of a High Wizard is drawn, ignoring all Traps and Phantasms. Place his marker in a RANDOM space and retain all of the cards drawn until he is encountered by any player. |
Player of Rank 0* or 4
| Roll | Gift |
|---|---|
| 1 or 2 | No gift is received by the player. |
| 3 or 4 | A High Wizard is summoned for the player. Draw ONE Wizard Card. If the card is a High Wizard, the player will encounter him immediately. If the card is a Trap or a Phantasm, the appropriate result occurs immediately. (See section 8.7) |
| 5 or 6 | Hamdrel reveals the location of a High Wizard. (See 5 or 6 in the previous level 1 to 3 table.) |
*A player that has NOT been initiated into an Order may seek Hamdrel's aid in this way.
7.354) A player can remain with Hamdrel for THREE turns, encountering her on each turn. After this he may not encounter her until he leaves her Cottage and returns. On his return he may remain for another THREE turns. After two such visits he will not encounter her again until he leaves her tile and returns.
7.36) HIGH HOLLOW – The entrance to the Underworld. High Hollow is honeycombed with potent mystical pathways. When a player enters this space roll TWO dice, reading only the higher die, on the table below:
| Roll | Effect |
|---|---|
| 1 or 2 | The player is transported to the Star Crest. |
| 3 or 4 | The player arrives at Hamdrel's Cottage. |
| 5 or 6 | The player is taken to Megmoran's Tower. |
7.361) This roll is not taken if the player enters High Hollow to fulfill a Task or if a High Wizard is in the High Hollow space.
7.37) THE STAR CREST – When a player enters the Star Crest he is entering the most ancient and mysterious part of the Enchanted Islands. It is warded by the Elves and may only be entered as part of a Task or Event Card, when a player is transported to it or on the turn after visiting and leaving it. At no other time may a player enter this space.
7.371) When a player enters the Star Crest, roll TWO dice, reading only the higher die, on the table below to determine what benefit is gained:
| Roll | Effect |
|---|---|
| 1 or 2 | Receive 10 Knowledge, 10 Perception and 10 Power points. |
| 3 or 4 | Immediately encounter TWO High Wizards. Draw Wizard Cards until a High Wizard is drawn, ignoring all Traps and Phantasms that are drawn. |
| 5 or 6 | Roll ONE die and immediately take that number of extra turns. |
7.3711) On any extra turns the player is allowed to have either Random or Specific Encounters as on normal turns.
7.3712) This roll is not taken if the player enters the Star Crest to fulfill a Task or if a High Wizard is present.
7.372) A player may re-enter the Star Crest on the VERY NEXT turn after he leaves it. If he does not do so at this time, he may not re-enter except as specified in section 7.37.
7.3721) No player is allowed more than ONE re-entry after any initial visit to the Star Crest.
7.38) SHRINEHEART ABBEY – When a player enters this holy fortress, the Monks aid him. Roll TWO dice, reading only the higher die, on the table below to determine how:
| Roll | Effect |
|---|---|
| 1 or 2 | Take ONE extra turn immediately. |
| 3 or 4 | The player contacts his Mentor telepathically. (See section 7.381). |
| 5 or 6 | Roll ONE die. Receive that number of points of any type. |
7.381) Telepathic contact, when attempted here, is automatically successful. It may be used to fulfill and receive Tasks and/or to advance to a higher Level in one's Order, if the player has enough points. Players in the Order of Wizards draw Wizard Cards until a High Wizard is drawn, ignoring all Traps and Phantasms. Members of the Order of Sorcerers roll ONE die. On a 1 or 2 Megmoran is contacted, on a 3 or 4 Meligar is contacted, and on a 5 or 6 Melekok is contacted. Members of the Order of Druids contact Rüktal.
7.382) This roll is not taken if the player enters the Abbey to be healed, to fulfill a Task, or if a High Wizard is present.
7.39) ELVEN DWELLINGS – When a player enters a structure in Elven territory, he will have an encounter with the Elves. Roll TWO dice, reading only the higher die, on the table below:
| Roll | Effect |
|---|---|
| 1 or 2 | The player receives the roll of ONE die doubled in any type of points. |
| 3 or 4 | The player receives the roll of ONE die in any type of points. |
| 5 or 6 | The Elves elude the player. No effect. |
7.391) This roll is not taken if the player enters a Dwelling to fulfill a Task, if a High Wizard is present, or if a player in the Order of Wizards wishes to attempt a Telepathy Spell.
7.301) COMMON TOWNS – When a player enters a structure in Common territory, except for Shrineheart Abbey, the player encounters Common Folk. To determine the effect of the encounter roll TWO dice, reading only the higher die, on the table below:
| Roll | Effect |
|---|---|
| 1 | Thieves steal any Magical Objects or Sacred Gems that the player possesses. |
| 2 | Roll ONE die and lose the number of points rolled. The points lost may be of any type. |
| 3 | The player is detained. He must remain in this space on his next turn and encounter the Common Folk again. |
| 4 | The player is informed of a Task that he may carry out. Draw a Task Card. |
| 5 | The Common Folk speed the player on his way. Take an extra turn immediately. |
| 6 | The player is given lodging for the night. No effect. |
7.3011) This roll is not taken if the player enters a Town to fulfill a Task or if a High Wizard is present.
7.302) PLAYER ENCOUNTERS – If a player enters a space that contains another player or players, other than a Rescue situation, a Player Encounter results if both players are Rank ONE or higher. If one of the players in this encounter is Dragonbound, see sections 7.304 and 7.3051.
If none of the special cases above apply, the result will depend on the Ranks of the players in the encounter. If any of them are Rank ONE to Rank THREE roll on the Level 1-3 table. If all of the players are at Rank FOUR roll on the Level 4 table. Roll TWO dice, reading only the higher die, on the appropriate table below:
Rank 1-3
| Roll | Effect |
|---|---|
| 1 | Demons attack each player in the encounter. One Demon Marker is placed on the space, but all players must dispel the Demons in order to remove the marker. |
| 2 | Each player in the encounter is transported to a RANDOM space. |
| 3 | A Winged Horse is summoned for each player in the encounter. |
| 4 | A High Wizard is summoned. Draw ONE Wizard Card. Each player in the encounter encounters the High Wizard, Trap, or Phantasm drawn. |
| 5 | The player in the encounter at the highest Level who has the most Task Cards must give TWO of his Optional Tasks to every player in the encounter who is on a lower Level than himself, and must give ONE of his Optional Tasks to every player in the encounter who is on the same Level as himself. |
| 6 | Each player in the encounter rolls ONE die and receives the indicated number of points of any type. |
Rank 4
| Roll | Effect |
|---|---|
| 1 | Demons attack each player (as in the Level 1-3 table). |
| 2 | All players in the encounter are transported to the Star Crest. |
| 3 | A Unicorn is summoned for each player in the encounter. |
| 4 | A High Wizard is summoned. Draw Wizard Cards until a High Wizard is drawn, ignoring all Traps and Phantasms. Each player in the encounter encounters the High Wizard drawn. |
| 5 | The player entering the space learns the identity of ONE Secret Wizard known to EACH other player in the encounter. |
| 6 | A Secret Wizard location is revealed to all the players in the encounter. Determine which High Wizard by drawing Wizard Cards until a High Wizard is drawn, ignoring all Traps and Phantasms. This card is shown to all of the players in the encounter, but is kept hidden from all other players. The cards drawn are placed face down near the Board. Then take TWO Secret Wizard Markers bearing the same letter. Place one marker in a RANDOM space, and the other marker on top of the cards drawn. When a player lands on the Secret Wizard Marker, the identity of the High Wizard is revealed to all players. |
7.3021) Results of Player Encounters affect the player entering the space first, then other players in a clockwise rotation.
7.303) RESCUE – When a player is stranded or trapped, a Rescue Encounter can occur.
7.3031) STRANDED – A player is stranded in the following cases:
- a – When he is on an island without a Boat or any other means of getting off the island.
- b – When he is in a Water space beyond swimming range without a Boat.
In either case above the player must ask for help before he can be rescued. If he does ask, the first player to encounter him will receive points as follows:
| Place Rescued From | Point Value |
|---|---|
| Dragon's Lair tile | 25 |
| Hamdrel's Cottage tile | 20 |
| Any Water space | 20 |
| Any other Island | 15 |
7.30311) When a player is rescued from being stranded normal Player Encounters do not occur. Instead, the rescuer receives the points for his good deed and the player that is rescued is transported to a RANDOM space which must be on a different island from the one he was stranded on.
7.3032) TRAPPED – When a player is caught in a Trap, losing turns, he need not ask to be rescued. The first player to reach him before his Trap expires releases him from the Trap and receives TEN points.
7.30321) To rescue a trapped player, the rescuer enters the space containing the trapped player. No normal Player Encounter occurs. Instead, the rescuer receives his points and the player that is rescued is free to move on his next turn.
7.3033) Points received for rescuing a stranded or trapped player may be divided up as the player wishes. (EXAMPLE – A player rescuing another player stranded in the Dragon's Lair may take 12 Knowledge, 7 Perception, and 6 Power points.)
7.304) DEMONS – When a player lands on a Demon Marker he will have an encounter with Demons. Roll TWO dice, reading only the higher die, on the table below:
| Roll | Effect |
|---|---|
| 1 | Roll ONE die and lose the number of turns rolled. |
| 2 | Roll ONE die. Lose the number of points indicated from the type the player has the least of. (Categories with zero points do not count.) If the player is at Rank FOUR, treat this result as a result of 3. |
| 3 | All Magical Objects and Sacred Gems are stolen by the Demons. |
| 4 | The player is Demon Dazed. (See section 7.3043.) |
| 5 | The player is transported to a random DRAGON'S LAIR space. |
| 6 | The Demons depart. Remove the Demon Marker from the Board. The player receives the roll of ONE die in any type of points. |
7.3041) On roll of 1-5, the Demons do not depart. The Demon Marker remains in the space, PLUS a second Demon Marker must be placed in a RANDOM space in the SAME Territory where the encounter occurred. If the encounter occurred in a Water space, the second Demon Marker is placed in a RANDOM space. Only one Demon Marker need be in any one space. If a second Demon is to be placed in a space already occupied by another Demon Marker, no new marker is placed.
7.3042) When the equivalent of a Demon encounter occurs as a result of meeting a Dragonbound player, a result of 6 will mean that the Dragonbound player is transported to a RANDOM space. The other player receives no points for this. If a 1-5 is rolled, no new Demon Marker is placed.
7.3043) When a player is Demon Dazed he will operate under the following restrictions until healed:
- a – When a player becomes Demon Dazed he loses all Movement Event Cards he currently holds.
- b – He may only attempt Boat Summoning, Transporting and Escaping Spells while affected.
- c – Any spell that he attempts will work on a roll of 1-3 instead of 1-5.
- d – No animal, other than a Dragon, will come near him. Any that are with him will leave. If an animal is encountered no encounter will result.
- e – He will treat all spaces that he travels through, excluding any part of the Sacred Circle, as MOUNTAIN spaces. This WILL apply to travel on Water.
7.3044) HEALING – to heal his affliction a player must visit a High Wizard, Rüktal, a Master Sorcerer, Hamdrel or Shrineheart Abbey. On encountering any of these he is automatically healed. When an encounter is used to heal an affliction nothing else can be gained from the encounter, even if the encounter is with the player's Mentor.
7.305) DRAGONS – A Dragon is encountered whenever a player enters the CENTER space of the Dragon's Lair tile or is in the same space with the Dragon Marker. To determine the effect of this encounter, roll TWO dice, reading only the higher die, on the table below:
| Roll | Effect |
|---|---|
| 1 | The player becomes Dragonbound. (See section 7.3051.) |
| 2 | Roll ONE die and lose the number of turns rolled. |
| 3 | The Dragon steals all Magical Objects and Sacred Gems that the player has in his possession. |
| 4 | Roll ONE die and lose double the number rolled in the type of points the player has the least of. (Categories with zero points do not count.) If the player is at Rank FOUR treat this result as a result of 3. |
| 5 | The player is transported to the CENTER of the Dragon's Lair. If he is already in this space he must remain there and encounter the Dragon again on his next turn. |
| 6 | The player is uneffected by the Dragon. |
7.3051) When a player becomes Dragonbound he will operate under the following restrictions until healed:
- a – A Dragonbound player will have no Random Encounters.
- b – When a player becomes Dragonbound he loses all Event Cards he currently holds.
- c – He may not use magic of any kind until he is healed.
- d – Until he is healed he may not encounter any of his Task Markers.
- e – While afflicted the player cannot gain points in any way or advance in his Order.
- f – He will treat all spaces that he travels through, excluding any part of the Sacred Circle, as MOUNTAIN spaces. This WILL apply to travel on Water.
- g – While affected the player may not enter the Star Crest or High Hollow.
- h – No animal, other than a Dragon, will ever come near a Dragonbound player. Any that are with him will leave. If any are encountered, no encounter results.
- i – If the player meets another player, in other than a Rescue situation, the other player will have the equivalent of a Demon Encounter. (See section 7.304.) Such a player encountered may not use a Demon Dispelling Spell.
7.30511) HEALING – A Dragonbound player may be healed in the same way as a Demon Dazed player. (See section 7.3044.)
7.4) MULTIPLE SPECIFIC ENCOUNTERS – If a player enters a space which has more than one item in it which calls for a Specific Encounter, he will encounter them in the following order until ALL have been encountered, or until he is transported out of the space:
- a – Task Marker
- b – High Wizard – If more than one, in the order of rank (Ishkatar first, Veldor last)
- c – Specific Place Encounters (Shrineheart Abbey, Elven Dwellings, Rüktal, etc.)
- d – Other players
- e – Demons
- f – Dragon
7.5) EXTRA SPECIFIC ENCOUNTERS – Whenever a player is transported to a space which calls for a Specific Encounter, he will have that encounter, even if he has already had an encounter that turn, and even if it is not his turn. If a High Wizard or Demon is placed on a player's space, he will encounter it immediately, even if it is not his turn.
7.6) REMAINING IN SPACES – A player will remain in a space as long as he wishes. However, if he is in a space which calls for a Specific Encounter (including Demons and Dragons, but excluding Hamdrel's Cottage, see section 7.354), he will no longer have encounters there. He may not have another encounter in that space until he leaves the space which it is in and then returns (unless a table indicates that he must remain for further encounters). After this second encounter, the player must leave the Territory tile and then return in order to encounter it again.
7.61) The rule in 7.6 does not fully apply to the Star Crest. (See section 7.37.)
7.62) Random Encounters can occur an unlimited number of times in any space.
8) Random Encounters
Whenever a player ends his movement in a space in which a Random Encounter is possible AND his Encounter Roll (in section 5.1) is 1-3, the player has a Random Encounter. Roll TWO dice, reading only the higher die, on the table below:
| Roll | Encounter |
|---|---|
| 1 | Demons (See section 8.2.) |
| 2 | Trap (See section 8.3.) |
| 3 | Animal (See section 8.4.) |
| 4 | Event (See section 8.5.) |
| 5 | Common Folk (See section 8.6.) |
| 6 | High Wizard (See section 8.7.) |
8.1) A Random Encounter is NOT possible in any of the following spaces:
- a – Any Sacred Circle Stone.
- b – Any MOUNTAIN space of a Sorcerer's Tower tile.
- c – Any space of Hamdrel's Cottage tile.
- d – Any space of the Dragon's Lair tile.
- e – Any Water space.
- f – Any space where a Specific Encounter is called for.
Random Encounter can occur in any other space, without restrictions.
8.2) DEMONS – When a random Demon is encountered, place a Demon Marker in the player's space. The effect of the encounter is determined by consulting section 7.304.
8.3) TRAPS – Roll TWO dice, reading only the higher die, on the table below:
| Roll | Trap |
|---|---|
| 1 | The player loses ALL turns until the end of the present Fortnight. |
| 2 | The player is transported to the CENTER of the Dragon's Lair. |
| 3 | Roll ONE die and lose the number of turns indicated. |
| 4 | The player is transported to a random DRAGON'S LAIR space. |
| 5 | The player must roll a 5 or 6 on his Movement Roll in order to move on. (Once he does, the Trap expires.) |
| 6 | The player is transported to a RANDOM space. |
8.31) While a player is in a Trap Random Encounters are not possible. He may be rescued by a player that enters the space. He may NOT have any other encounters. If a player is transported, he is freed from any Trap he is in.
8.4) ANIMALS – When an Animal is encountered, the player rolls TWO dice, reading only the higher die, on the table below:
| Roll | Animal |
|---|---|
| 1 | Dragon (See section 8.42.) |
| 2 | Unicorn (See section 8.43.) |
| 3 | Winged Horse (See section 8.44.) |
| 4 | Horse (See section 8.45.) |
| 5 | Hound (See section 8.46.) |
| 6 | Dove (See section 8.47.) |
8.41) A player may never use more than one Animal at a time. If the player encounters a second Animal the first will leave him. If a player is transported he loses any Animal that is with him.
8.42) DRAGON – When a Dragon is encountered randomly, move the Dragon Marker into the player's space and consult section 7.305.
8.421) When the Dragon leaves the Dragon's Lair tile as the result of a Random Encounter or Animal Summoning Spell, he will remain in the space that he goes to until a player enters the Dragon's Lair territory tile. If a player is already there, the Dragon will return to a random space of its tile immediately.
8.4211) When a player ends a turn in the Dragon's Lair, and the Dragon is on another tile, move the Dragon Marker to a random DRAGON'S LAIR space.
8.43) UNICORN – The Unicorn, when encountered, may be used for the player's NEXT turn. It will allow the player to move from any space on the Board to any other space including the Star Crest, except the CENTER of the Sacred Circle. After this one use the Unicorn departs.
8.431) A Unicorn will not transport a player into a WATER space.
8.44) WINGED HORSE – A Winged Horse may be used for the player's NEXT TWO turns. It allows the player to fly TEN spaces per turn, disregarding all terrain costs. It can land in the Star Crest. It can NOT land in the CENTER of the Sacred Circle or any space of Dragon's Lair. It will fly over Dragon's Lair. While the Winged Horse is present no Movement Roll need be taken. After two uses, the Winged Horse departs.
8.441) The Winged Horse will not alight in a WATER space.
8.442) The Winged Horse will leave any player that encounters the Dragon.
8.45) HORSE – A Horse may be used for THREE turns. It will allow the player to add FOUR to his Movement Roll. While using a Horse the player must obey all terrain restrictions. The Horse may not enter any part of the Sacred Circle, the Star Crest, or any space of Dragon's Lair. It will leave a player entering such spaces. After its uses, the Horse departs.
8.451) A player may swim up to TWO spaces with a Horse at a rate of one space per turn.
8.452) The Horse will leave any player that encounters a Dragon or a Demon. It will also leave if the player boards a Boat.
8.46) HOUND – A Hound may be used for FOUR turns. While it is with a player, he adds ONE to his Movement Roll. If the Hound is taken with the player in a Boat, its benefits will not apply to the Boat's movement. The Hound will not enter any part of the Sacred Circle, the Star Crest or any space of Dragon's Lair. It will leave a player entering such spaces. After its use, the Hound departs.
8.461) The Hound will leave any player that encounters a Dragon or Demon.
8.47) DOVE – The Dove is sent from Hamdrel bearing news of a Task. If a player encounters it, draw a Task Card. It has no other effect.
8.5) EVENTS – If the roll indicates that an Event occurs, draw an Event Card. The advantages or disadvantages accrued are explained on the card. When the effects of the Event expire, discard the card.
8.51) There are FOUR types of Event Cards as follows:
IMMEDIATE – These Events occur at once. Do everything that the card says before your current turn ends.
EXTENDED – These Events are of three types: 1) those that occur over an extended period of time, 2) Those that are kept and used later and 3) those that have delayed effects.
MOVEMENT – These Events affect the player's movement for a specified number of days. If a player draws a second Movement Event Card while he is still affected by the first, the first card is lost by the player. If a player becomes trapped, Demon Dazed or Dragonbound while using a card of this type he must discard it.
TRAP – These Events can be avoided with the Escaping Spell. A player that is caught in one can be rescued by another player. If a player in such a Trap is transported he is freed from the Trap.
8.6) COMMON FOLK – When random Common Folk are encountered roll as specified for Common Towns in section 7.301.
8.7) HIGH WIZARD – When a random High Wizard is encountered, draw ONE Wizard Card. A High Wizard may or may not be encountered in this way. In order to help remain hidden, each High Wizard has either projected a Phantasm of himself or set a Trap to discourage seekers.
8.71) If the card drawn bears the name of a High Wizard, the player encounters that High Wizard in the space that the player is in.
8.72) If the card drawn is a Phantasm, the player sees an image of a High Wizard which evaporates into mist, but has no encounter.
8.73) If the card is a Trap, the player is transported to the indicated location. Such a Trap can be avoided with the Escaping Spell.
8.74) Whenever Wizard Cards are drawn, they must be returned to the Wizard Deck immediately after the encounter, and the deck must be reshuffled. In cases where the High Wizard is not encountered immediately, the cards drawn are kept aside until the player reaches the High Wizard's location. Once the encounter occurs the cards are returned to the deck and the deck is reshuffled.
9) Tasks
Tasks are undertaken to increase the unity and wholeness of the Enchanted Islands so that they can hold back the force of Evil. By completing Tasks players increase their abilities and experience, working towards the day when they can deliver the Sacred Gems to Rüktal, thus defeating the power of Evil in the islands.
When a player is assigned a Task he draws a card from the Task Deck. Any spaces called for on the card that the player must go to are determined, as specified in section 4, and marked on the Board with the player's Task Markers. With certain exceptions, only the player that draws the Task Card may complete any portion of it. The following rules apply to the placement and completion of all Tasks:
9.1) When a Task Card is drawn each portion of it that can be marked with Task Markers is marked immediately. These markers are placed on the Board in the spaces determined by their requirements. Each marker must remain in the space it is initially placed in until it is picked up, until the end of the game, until the Territory which it is in is taken over by Evil or until it is replaced by a Demon Marker.
9.2) If a Task is given to another player as a result of a Player Encounter, the original cardholder's Task Markers are removed and replaced by those of the new cardholder.
9.3) If an Event Card is drawn which states that a number of Tasks are completed for the player, all Task Markers related to the Tasks selected for completion are removed from the Board.
9.4) There are two types of Tasks that a player can have:
9.41) EVERY Task that is given to a player by his MENTOR is a MANDATORY Task. All Mandatory Tasks which do not become impossible must be completed before a player can begin to collect Sacred Gems.
9.42) Any Task that a player receives from someone other than his Mentor is an OPTIONAL Task. The player is not required to either complete or attempt an Optional Task, but he must mark it.
9.5) A player may work on any number of Tasks at one time.
9.6) If a player has more than one Task Marker located in the same space only one encounter is required to pick them all up (provided the player has completed all prerequisite requirements for each Task Marker).
9.7) If the first requirement of a Task may be fulfilled in the space where the Task is received, then that requirement is fulfilled immediately.
EXAMPLE – A player receiving a Task from his Mentor which instructs him to get something from his Mentor need not visit that Mentor a second time to fulfill the requirement.
9.8) An ASTERISK (*) on a Task Card indicates a Magical Object which may be stolen from the player. If an encounter occurs where a player's Magical Objects are stolen, the Task that they are a part of becomes impossible (if the player has picked up any of the Magical Objects involved with that Task).
9.9) If a Task becomes impossible, any Task Markers related to it that are still on the Board are replaced by Demon Markers.
A Task becomes impossible when:
- a – A Magical Object necessary for its completion is stolen.
- b – A Territory that contains any of the markers for the Task is taken over by Evil.
In either case the Task becomes impossible, the card is discarded and any remaining Task Markers are replaced by Demons.
9.01) A Task is completed when all of the Task Markers placed for it are picked up and any High Wizards necessary have been encountered. When a Task is complete, the player who completed it receives the points specified for it at the bottom of its card. Record these points on the player's Record Sheet, discard the card and move the Completion Marker ONE box farther along the Completion Track on the Record Board. The Task Markers used for that Task may then be used to mark any new Task.
9.011) No points are gained for Tasks that are partially completed or that become impossible before they can be completed.
10) Magical Orders
The first goal of each player is to join one of the Magical Orders. Until he does so he may not accept any Tasks or gain any points.
When a player enters an Order, by meeting a High Wizard, Master Sorcerer or Rüktal, he becomes an apprentice and is given his first task by his Mentor.
10.1) Each order has FOUR Ranks. As a player gains Knowledge, Perception and Power points he will advance in Rank. When he reaches the Order's highest Rank, he may begin to collect the Sacred Gems.
The points required to reach each Rank, and the Magic Spells that a player at a given Rank in an Order can cast, are listed in the sections that follow:
10.11) THE ORDER OF WIZARDS – Players in the Order of Wizards follow the ways of the seven High Wizards. Each of the High Wizards is Mentor for all players that are in this Order. Their magic stems from their ominous mystical powers and their great wisdom and knowledge of the universe, since they themselves have existed from beyond time.
Rank Table
| Rank | Knowledge | Perception | Power |
|---|---|---|---|
| 1) Apprentice | 0 | 0 | 0 |
| 2) Scholar | 15 | 10 | 5 |
| 3) Sage | 40 | 30 | 20 |
| 4) Wizard | 75 | 60 | 45 |
Spell Table
| Rank | Spell | Parameters | Type |
|---|---|---|---|
| 1) Apprentice | Telepathy | Advancement Only | C |
| 2) Scholar | Boat Summoning | Range = 10 | A |
| Swiftness | Woods Only | A | |
| Animal Summoning | – | B | |
| Telepathy | Advancement Only | C | |
| 3) Sage | Boat Summoning | Range = 15 | A |
| Swiftness | Woods and Mountains | A | |
| Transporting | To a Random Space | A | |
| Animal Summoning | – | B | |
| Demon Dispelling | – | B | |
| Telepathy | Advancement Only | C | |
| 4) Wizard | Boat Summoning | Range = Unlimited | A |
| Swiftness | Woods and Mountains | A | |
| Transporting | To a Random Space in ANY territory. | A | |
| Animal Summoning | – | B | |
| Demon Dispelling | – | B | |
| Dragon Taming | – | B | |
| Escaping | – | B | |
| Telepathy | For Sacred Gems Only | C |
10.12) THE ORDER OF SORCERERS – The Master Sorcerers guide players who enter the Order of Sorcerers. Each is every Order member's Mentor. Their magical powers, learned originally from the Dragons, are dependent on the secret arts of controlling the elements of the world.
Rank Table
| Rank | Knowledge | Perception | Power |
|---|---|---|---|
| 1) Apprentice | 0 | 0 | 0 |
| 2) Augur | 10 | 5 | 15 |
| 3) Magician | 30 | 20 | 40 |
| 4) Sorcerer | 60 | 45 | 75 |
Spell Table
| Rank | Spell | Parameters | Type |
|---|---|---|---|
| 1) Apprentice | None | ||
| 2) Augur | Boat Summoning | Range = 15 | A |
| Swiftness | Mountains Only | A | |
| Escaping | Traps Only | B | |
| 3) Magician | Boat Summoning | Range = Unlimited | A |
| Swiftness | Woods and Mountains | A | |
| Animal Summoning | – | B | |
| Demon Dispelling | – | B | |
| Escaping | Traps Only | B | |
| 4) Sorcerer | Boat Summoning | Range = Unlimited | A |
| Swiftness | Woods and Mountains | A | |
| Transporting | To a Random Space in ANY territory. | A | |
| Animal Summoning | – | B | |
| Demon Dispelling | – | B | |
| Dragon Taming | – | B | |
| Escaping | Traps and Transporting | B | |
| Gem Summoning | – | C |
10.13) THE ORDER OF DRUIDS – Rüktal, High Priest of the Druids, is the sole Mentor for players in this Order. The magic of the Druid's flows from the Sun and from their perception of the total Oneness of the Mysteries of the Universe. This magic is integrally associated with the Sacred Circle of Stones and its rituals. Druids are mystics of the mind, utilizing their understanding of the earth's powers.
Rank Table
| Rank | Knowledge | Perception | Power |
|---|---|---|---|
| 1) Apprentice | 0 | 0 | 0 |
| 2) Priest | 5 | 15 | 10 |
| 3) Mystic | 20 | 40 | 30 |
| 4) Druid | 45 | 75 | 60 |
Spell Table
| Rank | Spell | Parameters | Type |
|---|---|---|---|
| 1) Apprentice | None | ||
| 2) Priest | Boat Summoning | Range = 5 | A |
| Transporting | From ANY Sacred Circle Stone to a Random Space, plus one turn after transporting. | A | |
| Demon Dispelling | – | B | |
| 3) Mystic | Boat Summoning | Range = 10 | A |
| Swiftness | Woods Only | A | |
| Transporting | From ANY Sacred Circle Stone to a Random Space in ANY territory, plus one turn. | A | |
| Animal Summoning | – | B | |
| Demon Dispelling | – | B | |
| 4) Druid | Boat Summoning | Range = 15 | A |
| Swiftness | Woods and Mountains | A | |
| Transporting | From ANY Sacred Circle Stone to a Random Space in ANY territory, plus one turn OR from ANY SPACE to a Random Sacred Circle Stone. | A | |
| Animal Summoning | – | B | |
| Demon Dispelling | – | B | |
| Dragon Taming | – | B | |
| Escaping | Traps and Transporting | B | |
| Perception | – | C |
10.14) In the tables above, under TYPE, the letters A, B and C are listed. Their meanings are:
- A = Movement
- B = Encounter
- C = Special
10.2) ADVANCEMENT – When a player has enough points he must encounter his Mentor in order to advance to the next Rank. As soon as he meets his Mentor, unless he is being healed, he will automatically advance.
10.21) If a player has enough points to advance TWO Ranks, he may not advance more than one. A gap of at least THREE days must transpire between advancing from one Rank to the next highest Rank.
10.22) A player may never be demoted. If his points fall below those required to reach his present Rank, he remains at that Rank. A player's points may never go below zero.
10.3) CHANGING ORDERS – A player is always free to change his Order. To do so, he must encounter a Mentor for the Order he wishes to join. He must start at the Rank of Apprentice in the new Order, but he maintains all points already gained. Any uncompleted Mandatory Tasks from his old Order are no longer Mandatory, but may be completed as Optional Tasks.
11) Magic Spells
As players advance to higher Ranks, learning the arts, wisdom, and mysteries of their Order, they are able to perform increasingly more powerful Magic Spells.
11.1) CASTING SPELLS – All Spells, regardless of Rank, have a chance of failure. Each time that a Spell is cast, roll ONE die. Unless specified otherwise, if the roll is a 6, the Spell FAILS. If the Spell does not fail, it succeeds and will have the effect listed for it.
11.2) SPELL DESCRIPTIONS – The Magic Spells are divided into THREE types:
- A = Movement
- B = Encounter
- C = Special
11.21) MOVEMENT SPELLS – Movement Spells are cast during the Movement segment of a player's turn and affect his movement for that turn. The effects of the Spells are as follows:
11.211) BOAT SUMMONING – This Spell may be cast at any time that the player is on a Coastal space AND he has at least one Movement Point remaining. If the Spell succeeds, any one unoccupied Boat within range is placed in any Water space adjacent to the player. If the Spell fails, the player may continue his move.
11.2111) No Boat may ever cross over land. In determining whether a Boat is within range, only Water spaces from the player to the Boat may be counted.
11.212) SWIFTNESS – A player may cast this Spell at any time during his movement to see if it will work in that turn. If it succeeds, it will work for any appropriate spaces during that turn, allowing the player to move through Woods and/or Mountain spaces as if they were Plains spaces. If the Spell fails, the player may continue his move.
11.213) TRANSPORTING – This Spell is cast in the place of a Movement Roll. If it fails, the player may not move on that turn. If it succeeds, the player is transported to the type of space indicated in the Spell Table for his Order and Level.
11.2131) A player in the Order of Druids automatically receives ONE extra turn immediately whenever he transports FROM a Sacred Circle Stone.
11.22) ENCOUNTER SPELLS – With the exception of Animal Summoning, Encounter Spells are cast only when the player is beset by the force that the Spell is intended to affect. The effects of the Spells are as follows:
11.221) ANIMAL SUMMONING – This Spell is cast from any space where a Random Encounter is possible. The player may only cast it if he did NOT have a Specific or Random Encounter on that turn AND if no Animal is currently with him. If the Spell succeeds roll on the table in section 8.4 to determine which Animal is encountered.
11.222) DEMON DISPELLING – This Spell may be cast whenever a Demon Marker is in the same space as a player that has the Spell. If the spell succeeds the Demon is dispelled. Remove its marker from the Board and gain the roll of ONE die in any type of points. If the Spell fails the Demon will attack. Roll on the table in section 7.304, but re-roll if the result is 6.
11.223) DRAGON TAMING – This Spell may be cast whenever the player is in the same space as the Dragon Marker or in the CENTER of the Dragon's Lair. On a roll of 1-3 the Dragon will reveal a Secret Wizard location to the player. Rules for Secret Wizards are found under result 6 of the Level 4 table in section 7.302. On a roll of 4 or 5, the Spell succeeds but no Secret Wizard is revealed. The player is unaffected by the Dragon. On a roll of 6, the Spell fails. See section 7.305 and roll for the Dragon Encounter. Re-roll if the result is a 6.
11.224) ESCAPING – This Spell is cast when a Trap is encountered and before the affect of the Trap is determined. If it succeeds, the player is not affected by the Trap. If it fails, he is.
11.2241) Any player able to use this Spell may use it to avoid Random Traps, Wizard Card Traps and Event Card Traps.
11.2242) Players at Rank FOUR, except for Wizards, may also use this Spell to avoid any unwanted transporting (due to Player Encounters, Demon Encounters, High Hollow, etc.)
11.23 SPECIAL SPELLS – These Spells may only be cast by one of the three Orders. Their effects are as follows:
11.231) TELEPATHY – This Spell may only be cast by members of the Order of Wizards (except when it occurs on the table at Shrineheart Abbey). To cast the Spell the player must be in an Elven Dwelling. The attempt is made in place of rolling for Elves. It may not be cast if there is a Wizard Marker (including Secret Wizards) on the Board. The Spell will succeed on a roll of 1 or 2. If it succeeds a High Wizard is contacted. Draw Wizard Cards, until a High Wizard is drawn, ignoring all Traps and Phantasms. If it fails, no contact is made.
11.2311) Unless the player is at Rank FOUR, the Spell may only be used to advance to his next Rank. When the contact is made, the player must have enough points to advance or failure is automatic.
11.2312) If the player is at Rank FOUR the contact is used to gather Sacred Gems. In this case, the player must have completed all Mandatory Tasks or the Spell fails automatically. Once contact is achieved, the player must roll ONE die according to section 7.326 to see if a Gem is given. The False Wizard will steal Gems telepathically.
11.232) GEM SUMMONING – Only Level FOUR members of the Order of Sorcerers may cast this Spell. The Spell must be cast from a Master Sorcerer's Tower. It may be cast in two ways:
11.2321) If any Wizard or Secret Wizard Markers are on the Board, the Spell is cast to contact any one of them. The Sorcerer rolls ONE die, as specified in section 7.326, to summon a Gem. Regardless of the result of the roll, the Wizard Marker is removed from the Board and his cards reshuffled into the Wizard Deck.
11.2322) If no Wizard Marker of any kind is on the Board, the Sorcerer may cast the Spell randomly. The Spell succeeds on a roll of 1 or 2. If it succeeds, the Sorcerer draws Wizard Cards until he draws a High Wizard, ignoring all Traps and Phantasms. The player must then roll ONE die, according to section 7.326, to see if a Gem is given. The False Wizard will summon all of the Sorcerer's Gems if the roll so indicates.
11.233) PERCEPTION – When a member of the Order of Druids advances to Rank FOUR, Rüktal automatically reveals the identity of the False Wizard to him. He secretly looks at each Gem Card and notes which of the High Wizards is False.
11.2331) When a Druid of this Rank meets the False Wizard his Gems will not be stolen if he rolls a 4 or 5. If he rolls a 1-3, they are stolen. (The roll referred to here is the roll to see if a Gem is given, in section 7.326.)
11.24) No Movement or Special Spell may be attempted more than once in any single turn. Encounter Spells may be cast once for each adversary met.
12) Evil Attack
While the players are travelling around the Enchanted Islands doing good deeds, the Evil Spirit is mounting its attack. Once every Fortnight it strikes, usually engulfing a Territory in impenetrable Darkness and loosing Demons from the Abyss to ravage the islands.
12.1) THE ATTACK – The Evil Spirit attacks when the Day Marker reaches Day 14. Unless Evil has been thwarted for that Fortnight players do not move on Day 14, although it does count as a turn for Animals and Events. If the attack is thwarted, players will take their normal turns on Day 14.
12.11) FIRST TWO FORTNIGHTS – During the first two Fortnights, the Evil Spirit's attack is still building momentum. No Territory tiles will be taken over during these Fortnights. Instead:
- A – On Day 14 each player is transported to a RANDOM space.
- B – After each player is transported, a Demon is placed in a random space in the Territory he was transported to. This is done before the next player is transported. If the Demon appears in a space containing a player it attacks him immediately.
12.12) SUBSEQUENT FORTNIGHTS – On Day 14 of each Fortnight, after the first two, the Evil Spirit takes over a Territory tile, unless his attack has been thwarted. The Territory taken is placed terrain side down in its location on the Board.
12.13) The Territory taken over is the one that is most lacking in Good Magic. This is determined as follows:
12.131) ALL Common Territories will be taken over before any others. ALL Elven Territories will be taken over before any Magic Territories.
12.132) The exact tile taken over is determined by adding the number of Demon Markers on it to the number of Task Markers on it. The Territory of the appropriate type with the HIGHEST total is taken over. If a tie exists for this, determine which falls with a random die roll.
12.14) After the Territory is taken over, one Demon Marker is placed by each player in turn in a random space of the Territory containing that player. If a Demon appears in a space containing a player it attacks.
12.141) If a player is in a Boat, or swimming, on Day 14 the Demon is placed directly on him. If the Demon is not dispelled, it will remain in that Boat or, if the player was swimming, that Water space until it is dispelled.
12.2) THWARTING THE ATTACK – The spread of Darkness can be forestalled through the completion of Tasks. The number of Tasks that the players, together, must perform to forestall the Evil is TEN. Per ten Tasks completed in the game the Evil is thwarted once.
12.21) As Tasks are completed, move the Completion Marker along the Completion Track. When it reaches TEN on this track, place the Thwart Marker in the Evil Thwarted box. This will indicate that on Day 14 normal player turns will be taken, no tiles will be lost and no Demons will appear.
12.22) The Evil is thwarted for EVERY ten Tasks completed. If the Completion Marker passes TEN twice before Day 14 occurs, the Thwart Marker must remain in the Evil Thwarted box until Day 14 has been passed twice.
12.3) BEGINNING THE NEXT FORTNIGHT – After the Evil Attack is resolved, the Day Marker is moved to Day 1. If the Evil was thwarted in its attack, the Thwart Marker is returned to the Successful Attack box. When this is done, players resume their normal turns.
12.4) RESULTS OF A TAKEOVER – When Territories begin to be taken over, the following results and rule changes take effect:
12.41) FOR PLAYERS – Any player who is located in a Territory which is taken over by Evil is transported to a random DRAGON'S LAIR space. Players may never enter a tile after it has been taken over. If a player is indicated to be transported to a specific Territory (such as by a Wizard Card Trap) which is taken over, the player is transported to a random DRAGON'S LAIR space.
12.42) FOR HIGH WIZARDS – If a High Wizard is on a tile when it is taken over, his marker is removed from the Board and his cards reshuffled into the Wizard Deck.
12.43) FOR TASKS – Any Task Marker in the lost Territory is removed. The Task which such a marker was part of becomes impossible when this happens. Tasks which call for a player to visit EVERY location of a certain type, however, will not become impossible unless NO location of that type remains on the Board.
12.44) FOR TASK CARDS – If a Task Card is drawn which indicates a specific Territory or type of Territory that has been taken over by Evil, the card is taken out of play. Draw another Task Card.
12.45) FOR RANDOM SPACES – When a random space is called for, it must be located in a Territory which has not been taken over by Evil. If a lost Territory, or type of Territory, is rolled, roll over.
12.46) FOR THE SACRED CIRCLE – If the Sacred Circle is taken over by the Evil Spirit before the Gems are delivered to Rüktal, all of the players lose and the game is over.
12.5) THE DRAGON'S LAIR – This Territory, a stronghold of Evil itself, is never taken over by Evil in an attack.
12.51) LAIR TIME – Due to the evil nature of Dragon's Lair, and the subtle power of the Dragons, players are affected by merely being in this land. Each time that a player travels in Dragon's Lair, he must keep track of the time spent there. If he stays too long, he will become Dragonbound.
12.511) Each player has a Lair Time Marker. On the turn that he enters the Dragon's Lair, he places this marker on the Day on the Calendar PRIOR to the Day that the Day Marker is on. If a player remains in the lair long enough that the Day Marker lands on his Lair Time Marker he becomes Dragonbound.
12.512) Whenever a player encounters a Dragon on the tile he will move his Lair Time Marker BACK one day on the Calendar. If he uses a Dragon Taming Spell in the encounter, he will move it back THREE days instead of one.
12.513) If a player leaves the lair before becoming Dragonbound remove the marker and consult section 7.3051.
12.52) DRAGON MOVEMENT – Whenever a player ENDS his turn in Dragon's Lair he must move the Dragon Marker to a random space of Dragon's Lair. If it lands on a space containing a player that player encounters the Dragon immediately.
13) The Sacred Gems
When a player reaches Rank FOUR in his Order he is no longer assigned Tasks nor does he gain or lose points. If an encounter calls for a Task Card to be drawn, or for the player to gain or lose points, the encounter is ignored. If the player has any unfinished MANDATORY Tasks he must complete them before beginning to collect Gems. Any Optional Tasks may also be completed if the player wishes, in order to affect the Evil Attack.
When a player has collected all six Sacred Gems, Diamond, Sapphire, Ruby, Emerald, Topaz and Onyx, he must bring them to Rüktal in the Center of the Sacred Circle. If he succeeds in delivering his precious trust, the Enchanted Islands are saved and he wins the game!
14) Record Keeping
The keeping of accurate records is an important part of this game. To aid in this, and in the general play of the game, Record Sheets have been provided for your use. On the front of these sheets players record information on their Orders, Levels, points, Animals, Events, Tasks, High Wizards, Gems and Secret Wizards. Everything that players must have a record of in order to play this game is recorded on the front of the Record Sheet.
On the back of the Record Sheets is a compendium of tables and charts that are used extensively in the play of the game. This feature is intended to aid in playing the game by diminishing the amount of time spent searching through the rule book.
14.1) It is strongly suggested that records be kept on these sheets in PENCIL, written as lightly as possible. This will increase the longevity of the sheets and diminish the need to buy replacements.
14.2) SPECIAL RECORDS – The following methods are suggested as the most efficient way to keep the necessary records.
14.21) MAGICAL ORDER RECORD – This section should be used by the player to keep track of his advancement through his Order.
14.22) CURRENT POINT RECORD – Keep a running total of points of each type in the space provided.
14.23) ANIMAL AND EVENT RECORD – The type of Animal or number of Event should be recorded in the ITEM column, and the turn that its effect ends noted in the ENDING TURN column.
14.24) TASK RECORD – The player must record the number of the Task Card, the type of Task (Mandatory or Optional), the markers placed for it in the order in which they must be picked up (High Wizards may be recorded with a W) and whether the Task is completed or becomes impossible. The Task Markers are then checked off as the player fulfills them.
14.25) GEM RECORD – Gems should be recorded by writing the type of Gem across from the name of the High Wizard that it is given by. If Gems are stolen they should be erased.
14.26) SECRET WIZARD RECORD – Secret Wizards can be noted on the sheet by writing the letter of the markers placed for him by his name. When the Secret Wizard is encountered erase this notation.
14.3) The Gem Record and Secret Wizard Record sections of the Record Sheet should be kept hidden from other players. Their information is confidential. No other information on a player's Record Sheet is considered to be confidential.
Appendix A: The Solitaire Game
The game of WIZARDS may be played solitaire. The only variance from the rules listed in the main rule book is in the set-up of the tiles. All other rules remain the same. As in the multi-player game, the player wins if he delivers the Sacred Gems to Rüktal. He loses if the Sacred Circle falls before he is able to do so.
SOLITAIRE SET-UP – Tile set-up in the Solitaire Game is accomplished in the following manner:
-
Remove the Sacred Circle, Hamdrel's Cottage, the Dragon's Lair and any ONE of the Sorcerer's Towers from the other tiles.
-
Shuffle the remaining tiles, face down.
-
Roll ONE die. Remove the number of tiles indicated by the roll, without looking at which tiles are selected. (Optionally, the player can select his own level of difficulty by removing up to SIX tiles instead of rolling a die. Which tiles are removed is still selected randomly.)
-
Shuffle the tiles set aside in (1) above, into the tiles remaining in play, i.e. those not removed in (3) above.
-
Without looking at the face of the tiles, arrange them as desired on the Game Board. When this is finished, turn the tiles face up and finish preparing to play.
EFFECTS OF BEING STRANDED – If the player becomes stranded in Dragon's Lair there is no hope of rescue. He becomes permanently Dragonbound and loses the game.
If he becomes stranded in a Water space he should advance the Day Marker to Day 14. If the Demons which attack him do not transport him to the Dragon's Lair, he may not encounter the Demons again in the same space and so drowns, losing the game.
If he becomes stranded anywhere else he must wait until he is transported by Demons or by a Random Encounter.
Appendix B: The Partnership Game
If FOUR or SIX play the game, two-man Telepathic Partnerships are possible. The partners are able to share their thoughts and learning so that all points gained by one are also gained by the other (even if the partners are in different Orders).
When Telepathic Partners meet on the Board they do not have normal Player Encounters, nor may they gain points for rescuing each other. However, when they meet, they may exchange as many Optional Tasks as they wish. Likewise, when both are gathering Gems, they may secretly exchange Gems if they meet.
In this version, the Evil Spirit takes over TWO Territories at a time instead of one (after the first two Fortnights).
Other than the above variances, all rules listed in the main rule book remain the same.
Appendix C: Territory Descriptions
The 18 Territories each have their own unique qualities and history. Their descriptions are as follows:
The Common Territories:
I – TORWALL – Home of the royal city of the rulers of Men. Torwall was once held under a Spell of Darkness by the Evil Spirit, in an attempt to take over the realm. This attempt failed, for the Men of Torwall built walls to lead them back to their city and thus overcame the curse. Eventually, the Spell was broken but the walls remain as a constant reminder of the strength of the royal city, even in the face of desperation.
II – WOODSWALL – When these Men began to mistrust the woods, where the Elves tended to dwell, they built walls between the woods and their towns. Due to these walls, the Men of Woodswall have been forced to look outward to the sea. They have become great fishermen, knowing much of the waterways.
III – LONGRIFT – Here is located the place of Men's reverence for the Powers beyond, Shrineheart Abbey. The Evil Spirit, in an attempt to break this land, caused the great impassable gorge which rends the Territory in two. Only the Powers of Mystery turned the Evil One away from this habitation of Holy Men.
IV – CRESCENT RIDGE – This Territory is named for the encircling ridge of mountains around it. The Men here are the most skilled in the ways of the highlands and are superb climbers.
V – MEADOWFARM – The most fertile of the Common Territories. Here dwell the farmers of the land. The Men of Meadowfarm are also renowned for their skill in the herbal arts, knowing much of all growing things.
VI – HILLSHIRE – This area of mountains and woods is the home of the herders. Not only are flocks tended here but the mystical arts of meditation are also honored in this quiet setting.
The Elven Territories:
I – GLENDALE – At the Courts of the Glendale Dwelling, the Royal Elf Maiden Aura presides over all of the Elves, attended by the most skilled Dancers and Musicians. Her intense powers of influence are used with Goodness, Truth, and Understanding to guide and encourage her people.
II – MEADOWSHIRE – This Territory is the center of the Mystery of Elven Music and is closely associated with Glendale. Here dwells the Elflord Hispan, true hearted and peace loving, wielder of the Mystical Powers of Music.
III – EDGEWOOD – The Halls of Havor, the Edgewood Dwelling, is the home of the Crafters of the Elves. Here Havor, the High Elflord, eldest and most skilled of all Elves, creates objects of Beauty, Power, and Mystery for all the islands.
IV – GREEN GROVE – The Elven Loremasters dwell here. Elflord Galen, the greatest of these, resides here as the Guardian of the Elves. His dwelling stands in protection of the most ancient of all places in the Enchanted Islands, the place of the origin of the Elves, the Star Crest, shrouded in the Mysteries of Time.
V – TIMBERLANE – The unsurpassed beauty of this Territory is the result of the dedication of the Elflord Damian to the fruits of Love and Peace. Here was born and nurtured the gracious Elflady Nova, fairest of all in the land.
VI – WOODLAND – Here dwells the Elflord Finrel, wisest of all Elves, with his Elflady Vawn, the Spice of the Islands. Together, they sustain the Richness and Fertility of the land. The Wise Woman Hamdrel, who favors all Woodland dwellers, keeps close ties with these Elves and encourages their Life-giving Magic.
The Magic Territories:
I – SACRED CIRCLE – Holiest of all the places in the Enchanted Islands. The Druids' Sacred Circle of Stones is the center of the Oneness of the Islands and the place of the Rituals of the Mysteries of the Universe.
II – MEGMORAN'S TOWER – Most powerful of the Master Sorcerers, Megmoran, the mysterious Sorcerer of Fire, possesses the Powers of the Inner Earth and the Enchantments of the Stars.
III – MELIGAR'S TOWER – Meligar, Sorcerer of Air, is Master of the Winds and closely associated to the creatures of wing. He is the Warden of High Hollow, a Mystical Gateway which utilizes the Flow of the Winds and is the sole access to the Underworld.
IV – MELEKOK'S TOWER – The Sorcerer of Water, Melekok, watches the Seas of both Heaven and Earth. He is the Crafter and Master of all Jewels and Metals which reflect the fluid radiance of the Waters of the Universe.
V – HAMDREL'S COTTAGE – Deep within a secret wooded valley, warded by walls of enchantment, lies the cottage of the ageless Wise Woman Hamdrel. Here is kept the Mystery of the Islands' Magic.
VI – DRAGON'S LAIR – The Dragon's Lair is a maze-like cave set into steep and treacherous mountains. Two Dragons dwell here. The ancient female remains always in the depths of the lair, while her mate and guardian wanders in the outer tunnels and throughout the islands.
Appendix D: The High Wizards
ISHKATAR – Wise Lord of the High Wizards, possessor of Knowledge and Understanding, seeing and hearing hidden things, Ishkatar is the greatest of all beings who inhabit the Enchanted Islands.
TOLMITAR – Tolmitar of the Good Mind seeks always the highest thoughts of Goodness and possesses intense mental energies of Light. He uses his wisdom to turn even the works of Evil to the service of Good.
AEVAREX – Righteousness, Truth and Purity are the source of the wisdom of Aevarex, fairest of the High Wizards, Healer of Harms.
ELEKOV – Elekov the Mighty. He is unsurpassed in the wise use of magical powers and honors the strength of even the humblest objects.
ZEGORAL – Devotion and Trust are the marks of Zegoral. He is the Teacher of the Wisdom and Holiness and Dedication.
TEREK – The Perfection of the World is the goal of Terek. He seeks, through his wisdom, to restore the proper order of all things.
VELDOR – Immortality and Life are the secrets of the wisdom of Veldor. He works for the true fulfillment of the lives of all beings.
The seduction and corruption of one of these High Wizards, causing him to turn his wisdom to lies, was the most tragic of all the deeds of the Evil Spirit.
Designer's Notes
In Gaming, as in Ritual and Art, players act out truths. The world of the Game is a real world – the actions which transpire throughout its course are real events, and the personalities encountered have actual existence. The players enter the world of the Game, experiencing and establishing the truths of that world. But these truths are not locked only into the world of the Game, for by playing it the players make its truths realities in our world.
The Wizards and Elflords have compelled us to set their realm free to become real for us, that their truths might plant their seeds in us. Thus by their yearning to be, they have called themselves into existence.
We have discovered much about their realm while working on this Game, much more than what has been included here. As it is we have included more than just what is necessary to play the Game, yet we know more than we are telling, and there is of course yet more to be discovered.
The Artwork associated with WIZARDS must also not be thought of as only illustrations to add spice. Rather they are windows into the world of the Game, many of which insisted on their creation in spite of our intentions. And as often as not the Art introduced us to new aspects of the Wizards' world which then found their way into the Game. The Game illustrates the Art as much as the Art illustrates the Game, for both are gateways into the realm of the Elflords.
And what do we find when we enter this realm? We meet a world of Truth, Beauty, and Peace; where Evil is conquered by positive creative Good rather than by violent destruction; where there is intense competition in attaining personal excellence, but always for the good of all rather than for selfish gain; where there is reverence for the Mystery of the Powers Beyond, yet where that Mystery becomes a part of all; where Music, Dance, Ritual, and Craft have Power to affect the course of events.
Thus when WIZARDS is played and these truths are acted out, their reality is established both in the Wizards' world and in our world, and the Game has Power to affect the course of events.
A number of realities and personalities from our world have also made their way into the world of WIZARDS, thus adding strength to their existence. And so these realities are also invoked when playing this Game, the magic of the Wizards flows into them, and the Spell of Spells for our world comes closer to realization.