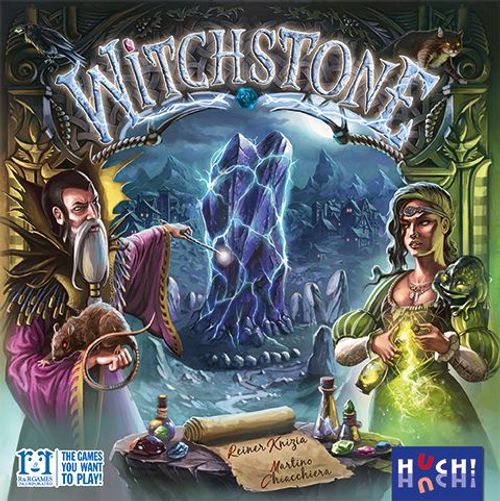
Witchstone
Witchstone Rulebook
Table of Contents
Table of Contents
Contents
- 1 gameboard
- 10 Owl tiles
- 12 Owl Counters (3 per player color)
- 15 special hex tiles
- 40 Scrolls
- 21 Magic chips
- 4 Big Witch figures (1 per player color)
- 44 small Witch and Wizard figures (11 per player color)
- 4 animal markers (1 per player)
- 4 position markers (1 per player color)
- 28 Crystals (6 per player color + 4x 1 black)
- 4 screens (1 per player color)
- 4 Magic cauldrons (1 per player color)
- 60 hex tiles (15 per player color)
- 80 Energy units (20 per player color)
- 1 player aid (with an action-counting track)
Object of the Game
As learned adepts of your guild, you gather around an ancient sacred stone. Each player occupies one of the four towers around the Witchstone and starts from there. Create your Magic Spells with the help of your Cauldron and grow a network of Magic Energy around the stone. Send out your Witches, scoop the Magic Crystals from your Cauldron, and make good use of the Pentagram and the Magic Wand. But don't forget to keep an eye on the Prophecies in order to ensure victory. Not all options are always available to you, so cleverly make the most of your opportunities. Only then shall you have the chance of accumulating the most victory points over the 11 rounds and claim victory as the Master of the Witchstone.
Set-up
Preparation of the Gameboard
- Put the gameboard in the middle of the table.
- Form two stacks of Owl tiles, sorting each in ascending order from 3 to 7, and place one stack each – with the 7 on top – on the two Owl spaces of the Pentagram.
- Shuffle the Scrolls. Put them as a face-down draw pile on the applicable space on the gameboard. Reveal 6 Scrolls and place them face up on the corresponding places.
- Mix the special hex tiles and put them as a face-down stack in the center of the Pentagram. Lay a special hex tile from this stack face up on each of the 3 hexagonal spaces of the Pentagram.
- Mix all round Magic chips. Randomly place one chip face up on each location in the Crystal ball (except for the Witchstone in the center). Put the remaining chips face up on the purple tea-cloth on the stone table, below the vial rack.
- Keep the player aid handy, next to the board.
(The areas of the gameboard are labeled: Pentagram, Scroll rack, Crystal ball, Vial rack, and the Witchstone in the center of the Crystal ball.)
Players' Preparations
-
Everybody chooses a player color. Take the following components in your color: the screen, the Magic cauldron, 15 hex tiles, 12 Witches and Wizards – hereafter collectively called 'Witches' (1 Big Witch and 11 small ones), 20 Energy units, 3 Owl Counters, 1 position marker, the animal marker, and 6 Crystals. In addition, take 1 Black Crystal.
Place the Black Crystal on the center space of your Cauldron and the 6 colored Crystals on the other marked spaces (bubbles).
Keep the position marker and the animal marker handy, next to your Cauldron.
-
Mix your 15 hex tiles, face down. Draw 5 of them and put them face up behind your screen. Keep the remaining 10 tiles as a face-down supply next to the screen.
Note: The inner side of your screen provides some additional information.
-
Put one Owl Counter on space "0" of the scoring track, the second one on the marked space of the Pentagram, and the third on the hilt of the Magic Wand.
-
The player who was the last to stir something in a pot becomes the starting player.
The player to their right (i.e., the last one in the order of play) places their Big Witch figure standing upright on one of the 4 tower spaces in the Crystal ball.
Collect 2 victory points for placing the Witch at this location and carry out the action of the Magic chip there. (Before the first game, first read the complete instructions in order to learn what the different actions mean.)
After that action, turn the chip over and put it behind your screen; at the end of the game, it will give you 2 more victory points.
When you have placed your Big Witch on a tower, this tower becomes your tower. The other 3 towers are foreign towers. They may be occupied by other players or empty.
Now the next-to-last player in the order of play places their Big Witch on an unoccupied tower and also collects 2 points, carries out the action of the Magic chip, and puts the chip behind their screen. This goes on until finally the starting player has placed their Big Witch and taken a Magic chip.
Course of the Game
The starting player begins the game by choosing one of their 5 hex tiles from behind their screen and laying it over 2 empty spaces of their Cauldron. Six spaces of the Cauldron contain printed action symbols that may not be covered. Spaces that contain Crystals cannot be covered by hex tiles either. (Through the Crystal action, you can move a Crystal one space, or move it onto the rim of the Cauldron. Crystals can also be removed directly from the Cauldron by giving up victory points – detailed explanation: see p. 21, "Crystal action".)
Each hex tile shows 2 different action symbols. You carry out these two action types one after another, in the order you wish. After that, you draw a new tile from your face-down supply and put it face up behind your screen. Then it's the next player's turn. Play proceeds clockwise until each player has had 11 turns. Each player will end the game with no supply left and 4 tiles remaining behind his screen.
Attention: Each round, you activate 2 action types. You always have to first completely finish one of the two action types (including any bonus actions, if applicable) before you use the other action type. As a reminder of which tile you have placed, you can put the position marker on that tile, if you like. (This can be helpful later in the game if you get multiple actions of one type that may activate further bonus actions.)
It is possible, late in the game, that you might place a tile with an action you can no longer use. This is fine, you simply skip the use of that action.
Important: In order to use the action types multiple times, place your hex tiles adjacent to symbols of the same kind in your Cauldron.
Multiple actions of one action type through clusters
If you place a hex tile in such a way that clusters of the same symbol are formed, you may carry out the corresponding action type multiple times. You have as many actions of a specific action type as there are symbols of this action type in that cluster (exception: "Scroll action"). If, for instance, you lay a hex tile with a Magic Wand symbol to form a cluster of 3 Magic Wand symbols, you may carry out the Magic Wand action 3 times.
If you lay the hex tile in such a way that the second symbol also forms a cluster, you may carry out this action type multiple times as well.
If a just-placed symbol is not adjacent to other symbols of the same kind, you carry out the respective action only once.
Example: In this case, you can carry out the Crystal action 5 times and the Magic Wand action only once.
The Action Types
There are 6 action types:
- Energy action
- Witch action
- Pentagram action
- Crystal action
- Magic Wand action
- Scroll action
Tip: If you get many actions of one type at once and maybe even additional actions through Magic chips, Scrolls, etc., it can be helpful to mark and count down the current number of remaining actions by using your own animal marker on the action-counting track (included in the player aid).
Energy action
Connect locations via Energy and earn 1, 3 or 6 victory points for a complete connection, plus the opportunity to move Witches to connected locations later on.
The gameboard shows connections between the locations in the Crystal ball. Each connection is made up of 1, 2, or 3 spaces requiring 1, 2, or 3 Energy units for completion.
When you activate the Energy action, you may place one Energy unit from your supply onto an unoccupied connection space in the Crystal ball.
The first Energy unit you place needs to start from your tower – in any direction.
If you activate multiple Energy actions at once during your turn, place the corresponding number of Energy units.
Note: Each connection can be begun and completed by only one player. If somebody has already occupied one or more connection spaces of a connection, the other players may no longer place any Energy units on this connection.
If you have already used up all your Energy units, you cannot carry out any more Energy actions.
You must complete a connection to a location that you have already begun before you begin a new connection. Then you may either start again from your tower or continue expanding from a location that you have already connected to your tower.
For each completed connection, you get victory points that you immediately record on the scoring track by advancing your Owl Counter:
- 1 victory point for a 1-unit connection
- 3 victory points for a 2-unit connection
- 6 victory points for a 3-unit connection
Witch action
Lay Witches next to your tower and move them from there to other connected locations in the Crystal ball. At the other locations, you get 2 victory points and, if available, 1 Magic chip.
When you activate the Witch action, you may either
a) Lay a Witch flat on standby. Take one from your supply and put her next to your tower, next to your Big Witch. (Witches lying down do not yet generate victory points but are just waiting for their actual deployment.)
or
b) Take a Witch lying next to your tower and stand her upright. Then move her to another location. You may move Witches only to locations that are energetically connected to your tower (through connections that are completely occupied by Energy units). If you use exclusively your own Energy connections, it costs you only 1 Witch action to move a Witch from your tower to a new location (across any number of occupied or unoccupied locations). But if you need to use other players' connections to get to a location of your choice, each foreign connection you use between two locations costs you 1 Witch action (regardless of whether the connection consists of 1, 2 or 3 Energy units). If, in such a case, you do not have enough Witch actions, you have to use your Witch action(s) in some other way or let them go to waste.
Example: In order to move a yellow Witch onto Red's tower, Yellow needs 3 actions:
- 1st action: Lay the Witch on his own tower.
- 2nd action: Stand a Witch upright and move it along the yellow connections to the Witchstone in the center.
- 3rd action: Move the Witch from the Witchstone across the red connection to the red tower.
Every time you stand a Witch upright on a location, you earn 2 victory points. Whoever first places a Witch on a location also takes the Magic chip lying there. Depending on the symbol, the front side of the chip gives you 1 additional action (out of the 6 action types) or 3 victory points.
You can use this extra action anytime while you are carrying out your Witch actions – at the latest, after your last Witch action on your current turn. After using the Magic chip, turn it over and put it behind your screen. (At the end of the game, it will give you 2 more victory points.)
The Witchstone in the center of the Crystal ball does not hold any Magic chips. When you place a Witch here, you put her on the unoccupied space with the highest victory point value still available. In addition to the normal 2 points for standing up at a location, you immediately earn the bonus points indicated on this space.
Example: Red is the second player to place one of her Witches on the Witchstone. For this, she earns 2 (as usual on a new location) + 3 (bonus) = 5 victory points.
If you activate multiple Witch actions during your turn, apply a) and b) in any order the corresponding number of times.
Once you have stood all your Witches upright on locations in the Crystal ball, you cannot carry out any more Witch actions.
Notes: Each location can hold no more than 1 Witch of each player. There may not be two or more Witches of the same color standing on any location. Any number of your own Witches may lie next to your own tower.
Once a Witch has been stood upright on a location, she cannot move from there and must stay there until the end of the game.
Pentagram action
Advance on the Pentagram and obtain Owl tiles (3–7 victory points) and special hex tiles.
When you activate the Pentagram action, advance your Owl Counter one space on the Pentagram in a clockwise direction. If you activate multiple Pentagram actions, you advance the corresponding number of steps on the Pentagram.
Note: When you have gone around the complete Pentagram once, you conduct the next round like the first, with the minor differences that there are different special tiles laid out and that the value of the Owl tiles decreases.
When you enter or pass
- a) a light-colored space, nothing happens.
- b) an orange space, you obtain the topmost Owl tile (the one with the highest victory point value) from the stack on that space and put it behind your screen.
- c) a dark-colored space, you obtain the special hex tile lying on that space; immediately lay another special tile from the draw stack (in the center of the Pentagram) on this space, as long as available; otherwise the space remains empty.
If you reach an Owl space on the Pentagram where all the Owl tiles have already been taken, you immediately get 2 victory points.
If you reach an empty hexagonal space on the Pentagram because no more special hex tiles are available, you get 2 actions of any one action type of your choice.
You have 2 options how you use a special hex tile – either once or permanently:
Once: If you want to use the special hex tile once, you may – according to the symbols depicted – carry out one of the two action types twice. After you have used the tile in this way, you turn it over and put it next to your screen.
Example: With this special tile, you may either do 2 Energy actions or 2 Witch actions.
Permanent: If you want to use the special hex tile permanently, place it face up on an empty space in your Cauldron. From now on, the 2 symbols on the special hex tile in your Cauldron contribute to clusters of the respective symbols.
Note: Laying a special hex tile in your Cauldron does not by itself trigger any action. However, the tile can already be used on the same turn when you are dealing with the second action type, if applicable:
Example 1: Green places the "Pentagram/Witch" hex tile in her Cauldron. First, she advances 4 spaces on the Pentagram – corresponding to the number of Pentagram symbols in the cluster – and passes one of the dark-colored spaces. She takes the special hex tile from there showing the combination 'Pentagram/Witch'. She places it in her Cauldron adjacent to her just-placed hex tile. Since this finishes her Pentagram action, she cannot advance an additional space on the Pentagram. But the Witch symbol on the special hex tile is included in the count for the second action type of her hex tile – that means Green has now 5 Witch actions (instead of the original 2).
Example 2: Red places the "Crystal/Magic Wand" hex tile adjacent to the special hex tile in her Cauldron. With this, she obtains 5 Crystal actions and advances 3 steps on the Magic Wand.
Example 3: Red places the "Energy/Magic Wand" hex tile adjacent to the special hex tiles in her Cauldron. With this, she obtains 3 energy actions and advances 4 steps on the Magic Wand.
Crystal action
Move Crystals in your Cauldron and activate additional actions by moving one or more Crystals out of the Cauldron.
When you activate the Crystal action, you may move one of your Crystals in your Cauldron 1 space. This can give you a benefit in two ways:
- You vacate a space so that you can place hex tiles there later on.
- Every time you move a Crystal out of your Cauldron onto the rim of the Cauldron, you activate additional actions.
Example: By placing his hex tile, Blue has activated 1 Crystal action. Now he uses this action to remove a Crystal from the Cauldron by moving a Crystal that is lying next to the rim of the Cauldron (A). Alternatively, he could have moved a Crystal onto an adjacent empty space – but not onto the space that is already occupied by a hex tile or a symbol printed on the Cauldron (B).
If you have moved a Crystal onto a specific symbol on the rim of your Cauldron, you must then take it from there and put it the vial rack on the gameboard. You may choose between two shelves – either:
- Put the Crystal into a vial on the shelf that corresponds to the symbol on the rim of the Cauldron, where you took the Crystal from. For this, you immediately get 2 actions of this action type.
Or:
- Put the Crystal on the bottommost shelf of the rack. For this, you receive 1 Magic chip of your choice from the table (below the rack). You can carry out the action of this chip at any time during the current Crystal actions – at the latest when you have moved the last Crystal. After that, you turn the Magic chip over and put it behind your screen.
If you activate multiple Crystal actions, you may take the corresponding number of moves. You may use the actions to move one Crystal or distribute the actions to move several Crystals.
Example: Yellow has 3 Crystal actions. He uses the first action to move a Crystal out of the Cauldron onto the rim space with the Crystal symbol and puts the Crystal on the corresponding shelf in the vial rack. This gives him 2 additional Crystal actions, so that he still has a total of 4 Crystal actions. He now uses the 4 Crystal actions to move the Black Crystal over 3 occupied spaces and then onto the rim space with the Witch symbol.
The Black Crystal has two special features:
- If the Black Crystal is put in a vial, it allows two additional actions of the corresponding action type. On the top six shelves of the rack, it grants 4 actions of the respective action type. On the bottommost (seventh) shelf, it grants 3 corresponding actions if the chip shows an action symbol. If the Magic chip shows 3 victory points, you receive 2 additional victory points, hence 5 points in total, which you score immediately.
- If the Magic Wand (see p. 22, "Magic Wand action") allows you to score for your Crystals in the rack or if you want to fulfill the "Your Crystals in the rack" Prophecy (see p. 23, "Scroll action"), the Black Crystal is not included in the count.
If there are no Crystals left in your Cauldron, you cannot carry out any further Crystal actions.
Notes: Crystals may be moved over occupied spaces (no matter whether the spaces are occupied by hex tiles or other Crystals). However, the movement of a Crystal has to end on an empty space. Printed spaces of the Cauldron are considered occupied. (And, vice versa, you may not put any hex tile or special hex tile on a space with a Crystal.) Crystals can be moved out of the Cauldron only from the designated spots (arrows).
- If you move several Crystals out of your Cauldron during your turn, it can be helpful to first leave these Crystals on the rim of your Cauldron until you have carried out all the movements. Then put these Crystals in any order on the corresponding shelves of the vial rack.
- Each vial can hold only one Crystal.
- Depending on the number of players, only a certain number of Crystals can be placed on each shelf: with two players, 4 Crystals maximum; with three players, 5 Crystals maximum; and with four players, 6 Crystals maximum (with the exception of the bottom row, where a maximum of 5 Crystals can be placed in the three- and four-player game). When one of the top six shelves is full (according to the number of players), you can alternatively only use the bottommost shelf. If (in a rare case) this shelf is full as well, you cannot place the respective Crystal in the rack but keep it next to your screen. You can avoid this case by moving the Crystal out of your Cauldron elsewhere.
Important: At any time during your turn, you may take a Crystal (also the black one) out of your Cauldron and put it next to your screen. This Crystal is considered improperly removed, though, which damages it irreparably. The first Crystal removed this way immediately costs you 1 victory point; the second, 2 victory points; the third, 3 victory points, and so on.
Magic Wand action
Advance on the Magic Wand and obtain bonus actions as well as victory points at interim scorings.
When you activate the Wand action, you advance your counter on the Magic Wand 1 space to the right. If you activate multiple Wand actions, advance the corresponding number of spaces on the Magic Wand.
If you cross or reach
- a) a light brown space, nothing happens.
- b) a dark brown space, you obtain one or more bonus actions of one action type according to the symbol on this space. If (after having advanced the corresponding number of spaces) you are furthest ahead on the Wand (this applies also if you share this position), you obtain twice the number of actions on all the dark brown spaces which you have crossed this turn on the Magic Wand.
- c) a silver space, you receive victory points for certain achievements that you can demonstrate at this moment.
Example: Red ends his movement on top of Yellow and is therefore furthest ahead at this moment.
Notes: If you have multiple Magic Wand actions and obtain multiple bonus actions and interim scorings, you must carry them out in the order in which you get them. You can use the animal marker to resolve in succession the spaces providing bonus actions and interim scorings. To do so, put the animal marker on the Magic Wand space where your counter currently is. Then advance your counter as many spaces as you have Wand actions. (If you are now first on the Magic Wand, all the bonus actions you have passed this turn count twice.) After that, advance the animal marker step by step towards the counter and resolve dark brown and silver spaces in the applicable order. Finally, put the animal marker aside.
Once you have reached the last space on the Magic Wand, you cannot carry out any further Wand actions.
The dark brown bonus spaces:
- Obtain 1 Crystal action (if you are in first position: 2 Crystal actions).
- Obtain 1 Energy action (if you are in first position: 2 Energy actions).
- Obtain 2 Witch actions (if you are in first position: 4 Witch actions).
- Obtain 2 steps on the Pentagram (if you are in first position: 4 steps on the Pentagram).
- Obtain 1 of the first three displayed Scrolls (if you are in first position: 1 of all displayed Scrolls).
The silver interim scoring spaces:
- 1 victory point for each complete Energy connection you have in the Crystal ball.
- 1 victory point for each of your Witches in the Crystal ball (lying or standing) – including the Big Witch.
- 1 victory point for each Scroll you own (used Reinforcing Spells count as well).
- 1 victory point for each Magic chip you own.
- 1 victory point for each Crystal in your player color in the vial rack.
- 2 victory points for each special hex tile you own. Included in the count are the special tiles in your Cauldron as well as those next to your screen.
Example: Through his Wand actions, Yellow advances 4 spaces on the Magic Wand and lands on the space where Red's counter is. After having moved forward, Yellow is dealing with the spaces he has crossed in order, beginning with the space "Victory points for Witches on the gameboard" (A). He earns 5 victory points for this, since there are currently 5 of his Witches on the gameboard: his Big Witch, 2 small Witches lying next to his tower, and 2 small Witches standing on other locations. Afterwards, he deals with the "2 Witches" bonus space (B).
Currently, Yellow is in first position on the Magic Wand (tied with Red and in front of Blue). Thus, Yellow may use the bonus space twice and gets 4 Witch actions (he carries out these Witch actions after the Witch scoring that he has passed on the Magic Wand prior to this). If Yellow had only been allowed to advance 3 spaces (C), he would have landed precisely on the bonus space, but behind Red. In this case, he would have obtained only the simple bonus action, i.e., 2 Witch actions.
Scroll action
Get 1 Scroll from the display. Multiple Scroll actions give you more choices.
When you activate the Scroll action, you get 1 Scroll from the display. If there is currently only one Scroll action available to you, you obtain the first displayed Scroll (position 1, furthest away from the draw pile). Display the Scroll face up in front of you.
If you activate multiple Scroll actions, your choices increase accordingly. If, for instance, you have 3 Scroll actions after placing a hex tile, you may choose 1 Scroll from the first 3 Scrolls of the display (i.e., from positions 1 to 3).
After you have obtained a Scroll, all cards above in the display are immediately moved 1 space down. Then a new Scroll is drawn from the draw pile and placed face up on position 6 (closest to the draw pile).
There are two kinds of Scrolls: Reinforcing Spells and Prophecies.
1. Reinforcing Spells
You can use Reinforcing Spells once, and only to increase corresponding actions that you have already triggered in a different way. A Reinforcement Spell alone does not trigger any actions.
Usually, a Reinforcement Spell gives you 2 additional actions. If, for instance, you move 3 steps on the Magic Wand after placing a hex tile, you may immediately advance 2 more steps there if you play a Wand Reinforcing Spell.
Exception: If you play a "Single Reinforcing Spell," you gain only 1 additional action, but you can choose the action type you want to reinforce.
Note: Reinforcement Spells of one type can be combined with one another, e.g., the combination shown on the right gives you 3 additional Crystal actions.
Once you have used a Reinforcing Spell, turn it over (so that the back is facing up) and put it next to your screen.
Unused Reinforcing Spells stay displayed in front of you, until they are used. If they remain unused until the end of the game, each unused Reinforcing Spell Scroll scores 2 victory points.
2. Prophecies
Prophecies are task cards that score victory points at the end of the game, depending on how well you were able to fulfill the Prophecies. You get:
- 1 victory point if you just possess the Prophecy but have not fulfilled it sufficiently.
- 3 victory points if you have fulfilled the Prophecy to a minor degree.
- 5 victory points if you have fulfilled the Prophecy to a major degree.
- 7 victory points if you have fulfilled the Prophecy perfectly.
Notes: If you obtain more than one Magic chip showing a Scroll during your turn, you take the first Scroll from the display for each used Scroll chip. If you want to increase the choices of what Scrolls to take, you can do this only by additionally playing one (or more) Reinforcing Spells "Single Reinforcing Spell" and/or "Double Reinforcing Spell" – but you cannot combine multiple Scroll chips to obtain a Scroll from a higher position.
If you want to keep it a secret from the other players how many Scrolls and which ones you have already collected, you can put unused Reinforcing Spells and Prophecies on a pile that you can take in your hand anytime.
In the unlikely case that the draw pile is depleted, you can choose only the remaining Scrolls from the display. Once the display has been used up as well, any further Scroll actions go to waste.
End of the Game
The game ends after 11 rounds, when each player has only 4 hex tiles left behind his screen.
Now, score for:
- your Owl tiles that you have collected on the Pentagram,
- your Magic chips, each of which is worth 2 victory points, and
- your Scrolls:
- a) Check whether you have unused Reinforcing Spells or unfulfilled Prophecies displayed in front of you. If you do, you score 2 victory points for each unused Reinforcing Spell and 1 victory point for each unfulfilled Prophecy.
- b) Score for your fulfilled Prophecies, as described below.
The player who has collected the most victory points becomes the new Master of the Witchstone and wins the game.
In case of a tie, the winner is the tied player who is further ahead on the Magic Wand or was the first to reach the final space there (i.e., the player whose counter is lying at the bottom, if applicable).
Explanation of the Prophecies
Clusters of Symbols
Largest cluster of a specific symbol in your Cauldron.
You need to have at least one cluster of 4 corresponding symbols in order to score 3 victory points; a cluster of 5 corresponding symbols to score 5 victory points; or a cluster of 6 or more corresponding symbols to score 7 victory points. With fewer than 4 corresponding symbols in a cluster, you have not fulfilled the Prophecy sufficiently.
Example A: Green has a cluster of 5 Witch symbols in total. Symbols printed in the Cauldron as well as double hex tiles and special hex tiles are included in the count. Unconnected symbols are not considered. Hence, Green scores 5 victory points for the Prophecy.
Occupied and Connected Locations
Witches at specific locations.
a) Different location types: The Crystal ball on the Prophecy shows different types of locations. If one of your Witches is at the first indicated location type, you score 3 points; if you have a Witch at the first and another Witch at the second indicated location type, you score 5 points; if you have Witches at all 3 locations, you score 7 points. If you have no Witch at the first indicated location type, the Prophecy is unfulfilled (1 point) – regardless of whether you have Witches on the other indicated location types or not.
b) Identical location types: The more locations of this type that are occupied by your Witches, the more points you earn. For 1 Witch at such a location, you score 3 points; for 2 Witches at two such locations, 5 points; and for 3 Witches at 3 such locations, 7 points.
Connected locations.
You score points if you have connected specific location types to your tower through Energy connections in your own color. Here as well, the first location type on the Prophecy needs to be connected to your tower before you may score for a connection to the second type of location etc.
Example B: Green has connected one foreign tower and one forest to her tower, but not the second foreign tower indicated in the second requirement; consequently, she scores only 3 victory points for this Prophecy.
Other Prophecies
3 / 5 / 7 points for:
- 3rd / 2nd / 1st at the Witchstone (the player whose Witch is standing on the space with the 5 is considered to be the first, etc.)
- 5–6 / 7–8 / 9+ of your own Witches on the gameboard (lying or standing, including your Big Witch)
- 1 / 2 / 3 Witches lying next to your own tower (at the end of the game – not your Big Witch)
- 3 / 4 / 5+ silver scoring spaces you have reached on the Magic Wand
- 2 / 3 / 4+ collected special hex tiles (in your Cauldron or next to your screen)
- 4 / 5 / 6+ collected Scrolls (used and unused ones)
- 4 / 5–6 / 7+ collected Magic chips
- 3 / 4 / 5+ Crystals of your own color in the vial rack (excluding Black Crystals and Crystals next to your screen)
Tip: All fulfilled Prophecies score 3, 5 or 7 points, but they are of different difficulty levels. Make sure to pick Prophecies that you think you can fulfill easily or that are suited for your playing situation.
Note: The black tower symbol on the Prophecies always stands for foreign towers (i.e., unoccupied towers or towers belonging to other players), never for your own.
The purple tower symbol stands for your own tower, i.e., the tower where your Big Witch is standing.
Explanation of the Reinforcing Spells
Single Reinforcing Spell
Play this card in addition to any action type (triggered by the placement of a hex tile or by means of a bonus action through Pentagram, Crystal, Magic Wand or Magic chip) and carry out 1 additional action of the corresponding type.
Double Reinforcing Spell
Play such a card in addition to the indicated action type (triggered by the placement of a hex tile or by means of a bonus action through Pentagram, Crystal, Magic Wand or Magic chip) and carry out 2 additional actions of the corresponding type.
Additional Rule for Mixed Player Groups
For advanced players who play with a group that includes beginners, it is also possible to play with handicaps.
At the start of the game, mix your hex tiles face down and return 4 of them to the game box without looking at them. Depending on the handicap level, you play with fewer tiles to choose from.
- Handicap level 3 (easy): Place 3 tiles face up behind your screen. On your turn, play one of them and draw a new one. You always have the choice 1 out of 3 (except for your last two turns).
- Handicap level 2 (medium): Place 2 tiles face up behind your screen. On your turn, play one of them and draw a new one. You always have the choice 1 out of 2 (except for your last turn).
- Handicap level 1 (hard): On your turn, draw 1 face down tile and play it. You have no choice.
The game ends when you have played all 11 tiles. On level 3 and 2 you cannot redraw tiles during the last round(s).
The Magicians behind Witchstone
Reiner Knizia
Over 20 years ago, Reiner Knizia left the mystical sphere of numbers to become one of the world's most successful and prolific Magicians of game designing. More than 700 of his games and books have been published worldwide in over 50 languages, winning numerous international awards. Among his notable games are classics such as Tigris & Euphrates, Modern Art, or Ra as well as recently popular titles such as The Quest for El Dorado, L.A.M.A., or My City. With his wide range of game ideas, he enchants players of all ages and tastes. Reiner's favorite pastime is to sit in his "tower" in Munich conjuring up ideas for even more new games.
Martino Chiacchiera
Martino Chiacchiera is a passionate full-time game designer committed to creating remarkable experiences through Magic Spells (i.e., rulebooks) that enchant players by providing happiness and powerful emotions. He is a bit crazy – as all Wizards are – and spends most of his time buried in his studio, surrounded by fascinating worlds in big and small game boxes. He has been the author of more than 40 board games including several bestseller series such as Deckscape, Decktective, Similo and the Mysthea trilogy.
Mariusz Gandzel
Originally meant to become an architect, in 2006 Mariusz Gandzel passed the Magic Portal of a Polish publisher and entered the fantastic world of illustrating games. Since then, Mariusz's art has put a Spell on players of RPGs, board and card games as well as of miniature wargames – among them those of the Star Wars universe, Lord of the Rings, Warhammer, and Call of Cthulhu. A powerful enchantment for his work is his love for the traditional way of painting. Film music, movies, and paintings of the 1980s serve as Reinforcing Spells for recreation and inspiration. The strongest magical power, however, is cast upon him by the special charms of his wife and his daughter.