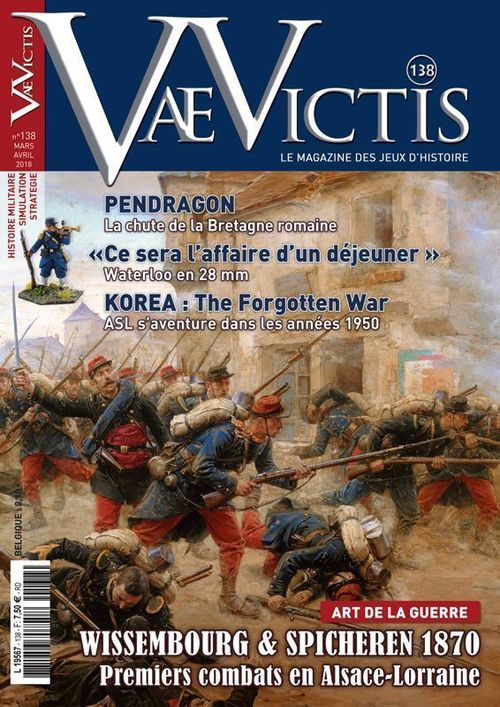
Wissembourg & Spicheren 1870
Wissembourg & Spicheren 1870 Rulebook
Table of Contents
Table of Contents
- 0 - Overview
- 1 - Combat units
- 2 - Facing
- 3 - Stacking
- 4 - Sequence of play
- 5 - Activation of formations
- 6 - Zone of control
- 7 - Movement
- 8 - Commanders in chief
- 9 - Formation HQ
- 10 - Artillery
- 11 - Combat
- 12 - Rally
- 13 - Scenarios
- Reference tables
0 - Overview
One player controls the French, the other the Germans (Prussians and Bavarians).
0.1 - Abbreviations
For simplification, the abbreviation hex. is used in the rules for hexagon.
The game requires the use of a six-sided die (1d6).
0.2 - Game scales
A game turn represents one hour of real time. The number of turns depends on the scenario.
A hexagon on the map corresponds to 700 m for the battle of Spicheren and 500 m for the battle of Wissembourg. A military unit represents a brigade or a regiment. Each combat point equals 500-800 men.
0.3 - Types of counters
0.3.1 - Commanders
The verso of the commanders indicates that the commander has been eliminated and a replacement has taken command. His values are generally of lesser quality.
There are two kinds of commander:
- Commander in chief. Shows the name, the inertia value, the corps number, the initiative bonus, and the movement value and command distance.
- HQ. Represents the formation commanders. Shows the name, the corps/division, the colour code of the formation, the command value, the combat bonus, and the movement value and command distance.
0.3.2 - Combat units
There are two types: infantry and cavalry. The number of step losses represents the unit's level of morale and cohesion. The verso indicates that the unit is disorganised.
A unit is eliminated when it reaches its step losses level.
Errata (3 September 2018): a unit is eliminated when it suffers as many losses as it has step losses. This is not stated explicitly in the rule.
0.3.3 - Artillery units
The number of step losses represents the unit's level of morale and cohesion. The verso indicates that the unit is disorganised.
Each artillery counter shows its name, colour code, range, combat value, movement value and step losses.
0.3.4 - Activation markers
There is one per formation. This marker indicates which formation will be activated when drawn.
0.3.5 - Scenarios
The presence of a black square on the lefthand value indicates that the counter is used for Wissembourg.
0.4 - Die roll tests
In general, as soon as the game requires a test (morale, activation, coordination, inertia...), the player must roll 1d6. To pass the test, he must get 6 or more by adding/subtracting the modifiers indicated in the rules to/from the die roll result. If the final number is less than 6, the test is a failure.
0.5 - Morale test
All combat units have a morale value. During a morale test, the player tests his morale/cohesion level indicated on the counter, plus any modifiers, as explained in 0.4. If the final number is less than 6, the unit fails the test and becomes disorganised or loses a step if it is already disorganised. If it is greater than or equal to 6, the test is successful and the unit suffers nothing. The modifiers are:
- +1 if the unit occupies a terrain with level 2 protection or more.
- +1 if the unit is stacked with its HQ or the commander in chief.
- -1 if an enemy is present on the unit's flank, even without attacking.
- -1 for each step loss.
- -1 if out of command.
1 - Combat units
The infantry and cavalry units are grouped into formations, according to their command, identified by the colour of the symbol and directed by an HQ, except detached units. This organisation occurs for the rules of activation; the units of the same formation always act together (see 5).
After a combat result, the units may become disorganised, and the counter is turned over. They may also suffer losses for the units with two steps or more; a loss marker "-1" or "-2" is then placed on the unit.
2 - Facing
All infantry, cavalry and artillery units follow the facing rules (front of the unit) that influence movement and combat. They have three front hex. and three flank hex., unless they are in a town or a village, in which case their front extends over the 6 surrounding hex.
Commanders in chief (see 8) and formation commanders (see 9) have no facing and are always considered frontal.
3 - Stacking
Units stacked together in a hexagon are limited to one cavalry or infantry unit plus one artillery unit, or two artillery units, but it is possible to exceed stacking limits during movement. The two artillery units may be from different formations.
A detachment is considered a normal unit. During retreats due to combats, crossing a friendly unit disorganises it, but if it is already disorganised, there is no step loss.
Commanders do not count for stacking.
4 - Sequence of play
The two battles are played in a fixed number of turns, defined by the scenario. Each game turn includes several phases.
A - Command verification
Each player verifies that the HQ are in command. The out of command commanders are indicated by an appropriate marker (8.3). The commanders in chief present on the map may move before the verification, if they pass their inertia test. The commanders in chief that arrive as reinforcements on this turn also move at this time. This is the only time they can move.
B - Operations phase
The players proceed to several operations segments in a row (limited to the number of formation markers from each camp), during which one of the players will draw at random an activation marker among those remaining in the container, except the first activation which is chosen by the camp that won the initiative. When all the HQ have been activated, the operations phase is over.
- Determination of the initiative for this turn. Each player rolls 1d6 and adds the initiative bonus of his commander in chief. The player with the better score wins the initiative (in the case of a tie, the German player wins the initiative). He chooses a formation which is immediately activated and then puts that activation marker to the side. The other activation markers of the two camps are put in a container and are drawn at random successively, except the reinforcement formations that have not yet arrived and remain out of the container.
- If only one of the commanders in chief is on the map, his camp automatically has the initiative. If none of the commanders in chief is present on the map, no one has the initiative and all the activation markers are placed in the container.
- Activation segment of the formation corresponding to the activation marker drawn by the player that owns this formation.
Note: the player may decide to do nothing with his activated formation, in which case another marker is then drawn but the formation cannot be activated this turn.
When a formation is activated, the artillery units of this formation may fire, then all the units of this formation may move and finally combat according to the state of command of the formation (8.3 and 9.2), including the formation commander.
C - Rally phase
The "Out of command" markers are removed from the HQ counters. Disorganised units outside of ZoC test their morale to determine whether or not they keep this status.
The turn is over; move the Turn marker forward one space.
5 - Activation of formations
Each formation (corps, divisions or brigades according to the camps and the battles) has an activation marker.
At the beginning of the operation phase, the two camps draw the initiative and the winner chooses a marker that he will play right away. The other activation markers are placed in a container and will all be drawn, one by one, during this operation phase.
An HQ and the units he commands are activated when the player draws its activation marker during an operations segment. After possibly testing the HQ's initiative (see 8.3 and 9.1), the units of this formation may then act.
Formation actions are divided into three steps: barrage fire, movement, then combats.
A formation may only be activated once per turn and a unit may only move and attack once per turn, with the possible exception of defensive artillery fire.
6 - Zone of control
Each combat unit, including the artillery, except for HQ, exerts a Zone of Control (ZoC) in its three front hex. in all the terrains it may occupy.
6.1 - ZoC properties
A unit that enters an enemy ZoC stops its movement for the turn but is not required to attack.
It is prohibited to go directly from one enemy ZoC to another enemy ZoC: so a unit in a ZoC surrounded by enemy ZoC cannot move.
A ZoC is not exerted on terrains where a unit cannot go (for example uncrossable rivers where there is no bridge).
For a non-disorganised unit, leaving a ZoC costs half its movement capacity rounded up, but it may move at least one hex. For a disorganised and/or out of command unit, the cost is the full movement capacity.
The unit retreats one hex outside of enemy ZoC (the same enemy or another).
Disorganised cavalry cannot enter an enemy zone of control.
The presence of a friendly unit in an enemy ZoC cancels the latter in terms of command limits and movement of commanders, but not retreats.
Finally, a unit that retreats to an enemy ZoC after a combat result may become disorganised and suffers a step loss (see 11.4).
6.2 - Properties of the flanks
The three flank hexagons of an enemy unit exert no ZoC, do not prohibit movement, and a unit that retreats to a flank hex. of an enemy unit after a combat result suffers no penalty.
7 - Movement
7.1 - Overview
A unit or HQ of an activated formation may move with all or part of its movement potential, depending on the state of its command (see 8.3 and 9.1).
Entering a hex. costs the moving unit a certain number of movement points (MP). Terrain costs are indicated on the Terrain table provided in the rules.
Movement points cannot be accumulated from one turn to another.
One unit's movement must be finished before moving on to that of another unit of the same corps. The commanders in chief follow their own movement rule.
7.2 - Movement of the commanders in chief
The commanders in chief move with their movement potential during the command verification phase if they pass an inertia test, but they may not enter a hexagon adjacent to an enemy unit unless it is occupied by a friendly unit.
An inertia test consists of rolling a die and adding the commander's inertia value; on a 6 or more the commander may move.
If an enemy unit is present in a radius of three hex. around a commander in chief during the command verification phase, he may move normally without testing his inertia.
7.3 - Change of facing
Changing facing is free and can be done at any moment during a unit's movement phase, but not during an enemy movement phase or before defensive fire. It is permitted in certain limits during the advances after combats and retreats before and after combats.
7.4 - Arrival of reinforcements
Some of the troops of the two camps arrive as reinforcements. On the turn of their arrival, they can be activated normally like an available formation but are not in command and must test the initiative of the HQ to enter the map. Their activation marker is placed in the container at the same time as that of the other units.
Exception: for the battles of Wissembourg and Spicheren, the HQ that enter as reinforcements are considered to be in command during their arrival turn only and enter the game in the turn indicated in the scenario. They may have to take a specific test indicated in the special rules of the scenarios.
To simulate the arrival in road column, each unit after the first spends the terrain cost for the hex. (1/2 for a road or 1 for clear terrain) multiplied by the number of units that have already entered. For example, if four units enter from a road, the first pays 1/2 point, the second 1 point, the third 1 1/2 points and the fourth 2 points for the first hex. entered on the map.
If the formation does not enter because it fails the initiative test, it will take the test again the following turn with a bonus of +1 cumulative for each turn it fails to enter.
If units arrive as reinforcements after part of the formation has already entered, these units enter the game on the planned turn and move normally when their activation marker is drawn. They must move toward their HQ to be in command.
8 - Commanders in chief
Each battle presents its commanders in chief; see the special rules for the scenario.
8.1 - Overview
Each commander in chief has a command range (expressed in cavalry movement points) that represents his capacity of control over the formation HQ. This value is equal to his movement capacity: 6 MP.
8.2 - Command
To be in command, an HQ must be in the command radius of his commander in chief. This radius is traced from the latter to the HQ by a route of hexes with a distance of 6 movement points maximum, cost of the terrain of the cavalry, and must not pass by enemy ZoC unless they are occupied by friendly units.
If the commander in chief is in a town, 2 movement points may be added, for a total of 8 MP.
The commander in chief may directly command a number of units (not formations) equal to his inertia value. These units must be within command range of the commander in chief but not necessarily within range of their HQ (if they have one). The unit will be activated with its formation when its marker is drawn and will be considered as activated normally regardless of the status of its formation commander (if it has one).
8.3 - Out of command formations
An HQ that is out of command at the beginning of the game turn receives an "Out of Command" marker. When this HQ is drawn during the operations phase, the units of its formation can only act effectively if the commander passes an activation test.
Activation test: the commander of an out of command formation is activated if the player gets a 6 or more with 1d6, adding the command value of the commander. If successful, all the units of this formation may act normally. If it fails, the HQ cannot move, but artillery barrages are authorised, as well as the defensive support during an enemy activation. The units of his formation will act like out of command units (9.2).
If the HQ is in an enemy ZoC, it can still retreat one hex if this is not in enemy ZoC.
Detached units are in command if they are within command range of the commander in chief, or within command range of an HQ that is itself in command. Otherwise, out of range units are considered out of command.
8.4 - Death of commanders in chief
A commander in chief is eliminated when the units with which he is stacked are completely eliminated by combat; otherwise he follows a unit that retreats.
If during enemy movement he becomes adjacent to an enemy but is not stacked with a friendly unit, he is immediately placed on the closest friendly unit. This rule applies also to HQs.
Note: since a commander in chief provides no combat bonus, there is no benefit in having him participate in an attack.
9 - Formation HQ
The HQ represent the various formation commanders of each army. They each command several brigades.
An HQ is activated according to the activation rules of formations (see 5) and command (see 8). A commander may only be activated once per turn and moves like a cavalry unit.
Errata (3 September 2018): an HQ alone on a hex follows the same rule as the commander in chief (see 8.4).
9.1 - Command of units
Once activated, an HQ may act with all the units of his formation that are in command at the beginning of the activation. To be in command, a unit must be in the HQ's command radius, according to the same principles as in rule 8.2, with 6 cavalry movement points counting the terrain cost (the town bonus of +2 MP applies).
The units' command check is done at the beginning of the formation's activation, before any movement, such that an out of command unit remains so during the whole phase, even if the HQ moves within command range.
To command, a formation commander does not have to be stacked with units of his formation.
9.2 - Out of command units
A unit that is out of command at the moment of the activation of a formation cannot enter an enemy ZoC and therefore cannot attack. It can move, nevertheless, but at most with half of its movement potential rounded down. This potential movement may in no case put it out of command range of its HQ; if it is already out of range, it must move that number of hex. closer if it moves.
If it is already in a ZoC, it can either disengage or attack with a potential coordinated attack (see 11.1), or do nothing. An out of command unit that disengages from the ZoC of an enemy unit uses all of its movement potential to retreat from a hex. not in ZoC.
9.3 - Death of formation commanders
An HQ is eliminated when the units with which he is stacked are completely eliminated by combat or by a mortality test following a combat in which it participated. The test takes place after the combat. The player rolls 2d6: on an unmodified 12, the commander is killed.
For the HQ, participating in a combat signifies coordinating an attack or giving his bonus in offence or defence. The HQ just needs to be present and the player must have declared that he is participating.
An HQ can also be eliminated following artillery fire on his hex. If the result is "T" or better, he also tests his elimination.
An eliminated HQ is immediately turned over to its verso, indicating the replacement by an aide de camp (identified by a replacement bar), that the player places on a unit of his formation. An aide de camp that is killed is replaced by himself.
9.4 - Demoralisation of formations
A formation that suffers a precise threshold of losses becomes demoralised at the beginning of the following turn. This threshold is indicated in a table provided with each battle. The step losses that are counted are those of the units comprising the formation (see the provided table), and the table indicates the number of steps to lose to become demoralised.
Place a Demoralised (Démoralisée) marker on the formation commander.
The units of a demoralised formation can no longer voluntarily enter a hex. adjacent to an enemy unit; if this is impossible, they don't move. In addition, they systematically suffer an additional -1 on all their morale tests.
They must move toward their friendly edge of the map (see the scenario's special rules) by at least one hex. per turn; thus they try to end their movement closer to the friendly edge of the map than they started.
Once they exit the map, they do not return to the game.
10 - Artillery
The artillery attached directly to a brigade was generally included in the unit and is not represented by a counter. Only the artillery of the army corps or army has been represented by counters.
Each artillery unit is equipped with:
- A fire power that indicates the column on the combat table used to resolve barrage fire or defensive support, and that will help the unit defend itself if its hex. is attacked.
- A number of step losses (morale and cohesion value) like any combat unit. Most of the artillery units only have one strength step but can be disorganised and rallied like any combat unit.
- A movement value to move following the normal rules.
- A range that is used to know which enemy units can be reached during the fire and barrage phases. This range is calculated from the artillery's hex and must respect a valid line of sight.
10.1 - Artillery fire
Artillery units may fire at different moments during an operation phase, but only once per activation phase. They can act:
- During the barrage fire phase of the activated formation.
- In response to an enemy attack against its own hexagon or a hex. within range, as defensive support.
An artillery unit that is attacked alone in a hex. cannot change facing before firing, since this is only authorised during the movement phase, and it is automatically and immediately eliminated if the enemy survives its defensive fire.
10.2 - Procedure
10.2.1 - Fire range and fire zone
The artillery's maximum range is indicated in hexes on the unit and depends on the camp. Its fire zone extends from its three front hexes.
When artillery fire occurs against an adjacent hex., a +1 is added to the die roll in both attack and defence to simulate the effect of canister and the close range.
10.2.2 - Line of sight
To be hit, a target must be in the artillery unit's line of sight. This line of sight is blocked by any friendly or enemy unit or obstacle hex (village/city, woods, higher or equal elevation), excluding hex borders, located between the artillery and its target.
These elements block the line of sight if they are located at the same or higher elevation level. If they are located on a lower level, they block the sight if they are adjacent to the target.
When an artillery unit is on a higher elevation than its target, the LOS must go downslope, otherwise it is blocked. In other words, every hex between the artillery unit and its target must be on a strictly lower elevation than the firing artillery.
Fire is always permitted on an adjacent target, or if it passes through a hex side of two hexes, one of which is not blocking, even if there is a difference of more than one elevation level (steep slope).
10.1.1 - Barrage fire
The barrage fire phase takes place when a formation is activated, but before movement. Any enemy unit within range can be attacked following the normal combat rules (see 11.3), but retreats required by certain combat results are not carried out. An artillery unit may change facing by one hex side before firing.
The artillery that fires on a hex. containing artillery and another unit chooses its target before resolving the fire. The result only applies to the selected unit.
Except for a special rule in the scenario, it is not possible to combine fire of several artillery units in the same formation, but the same target may be attacked several times in succession.
A unit that engages in barrage fire can move normally immediately after.
An artillery unit may not fire during the assault phase and so does not participate in the combat at the same time as the infantry or the cavalry: it fires only at the beginning of the activation phase and does not advance after a combat even if the unit with which it is stacked advances.
10.1.2 - Defensive support
An artillery unit's fire value may be added to a unit of its formation that defends, on the condition that the artillery unit has an attacking unit in its range and its line of sight. For defensive fire, the maximum range is half of the maximum range, rounded up.
This artillery value is added to the defender and may be shared between the potential attackers within range and in its line of sight, as in a normal defensive combat (see 11.2). Any adjacent artillery bonus is added to each defensive combat.
An artillery unit may only provide one defensive support per activation, either to itself if it is attacked, or to a unit attacked by an enemy within range and in its line of sight.
11 - Combat
Combats take place after movement, at the attacker's choice. He can attack anyone in his three front hexes with no obligation to attack all the adjacent enemies, unless he wishes to do so; however, all the defenders adjacent to the attacker, even if they are not attacked, may combat defensively, unless they are attacked during this activation by another attacker.
At the beginning of the combat phase, the attacker indicates his attacks, bearing in mind that only the units from the activated formation may fight.
Combats always proceed in two steps: the defender acts first to attempt to push the attacker back. If he succeeds, the combat is over; if he fails, the attacker carries out his assault.
11.1 - Combats with multiple attackers
When multiple attackers are adjacent to the same defender, it is possible either to attempt to coordinate their assault if an HQ is present (see 11.2), or to attack each separately; the player determines the order of these attacks. Each combat must be fully resolved before proceeding to the next. If the combat forces the defender to retreat, the following combats do not take place.
To coordinate an attack, an HQ must be stacked with one of the attacking units and must pass a coordination test: 6 or more on the die, adding his command value.
If he is successful, the assailants combine their attack values and there is only one defensive combat. If he fails, each attacker attacks separately.
11.2 - Combat sequence
11.2.1 - Defensive combat
The defender's unit can attack each adjacent enemy unit that is assaulting following the normal combat procedure, dividing its combat value among the attackers.
If a defending unit adjacent to the attacker is not attacked itself, it may add its combat value to that of the attacked unit, or divide it among several attacked units. The attacker's terrain protection value is always 1.
The defender has the option of retreating before the combat instead of fighting (see 11.4).
Against an enemy on its flank, the defender's combat value is divided by two, rounded down, with a minimum of 0.
If there are multiple attackers, the defender may divide his combat value as he wishes, bearing in mind that the value applied against any attacker in a flank hex is divided by two and rounded down, and that he can attack with a power of 0 any enemies against whom he did not apply his combat value.
A combat with a value of 0 or less, after modifiers, is still resolved on the 0 column.
Example of defensive combat: a defender in clear terrain has a combat value of 5 and is attacked by three enemies, including one in a flank hex, that coordinate their assault (a commander is present and passed his coordination test). During his defensive combat, he may either concentrate all 5 points against one of the enemies in his front, or attack one with 3 and one with 2, or attack one with 2, one with 1 and the flank hex attacker with 2, which becomes 1; in addition he would attack all the others on the 0 column.
If the commander had failed his coordination test, the attacker would have to choose a combat unit for first attack with defensive combat applied against it only, then if it survived, an assault...
11.2.2 - Assault
If all the attacking units attack individually, the defender follows normal combat procedure, in an order chosen by the attacker, and the results are applied successively.
If the presence of the formation commander of one of the attacking units allows the attacker to make a coordinated assault by multiple units on the same enemy, the combat values are accumulated for a single result. The commander must pass a coordination test as explained in 11.1. The attacker is not required to combine his attacks but may resolve them individually as he wishes, and may decide this at the moment he announces all his attacks.
If the defender retreats, then a unit of the attacker's choice (which must be cavalry if present) that participated in the combat must advance. The attacker may change facing by one hex side. Even if the attacker retreats, the defender cannot occupy his place but may change facing by one hex side.
An artillery unit, even if present during the attack, may not advance after combat.
At the end of combat, do not forget to check for casualties of commanders if they participated through coordination or bonus (see 9.3).
Assault example: following the defensive combat example above, after the defensive combat, two attackers remain with combat values of 6 and 7, attacking from the front hexes. As indicated, a commander is present (with +2 combat bonus) and passed his coordination test. The two attackers add up their values: 6+7 = 13. This value is divided by the clear terrain protection value of 1 for a result of 8, which is the maximum column, plus 5 on the die and another 2 for the commander. The result is automatically D+1. The defender's counter is turned over and a "1 loss" marker is placed on top. If the defender had been in a village with a terrain protection of 2, the combat value would have been divided by 2, for a result of 6, plus 2 to the die roll for the commander bonus.
11.3 - Combat sequence and results
Each unit uses its combat value divided by the terrain value (always considered equal to 1 in the case of a defensive combat), rounding down. This combat value is used on the combat table with the die roll, which may be modified by the unit's level of step losses, flank attack, commander bonus...
All the modifiers are added and subtracted before being calculated on the table. If there are several terrains in the hex, the defender takes the best but also takes into consideration the hex side bonuses.
The possible combat results are: -, D, T or D+1.
- - : nothing. The battle continues.
- D : disorganisation. The counter is turned over or suffers a step loss if it has already been turned over. If the maximum level of step losses has been reached, the unit is eliminated from the game.
- T : morale test (see the disorganisation test below).
- D+1 : loss + disorganisation.
T = disorganisation test. The unit tests its morale with a d6 and possible modifiers (see 0.5). If it is successful, nothing happens. If it fails, the unit follows the result D. If an artillery unit is stacked with another unit, only the other unit tests its morale. The artillery unit will suffer the results dependent on the other unit, meaning it will disappear if the defender retreats. If an attacker retreats after an unfavourable defensive combat, a stacked artillery unit remains in place and undamaged.
D+1 = loss + disorganisation. The unit automatically takes a loss and also suffers the result D as explained above. If an artillery unit is stacked with another unit, it cannot suffer the loss but will be eliminated if the defender retreats.
Retreats. A unit that is not in a terrain with a protection value greater than 2 immediately retreats one hex. If it is already occupied by a friendly unit, the occupying unit is disorganised if it wasn't already; otherwise there is no other effect, and the retreating unit retreats an additional hex.
If retreat is impossible because of a friendly or enemy unit or uncrossable terrain, the unit suffers an additional step loss and remains in place. If the retreat hex. is in an enemy ZoC, the unit still retreats but suffers an additional level of loss.
An artillery unit stacked with a friendly unit that must retreat is eliminated immediately.
A unit may refuse retreat by passing a morale test. If the unit is successful, it doesn't retreat but loses an additional step, in attack as in defence. If it fails the morale test, the unit retreats as indicated above.
Retreats are resolved by the owner of the unit with the following rules: the retreat must take place toward the friendly edge of the map, indicated in the battle's special rules. It must avoid the enemy ZoCs and friendly units if possible, and move toward the terrain with the lowest cost in movement points (excluding communication routes). If all these rules are respected and there are several possible retreat hexes, the owner may choose.
In the case of advances or retreats after combat, an HQ that is stacked with the unit is not required to follow. It may remain in place if an attacker retreats, to give his attack bonus.
11.4 - Retreat before combat
It is possible to retreat before each combat instead of engaging in defensive combat if the unit has a movement potential greater than or equal to that of its attackers. The unit retreats one hex and becomes disorganised, or loses a step if it was already disorganised, if its movement potential is not greater than that of at least one of the attackers. Thus, cavalry facing infantry will retreat without problem without becoming disorganised. On the other hand, cavalry facing cavalry or infantry facing infantry will become disorganised. The attacker may occupy the vacated hex. Cavalry retreating from infantry may retreat a second hex.
Retreat must be outside enemy ZoC, even if occupied by a friendly unit, and the retreating unit may change facing by one hex side.
11.5 - Cavalry charges
Cavalry units attack or defend only by charging, which is similar to an infantry attack as in 11.2, with the possibility of coordination with infantry; defensive combat is called defensive counter-charge and assault is called a charge. The following modifications also apply:
- A charge is prohibited against a unit in terrain which the cavalry cannot enter or cross.
- To charge, the cavalry must not have spent more than half its movement points (i.e. 3 MP maximum).
- Cavalry that charges (not a defensive counter-charge) is automatically disorganised at the end of the combat if it isn't already. If it is already disorganised as a result of the combat, it doesn't suffer an additional step loss. If it charges an enemy cavalry unit that retreats before combat, it is not disorganised.
- Disorganised cavalry cannot charge offensively, but it can counter-charge defensively. Moreover, disorganised cavalry cannot enter an enemy zone of control.
12 - Rally
During the rally phase, all disorganised units may attempt to reorganise, that is, to turn the unit to its front side, but they may never recover step losses. They may not be adjacent to an enemy unit and must pass a morale test as appropriately modified for combat results. There is an additional modifier of -1 if the unit is within range of enemy artillery. Also, there is a -1 modifier for an out of command unit and a +1 if the formation's commander is adjacent. In the case of failure, the unit remains disorganised but suffers no step losses.
13 - Scenarios
Translator's note: "DI" is the French division d'infanterie (infantry division) and "ID" is the German Infanterie-Division (infantry division). "Kav Div" is cavalry division. Hex codes are the map coordinates printed in the rules.
13.1 - The battle of Spicheren
The battle begins at 11.00 in the morning and continues through 22.00, for 12 game turns of 1 hour each. During the initial set-up and during the arrival of reinforcements, players choose the units' facing freely.
13.1.1 - Initial set-up
- French army
- 1re DI: Vergé and brigade Jolivet (1re): 0609 or 0510. Brigade Valazé (2e) and Art. 1: 0113, 0212, 0213 or 0312.
- 3e DI: Laveaucoupet, brigade Doens (1re) and Art. 3: 1313. Brigade Micheler (2e): 1607.
- Division de cavalerie: Valabrègue, brigade Valabrègue (4e-5e Chasseurs) and brigade Bachelier (7e-12e Dragons): 0113, 0212, 0213, 0312.
- Prussian army
- 14 ID: von Kameke, 27e brigade (François) and Art. 14: 1601, 1701, 1702, 1801, 1802, 1902, 1903 or 2002.
Translator's note: the source prints "Prussian Army" a second time within the 14 ID entry, apparently a layout repetition; it is not transcribed here.
13.1.2 - Reinforcements
- French army
- 15.00: 2e DI (Bataille + brigades Pouget and Bastoul + Art. 2) enters from the road 0414 and/or the path 0614 (the counters may enter by different hexes).
- 16.00: Frossard: 0113, 0212, 0213 or 0312.
- Prussian army
- 11.00: rest of 14 ID (28e brigade Woyna + 15 Husaren) enters from the road in 1901.
- 14.00: Alvensleben, 5 ID (Stülpnagel + 9e brigade Doering + 10e brigade Schwérin + 12 Dragoner + Art. 5) enter from the road in 1901.
- 13 ID (Glümer + 26e brigade der Goltz + 8 Husaren): see special rule.
- 15.00: 16 ID (Barnekow + 32e brigade Rex + 9 Husaren + Art. 16) enters from the road in 1901 and/or the railway in 1301 (the counters may enter by different hexes).
- Errata (3 September 2018): the 9 Husaren cavalry of 16 ID enters with the rest of its division at 15.00.
- 16.00: the 14e brigade Grüter from 6 Kav Div. enters from the road in 1901.
- 17.00: Zastrow, Rheinbaden and 5 Kav Div. (11e brigade Barby + 13e brigade Redern) enter from the road in 1901. Remove the Alvensleben counter (it may return to the game by placing it on a friendly unit if Zastrow has just been eliminated).
- Errata (3 September 2018): the 17.00 entry reads "13e brigade Redern", not "12e brigade Redern"; the counter is correct. The rulebook text as printed already reads 13e.
13.1.3 - Victory conditions
The French player may decide to remain on the battlefield (hoping for reinforcements in the night or the next morning) or to begin a retreat (historical choice to avoid encirclement). The score of each camp is calculated at the end of the game by tallying the various VP.
At the beginning of the 20.00 turn (turn 10), take a first VP count for the control of the battlefield. Add up the VP for the control of the objectives: Rotherberg 1607 (2 VP), Fonderie 0708 (1 VP), Stiring-Wendel 0510 + 0609 (1 VP), Spicheren 1411 + 1412 (1 VP), Sarrebruck 1701 + 1801 + 1902 (2 VP) and Forbach 0113 + 0212 + 0213 + 0312 (2 VP).
An objective is controlled by the side whose units were the last to occupy it. If a player controls part of the hexes of a city and the other player controls the rest, no VP are awarded. Initially, the French player controls all the objectives except Sarrebruck.
At the end of the game, a second VP count for control of the battlefield takes place.
Game note: the idea is for the French player to be faced with the choice of leaving the battlefield at the end of the game or holding the terrain. Historically, the French held out until late and then retreated in disorder at the last moment for fear their lines of communication would be cut.
At the end of the game, each demoralised enemy formation awards 1 VP. On the last turn, check if formations became demoralised during the rally phase.
At the end of the game, each camp wins 1 VP for each two enemy units that are eliminated or cannot trace a line of hexes toward the friendly edge without crossing an enemy unit or ZoC.
At the end of the game, the French player wins 1 VP for each two French units that managed to leave the map by one of the roads on the southern edge (0414, 0614, 1315 or 2015), the road to Forbach (0113) or the railway (0112).
The player may not have his units exit before 20.00 (turn 10) unless they are demoralised. If demoralised formations leave the battlefield before 20.00, they are not counted in the VP for exiting the map, but they are counted for demoralisation VP.
If Frossard is the only unit on the battlefield at the end of the last turn, the French player loses 1 VP.
The final victory level is determined by the gap between the VP of the two players:
- Difference of 8 VP or more: strategic victory.
- Difference of 5 to 7 VP: operational victory.
- Difference of 2 to 4 VP: tactical victory.
- Difference of 1 VP or less: no victor.
13.1.4 - Line of retreat
- Prussians: northern edge.
- French: southern edge.
13.1.5 - Demoralisation
| Formation | Steps | Demo |
|---|---|---|
| 1re DI | 5 | 3 |
| 2re DI | 5 | 3 |
| 3re DI | 5 | 3 |
| Cavalry Division | 4 | 3 |
| 2re DI (IIIe Corps) | 6 | 4 |
| 13 ID | 4 | 3 |
| 14 ID | 7 | 4 |
| 16 ID | 5 | 3 |
| 5 ID | 7 |
13.1.6 - Special rules
- To simulate French inertia, the French player has a penalty of -2 on the HQ's activation tests during turns 1 and 2 (see 8.3, as there is no Army Commander).
- Errata (3 September 2018): the penalty applies to the HQ activation test, not to the initiative test, since there is no French commander in chief. The rulebook text as printed already reads "activation tests".
- The two faces of the Rheinbaden/Valabrègue activation marker are used in the same battle. If both units are in play in the current turn, when the activation marker is drawn, on an even result of 1d6 the Rheinbaden formation is activated, otherwise it is the Valabrègue formation that is activated. Put the marker back at the end of the activation in the container. When drawn for the second time in the turn, activate the formation that was not activated the first time. Then discard the marker until the end of the turn.
- If an artillery unit is stacked with another unit on Rotherberg's hex (1607), the artillery's combat value is divided by 2 (the overhang was too narrow to deploy the whole battery).
- Errata (3 September 2018): the protection value of Rotherberg hex (1607) is 2, not 1.
- Historically, the 13 ID was sent across the woods to go around the French. In order to maintain the uncertainty, during the division's entry as reinforcements, the German player places the decoy marker face down and the 13 ID marker, as he chooses between the road 0501 and the road 1101. When the activation marker of the division is drawn, the Prussian player can move each of the two markers by 3 MP (passing through the woods without a road is prohibited). In woods or a village, the markers are revealed when a French unit becomes adjacent (if the French unit was moving, its movement ends). In clear terrain, they are revealed if at some point they are in the line of sight of a French unit located at 4 hex. maximum. When a marker is revealed, the Prussian player places the division's artillery in place of the 13 ID marker. The other counters are placed in the same hex. or an adjacent hex. The decoy marker is removed from the game.
- When the activation marker of the 13 ID or the 16 ID is drawn, the German player may decide to play it right away or to hold onto it to activate the drawn division when the marker of another infantry division is drawn, on the condition that the respective HQ are in command and within command range of each other. The two markers may not be kept and played together during the activation of a third division. The units of the two activated divisions can act together as if they belonged to the same division. In this case, to simulate the efficiency of the German artillery, two stacked artillery units can fire together for a barrage fire.
13.1.7 - Variations
There are two options that can be played separately or together. They simulate a French command that is more active than in reality.
- Historically, Frossard had lunch with the mayor of Forbach until 16.00, unaware of the importance of the battle underway. This variation simulates Frossard's taking command at the beginning of the battle. Starting with the 1st turn, at each command test phase, on a 1d6 ≤ the current turn number, place the Frossard counter in Forbach (0113, 0212, 0213 or 0312). If this option is played, the Prussian player is awarded 1 VP.
- Errata (3 September 2018): the condition is "1d6 ≤ the current turn number"; the printed English text already reads so.
- Historically, Frossard took a long time to request reinforcements. Bazaine refused to send them despite Frossard's insistent demands in the middle of the afternoon. In this variation, starting with the turn following Frossard's entry into the game, roll 1d6 at the beginning of each operation phase. The 2nd division of the IIIe corps (Castagny + brigade Potier (1re) + brigade Arnaudeau (2e) + Art. 2) arrives as reinforcement from the road from Forbach in 0113 for a result of 4 or more. If this result is obtained before the 15.00 turn, the division enters as reinforcement in the 15.00 turn. If it is obtained after the 15.00 turn, the division enters as reinforcement in the turn in which the positive result is obtained. If this option is played, the Prussian player is awarded 1 VP.
13.2 - The battle of Wissembourg
The battle begins at 9.00 in the morning and continues until 15.00 for seven one-hour game turns. During the initial set-up and during the arrival of the reinforcements, the players freely choose the facing of their units.
13.2.1 - Initial set-up
- French army
- Douay: 0806.
- 1re brigade: Montmarie and the 50e RI (Ardoin): 0806. Art. 2 and the 74e RI (Theuvez): 0707.
- 2e brigade: Pellé and 1er Turcos (Morandy): 0603.
- Brigade de cavalerie: Septeuil, 11e Chasseurs (Astugue) and 3e Hussards (Espeuilles): 0807.
- Prussian army
- II Bav Korps: Art. 4: 0601.
13.2.2 - Reinforcements
- French army: none.
- Prussian army
- 9.00: II Bav Korps (Hartman + 7e brigade Thiereck + 8e brigade Maillinger + 2 Chevau-léger) enters from the road 0701.
- 10.00: Kirchbach and 9 ID (17e brigade Bothmer + 18e brigade Voigts-Rhetz + 4 Dragoner + Art. 9) enter from the road 1501.
- Frédéric-Guillaume, von Bose and 21 ID (41e brigade Koblinski + 42e brigade Thile + 14 Husaren + Art. 21) enter from the road 1706.
- 11.00: Art. 10 enters from the road 1501.
- 12.00: 10 ID (19e brigade Henning + 20e brigade Montbarry + 14 Dragoner) enters from the road 1501.
- 13.00: 22 ID (43e brigade Kontzki + 44e brigade Schkopp + 13 Husaren + Art. 22) enters from the road 1706.
13.2.3 - Victory conditions
The victor is the player with more VP at the end of the game. If the difference is 1 VP, this is a tactical victory. If it is 2 VP, it is an operational victory. A difference of 3 VP or more denotes a strategic victory.
The French player is awarded 2 VP if he controls Wissembourg (0603) and the castle (0806) at the end of the 12.00 turn. Both objectives must be controlled at the same time to get the 2 VP.
The control of Wissembourg or of the castle at the end of the game awards 2 VP per objective (cumulative with the VP of the previous paragraph). Only 1 VP is awarded if the player cannot trace a line of hexes, outside of enemy units or ZoC, toward the friendly edge.
The French player receives 1 VP for two units that exit by the southern or western edge of the map.
The French player loses 1 VP if Douay or his replacement remains alone on the map at the end of the game.
The Prussian player receives 1 VP for every two French units that are eliminated or remain on the map but cannot trace a line of hexes, outside enemy units or ZoC, toward the friendly edge.
The Prussian player receives 1 VP if at least one French formation (on or off the map) is demoralised at the end of the game. Completely eliminated formations do not count.
The Prussian player loses 1 VP for each of his demoralised formations.
On the last turn, check whether formations became demoralised during the rally phase.
13.2.4 - Line of retreat
- Prussians: northern edge.
- French: southern edge.
13.2.5 - Demoralisation
| Formation | Steps | Demo |
|---|---|---|
| 1re brigade | 5 | 3 |
| 2e brigade | 3 | 2 |
| 2e brigade (variation) | 5 | 3 |
| Cavalry Brigade | 2 | 1 |
| Brigade Wolff | 4 | 3 |
| II Bav Korps | 4 | 3 |
| V Korps | 12 | 7 |
| XI Korps | 14 | 8 |
13.2.6 - Special rules
- The French player may stack two infantry units or two cavalry units with the same facing in the same hex, and in addition to an artillery unit.
- When this kind of hex is attacked, the defender's two units are attacked at the same time. A D or T result applies to the two stacked units. A result of 1 only applies to one unit chosen by the French player.
- When an artillery unit fires on a hex where two infantry/cavalry units are stacked, the shooter chooses only one targeted unit.
- The French artillery may support any French unit in defence, but remains limited to only one defensive support per turn.
- When Frédéric-Guillaume enters the game, he enters on the map and moves when the XI Korps marker is drawn. For the following turns, he moves following the basic rules.
- To simulate the efficiency of the German artillery, two artillery units that are stacked together and belong to the same formation may fire together for a barrage fire.
- On the 1st turn, the Prussian player has the initiative.
- Terrain: the terrain protection for level 3 is 2. The village of Wissembourg has a protection level of 3, since it has a surrounding wall.
13.2.7 - Variation
Historically, the 78e RI (Brice) of the 2e brigade left to relieve the 96e (Franchessin) at Climbach. This variation has the 78e RI remaining with the division. Place it freely, south of the Lauter or in Wissembourg during the initial set-up.
The 1re brigade of the 1re division (located 8-13 km away), that historically hadn't received any orders, enters as reinforcements from the road 0105: 96e RI (Franchessin) at 13.00, Moréno and 18e RI (Bréger) at 14.00. The battle begins at 9.00 in the morning and continues through 18.00, for 10 game turns of 1 hour each.
For this variation, an enemy demoralised formation awards 1 VP. The control of Wissembourg or the castle at the end of the game awards 2 VP each. The benefit is only 1 VP if the player cannot trace a line of hexes outside of enemy units or ZoC toward its friendly edge. They are no other possible VPs.
Translator's note: the variation's last sentence is printed as "They are no other possible VPs."
Reference tables
Morale and rally modifiers
Common modifiers
- +1 for terrain protection 2 or more.
- +1 if commander in chief or HQ stacked.
- -1 per step loss level.
- -1 if out of command (if the HQ is on the map).
- -1 if enemy presence on the flank.
- -1 if the formation is demoralised.
- -1 during a night turn.
For rally only
- +1 if commander in chief or HQ is adjacent.
- -1 if within range of enemy artillery.
Terrain effects table
| Type | Movement | Blocks the LoS? | Combat (defensive protection) |
|---|---|---|---|
| Clear, levels 1-4 | Standard | No | None (1)¹ |
| Clear, levels 5-6 | Standard | No | None (2) |
| Level ↗ or ↘ | +1 PM/level² | No | -1 column ↗ per level; +1 column ↘ |
| Hamlet/Fort | Other terrain³ | Yes | None (1) and -1 on the die⁴ |
| Village | Other terrain³ | Yes | Facing in all directions (2); Wissembourg (3) |
| Castle | Other terrain | Yes | Facing in all directions (2)⁵ |
¹ At Wissembourg, level 3 has a defensive protection of (2). ² +0 MP for the 1st level if movement is by road/path/railway. ³ As road/path if entered by road/path. ⁴ Only if presence of a single French regiment: facing in all directions (2). ⁵ Only if presence of a single French regiment (3). ⁶ If all the attackers are on the other side of the river, with or without a bridge.
Translator's note: the Woods cell in the source carries an unexplained "Disorganised cav." label with no value. It is kept in the cell as printed, and the Stream and river rows are transcribed as printed.
Combat results table
| Die | 0 and - | 1 | 2 | 3 | 4 | 5 | 6 | 7 | 8 |
|---|---|---|---|---|---|---|---|---|---|
| 0- | - | - | - | - | - | - | T | T | T |
| 1 | - | - | - | - | - | T | T | T | D |
| 2 | - |
Key: - = nothing; T = morale test; D = disorganisation; D+1 = disorganisation + 1 step loss.
Combat column modifiers
Terrain protection (see the terrain table). Note: division calculation goes first; for defensive combats, the terrain protection is always 1.
Column modifiers
- -1 per loss level.
- -1 per level if the enemy is higher than an attacker (smallest distance if there are several units); -1 for artillery fire, regardless of the distance.
- -1 if river (infantry at Wissembourg) or stream (cavalry at Wissembourg).
- +1 if the enemy is lower than one of the attackers (regardless of the difference in levels).
- +formation commander bonus (except for artillery fire).
- +1 if the artillery is adjacent to the enemy (or 2 hex. for the Germans).
- +2 for the attacker if at least one of the defender's flanks is attacked.
- +1 for a French infantry unit in defence (Chassepots).
- -1 night turn.
- -1 for a trench.
- -1 for a stream (infantry).
- -1 if hamlet.
Die roll modifiers
- +1 for each column greater than 8.
Defence value modifier
- Combat value divided by 2 (rounded down) on an enemy flank attack.