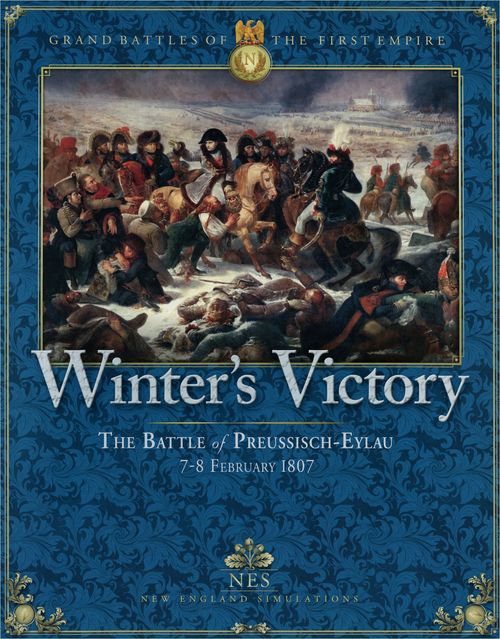
Winter's Victory: The Battle of Preussisch-Eylau, 7-8 February 1807
Winter's Victory: The Battle of Preussisch-Eylau, 7-8 February 1807 Rulebook
Table of Contents
Table of Contents
- 1.0 Introduction
- 2.0 Game Components
- 3.0 Setting Up the Game
- 4.0 Sequence of Play
- 5.0 Unit Facing
- 6.0 Movement
- 7.0 Formations
- 8.0 Infantry Formations
- 9.0 Stacking
- 10.0 Terrain
- 11.0 Fire Combat
- 12.0 Shock Combat
- 13.0 Unit Morale and Recovery
- 14.0 Army & Corps Morale and Demoralization
- 15.0 Brigade Fatigue
- 16.0 Command Units
- 17.0 Command & Control and Command Activities
- Order Delivery & Activation Example
1.0 Introduction
Winter's Victory is a grand tactical level simulation of the battle of Preussisch-Eylau that occurred on February 7th and 8th in 1807 in East Prussia. The main four-map scenario simulates the battle fought from dawn to dusk on February 8th. Additionally, two separate single map scenarios depict the opening engagement of February 7th and the attack of Davout's III Corps against the Russian Left Wing. An optional scenario is provided to allow players to combine the battles of February 7th and 8th into a single grand battle.
Winter's Victory has many rules and concepts that may seem daunting at first to players unfamiliar with this level of historical game. Try not to be intimidated; the rules are divided into major sections and structured in a way to help players "learn as you go". Players should first read the rules – do not try to memorize them – to understand the concepts of movement, fire, Shock Combat and command. The players should then set up one of the single map scenarios and use the Sequence of Play as a checklist to run through a turn or two, referring to specific rules as questions arise. (Note that the Sequence of Play actions list the specific rules sections that apply to each point).
2.0 Game Components
[2.1] The Game Map
The game map is made of four 25.5 x 33 inch map sections, which, when put together form the Eylau field of battle. A hexagonal grid is overlaid on the game map to regulate movement of the playing pieces and calculate ranges which affect fire combat, command and Shock Combat. There are a number of different types of terrain displayed on the map which are explained in the Terrain portions of the rules and the Terrain Effects Chart.
[2.2] Game Charts and Tables
A number of visual aids are provided with the game to help players with many of the game functions. Some of these tables are printed on the map while some are provided on separate cards. The information in the tables pertain to both sides except for the Fire Combat Tables which are side specific.
[2.3] Playing Pieces
There are 11 sheets of 9/16 inch two-sided playing pieces in Winter's Victory called "counters". Counter categories include combat units, command units, information, and game markers. The combat and command counters represents the various types of military units and leaders that participated in the battle. The informational markers help regulate play, facilitate game functions and modify various attributes of the combat units.
[2.31] Combat Units
Combat units consist of infantry, skirmishers, cavalry, artillery and gun crews. Combat unit counters contain the unit's organizational designation, combat strength, movement factor and unit effectiveness rating. Infantry units are primarily battalion level and represent being in either column formation on the front side of the counter or line formation on the back (reverse) side. A skirmish unit counter represents approximately a company sized unit and may be either one or two sided. Artillery counters are battery level units and are shown as limbered on the front side or unlimbered on the back side. (Cavalry units show Full Strength on the front and Reduced Strength on the back; infantry counters show Unit Designation, Brigade/Division, Corps (French), Troop Strength, Effectiveness Rating, Movement Allowance, Effectiveness Modifier and Firing Class; artillery counters show Gun Strength, Movement Allowance, Effectiveness Rating (uses crew's current rating), Effectiveness Modifier and Firing Class.)
[2.32] Commander and Leader Units
Each army has a command structure. The French Army under the overall command of Napoleon operated in separate Corps that controlled the various subordinate artillery, divisions and brigades. The Russian Army consisted of separate divisions that were assigned as needed to Wings, or to ad hoc commands such as Detachment Commanders.
- Army, Corps (Wing) and Division level command units are higher level command units used to manage lower level commands through the use of "orders" and Command & Control restrictions. Army and Corps Commanders are denoted by their historic portrait. Division level leaders are identified by a flag symbol. The movement ability of these leaders is predicated by their current "Command State" (see 17.6).
- Brigade level command units display on the front side the original officer represented while the reverse side represents that officer's replacement following loss of the original leader.
All command units display the officer's name and his command identification. The counters will also indicate the leader's command rating, movement allowance, and for some exceptional officers, a command bonus.
[2.33] Information and Game Markers
The various function of game markers are described in the relevant rules sections. Case 2.35 provides an inventory of many of the different markers. They are provided to track game activities or indicate alterations to a combat a unit's physical and/or morale condition.
[2.34] Sample Units
(Illustrations of sample Infantry, Cavalry, Artillery and Command unit counters, with labelled parts: Unit Designation, Brigade/Division, Corps (French), Troop Strength, Effectiveness Rating, Movement Allowance, Effectiveness Modifier, Firing Class, Gun Strength, Division Name, Command Rating/Radius, Division Color Bar (Russian), Corps Color Bar (French). A division designation in parentheses denotes a temporary or non-original assignment.)
[2.35] Summary of Unit Types and Markers
(Illustrated inventory of counters and markers: Infantry Unit (Full/Reduced Strength, Grenadier); Heavy and Light Cavalry Units (Full/Reduced Strength); Foot Artillery and Horse Artillery Units (Limbered/Unlimbered); Light Skirmish Company, Line Skirmish Company, Jaeger Light Skirmish Company, Line Skirmish Unit (single sided); Command Units — Corps Commander (Wing Commander), Division Leader, Brigade Leader (Standing/Mobilized); Formation Attack Order and Formation Attack Order Violation markers; Artillery Ammunition Point Marker; Ammo Depleted Marker; Delay 0 (Order Received) and Delay 1 markers; CP Marker; Artillery Crew Marker; Game Turn Marker; Game Turn Phase Marker; General Order Marker; Disordered Marker; Fire Combat Marker; Routed Marker; Square Marker; Extended Line Marker; Road Column Marker; Out of Command Marker; Inactive Marker; Headquarters Marker; Charge Zone Marker; Troop Strength Point Markers (1 through 16); Morale Level Markers (1, 10, 100); Marker (1 through 8).) Some French Light Skirmish Companies are single strength, one-sided units (see 8.6).
[2.4] Definition of Terms
Allies — The combined forces of the Russian Army and Prussian units that were present at the battle. If a rule applies to only one or the other then the individual Russian or Prussian word is used.
Command Bonus — This is a modifier present on Command Units with exceptional ability and modifies different die rolls when applicable.
Command Units — These counters represent the officers and their staff at different levels in the chain of command for each army at Eylau. Except for the Army commanders each command unit has a superior officer. There are two types of command units: Commanders and Leaders.
Commanders – Army, French Corps, Russian Wing, and Russian Detachment Commanders represent the named leader of higher command levels. Army, Corps/Wing Commanders are denoted by their portrait on the counter.
Leaders – Division Leaders, Brigade Leaders, and Russian Special Leaders are command units representing the named leaders of lower command levels and are denoted by a flag symbol. Division Leaders command Brigade Leaders and combat units in their chain of command. Brigade and Special Leaders extend command and control for combat units under their level of command. Brigade and Divisional leaders extend certain morale and rally benefits to units under their command.
Command Rating — The Command Rating value on a counter indicates the relative command ability of the officer represented. It also functions as a Command Radius to determine the maximum distance, in hexes, that an officer can control subordinate leaders and combat units.
Combat Strength — Combat Strength represents the approximate numerical strength in a given infantry or cavalry formation and the number of guns in an artillery battery. The Combat Strength value is used to determine firepower in Fire Attacks and unit strength in Shock attacks. The unit counter contains the initial strength of the unit at the beginning of the battle on February 7, 1807.
Corps/Division Color Bar — The different colors allow players to quickly spot units of the same higher level command on the map. For the French counters the bar colors differentiate Corps. For the Russian counters the bar colors differentiate Divisions. For the Prussian counters the bar colors differentiate Brigades.
Effectiveness Rating — The Effectiveness Rating is shown on all combat units. It represents the relative quality and efficiency of a specific unit. Over the course of the game a unit's original Effectiveness Rating (as shown on the counter) may be modified by adding or subtracting various numerical factors for Attack Orders, combat strength losses, fatigue level and army or corps morale levels (see 13.2). A unit's current Effectiveness Rating is used for morale checks to determine if a unit Disorders, Routs, or Rallies. The effectiveness rating is also used to determine the final Effectiveness Differential of the opposing units engaged in Shock Combat.
Effectiveness Modifier — A value added to a unit's Effectiveness Rating whenever it checks for morale. Note that this modifier is not added to the unit's Effectiveness when determining the Effectiveness Differential during Shock Combat or when making a comparison with other friendly units.
Facing — Cavalry, artillery and battalion sized infantry formations require that the unit has a facing. Such a unit must be positioned in the hex such that the top of the counter "faces" an apex (not a hexside) of the hex that it occupies. Some unit types and formations have all around facing.
Firing Class — The firing class rating of a unit is a reflection of its historical ability to deliver fire onto an opponent. The rating reflects the type of weapons, training and experience of the unit. The firing class rating is expressed as a number from 1 to 3 and appears on the unit counter as a series of dots underneath its Effectiveness Rating. For infantry, a firing class rating of 1 denotes an Elite unit, a rating of 2 denotes a line unit and a rating of 3 denotes a unit in skirmish formation. For artillery a firing class rating of 1 denotes higher caliber guns, a rating of 2 denotes medium caliber guns and a 3 denotes smaller caliber guns, or mix thereof depending on the battery type or nationality.
Formation — A formation is a general term that describes the deployment state of a unit. Units may be either Formed or Unformed under differing circumstances.
Formed Units – Formed units are units that are neither unformed voluntarily or involuntarily (see Unformed Units below). Formed Infantry unit may be deployed as: Line, Extended Line, Column, Road Column, or Square. Formed Cavalry has a single formation, mounted, which applies when both formed and unformed. Artillery has two formations: limbered and unlimbered.
Unformed Units – Skirmish formation, General Order, and Artillery crews are voluntary unformed formations. Disordered and Routed units are involuntary unformed formations and occur as a result of a required unit morale check, Shock Combat or when certain unit types enter or cross certain terrain features.
Movement Allowance — Movement allowance reflects a unit's ability to move a given distance over the terrain map in one game turn. It is expressed in Movement Points (MPs) and appears on both sides of its counter. These points are expended as a unit traverses from hex to hex on the map or as the unit changes its facing or formation. Various terrain features require expenditure of a specific number of movement points.
Unit & Command Designations — Every combat and command unit has a Command Designation. The Command Designation identifies the corps, division and brigade within the army that each unit belongs to. Each unit is uniquely identified by its Unit Designation (along with its unit type and nationality).
Unit Designation — For infantry battalions, the unit designation identifies its battalion/regiment. For cavalry, the unit designation identifies its regiment. For artillery, the unit designation identifies its battery/regiment. Artillery Crew Markers have the same unit designation as the guns they serve.
French Command Designations — The Command Designation of a French unit identifies the unit's corps, division and brigade. The Command designation of a French artillery battery identifies the unit's corps and/or division. The Command designation of a French Command unit identifies the Leader's corps, division and/or brigade.
Abbreviations used in French Command Designations: C–Cavalry, Chs–Chasseur, Grn–Grenadier, IG–Imperial Guard, Lt–Light infantry, LC/LtC–Light Cavalry, Tir–Tirailleur, Chs a Chv–Chasseur a Cheval, Cuir–Cuirassier, Drg–Dragoon, Grn a Chv–Grenadier a Cheval, CR–Cavalry Reserve, Hus–Hussar, H–Heavy, HC–Heavy Cavalry
Allied Command Designations — The Command Designation of a Russian or Prussian unit identifies the unit's division and brigade. The Command designation of a Russian Command unit identifies the Leader's division and/or brigade. Additionally, the Russian army has temporary commands called "Wings" with designated Wing Commanders. Wing affiliations are not shown on combat or leader units. Players need to refer to the scenario and Command Rules for further explanation on Wing commands and their effects on Command and Command units.
Abbreviations used in Russian/Prussian Command Designations: C–Cavalry, Grn–Grenadier, Lt–Light artillery, Cuir–Cuirassier, Cos–Cossacks, Drg–Dragoon, Hus–Hussar, Jgr–Jaeger, Fus–Fusiliers, Sch–Schutzen, Lft–Left, LW–Left Wing, Rt–Right, RW–Right Wing, Ctr–Center Wing, HA–Horse artillery, Pr–Prussian, RG–Rear Guard, AG–Advanced Guard.
[2.5] Game Scale
Each map hex represents 116 yards from hexside to hexside. Each combat strength point represents approximately 50–60 infantrymen, 40–50 cavalry troopers, or one artillery gun. An artillery crew strength point represent the typical number of crew required to man 1–3 guns. Each Daylight and Dusk/Dawn turns represent 15 minutes, and Evening turns representing 30 minutes of time. The Transitional Night turns represent a few hours.
[2.6] Inventory of Game Parts
A complete game of Winter's Victory contains the following components:
- Four 25.5 x 33 in. map sections
- Game Rules Booklet
- Game Playbook (exclusive rules, scenarios, and optional rules)
- Eleven Counter Sheets (8.5 x 11 in.)
- Command Charts and Tables Card
- Terrain Effects Chart/Player Aide Tables
- Two Fire Combat Tables: French Infantry & Artillery and Allied Infantry & Artillery
- Shock Combat Tables (2)
- Brigade Commitment/Fatigue Displays (1 French and 3 Allied)
- Five Scenario/Setup and Reinforcement Cards
- Sequence of Play display card
- One 10-sided die
3.0 Setting Up the Game
Winter's Victory has four scenarios to choose from. Scenario 20.3, depicts the day long "Battle of Eylau" which occurred on the 8th of February and uses all four maps. Two other smaller scenarios Scenarios 20.1 and 20.2, will use only one of the maps. And a fourth scenario, Scenario 20.4, the longest and most expansive, will allow players a less scripted option in a combined two day battle of the 7th and 8th with alternate setups and reinforcement schedules. Go to The Scenarios (section 20.0) found in the separate playbook to review each scenario and choose one to play. Each scenario describes which map or maps are needed, which setup card to use and instructions for setting up the game in order to begin play.
4.0 Sequence of Play
Winter's Victory uses an asymmetrical, reciprocating sequence of play each Game-turn which is segmented into phases. Players conduct activities in each "Phase", alternating as the active or "Phasing Player". The opposing player who is not active, is the "non-Phasing Player". During the Reciprocal Fire Phase both players participate alternately. During a turn, each player separately commands his forces, moves units, conducts fire and Shock Combat and rallies his forces. The game-turns are divided into four categories: Daylight, Dusk/Dawn, Evening, and Night. Each game turn consists of 10 phases. After completion of each phase, the Turn Phase marker is advanced to the next phase. Upon completion of the last phase, the Game-turn marker is advanced to the next Game-turn. The Game-turn sequence is summarized below.
4.1 Game-Turn Sequence Outline – Daylight Turns
Daylight Game-turns are conducted in the following sequence of play.
1. Game Turn Interphase
A. Army/Corps Morale Segment: Both players check their Army or Corps Morale Levels. If any are at 0 or less, implement the effects of Demoralization or Disintegration for the affected Corps or Army (see 14.2).
B. Snow Event & Visibility Segment: If Snow Event is indicated on the Turn Record Track, players determine if a Snow Event occurs, if so, implement the Snow Event procedures (18.3). If Snow Event is continuing, adjust the Snow Rate and Visibility if needed (see 18.2 and 18.3). Note any Visibility change for Daylight, Dusk/Dawn, Evening, or Night Game-turns.
HOURLY ONLY GAME-TURN INTERPHASE ACTIVITIES. On each Hourly Game-Turn (red Turn number on the track) the following activities are conducted by both players (simultaneously):
C. Special Fatigue Accrual Segment:
- Cavalry Charge Fatigue Accrual: (15.21).
- Jaeger Battalion Fatigue Accrual (Optional): (see 19.11).
D. Brigade Fatigue Accrual & Recovery Segment: All activated brigades accrue fatigue points and Brigade Fatigue Levels are adjusted (see 15.11). All non- or deactivated brigades with 3 or more Fatigue Points, may recover (subtract) fatigue points and Brigade Levels are adjusted (see 15.12). Check Brigade Fatigue Levels for Attack Order Violation (see 17.75).
E. Brigade & Division Leader Deactivation Segment: Both Players may deactivate any brigade that is eligible to deactivate and deactivate any Division Leader that has no active (on-map) Brigade Leaders subordinate to him (see 17.54).
F. Army Command Points Addition Segment: Both players receive Army Command Points (CPs) and add them to their Army's Command Points Total (see 17.21).
G. Command State Continuation Segment: Both players may assign CPs to any of their Mobilized Commanders or independent Division Leaders they wish to. Both Players then check all required Commanders and then Division Leaders that are in a Mobilized Command State to determine if they remain in their Mobilized State (see 17.63).
2. Allied Command Phase
The Allied Player announces his command decisions and Command unit activities through a structured sequence by Command unit type. The following Command unit activities and activations must occur in the order presented during each Command Phase.
A. Delay Marker Delivery Check Segment:
- The Allied Player makes Order Delivery checks for all friendly Command units stacked with a Delay 1, 2, or 3 marker (ignore all Order Received markers) and apply any changes (17.35).
B. Brigade Leader Activation Segment: The Allied player activates any Brigade Leader (on the BC/FD) that is stacked with an Order Received marker and places him on the map (17.52). Remove the Order Received marker (retain the Attack Order marker if any).
C. Division Leader/Detachment Commander Activity Segment:
- Division Leader Activation: Activate any Allied Division Leader that is stacked with an Order Received marker (from the BC/FD) and place him on the map (17.52). Retain the Order Received marker (and Attack Order marker if any).
- Division Leader Activity: An active (on-map) Division Leader or Detachment Commander, stacked with an Order Received marker may, (a) attempt to activate any of his Brigade Leaders (17.32); and/or (b) change his Command State from Standing to Mobilize (17.61). A Division Leader without an Order Received marker may only change his Command State from Mobilized to Standing and/or end an Attack Order.
- Division Attack Order Activity: Brigades subordinate to a Division Leader with a Division Attack Order, must receive Brigade Attack Orders. Immediately place a Brigade Attack Order marker on all subordinate on-map Brigade Leaders within his Command Radius and make an Order Delivery check for any subordinate Brigade Leader(s) on the BC/FD (using the normal order delivery process). Note: Activated (on-map) Brigade Leaders beyond the Division Leader's Radius may not receive an Attack Order marker at this time (see 17.71). Note: Remove the Attack Order marker from any Division Leader that has no active Brigade Leaders or any Brigade Leader no longer stacked with an Attack Order marker.
- Grand Battery Leader Activity: Conduct activities for Grand Battery Leaders stacked with an Order Received marker (19.52).
D. Wing/Reserve Commander Activity Segment:
- Wing/Reserve Commander Activity: An Active Wing Commander with an Order Received marker may, (a) issue an order to activate one or more subordinate Division Leaders or one Brigade Leader (17.41); and/or (b) change his Command State from Standing to Mobilize (17.61). A Wing Commander without an Order Received marker may issue an order to activate one subordinate Division Leader or one Brigade Leader (see 17.41).
- Wing/Reserve Commander Attack Order Activity: A Wing Commander with a Wing or Division Attack Order marker, may send a Divisional Attack Order to one or more subordinate Division Leaders (see 17.71), including any inactive subordinate Division Leader on the BC/FD, (add a Division Attack Order marker to the resulting Delay marker (see 17.34).
E. Army Commander Activity Segment: The Allied Army Commander may (a) change his Command State (see 17.62); and/or (b) issue orders to Wing and Detachment Commanders, and to any subordinate Division or Brigade Leaders (see 17.22 & 17.32). Army Command Points may be required for each order issued (see 17.22). If an order is an Attack Order, one additional CP is required (see 17.71).
F. Cavalry Charge Declaration Segment: The Allied player announces any Cavalry Charges (12.52). Place Charge Zone markers for each successful initiation.
G. Ammunition Resupply Segment: Remove Ammo Deplt markers from units eligible to resupply (11.92).
3. Allied Rally Phase
A. Combat Units Rally Segment: The Allied player attempts to recover Exhausted cavalry and rally each of his Disordered and Routed units. Routed units not able to rally must continue to retreat (see 7.22 and 13.4).
B. Attack Order Stoppage Check Segment: The Allied player determines if any of his ongoing Attack Orders must end due to Attack Order Violations (see 17.76).
4. French Movement Phase
A. Command Status Segment: French Division leaders, Corps and Army Commanders may change their Command State from Mobilized to Standing. Next, determine the command status of French Division and Brigade Leaders and combat units and mark those which are Out of Command with an Out of Command marker (see 17.11 & 17.12).
B. French Movement Segment: The French player may move some, all, or none of the French units in accordance with the rules for movement (see 5.0, 6.0, 7.0, and 8.0). Skirmish units may detach from or reattach to infantry battalions at the start of the Movement Phase. The non-phasing player (Allied) may not conduct any movement during this phase.
5. Allied Shock Phase
The Allied Player conducts infantry shock attacks and cavalry charges in any order he chooses and in accordance with the rules for Shock Combat (see 12.0). The French player may initiate opportunity charges if eligible to do so (see 12.56).
6. Reciprocal Fire Phase
Both players resolve artillery and infantry fire combat in the order listed below. In each segment, players alternate fire, one unit or stack at a time, until all fire is completed (see 11.0).
A. Reciprocal Skirmisher Fire Segment: All Skirmish companies and units in General Order from both armies, may execute fire combat. Skirmish units and units in General Order fire alternately between opposing players until all desired units have fired.
B. Reciprocal Infantry Battalion Fire Segment: All infantry battalions (and those Disordered) from both armies may execute fire combat. Infantry Fire is alternated between opposing players until all desired infantry battalion units have fired.
C. Reciprocal Artillery Fire Segment: All artillery units from both armies may conduct fire combat. Artillery fire alternates between opposing players until all desired artillery units have fired.
Note: The following Phases 7-10 are similar to Phases 2–5 except that the players roles are reversed; the French Player now assumes the actions of the Allied Player and the Allied player those of the French with noted exceptions.
7. French Command Phase
A. Delay Marker Delivery Check Segment
B. Army Commander Activity Segment: The French Army Commander (Napoleon) may initiate orders to on-map Corps Commanders and Division Leaders and activate inactive Division or Brigade Leaders (see 17.22 & 17.32). The Army Commander may change his Command State simply by doing so (no CP or Order required).
C. Corps Commander Activity Segment: Same as the Allied Wing Commander Activity Segment except applied to French Corps Commanders.
D. Division Leader Activity Segment:
- Division Leader Activation
- Division Leader Activity
- Division Attack Order Activity
E. Brigade Leader Activation Segment: Same as the Allied Brigade Leader Activation Segment except applied to French Brigade Leaders.
F. Cavalry Charge Declaration Segment: (see 12.52).
G. Ammunition Resupply Segment: (see 11.92).
8. French Rally Phase
A. Combat Units Rally Segment: Same as the Allied Rally Segment except all French units recover from Disorder normally (no die roll required).
B. Attack Order Stoppage Check Segment: (see 17.76).
9. Allied Movement Phase
A. Command Status Segment
B. Movement Segment
10. French Shock Phase
End of Game-turn: Players determine if the game ends because of conditions set by the scenario or by mutual agreement. If the game is at an end, players may calculate the levels of victory based on the victory conditions for the scenario. If the game is to continue, advance the Game-turn marker one turn on the Game-Turn Track.
4.2 Dusk/Dawn Game-Turns (1–5 and 45–50)
Dusk and dawn turns are conducted per the normal sequence of play. However, visibility and line of sight are reduced to 4 hexes; i.e., artillery fire is reduced to a range of 4 hexes (see 19.9.1 in Playbook).
4.3 Evening Game-Turns (51–53)
Evening turns represent the post sunset period of greatly diminished light but are still conducted per the normal sequence of play. Visibility and line of sight are restricted to 2 hexes. Additionally, there are reduced abilities for command and control and for units to rally (see 19.9.2 in Playbook).
4.4 Night Game-Turns (54–59)
Night Game-turns represent 15 or 30 minutes of time and are conducted per the normal sequence of play. The effects are the same as Evening Game-turns with some additional restrictions (see 19.9.3 in the Playbook).
4.5 Transitional Night Turns (Scenario 20.4 only)
The Transitional Night Game-turns 60 and 61 are used only with the optional rules for Scenario 20.4 to transition from the end of one day to the beginning of another. See Scenario 20.45 for details.
5.0 Unit Facing
Facing defines the orientation of a unit or stack of units within a hex. There are two types of unit facing: frontal and all-around. The type of facing each unit or stack of units is using can vary according to a unit's type, formation and morale status. Frontal facing indicates the unit's general march direction for movement and the unit's field of fire for combat and defines the two frontal hexes it is facing. All-around facing has no such directional restrictions and the unit faces all six adjacent hexes.
FACING PROCEDURE: Units which exhibit frontal facing must be unambiguously oriented on the map such that the top of the counter is facing one of the vertices of the hex it occupies (see diagram). The unit's frontal hexsides are the two hexsides to the left and right of the vertex at the top of the counter. The unit's rear hexsides are the two hexsides to the left and right of the vertex at the bottom of the counter. The unit's flank hexsides are the remaining two hexsides to the left and right of the counter.
(Facing diagram: infantry unit in Column formation, showing FRONT, FLANK and REAR hexsides.)
5.1 Units that Exhibit Frontal Facing
The following Formed units/formations exhibit a two or three hex frontal facing and must comply with the facing rules: A. Infantry battalions in Line, Extended Line (3 hex facing) or Column formation B. Cavalry units (except Cossacks; see 19.2) C. Artillery in unlimbered formation (also while Disordered; see 7.56)
5.2 Units that Exhibit All-Around Facing
The following units possess all-around facing no matter how the unit is oriented in the hex it occupies: A. Skirmish companies B. Infantry or cavalry in General Order formation C. Infantry battalions in Square formation
D. Limbered artillery batteries E. Artillery crews F. Command units G. Disordered units (Exception: Disordered artillery) H. Routed units
A unit that exhibits all-around facing has no flanks or rear; it is considered to be facing all six hexes adjacent to the hex it occupies. Exception: A Disordered unlimbered artillery unit retains its frontal facing (see 7.56).
5.3 How a Unit's Facing is Changed
The facing direction of a frontal facing unit may be changed during the owning player's Movement Phase while the unit is being moved. This facing change is conducted by orienting the unit's facing to the closest vertex in the hex to the left or right of the current vertex.
[5.31] Changing a Unit's Facing
To change its facing, a unit with frontal facing must expend 1/2 Movement Point for each vertex to which it rotates. Exception: An infantry battalion in Extended line pays 1 Movement Point to change its facing (see 8.34).
[5.32] Changing from All-around to Frontal Facing
A unit that has all-around facing and changes formation (even from an involuntary formation) may assume any frontal facing in the hex at no Movement Point cost for the formation change. In effect, the unit is allowed to change its facing and formation in the same action.
5.4 Facing and Movement
A unit may only enter a hex it faces as it is moved. A unit or stack with frontal facing may not move directly into a hex to its flank or rear. In these cases, the unit must first be reoriented in the hex it occupies so that it now faces the hex it wishes to move into (exception; see 5.42).
- At the end of the Movement Phase, any unit that is ambiguously faced must be corrected. If players cannot agree about a unit's facing, a roll of the die may be used to determine the unit's facing.
[5.41] Facing Effects on a Friendly Occupied Hex
A unit with frontal facing which enters and remains in the same hex with another Friendly unit must be able to expend the required Movement Points, if necessary, to ensure that its facing conforms to the other Friendly units in the hex (exceptions: skirmish units and artillery crews; see 7.61 and 9.31). If the moving unit does not possess enough Movement Points to correct its facing, then it may not enter the hex.
Note: Because players will often conclude the movement of one unit before executing another unit or stack's movement, the previous requirement can be ignored provided the previously present unit moves out first. If that unit is not the next one moved mark the hex with an irrelevant marker as a reminder.
[5.42] Facing to the Rear
At the beginning of its movement, an infantry unit in Column or Line formation may face to its rear (180°) and move into one of its rear facing hexes in accordance with the following procedure:
- An infantry unit may change its facing to its rear at a cost of 1/2 Movement Point. Place a Facing to the Rear marker on the unit indicating that the front facing side of the unit is Facing to the Rear.
- The unit may now move Facing to the Rear through either of its original rear hexsides with the following restrictions:
- It may move no more than two hexes.
- It may not change its facing except to return to its original facing.
- It may not change its formation.
- It applies a -1 to its Effectiveness Rating.
- If it moves into an obstructed hex or crosses or Stream hexside, it immediately becomes Disordered.
- A unit that is Facing to the Rear, may return to its original facing at a cost of 1/2 Movement Point. Simply reorient the counter 180° again so that it is back to its original facing. Or, it may convert its Rear Facing to a new front facing by expending 1 MP. A unit that does not return to its original frontal facing retains its Facing to Rear marker.
5.5 Facing Effects on Fire & Shock Combat
[5.51] How Facing Affects Fire Combat
- A unit may only fire through a hexside it faces. For a formed unit, these are its frontal hexsides. However, a unit which has all-around facing may fire in any direction.
- A unit which is fired upon through either of its flank hexsides is automatically an enfilade (Class I) target unless protected by terrain (see 11.42). If a Line of Sight leading to a unit bisects its flank and front (or rear) hexside, the unit is not an enfilade target.
[5.52] How Facing Affects Shock Combat
- A formed infantry or cavalry unit may only execute a shock attack through its frontal hexsides. A unit which possesses all-around facing may execute a shock attack in any desired direction.
- A unit may be subject to a shock attack from any direction. A unit which receives a shock attack through either its flank or rear hexside is automatically Disordered if it is not already Disordered (see 12.22.4).
6.0 Movement
During the Movement Phase, the Phasing Player may move any number of his non-routed units that are eligible for movement as he desires. Movement by a given unit is restricted by the Movement Allowance – the maximum number of Movement Points – of that unit, as well as restrictions imposed by terrain, command and other rules.
MOVEMENT PROCEDURE: Units may be moved individually or in stacks. Before another unit or stack is moved, the Phasing Player must complete the movement of the previous unit or stack. Each unit or stack is moved separately, tracing a path of contiguous hexes through the hex grid. As each unit enters a hex, it must pay a portion of its Movement Allowance. Certain types of movement required by a unit, such as Shock Combat, cavalry charges, and Disordered or Routed retreats, are not considered "movement" and do not use any Movement Points (MPs).
6.1 General Movement Restrictions
Only units belonging to the owning player may be moved during that player's Movement Phase. He may choose to move all, some, or none of his eligible units up to the limits of each unit's Movement Allowance. Friendly units moving during the Movement Phase are prohibited from entering a hex occupied by an Enemy combat unit (Exception: see 8.66). Additionally, a unit's movement may be altered by its current formation, terrain features, other friendly units, and Command Control restrictions. The following units are prohibited from moving during the Movement Phase:
- Command units that are not activated (not on the map) or brigade leaders that are Out of Command (see 17.11).
- Combat units that are Out of Command (exception: 17.13 & 17.14) or part of a brigade that is not currently committed (see 16.14).
- Routed units (Routed units retreat during the Rally Phase; see 13.31).
[6.11] Movement Points (Movement Allowance)
Movement Points are used by a unit to facilitate movement, facing changes, and formation changes. The number of Movement Points expended by a unit during a Movement Phase may not exceed its current Movement Allowance (Exception: see 6.4). Unused MPs may not be accumulated from one Movement Phase to another or transferred among units. A unit is not required to expend the full portion of its Movement Allowance.
- A unit's Movement Allowance is determined by the formation adopted by a unit. During its movement, a unit expends a number of Movement Points in order to change its facing and/or formation (See 5.0 and 7.0) and pay the terrain cost for each hex entered and hexside crossed.
[6.12] Moving Into a Friendly Occupied Hex
A unit may enter a hex occupied by another friendly unit at no additional Movement Point cost. However, a unit (not in Road Column), moving through a hex occupied by a friendly formed unit, may require it to expend an additional MP and/or adopt General Order (see 6.13). A unit that enters a hex occupied by a friendly formed unit is placed at the bottom of the stack if entered through the unit's flank or rear hexsides, and placed on the top of the stack if it enters through unit's frontal hexsides. Stacking limits must be observed at all times. If the stacking limit is violated, both the moving unit and the occupying unit(s) are Disordered (see 9.1). A formed unit that ends its movement stacked with another friendly formed unit must be of the same unit type and have enough MPs to adopt the same facing as the unit occupying the hex (see 5.41 and 9.14).
[6.13] Moving Through a Friendly Occupied Hex
During its movement, a unit that has enough Movement Points to do so, may enter (to move through) a hex occupied by other friendly units without penalty with the following formed unit type exceptions:
- Formed Cavalry: A formed cavalry unit must pay 1 additional MP to enter a hex occupied by a friendly formed unit. If the unit occupying the hex is an infantry unit in Line Formation and the cavalry unit is moving across the infantry unit's frontal hexsides, the infantry unit must adopt General Order.
- Infantry in Line: An infantry unit in Line Formation that moves through a hex occupied by any formed unit, must pay 1 additional MP to exit the occupied hex or adopt General Order. An infantry unit in Line formation must adopt General Order if any formed unit type moves through its hex from front to rear or rear to front.
- Unlimbered Artillery: A formed infantry or cavalry unit that enters a hex from front to rear or rear to front, containing a friendly unlimbered artillery unit, must pay 1 additional Movement Point to exit (however see 6.5 and 6.6). This movement has no effect on the artillery unit.
Note: Units in Grand Tactical Movement may move through other Friendly units without penalty, subject to the rules above (see 6.42).
[6.14] Movement and the Presence of Enemy Units
Movement by units into a hex is not inhibited by the presence of Enemy units adjacent to that hex. However, units leaving a hex in an Enemy Minimum Range Fire Zone or leaving an Enemy Medium Range Fire Zone may be fired upon (see Special Firing Opportunities, case 11.31). A friendly unit moving within two hexes of an enemy cavalry unit may trigger an Opportunity Charge (see 12.56).
6.2 Terrain Effects on Movement
Regardless of unit type, during the Movement Phase, a unit expends at least one MP from its Movement Allowance to enter a Clear terrain hex. To enter other type of hexes or cross certain types of hexsides containing terrain features, a unit may need to spend more than one Movement Point (depending on its formation or unit type). Non-clear terrain hexes or hexsides that may impede movement, affect Shock Combat, and/or block line of sight are generally referred to as Obstructed Hexes or Hexsides. All movement costs and penalties for terrain are cumulative. Thus the total distance a unit may move (in hexes) in a single Movement Phase will vary according to the hexes entered and/or hexsides crossed. In addition, a formed combat unit moving into an obstructed hex may be required to adopt General Order, become Disordered, or be prohibited from entering the hex; see separate Terrain Effects Chart (TEC).
[6.21] Obstructed Terrain Hexes
Town/Village (Hard Cover): The cost to enter a Town/Village hex for all unit types is 2 Movement Points (Exceptions: artillery and skirmish units; see 6.3 and 8.65.2). A formed infantry or light cavalry unit immediately adopts General Order when it enters a Town/Village hex (Exception: see 6.52). A heavy cavalry or artillery unit immediately Disorders when it enters any obstructed terrain hex.
Woods (Soft Cover): Infantry and Light Cavalry units expend 2 MPs to enter a woods hex and must immediately adopt General Order (Exception: skirmish units; see 8.65.2). Heavy cavalry and artillery units are prohibited from entering a woods hex except through a road hexside (see 6.52 and 6.6).
Light Cover: All unit types except artillery expend 1 Movement Point to enter a Light Cover hex. An artillery unit must expend 2 Movement Points to enter a Light Cover hex.
Farmette: Infantry and Light Cavalry units expend 1 Movement Point to enter a Farmette hex. Heavy Cavalry and artillery units expend 2 MPs to enter a Farmette hex and Disorder.
Frozen Wetlands: All units, regardless of type or formation, expend 2 Movement Points to enter a Frozen Wetlands hex. Formed infantry and light cavalry units adopt General Order and heavy cavalry units immediately Disorder. An artillery unit may not move into a Frozen Wetlands hex unless moving along a road hexside (see 6.52 & 6.6). An artillery unit may never retreat into, or unlimber in, a Frozen Wetlands hex (even on a road).
[6.22] Obstructed Terrain Hexsides
Light Cover Hexside: A formed infantry or cavalry unit pays 1 additional Movement Point whenever it crosses a Light Cover hexside. An artillery unit pays 1 additional MP and Disorders when crossing a Light Cover hexside.
Brook Hexside: A formed unit expends one additional (+1) Movement Point to cross a Brook hexside, (See also 6.32, Artillery Gun Loss.)
Stream Hexside: A formed infantry unit expends 2 additional Movement Points or expends 1 additional MP and Disorders whenever crossing a Stream hexside. A cavalry unit expends 1 additional MP to cross a Stream hexside and immediately Disorders. An artillery unit expends 2 additional MPs to cross a Stream hexside and Disorders and checks for gun loss (See 6.32).
Major Stream Hexside: An infantry or cavalry unit must expend 2 additional Movement Points to cross a Major Stream hexside and immediately Disorders. An artillery unit may never cross a Major Stream hexside unless it is traversed by a road. Skirmish and Disordered units simply pay 2 additional MPs to cross a Major Stream hexside.
[6.23] Slope Hexsides
There is no movement point cost for infantry and cavalry units when moving down slope (crossing a contour hexside to a lower level) or up slope (crossing a contour hexside to a higher level). However, infantry and cavalry must expend one additional MP when crossing a Steep Slope hexside from a lower elevation (see 6.3 below).
6.3 Terrain Effects on Artillery Movement
A limbered artillery unit may enter a Town/Village hex at a cost of 3 Movement Points or a Light Cover hex at a cost of 2 MPs. It may never enter a Woods or Frozen Wetlands hex except through a road hexside (see 6.52 & 6.6). Except for Light Cover, an artillery unit Disorders upon entering or crossing an obstructed terrain hex or hexside, (depending on the terrain type, it may rally from Disorder in that hex during its friendly Rally Phase).
(Diagram: Artillery Movement in Obstructed Terrain — an artillery unit entering obstructed terrain from a non-road hex versus from a road hex; the example shows the cost of the first obstructed hex and General Order/Disorder, then 1 MP per connected road hex.)
[6.31] Slope Hexsides
- An artillery unit, not in Road Column, must expend 1 additional Movement Point when moving across a Slope hexside from a lower elevation.
- When moving across a Steep Slope hexside, an artillery unit expends 2 additional MPs if moving from a lower elevation and 1 additional MP if moving from a higher elevation.
[6.32] Artillery Gun-Loss from Movement
Each time that an artillery unit crosses a Stream, Brook, or Light Cover hexside, or "Limbers to Retreat" (7.57), the owning player must check for gun-loss (i.e., gun carriage breakdown). Note: There is no gun-loss check if the hexside is traversed by a road.
Gun-Loss Check Procedure: To check for gun-loss, the owning player rolls one die. On a roll of 7, 8 or 9 the battery loses one strength point. The gun-loss die roll is adjusted by the following die roll modifiers if the artillery battery is:
| Modifier | Condition |
|---|---|
| –2 | crossing a Brook or Light Cover Hexside |
| –1 | a Horse Artillery battery |
| +1 | a Firing Class 1 Artillery battery |
6.4 Grand Tactical Movement
While moving, an unit or leader may increase its Movement Allowance by employing Grand Tactical Movement.
[6.41] How Units Employ Grand Tactical Movement
During its Movement Phase, a unit may add 2 Movement Points to its Movement Allowance if it meets the following criteria:
- If a combat unit it must begin its movement In Command.
- The unit may not move within 6 hexes of any non-routed enemy unit throughout its movement. A unit must end its movement the instant it moves to within 6 hexes of an enemy unit.
- The unit may not be a skirmish unit, an artillery crew, or Routed.
- A cavalry unit may not be exhausted.
[6.42] How Units Move by Grand Tactical Movement
A unit moving by Grand Tactical Movement pays the movement point cost for each hex entered and hexside crossed using the Grand Tactical column on the Terrain Effects Chart except in the following circumstances:
- An artillery or cavalry unit pays 1 MP when entering a Woods or Frozen Wetlands hex if entered from a connecting road hex. All units pay the movement point cost for each hex if entered from a connected road in accordance with Road Benefit During Movement (see 6.52).
- The unit is in Road Column Formation (see Cases 6.6).
- During Grand Tactical Movement a unit pays no Movement Point cost for changing its facing or formation (exceptions: 6.61 and 6.62). However, a formed unit must be facing an apex at the end of its movement.
- During Grand Tactical Movement a unit Disorders whenever it enters or crosses terrain that would normally cause it to adopt General Order.
6.5 Roads and Movement
There are two types of roads on the Map: Major Roads and Minor Roads. During Grand Tactical Movement, there is a Movement Point benefit for units being in Road Column (see 6.6). However, during normal "tactical" movement, formed units may also receive a movement cost "exemption" while moving along a road when entering towns, woods or frozen wetland hexes, or crossing Stream hexsides.
[6.51] Entering and Exiting a Road Hex from a Non-road Hex
Combat units that enter or exit a hex containing a road through a non-road hexside must pay the normal Movement Point cost required to enter that hex; including the cost to cross any terrain hexside.
[6.52] Road Movement Exemption
Infantry and Cavalry – During movement (non-Grand Tactical), an infantry battalion or cavalry unit, pays its normal movement point cost to enter the first obstructed hex containing a road (see the TEC). The unit then pays only one MP per hex while moving into an obstructed hex if the hex entered is connected along the same road. These units will assume General Order (or become Disordered if Heavy Cavalry) upon entering the first obstructed hex. It may also enter and pass through another friendly unit that is not in Road Column without penalty to either (see 6.64). A unit may enter a prohibited terrain hex with a road if entered from a contiguous road hex. It pays 2 Movement Points to enter and is immediately Disordered.
Artillery – During movement, a limbered artillery battery pays only 1 MP to enter an adjacent obstructed hex with a road if entering from a connected road hex (and immediately Disorders). If an artillery battery enters an obstructed hex containing a road from a hex not connected by a road, it pays the normal movement cost to enter that hex, but may continue into additional hexes paying only 1 MP for each hex entered from a connected road.
Note: While moving into an obstructed hex from a connected road hex, an artillery battery is considered to occupy 2 hexes of road if its gun strength is greater than 4; the hex it occupies and the hex to its rear (i.e., the previous road hex it came from).
Stream/Brook Hexsides – During regular movement, a unit crossing a Brook, Minor or Major Stream hexside traversed by a road, pays 1 additional MP cost but does not suffer Disorder (see TEC) and an artillery unit does not check for gun loss (see 6.32).
6.6 Road Column and Grand Tactical Movement
During Grand Tactical Movement, an infantry, cavalry, or limbered artillery, unit may enter into Road Column Formation. A unit in Road Column moving along a road, ignores all terrain hex and hexside penalties AND pays only 1/2 Movement Point per hex when moving along a Major Road and 2/3 MP when moving on a Minor Road. A unit in Road Column is indicated by a Road Column marker placed on it. Note: Command units pay no additional Movement Point cost to enter into or exit out of Road Column.
[6.61] Entering into Road Column Formation
A formed unit or unit in General Order may change to Road Column Formation only if on a road hex and eligible to employ Grand Tactical Movement. In addition, a unit must expend the following Movement Points depending on the road type:
- an infantry or cavalry unit expends 1 MP if on a Major Road hex and 2 MPs if on a Minor Road hex.
- a limbered artillery battery expends 1 MP to enter into Road Column, regardless of the road type.
[6.62] Exiting from Road Column Formation
A unit in Road Column must pay an additional cost in MPs to exit from Road Column (before entering another hex). The cost to exit from Road Column varies depending on the type and size of the combat unit.
- An infantry unit pays 1 Movement Point for each 8 points (or portion thereof) of its current Troop Strength to exit from Road Column.
- A cavalry or artillery unit pays 1 Movement Point for each 4 points (or portion thereof) of its current Troop Strength to exit from Road Column formation (the artillery unit remaining in limbered formation).
[6.63] Road Column and Facing
Units have all around facing while in Road Column; a unit is exempt from facing change Movement Point costs. However, as a visual aide, players may wish to face units in Road Column to the hexside they are moving to when moving along a road.
[6.64] Road Column and Stacking
A unit in Road Column may ignore normal stacking restrictions and enter and pass through another unit that is not in Road Column regardless of stacking limits. A Leader unit automatically adopts the Road Column status of the unit it is stacked with. If moving independently, a Leader unit may enter or leave "Road Column" at no cost in movement Points.
(Road Column Examples diagram: a 12 strength artillery unit in Road Column occupying 3 road hexes; a 7 strength cavalry unit in Road Column taking up 2 hexes along a road; two infantry units with 8 SPs in Road Column.)
[6.65] Extended Length of Units in Road Column
When entering Road Column Formation the following road occupation levels applies to the following unit types:
Infantry: An infantry unit occupies one hex of road for each increment of 8 strength points or part thereof. Place a number of Road Column markers behind the lead unit counter as needed.
Artillery and Cavalry: A cavalry or artillery unit occupies one hex of road for each increment of 4 strength points or part thereof. Place a number of Road Column markers behind the lead unit counter as needed.
Player's Note: Once players become accustomed to the Road Column extended line procedure they may eliminate the non-lead use of the Road Column markers for many units so long as they keep the appropriate spacing between multiple units in single file.
6.7 Reinforcements and Road Entry
The scenarios specifies units as reinforcements to arrive at designated entry hexes. A combat unit may enter the map from a road hex in Road Column formation if there is no enemy unit within 6 hexes of the entry hex.
[6.71] Road Types Effects on Entering Units
The same road type as the entry hex road is assumed to continue off the map. Multiple units entering at the same hex are assumed to be in a line of column extending off the map with appropriate spacing per unit (see 6.65) and each succeeding unit reduces its number of Movement Points depending on the number of units ahead of it.
[6.72] The Effects of Enemy Units on Entering Reinforcements
If an entry hex is blocked by enemy units or is in the Fire Zone of enemy units, the owning player may choose to enter units one, two or three turns later. For each game-turn delayed, the units may enter the map up to 4 hexes from the original hex of entry. Units may enter in any formation (except square).
7.0 Formations
Formation is a general term that describes the deployment state and morale status of a unit at any given time. The formation of a unit can be changed either voluntarily or involuntarily during the course of the game. However, a unit may only be in one formation at a given instant. The various formations which a unit may adopt depend on the unit's type and the terrain it occupies. Generally, infantry battalions, cavalry units and artillery batteries (with its crew) are considered formed units if not in Skirmish, General Order, Disordered, or Routed formation. The current formation status of a unit may affect the unit's facing, movement, and combat capabilities.
7.1 Changing a Unit's Formation
A player may voluntarily change the formation of any unit he controls only during his Movement Phase. Depending on the formation, a unit may be required to expend Movement Points to change its formation and may change at any time during its movement (Exceptions: Square formation and Skirmish units; see 8.4 and 8.6). A unit that is Disordered or Routed may not change its formation (other than to rally).
[7.11] The Movement Cost of Changing Formation
The Movement Point cost for changing formation differs by nationality and is taken from the unit's highest Movement value.
- A French unit expends one Movement Point to change formation.
- An Allied unit expends two Movement Points to change formation.
Exceptions: See 7.51 for when an artillery unit is unlimbering and 8.5 for General Order and 8.6 for Skirmish formations.
[7.12] How Changing Formation is Affected by Enemy Units
A unit may be fired on when it voluntarily attempts to change formation within an Enemy Minimum Range Fire Zone. Additionally, an artillery unit may be fired on when it voluntarily attempts to unlimber in an Enemy Infantry Maximum Range Fire Zone or in an Enemy Artillery Medium Range Fire Zone. Exceptions: Formation change to General Order and detachment of Skirmish companies.
7.2 Involuntary Change of a Unit's Formation
There are two involuntary formations which reflect a unit's morale status and cohesion; Disorder and Rout. These imposed formations can occur in any Game-turn phase and are the result of morale and/or terrain related conditions. These units are referred to as "unformed" units. Note that General Order and Skirmish formations are also considered "unformed", but these are not caused involuntarily (see 8.5 and 8.6). Whenever a combat unit Disorders or Routs, the appropriate Disordered or Routed marker is immediately placed on the unit.
Note: As an involuntary formation, Disorder is a modification of the physical and morale state of a unit's voluntary formation. Rout is a condition of its own and is considered, for game purposes, to be its own "formation".
[7.21] Disordered Units
Disorder may be caused by Formed units entering obstructed terrain or crossing an obstructed terrain hexside, failing a morale check, as a result of Shock Combat, or from entering a hex occupied by a friendly Disordered unit. A unit that is Disordered is negatively affected for Morale, Fire and Shock Combat (see 12.2 and 13.13).
- A unit that is Disordered has all around facing for the purposes of Movement and executing Fire Combat (Exception: 7.56, Disordered Artillery), and when it fires, it applies the Disordered Column Shifts indicated on the Fire Combat Results Table. (See optional rule 21.52 Disordered Line and Extended Line Fire Combat.)
- At Minimum or Medium Range, if the shifts for Disorder cause the combat ratio to go off the table, the fire combat is resolved using the left most column.
- At Maximum or Extended Range, if the shifts for Disorder cause the combat ratio to go off the table, no fire combat is allowed.
- When fired upon, a Disordered unit retains the Target Class it would be in if it were not Disordered.
- During movement, a Disordered unit may not change its formation and ignores the movement point cost for changing its facing. Infantry battalions pay the cost for terrain as a unit in General Order. All other Disordered combat units, continue to pay their normal movement cost for terrain. A Disordered cavalry or limbered artillery unit that moves into a hex occupied by a friendly formed infantry unit in Line Formation, causes the formed unit to immediately Disorder.
- A Disordered unit that retreats into a friendly occupied hex might cause the friendly unit to check morale. If the checking unit does not Disorder or Rout as a result of the morale check, the retreating Disordered unit continues until it reaches an unoccupied hex (see 13.33).
[7.22] Routed Units
Rout may be caused by a unit failing a morale check, the result of a Shock Combat, or entering a hex occupied by other friendly Routed units. A Routed unit may never move during the Movement Phase and may never execute fire or Shock Combat. When Rout first occurs, place the Routed (Rtd) marker atop the unit and retreat it 3 hexes (see 13.1). A Routed unit that fails to rally during its Rally Phase must continue to retreat (see 13.42). Regardless of its current formation, an infantry battalion Routs on its column side; remove any other formation markers (including Disordered).
[7.23] Recovery from Disorder and Rout
A unit that is either Disordered or Routed recovers to a voluntary formation only if it rallies during the Friendly Rally Phase (see 13.4).
7.3 Infantry Formations
There are five different voluntary infantry formations: Column, Line, Square, General Order and Skirmish formation. Specific restrictions regarding the deployment and effects of infantry formations, are described in detail in Section 8.0.
7.4 Cavalry Formations
Cavalry units have only one formation which is represented by the front side of the counter. Cavalry units represent regiments and are classified as either Heavy Cavalry or Light Cavalry. The front of the counter represents it's "normal" formation and the back of the counter represents the unit's exhausted condition which may occur after cavalry charges. Thus, at any given time, a cavalry unit will be either Disordered, Routed, Exhausted or in "Cavalry Formation".
[7.41] Exhausted Cavalry
In addition to being Disordered or Routed, a cavalry unit, after a charge, may become "exhausted", causing a temporary reduction in its effectiveness. At the end of its charge, a unit becomes exhausted under any of the following conditions:
- it has conducted more than one shock attack or conducted one shock attack and advanced 6 or more hexes during a charge.
- it Routs as a result of a Shock Combat while conducting a charge.
Flip the unit to its reverse side (the side in black) indicating it is exhausted. Thus, a cavalry unit that has completed a charge may either be Disordered, Disordered and Exhausted, or Routed and Exhausted.
- Exhausted cavalry returns to normal during the friendly Rally Phase. If at the start of the Rally Phase the cavalry unit is not Routed or Disordered, it flips from its Exhausted side to its normal (front) side.
- An Exhausted cavalry unit that participates in a charge, automatically Disorders at the completion of it's Primary Charge Zone.
- An Exhausted cavalry unit that expends more than 3 Movement Points during its movement immediately Disorders.
[7.42] Cavalry Reaction to Moving Enemy Units
- During the opposing player's Movement Phase, if an enemy combat unit moves to within 2 hexes of a friendly cavalry unit, the cavalry unit may immediately adjust its facing one vertex left or right of its current facing.
- Heavy cavalry must make a morale check if it attempts to execute Cavalry Reaction Facing.
- If the facing adjustment is greater than one vertex, then the cavalry unit automatically Disorders.
- If a facing change is made or not, a friendly cavalry unit may either attempt to execute an Opportunity Charge (if eligible to do so per 12.56.1), or if the enemy unit is non-cavalry, it may move away one or two hexes. The cavalry unit is automatically Disordered at the end of this move if any change to its facing was made. Note: A friendly cavalry unit may change its facing and/or move away only once in the same Movement Phase.
7.5 Artillery Formations
An artillery battery is a Formed unit. There are two voluntary artillery formations; limbered (capable of moving) or unlimbered (capable of firing). Each artillery unit counter is back-printed so that the front side represents its limbered formation and the reverse side represents its unlimbered formation. The counter shows the unit's designation (battery/regiment), number of guns, crew effectiveness, firing class and movement allowance. Each artillery unit has a designated artillery crew marker which is placed underneath the artillery counter. The presence of an artillery crew indicates that the artillery battery is "manned" and may operate normally; move, engage in fire combat and change formation. Note: A Horse Artillery unit is considered an artillery formation, not a cavalry formation.
[7.51] Changing Artillery Formations
An artillery battery in limbered formation may move but may not fire. An artillery battery in unlimbered formation may fire but may not move. An artillery unit may voluntarily change its formation at anytime during its Movement Phase by expending two Movement Points; simply by flipping the counter from one side to the other. An artillery unit may not change formation or facing without the presence of its gun crew.
- An artillery unit may not change its formation in a woods hex.
- An unlimbered artillery unit may not change its formation if it is Out of Command (see 17.12).
- Whenever changing its formation, an artillery unit may be fired upon if it is in certain Fire Ranges of enemy units (see 7.12).
[7.52] Artillery Formations and Facing
An artillery battery that is limbered has all around facing. An artillery battery may assume any facing (no Movement Points required) whenever it changes its formation; i.e., unlimbers (see 5.32) or rallies from Disorder. An unlimbered artillery battery may change its facing (at a "cost" of 1 MP) to any apex during the friendly Movement Phase without limbering. Note: This may trigger enemy fire (see 11.3).
[7.53] Artillery Formations and Artillery Crews
Each artillery crew has the same unit designation as the artillery unit (guns) it serves. An artillery unit may not move, fire, or change facing or formation unless stacked with its designated crew (see 7.6 Artillery Gun Crews).
- An artillery unit's crew current strength and Effectiveness Rating are always used when defending during Shock Combat (see 12.22.2).
- While unlimbered, an artillery unit uses its crew's current Effectiveness Rating whenever required to check morale. While limbered, an artillery unit uses its printed Effectiveness Rating for checking morale regardless of the current Effectiveness Rating of its crew.
- Infantry units, cavalry and skirmishers may not be used to fire artillery.
- A hex occupied by a non-crewed artillery unit is treated as a Light Cover hex. Non-crewed artillery units are reduced if stacked with an Enemy infantry unit at the end of a friendly Shock Phase (see 12.43.3).
[7.54] Artillery Units and Fire Combat
- An Artillery unit fires at its current gun strength on the Artillery Fire Table. The Firing Class of an artillery unit is indicated on its unlimbered side.
- Unless protected by a Light Cover hexside, a limbered artillery battery is always a Class 1 Target (from artillery fire) or a Class 2 Target (from infantry fire) and an unlimbered artillery battery is always a Class 3 Target. An artillery battery (the guns) suffers a one strength point loss for each "hit" sustained by either infantry or artillery fire. Place the appropriate SP marker underneath the artillery unit to denote its reduced gun strength.
[7.56] How Disorder and Rout Affects an Artillery Battery
An artillery unit, without its crew, is never Disordered or Routed. A limbered artillery battery (with crew) becomes Disordered or Routed as a single unit. If the artillery crew of an unlimbered artillery unit becomes Disordered or Routed the artillery unit is may be Disordered or Routed as well. An artillery battery is Disordered under the following conditions:
- An artillery unit is Disordered whenever its crew is Disordered (because of morale check or Shock Combat).
- An artillery unit is automatically Disordered when it first enters an Town/village hex, but need not remain so (see 13.41).
Disorder: When an artillery battery is Disordered, place a Disorder Marker on top of the battery unit itself, rather than on the battery's crew. A Disordered artillery battery:
- may not change formation, except as a result of a morale check.
- executes fire combat applying the Disordered column shifts indicated on the Artillery Fire Combat Results Table.
- retains its facing while Disordered, and may not change its Facing during the Friendly Movement Phase.
- may not rally from Disorder if in the Fire Zone of a non-disordered formed enemy infantry unit (and not protected by Light Cover).
Note: An artillery unit that becomes Disordered in the process of changing its formation or facing, may complete the change as Disordered.
Rout: When a limbered artillery battery becomes Routed, the artillery unit and its crew must rout together according to the rules for Retreat (see 13.3). Place a Routed marker on top of the battery unit.
When an unlimbered artillery battery becomes Routed, only the artillery crew is retreated. A Routed marker is placed on the artillery crew and it is retreated according to the rules for Routed retreat and the associated artillery unit becomes "un-manned". When the artillery crew returns to its artillery unit, the artillery battery is considered "manned" in the next phase after it enters the hex.
[7.57] Limbering to Retreat
When an unlimbered artillery battery suffers a Disordered or Routed retreat as a result of a Morale Check (not from Shock Combat or during a cavalry charge), it may first limber and then conduct the retreat. After the artillery unit limbers, the owning player rolls a die; if the resulting number is equal to or less than 1/2 its current gun strength (rounded down), the retreating artillery unit loses 1 gun strength point. Note: The action of Limbering to Retreat is part of the involuntary formation of a Disorder or Rout retreat and is not fired on while limbering or exiting the hex by enemy units.
7.6 Artillery Gun Crews
An artillery crew is normally stacked beneath its artillery unit (an artillery unit having the same unit designation). When combined with an artillery battery they function as described in case 7.5.
[7.61] Artillery Crew Capabilities and Restrictions
An artillery crew stacked with its battery or on its own (not with its battery due to movement, after recovering from rout, etc), operates as follows:
A. An artillery crew alone, moves, checks morale, rallies and is a Target Class as that of a Skirmish unit (See 7.62 and 8.6). However, an artillery crew may not initiate shock combat and has no inherent fire capability. B. An Artillery crew may stack with any friendly infantry or artillery unit. It may contribute to the defensive strength of a unit in the same hex for Shock Combat, but may not use its Effectiveness Rating (unless alone in the hex). When stacked with infantry, an artillery crew is the last unit to take a loss from Fire or Shock Combat. C. An Artillery crew assumes the Movement Allowance of the artillery unit to which it is attached; ie., an Artillery crew attached to a Horse Artillery unit has a Movement Allowance of 6 while moving with the battery. E. An Artillery crew may move into and exit hexes occupied by other friendly units. When doing so they do not affect the friendly unit's formation or facing, but they do assume the morale state of the friendly unit (Disorder or Rout). F. An artillery crew that conducts a Disordered or Routed retreat does not cause any adjacent friendly unit (or friendly unit retreated into), to Disorder or require to check morale except when it first retreats from its artillery battery. G. An Artillery crew may not act as a gun crew for any artillery unit which does not have the same unit designation. An artillery crew may not combine its strength with another artillery crew that has a different unit designation. A Skirmish unit may not serve as an artillery crew.
(Source lettering skips D in 7.61, as printed.)
[7.62] How Artillery Crews are Reduced
An artillery crew is made up of one or more steps depending on the size of its artillery battery. Unlike other units, artillery crew steps are represented on the fronts and backs of the crew counters themselves. A single step of an artillery crew is equivalent to "manning" 3 guns of an artillery battery. Whenever an artillery battery is reduced to its next lower 3 gun increment, the artillery crew counter is flipped to its next reduced strength side. An Artillery crew is affected as a result of the following occurrences:
A. When stacked with its artillery battery, an artillery crew takes no direct loss as a result of fire combat from an enemy artillery or infantry unit. Instead, the guns take the loss from the fire combat result. Similarly, an artillery crew takes no direct loss from Shock Combat. Instead, the gun strength is used to calculate the loss from the Shock Combat result.
EXAMPLE: A Disordered 6-gun artillery battery, with a current gun strength of 5, receives a Dr1 as a result of Shock Combat. The Dr1 result is converted to a Rout result and the battery takes a 2-gun loss (see 12.42). The artillery crew is reduced (the battery now has 3 guns) and makes a Routed retreat of 3 hexes.
B. When alone, an artillery crew takes losses from Fire or Shock Combat as a loss of Gun Strength Points. Place an SP marker beneath the crew marker equal to the number of gun SPs lost. For every 3 gun SPs accrued, reduce the artillery crew by one. C. An artillery battery must be reduced of its gun strength if its artillery crew counter is reduced in strength below the number of guns it is allowed to service. This required gun reduction is applied the instant the crew is reunited with its battery. D. When all the guns of an artillery battery are eliminated, its assigned artillery crew counter is eliminated as well and removed from the map.
ARTILLERY CREW EXAMPLE: The artillery crew below is from an 8 gun artillery unit. For every 3 guns eliminated from the battery, the crew is reduced by one step. (Illustration: Full Strength crew at 8-7 guns; –1 Step at 6-4 guns; –2 Steps at 3-1 guns; Crew Eliminated at 0 guns.)
[7.65] Abandoning the Guns
An artillery crew may voluntarily leave its battery during the friendly Movement Phase or immediately prior to an enemy infantry shock attack. During Movement, an artillery crew may only leave its battery if the artillery unit is unlimbered (a crew may never leave a limbered artillery unit). During Shock Combat, an artillery crew may voluntarily leave its battery if the artillery battery is about to receive a shock attack by an enemy infantry unit (not cavalry). After the opposing player declares a shock attack against a friendly artillery battery, the owning player may elect to "abandon the guns" and move the artillery crew one or two hexes. If the artillery crew leaves its guns, the artillery unit may still fire at the attacking enemy unit, but does so as Disordered. An artillery crew that leaves its battery prior to shock combat does so as Disordered (unlike During Movement above). The attacking enemy unit may not fire at the retreating artillery crew (as it leaves its Minimum Range Fire Zone). Other enemy units adjacent to the friendly artillery battery may fire on the artillery crew when it leaves the battery.
8.0 Infantry Formations
There are five voluntary infantry formations: Column, Line, Square, General Order and Skirmish Order. Each battalion-size infantry unit is back-printed so that the front side of the counter represents the unit in Column formation and the reverse side the unit in Line formation. In general, to change from Column to Line or Line to Column, an infantry unit is simply flipped during its movement. A separate marker is used to indicate other formations. An infantry unit may change its formation voluntarily at any time during the owning player's Movement Phase (Exceptions: Changing to Square formation and detaching or recombining Skirmish units; see 8.4 and 8.6). To change its formation, a unit must expend the appropriate number of Movement Points which is different for each army:
- French infantry units expend one MP to change formation.
- Allied infantry units expend two MPs to change formation.
Exceptions: General Order is an automatic formation change which expends no Movement Points and is caused whenever a formed unit enters obstructed terrain (see 8.5). Also, an infantry battalion may detach a number of Strength Points to operate in Skirmish Formation at no cost in Movement Points (see 8.61). Note: There is no cost in Movement Points whenever a unit suffers Disorder or Rout. Units which are Disordered or Routed may change formation when they Rally (see 13.4).
8.1 Column Formation
The Column formation is represented by the front side of an infantry unit counter. It generally represents an infantry battalion with a front of one or two companies. It has a higher movement rate than a Line formation but is more vulnerable to artillery fire due to its compactness. Only the top most unit in Column formation may engage in fire combat and takes losses when fired upon; see 9.5 (Exceptions: see 8.42).
8.2 Line Formation
An infantry battalion in Line formation is most effective when used for fire combat, however, it has a lower movement rate than a column formation. The Line formation is represented by the back side of an infantry unit counter. The length of the line (how many hexes it occupies) depends on the size of the battalion (see case 8.3). Only the top most unit in Line formation may engage in fire combat and takes losses when fired upon; see 9.5 (Exceptions: see 8.42).
8.3 Extended Line Formation
When an infantry unit adopts Line formation, and it has a current Troop Strength of 10 or more, the use of a special Extended Line Marker is required. The battalion in Extended Line formation is represented by the addition of the Extended Line marker placed on either of its flank hexes, and acts as a single unit occupying two adjacent hexes.
[8.31] Changing into Extended Line Formation
An infantry unit that enters Line formation as an Extended Line may do so only if it meets the following requirements:
A) It has a unit strength of 10 or more. B) The unit is not Disordered or Routed. C) No unit occupies the flank hex that is to be extended into. D) Both hexes the unit and marker will occupy may not be an obstructed hex or occupied by another unit (except skirmish) and the hexside between them may not be a Stream or Light Cover hexside.
If the above conditions are met, an Extended Line marker is placed into the flank hex to be extended. The arrow must point to the extending unit.
[8.32] Characteristics of a Unit in Extended Line Formations
- For all purposes except when executing Fire or Shock Combat, the unit and marker of an Extended Line are treated as a single unit and assumes its current Troop Strength and Effectiveness in each of the two hexes it occupies (see rule 11.5). When fired upon, a line of sight may be traced to either hex the unit occupies.
- When a unit in Extended Line voluntarily changes to another formation, or its current Troop Strength falls below the strength which requires an Extended Line, the Extended Line marker is removed (at the end of the current Phase) and the unit counter is placed in either of the previously occupied hexes. Note: The unit is only subject to fire combat if the newly vacant hex that it occupied was in the Minimum Fire Zone of an enemy unit and the change was voluntary (not due to a strength reduction).
[8.33] Extended Line and the Effects of Involuntary Formations
-
Disorder: A unit in Extended Line is automatically Disordered when any of the following occurs:
- At the end of any phase, it is stacked with another unit, other than a skirmish or command unit, in either of the two hexes it occupies.
- Whenever it enters a Frozen Wetlands hex.
- Under any circumstance that would cause any other formed unit to be Disordered.
When either hex of an Extended Line formation becomes Disordered the entire unit is Disordered and retains its extended line status in both hexes. If the unit recovers from Disorder, the unit remains in both occupied hexes (unless its current strength falls below the strength that requires the use of an Extended Line marker). During the friendly Movement Phase or when engaging in Shock Combat, the owning player may choose (or may be required) to consolidate a Disordered Extended Line into a single hex by simply removing the Extended Line marker and placing the unit counter in one of the occupied hexes (see 8.35.1). Otherwise the Extended Line unit may continue to occupy two hexes.
-
General Order: A unit in Extended Line automatically adopts General Order when any of the following occurs:
- If either hex it moves or shock attacks into is an obstructed terrain hex or if any half of it attempts to execute a shock attack across a Light Cover hexside. This conversion occurs prior to the resolution of the Shock Combat, but after all eligible adjacent enemy units have fired.
- If not Disordered or Routed and it changes its facing at the conclusion of its initial shock attack.
-
Routed: The instant a unit in Extended Line becomes Routed, the Extended Line marker is immediately removed and the unit flipped to its Column side (with the Rout marker) and placed in either hex previously occupied.
[8.34] Extended Line Effects on Movement
- A unit in Extended Line moves as one unit (use the unit's Line formation Movement Allowance). When moving, a unit in Extended Line enters the two frontal hexes simultaneously. The hex with the highest cost is expended from the unit's Movement Allowance.
- An Extended Line Formation may change its facing by pivoting on one of its hexes and moving forward with the other hex, expending one Movement Point for each pivot hex rotated.
(Diagram: Facing Change in Extended Line — a change of facing in Extended Line costs 1 MP not 1/2.)
[8.35] Extended Line and Shock Combat
- A unit in Extended Line may be Shock attacked in either hex it occupies. If a unit in Extended Line is...
- ... attacked through its frontal hexside, the attack is resolved in either the hex occupied by the battalion counter or the marker. The defending battalion's strength is halved (rounded up). Alternatively, the defending unit in Extended line may voluntarily adopt General Order (removing the Extended Line marker) and defend in the hex being attacked (before firing; see 11.31).
- ... attacked through a flank or rear hexside, the Extended Line is immediately Disordered and its marker removed (the single unit may then be placed in either hex). If the removal of the marker makes the attacking and defending units no longer adjacent, the attacking units must enter the vacated hex and resolve the shock attack against the defending Disordered unit. (If the attacking unit is not facing the defending unit when it enters the hex, then it immediately adopts General Order to enable it to execute the shock attack.)
- A unit in Extended Line (which is not Disordered) may execute a Shock attack only into a hex it faces. When a unit in Extended Line executes a shock attack ...
- ... against a non-skirmish unit in a clear hex, it does so using up to 9 of its strength points if attacking only the center hex it faces. When attacking one of the left or right hexes it faces (or left and center or right and center), its strength is split evenly between marker and unit (the owning player may adjust the strength of each side up to ±2 SPs). If not Disordered or Routed from the Shock Combat, a unit in Extended Line must adopt General Order after executing a shock attack.
- ... into an obstructed hex, it automatically adopts General Order and occupies a single hex (remove the Extended Line marker and place the unit in Column in either hex). This conversion occurs prior to the resolution of the Shock Combat, but after any opportunity fire from adjacent enemy units.
- ... against enemy Skirmish units in a Clear or Light cover hex, the unit in Extended Line must be able to advance into two of its frontal hexes. If it cannot, it may a.) execute the shock attack from one of its two hexes (see 2 above) or b.) adopt General Order first.
- A unit in Extended Line may execute a shock attack against two enemy skirmish units in adjacent hexes if both hexes are clear or Light Cover terrain. The owning player splits the strength of the battalion and executes each Shock Combat individually. At the conclusion of the second Shock Combat, the attacking battalion must adopt the worse of the two results of both Shock Combats.
8.4 Square Formation
A Square is a formation that infantry adopt when threatened by cavalry. An infantry battalion that is in Square formation is represented by placing a Square Formation marker on top of the unit.
[8.41] Changing into Square Formation
During its Movement Phase, a formed infantry unit may change its formation to Square Formation only at the beginning of its movement. Whenever changing its formation to Square, an infantry unit automatically converts to its Column side (if not in Column already) and a Square Formation marker is placed on top the counter. Note: A unit in Extended Line may form Square in either of the two hexes it occupies (removing the Extended Line marker).
- A battalion may not adopt Square formation in an obstructed hex.
- When an infantry battalion adopts Square formation, all other units in the hex are also in Square formation. Skirmish units and Artillery Crews may enter a hex containing a Square formation.
- While in Square formation, a unit may not move except to change its formation (however, see Optional Rule 21.11).
[8.42] Square Formation Affects on Fire and Shock Combat
- A Square formation has all around facing. Thus, it may fire at any target hex within its Fire Zone as many times as it is eligible to do so. During the Reciprocal Fire Phase, a unit in Square formation may fire at up to 3 separate target hexes (alternating with opposing firing units) as long as each target hex is not adjacent to another target hex at minimum range and not within two hexes to another target hex at maximum range.
- Unless protected by a Light Cover hexside, a unit in Square is a Class I Target for fire combat.
- The Effectiveness Rating of the top infantry battalion in a Square formation, which is not Disordered, is modified by +2 when defending against an Enemy cavalry unit during a Shock attack. A cavalry unit automatically Disorders when it attempts to execute a Shock attack against an enemy infantry unit in Square formation.
- A unit in Square that initiates a Shock attack, automatically adopts General Order, (if not Disordered) prior to the defending fire combat and resolution of the Shock Combat.
- All infantry battalions stacked in the same hex combine their strength for fire and Shock Combat when in Square formation. Units in Square Formation use the Square/Column row on the Fire CRT when executing a Fire Combat.
- A battalion of 2 or less strength points in Square formation is automatically Disordered if defending in Shock Combat.
[8.43] Square Formation Affects on Morale
- A unit in Square formation receives a –1 die roll modifier whenever it checks for morale (even if Disordered).
- An infantry unit in an enemy Charge Zone is required to make a morale check before it attempts to change into Square formation (see 12.61).
8.5 General Order Formation
A General Order Formation is a required "voluntary" formation for infantry battalions and light cavalry units whenever they enter or occupy certain obstructed terrain hexes. While in General Order, infantry battalions are considered "unformed" and share many of the same attributes as Skirmish units and have special implications when firing, conducting shock attack and checking morale.
[8.51] When Units Must Adopt General Order
A formed infantry battalion automatically adopts General Order Formation (unless it is already Disordered or in Road Column) the instant any of the following occurs:
- it moves or initiates a shock attack into a Town/Village, Woods, Farmette or Frozen Wetlands hex, or after crossing a stream hexside.
- it changes its facing during Shock Combat.
Note: No General Order marker is required when in an obstructed hex. Whenever adopting General Order, an infantry battalion automatically assumes its Column side, regardless what formation it is in.
[8.52] How Units Reform from General Order
A unit in General Order reforms only during the Friendly Movement Phase. A unit in General Order that exits from an obstructed terrain hex (or has crossed an obstructed hexside) and enters a clear hex, must expend one additional MP (+1) to reform. Exceptions: A unit that does not have enough MPs to reform or is in the Minimum Range Fire Zone of an enemy unit, is not required to reform that Movement Phase. A unit that does not reform by the end of its movement has a General Order marker placed on it. When the unit reforms it may assume any formation and facing.
Note: Reforming from General Order is considered a change of formation, therefore, if the reformation occurs in an enemy Minimum Range Fire Zone, the unit is subject to fire by enemy units per 11.31.
[8.53] Light Infantry Units and General Order
French and Allied Light Infantry (Jaeger) battalions may adopt General Order at anytime and remain in General Order regardless of terrain (See 13.41).
- Light Infantry battalions Disordered in a Hard of Soft Cover hex automatically rally to General Order during the friendly Rally Phase, even in the Minimum Fire Zone of an Enemy unit (see 13.41).
- Light Infantry battalions in General Order attacking into or defending are not Disordered due to a "D" or "D1" result during Shock Combat, but the one SP loss is still taken (it does Disorder and retreat due to a Dr result: see 12.4.2.2).
[8.54] The Effects of Being in General Order
- Units in General Order have all around facing.
- A unit in General Order has its Effectiveness Rating reduced by 1.
- A battalion in General Order may add the Troop Strength of any Skirmish unit that is stacked with it for fire and Shock Combat. Note: The battalion assumes priority for Shock Combat results and morale checks.
- For fire combat, units in General Order use the Skirmish/General Order row on the Fire Combat Results Table. Regardless of its printed Firing Class, a unit in General Order fires as a Class 3 firing unit when occupying clear terrain or firing at maximum range and as a Class 2 firing unit when occupying obstructed terrain (at minimum range).
- A unit in General Order receives no benefit from being stacked with a Command unit for morale or Shock Combat purposes.
- A unit in General Order is considered to be In Command when occupying a town/village or woods hex.
- Light Cavalry automatically adopts General Order when entering a obstructed terrain hex (see Terrain Effects Chart). A Light Cavalry unit that exits an obstructed hex into a clear hex may not remain in General Order and must reform in the same manner as infantry battalions (see 8.52).
- A unit in General Order that becomes Disordered, is simply considered as Disordered, not a Disordered, General Order formation. Note: An infantry battalion in an obstructed hex that is Disordered, continues to fire using the Skirmish/General Order row on the Fire CRT.
8.6 Skirmish Formation
Skirmish formations are company sized units that are detached from infantry battalions. They have a single voluntary formation: Skirmish Formation. Each French Corps or Allied Jaeger Regiments have dedicated sets of skirmish unit counters that may only be used by battalions from those corps or regiments. Skirmish units of the light battalions are distinguished from those of line battalions by the horn icon in the unit type symbol (see 2.35, Summary of Unit Types). Note: Skirmish units may only be created by, and recombined with, their corresponding battalions types.
[8.61] Creating Skirmish Companies
Skirmish companies may be created and detached only at the beginning of the Phasing Player's Movement Phase, i.e, battalions may detach skirmish units first and then move. For each skirmish unit that detaches from a battalion, the battalion's strength is reduced by one SP for each skirmish SP it detaches (see 8.62 and 8.63). A strength marker is placed beneath the battalion counter reflecting it reduced strength. The skirmish unit is placed in the hex with the detaching battalion and the battalion and skirmish unit may then move separately. Although the detachment of skirmish units is considered a change of formation, it does not trigger enemy firing opportunities (11.3) nor is there a cost in Movement Points (see 12.61.2).
NOTE: For convenience, players may agree that skirmish units may be detached from a battalion at the beginning of each battalion's movement.
[8.62] Restrictions on Creating Skirmish Companies
-
French Light Infantry (Lt) or Allied Jaeger (and Prussian Fusilier) battalions may convert all of their Troop Strength into skirmish companies. A battalion which uses all of its Troop Strength to create into skirmish companies is removed from the map and placed in the Battalions Broken Down Box (see map). When created, an equal number of skirmish company Strength Points are placed in the hex the unit occupied.
-
French Line or Prussian Line battalions may detach only one skirmish unit per game and only if the battalion is at full-strength (see 8.63).
Player's Note: At the start of a scenario, (or upon activation) each Line battalion may "save" its skirmish company by placing it between the battalion marker and its strength marker. When placed beneath the battalion marker, the skirmish unit's strength (1 or 2 SPs) is added to the infantry unit's newly reduced Strength.
-
Russian Musketeer and Grenadier infantry battalions may never detach skirmish companies, (exception; see optional rule 21.24).
-
Disordered or Routed battalions may not detach or incorporate skirmish units.
[8.63] French Two-strength Skirmish Companies
French battalions with an original Troop Strength of 10 or more, detach skirmish units in strength increments of 2. French battalions with an original strength of 9 or less, may only create skirmish unit(s) with a strength of 1. A two-strength French skirmish unit is two-sided and has a strength of 2 on the front and a strength of 1 on the back. When a two-strength skirmish unit suffers a loss, it is flipped to its one strength side. Two single-strength skirmish units may not combine to form a two-strength skirmish unit.
(Illustration: a two strength skirmish unit from a Light battalion with an original strength of 14 (Full/Reduced); a one strength skirmish unit from a Light battalion with an original strength of 9.)
[8.64] Recombining Skirmish Companies into Infantry Battalions
A Skirmish unit that has not moved and is in the same or adjacent hex to a receiving battalion, may be attached at the beginning of that battalion's movement, or a skirmish unit may move to a hex occupied by an eligible battalion and recombine with it, but only if that battalion's movement has ended. The skirmish unit is removed and the same number of SPs of the recombined skirmish unit is added to the strength of the battalion. Skirmish units may only recombine with battalions bearing the same corps or regiment designation and of their own infantry type (e.g. Jaeger skirmish units may only combine with Jaeger battalions). The number of skirmish SPs attached to a battalion may not exceed the battalion's original strength.
[8.65] Skirmish Units Capabilities and Restrictions
A. Movement: In addition to the normal rules of Movement (Section 6.0), the movement of skirmish units is altered as follows:
- They may never voluntarily enter the Minimum Range Fire Zone of a formed Enemy infantry battalion, unless the hex the skirmish unit is moving into is an obstructed hex or "protected" by an intervening Light Cover hexside (see 11.13).
- Except when entering a Frozen Wetlands hex, or crossing a Major Stream, they may enter any hex at a cost of one Movement Point, and never Disorder for reasons of terrain (see the TEC).
- If not Routed, they may enter any friendly formed infantry or artillery occupied hex without affecting the unit in that hex (see 13.33). Note: If Disordered, a skirmish unit may enter a hex occupied by a friendly unit without affecting the unit.
- They may not enter a hex occupied by a friendly cavalry unit.
- A skirmish unit may not voluntarily move more than five hexes away from an infantry battalion of the same nationality unless the hex it is in, and the hex it is moving into, is a Hard or Soft Cover hex. Similarly, a skirmish unit that is beyond five hexes from a friendly infantry battalion, may not enter a hex which is neither Hard nor Soft Cover except to move closer to a friendly infantry battalion.
- If a skirmish unit is beyond five hexes from an infantry battalion of the same nationality and occupies a hex which is neither Hard nor Soft Cover, it is not forced to move, but if it does, it must move in a direction that decreases the distance to a friendly infantry battalion.
- A skirmish unit that is greater than five hexes away from an infantry battalion of the same nationality has +1 die roll modifier whenever it checks morale.
B. Shock Combat: In addition to the normal rules for Shock Combat (Section 12.0), a skirmish unit is affected as follows:
- It may never execute a shock attack against the frontal facing hexside of a formed Enemy unit (although it may against an artillery battery or a battalion in General Order). It may never initiate a shock attack against an infantry battalion or cavalry unit that is greater than 3x its own troop strength.
- It receives no benefit from being stacked with a Command unit.
- It is not Disordered due to a "D" or "D1" result in Shock Combat, but the one Strength Point loss is still taken (it does Disorder and retreat due to any Dr result).
- It is considered already "unformed" for Shock Combat, therefore its Effectiveness Rating is not modified for being unformed.
- REMOVED.
- It receives a +1 modifier to its effectiveness if it occupies a Light Cover hex and the total strength in the hex does not exceed 4 SPs.
C. Morale: In addition to the normal rules of Morale (Section 13.0), a skirmish company's Morale is affected by the following:
- During the Phasing Player's Rally Phase, friendly Disordered skirmish units in a Hard of Soft Cover hex automatically rally even while in the Minimum Range Fire Zone of an Enemy unit (see 13.41).
- During the friendly Rally Phase, Routing skirmish units are automatically rallied if not in the Fire Zone of an Enemy unit. They do not require a Command unit (see 13.42).
- Skirmish units more than five hexes away from an infantry battalion of the same nationality adds 1 to their morale check die roll (see 13.13).
- A skirmish unit that conducts a Disordered retreat into a hex occupied by a friendly formed unit, does not cause the formed unit to check morale (see 13.32).
D. Fire Combat: In addition to the normal rules of Fire Combat (Section 11.0), the fire capabilities of a skirmish company are modified as follows:
- A Skirmish unit that occupies a hard or soft cover hex fires as Class 2 Firing unit regardless of its printed Firing Class. This Fire Class modifier is only applied when firing at a target in its Minimum Fire Zone (see 11.62).
- Skirmish units use the Skirmish/General Order row on the Fire Combat Results Table. A stack of skirmish units may split their fire and fire out of multiple hexsides, however, they may fire a maximum Strength Points of 9 out of any single hexside (see 11.62).
- Skirmish companies of four SPs or less that occupy a Light Cover hex are considered to be in Soft Cover (Target Class 4) for fire combat.
[8.66] Enemy Unit's Movement and Friendly Skirmish Units
A skirmish unit in Clear or Light Cover hex must "displace" one or two hexes if an enemy formed unit attempts to move into the hex it occupies.
- The moving unit must have a strength of at least 300% of the skirmish units strength.
- The moving unit may not fire at the displacing skirmish unit, but other enemy units adjacent to the displacing unit may.
- The displaced skirmish unit may fire at the moving unit, applying a -1 to the fire result die roll.
- At the conclusion of the enemy unit's movement, if the skirmish unit is adjacent to the enemy formed unit, the friendly skirmish unit may again displace to an adjacent hex not adjacent to the enemy unit.
9.0 Stacking
9.1 Stacking Limitations
There is a maximum number of Friendly formed units that may occupy a single hex and a maximum number of Troop and/or Artillery Gun Strength points allowed in a hex at any given moment. Stacking limits are strictly observed throughout a Game-turn, even during movement (Exception: see 6.64 and 9.31). All units in the hex are immediately Disordered if the stacking limit of a hex is violated (if already Disordered there is no additional affect). During the Rally Phase, units in a hex that exceed the stacking limit may not recover from Disorder (however, they may rally from Rout).
[9.11] Troop and Gun Strength Stacking Limits
The total number of Friendly Troop (and gun) Strength Points which may be stacked in a single hex at any given moment is limited according to the following type of units being stacked and the terrain type they are in:
- The maximum number of infantry Strength Points that may occupy a clear hex is 36, and an obstructed hex is 18.
- The maximum number of cavalry Strength Points that may occupy a clear hex is 24, and an obstructed hex is 12.
- The maximum number of Artillery SPs (guns) that may occupy a clear hex is 12, and in an obstructed hex is 6. For artillery, only the unit's current gun strength is counted, not the artillery crew's. Note: An artillery unit using the road exemption to move into an obstructed hex may exceed the strength limit above and not Disorder (see 6.52 and 6.63).
Note: Except for artillery, a unit's current Troop Strength is counted for stacking purposes.
[9.12] Command Units and Markers Effect on Stacking
Informational markers and Command units do not count against the stacking limit. Command units may stack with any friendly unit; there is no limit to the number of Command units which may occupy a single hex.
[9.13] Unit Nationality and Stacking
All units of the same nationality are considered friendly to each other and may stack in the same hex. Units of different nationalities allied to one another may be stacked in the same hex. Friendly and Enemy units may never occupy the same hex at any time during the game.
[9.14] Unit Types and Stacking
- The maximum number of Friendly infantry battalions that may occupy a single hex is 3. The maximum number of cavalry units or artillery units that may occupy a single hex is 2.
- Friendly units of different combat types (infantry, cavalry, and artillery) may not occupy the same hex at the end of any phase (Exception: see 7.61, 8.65A and 9.41). Friendly units of the same type, but of different formations, may not occupy the same hex at the end of any phase (Exception: see 8.65A and 9.41).
9.2 How Stacking Affects Movement
Stacking or unstacking units is permitted only in the Movement Phase. There is no Movement Point cost for units to change position in a stack. During all other phases, units order in a stack may not be altered.
During the Movement Phase, units which occupy the same hex may be reorganized (i.e., stacking and unstacking) by the Phasing Player.
9.3 Stacking Effects on Facing and Formations
Units stacked in the same hex must be of the same unit type and face in the same direction at the end of their Friendly Movement Phase (see 5.41). At the end of any phase, infantry units that are in different voluntary formations and occupy the same hex are immediately Disordered (exceptions: see 8.65.3 and 9.41). At the end of any phase, if an infantry, cavalry, or artillery unit occupies the same hex with another unit type, then both are immediately Disordered (exceptions: see 9.31 and 9.4).
[9.31] Artillery Crews and Skirmish Units
Whenever stacked with an infantry battalion, an artillery crew or skirmish unit is always placed beneath the battalion. Artillery crews and skirmish units may not end their movement stacked with a cavalry unit (see 7.61 and 8.64). A skirmish unit stacked with an infantry battalion is considered part of the battalion for Fire and Shock Combat (see: 8.64).
9.4 Artillery and Stacking
Only two artillery units may occupy the same hex at the end of the friendly Movement Phase. The total gun strength of both may not exceed 12 and they must adopt the same facing. Artillery units in the same hex must combine their gun strengths and fire as a single unit.
[9.41] Skirmish Units Stacked with Friendly Artillery
Skirmish units may stack with an unlimbered artillery unit with a limit of 6 combined skirmish/artillery crew strength points. Skirmish units stacked with an artillery unit must be at the bottom at all times. A Skirmish unit may fire through the artillery unit's Flank or Rear hexsides as a separate fire combat. It may not fire through the two frontal facing hexsides. When losses are taken from a single fire or Shock Combat, the first lost is taken from the artillery battery and the second loss must be from the skirmish unit(s). Any additional losses are taken as the owning player chooses.
9.5 How Stacking Affects Fire and Shock Combat
[9.51] Stacking and Fire Combat
Typically, the top combat unit stacked in a hex may engage in fire combat and takes losses when fired upon, and the bottom unit takes the losses when fired on through its rear hexsides. However, there are numerous exceptions, dependent on unit type, detailed in other rules sections (see 8.42, 8.54, 8.65, 9.41, 11.5, 11.6 and 11.7). Also: See optional rule 21.21.
- Strength Point losses from fire combat are inflicted on the topmost combat unit in the hex. If the top unit is eliminated any additional loss is inflicted on the new topmost unit. If a fire result calls for losses in excess of the total number of SPs, all SPs in the hex are eliminated and excess losses are ignored.
- More than one skirmish company, or battalions in General Order, may fire from the same hex and may fire into different target hexes (see 11.6).
- The combat unit(s) under a Command unit may still fire and must suffer losses normally. Command units do not block line of sight, fire combat or take the step loss when fired upon, however, they may be reduced due to an adverse combat result (see 11.44 and 19.8).
- A stack of units may be fired upon if its stacking order is rearranged within an enemy Minimum Range Fire Zone (see case 11.3).
[9.52] Stacking and Shock Combat
During Shock Combat all units stacked in a hex participate as a combined force when attacking or defending and apply the result as a single group regardless of the SPs actually engaged (see 12.13).
10.0 Terrain
The terrain features printed on the map represent many of the topographical features of the battlefield. Included are such features as towns and villages, roads, streams, woods and the contour of the ground. The terrain features fall into two game categories: Terrain Hexes and Terrain Hexsides. These terrain features may effect the movement and combat capabilities of leaders and combat units which are explained in the following cases.
10.1 Terrain Features
All terrain features on the map are identified on the Terrain Key (see Map and the Terrain Effects Chart; TEC). Regardless of formation, during movement, all units expend at least one Movement Point to enter a clear terrain hex and may have to spend more than one Movement Point depending on the terrain in the hex entered or hexside crossed (Exception: see TEC). How Terrain affects movement is described in detail in section 6.2.
[10.11] Terrain Hex Types
There are five basic types of hexes depicted by the varying terrain features represented; Clear, Light Cover, Soft Cover, Frozen Wetlands, and Hard Cover. A hex that contains more than three buildings is a Hard Cover hex. A hex that contains any woods symbology or three or less structures is considered a Soft Cover hex. A hex that contains brush and small tree symbology is a Light Cover hex. A hex that contains wetland symbology is a Frozen Wetland hex. A hex which does not have any terrain symbology is a Clear hex regardless of any terrain features running along any of its hexsides. Collectively, Hard Cover, Soft Cover, Light Cover, and Frozen Wetland hexes may be referred to as "obstructed terrain hexes". Although Frozen Wetland and Light Cover hexes are "obstructed hexes" that may affect movement, morale, and fire combat, they do not block Line of Sight.
[10.12] Terrain Hexside Types
There are three types of hexsides represented by the different terrain features depicted graphically on the map; Light Cover hexsides (representing a small line of brush, hedges, low stone walls and fences), Stream type hexsides (Brook, Stream, and Major Stream), and Contour hexes (representing a value of gradient in the slope of the ground). All hexsides containing terrain features are collectively referred to as "obstructed terrain hexsides" in these rules. Obstructed terrain hexsides may affect movement, morale and fire combat, they never affect or block Line of Sight.
[10.13] Contour Hexsides
In order to depict the undulating nature of the ground in the game, the elevations have been abstracted by being divided into six distinct levels. These six levels of elevation are distinguished by different shades of color. The hexside which is between two different shades of color represents the "contour" between elevations. There are two types of contour hexsides; Slope and Steep Slope hexsides. A hexside with a Steep Slope symbol is a Steep Slope hexside. All other contour hexsides are simply termed Slope hexsides regardless of elevation. Each level of elevation represents approximately 4 to 5 meters of elevation difference. The darker the shade of color, the higher the elevation. The effects of elevation on movement and combat are described in the following rules.
10.2 Terrain Effects Chart (TEC)
(see map and separate chart)
10.3 Terrain Effects on Formations
[10.31] Obstructed Terrain Hexes and Formed Units
A Formed infantry battalion automatically adopts General Order when it enters an obstructed terrain hex. Likewise, a Formed Light cavalry unit must assume General Order when it enters a Town or Woods hex.
- A Formed heavy cavalry or artillery unit immediately Disorders upon entering an obstructed terrain hex. However, a Formed cavalry or artillery unit may not be disordered if it enters an obstructed terrain hex with a road from a hex connected by the same road (see 6.52 and 6.6). If any cavalry unit becomes Disordered in an obstructed terrain hex (even with a road), it remains disordered as long as it occupies an obstructed hex.
- While occupying an obstructed terrain hex, cavalry and artillery units receive no defensive combat benefit, but retain any morale benefit. If fired on or defending during Shock Combat in a town or woods hex, the unit is treated as if it is in a clear terrain hex (see 11.12 and 12.22.7).
[10.31] Obstructed Terrain Hexsides and Formed Units
(Numbered 10.31 a second time, as printed.) The effects of obstructed terrain hexsides on Formed units is dependent on the type of unit and the terrain hexside type being crossed. The effects are generally added movement cost and/or possible adoption of an involuntary formation (Disorder or General Order). See the Terrain Effects Chart for how each type of hexside affects each combat unit type.
10.4 Terrain Effects on Observation
The ability of a unit to see another unit on the map depends on the facing of the sighting unit and the terrain that is between both of them; referred to as the Line of Sight (LOS). A unit may not fire at a unit it is unable to observe. In order to determine if one unit can observe another unit, players should carefully follow the procedure below:
- Determine the Facing of the sighting unit. A unit's field of observation is limited by its Facing. A unit may only see through the hexsides which it is facing.
- A unit may never trace a Line of Sight through it rear or flank hexsides. A unit that has all-around facing may see in all directions.
- Units that are in adjacent hexes can always observe each other (unless the unit's facing does not permit it).
- Determine the LOS between the observing unit and the unit it is trying to see. This is done by visualizing a perfectly straight line from the center of the hex occupied by the sighting unit to the center of the hex the sighting unit is attempting to observe. (A straightedge tool, such as a ruler or piece of thread, may be required to aid players in visualizing this line.)
- Determine if the LOS is clear (allowing observation) or blocked (preventing observation). The players determine if any of the hexes traversed by the LOS contains any blocking terrain. If the two units occupy hexes on the same elevation level, blocking terrain always blocks Line of Sight. There are three types of blocking terrain: elevated hexes (any hex that is higher than both the sighting unit and the observed unit), obstructed hexes (any hex that contains any woods, village with one or more building features in it), or occupied hexes (any hex that is occupied by two or more Strength Points). If the Line of Sight is not blocked and the two units are on the same elevation level, then they are able to observe one another (exception: units occupying reverse slopes to one another; see 10.43). If the LOS is blocked, observation is not achievable.
[10.41] Observation of Units on Different Elevation Levels
If the two units occupy hexes on different elevation levels, the LOS is automatically blocked if any intervening hex is at an elevation level higher than the two observing units (including reverse slope; see 10.43). If LOS is permitted and the units are on different elevations, use the following protocol to determine if the two units can observe one another:
- Determine which of the two units is at the higher elevation level. Regardless of which unit is on the higher level, the observation procedure is always initiated in the hex occupied by the higher unit (even if it is the unit on the lower ground that is attempting to observe the higher unit).
- Directly following the line of sight, count the number of hexes occupied by the higher unit (inclusive) to the last hex which is higher than the hex occupied by the lower unit. Count any Hard or Soft Cover hex (Village/Town, Farmette with 3 or more structures) or enemy combat units (with 2 or more Strength Points) as one additional level of elevation (see 10.42). Retain this total number as it will be needed in Step 5.
- Continuing, following the LOS, count the number of hexes from the first slope hex which is at the next higher level as the lower of the two units (inclusive), to the hex that unit actually occupies (inclusive). Keep this total in mind and go to Step 4. (Note: The first slope hex is a hex whose slope hexside crosses the LOS path.)
- Now, determine the elevation level difference between the hex occupied by the higher unit and the hex occupied by the lower unit. (Example: If the lower unit is at Elevation Level 1 and the higher unit is at Elevation Level 3, then 2 is the difference in elevation levels.) Now multiply the hex count obtained in step 3 by the elevation difference obtained in this step. Retain this total and proceed to the next step.
- Subtract the total figure calculated in step 4 from the hex count obtained in step 2. If the result is 0 or less, the two units may observe one another.
Line of Sight (LOS) Examples
Example A: Observation determination when units occupy hexes at different elevation levels. The artillery unit in Hex X can observe the enemy infantry unit in Hex A, but not the infantry unit in Hex C.
- The artillery unit in Hex X is higher at elevation level 2. The infantry unit in Hex A is lower and at elevation 0.
- Count the hexes following the line of sight from Hex X (inclusive) to the last hex which is higher than Hex A. That number is 4 hexes.
- Next, count the number of hexes from the hex which is at the next higher level as the lower unit (inclusive), to Hex A, the hex the infantry unit actually occupies. That number is 2 hexes.
- The elevation difference between the two units is 2. Multiply the number from Step Three by this elevation difference; the result is 4 (2 x 2 = 4).
- Lastly, subtract the number from Step Four (4) from the number of hexes determined in Step Two (4). The result is 0 (4 – 4 = 0). Both units may observe one another!
The artillery unit in Hex X cannot observe the enemy infantry unit in Hex C. Using the same formula, the distance to the last hex higher than the lower unit in hex C is 5. Continuing, the number of hexes from the first slope hex which is at a higher level than the unit in Hex C is 2. This number is multiplied by the elevation level difference which is 2, for a result of 4. Subtracting 4 from 5 results in a positive number of one (5 – 4 = 1). Both units may not observe one another! NOTE: For a simplified Line of Sight rule, See Optional Rule 21.6.
Example B: Observation determination when units occupy hexes at the same elevation but are on reverse slopes. The artillery unit in Hex Y can observe the enemy infantry unit in Hex D, but not the infantry unit in Hex B. Although both the artillery unit in Hex Y and the infantry unit in Hex B are on the same elevation level, both units occupy slope hexes and have an intervening "full" hex or hexside at the same level between them. These units are considered to be on a "reverse slope" and cannot observe each other.
(Diagrams for Examples A and B are not reproduced.)
[10.42] Units and Terrain Effects on Line of Sight
- If the LOS passes directly along a hexside between two hexes with different terrain features (i.e., clear/woods or Level 2/Level 3), the friendly unit attempting to observe a target unit may trace its LOS through either of the two hexes (exception; see No. 4 below).
- Terrain features on a hexside (including Light Cover hexsides) do not block line of sight.
- A line of sight may always be traced into or from a blocking terrain hex, but it may not be traced beyond that hex.
- Woods hexes always block LOS regardless of elevation differences
- Friendly combat units may never be "fired over" regardless of elevation.
- Command units never block LOS. The topmost combat unit under any number of command units may fire and be fired upon.
[10.43] "Reverse Slope" and Line of Sight
If the two units occupy hexes on the same elevation level, the LOS is blocked if both units occupy a slope hex and there is at least one intervening non-slope (full color) hex or hexside that is at the same elevation level as the two observing units (see Line of Sight Examples above). This reverse slope principle applies if one of the units occupies a lower elevation and the other is on a slope hex with the a full elevation hex or hexside between them. Note: An intervening (full color) hexside is a hexside where no portion of it has any color of a lower elevation.
10.5 Terrain Effects on Combat
The effects of terrain on fire and Shock Combat are explained in detail within the rules sections for Fire and Shock Combat (see 11.12 and 12.14).
11.0 Fire Combat
Fire Combat occurs in either the Reciprocal Fire Phase or during any Phase in which a unit within an opposing unit's Minimum Range Fire Zone, attempts to change its facing, formation, or stacking order, or leaves a hex of that Fire Zone. The Reciprocal Fire Phase is divided into three parts: the Reciprocal Skirmish/General Order Fire Segment, the Reciprocal Infantry Battalion Fire Segment, and the Reciprocal Artillery Fire Segment. During each of the Fire Segments the French and Allied players alternately fire one unit at a time. A player may fire all, some or none of his eligible units during this phase. A unit may only fire once during the Reciprocal Fire Phase. Units must fire individually and cannot combine their strength to fire on a target (exception Skirmish formations, units in General Order, and split artillery batteries). A unit must fire at single target hex and only at an enemy unit that it may observe. The result of each fire combat is determined by the roll of a die and consulting the appropriate Fire Combat Results Table.
FIRE PROCEDURE: A unit that fires, is considered to be executing a fire attack. To execute a fire attack, a player identifies a Friendly unit that is firing and an Enemy unit that is the target. The Fire Protocol is then used to resolve the fire of each firing unit and its result is applied before any other unit fires. Each unit (or stack of units) must fire individually regardless of when the fire combat happens. At the beginning of each Fire Segment of the Fire Phase (either artillery, infantry, or skirmish) a player rolls a die; on a roll of 0–4 the French player fires first, on a roll of 5–9 the Allied player fires first. The player who fires first selects a hex with an eligible unit at one end of his army or the other and resolves the fire attack with the indicated unit. After the first player has resolved one fire attack, the opposing player resolves a fire attack following the same procedure. The first player then again fires a unit(s) from a second hex (still proceeding down the length of his battle line from the beginning flank). After this second fire combat, his opponent fires a second unit following the same procedure. This alternate pattern is repeated until all desired, permissible fire has been executed.
NOTE: The fire combats that alternate between players should generally move from one side of the map to the other in a contiguous manner; proceeding down the battle line from one unit to the next firing unit. A player may choose to skip (pass) a unit if he desires and move on to another unit but may not return to fire a skipped unit. Players should endeavor to live up to the spirit of the above rule in instances where opposing forces are in complex, intertwined positions.
FIRE PROTOCOL:
- The attacking player identifies which of his units is firing and which enemy unit will be the target.
- The attacking player calculates the range between the firing unit and target hex. Range is defined as the fewest hexes between the firing hex (exclusive) and the target hex (inclusive). This range is simplified into four classifications; Minimum, Medium, Maximum or Extended:
| Unit Type | Minimum | Medium | Maximum | Extended |
|---|---|---|---|---|
| Infantry | 1 hex | NA | 2 hexes | None |
| Artillery | 1,2 hexes | 3,4 hexes | 5-8 hexes | 9–12 hexes |
-
The attacking player determines the target class of the unit. When a unit is fired upon, it is always classified as to one of five different Target Classes:
- Target Class 1: Column or Square formations, Enfiladed targets, Limbered Artillery (from artillery fire), or Skirmish/General Order formations of 8 or more SPs (from artillery fire), or 5–7 SPs (from infantry fire).
- Target Class 2: Infantry Line formations, all Cavalry formations and Limbered Artillery (from infantry fire), or Skirmish/General Order formations of 5–7 SPs (from Artillery Fire), or 8+ SPs (from infantry fire).
- Target Class 3: Any unit protected by a Light Cover hexside, Routed formation, Unlimbered Artillery or Screened Target, and Skirmish/General Order formations of 4 SPs or less.
- Target Class 4: Any unit in a Soft Cover hex or Skirmish units (4 SPs or less) in a Light Cover hex or protected by a Light Cover hexside.
- Target Class 5: Any unit protected by Hard Cover (town/village hex).
Note: Unless protected by Hard or Soft Cover, a Disordered unit is the same Target Class as the formation from which it went into disorder.
-
The attacking Player determines the Troop Strength of the firing unit and references the appropriate horizontal line on either the infantry or artillery Fire Combat Results Table according to the following:
- An infantry unit firing at Minimum Range (1 hex), or at Maximum Range (2 hexes), finds it's current Troop Strength located on the horizontal line of the unit's current formation (even if Disordered).
- An artillery unit firing at Minimum Range (1 or 2 hexes), uses it's current Gun Strength located on the horizontal line titled "Minimum Artillery Range." Similarly, an artillery unit firing at Medium Range (3 or 4 hexes) or at Maximum Range (5 to 8 hexes), fires with its current gun strength using the appropriate horizontal line.
After completing step 6 above, the opposing player then conducts steps 1 through 6. The procedure is repeated until each player has fired their desired eligible units.
FIRE COMBAT RESULTS TABLES (see separate charts)
- There are three separate Fire Combat Results Tables; one infantry fire table for the French and Prussians, one infantry fire table for the Russians, and one artillery fire table for both sides. Note: For Winter's Victory Prussian units fire using the French Infantry Fire Combat Results Table.
11.1 General Rules of Fire Combat
[11.11] Restrictions on Fire Combat
- Firing is optional for each unit; a unit is never required to fire.
- The following unit types may never fire: command units, cavalry, limbered artillery, an artillery battery without its crew, artillery crews, and routing units.
- Normally, only the top combat unit of multiple combat units stacked in the same hex may fire with the following exceptions:
- All units in Skirmish or General Order formation stacked in the same hex may fire together or separately (see case 11.6).
- All units in Square formation stacked in the same hex combine their Strength Points as a single fire combat (see 8.42).
- During a Reciprocal Fire Phase a unit may only fire once, however, it may fire as often as it is eligible to do so in other phases.
- A unit may only fire through a hexside it faces and be able to see the target unit. A formed unit may not fire through its flank or rear hexsides.
- A unit's current Troop or Gun Strength is always used for fire combat and a unit's Combat Strength may never be divided for fire combat; i.e. firing units may not split their fire (exceptions: see 11.5 and 11.6).
- During a Reciprocal Fire Phase a unit that fires, must always fire at the closest enemy unit unless the closest enemy unit is a Skirmish or Routed unit (Exceptions: see 11.46 and 11.71). If two targets are equidistant, the player may freely choose which target to fire at.
[11.12] Terrain Hex Types and Fire Combat
- For Fire Combat purposes, regardless of all other considerations, a unit which occupies a Town/Village hex is always considered a Hard Cover target (Target Class 5). Similarly, a unit which occupies a Woods or Farmette (3 or less structures in Light Cover) hex is always considered a Soft Cover target (Target Class 4). Exception; see 11.12.2 below.
- A target hex that can be considered either a Hard Cover or Soft Cover hex is always considered a Hard Cover target hex.
- Units occupying terrain that is not either Hard Cover, Soft Cover, or Light Cover receive no benefit from enemy fire.
- Cavalry and artillery units which occupy an obstructed hex receive no benefit when fired upon; i.e, they are fired on as the Target Class they would be if they occupied a clear hex.
- For Fire Combat, a unit or stack of units which occupies a Town/Village or Woods hex may fire a maximum of 9 Strength Points out of a single hexside (see 8.54 and 8.65.D).
[11.13] Terrain Hexside Types and Fire Combat
For Fire Combat purposes, a Soft Cover hexside protects a combat unit located directly behind the obstructed hexside; indicated by the hexside symbology which "splays" into the protected hex. A unit which occupies a hex protected by a Light Cover hexside is considered a Soft Cover Target if it is fired at through that protective hexside.
11.2 Fire Zones
[11.21] Types of Fire Zones
Any unit which is capable of fire combat projects a Fire Zone into every hex it can observe which is within its maximum fire range. For example, an unlimbered Class 2 artillery battery projects a triangular Fire Zone through its frontal hexsides into every hex it can observe which is within six hexes.
- A unit's Minimum Range Fire Zone includes every hex within its minimum fire range.
- A unit's Medium Range Fire Zone includes every hex within its medium fire range (artillery only).
- A unit's Maximum Range Fire Zone includes every hex within its maximum fire range.
(Diagrams: Infantry and Artillery Fire Zones; maximum fire range for Russian Light (Lt) artillery batteries; maximum fire range for all Class 3 artillery batteries and Russian Horse artillery.)
[11.22] Artillery Maximum Fire Ranges
All Class 1 and 2 artillery batteries have a Maximum Fire Range of 8 hexes (exception; see 11.23). All Class 3 artillery batteries and Russian Class 2 Horse artillery have a Maximum Fire Range of 6 hexes. (Exception; see Special Rule 19.42, Russian Light Artillery Batteries.)
[11.23] Artillery Extended Range Fire Zone
The Extended Range Fire Zone is from 9 to 12 hexes, beyond an artillery unit's Maximum Range Fire Zone. The Artillery Extended Range applies only to Class 1 foot artillery batteries with a fire strength of 4 guns or greater. All other artillery batteries, and Disordered batteries may not fire at Extended Range. The following rule sequence applies when firing at a target in the Extended Range Fire Zone.
- The phasing player declares a target hex which must be in the line-of-sight of the firing unit.
- Roll a die to determine actual impact hex. The actual impact hex must be along the direct line of site from the center of the firing hex to the center of the target hex. Interpret the roll on the Extended Range Result Table.
- Roll the die again and index the number of guns and the die roll to the Extended Range Artillery fire row on the Artillery Fire CRT normally to determine the result.
EXTENDED RANGE FIRING RESULT TABLE
Russian Artillery Fire:
| Die | Fire Result |
|---|---|
| 0-1 | 1 hex short of target hex |
| 2-5 | on target |
| 6,7 | 1 hex overshoot of target hex |
| 8 | 2 hex overshoot of target hex |
| 9 | 3 hex overshoot of target hex |
French Artillery Fire:
| Die | Fire Result |
|---|---|
| 0 | 1 hex short of target hex |
| 1-6 | on target |
| 7,8 | 1 hex overshoot of target hex |
| 9 | 2 hex overshoot of target hex |
11.3 Special Firing Opportunities
A unit may immediately fire at an Enemy unit within its Minimum Range Fire Zone if that enemy unit attempts to change its formation, its stacking position, or expends 1 or more MPs to change its facing (Exception: A unit may not be fired at when detaching skirmishers, or required to adopt General Order or an involuntary formation; Rout or Disorder). In addition, a unit may immediately fire at an Enemy unit (or stack) if any of the following conditions occur:
- An Enemy Unit attempts to leave a hex within the Minimum Range Fire Zone of a friendly unit. The fire combat results are applied in the exiting hex before the unit leaves (see 11.32 and 13.34). Exception: During a charge, an enemy cavalry unit or stack may be fired upon (by each eligible friendly unit) when it exits those units' Minimum Range Fire Zones; not a hex in those enemy Minimum Fire Zones (see 12.53).
- An Enemy Artillery Unit attempts to unlimber within the Medium Range Fire Zone of any friendly artillery unit or within the Maximum Range Fire Zone of any friendly infantry unit (see 11.71.2).
- An Enemy Unit attempts to leave the Medium Range Fire Zone of a friendly artillery unit. The fire combat is calculated at medium range and any results are applied in the exiting hex (see 11.71.2).
In all cases, the moving player declares his intentions first, giving his opponent the opportunity to fire at the unit(s) before the maneuver is executed. If the fire combat result requires a Morale check, the unit immediately checks Morale. If it passes or Disorders, the intended action may continue. If the unit Disorders and retreats or Routs, the unit retreats the required number of hexes.
Note: Except for the hex in which the retreat originates, a unit that is retreating may be fired upon each time it retreats from a hex within an enemy Minimum Range Fire Zone.
[11.31] Special Firing Opportunities Exception
A cavalry or skirmish unit that begins its movement in a hex within an enemy Minimum Range Fire Zone, and possesses a greater Movement Allowance than those unit(s) projecting the Fire Zone, may leave that first hex without being fired on. The first hex moved into may not be an adjacent hex to the enemy unit(s) projecting the Minimum Range Fire Zone it is leaving. Note: A formed cavalry unit Disorders as it moves out of an enemy Minimum Fire Zone using this exception.
[11.32] Special Firing Opportunities and Shock Combat
A Shock Combat is executed while opposing units occupy adjacent hexes, therefore, an enemy unit executing a shock attack may be fired upon, in the hex it occupies, by all eligible friendly units before the shock combat is resolved. If, after the shock combat resolution, the attacking unit(s) advance into the defending hex, the attacking units are not fired upon while making this advance (see 12.0 SHOCK COMBAT PROCEDURE: No. 2, 12.41 and 12.53).
Note: Units executing a shock attack into or across terrain that will cause the attacking unit to Disorder or adopt General Order, receives any and all defensive fire before the involuntary formation change takes effect.
11.4 Special Targets
[11.41] Massed Target
A unit (or stack) which is not protected by Hard, Soft, or Light Cover is considered a Massed Target if the total number of infantry Strength Points in the hex is greater than 18, or the total number of cavalry troop or artillery gun strength points in the hex is greater than 12 SPs (the gun strength of limbered artillery is 3x for determining Massed Target). Note: Infantry SPs stacked with artillery are added to the gun strength for determining a Massed Target. Additionally, the Fire Combat die roll is modified by +2 when firing on a Massed Target.
Note: A Massed Target is either a Class 1 Target on the artillery Fire Combat Results Table or a Target Class 2 on the infantry Fire CRT.
[11.42] Enfiladed Target
A target unit which is not protected by hard or soft cover is automatically an enfilade target (Target Class 1) if fired upon through either of its flank hexsides (Note: An unlimbered artillery battery is never considered enfiladed).
[11.43] Skirmish Units
A Light Cover target hex occupied only by Skirmish units of 4 or less strength points (and not protected by hard or soft cover) is fired upon as a Class 4 Target.
[11.45] Screened Targets
Generally, a unit that cannot be observed cannot be fired upon. However, whenever an artillery unit fires at a Class 2 or 3 target hex at Medium and Maximum range only, the hex immediately behind it may be fired on as a Screened Target (Target Class 3) if the following conditions are met:
- The target unit and the Screened unit must be on the same level of elevation. The firing unit may not be at more than 1 elevation difference from the target unit(s).
- The Screened unit must occupy a hex that is adjacent to the target hex and is along the LOS of the firing artillery unit.
- The Screened unit may only be a Target Class 1 or 2 type unit.
If all of the above conditions are met, the firing artillery unit executes two separate Fire attacks; one against the first target and one against the Screened Target behind it. The two attacks are considered one attack for purposes of Ammunition Supply (i.e. both attacks expends 1 point of ammunition).
[11.46] Artillery Firing at Enemy Skirmish Units
Enemy skirmish units of 3 or less troop strength points that occupy a clear, wetland or Light Cover hex, do not block line of sight, and need not be targeted if the hex is in the Medium, Maximum, or Extended range Fire Zone. However, firing through them to the adjacent target hex directly behind, will cause the skirmish unit(s) to be a "screened target" as a Target Class 4 (see 11.45). Skirmish units of 1–3 strength points that occupy a clear, wetland or Light Cover hex, within the Medium Range Fire Zone, and are the target hex will cause a unit directly behind them to be a screened target (see 11.45). Note: In either case, the fire combats are resolved separately for each target hex.
11.5 Formed Infantry and Fire Combat
[11.51] Column Formation Fire Combat
A unit in Column formation occupies a single hex and may fire into only one of the hexes it faces. When stacked with other units in Column, only the top unit may fire (however see Optional Rule 21.21 & 21.25). Units in Column Formation use the Square/Column row on the Fire CRT when executing a Fire Combat.
[11.52] Line Formation Fire Combat
A unit in Line formation (a Troop Strength of 9 or less) occupies a single hex and may fire into only one of the hexes it faces; i.e., it may not split its fire. When more than one unit in Line Formation occupy the same hex, only the top unit may fire.
[11.53] Extended Line Formation Fire Combat
When a unit in Extended Line fires, it may fire twice (depending on the range), dividing its fire from each hex it occupies; once for the battalion counter and once for the Extended Line marker.
- When firing at Minimum Range, the combat results from both die rolls are applied before the receiving enemy unit(s) check morale.
- When a unit in Extended Line Formation fires during the Reciprocal Fire Phase, both die rolls are made and the fire combats are resolved before the opposing player takes his next fire.
- Extended Line and Minimum Range Fire. A unit in Extended Line formation may fire at any 2 hexes in its Minimum Range Fire Zone regardless of terrain, dividing its current Troop Strength evenly (adjusting no more than ±2 SPs) between the unit and the marker (if uneven, the owning player adds to the lesser strength half of the unit). Regardless, it may only fire a maximum of 9 strength points from each of the hexes occupied by the unit (and marker); it may never combine its strength when firing at Minimum Range. When firing at 2 Minimum Range target hexes, the two target hexes must be adjacent to one another (A & A or B & B in the diagram).
- If a unit in Extended Line fires at the center target hex (A/B hexes) as its only fire, it fires only once using the 8,9 column on the fire CRT and applies a +1 to the die roll. (See Optional Rule 21.51)
- Extended Line and Maximum Range Fire. At Maximum Range, the fire may split in two, but the target hexes must be two adjacent hexes (A & AB, AB & BA or BA & B in the diagram). If both counters of the Extended Line fire at the same target hex (hexes marked AB or BA at Maximum Range), it must do so as a combined (single) fire combat strength. If the target is not observable from one of the hexes, then only the portion of the unit from the other hex is used to resolve the fire combat.
Note: For a more accurate representation of frontage-to-fire capability of units in line formation – at a slight cost to playability – players may employ the Line and Extended Line Fire Combat optional rules (21.51 in the Playbook).
11.6 Units in Skirmish & General Order and Fire Combat
[11.61] Multiple Fire Combat from a Single Hex
An Infantry unit (or units) in General Order, or a stack of Skirmish units occupying a single hex, may split its fire through any combination of the six adjacent hexes (up to the limit of the troop strength in the hex). They may fire out of as many hexsides as desired in any combination. (e.g. Six skirmish units could fire one fire strength point out of each hexside or two strength points out of 3 hexsides. etc.). Each fire from the stack occurs as a separate die roll and is applied to each target hex separately. Each fire combat from the same hex is executed to the target hexes alternately with any opponent's fire combats.
[11.62] Units in Skirmish/General Order Formation Firing Limitations
For multiple units in General Order or Skirmish formation stacked in the same hex, the maximum number of Strength Points that may fire out of a single hexside is 9. Note: A target hex may be fired on only once from the same hex that contain units in General Order/Skirmish formation.
11.7 Artillery Fire Limitations
An artillery battery may fire only if it meets all of the following conditions:
- The artillery battery must be the topmost combat unit in the hex.
- The artillery battery unit must be unlimbered.
- The artillery crew must be stacked directly beneath the battery unit.
- The battery must have at least one round of ammunition (see 11.93).
[11.71] Artillery Targeting and Fire Restrictions
- During the Reciprocal Fire Phase, an artillery unit must fire at the closest enemy unit unless the target is in a Soft or Hard Cover hex, or is a Skirmish or Routed unit (see also 11.46). Additionally, an artillery unit that fires at its Maximum or Extended Range or is stacked with a command unit (or within the Command Radius of a special artillery leader) may fire at any target within its LOS.
- Whenever an artillery unit fires during an opponents Movement Phase, a –1 is applied to the die roll.
11.8 Fire Combat Effects
The Fire Combat Table contains the results of the die roll when cross referenced to the Firing Class, Target Class, Target Range, Firing Formation, and Firing Strength. The possible results are:
- A number (1, 2 or 3) indicating the number of Strength Points eliminated from the target unit. Immediately place a numbered chit beneath the affected unit.
- An "M" indicating a morale check for the target unit. No strength loss, however the topmost unit immediately makes a morale check.
- A "0" indicating no loss or morale effect to the target.
[11.81] The Effects of Fire Combat Results
For each point of combat loss, the Troop Strength of the target unit is reduced by one. Place a numerical marker reflecting the new Troop Strength of the affected unit directly beneath the combat counter which represents the unit. This chit should represent the new Troop Strength of the affected unit (i.e., a nine-Troop Strength Point unit suffering a 2 result would have a 7 chit placed under it). If a battery's Gun Strength has been reduced (see case 11.82), a numerical marker would be placed directly beneath the battery to reflect its new Gun Strength (not the crew).
- Strength Point losses resulting from fire combat are inflicted on the topmost combat unit in the target hex (Exception: see 9.41).
- A unit (the organizational counter) is immediately removed from play when it's Strength is reduced to zero.
[11.82] The Effects of Fire Combat Results on Artillery Units
Whenever an artillery unit is fired on, (even by infantry) it is the gun strength point that is lost from the fire combat result; never the crew. The fire result represents the number of guns eliminated from the battery. The crew is reduced as a result of gun losses (see 7.62).
[11.83] The Effects of Fire Combat Results on Unit Morale
A unit is required to make an immediate morale check when the result is an "M" or it's Strength is reduced due to fire combat (see 13.11).
[11.84] The Effects of Fire Combat Results on Command Units
A command unit is vulnerable whenever the combat unit(s) it is stacked with suffers one or more strength point losses from fire combat. For each fire combat resulting in a loss, the owning Player rolls one die. If the fire combat was from Medium or Minimum range, an 8 or 9 result reduces the command unit. If the fire was from Maximum range, a result of a 9 reduces the command unit. A command unit does not check for loss if the fire was from Extended Range. In all cases, apply the loss procedure appropriate for the level of the Command unit (see 19.8).
Note: A command unit may never be fired upon if alone in a hex.
11.9 Ammunition Supply
Only artillery and infantry Skirmish formations are affected by ammunition supply; cavalry units are never affected by ammunition depletion.
[11.91] Skirmish Unit Ammunition Depletion
Whenever a skirmish unit fires, a Fire Combat die roll of "9" causes the firing unit(s) to run low or out of ammunition. Immediately place an Ammo Deplt marker on top of the unit(s). When multiple Skirmish units in the hex are firing at different targets, resolve all fire combats before placing the Ammo Deplt maker on the units. At the end of any phase, all Skirmish units stacked in the same hex are considered to be depleted of ammunition if any Skirmish unit in the hex is depleted of ammunition.
- When depleted of ammunition a unit may move and participate in Shock Combat, but may not engage in any fire combat.
- When stacked with an Ammo Dept marker a skirmish unit's morale die roll is modified by +2 (see 13.13).
[11.92] Skirmish Unit Ammunition Resupply
At the end of the Friendly Command Phase, an Ammo Deplt marker is removed from any Friendly Skirmish unit if it is possible to trace a path no longer than four hexes to an infantry battalion or artillery unit of the same nationality. This "supply path" may not be traced into a hex within an enemy Minimum Fire Zone (unless occupied by a Friendly combat unit).
[11.93] Artillery Ammunition
Unlike infantry, each artillery battery starts with eight (8) points of ammunition as a starting ammunition supply level (unless the scenario specifies a different starting level). Artillery ammunition is represented by a grey numerical marker which is stacked directly under the unit. Like the troop strength marker, the ammunition level marker is considered an integral part of the battery unit (i.e. the marker stays with the battery and cannot be moved by itself).
NOTE: Players need not use an Artillery Ammo Point marker for a battery until it has expended its first round.
-
An artillery battery is required to expend one point of ammunition each time it fires...
- ... at Extended Range with a fire combat die roll of 5– 9.
- ... at Maximum Range with a fire combat die roll of 7– 9.
- ... at Medium Range with a fire combat die roll result of 8–9.
- ... at Minimum Range with a fire combat die roll result of 9.
An artillery battery expends no more then 1 point of ammunition in a single phase regardless of how many times it fires.
-
When an artillery battery has used its last ammunition point, place an "Ammo Deplt" marker on the battery. When stacked with "Ammo Deplt" marker, an artillery battery may continue to fire with the following restrictions:
- it may fire only into its Minimum or Medium Range Fire Zones, but fires using the row of the next higher Fire Range.
- a numeric strength loss result greater than 1 is reduced to a 1.
-
Unlike infantry units, there is no provision for resupplying an artillery battery with ammunition during regular Game-turns. Instead, artillery units are automatically returned to full supply status at the end of the Command Phase of any Transitional Night Game-turn. Artillery ammunition cannot be "captured", used or destroyed by enemy units.
12.0 Shock Combat
Shock Combat represent the physical and emotional effects when infantry or cavalry formations engage in close combat. Shock Combat occurs between opposing units which occupy adjacent hexes during the Phasing Player's Shock Phase. Shock Combat is optional and initiated by the Phasing Player in any sequence desired. His units are always considered the attacking units. Those units of the non-Phasing Player are the defending units. Units in different hexes may never combine for Shock Combat, but units in the same hex must combine when engaging in Shock Combat. A unit executing a shock attack from a hex within any Enemy Minimum Range Fire Zone may be fired upon by all units exerting the Fire Zone (including the enemy unit being shock attacked). After combat, the side that occupies the hex is considered the winner, the side that retreats is the loser.
SHOCK COMBAT PROCEDURE: The phasing player may conduct Shock Combat with his eligible units in any order he chooses. Each Shock Combat uses the following sequence:
- The player declares which of his unit(s) will shock attack and into which enemy occupied hex (see Optional Rule 21.71).
- The defending unit and friendly units (to the defender) adjacent to the attacking enemy unit(s) may execute any fire combats against the attacking unit (for leaving the Minimum Fire Zone of an enemy; see 11.31.3). The attacking unit checks morale (if required) after all enemy units have fired.
- Apply any involuntary formation change due to the effects of terrain or formation (see 12.14).
- Compare the total current troop strength of the attacking unit(s) to the defending unit(s) and form a combat ratio of attacker to defender (use the crew strength when attacking an artillery unit). Round down in favor of the defender to the nearest ratio indicated on the Shock Combat Results Table (e.g., attacker's 5 SPs to defender's 3 SPs; 5 ÷ 3 = 1.66 to 1 or 3 to 2 ratio, attacker's to defender's strength).
- Determine the current Effectiveness Rating of the topmost unit of both the attacker and defender. Then apply the Shock Combat Modifiers for the attacker and defender to determine their respective final effectiveness. Subtract the final Effectiveness Rating of the topmost defending unit from that of the topmost attacking unit to determine the Shock Combat differential (the "net" differential may be either positive or negative). Now locate this number along the horizontal line at the top of the Shock Combat Results Table.
- The attacking player rolls one die. This number is located to the right of each combat ratio (from Step 4 above). The player cross-indexes the appropriate row with the proper differential column (from Step 5). The result indicated is applied to both the attacker and defender as described in case 12.4.
12.1 Shock Combat Principles
[12.11] Restrictions on Executing Shock Combat
- Only infantry and cavalry formations may initiate Shock Combat. Command units, artillery units, and Routed formations may never initiate a shock attack.
- Shock Combat is not required; a unit need not attack during its Shock Phase. Shock Combat is always initiated at the discretion of the phasing player, however, Shock Combat conducted during a cavalry charge may be required (see case 12.53).
- A shock attack may be executed by a unit or stack of units only against an adjacent enemy-occupied hex that it faces. It may never attack through its flank or rear hexsides. Units that have all-around facing may execute a shock attack into any adjacent Enemy-occupied hex.
- Shock attacks are conducted one at a time. Friendly units in different hexes may never be combined during Shock Combat; i.e., attacking units from different hexes must make separate attacks. Conversely, defending units in different hexes must be attacked separately.
- A unit (or stack) may execute or receive more than one shock attack in the same Shock Phase. Infantry units may execute no more than 2 shock attacks in a single Shock Phase (see Optional Rule 21.74). A cavalry unit, during a charge, may execute any number of shock attacks. However, once a unit receives a Disordered Retreat or Rout result, it may no longer execute shock attacks for the rest of the Phase.
[12.12] Changing Facing During Shock Combat
While executing a shock attack, a formed infantry unit may change its facing after its first Shock Combat, however, when it does so it instantly assumes General Order (no fire from adjacent units for this change of facing during Shock Combat). A formed cavalry unit automatically Disorders if it changes its facing during Shock Combat (see 12.54).
[12.13] Effects of Stacking in Shock Combat
The Troop Strengths of all units stacked in the same hex must be combined when involved in Shock Combat and all units stacked in a hex are affected when attacking or defending; the stack applies the result, retreats and advances as a single group. Note: The number of Troop Strength Points each side can apply to calculate the ratio for Shock Combat is limited to the stacking limit of the terrain type occupied by the defending unit(s).
[12.14] Effects of Terrain on Units During Shock Combat
A Formed infantry unit initiating shock attack against an enemy unit in a Hard of Soft cover hex or across an obstructed hexside, may be required to adopt General Order or become Disordered. This involuntary formation change takes effect after and all defensive fire from the defending unit(s), but before the Effectiveness differential for the Shock Combat is determined (see 11.3).
- A Formed unit adopts General Order when it attempts to execute Shock Combat into an obstructed hex. If the unit did not Disorder or Rout as a result from defending fire, it is flipped to its column side with the General Order marker.
- A Formed unit becomes Disordered if it executes a shock attack across a Stream or Major Stream hexside.
- A Formed unit executing a shock attack across a Light Cover hexside automatically Disorders at the conclusion of the shock attack (if it is not Disordered or Routed).
- A defending unit's Effectiveness Rating may also be modified by the effects of terrain as listed on the Effectiveness Modifiers found with the Shock Combat Results Table (see 12.2).
- A unit or stack executing a shock attack from a Hard Cover hex receives defensive fire as if coming from a Soft Cover hex.
- A unit or stack defending in a Hard Cover hex with more than 9 Troop Strength Points, treats the hex as a Soft Cover hex.
12.2 Determining the Final Differential for Shock Combat
To obtain the differential for a shock attack, the Effectiveness Rating of the topmost defending combat unit is subtracted from that of the topmost attacking combat unit. Before modifiers are applied, the current Effectiveness Rating of a unit is determined (see 13.2). Note: For Shock Combat, a unit's Effectiveness Modifier for Morale Checks IS NOT APPLIED when determining the unit's current Effectiveness Rating.
[12.21] Shock Combat Modifier Explanations
- A Command unit modifies a combat unit's effectiveness only if the it is not reduced. General Order, Skirmish, Routed, and Disordered units do not receive the modifier for being stacked with a Command unit.
- A Russian infantry unit receives a +2 modifier to its Effectiveness Rating when attacking during Shock Combat.
- Defending Skirmish units which occupy a Light Cover hex receive a +1 modifier if the total strength does not exceed 4 Troop Strength points.
[12.22] Unit Type Effects on Shock Combat Modifiers
- Skirmish units (not Disordered or Routed) are considered unformed when determining the Shock Combat differential and use their printed Effectiveness Rating.
- REMOVED
- For Shock Combat, an artillery unit (limbered or unlimbered) uses its current Strength and Effectiveness Rating of the artillery crew (see 7.53). An artillery crew stacked with its battery is considered Disordered or Routed if the artillery unit is Disordered or Routed (see 7.56).
- A Formed unit is instantly Disordered if it is attacked through any of its flank or rear hexsides, is in Road Column, or is limbered artillery. After the defending unit Disorders, it may fire at the attacking unit (if eligible to do so) before the Shock Combat is calculated (see 11.32).
- Whenever an attacking unit adopts General Order or Disorders because of terrain, it does so after all enemy fire, but before the determination of the Shock Combat differential.
- A Cavalry unit Disorders automatically when it attempts to execute Shock Combat against a unit in Square formation. A Disordered cavalry unit does not receive Cavalry Impetus Bonus.
- For Shock Combat, cavalry and artillery units receive no modifier benefit for occupying any type of obstructed terrain hex.
[12.23] Combat Ratio and Differentials Effects on Shock Combat
- A shock attack executed at a percentage ratio greater than 2 to 1 uses the 2 to 1 Ratio row. However, the attacking unit's Effectiveness Rating may increase when a Shock attack is executed at a ratio higher than 2 to 1 and its Effectiveness Differential is at –3 or better. The attacking unit's Effectiveness Rating is modified for either of the following increased ratios; 3 to 1 or greater, the Effectiveness Rating is modified by +1. 4 to 1 or greater, the Effectiveness Rating is modified by +2.
- When a shock attack is executed in Clear or Light Cover terrain at a Differential of –1 or better and the ratio is 5 to 1 or greater, the defending units automatically receive an "Dr" result with no effect to the attacker (exception: does not apply to an artillery crew with its battery).
- A shock attack may be executed at a ratio of less than 1 to 2 using the 1 to 2 Ratio row. However, if the ratio is less than 1 to 3, the Attacking unit's Effectiveness Rating is modified by –1.
- If a shock attack is executed at a Differential greater than +7, the +7 Differential column is used.
- If the Differential to the attacker is –4, the final Combat Ratio is reduced two rows at the –3 Differential. If the row reduction is less than 1 to 2 or if the Differential is –5 or less, the attacking unit(s) automatically suffers a "Dr" result and the defender is unaffected.
SHOCK COMBAT MODIFIERS
When calculating the differential for Shock Combat, a unit's current Effectiveness Rating is further modified according to the following:
- Modify the top Attacking unit's Effectiveness Rating as follows:
| Modifier | Condition |
|---|---|
| –3 | if Disordered (–1 if Skirmish or Cossack unit) |
| –2 | if facing into the wind in Heavy Snow |
| –1 | if facing into the wind with Light Snow |
| –1 | if the Ratio is less than 1 to 3 (use the 1 to 2 Ratio; 12.23.3) |
| +1 | if stacked with an unreduced Command unit (see 12.21) (1) |
| +2 | if a Russian infantry unit |
| +1 | if Ratio is 3 to 1 (use the 2 to 1 Ratio table)* |
| +2 | if Ratio is 4 to 1 or greater (use the 2 to 1 Ratio table)* |
| +2 | Cavalry Impetus Bonus (see 12.55) (1) |
- Modify the top Defending unit's Effectiveness Rating as follows:
| Modifier | Condition |
|---|---|
| –6 | if Routed |
| –3 | if Disordered (–1 if skirmish, artillery crew, or Cossack unit) |
| –1 | if facing into the wind in Heavy Snow |
| +1 | if stacked with an unreduced Command unit (see 12.21) (1) |
| +1 | if attacking unit is from a lower elevation, across a steep slope hexside |
| +1 | if attacking unit is attacking across a Stream hexside |
| +1 | if in a Light Cover hex (Skirmish units only; 4 SPs or less) |
| +1 | if in a Soft Cover hex or protected by a Light Cover hexside |
| +2 | if in a Hard Cover hex (infantry only) |
| +2 | if in Square formation against Cavalry (see 8.42 and 12.54.2) |
* The modifiers for Ratios are not cumulative; use 3 to 1 or 4 to 1, not both. (1) No modifier if unit is Disordered.
12.3 Shock Combat Results Table
(see separate chart)
12.4 Shock Combat Results
Each Shock Combat yields a result to either the attacking unit(s), the defending unit(s), or to both. Troop Strength Points may be eliminated, Command units may be depleted (inverted), and combat units may become Disordered or Routed forcing them to retreat. Losses are taken first from the topmost combat unit in either the attacking or defending stack (or both). The Shock Combat result determines the Morale state of both the attacking and defending units; a unit which suffers a loss or is forced to retreat does not check morale again. However, a unit that is forced to retreat as a result of Shock Combat may cause friendly adjacent units to check Morale. A unit that it is forced to retreat out of a hex within another Enemy unit's Minimum Range Fire Zone may be fired upon by all enemy units except for the unit that caused the retreat.
[12.41] Explanation of Shock Combat Results
Each Shock Combat Result is shown in the form Attacker/Defender; the attacker's results to the left of the slash and the defender's to the right. The result may be a combination of the following actions depending on the die roll, net effectiveness differential and combat odds. The attacking and/or defending units are affected by the following results:
- • — No effect.
- D — Disordered (no Troop Strength loss); no Morale check or retreat required or permitted. No additional effect if already disordered.
- D1 — Disordered and loss of one Troop Strength Point; no Morale check or retreat is required or permitted. No additional effect if already Disordered.
- Dr — Disordered retreat: unit(s) disorder and must immediately retreat two hexes (however, it suffers no Strength Point loss). Adjacent units may need to check Morale.
- Dr1 or Dr2 — Disordered, loss of one or two Troop Strength Points and unit(s) must immediately retreat two hexes. Adjacent units may need to check Morale.
- R — Routed, loss of two Troop Strength Points and unit(s) must immediately retreat three hexes. Adjacent Friendly units may need to check Morale.
Note: All attacking units participating in an attack must immediately occupy the attacked hex if all the defending units are eliminated or retreat as a result of Shock Combat. The attacking units are not fired upon while making this advance (see 11.31).
[12.42] Adjustments to Shock Combat Results
- A unit that is already Disordered and receives a "Dr", "Dr1", or Dr2 result converts that result to an "R". A Routed unit automatically receives an "R" result when it is shock attacked, however, the Shock Combat is resolved according to the regular procedure to determine any result to the attacking unit(s). Each time a Routing unit (or stack) is shock attacked, it must retreat three hexes and loses 1 additional Strength Point.
- Skirmish units and Light Infantry battalions (in General Order) attacking or defending, do not Disorder due to a "D" or "D1" result. A unit already Disordered is not further affected (see 8,53).
- A charging cavalry unit that shock attacks an enemy Skirmish unit ignores a "D" result (i.e., it converts to a "•" result).
- If either side has only 1 or 2 Strength Points, the SP loss from the result to both attacker and defender is reduced by 1 Strength Point.
- If both the attacker and defender each have a troop strength total of 8 or more, any strength point loss is increased by 1.
- Losses are taken first from the topmost unit in the stack and then evenly distributed beginning with the second topmost unit working the way down the remainder of the stack.
[12.43] Artillery Special Effects on Shock Combat Results
- An Artillery Crew Strength is used to determine the odds ratio, however, the artillery battery's gun strength is used to satisfy the loss from the Shock Combat result.
- A cavalry unit that executes a shock attack against an artillery unit is automatically Disordered at the conclusion of the Shock Combat if the Shock Combat result did not render it Disordered or Routed (see 12.54).
- An uncrewed artillery unit automatically loses 2 gun SPs at the end of a Friendly Shock Phase if it is stacked with an Enemy infantry unit.
- A Formed infantry unit must adopt General Order (if not Disordered) at the conclusion of a shock attack if the hex is occupied by an uncrewed artillery unit.
- During Shock Combat, whenever an unlimbered artillery battery suffers a Dr or R result, only the crew retreats, leaving the guns behind.
[12.44] The Effects of Shock Combat Results on Command Units
Any Command unit stacked with combat units that are engaged in Shock Combat is vulnerable if at least one Friendly Troop Strength Point in the hex is eliminated. For each command unit affected, the owning player rolls a die. If a 7, 8 or 9 is rolled the command unit becomes a casualty. Apply the leader loss procedure appropriate for the level of the command unit (see 19.8).
12.5 Cavalry Units and Shock Combat
Cavalry units conduct shock attacks normally, but do so through the Cavalry Charge, i.e., cavalry units must initiate a charge in order to execute a shock attack (exception: Cossacks, see 19.2 and Optional Rule 21.34). A cavalry unit may also initiate an Opportunity Charge during an opponent's Movement or Shock Phase (see case 12.56).
[12.51] Cavalry Charge Requirements
During the Charge Declaration Segment of the Command Phase, the Phasing Player may initiate a charge by any of his formed cavalry units. The initiating cavalry unit(s) must:
- be In Command, either from its brigade leader or be within the Command Radius of a division or corps command unit with a "C", or stacked with any leader of the same nationality.
- neither be Disordered or Routed (must be formed).
- have a line-of-sight to at least one enemy unit strength point that will be within its projected Charge Zone.
Note: During his Command Phase, the player may declare as many cavalry charges as he wishes and with as many cavalry units eligible to do so. A cavalry unit or stack may never initiate more than one charge in a phase.
[12.52] How Cavalry Charges are Initiated
CAVALRY CHARGE INITIATION PROCEDURE: If all the above requirements are met, the cavalry unit(s) may initiate a charge using the following procedure:
-
Make a Morale Check: For each charge, the topmost cavalry unit immediately makes a morale check applying all eligible Morale Check Modifiers (13.13). If the unit passes its morale check, it successfully initiates a charge with all units it is stacked with. If the morale check fails, the cavalry unit immediately Disorders (and possibly retreats) and the charge may not be initiated.
Note: If the morale check is successful, all units stacked beneath the checking unit are then required to join the charge. If the topmost unit fails the morale check, all of the units stacked under this unit are Disordered.
-
Project the Charge Zone: All cavalry units that initiate a charge deploy a Charge Zone on the map which is defined by Charge Zone Markers. The Charge Zone extends 6 hexes out from a unit's frontal vertex and projects into all hexes in the Charge Zone except Frozen Wetland, Town/Village, and Woods hexes (it does extend across obstructed hexsides). When a unit initiates a charge, the owning Player places three Charge Zone Markers on the map; one on the charging cavalry unit(s) and two markers 6 hexes away and 6 hexes opposite each other as shown in the Charge Zone Diagram. A Charge Zone is divided into two sub-charge zones: a Primary Charge Zone (range 1–3 hexes) and a Secondary Charge Zone (range 4–6 hexes). The 3 original Charge Zone Markers are repositioned to indicate the Secondary Charge Zone, which is not done until the charging cavalry unit enters the last hex of the Primary Charge Zone during its charge.
-
Complete All Charge Attempts: After the Phasing Player places the Charge Zone Markers on the map, he may resume conducting other Command Phase activities, including attempting other cavalry charges. Note: Cavalry charges do not occur during the Command Phase. All charges will be executed during the ensuing Friendly Shock Phase.
(Cavalry Charge Zone Diagram: the Charge Initiated Hex, the Primary Charge Zone (3 rows) and the Secondary Charge Zone beyond it; use the original Charge Zone Markers to define the Secondary Charge Zone.)
[12.53] How Cavalry Charges are Conducted
- Cavalry units may conduct charges in any order that the Phasing Player chooses and may be intermingled with any infantry Shock Combats. However, each cavalry charge (or infantry shock attack) must be concluded before another is executed.
- All shock attacks by charging cavalry are conducted and resolved per the shock attack rules of 12.1 and 12.2. During a charge, a cavalry unit (or stack) may be fired upon whenever it leaves the Medium Range Fire Zone and the Minimum Range Fire Zone of any and all enemy units exerting those fire zones (see 11.3.1). All enemy units that exert a Minimum or Medium Range Fire Zone may fire on the charging cavalry unit, however, the cavalry unit only makes one morale check after all opportunity fire combats (into a target hex) are resolved.
- A cavalry charge never requires the expenditure of Movement Points. A charging cavalry unit moves up to 6 hexes, one hex at a time, toward the furthest extent of its charge zone, executing shock attacks against enemy units it faces. After advancing 6 hexes during its charge (including hexes entered due to shock attacks), the charge must end. However, the cavalry unit must continue its charge by attacking any adjacent enemy units it is facing.
- A charging cavalry unit in its Primary Charge Zone may not voluntarily change its facing. But, it may voluntarily change its facing while in its Secondary Charge Zone (and immediately Disorder; see 12.54.2).
- A charging cavalry unit must conduct a shock attack against any adjacent enemy unit (in any eligible hex) it is facing – inside its Primary Charge Zone or inside and outside its Secondary Charge Zone. If the charging cavalry unit faces more than one adjacent enemy unit, it may shock attack either. Note: A cavalry unit may not end its charge until it is no longer facing any enemy units.
- For each Shock Combat during a charge, each defending enemy stack that is not in Square or Disordered, must first make a morale check and apply the result before it conducts fire combat (see 12.6).
- If a charging cavalry unit suffers a Dr, Dr1, or R result, the charge must end in the hex the cavalry unit retreats to. At the conclusion of its charge, cavalry unit is automatically Disordered (but does not Rout if already Disordered) and may be "Exhausted" (see 7.41).
CAVALRY CHARGE EXECUTION PROCEDURE
Cavalry units that have initiated a charge must conduct the charge. If the cavalry unit does not have a line of sight to an enemy unit in the charge zone, then the charge must be aborted; the Charge Zone markers are removed and the cavalry units remain formed. A cavalry charge is executed according to the notes above and the following procedure during the Shock Phase:
-
Cavalry units in a Primary Charge Zone must move within the Charge Zone toward the 3rd row of hexes of that zone.
-
A cavalry unit in a Primary Charge Zone must shock attack any adjacent enemy units it is facing with the following exceptions:
- adjacent enemy units in rearward hexes (in the direction of the starting hex) must be bypassed
- adjacent enemy units in lateral hexes (flank hexes of the cavalry unit's original facing) outside the Primary Charge Zone, must be bypassed
Note: Adjacent enemy units in lateral hexes inside the Primary Charge Zone may be bypassed or attacked if the cavalry unit is facing it.
-
Once the charging cavalry unit has reached the 3rd row of the Primary Charge Zone (and it is not facing any enemy units), it may continue into the Secondary Charge Zone, or it may attempt to end the charge (go to no. 4 below if the charge is continuing).
If the cavalry unit wishes to end the charge, it must first pass a Cavalry Charge Control Check. The owning player rolls one die and compares the result to the Effectiveness Rating of the topmost cavalry unit in the stack. If the number is equal to or greater than the cavalry unit's unmodified Effectiveness Rating, the cavalry unit passes and ends its charge in that hex. The cavalry unit Disorders (12.54) and may move one additional hex, which must be inside the Primary Charge Zone and not end adjacent to an enemy unit. If the charging cavalry unit fails its Control Check, then it must continue to the Secondary Charge Zone.
-
Unless the charge has ended, a charging cavalry unit must project a Secondary Charge Zone (even if required to shock attack into an adjacent hex). Note: once projected, the hex occupied by the charging cavalry unit (which was in the Primary Charge Zone), is now the Secondary Charge Zone starting hex.
-
A charging cavalry unit that projects a Secondary Charge Zone must either execute a shock attack against enemy units it faces, or, if there are none, move at least one hex forward (toward the furthest row of the charge zone). A cavalry unit may voluntarily end its charge in any hex within the Secondary Charge Zone after the . If the charging cavalry unit executes a shock attack of the Secondary Charge Zone, the charge must end when the last adjacent enemy unit has been attacked.
[12.54] Cavalry Charge Restrictions and Conditions
-
A cavalry unit executing a charge may not enter an obstructed hex or execute a shock attack against units that occupy an obstructed hex, even if the cavalry unit is Disordered. However a cavalry unit that suffers a Dr, Dr1, or R result, may retreat into an unoccupied obstructed hex it can normally move into.
-
During the charge, a charging cavalry unit is Disordered at the moment it fulfills any of the following conditions:
- It executes a shock attack against an infantry unit in Square formation (even if the unit in Square is Disordered).
- It executes a shock attack across a Stream hexside.
- If it executes a shock attack across a Brook or Light Cover hexside, the owning player rolls a die. If the die result is 6 or greater, the cavalry unit Disorders. Note: Any Disorder occurs before the Shock Combat Differential determination but after any fire by defending units.
- At the conclusion of a shock attack against an Enemy artillery unit or after entering a Light Cover hex during a charge.
- It enters a hex occupied by any number of Friendly Troop or Gun points. Additionally, friendly units are Disordered when a friendly cavalry unit enters their hex while charging; skirmishers and those already Disordered, immediately conduct a Disordered Retreat.
- It has advanced 6 hexes within the Charge Zone or completed its charge. Note: At the completion of any charge, a cavalry unit is immediately Disordered (if not already) and may become Exhausted (see 7.41).
- It is formed and voluntarily changes its facing while executing a charge.
Note: A cavalry unit that is Disordered suffers no additional penalty if it Disorders again from any of the above conditions. However, a Disordered cavalry unit becomes Routed if it incurs a Dr or R as a result of Shock Combat (see Case 12.42) or fails a Morale Check.
[12.55] Cavalry Impetus Bonus
A charging cavalry unit (that is not Disordered or Exhausted) may receive a +2 Cavalry Impetus Bonus modifier to its Effectiveness Rating when determining the Differential for Shock Combat. Exception: If the defending unit is a skirmish unit or an artillery crew (even if it is with its battery), the charging cavalry retains its Cavalry Impetus Bonus while it is Disordered.
Note: During an Opportunity Charge, if the shock combat involves two opposing charging cavalry units, the Cavalry Impetus Bonus is given to both charging cavalry units (unless one of them is Disordered or Exhausted).
[12.56] Opportunity Charges
During any Shock Phase or during an opponent's Movement Phase, a formed cavalry unit may declare an Opportunity Charge. Once declared, an Opportunity Charge is executed as a normal charge and must follow the Cavalry Charge Initiation and Execution Procedure (12.52 and 12.53). No more than one Opportunity Charge for each player may be in process at any given time and all Opportunity Charges are resolved from the last one declared to the first.
-
Opportunity Charge During an Opponent's Movement Phase: Whenever an enemy combat unit enters a hex within 2 hexes of a cavalry unit, that has a line-of-sight through its front facing hexsides to the moving enemy unit, the cavalry unit may attempt to initiate an Opportunity Charge using the standard Cavalry Charge Initiation Procedure.
- If the Opportunity Charge attempt is successful, the Phasing Player temporarily pauses his movement, allowing the non-Phasing Player to places his Charge Zone markers on the map. If the cavalry unit is In Command, the Charge Zone is projected as in a standard cavalry charge. If the cavalry unit is not In Command, then only the Primary Charge Zone is projected. Once the Charge Zone markers are placed, the Phasing Player resumes moving. The Opportunity Charge will be executed during the ensuing Shock Phase following the opponent's Movement Phase in which it was initiated.
- If the Opportunity Charge attempt is unsuccessful, the cavalry unit(s) Disorder (and possibly retreats; see 13.1).
Note: During the opponents Movement Phase, if the moving enemy unit is a non-cavalry unit, the friendly cavalry unit may move away 1 or 2 hexes (per 7.42), but only if an Opportunity Charge is not attempted.
-
Opportunity Charge During any Shock Phase: Whenever an enemy combat unit advances – or a charging enemy cavalry unit enters – into a hex within 2 hexes of friendly cavalry unit, and that cavalry unit has a clear line-of-sight to the enemy unit, the friendly cavalry unit may perform an Opportunity Charge using the standard Cavalry Charge Initiation Procedure, but projecting only a Primary Charge Zone. A cavalry unit that is already projecting a Charge Zone, may performs the Opportunity Charge in lieu of its original intended charge.
- During a Shock Phase, an Opportunity-Charge is executed immediately. If triggered by enemy charging cavalry, the enemy cavalry unit must temporarily pause its charge. The non-Phasing Player then places Charge Zone markers (Primary Charge Zone only) and his cavalry unit either: a) advances one hex toward the phasing player's unit which triggered the Opportunity-Charge and initiates the shock attack. b) initiates the shock attack against the triggering unit in an adjacent hex.
- The charging cavalry unit must continue its Opportunity Charge per the standard charge rules until it enters the last hex of its Primary Charge Zone (and Disorders) or continues (if facing additional enemy combat units). Once the opponent's Opportunity Charge ends, the Phasing Player may then resume his paused charge or Shock Combat.
(Cavalry Opportunity-Charge Example diagram: shows the Primary Charge Zone, the Counter-Charge Initiated Hex.)
12.6 How an Enemy Cavalry Charge Affects the Movement and Morale of Friendly Units
The following rules take into account that, as a weapon system, the cavalry unit moves faster while executing a charge than the normal rate at which opposing formations maneuver.
[12.61] Cavalry Charge Affects on Movement
- Inside an enemy cavalry unit's Charge Zone, a friendly unit's Movement Point cost is +1 for each hex entered (except those hexes that prohibit charging cavalry to enter) and for any formation change. A unit's Movement Point cost to change its facing is doubled.
- Outside an enemy cavalry unit's Charge Zone, within 3 hexes of the charging cavalry unit, the MP cost is +1 for each hex entered that is closer to the Charge Initiated Hex than the previous hex and for any change of formation.
[12.61] Cavalry Charge Affects on Facing and Formation
(Numbered 12.61 a second time, as printed.)
- If attempting to change its facing or formation while in a hex within an enemy unit's Charge Zone, the friendly combat unit must first make a Morale Check (see 13.11.7). All Morale Check modifiers are applied. If the modified die roll exceeds its Effectiveness Rating by ...
- ... 3 or less, then it immediately Disorders but may continue to change its facing or formation.
- ... 4 or more, than it immediately Disorders but may not change its formation (Note: No retreat per 13.1).
- A unit or stack occupying a hex in more than one Enemy Charge Zone is required to make only one morale check.
Note: Although detachment of skirmish units is considered a change of formation (8.61), there is no morale check for detaching skirmish units while in a charge zone.
[12.62] Cavalry Charge Affects During Shock Combat
-
The topmost defending unit in a hex that is receiving an Enemy cavalry unit's shock attack during a charge must first check its morale (before it fires at the cavalry unit and the Shock Combat is calculated). All Morale Check Modifiers are applied.
-
A unit in Square Formation, Disordered or Routed is not required to make this morale check prior to the cavalry shock attack. Note: No morale check is required if the Disorder is from a flank or rear shock attack.
- A unit or stack occupying a hex in more than one Enemy Charge Zone applies the modifier from only the attacking cavalry unit.
- Artillery crews and skirmish units are automatically Disordered prior to an enemy cavalry shock attack (see 12.22.2), even if they passed their morale check.
Example: A skirmish unit that is shock attacked by an enemy cavalry unit during a charge first makes a morale check. If it passes, the skirmish unit fires at the enemy cavalry unit as not disordered. However, the skirmish unit automatically Disorders for the ensuing Shock Combat.
[12.63] Cavalry Charge Morale Check Modifiers
A variable Cavalry Charge Modifier is applied whenever a unit is in an enemy cavalry charge zone and must check for morale. The value of the modifier is determined by which charge zone the unit is in and the type and strength of the topmost cavalry unit that initiated the charge (see table below). The strength of two cavalry units of the same type may be combined to determine "cavalry strength".
Note: No modifier is applied if the charging cavalry unit is not in the line of sight of the checking unit or the cavalry unit is Disordered.
| Cavalry Strength | Heavy Cavalry (Primary/Secondary Charge Zone) | Light Cavalry (Primary/Secondary Charge Zone) |
|---|---|---|
| 1–4 | +1/0 | 0/0 |
| 5–8 | +2/+1 | +1/0 |
| 9+ | +3/+2 | +2/+1 |
See the Cavalry Charge Morale Check Modifier Table on the player aide card for Heavy and Light Cavalry types and identification symbology.
13.0 Unit Morale and Recovery
A unit's Morale is based on the Effectiveness Rating assigned to each type of combat unit. At any time in the game a combat unit will be in one of two morale states based on its current formation: "good morale" (any voluntary Formed or Unformed formation), or "poor morale" (either Disordered or Routed formation). A unit that has "good morale", is indicated by the absence of a Morale Marker on top of the unit. A unit that is Disordered is represented by a Dis marker on top of the unit. A unit that is Routed is represented by a Rtd marker on top of the unit. In addition, Cavalry have an "exhausted" state which affects its Effectiveness Rating and occurs immediately after execution of certain cavalry charges (see 7.41).
13.1 Unit Morale
UNIT MORALE CHECK PROCEDURE: Whenever a combat unit is required to check Morale, the player who controls the unit rolls one die. The die roll is then modified by the Morale Check Modifiers (see 13.13), and the die result is compared to the Current Effectiveness Rating of the checking unit. If the die roll is less than or equal to the units Effectiveness Rating, there is no effect. If the die result is greater than the unit's Effectiveness Rating, the morale result will be one of the following if the checking unit is ...
- ... Disordered it is automatically Routed and immediately retreats 3 hexes if the die roll exceeds its current Effectiveness Rating.
- ... Unformed (voluntarily, i.e. it is either in Skirmish or General Order formation), it becomes Disordered and immediately retreats 2 hexes if the die roll exceeds its current Effectiveness Rating by 3 or less; it becomes Routed and retreats 3 hexes if the die roll exceeds its current Effectiveness Rating by 4 or more.
- ... Formed (i.e. it is not a Skirmish unit, in General Order or Disordered) it becomes Disordered if the die result exceeds its current Effectiveness Rating by 3 or less; it becomes Disordered and immediately retreats 2 hexes if the die roll exceeds its current Effectiveness Rating by 4 or more.
If a unit or stack suffers a Disordered or Routed result, a Disordered or Routed marker is immediately placed on the affected unit(s). Disordered and Routed markers are removed only during the unit's Rally Phase (see 13.4). Note: See 13.2 for determining a unit's current Effectiveness Rating.
[13.11] When a Morale Check is Required
A Morale check is always conducted by the topmost combat unit in a hex regardless of the circumstances. If the unit checking morale is forced to Disorder or Rout as a result of its Morale check, all of the combat units stacked with it must immediately adopt the same involuntary formation. The topmost combat unit stacked in a hex is required to immediately check its Morale under any of the following conditions:
- If a unit in the hex incurs one or more Strength Point losses or an M as a result of a single Enemy Fire Combat.
- If one or more units are eliminated in the same hex as a result of a single Enemy Fire attack.
- Whenever a friendly unit leaves the first adjacent hex while executing a Disordered or Routed retreat (exemption, see 13.12). Note: A unit is required to check for morale only once during the retreat of a single retreating friendly unit or stack.
- Whenever all friendly units in an adjacent hex are eliminated or forced to retreat as a result of Enemy Fire or Shock Combat (exemptions, see 13.12).
- Whenever one or more Gun Strength Points are eliminated by a single Enemy Fire attack, the artillery crew stacked under the affected artillery unit must immediately make a Morale check.
- During the Friendly Movement Phase, a unit (not in Square Formation) occupies a hex within the Charge Zone of an Enemy cavalry unit and attempts to change its facing or formation (see 12.61.2).
- Whenever a cavalry unit attempts to initiate a charge.
- Whenever a Friendly unit (not skirmish or artillery crew) executes a Disordered or Routed retreat into the hex it occupies (see 13.33).
[13.12] Units Exempt from Morale Checks
Command units, artillery units (guns only), and Routed units are never required to check morale. Other units are excused from a required Morale check under the following circumstances:
- A Formed unit is never required to check morale due to the elimination of a skirmish unit (or artillery crew) in an adjacent hex.
- A Formed unit is never required to check morale due to the presence of a retreating skirmish unit or artillery crew from an adjacent hex.
- A Formed unit is not required to check morale when a Friendly infantry battalion or cavalry unit with a lower or equal original Effectiveness Rating exits an adjacent hex while executing a Disordered or Routed retreat.
- A unit that has rallied from Rout or Disorder during its Rally Phase is not required to check morale if a Friendly unit, that has failed to rally, leaves an adjacent hex while executing a Routed retreat.
Note: A unit in Skirmish, General Order, or Disordered formation must always check Morale when a unit of any type or Effectiveness level first occupies an adjacent hex while conducting a Routed or Disordered retreat.
[13.13] Morale Check Modifiers
The following schedule lists the die roll modifiers for morale checks. A checking unit's die roll is modified by the following:
| Modifier | Condition |
|---|---|
| –# | the unit's Effectiveness Modifier (1, 2 or 3) |
| –3 | if occupying a Hard Cover hex (town/village hex) |
| –2 | if occupying a Soft Cover hex (woods, farmette hex) |
| –1 | if occupying a Light Cover hex (skirmish units; 4 or less SPs) or any unit type protected by a Light Cover hexside |
| –1 | if an infantry battalion* and adjacent to, or stacked with, a non-Routed infantry battalion of the same regiment |
| –1 | if a Russian infantry battalion* and adjacent to a Russian Light Artillery battery of the same division (see 19.42.4) |
| –1 | if stacked with a friendly unreduced Command unit |
| –1 | if it is in Square formation |
| +1 | if facing into the wind during snow |
| +1 | if the elimination of a Friendly unit in the same hex mandates the Morale Check |
* (only when occupying a clear hex)
| +1 | if it is fired on through its Rear or Flank hexside (enfiladed) | | +1 | if it is Disordered | | +1 | if a skirmish unit and greater than 5 hexes from a friendly battalion | | +2 | if stacked with an Ammo Depl marker | | +? | if not in square formation and being shock attacked by a Formed enemy cavalry unit within its Charge Zone (see 12.63 or Cavalry Charge Morale Check Modifiers Table on player aide card) |
Morale Check Modifiers Conditions
- All Command units stacked in the hex must first check for Leader Loss before the Combat unit checks for Morale. A unit that is Disordered, in General Order or Skirmish formation gain no benefit if stacked with a leader when checking Morale.
- When modifying for morale, a unit receives the benefit of any Cover within the hex or hexside regardless of the location of this Cover related to the cause of the Morale check.
- The modifiers of a Charge Zone are only applied to a unit when a morale check is required within an enemy Charge Zone.
13.2 Determining a Unit's Current Effectiveness Rating
A unit's current Effectiveness Rating is first determined before additional modifiers are applied for either a morale check or during Shock Combat. Note: A unit's current Effectiveness Rating can never be less than zero (0). To determine a unit's current Effectiveness Rating, the original Effectiveness Rating of a combat unit is modified by the following:
| Modifier | Condition |
|---|---|
| +1 | if the unit is part of a Brigade that has an Attack Order (does not apply for self rallying). |
| –1 | if its current Troop Strength is 1/2 or less of its original (face-value) Troop Strength (Exception: Artillery Crews). |
| –1 | if in General Order. Note: A unit that becomes Disordered is no longer considered in General Order. |
| –1 | if its Army or Corps Morale Level has been declared "Demoralized". |
| –1 | if its brigade is at Fatigue Level 1* |
| –2 | if its brigade is at Fatigue Level 2* |
* (see 15.2 and the Brigade Fatigue Level Table on each player's Brigade Commitment/Fatigue Display)
EXAMPLE: if an infantry battalion's original Strength is 9 and its original (printed) Effectiveness Rating is 5, its Effectiveness Rating is reduced to 3 if its current Strength is 4 and it's brigade is at Fatigue Level 1 (Fatigued).
13.3 How Units Conduct Retreats
Units are forced to retreat either from a result of Shock Combat or a morale check resulting in a Routed or Disordered retreat (see 13.1). Units forced to retreat expend no Movement Points (all costs due to terrain are ignored). If any unit in a stack is forced to retreat, all Friendly units stacked with it are also required to retreat. Units retreating from the same hex must be retreated as a single group.
- A retreating unit is never allowed to enter a hex containing any Enemy units. A retreating unit that has no path of retreat or a Routed unit that retreats off the map edge is eliminated. Note: Scenario or special rules may allow for units to move off the map edge without being eliminated.
[13.31] Retreat Distances
- Morale Check or Shock Combat: A unit that suffers a Disordered Retreat as a result of a morale check or a result from Shock Combat, must retreat 2 hexes. A unit that suffers a Rout as a result of a morale check or a Shock Combat result, must retreat 3 hexes.
- Friendly Rally Phase: At the end of the Rout Recovery Segment of the Friendly Rally Phase, a routing unit or stack which is within eight hexes of an enemy unit and fails to rally (see 13.42), must retreat 6 hexes. A routing unit or stack which is beyond eight hexes of an enemy unit and unable to rally, retreats 3 hexes.
[13.32] Determining the Path of Retreat
All retreats are implemented by the owning player. In determining the path of retreat, units must retreat toward the map edge in the direction of their "general line of retreat" (unless stipulated differently in the scenario rules). Initially however, the path of retreat should be opposite the source of the receiving enemy Fire or Shock Combat that caused the retreat and/or toward the leader the combat unit is subordinate to. Once beyond the tactical situation, units must retreat toward their army's general "lines of communication".
- Units must retreat in as straight a path of hexes as possible and are unencumbered by terrain. Units may change direction or "swerve" to avoid friendly formed units or Enemy Minimum Range Fire Zones, but may not turn to avoid reaching the map edge.
- Units may not retreat into terrain hex types they are prohibited from moving into. In situations in which players do not agree, the retreat direction may be determined by die roll.
[13.33] Retreating Into a Friendly Occupied Hex
Units may retreat into a Friendly occupied hex, however, the top most unit in the hex being retreated into must immediately make a Morale check, (as per 13.11 & 13.12), before the retreating unit enters the hex.
- If the occupying friendly unit fails its Morale check and must make a Disordered or Routed retreat, it immediately retreats before the original retreating unit enters the hex. Adjacent units may be required to check morale per 13.11 and 13.12.
- If the occupying friendly unit remains in the hex, the retreating unit continues to the next hex along its path of retreat. If the retreating unit ends its retreat stacked with a Friendly unit (and both are not Disordered or Routed), the retreating unit(s) continues for an additional hex until it reaches a non-occupied hex. The friendly unit remaining in the hex is not required to make another morale check.
- If it passes its morale check, the friendly formed unit that occupies the hex being retreated into is automatically Disordered if the Troop (and/or gun) Strength Points of the retreating unit(s) is 4 or more and the unit occupying the hex...
- ... has a Troop Strength of 5 or more or...
- ... the unit is in Line Formation.
Note: A retreating stack of Skirmish units or artillery crews of 4 or less retreating into hex occupied by a friendly Formed unit does not cause the Formed unit to check morale or automatically Disorder.
[13.34] Retreating from an Enemy Minimum Range Fire Zone
When required to retreat, a unit may not be fired on in the first hex retreated from. However, a unit may be fired on from all subsequent hexes during its retreat which are in Enemy Minimum Range Fire Zones (see 11.31).
13.4 How Units Rally from Disorder and Rout
During each player's Rally Phase, the owning player may "rally" his units by removing the markers from his Disordered and/or Routed units within the restrictions of the following rules.
[13.41] Rally from Disorder
During the Phasing Player's Rally Phase, the owning player must rally from Disorder each Disordered Friendly unit that is not within the Minimum Range Fire Zone of an Enemy unit. For most units, this occurs automatically and without restriction, however, certain units in a town or woods hex may be required to remain Disordered. When a unit recovers from Disorder, remove the Disorder marker from the unit(s). The unit may adopt any formation allowable in the hex for its unit type, and its facing may be to any desired direction. Note; A battalion that recovers from Disorder in a town or woods hex reverts to General Order.
- Heavy cavalry may not rally from Disorder in a town/village hex.
- An artillery unit of 6 or less gun SPs may rally from Disorder while in a town/village hex with a road.
- Skirmish units, French Light infantry battalions, and Russian Jaeger battalions in a Hard or Soft cover hex automatically recover from Disorder even if in the Minimum Fire Zone of an enemy unit (see 8.65.C).
[13.42] Rally from Rout
Once all eligible Disordered units have rallied, the Phasing Player may then attempt to rally all friendly Routed units that are not within any enemy unit's Fire Zones (excluding Extended Fire Zones) with a clear Line of Sight to the routing unit or, if in clear terrain and within a potential Primary Charge Zone of a Formed enemy cavalry unit (with a Line of Sight). Friendly skirmish units must rally first and then routed non-skirmish units may rally in the following order:
A. Skirmish Units: Removes the Rout marker from every Friendly routed skirmish unit or stack eligible to do so. Skirmish units do not need to be stacked with a command unit in order to rally. A Routed skirmish unit that rallies immediately recovers "good morale" (does not go to Disorder). Remember, artillery crews are treated like skirmish units. After all eligible Skirmish units have rallied, the owning player must retreat the remaining non-rallied Routed Skirmish units 3 or 6 hexes (13.31).
B. Non-Skirmish Formations: Immediately following the rallying of all skirmish units, the Phasing Player must rally all other friendly Routed units that are stacked with a friendly Command Unit of the same nationality (even those reduced).
C. Self Rally: If a Non-Skirmish Routed Formation is not stacked with a friendly Command Unit it may attempt to self-rally. The owning player rolls one die; if the result is equal to or less than the unit's Current Effectiveness Rating, the unit rallies. If the result is greater, the units does not rally and retreats the required number of hexes. If the result is 4 or more than its Effectiveness Rating, the unit loses 1 strength point and retreats the required number of hexes (see 13.32). The self-rally die roll is modified by the following:
| Modifier | Condition |
|---|---|
| –# | the unit's Effectiveness Modifier (1, 2 or 3) |
| –1 | if it is adjacent its Brigade Leader |
| –1 | if it is an artillery battery |
| –1 | if stacked with or adjacent to another unit bearing the same brigade or regimental designation |
| +1 | if it is in a woods or town/village hex |
| +2 | if the unit is within 4 hexes of an Enemy unit |
When rallied, the Routed marker is immediately flipped to its Disordered side. Therefore, a formed unit requires two game-turns to recover good morale. A Routed artillery or cavalry unit may rally only in clear terrain. A Routed infantry unit may be rallied in any terrain. After all eligible units have rallied, the owning player must retreat the remaining Routed units which failed to rally, 3 or 6 hexes (see 13.31).
14.0 Army & Corps Morale and Demoralization
Army or Corps Morale levels are a way of measuring the willingness of each army to continue the battle as it endures losses. In some scenarios, the Corps or Army Morale Levels are a factor for adjusting the level of victory. In each scenario the starting morale totals are indicated by the Morale Total markers on each side's Army or Corps Morale Level Tracks (see the map and separate scenario cards). During the game, these Morale markers are adjusted to reflect changes in the Morale levels from the loss of combat units, command units, and routed and rallied units. When its Morale Level reaches zero, the Army or Corps may become Demoralized. Note that Prussian Corps Morale is separate from the Russian Army Morale with the Prussian markers placed on the Allied Morale Track to monitor their morale level.
14.1 Adjusting Army and Corps Morale Levels
As a player's army or corps incurs unit losses and routs, the morale totals are decremented by the appropriate value. As the army recovers routed units, the level is increased by the appropriate value.
[14.11] Morale Points for Unit Eliminated, Routed, and Rallied
The owning player's Army or Corps Morale Record total is immediately reduced for each Friendly battalion, cavalry regiment, and artillery battery which is reduced to half, eliminated or routed. When this occurs, Morale Points are subtracted from the appropriate Morale Track. For each routing unit that rallies, Morale Points are added back to the appropriate Morale Track. The number of Morale Points which are gained or lost for units reduced, eliminated or routed will be specified in each scenario's special rules. Note: If a unit routs off the map, the unit is considered eliminated and becomes a loss of morale points. Units that Disorder have no effect on Morale levels.
[14.12] Morale Points for Command Units
Depending on the scenario, the Army or Corps Morale total may be reduced for each command unit reduced. The number of Morale Points which are lost for each command unit reduced will be specified in each scenario's special rules.
[14.13] Morale Points for Geographical Objectives
There may be geographical objectives which both armies may gain Morale Points for occupying. These objectives are included in the Initial Morale Point total for both Armies or Corps if applicable and will be described in the scenario rules.
14.2 Corps and Army Demoralization
[14.21] Army or Corps Demoralization Determination
On any Game-turn Interphase in which an Army's or Corps' Morale total is at zero or less the owning player rolls a die; if the die roll result is equal to or less than the negative value of the Morale Total, the Army or Corps is determined to be Demoralized.
[14.22] Effects of Army or Corps Demoralization
Once declared "Demoralized" the combat units of the demoralized army or corps generally suffer the following effects:
- All combat units have their Effectiveness Rating permanently reduced by one (1).
- A unit that is Routed and attempts to self-rally may not receive any Leader benefit die roll modifiers for self-rally (see 13.42.B).
The Scenario rules describe any additional effects of Demoralization to units, possible affects on victory conditions, and rules specific to the scenario.
[14.22] Effects of Army or Corps Disintegration
(Numbered 14.22 a second time, as printed.) The Scenario rules will indicate if Army or Corps Disintegration is used in the scenario and what effects Disintegration has on units and victory conditions (see Playbook for the Scenarios).
15.0 Brigade Fatigue
Fatigue is measured at the brigade level and represents the toll on combat units resulting from continuous movement and combat operations. A brigade's Fatigue Level is measured in accrued Fatigue Points and is directly proportional to the amount of time that a brigade is committed to movement and combat. In general, a brigade's Fatigue Points will increase by one for each hour committed to the battle. Additionally, cavalry units add Fatigue points to their brigade's Fatigue Point total for one or more cavalry charges executed within the same hour.
15.1 Tracking Brigade Fatigue
The Brigade Commitment/Fatigue Display is used to track brigade commitment and Brigade Fatigue levels. Each Brigade has as a box for its brigade leader and an attached box to keep track of its Brigade Fatigue Points and Fatigue Level. At the beginning of each scenario all non-activated brigade (and divisional) leaders are placed in their appropriate box on the BC/FD per each scenario's setup (see Scenarios 20.0).
Fatigue Points – Fatigue Points range from values of 1 to 8. Players will increase the Fatigue Points of each committed brigade by a value of one during each hourly turn that a brigade is active. This is done by placing a colored numbered "fatigue chit" in the brigade's Fatigue Level box.
Fatigue Levels – Fatigue Levels are a stratified measure of accumulated Fatigue Points and indicate at each level the effects of increasing fatigue. There are three Fatigue Levels indicated by the colors on the Fatigue Point chits; 0: Green (Fresh), 1: Yellow (Fatigued), and 2: Red (Exhausted). See Brigade Fatigue Level Table below.
[15.11] Brigade Fatigue Accrual
- Accrual of Fatigue Points for all committed brigades occurs at the beginning of the Brigade Fatigue Accrual & Recovery Segment of each Hourly Game-turn Interphase. For each committed brigade (16.14), increase the value of the fatigue chit in the brigade's Fatigue Level box by one, (place a green '1' chit in any empty Fatigue Level box).
- The Fatigue Points of a committed brigade does not accrue above 3 (Fatigue Level 0) until a unit of the brigade engages in any of the following:
- engages in Shock Combat or executes infantry Fire combat
- executes a Cavalry charge
- performs a Routed retreat
[15.12] Brigade Fatigue Recovery
At the end of the Brigade Fatigue Accrual & Recovery Segment of each Hourly Game-turn Interphase, any brigade currently not committed (its leader is not activated and on the BC/FD), may subtract up to 3 Fatigue Points from the brigade's Fatigue Point total. Adjust the Brigade's Fatigue Level if the decrease in Fatigue Points causes a change in the Fatigue Level. Note: A brigade's Fatigue Points value may never be reduced below 2.
15.2 The Effects of Brigade Fatigue
Only infantry and cavalry combat units are affected by its brigade increase level of Fatigue. A combat unit's current Effectiveness Rating and capability are modified in according to the following Fatigue Levels:
| Fatigue Level | Chit Color | Fatigue Points | Fatigue Status | Effect |
|---|---|---|---|---|
| 0 | Green | 1–4 | Fresh | No effect |
| 1 | Yellow | 5–6 | Fatigued | –1 to unit's Effectiveness Rating |
| 2 | Red | 7–8 | Exhausted | –2 to unit's Effectiveness Rating; must pass morale check to attempt Shock Combat |
Note: The above Fatigue Effect modifiers are in addition to other Shock Combat and Morale check modifiers.
(Source illustration caption for 15.1: Fatigue chit; 5 Fatigue Points at Level 1.)
[15.21] Cavalry Charges and Fatigue
Cavalry units add one Fatigue point to their brigade's Fatigue Point total for any cavalry charges executed. One fatigue point is added if any or all units of the brigade conduct one or more charges during the previous hourly game-turn. Cavalry charges by separate units of the same brigade during the same hourly period adds only one to the brigade's Fatigue Point total. Players indicate that a unit has charged by placing a charge marker in its brigade's fatigue box. During the Game-turn Interphase, one additional Fatigue Point is added to its Fatigue Point Level and the charge marker is removed.
[15.22] Attack Orders Affect on Fatigue
At the conclusion of an Attack Order, voluntarily or involuntarily, Brigades which were part of a formation that was under an Attack Order must add 2 to their Fatigue point total (see 17.76.B).
16.0 Command Units
Battlefield management of formations in Winter's Victory is accomplished through Command units of the various command levels of each army. Each Command unit in the game represents the named leader and his staff for the various formations. Command units are not combat units and have no combat strength. While combat units may benefit from being stacked with a Command unit for morale and combat purposes, a Command unit's primary function is to maintain control of combat units within a chain of command.
16.1 Command Unit Overview
There are four basic types of Command units used in Winter's Victory: Army Commanders, Corps Commanders, Division Leaders and Brigade Leaders. Additionally, an army may also have a number of special command unit types which may be game or scenario specific as described in either exclusive or scenario rules. These Command units, although of various types (see 16.2) share many characteristics, capabilities and states.
[16.11] Command Units and Movement
Command units may enter any hex at a cost of one Movement Point regardless of terrain type entered or crossed. Command units automatically assume the movement of any combat unit it is stacked with and may employ Grand Tactical Movement and Road Column (see 6.6).
[16.12] Command Rating/Command Radius
All Command units have a Command Rating which is equal to its printed Command Radius (2.34). When used as a Command Radius, the value indicates an area centered on the Command unit out to a maximum distance (in hexes), within which the Command unit will exert influence.
To exert this influence, paths must be traced from the Command unit out to the receiving Command or Combat unit. While terrain has no effect on this distance, the presence of enemy units, and their Minimum Range Fire Zones, do block the path of a friendly trace. Note: uncrewed enemy artillery batteries are ignored.
When used as a Command Rating, the value serves as a comparison value against a die roll to determine success or failure when attempting to execute certain Command & Control activities and functions (see Command & Control, 17.1).
[16.13] Command Bonus
Some Command units possess a printed Command Bonus (see 2.34) that favorably modifies certain die rolls when attempting to execute a Command & Control activity. This bonus exists for certain historical figures who showed better than average command abilities and is not associated with its type of Command unit. The Command Bonus will be used as a modifier during the following Command & Control activities:
- Involuntary Change of Command State; Mobilized to Standing (17.63)
- Order Delivery and Activation Delay checks (see 17.35)
[16.14] Active/Inactive Command Units and Brigade Commitment
All Command units are either Active or Inactive (Exception: Army Commanders are always Active). An Active Command unit is fully operational and can execute all available Command & Control activities. An Inactive Command unit may not move, execute or provide any Command & Control activities (except to receive an order). However, it still projects a Command Radius (if on the map). This Active/Inactive state is indicated differently based on the Command unit type.
- A Division or Brigade Leader is an Active leader if it is on the map, regardless of any other command state or condition. An Inactive leader is a leader on the BC/FD.
- A Corps/Wing or Detachment Commander that is on the map and is stacked with an Inactive marker is Inactive and remains so until it is activated by a Received Order (see 17.5).
Changing a Command unit from Inactive to Active, and vice versa, is a Command & Control activity (see 17.4 and 17.5).
In order for a brigade's combat units to be In Command, their brigade must be Committed (see 17.52). A brigade is Committed when its Brigade Leader has been Activated and present on the map (see 17.4). Note: Committed brigades are subject to Brigade Fatigue (see 15.1).
[16.15] Command States
Army Commanders, Corps Commanders and Division Leaders display a Standing state on the front side and a Mobilized state on the reverse side; henceforth referred to as their "Command State". The Standing side has an extended Command Radius with reduced movement; represents the commander and his staff establishing their presence at a fixed location. The Mobilized side, has a reduced Command Radius with greater movement ability; representing those same leaders and staff mounted to move to a new location. Changing a command unit's Command State is a Command Activity (see 17.6).
[16.16] Command Control
All Division and Brigade Leaders, and combat units are subject to Command Control limitations. In order for leaders and combat units to be fully effective, they must be In Command (see section 17.1).
[16.17] Displacement - Proximity to Enemy Units
If a Command unit is alone in a hex and an enemy unit moves adjacent to it, the Command unit is immediately displaced to the nearest friendly unit or any hex up to three hexes away from its current location as long as it is closer to a friendly unit in its command or another friendly command unit.
[16.18] Morale/Rally Benefits
In addition to Command & Control capabilities, a non-reduced Command unit may provide a morale benefit when stacked with a friendly unit (see 13.13), and Routed units may require a Command unit in order to rally (see 13.4). Scenario special rules may give Command units additional capabilities.
16.2 Commanders and Leaders
The four basic types of Command units are classified into two functioning levels: Commanders (Army Commanders and Corps Commanders) and Leaders (Division Leaders and Brigade Leaders). The primary difference between Commanders and Leaders is their ability to issue orders. Commanders can issue orders on their own initiative, subject to unit type characteristics. Division Leaders can only issue orders if they themselves have received an order (under an Order Received marker), while Brigade Leaders never issue orders.
(Counter illustrations: COMMANDERS — Army Commander, Corps Commander (Standing/Mobilized sides); LEADERS — Division Leader (Full and Reduced, each with Standing and Mobilized sides), Brigade Leader (Full/Reduced).)
[16.21] Army and Corps Commanders
Army and Corps Commanders represent leaders of higher command levels; denoted by their portrait on the counter. Army Commanders provide command control for corps and divisions within their respective armies. Corps (Wing) and Allied Detachment Commanders provide command control for divisions or brigades within their respective commands.
The French Commanders are comprised of the French Army Commander (Napoleon) and all French Corps Commanders.
The Allied Commanders are comprised of the Allied Army Commander (Beningsen), Wing Commanders (Left, Center, Right, and Reserve Commanders, and the Detachment Commanders (Reserve Horse Artillery Commander, the Left and Right Cavalry Reserve Commanders, and the Left and Right Rear Guard Commanders).
The Prussian Commander is represented in the game as a special Corps Commander (L'Estocq).
[16.22] Division Leaders
Division Leaders provide command and control for brigades (or individual units) under their level of command within their command radius. Division Leaders are denoted by a flag symbol along with their divisional designation. Division Leaders are represented by two counters; one for its full capacity and another for its reduced capacity due to leader loss from combat (both have a Standing side and a Mobilized side).
[16.23] Brigade Leaders
Brigade Leaders provide command and control for their subordinate combat units. Brigade Leaders are denoted by a golden badge (Imperial Monogram) symbol along with their brigade designation. Brigade Leaders are represented by a single counter; one side for its full capacity and the flip side for its reduced capacity due to loss from combat (see 2.35 and 19.44).
16.3 Command Designations and Chain of Command
Each Leader and Combat Formation has a unit Command Designation printed on both sides of its counter. The Command Designation indicates the initial command structure within the Army: (Corps, Division, Brigade, Battalion etc.). Each combat unit is uniquely tied to its chain of command by its command designation (See 2.4 Definition of Terms, Unit & Command Designation). The chain of command is depicted in the Brigade Activation/Fatigue Displays; one for the French and one for the Russians/Prussians. These charts define each army's chain of command in effect at the start of the battle on the 8th and are also used to manage Brigade Activation/Deactivation and Brigade Fatigue Levels.
[16.31] Command Chain
For both armies, each infantry battalion and cavalry regiment unit is subordinate to its Brigade leader which bears the same Command Designation. Each brigade leader is subordinate to his division leader bearing the same division designation. Each division leader is subordinate to his Corps (French) or Wing (Russian) commander. Each Corps or Wing commander is subordinate his Army commander (Napoleon for the French Army, Bennigsen for the Allied Army). Army and Corps/Wing commanders are the originating source of various Command & Control activities, such as voluntarily activating brigades and division leaders and issuing General Orders and Attack Orders. Per the exclusive or scenario rules, there may be additional command types or rules that modify or redefine the normal chain of command for one or both armies. Some of these may include the following:
- Detachments and/or Independent Commands: Command units that operate independently from the Command Chain.
- Attachments: Command units that operate within the Command Chain via a different superior Command unit.
- Special Commands: Command unit types created for a special or unique function are inserted into the usual Command Chain for their particular purpose.
[16.32] Allied Army Commands
Wing Commanders: In the Allied Army the Wing and Reserve Commanders are all directly subordinate to the Army Commander; for the Russian Army they act as "Corps Commanders". Only the Prussian Corps (L'estocq) Commander is independent; acts as if he is stacked with a Received marker. Bagration is an ad hoc special Army Commander whose status is different depending on the scenario, (See 19.53 Bagration).
Detachment Commanders: Russian Detachment Commanders, including Cavalry Reserve and Artillery Reserve Commanders, are normally subordinate to the Russian Army Commander, but may be "attached" to Wing Command. Detachment Commanders act as "independent" division leaders that have brigades attached to them and may operate semi-autonomously (see 19.51).
Division Leaders: Russian Division leaders are normally subordinate to the Army Commander. However, if Wing and Reserve Commanders are present or part of the scenario, they then become subordinate to a Wing or Reserve Commander (see 17.11).
[16.33] French Commands
Corps Commanders: In the French Army, all Corps Commanders are directly subordinate to the Army Commander (Napoleon). Corps Commanders not starting on the map are considered "independent". Once on the map, a Corps Commander acts as any other Corps command unit.
Division Leaders: French Division Leaders are normally subordinate to the Corps commander bearing the same Command Designation unless detached or designated "independent" per any special scenario rules.
17.0 Command & Control and Command Activities
At the Battle of Eylau two different command systems clashed. Both Russian and Prussian armies still operated under what had been the "Prussian System" since Frederick the Great. The French had a new structure, born out of the French Revolution and was more innovative and egalitarian. In the Russian Army, social ranking often superseded military competency. Whereas the French Army's merit based system gave greater transparency and respect among its officers that the Russians did not often arise to. Another advantage the French army enjoyed was the relatively higher level of education among the general population, which meant that their NCOs — the backbone of any army — were generally of a higher caliber than most of their opponents. The game attempts to capture these two systems, and to somewhat reflect the difficulty in getting orders issued and acted upon.
17.1 Command & Control
Command Control simulates the rigid control leaders had over the combat formations attached to them. In order to operate normally; ie., move, change facing or formation, or to initiate Shock Combat, a formed infantry, cavalry, or artillery unit must be In Command. Skirmish units, units in General Order, Disordered, and Routed units are always considered In Command. A unit that is not In Command is said to be Out of Command.
[17.11] How and When to Determined Command & Control
Combat Units: In order to be In Command, a formed infantry or cavalry unit must be part of a brigade that is currently committed (see 17.52) and, a) be within the Command Radius of its Brigade Leader or, b) stacked with any leader from the same army or, c) be adjacent to a combat unit of the same brigade or regiment that is itself In Command. Note: Leaders being used to determine command control for combat units need not be In Command themselves.
- A formed unit that has only a division or corps designation is In Command if: a) it is within the Command Radius of a command unit which has the same division and corps designation, or c) it is stacked with any leader of the same army or d) the command unit he is subordinate to is in its Mobile Command State.
- An artillery unit is In Command if: a) in limbered formation, or b) it is within the Command Radius of a command unit to which it is assigned to or bears the same Division or Corps designation, or c) it is stacked with any leader of the same army or d) the command unit he is subordinate to is in its Mobile Command State.
A Combat unit that is In Command at the start of its friendly Movement Phase is In Command for the duration of that phase. During other phases, a unit's command status is determined at the moment it is required (players may wish to place an Out of Command marker on units that are Out of Command, but most of the time this will not be necessary).
Corps (Wing): Activated Corps (Wing) Commanders are always considered to be In Command. Their current Command State determines how they can move (see 17.63).
Division and Brigade Leaders: The command status of an activated Division and Brigade Leader is determined during the Command Status Segment of the Phasing Player's Movement Phase. A Division or Brigade Leader is deemed In Command under the following circumstances:
- A Division Leader is In Command if it is within the Command Radius of the Corps Commander with the same Corps Designation (or one he is assigned to), or if he is in his Mobile Command State.
- A Brigade Leader is In Command if (a) it is within the Command Radius of the Division Leader with the same Divisional Command Designation (or any Division Leader or Commander he is assigned to), or (b) if the Division Leader (or Detachment Commander) he is subordinate to, is in his Mobile Command State.
- A Light Cavalry Brigade Leader (with LC) is In Command if (a) it is within 2x the Command Radius of the Division Leader or Corps Commander to which it is subordinate to, or (b) if the Division Leader or Corps Commander which he is subordinate to is in his Mobile Command State.
Place an Out of Command marker on those leaders that are determined to be Out of Command.
[17.12] Effects of Being Out of Command
Combat Units: A combat unit that is Out of Command is under the following restrictions:
- A combat unit may not change its facing or formation unless it first makes a morale check. If the morale check fails the action simply does not occur; the unit does not Disorder or Rout.
- A combat unit may not move (exception, see 17.13).
- A combat unit may not initiate Shock Combat.
- A cavalry unit may not initiate a cavalry charge (but may initiate an Opportunity Charge).
- An unlimbered artillery battery may not change its formation (limber). Note: a limbered Out of Command artillery unit may still move and unlimber.
Note: Being Out of Command does not affect a unit's ability to conduct fire combat or defend against a charge or Shock Combat. Units that are Out of Command must still perform all morale checks when required to do so regardless of the circumstances.
Brigade Leaders: During the Movement Phase, a Brigade Leader that is Out of Command may not move (exception: 17.13 and Optional Rule 21.81).
Division Leaders: An Out of Command Division Leader that moves, may move only to a hex that is closer to the commander he is assigned to.
[17.13] Movement Exceptions for Units that are Out of Command
During the Movement Phase, a combat unit or Brigade Leader that is Out of Command may move only if the command unit it is subordinate to does not move during the same Movement Phase. If an Out of Command unit does move, it must end its movement at least one hex closer to the command unit it is subordinate to or, if that command unit is not available, then to the next higher command unit within it's chain of command).
[17.14] Combat Units Exempt from Command Control
The following units are exempt from any command control restrictions:
- Skirmish companies
- Units in General Order (when occupying a town/village or woods hex)
- Artillery crews (not stacked with their artillery unit)
- Disordered and Routed units
17.2 Army Commanders, HQs and Command Points
Both Army Commanders receive and employ Command Points. As an abstraction; the number of Command Points and how they are used somewhat represents the capabilities of each army's command structure, staffing efficiency and the commander's ability to transmit orders to lower level leaders in a complex and chaotic environment.
Army HQs and the expenditure of Command Points represent the command & control capabilities of each Army. While Army Commanders can move about the battlefield and issue orders directly to subordinates, they are much more efficient when sending orders through a well staffed Army HQ.
[17.21] Receiving Army Command Points
During the Army Command Points Addition Segment each hourly turn, both armies receive Command Points. For the French Army, the number of CPs is reset; any remaining CPs from the previous hour are lost. For the Allied Army, the new CPs are added to any remaining CPs on the Allied CP Track.
French: The French army receives 6 CPs if Napoleon is in command. If Napoleon suffers Leader Loss, no Command Points are received (see 19.81).
Allied: The Allied army receives 3 CPs if Bennigsen is in command. The 3 new CPs are added to the Allied Army's CP point total up to a maximum of 5. If Bennigsen has suffered a Leader Loss, only 2 CPs are received (19.81.B). Even if the replacement Army Commander has not been identified yet, the Command Points are still received (see 19.81.B).
[17.22] Using Army Command Points
Command Points are expended by Army Commanders to conduct command activities or used to keep command units in their Mobile Command State. In order to spend CPs, Army Commanders must be stacked with or adjacent to their respective Army HQs.
A Command Point must be expended for any of the following activities:
- Whenever an Army Commander issues Orders while at his HQ (17.32)
- Whenever an order is sent as an Urgent Order (see 17.35)
- To exempt a Command unit from making a required Command State Continuance Check (see 17.64)
[17.23] Army Headquarters
An Army HQ is not a unit; once placed per scenario setup, it never moves nor retreats. It must be attacked by Shock Combat for an enemy unit to enter the hex it occupies (It has an intrinsic value of 2 SPs and defends as a skirmish unit). If the hex containing the Army HQ is occupied by an enemy unit, it is considered "suppressed" and may no longer act as a Headquarters (see Exclusive or Scenario rules for the effects on an army's HQs when it is suppressed).
17.3 Issuing and Receiving Orders
Some Command activities require an Active Command unit to have "received" an Order. An Order is an abstract command device issued by a higher level command unit which allows a receiving subordinate commander or leader to become Activated and/or engage in one or more Command Activities. Orders are sent through the Order Delivery process. When an order has been successfully delivered, the command activities allowable by the receiving leader, may be implemented.
Note: An Attack Order is special type of order that will allow the combat units of a division or corps a temporary increase in attack and morale capabilities (see Attack Orders 17.7).
[17.31] Activities Requiring Orders
A command unit must have an Order Received marker to implement the following Command Activities:
- Voluntarily Activate (see 17.41)
- Issue orders to subordinate command units (see 17.32)
- Voluntarily change Command State; Standing to Mobilized (see 17.61)
- Initiate a Divisional or Corps Attack Order (see 17.7)
[17.32] Issuing Orders
Active command units may issue orders to subordinate command units. A command unit is not required to be "active" to receive an Order. A command unit will automatically activate when the order is received (see 17.4). Orders are issued during the Activity Segments of each player's Command Phase based on the command unit type:
Army Commander (at HQ): While in the same or adjacent hex as its Army Headquarters, an Army Commander must use Command Points to issue Orders, if available. It costs 1 CP to issue an Order to any subordinate command unit. In addition, it cost 1 CP to issue an Attack Order (see 17.7), and/or 1 CP to make an order "urgent" (see 17.35). If there are no CPs, the Army Commander may still issue an order, but does so as if not at his HQ (see below).
Army Commander (not at HQ): When not in the same hex as his Army HQ or if there are no CPs available, an Army Commander may issue one Order to a Corps Commander, or Division Leader, or Brigade Leader that is within his Command Radius, An Army Commander may issue a Attack Order only if he is in the same hex as a Corps Commander or Division Leader.
Corps / Wing Commander ...
- ... with an Order Received Marker can issue orders to one or more direct subordinate leaders or one order to a single subordinate two levels below.
- ... without an Order Received Marker can issue an order to only one direct subordinate but must currently be in his Mobile Command State.
Division Leader ...
- ... with an Order Received Marker may issue orders to one or more Brigade Leaders subordinate to him.
- ... without an Order Received Marker may issue an order to only one Brigade Leader but must currently be in his Mobile Command State.
All orders must use the Order Delivery and Activation Delay procedure when they are issued (see 17.34).
[17.33] How a Commander's Command State Affects Issuing Orders
A Command unit's current Command State affects its ability to issue orders in the following ways:
- A Command unit that is in its Standing Command State may issue up to 3 orders during its Command Phase.
- A Command unit that is in its Mobile Command State may issue only 1 order and the receiving leader must be within the sending Command unit's Command Radius. (Exception: see 17.71.)
[17.34] Order Delivery
Orders are not always automatically received; delay may occur or even be ignored due to distance and/or "the fog of war". This delivery status of an order is determined by a single die roll on the Order Delivery Table (see the Order Delivery player aid card). There are three types of order delivery results: Received, Delay 1 Turn, and Ignored. A Command unit that has successfully "received" an order has an Order Received marker is placed on it. An order sent at longer distances may be delayed initially by up to three levels (turns); depending on the length of the delay, the receiving Command unit will be marked with a Delay 1, Delay 2, or Delay 3 marker.
An order's delivery outcome is predicated on the proximity of the sending command unit to the receiving command unit. It may be determined upon sending (if within the command unit's Command Radius) or on a later turn during the Delay Marker Delivery Check Segment.
Relative to the Sending Command Unit, the order delivery outcome is based upon the Receiving Command unit being...
- ... in the same location: An order is automatically received if the Sending Command Unit is in the same hex as the Receiving Command Unit. Immediately place an Order Received marker on the Receiving Command unit. Note: No die roll on the Order Delivery Table required.
- ... within the Sending Command Unit's Command Radius: An order is immediately determined by a die roll on the Order Delivery Table when the Receiving Command Unit is within the Command Radius of the Sending Command Unit. If the result is Received, an Order Received marker is placed on the unit. If Ignored, the order is discarded and no marker is placed. If the result is Delay 1 Turn, a Delay 1 marker is placed on the Receiving Command Unit.
- ... beyond the Command Radius: An order is automatically delayed if the Receiving Command Unit is beyond the Command Radius of the Sending Command Unit. The level of delay is determined by distance. For each Command Radius distance (or fraction thereof) beyond the initial Command Radius, 1 Delay level is added; up to a maximum of 3 levels. Place the appropriate Delay 1, 2, or 3 marker on the Receiving Command Unit. Note: No die roll on the Order Delivery Table, the order delivery check will occur in subsequent game-turns (see 17.35).
Note: Because inactive Division and Brigade Leaders are on their respective Brigade Commitment/Fatigue Displays (BC/FDs) at the time orders are issued to activate them, any combat unit subordinate to the receiving leader may be used to calculate the distance for the order's initial delivery state.
[17.35] Order Delay Resolution (Delay 1, 2, 3 and Ignored)
During each Delay Marker Delivery Check Segment of the phasing player's Command Phase, Command units with Delay markers are checked in the following order:
- For each Command unit with a Delay 1 marker, the player rolls a die on the Order Delivery Table. If the modified result is Received, the Delay 1 marker is flipped to its Order Received side. If Ignored, the order is discarded and the Delay marker is removed. If the result is Delay 1 Turn, the Delay 1 marker remains on the command unit.
- Command units with Delay 2 or Delay 3 markers are reduced to Delay 1 or Delay 2 respectively.
- When activating Brigade Leaders, Ignored results are treated as Delay 1.
- For each turn (after the initial order delivery check) that an order remains at Delay 1, a –1 modifier per turn is applied to subsequent rolls. Strength chits markers may be used to indicate the current modifier.
Additionally, the result of the Order Delivery may be affected by one or more of the following die roll modifiers:
| Modifier | Condition |
|---|---|
| – # | the receiving command unit's Command Bonus |
| –1 | the receiving command unit is a French Brigade Leader |
| –1 | the sending command unit is stacked with an Attack Order or an Order Received marker |
| –2 | the sending command unit is adjacent to the hex that the receiving leader (or one of its combat units) is in |
| –2 | if an additional CP for "urgent" is used to send an order |
| –2 | the order is sent from the Army HQ or from the Army Commander |
Order Delivery Modifier Explanations
If an order is not "Received" on the initial delivery result, players may place a marker (i.e., strength marker) with the Delay marker as a reminder of one or more the modifier during subsequent Order Delivery die rolls.
Urgent Orders: Army Commanders may spend one additional CP to make an order urgent, providing a –2 modifier on the Order Delivery Table.
Command Unit is an Army Commander: If the sending command unit is an Army Commander, or from the HQ (using a CP), the order delivery die roll has a –2 modifier.
[17.36] The Effects of Received Orders
When orders are received, command units become subject to a variety of required effects and capabilities. These can vary by command type.
- When an on-map "Inactive" Command unit is stacked with an Order Received marker, it immediately becomes active (see 17.5).
- If the order is also an Attack Order, then the receiving Command unit may adopt those Attack Orders per 17.7.
- If the receiving Command unit is in its Standing Command State, it may voluntarily switch to its Mobilized Command State (see 17.61). Doing so removes the Order Received marker.
The sequence of receiving an order occurs at different segments during the Command Phase for different Command unit types. Each Command unit type is affected as follows:
Brigade Leaders: During the Brigade Leader Activation Segment any Brigade Leader on the BC/FD stacked with an "Order Received" marker must activate (see 17.52).
Division Leaders & Corps Commanders: Other than activating (17.51 & 17.52), when a Corps Commander or Division Leader receives an order, it is not required to implement any activity allowable from the Order Received during their respective Activity Segments. Instead, it may retain the Order Received marker and delay implementing any of its Command capabilities (see 17.41). Retained orders are considered "in pocket", and may be retained until used.
17.4 Command Activities
Army Commanders, as well as active Corps, Wing and Detachment Commanders, and Division Leaders must conduct certain command activities during their respective Activity Segments as designated in the Sequence of Play. For Commanders and Division Leaders, command activities generally consist of issuing orders, and/or changing their Command State.
[17.41] Command Activities Segments
Each of the following Active Commanders and Leaders have different command capabilities and limits during their respective Activity Segments:
Army Commander Activity: An Army Commander may, a) freely change his Command State from Standing to Mobilize or Mobilize to Standing (17.62), b) issue orders (up to his limit) to subordinate Corps Commanders, Division Leaders, and Brigade Leaders (17.22 & 17.32). If he is at or within his Command Radius of the Army HQ, a CP is required for each order issued. If not at his HQ (or the HQ has no CPs), he may issue an order but with limitations (see 17.33).
Corps Commanders: A Corps Commander with an Order Received marker may, a) issue orders to one or more subordinate Division Leaders or to one Brigade Leader (see Issuing Orders 17.32) and, b) change his Command State from Standing to Mobilize or Mobilize to Standing. If his Command State change is implemented, the Order Received marker is removed.
A Corps Commander without an Order Received marker may
- issue an order to one subordinate Division Leader.
- change his Command State from Mobilize to Standing (see 17.62).
Note: The Activity Segment for a Wing/Reserve Commander is the same as that of the Corps Commander.
Division Leader Activity Segment: An Active (on-map) Division Leader stacked with an Order Received marker may, a) send orders to activate his Brigade Leaders (17.32) and/or, b) change his Command State from Standing to Mobilize (17.62). If the Command State change action is implemented the Order Received marker is removed.
A Division Leader without an Order Received marker may
- issue an order to one subordinate Brigade Leader only if in his Mobile Command State (see 17.32).
- change his Command State from Mobilize to Standing (17.62).
Note: Brigade Leaders have no Activity Segment, they issue no orders and are either active or inactive (on the map or on the display).
17.5 Command Unit Activation and Deactivation
Command unit activation occurs during the phasing player's Command Phase. Each activation attempt requires an Order to be Issued from an Active higher-level Command unit (17.3). Corps (Wing) Commanders and Detachment Commanders that begin inactive on the map activate differently than Division and Brigade Leaders that begin inactive on their army's Brigade Commitment/Fatigue Display (BC/FD). Note: It is possible for a Command unit to become Activated involuntarily.
[17.51] Corps/Wing and Detachment Commander Activation
Corps/Wing Commanders and Allied Detachment Commanders are always on the map; if Inactive, they are Activated the first time they successfully receive an Order Received marker.
[17.52] Division and Brigade Leader Activation & Placement
Division and Brigade Leaders, that are Inactive will be on their army's Brigade Commitment/Fatigue Display (BC/FD). During the Brigade & Division Leader Activation Segment the owning player must activate any inactive Brigade and Division Leader that is stacked with an Order Received marker. When Division and Brigade Leaders become activated, they are removed from their holding spaces on the BC/FD and placed on the map with the following restrictions:
Brigade Leaders: When a Brigade Leader is activated (voluntarily or involuntarily), it is placed on any combat unit of its brigade and its brigade becomes immediately committed (see 16.4 and 15.1). When voluntarily activated, the Order Received marker is removed.
Division Leaders: When a Division Leader is activated it is placed on the map in its Standing Command State on or adjacent to any subordinate leader or combat unit. A Division Leader retains the Order Received marker when it is activated voluntarily. If activated involuntarily, it is placed on the map (or the Inactive marker is removed) without an Order Received marker.
[17.53] Involuntary Activation
At any time during the Game-turn, a Brigade Leader may activate under any of the following circumstances:
- the instant an enemy Combat unit comes to within 4 hexes of any Combat unit belonging to the brigade.
- the instant any Combat unit belonging to the brigade is fired upon and required to make a morale check. Exception: units fired on at extended range does not cause involuntarily activation (11.23).
At any time during the Game-turn, a Brigade Leader must activate under any of the following circumstances:
- the instant any combat unit belonging to the brigade is subjected to a shock attack or is in an Enemy Cavalry Charge Zone.
- the moment any combat unit of the brigade enters the map as a reinforcement.
An Inactive Division Leader must be activated whenever a Brigade Leader, that is subordinate to it, becomes activated voluntarily or involuntarily. Corps Commanders are never activated involuntarily.
[17.54] Brigade and Division Leader Deactivation
Only Brigade Leaders and Division Leaders deactivate; Corps Commanders and Allied Detachment Commanders, once activated, never deactivate. When Brigade or Division Leaders are deactivated, they once again become Inactive and returned to their respective space on their BC/FD.
Brigade Leader Deactivation: A brigade leader may be deactivated only during the Brigade and Division Leader Deactivation Segment (the Hourly Game-turn Interphase). Upon deactivation remove the Brigade Leader counter from the map and place it in his Brigade Leader space on the Brigade Commitment/Fatigue Display. Note: A Brigade is no longer committed once its Brigade Leader is deactivated. Do not adjust any Fatigue points on the display at this time (see 15.1).
The owning player may deactivate any of his active infantry or cavalry brigades which meets all of the following requirements:
- all non-eliminated battalions/regiments of the brigade must be In Command (17.1) and may not be Routed
- the Brigade Leader must be In Command
- no unit of the brigade may be within 6 hexes of an enemy unit
- French Light battalions which have been broken down, must have at least 1/3 (rounded up) of their original troop strength for the brigade to which they belong to deactivate.
A Brigade Leader which has lost all of its combat units automatically deactivates and is immediately removed from the map. The brigade leader is considered retired (not reduced).
Division Leader Deactivation: A Division Leader must be deactivated if all the Brigade Leaders subordinate to it are inactive; i.e, have deactivated or retired from the game. When this occurs, simply remove the Division Leader and returned it to its respective space on the BC/FD.
17.6 Command State Management
Army Commanders, Corps Commanders, Division Leaders and Allied Detachment Commanders are always in one of two Command States: Standing or Mobilized. The Standing side has an extended Command Radius with limited movement ability. The Mobilized side has a reduced Command Radius but greater movement ability (see 16.21).
[17.61] Change of Command State: Standing to Mobilized
A command unit may change its Command State from Standing to Mobilized only during its Activity Segment of the friendly Command Phase and to do so the Command unit must be stacked with an Order Received marker (17.36). The Order Received marker is removed when the command unit changes its Command State from Standing to Mobilized.
Note: An Army Commander may always change his Command State voluntarily (no Order Received marker or CP required).
[17.62] Change of Command State: Mobilized to Standing
A Command unit may change its Command State from Mobilized to Standing during its Activity Segment of the friendly Command Phase or during the Command State Change Segment of its Movement Phase. No Order Received marker is necessary.
[17.63] Involuntary Change of Command State
During the Command State Continuation Segment of the Game-turn Interphase both players must check the Command State status of the following command units that are in their Mobilized Command State:
Allied: Each Wing Commander and Detachment Commander, and activated Division Leaders.
French: Each Corps Commander and activated Division Leader, and any "independent" Division Leader.
For each command unit requiring a Command State Continuation check, the owning player rolls a die and applies the following die roll modifiers:
| Modifier | Condition |
|---|---|
| – # | the Command unit's Command Bonus |
| +1 | if a Corps or Wing Commander; for each subordinate Division Leader not within his Command Radius |
| +1 | if a Division Leader; for each subordinate Brigade Leader not within his Command Radius (a Brigade Leader on the BC/F Display or which has been "retired" is considered not to be within his Command Radius) and... |
| +2 | for each subordinate Brigade Leader not within 2x his Command Radius |
| +2 | if making a check during an Evening Game-turn |
| –1 | if a Division Leader (non-independent) and is within the Command Radius of the Corps/Wing Commander which he is subordinate to or... |
| –2 | the Corps/Wing Commander to which he is subordinate to is stacked with a CP or remains Mobilized |
| –2 | if a French Light Cavalry Division Leader (LC) |
| –2 | if the Command unit is under an Attack Order |
If the result is greater than the command unit's current Command Rating, the Command unit immediately goes to Standing (flip the Command unit to its Standing side). All Corps (Wing) Commanders check first. Remove all CP markers at the end of the phase.
[17.64] Command State Continuation Check Exemptions
Any Corps (Wing) Commander, Detachment Commander, and Independent Division Leader may be exempted from the Command State Continuation Check by expending an Army Command Point. Before rolling the die, the owning player may expend a CP to exempt that command unit from making a Command State Continuation Check that phase. The Army CPs total is immediately reduced for each exemption made. The following Command units are eligible to receive a CP:
- Corps (Wing) Commanders
- Detachment Commanders
- Independent Division Leaders or Division Leaders subordinate to the Army Commander
Note: The receiving Command unit may of any distance from the HQ, but it must be able to trace a path free enemy minimum Fire Zones.
17.7 Attack Orders
An Attack Order represents a mandated attack for higher level formations, from the army command level as part of a grander operational effort. It carries with it an increased level of motivation and purpose by the officers and a greater sense of determination or "elan" by the rank and file.
[17.71] Issuing and Receiving Attack Orders
An Attack Order is a special "Order" type which may only be issued by the Army Commander to a Corps (Wing) Commander or to a Division Leader. Once received, the Corps Commander may implement either a Corps Attack Order (of at least two divisions) or a Division Attack Order to one of his subordinate division leaders.
Army Commanders: An Attack Order issued by an Army Commander cost 1 additional CP to initiate; thus it cost 2 CPs to issue an Attack Order with a normal order. If there are no Army CPs available, the Army Commander may still issue an Attack Order only if he is in the same hex as the receiving Command unit. When an Attack Order is sent to a Corps/Wing Commander, a Corps Attack Order marker will accompany the Order. When an Attack Order is sent to a Division Leader, a Division Attack Order marker will accompany the Order marker.
Corps Commanders: When a Corps (Wing) Commander receives a Corps/Wing Attack Order, he may act on it that turn or hold it for a later turn. The "received" Attack Order is implemented during any friendly Corps Commander Activity Segment. Note: To indicate that an Attack Order is being "held" it is placed beneath the Corps Commander's counter and the Order Received marker may be retain (or removed). When the Corps Commander implements an Attack Order, it must be declared as a Corps Attack Order or as a Division Attack Order.
- If a Corps Attack Order, the Attack Order marker is placed on top of the Corps Commander's counter and the Order Received marker, if any, is removed (the Attack Order now acts as an Order Received marker for the Corps Commander). Division Attack Orders are sent to two or more Division Leaders of that Corps using the normal Order Delivery process (including leaders on the BC/FD). The Corps Attack Order becomes implemented when the Attack Order is received by at least one of the Division Leaders and the Division Leader is in (or converts to) his Mobile Command State. At the moment of implementation, immediately place the Corps Attack Order Violation marker in the "0" space on the Attack Order Violation Track. Note: Division Leaders that enter as reinforcements must be on the map before they can be sent an Attack Order.
- If a Division Attack Order, an Attack Order is sent to only one subordinate Division Leader (using the normal Order Delivery process). A Division Attack Order is implemented once the order is received and the Division Leader is in (or converts to) his Mobile Command State (removing the Order Received marker). Immediately place the Attack Order Violation marker (with the same upper case letter) on the "0" space on the Attack Order Violation Track. The Attack Order marker with the Corps Commander is then removed.
Division Leaders: A Division Leader (or Detachment Commander) may receive a Division Attack Order from either the Army Commander or the Corps Commander that he is subordinate to (regardless if it is a Division Attack Order or part of a Corps Attack Order). A Division Leader may not initiate his own Attack Order. Once a Division Attack Order is received, the process for issuing Attack Orders to his brigades occurs automatically in the same Division Leader Activity Segment. Note: After the Division Leader implements the Attack Order, the Order Received marker is removed; the Attack Order marker will act as an Order Received marker for the Division Leader.
Brigade Leaders: Brigade Leaders automatically receive an Attack Order during the Division Attack Order Activity sub-segment in which their Division Leader has received an Attack Order. Immediately place a Brigade Attack Order marker on all Brigade Leaders within the radius of their Division Leader that has received an Attack Order.
- A Brigade Leader (on the map) beyond the Command Radius of its Division Leader may not receive the Attack Order until it is within the Command Radius of its Division Leader with the Attack Order during any subsequent Division Attack Order Activity sub-segment.
- Any of his Brigade Leaders still on the BC/FD are automatically sent an Order with the Brigade Attack Order marker. The Order Delivery process is applied normally as if one of the Brigade Leader's combat units is within the Command Radius of the sending Division Leader. Once the Brigade Leader receives an Attack Order and has been transferred to the map, the Order Received marker is removed.
Note: Brigade Leaders receive an Attack Order only as part of a division in an Attack Order; Brigade Leaders may not be issued an Attack Order individually.
[17.72] Attack Order Formation Structure
An Attack Order is marked with an upper-case letter A, B or C simply as a means to identify the Corps and/or Division command unit to whom the Attack Order was sent. It also helps identify the lower commands of a formation under a particular Attack Order. The Brigade Attack Order markers, that are labeled with the same lower-case letter as that of the associated Division Attack Order marker, are placed on each of the Brigade leaders of the Division with the Attack Order.
(Attack Order Formation Example illustration: Division Attack Order Marker (upper case "B"); Brigade Attack Order Markers (lower case "b").)
[17.73] How Attack Orders Affect Command and Combat Units
- Command Units: While under an Attack Order;
- Division and Brigade Leaders are considered to be In Command.
- Corps Commanders and Division Leaders receive a –2 modifier when required to make a Command State Continuation check.
- Combat Units: While under an Attack Order, an infantry unit that is not Disordered, Routed or Out of Command is affected by the following benefits and requirements:
- An infantry unit that is subordinate to a command unit with an Attack Order has its Effectiveness Rating increased by +1 for all purposes.
- During its Friendly Movement Phase, if it is not adjacent to an enemy unit, it must move and end its movement at least one hex closer to an enemy unit than when it began
- A skirmish unit benefits from an Attack Order only if it is within five hexes of an infantry battalion which is part of a brigade under an Attack Order.
[17.75] Attack Order Violations
Attack Order Violations are added as they occur and accrued on the owning player's Attack Order Violation Track. The player adds one to his Attack Order Violation total for any of the following violations:
- for each brigade in the attacking formation of which at least one battalion is not adjacent to an enemy unit OR has not moved at lease one hex toward an enemy unit by the end of the friendly Movement Phase.
- for each brigade in the attacking formation which has one or more Routed battalions at the end of the friendly Rally Phase.
- for each brigade in the attacking formation that is at Fatigue Level 2 or 3; added at the end of the Brigade Accrual & Recovery Segment.
- for each command unit from the attacking formations the instant it is reduced or goes to its Standing Command State during the Attack Order.
Example: Two battalions in the same brigade under an Attack Order are routed. At the end of the Friendly Rally Phase, the Attack Order Violation Marker is advanced just one space on the Attack Order Violation Track.
[17.76] Ending an Attack Order
A. Determining the Ending of an Attack Order
An Attack Order can be terminated voluntarily or involuntarily at the end of the Friendly Rally Phase.
- The owning player may end the Attack Order by simply stating his wish to do so.
- The owning player may be required to end an attack if any of his current Attack Orders has one or more violations accrued on the Attack Order Violations Track (see map). For each Attack Order formation, the owning player rolls a die. If the die roll number is equal to or less than the number of violations on the Attack Order Violations Track, the attack must end. The Command Bonus of the highest command unit of the attacking formation (Corps or Division) is added to the die roll.
If an Attack Order ends, remove the marker for that Attack Order on the Attack Order Violations Track. All Attack Order markers are removed from the leaders and commanders of that Attack Order formation.
- All Division Leaders are immediately converted to their Standing Command State; If the Attack Order was a Corps (Wing) level Attack Order, the Corps Commander is flipped to his Standing Command State.
B. Fatigue Points Added to Participating Brigades
At the end of an Attack Order, each infantry brigade that was part of the Attack Order adds the following number of Fatigue Points to each of their Fatigue Levels:
- French brigades: 2 Fatigue Points
- Russian brigades: 1 Fatigue Point
Order Delivery & Activation Example
The French player wishes to activate Marshal Augereau, the VII Corps Commander and activate General St-Hilaire the 1st Division Leader and give him an Attack Order. (Map illustration: combat units of 1st Division, IV Corps; Napoleon, 14 hexes from the nearest St-Hilaire combat unit and 7 hexes from Augereau; St-Hilaire inactive on the Brigade Commitment/Fatigue Display; Augereau inactive but on the map.)
Game-Turn 9 — French Command Phase
During the Army Commander Activity Segment, of the French Command Phase, Napoleon has 4 CPs with which to issue orders.
- Napoleon issues an Order with an Attack Order, using 2 CPs, to St-Hilaire. However, St-Hilaire is "inactive", the counter representing him is in his space on the BC/FD, not on the map. To calculate the distance to St-Hilaire, Napoleon must trace to the closest combat unit of St-Hilaire's command which is 14 hexes away; greater than one, but less than 2 Command Radius distance from Napoleon (see 17.34). The French player places a Delay 1 marker with an Attack Order on St-Hilaire in the French BC/FD. Note: There is no Order Delivery Delay die roll at this time.
- Napoleon uses the third CP and issues an Order to Augereau. The counter representing Marshal Augereau is on the map and within Napoleon's Command Radius; 7 hexes away. The French player must check for Order Delivery Delay. He rolls one die and consults the Order Delivery Table (see separate Player Aid Card). The die roll is a 5 with a –2 modifier (sending command unit is an Army Commander) for a result of "Delay 1 Turn". A "Delay 1" marker is placed on the Augereau counter (retaining the "Inactive" marker).
Game-Turn 10 — French Command Phase
A. Delay Marker Delivery Check Segment
The French Player must make Order Delivery checks for each Command unit (on and off map) with a Delay 1, 2 or 3 marker stacked with it. The French Player has two, Augereau and St-Hilaire.
The French Player first rolls a die for Augereau and consults the Order Delivery Table. The die roll is 7 (still with a –2 modifier) and the result is a "Delay 1". The Delay 1 marker remains on Augereau. A 1 Strength marker is added onto the Delay 1 marker. Next, he checks for St-Hilaire. He rolls one die and consults the Order Delivery Table. The die roll is a 6 (with a –3 for St-Hilaire's Command Bonus and a –2 as the sending command unit is an Army Commander); the result is "Received". The French player flips the "Delay 1" marker to "Order Received".
D. Division Leader Activity Segment
- Division Leader Activation Sub-segment: the French player moves St-Hilaire with both the Order Received and Attack Order markers to the map on any combat unit in his command in his Standing Command State. St-Hilaire is placed on a combat unit of Candra's brigade.
- Division Leader Activity Sub-segment: No activity. The French player wishes to keep St-Hilaire in his Standing Command State for this turn and retains the Order Received marker.
- Division Attack Order Activity Sub-segment: Next, the player must roll to activate the two "inactive" brigade leaders of St-Hilaire's Division, Candras and Vare which are still on the BC/FD. The Order Delivery for Candras is automatically received; no die roll required (as he is stacked with a combat unit of Candras' brigade). An Order Received and a Brigade Attack Order marker are placed on Candras. The Order Delivery die roll for Vare is an 8 (with –1 for being a French Brigade Leader, –2 the sending Command unit is stacked with an Attack Order, and –2 for the sending command unit being adjacent to a combat unit of Vare's brigade) for a modified die roll of 3: the result is "Delay 1 Turn". A Delay 1 marker is placed on Vare with an Brigade Attack Order marker.
E. Brigade Leader Activation Segment
The French Brigade Leader, Candras now has an Order Received marker is moved to the map (with his Brigade Attack Order marker) on any combat unit with the same brigade designation (1/1/IV). The Order Received marker is remove. Vare is not moved to the map as he is stacked with a Delay 1 marker.
Game-Turn 11 — French Command Phase
A. Delay Marker Delivery Check Segment
The French Player must check for Augereau and the Brigade Leader Vare. He first rolls a die for Augereau and consults the Order Delivery Table. The die number is 3 and the result is a "Order Received". Augereau is now "active" remove the Inactive marker, but retain the Order Received marker.
Next, the French player makes an Order Delivery check for Vare. The die roll is a 2 and the result is "Received". The "Delay 1" marker flipped to its Order Received side.
D. Division Leader Activity Segment
- Division Leader Activity Sub-segment: The French player now wishes to change St-Hilaire's Command State to Mobilized. The Order Received marker with St-Hilaire allows this action. He flips St-Hilaire to his Mobilized side and removes the Order Received marker. This also begins the "Attack Order".
E. Brigade Leader Activation Segment
The Order Received marker is removed from the Vare leader counter and he, with his Brigade Attack Order marker, are moved to the map onto a combat unit of his brigade.