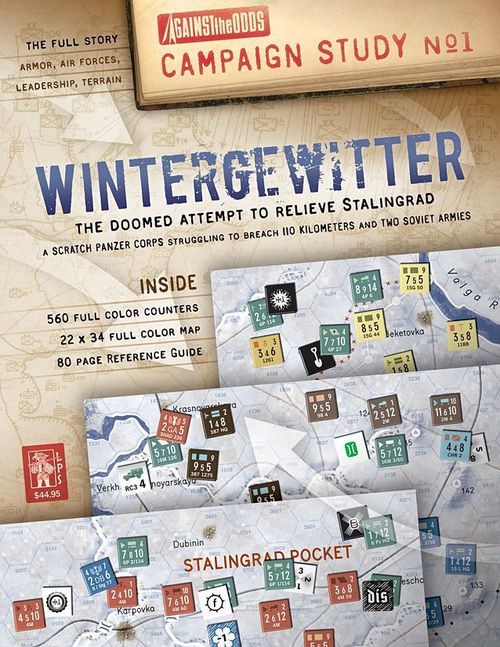
Wintergewitter
Wintergewitter Rulebook
Table of Contents
Table of Contents
- Read This First
- 1.0 Introduction
- 2.0 Game Equipment
- 3.0 Game Sequence
- 4.0 Air Operations
- 5.0 Stalingrad Pocket Phase
- 6.0 Initiative Phase
- 7.0 First Player Phase
- 8.0 Movement
- 9.0 Stacking
- 10.0 Zones of Control (ZOC)
- 11.0 Combat
- 12.0 Artillery
- 13.0 Disruption
- 14.0 Supply
- 15.0 Entrenchments
- 16.0 Special Units
- 17.0 Recovery and Replacement Phase
- 18.0 Fog of War
- 19.0 Scenarios
- 20.0 Operation Gross
- Detailed Sequence of Play
- Errata Summary (Against the Odds addenda, 18 October 2011)
Read This First
The rules are organized to follow the game's sequence of play. They are written in the Case System. The rules are divided into Modules (each dealing with a major aspect of play), numbered sequentially and titled. Each Module is divided into Sections (dealing with a sub-topic of the Module), also numbered sequentially. Modules and Sections are introduced by text briefly describing their subject. The majority of each Section consists of Cases, the specific detailed rules that govern play. Each Case is numbered sequentially, and the numbering follows the Module of which the Case is a part. A Case numbered 7.51, for example, is the first Case of the fifth Section of the seventh Module of the rules. Each Module can have as many as ninety-nine Sections and each Section can have as many as ninety-nine Cases. The numbering is an organizational aid: use it to determine where a Case is located in the rules. The example 3.1.4 is the fourth Case of the first Section of the third Module.
Learning to Play the Game. Begin by familiarizing yourself with all of the components listed for this game. Then skim through the charts and rules, reading all the titles of the Modules and Sections. Set up a game scenario or portion of a scenario (after reading the applicable Module) and play a trial game against yourself. During this trial game, refer to the rules only when you have a question; the numbering system makes it easy to look up rules when you do. A trial game may take an hour or two, and it is the quickest and most pleasant way to learn (short of having an experienced friend teach you). The rules are not designed to be memorized word-for-word. Taking in the rules as you play along is the best approach to mastering this game.
General Abbreviations
- B: Bomber
- Bh: Heavy Bomber
- DB: Dive bomber (Ju-87 Stuka)
- F: Fighter
- GA: Ground attack
Soviet Abbreviations
- BADS: Bomber Air Division
- IAD: Fighter Air Division
- SADS: Mixed Air Division
- SHAD: Ground Attack Air Division
- 2M: Second Guards Mechanized Corps
- 4C: Fourth Cavalry Corps
- 4M: Fourth Mechanized Corps (historically soon to become the Third Guards Mechanized Corps, but it retains its original designation in Operation Wintergewitter)
- 7TK: Seventh Tank Corps
- 13TK: Thirteenth Tank Corps (in name only; this unit was organized as a mechanized corps)
German Abbreviations
- B: Gruppe Bischof
- JG: Jagdgeschwader (fighter squadron) when referring to air units
- KG: Kampfgeschwader (bomber squadron) when referring to air units, or Kampfgruppe (battle group) when referring to ground units
- L: Panzerverband Langenthal (feldgrau color) or Luftwaffe Ground (blue)
- SG: Schlachtgeschwader (ground attack squadron)
- STG: Stukageschwader (dive bomber squadron)
- ZG: Zerstoerergeschwader (heavy fighter squadron)
- 6P: Sixth Panzer Division
- 14P: Fourteenth Panzer Division
- 15L: Fifteenth Luftwaffe Field Division
- 16M: Sixteenth Motorized Division
- 17P: Seventeenth Panzer Division
- 23P: Twenty-third Panzer Division
Rumanian Abbreviations
- C: Group Christea
- Lt: Light infantry
- Mixed: a conglomeration, for game purposes, of company-sized heavy weapons units
- 6C: Sixth Corps
- 7C: Seventh Corps
Errata (2011): the Rumanian abbreviation for the Group Christea units is corrected to CHR.
Mechanized Units and Unit Sizes (chart)
Mechanized units (chart legend): Tank, Assault Gun, Heavy Tank, Reconnaissance, Mechanized Infantry.
Unit sizes (chart legend): Army, Corps, Division, Regiment, Brigade, Battalion, Company.
1.0 Introduction
Wintergewitter (Winter Storm) simulates the attack by the German 57th Panzer Corps to open a corridor to the German Sixth Army trapped in the Stalingrad Pocket. Fought between the 12th and 23rd of December, 1942, the battle sealed the fate of the twenty German divisions in the Pocket. The loss of the entire Sixth Army marked what is generally considered the turning point of the war in the East, if not the Second World War.
Wintergewitter is played in a number of game turns, each with several player phases. The German player must use his initial combat advantage to quickly open a corridor to the pocketed Sixth Army before the Soviet player can react. In addition to the 57th Panzer Corps' attack, the German player may also execute the second phase of the relief operation, an attack by elements of the Sixth Army to link with the advancing relief force. The Soviet player must withstand the initial German armored onslaught until he can bring powerful reinforcements into play. He must prevent any contact between the relief force and the entombed Sixth Army, and destroy the 57th Panzer Corps.
2.0 Game Equipment
Each copy of Wintergewitter is composed of the following:
- 560 half-inch counters in two sheets
- One 22 by 34 inch map
- Player's aids with charts, tables and tracks
- This set of rules
- One ten-sided die (a roll of 0 is read as 10)
2.1 Unit Counters
The various pieces, called units, represent the formations engaged in this battle. Other counters are used as markers to convey information important to game play.
For movement purposes there are three unit classes: Mechanized, Motorized and Non-Motorized. Each class is defined by unit type icon. See also 7.1's note concerning Motorized Infantry.
Sample land unit: front shows the normal strength, back shows the reduced strength. The unit carries an ID, a combat strength, a movement allowance, a stacking value, a unit size (see 2.1.2), a unit type (see above), and a proficiency rating.
Sample artillery unit: front shows the normal strength, back shows the reduced strength. The unit carries an ID, a combat strength, a movement allowance, a stacking value, a unit size, an artillery range, a proficiency rating and a unit type.
Unit types: Motorized HQ, Motorized Infantry (7.1), Motorized Cavalry, Motorized Engineer, Motorized Artillery, Rocket, Motorized AA; Non-Motorized Infantry, Cavalry, Engineer, Anti-Aircraft, Anti-Tank, Army/Corps HQ.
Map markers: Strength, Disrupted, Relief Column, Fired Artillery, Moved Artillery, Interdiction, Bridged, Bridge Out, Organic Supply, Out of Supply, Construction, Entrenchment.
Air units: Fighter, Ground Attack, Dive Bomber, Bomber, Heavy Bomber. A sample air unit has a front (available) and back (flown) side, a unit ID, a unit type, a proficiency rating, a defense factor, a bombardment factor and an air-to-air factor.
Soviet Ring Forces are marked with dark print over a light background. Ring Force and Non-Ring Force counters are distinguished in this way.
Track markers: German Initiative, Soviet Initiative, Turn, German Infantry Replacement, Soviet Infantry Replacement, German Artillery Replacement, Soviet Artillery Replacement, German Armor Replacement, Soviet Armor Replacement.
Errata (2011), 2.1 (clarification): Soviet mortars are those artillery units with a printed range of 2. Guns/Howitzers are those artillery units with printed ranges of 3 or more.
2.1.1 Unit Abbreviations
See the unit abbreviation lists above.
2.1.2 Unit Size Symbols
Units in Wintergewitter vary in size. Sizes are explained below:
- Regiment: 800 to 2400 men
- Battalion: 300-900 men
- Company: 100-200 men
- KG: ad hoc units of approximately 300 men
- Aircraft units represent 30-90 aircraft
2.2 Game Markers
Several different types of markers are provided to facilitate game play. The most numerous are unit strength (Pollard) markers. Each unit's full strength is shown on the front of the unit. Almost all units possess a reduced strength that is indicated on the reverse side.
If a unit is forced to suffer a strength point loss that brings the unit's current strength between its full and reduced values, or to a strength below its reduced value, then a Pollard marker is required. Place a Pollard marker under the unit, orienting the marker so it indicates the number of strength points remaining. When a unit's losses equal or exceed its original strength, it is eliminated.
2.3 Maps and Charts
The map represents the contested area across which the battle raged in late 1942. Each hexagon represents one type of predominant terrain. The following charts and tables are necessary for game play:
- Game Turn Record Track
- Combat Results Table (CRT)
- Bombardment Table
- Counter-battery Table
- Air Combat Table
- Terrain Effects Chart (TEC)
- Air Operations Charts (one German, one Soviet)
- Detailed Sequence of Play Chart
2.4 Game Scale
Each hex is approximately two miles across. Each turn is 12 hours.
2.5 Dice and Rounding Convention
A ten-sided die is needed to play Wintergewitter (having one for each player would speed play somewhat). Treat a DR of zero as 10. In all game functions, ratios of .50 and higher are rounded up. Ratios of .49 and lower are rounded down.
3.0 Game Sequence
Each turn consists of a number of different phases. These must be performed in strict sequence.
3.1 Sequence of Play
A complete game turn consists of the following phases:
-
Air Operations Phase
- a. Air Allocation Segment
- b. Air Combat Segment
- c. Air Bombardment Segment
- d. Interdiction Segment
-
Stalingrad Pocket Phase
- a. Operation Thunderclap Initiation Segment
- b. German Sixth Army Activation Segment
- c. Soviet Ring Forces Segment
-
Initiative Phase
- a. Initiative Determination Segment
-
First Player Phase
- a. Supply Determination Segment
- b. Non-motorized Unit Combat Segment
- c. Non-motorized Unit Movement Segment
- d. Mechanized Unit Movement Segment
- e. Mechanized Unit Combat Segment
Note: Players may perform Segments d. and e. in any order. See Sections 7.1 and 8.1 for details and restrictions.
After the last phase has been performed, play proceeds to the next game turn. At the conclusion of the last turn of the scenario, the game is over and victory is determined.
4.0 Air Operations
The Air Operations Phase is broken down into a number of segments. Most air unit functions occur during the Air Operations Phase before ground units are moved. However, German DB air units may conduct missions during the German player phase. At the end of each game turn, air units attempt to recover from disruption and ready for operations next turn.
4.1 Air Missions
During each Clear weather day turn, air units may perform one mission. Note: air operations are not permitted in Overcast weather. The types of missions are:
- Interdiction: Only German units may be assigned this mission.
- Ground Attack (also called bombardment): All air units with an air-to-ground factor may be assigned this mission.
- Air Superiority: Only fighter units may be assigned this mission.
- Escort: Only fighter units may be assigned this mission.
4.2 Air Allocation Segment
During this segment, each player allocates ready aircraft to the desired mission areas shown on the player's Air Operations Chart. In most mission areas, the player may assign both mission aircraft and a fighter escort.
Each air unit may perform only one mission per turn. In order to execute a mission, the unit must be available for operations at the start of that turn. All aircraft have adequate range to operate over the entire game map and may be moved from the various mission boxes onto any target hex on the map.
The Air Allocation Segment consists of three steps:
- The Soviet player secretly places any or all of his ready air units in the mission boxes on his Air Operations Chart.
- The German player does the same with any or all of his ready air units (except for his ready fighter units).
- Both Air Operations Charts are revealed. The German player may now place his ready fighter units in any of his mission boxes.
4.3 Air Combat Segment
Air combat can only be initiated by fighter units conducting an air superiority mission. During the Air Combat Segment, each player determines if a unit committed to air superiority makes an interception. Roll a die for each fighter unit. If the result is equal to or less than the unit's proficiency rating, it has made an interception and may be allocated against enemy units in the appropriate box on the opposing player's Air Operations Chart. Units that fail their proficiency check are placed in the flown box. Soviet fighter units committed in a mission box with no German units return to the flown box.
Note: Opposing fighter units on air superiority missions do not intercept one another. Air units on air superiority only perform Interception missions against enemy air units on other missions.
4.3.1 Combat Procedure
Once allocated against enemy air units in the appropriate mission box, air combat is resolved. If escorts are present, they must be engaged first. Players first determine which set of fighters, the escorts or the air superiority (intercepting) fighters, have gained "the bounce". Each player rolls the die and adds its value to the highest proficiency rating of one of his engaged fighter units. The player with the highest total (ties are re-rolled) has gained the advantage, designating which units will be paired in air combat and firing first.
Once he pairs his fighter units with enemy fighter units, those units may only engage in air combat with each other. If one player possesses more fighters than the other, units must be allocated against all enemy units before more than one unit may fire at a single enemy unit. If more than one fighter unit is allocated against a single enemy fighter unit, each attacking unit fires separately. If the first attack forces the enemy unit to abort, the additional fighters allocated may not be reassigned. Each unit may fire only once during this round of fighter combat.
Once units have been designated for engagement, the firing unit's air-to-air combat factor is compared to the target unit's defensive factor and a differential is calculated. Roll one die, modify as indicated on the Air Combat Table, and refer to the Air Combat Table for results. After the player with the bounce has fired, any combat results are applied. The disadvantaged player may now return fire with any surviving aircraft.
If after the round of fighter combat the air superiority player has any remaining aircraft, he may now fire on enemy bomber aircraft in the appropriate mission box. For this round of combat, all fire is simultaneous. No losses are extracted until both sides fire. The intercepting player designates which units will be engaged. He may choose to fire on any or all bomber units in the mission box. However, each intercepting fighter may fire only once during this round. If more than one fighter unit is allocated against a single bomber unit, each attacking unit fires separately. Each bomber may fire only once during this round of combat and no bomber may fire unless fired upon.
Following the Air Combat Segment, all surviving fighter units are placed in the flown box. Surviving bomber units may now conduct their mission.
Example of play. During step 1 of the allocation process, the Soviet player has secretly designated two ground attack regiments to conduct ground attack missions. These are escorted by two fighter regiments. During step 3 of the Air Allocation Segment, the German player decides to commit his best fighter unit, II/JG52, to an air superiority mission against the Soviet ground attack force. First the German must roll to see if the fighter unit actually intercepts the Soviet units. In the case of this unit, a roll of eight or less means that the interception was made; with a roll of "five", the players move on to the air combat procedure. First, the bounce is determined. The German rolls a "six" which is added to the proficiency rating of his fighter unit (eight) for a total of 14. The Soviet player takes either of his fighter units (both possess a rating of six) and rolls the die. A result of "seven" gives a total of 13. The German has gained the bounce.
The German now designates his fire against one of the two escorting fighter regiments. The Soviet player has an additional fighter unit available which obviously is designated against the sole German unit involved.
Next the German player resolves the fire of his unit. With an air-to-air combat factor of six against the Soviet unit's defensive factor of five, the combat is rolled on the +1 column of the Air Combat Table. A +1 die roll modification is awarded because the German unit has a higher proficiency rating than its target unit. A roll of "four" (modified to five) means that the Soviet unit must abort its mission and return to the flown box. It cannot return fire. Now the second Soviet fighter unit can fire. It rolls on the -1 column with no die roll modifications. A roll of "five" yields a no result.
The German fighter can now attack the mission force. It picks one of the Soviet ground attack regiments to engage. Fire is simultaneous. A German roll of "six" (modified to eight because of a proficiency rating three better than the target unit) results in the abort and disruption of the Soviet unit. The Soviet unit, firing with a -1 die roll modification, gains a result of no effect with a roll of "seven". The other Soviet ground attack regiment does not fire, but is now free to conduct a ground attack mission.
4.4 Air Interdiction Segment
This mission may only be performed by German air units. The German player allocates aircraft assigned to this mission against any hex. If a successful result is gained (see below), an interdiction zone of five hexes from the target hex is created. Any unit starting in or moving into this zone loses the number of movement points of the result gained. If multiple interdiction zones are created which overlap, the movement penalty on any affected Soviet unit is cumulative. Units cannot use administrative movement into or out of an interdiction zone.
4.4.1 Interdiction Procedure
Total the bombardment strength of the attacking unit(s). Roll on the Bombardment Table. Any number result obtained is the number of movement points lost by every Soviet unit starting in or moving into the newly-created interdiction zone. After completing this mission, aircraft are placed in the flown box.
Example of play. The German player intends to attack the Soviet 91st Rifle Division this turn and decides to commit the II/STG 77 unit against hex 2538 in an attempt to restrict that formation's ability to maneuver. The attack is rolled on the seven column of the Bombardment Table. A roll of "seven" indicates that any Soviet unit within a five-hex radius of hex 2538 loses one movement point, and any Soviet unit which subsequently moves into that interdiction zone loses one movement point.
4.5 Air Bombardment Segment
During this segment, units assigned to ground attack missions which have survived the Air Combat Segment conduct attacks against enemy ground units. For Soviet air units, the target must be within five hexes of any Soviet ground unit. German air units may strike any hex on the map. Any number of aircraft may be assigned to a single target.
4.5.1 Air Bombardment Procedure
To resolve bombardment, the active player allocates the bombardment factors of any ground attack mission aircraft against an enemy unit. (Note: If using Module 18.0's fog of war rules, as an alternative to attacking the top ground unit, the bombarding player may attack any hidden unit in a stack by choosing one at random.) Determine the total bombardment factors allocated against the target unit and roll on the Bombardment Table. Results are applied immediately. After completing bombardment, aircraft are placed in the flown box.
German DB (Ju-87 Stuka) dive bomber units may conduct bombardment during the Air Bombardment Segment, or they may be withheld to support the hasty or prepared attack of a German mechanized/motorized infantry (see Section 7.1) unit during its Movement or Combat Segment.
Example of play. Continuing the example from Section 4.3, the Soviet ground attack regiment which survived interception is now allocated to attack a large German concentration. The top unit in the stack is a 12-10 tank battalion; the other units in the stack are unknown. He decides to attack the tank battalion. The ground attack regiment has a bombardment value of five. The attack is rolled on the three column of the Bombardment Table after the one column left shift for attacking an armored unit is applied. There are no die roll modifications. A roll of "eight" gives a result of "1". One strength point is removed from the target tank battalion. The ground attack unit is placed in the flown box.
4.6 Air Unit Recovery Procedure
Air unit recovery is performed during the Recovery and Replacement Phase (see Module 17.0). Before air units can be allocated to missions, they must be readied for operations. All aircraft begin the game ready. After flying any mission, all aircraft must go through the readying process.
Procedure. Each unit in both the flown box and the disrupted box rolls a single die. If the roll is equal to or less than the number indicated on the Air Operations Chart for that type of aircraft to achieve ready status, the aircraft may be moved to the aircraft available box. If the die roll is greater, the unit remains in the flown or disrupted box and is not available next turn for operations.
5.0 Stalingrad Pocket Phase
One of the great "what-ifs" of the Second World War was the intriguing possibility that the Sixth Army would have been permitted to attempt a breakout to link with the relief attack. As originally planned, the second phase of the relief operation was to have been an attack by the Sixth Army, code-named Operation Thunderclap. In the end, Operation Thunderclap was forbidden by Adolf Hitler, who insisted that the Sixth Army could only conduct such an attack if it also held its positions along the Volga. This condition rendered the original scope of Thunderclap impossible. However, even given this restriction, the Sixth Army still could have committed an armored battlegroup under the control of the headquarters of the 14th Panzer Division to punch through the Soviet ring and open a tenuous corridor to the approaching relief forces. The commander of the Sixth Army gave this option serious consideration before deciding against it. Wintergewitter gives this limited option to the German player. Eastern Front purists may choose to ignore this rule, but players who include it will find it heightens the degree of uncertainty because the Soviet player is forced to consider the possibility of facing an attack from two directions.
5.1 Operation Thunderclap
Initiation of Operation Thunderclap may only be attempted once per game. It may not be attempted until elements (defined as at least 12 stacking points) of the 57th Panzer Corps have approached to within 10 hexes of the Pocket. Once this condition has been met, at the start of any subsequent Stalingrad Pocket Phase the German player can roll a single die in an attempt to initiate Operation Thunderclap.
5.2 Operation Thunderclap Initiation Table
Use the table below to ascertain the result:
- Die roll 1-5: The attempt fails; permission for Operation Thunderclap is denied.
- Die roll 6-10: Operation Thunderclap is initiated and Sixth Army units are activated. The nine units of the 14th Panzer Division are available in the Stalingrad Pocket.
Modifiers
- +1 DRM if any German unit is within five hexes of the Pocket.
Note: The German player decides what turn the DR for initiation of Operation Thunderclap occurs.
If activated, Sixth Army units immediately conduct a special player phase. Sixth Army units may not receive any air support nor any replacements. They continue to move once per turn during the Stalingrad Pocket Phase until the 14th Panzer Division headquarters unit can trace a line of communications to the 57th Panzer Corps headquarters. This path can be of any length, but cannot be traced through Soviet units or their zones of control (Soviet ZOCs are negated by friendly units for this determination). Once such a path is established, there is no longer a Stalingrad Pocket Phase in subsequent turns, and Sixth Army units move as other German units during the regular German Player Phase (even if the path is later cut in a subsequent phase/turn).
Once activated, Sixth Army units are placed on any hex inside the Pocket. If any Sixth Army unit leaves the Pocket and is subsequently forced to return to the Pocket or voluntarily returns to the Pocket before the Germans have opened the above-described line of communications to the 57th Panzer Corps headquarters, Operation Thunderclap is considered to have ended and all Sixth Army units are removed from play at the conclusion of the current Stalingrad Pocket Phase. No victory points are awarded to the Soviet player for any German units removed from play in this manner.
Until the 14th Panzer Division headquarters can trace a supply line to any other German headquarters unit, the supply situation of all Sixth Army units exists as described below:
- First turn of activation: Regular supply
- Second turn of activation: Organic supply
- All subsequent turns: Out of supply
5.3 Soviet Ring Forces
There are three Soviet armies that man the inner ring of the Stalingrad Pocket. These forces were assigned the mission of preventing a breakout by the trapped Sixth Army. Soviet Ring Forces are set up within 3 hexes of the Stalingrad Pocket and may not move once placed.
Soviet Ring Forces defend in place and never retreat voluntarily. If attacked in any way (bombardment, hasty or regular attacks), Soviet Ring Forces must first make a proficiency check to defend in place. If the unit fails the proficiency check it will retreat if called for in combat. The only Soviet Ring Forces units that can move, attack, and perform counter-battery fire during the Soviet Ring Forces Segment are those units that have been forced to retreat as a result of combat and any unit released as described below. During each Soviet Ring Forces Segment, the Soviet player rolls a die for each of the three Soviet Ring Armies that have been attacked (if any) in any manner. If the roll is "eight" or greater, the Soviet player may release a single unit of that army. This unit must follow all movement rules (including perhaps those for moving out of an enemy ZOC, as all Soviet Ring Forces adjacent to the Stalingrad Pocket are assumed to be in a German ZOC).
6.0 Initiative Phase
During this phase, possession of the initiative is determined. The player who gains it becomes the first player; the losing player becomes the second player for the remainder of the game turn.
6.1 Initiative Determination
Each player decides how many attacks (hasty or prepared, not bombardment) he plans to conduct this turn and writes this down, keeping it secret from the opponent. Each player then openly (not secretly) rolls a single die and adds the planned number of attacks to their respective die rolls. The DR totals are revealed and the player with the highest gains the initiative. In the case of a tie result, roll the dice again. The player with the initiative now becomes the first player and moves first. Keep track of the Initiative player's total number of planned attacks using the Mandated Attack markers as a reminder throughout the turn.
Note: Failure to meet the attack commitment total will result in a loss of victory points. See below.
6.2 Initiative Requirements
The player gaining the initiative must conduct the stated number of planned attacks. He can conduct more if desired. Failure to conduct the planned number of attacks results in forfeiture of victory points (see Case 19.3.3). The player who lost the initiative is not bound by his planned number of attacks; he can conduct as few or as many as desired.
6.3 Initiative Effects
The player gaining the initiative becomes the first player for determining move sequence. If the same player gains the initiative on consecutive turns, additional effects come into play.
- On the second consecutive turn, all units of the owning player gain one additional movement point.
- On the third consecutive turn, all units of the owning player gain one additional movement point and each of his attacks (hasty and prepared, not bombardment) are given a +1 die roll modifier.
- On the fifth consecutive turn, all units of the owning player gain one additional movement point and each of his attacks (hasty and prepared, not bombardment) are given a +2 die roll modifier.
Clarification: The above movement point bonuses are not cumulative.
Example of play. It is turn one. The German player plans a total of eight attacks to open his offensive. The Soviet player plans on making only two. Both players roll a single die. The German player adds his die roll of "five" to his bid for eight attacks for a total of 13. The Soviet player adds his die roll of "seven" to his attack bid of two for a total of 9. The German player has gained the initiative and becomes the first player. The German player records his 8 mandated attacks (his bid amount) on the Game Record Track using his Mandated Attack Marker.
7.0 First Player Phase
The player who gains the initiative becomes the first player for the turn. His opponent becomes the second player.
7.1 Player Phase Segments
Each player phase consists of five segments (see Module 3.0 Game Sequence or the Detailed Sequence of Play Chart). After supply is determined, the phasing player conducts a combat segment with his non-mechanized units followed by a movement segment for his non-mechanized units. Non-mechanized and mechanized units are distinguished as indicated below:
- German: All Rumanian units, all units of the 15th Luftwaffe Field Division, Gruppe Bischoff, and the three Relief Convoy units are non-mechanized. All other Axis units are considered to be mechanized.
- Soviet: All units assigned to the 2nd Guards Mechanized Corps, the 4th Mechanized Corps, and the 7th and 13th Tank Corps are mechanized. All other units are non-mechanized.
Note: All motorized infantry units are considered "mechanized" for activation (but use the Motorized column of the Terrain Effects Chart).
7.2 Mechanized Activation
Following the movement of all non-mechanized units, the phasing player has an option regarding the order of activation of his mechanized units. The phasing player may execute mechanized units' Movement or Combat Segments in the order he desires, but all movement must be completed before combat can occur, or all combat must be resolved before movement can occur.
8.0 Movement
Each unit moves across the game map from hex to adjoining hex paying the appropriate movement point cost for each hex entered and/or each hexside crossed. The rate of movement is different for units in each of the three movement categories (mechanized, motorized and non-motorized). Refer to the Terrain Effects Chart for exact costs.
8.1 Movement Procedure
Units may be moved singly or in stacks. If stacked, the entire stack may only move at the rate of the slowest unit. Slower units in a stack may be dropped off during the move. Movement of one stack must end before another may begin. Once a player's hand is removed from a stack/unit its move is finished for the turn (play nice!).
Movement Points (MP) may never be accumulated from turn to turn and may never be transferred from unit to unit. Weather may also impact movement. During several turns, road conditions are icy (see Turn Record Track) and all units will treat road hexes as clear terrain.
A number of other factors can affect a unit's movement capability, including enemy zones of control (Module 10.0), disruption (Module 13.0), supply (Module 14.0), and interdiction (Section 4.4).
8.2 Movement Restrictions
- No Soviet unit may enter any hexes inside the Stalingrad Pocket.
- No unit of either side may cross the Don River. This includes retreats across bridge hexes.
- There is no minimum movement capability. Units cannot move even a single hex if they lack the movement points to do so.
8.3 Administrative Movement
Units may move up to one and one-half their normal movement rate if taking advantage of administrative movement. To do so, they must not start or move adjacent to enemy units at any point in their movement phase. Disrupted units may not use administrative movement. Administrative movement cannot be conducted in an interdiction zone.
8.4 Hasty Attacks
Hasty attacks are conducted during movement. Each single unit or stack must finish its movement, including all hasty attacks, before the next unit or stack may move. Units must start the Player Phase stacked together to move and execute hasty attacks together. Only the German player may use supporting air or artillery units for bombardment during a hasty attack, and only in the German Mechanized Unit Movement Segment. See Section 7.1.
8.4.1 Hasty Attack Procedure
The active unit or stack moves next to an enemy unit, paying the movement cost to enter an enemy zone of control, the movement cost for a hasty attack, and the cost to enter the terrain of the defender. Hasty attack movement costs vary by unit type:
- German units: 2 MP
- Soviet units: 3 MP
- Rumanian units: 4 MP
Note: Units conducting a hasty attack do NOT pay ZOC costs for enemy units that project a ZOC into the target hex.
A hasty attack cannot be executed if the unit lacks sufficient movement points. More than one hasty attack may be conducted by a stack in a single Player Phase if movement points are available. However, any subsequent hasty attack, even if against the same defending hex/units, will still require all steps of the combat process to be followed (in particular PR checks and defensive fire; Section 11.2).
Hasty attacks are generally resolved using the normal combat rules. However, artillery units cannot perform defensive bombardments against hasty attacks. The unit or stack executing the hasty attack may not combine fire with any other friendly units that may be adjacent to the target hex.
If the defending hex is vacated, the active units must advance into the vacated hex. If the active units have movement points remaining, they may continue moving and execute additional hasty attacks. If the defender remains in the original hex, no advance after combat is possible but the active units may continue to move and execute additional hasty attacks if sufficient movement points remain. Each subsequent hasty attack on the same defending hex still requires the attacking unit to pay the movement points required to enter the defender's hex and those required for a hasty attack, but not the movement points required to enter an enemy zone of control. However, if the moving units retreated to satisfy combat losses or were disrupted, then their movement ends. If these results were taken as strength point losses, the active unit or stack may continue to move until its movement points are exhausted.
A defending stack may be subjected to any number of hasty attacks during a single Player Phase.
9.0 Stacking
Each unit has a stacking value that corresponds to its size and whether it is normal or reduced status. The stacking values are depicted on the counter and will differ if the unit is full or reduced strength.
Air units and game markers stack freely.
9.1 Stacking Limits
No more than 18 stacking points may occupy a single hex.
Stacking limits only apply at the end of each movement segment, immediately before a hasty attack is conducted, and at the conclusion of any retreat. Any number of units may traverse a hex between these points in the Player Phase. If a hex remains over-stacked at the end of a movement or combat segment, the owning player must remove or reduce units sufficient to bring the stack within required limits.
9.1.1 Soviet Ring Forces
Soviet non-Ring units can stack with Ring Army units. If they do, however, be sure to keep track of whether the Ring Army units remain unreleased (Section 5.3).
Note: Orienting/rotating un-activated units proved an easy way to do so in play-testing.
10.0 Zones of Control (ZOC)
Most units possess a zone of control (ZOC) which extends into all six adjacent hexes.
10.1 Zone of Control Limits
ZOC do not extend across major river hexsides or major river bridges. The following units do not possess ZOC:
- Headquarters units
- Company-sized units
- Disrupted units
10.2 Movement and Supply Effects of ZOC
- Units must pay an additional 2 movement points to enter an enemy ZOC.
- Artillery-class units may only enter an enemy ZOC if a friendly non-artillery unit is already present or if accompanied by a friendly non-artillery unit.
- Units must pay an additional movement point to leave an enemy ZOC. A unit may move directly from one enemy ZOC to another if it possesses sufficient movement points.
- Supply cannot be traced through enemy ZOC. However, friendly units negate enemy ZOC for purposes of tracing supply.
Note: Detailed treatment of the effects of ZOC on combat is provided in Section 11.7.
11.0 Combat
Combat is completely voluntary. Units must be adjacent to initiate combat (except artillery units). Attacks which are made solely with non-adjacent units are considered bombardment (see Module 12.0).
11.1 Types of Combat
There are two types of attacks: hasty and prepared. Both are performed against all defending units in a hex, not individual units. A player may initiate any number of hasty attacks against a defending hex in a single Player Phase, limited only by the units available and their movement point expenditure. However, each defending hex may only be subjected to a single prepared attack per Player Phase.
11.2 Combat Sequence
The procedure described below is to be followed when resolving combat:
- The active player (the one rolling the dice) indicates which hex he will attack. If the Initiative Player is attacking, the Mandated Attack marker is reduced by one space on the Turn Record Track. He also selects a lead unit for the engagement and designates any eligible artillery units to conduct bombardment. If the German player has withheld Ju-87 units from the Air Phase, he may also designate these to perform air bombardment against the hex.
- The inactive player also selects his lead unit and designates any eligible artillery units to conduct defensive bombardment.
- Both players conduct counter-battery fire with eligible artillery units. Note: Both motorized and non-motorized artillery units can perform counter-battery fire regardless of the attacker's combat phase (whether non-mech or mechanized).
- The inactive player may now conduct defensive bombardment with all units which survived counter-battery fire.
- The active player conducts bombardment with artillery (that survived counter-battery fire) and German DB (Ju-87 Stuka) air units. If present, German DB air units bombard separately from artillery units.
- The inactive player conducts fire combat against attacking enemy units with losses being applied immediately. Exception: If the defending units are disrupted, the active player executes step 7 first. Surviving defending units then execute step 6. Note: Both mechanized and non-mechanized units can perform defensive fire in a hex regardless of the attacker's combat phase (whether non-mech or mechanized).
- The active player now conducts fire combat against adjacent enemy unit in the hex indicated. Results are applied immediately.
- If all defending units are destroyed or retreated, attacking units may advance after combat. Defending units may never advance after combat.
11.3 Lead Units
Each player must select a lead unit for each engagement. This unit determines unit proficiency die roll modifications for the entire engagement. Lead units also take the first losses in any engagement. The lead unit, if possible, cannot be an artillery or headquarters unit. If these are the only unit types available, they may be designated as a lead unit.
11.3.1 Attacking Lead Unit Demise
If the lead attacking unit is eliminated, disrupted, or retreated before an attack is resolved a new lead unit is chosen by the attacking player. Any/all other attacking units must pass a Proficiency Check against the new lead unit's PR, to see if they still can participate in the attack. Those that fail may not attack. If this is an attack by the Initiative Player, and the number of Mandated Attacks has not yet been met, those units that do pass must still attack. Otherwise the attacker has the option of calling it off. (Fubar/Snafu is a fact of life in war. Deal with it!)
Exception: If the lead unit in a hasty attack is eliminated, retreated or disrupted the combat sequence is immediately stopped. The Mandated Attack marker is not readjusted, however (i.e., the hasty attack still counts in that regard).
11.3.2 Proficiency Ratings
Each unit has a unit Proficiency Rating (PR), representing the unit's training, steadfastness, morale, general cohesiveness, and efficiency. During any prepared or hasty attack, use the PR of the attacking and defending lead units. The PR for the various units in the game is shown on the individual counter and differs if the unit is full or reduced strength.
11.4 Combat Resolution
Several other factors affect combat resolution. These will cause either a column shift on the Combat Results Table (CRT) or a die roll modification. Column shifts always result in left column shifts, favoring the defender. DRMs may accrue to either side. Each player adds the total number of positive and negative DR modifications and uses the net to modify all die rolls in the engagement.
Errata (2011), 11.4 Combat Resolution (clarification): The comprehensive example of play shows the full combat resolution process, but the rules are a bit terser. To be clear, to resolve a fire combat (offensive or defensive), add up the current combat strengths of all attacking units, find the corresponding column on the Fire CRT, apply all column shifts and die roll modifiers and roll the die.
Column shifts are a result of terrain. These shifts are always in favor of the defender, generating left column shifts. Column shifts are indicated on the Terrain Effects Chart. All terrain effects are cumulative.
DRMs are produced in the following cases (also see the Combat Modifications Chart):
- Initiative: The player with the initiative has a +1 DRM if he has held the initiative for three consecutive turns and a +2 DRM if the initiative has been held for five consecutive turns (see Section 6.3).
- Unit proficiency: The player with the superior proficiency rating receives a combat bonus for fire combat as indicated below:
- +1 or +2 = +1 DRM
- +3 or +4 = +2 DRM
- More than +4 = +3 DRM
- No DRM is awarded if the players have the same proficiency rating.
- Armor Superiority: Either player receives a +2 DRM if a tank, panzer or assault gun unit is engaged in the combat and the other player has no such units present. Several other types of units negate Armor Superiority, but cannot generate it themselves: German self-propelled antitank guns, antitank units and antiaircraft units; Soviet antitank units.
- Combined Arms: The German player (only) receives a combat bonus of +1 DRM if any of his attacking stacks combines a panzer or assault gun unit with a mechanized or motorized infantry unit. These units must be in the same hex to generate this bonus, not just committed to the same attack.
- Multi-hex attacks: If the attacking player has units in a multi-hex prepared attack, DRMs are awarded as indicated below:
- 4 hex attack = +1 DRM
- 5 hex attack = +2 DRM
- 6 hex attack = +3 DRM
- Supply: Adverse supply conditions result in a -1 or -2 DRM. See Module 14.0.
11.5 Combat Results
The first number of the combat result indicates any mandatory strength point losses. The second number is the optional step loss. Mandatory strength point losses are implemented immediately. The optional result may be implemented as a retreat or a proficiency check. If a unit fails a proficiency check and has insufficient strength points to cover the loss, the attacker may advance an additional number of hexes equal to the unsatisfied result. The defender may never advance after combat.
A proficiency check is made by rolling one die. If the roll is equal to or less than the proficiency rating of the lead unit, the check is passed. If the roll is higher, the check fails. If the lead unit was eliminated, each unit in the stack must pass, or fail, this proficiency check on its own DR.
The table below indicates the choices available to satisfy an optional result and the effects of a proficiency check:
11.5.1 Attacker Results Options
- No check: The affected unit or stack must retreat the number of hexes indicated. If conducting a hasty attack, the affected unit's or stack's movement ends.
- Failed check: The affected unit or stack loses the number of strength points equal to the optional result, may not fire during this combat (it may have fired previously in this combat), may not advance after combat, and is disrupted. Place a disrupted marker on the unit or stack.
- Passed check: The affected unit or stack loses the number of strength points indicated but may conduct combat and advance after combat.
11.5.2 Defender Results Options
- No check: The affected unit or stack must retreat the number of hexes indicated.
- Failed check: The affected unit or stack must lose a number of strength points equal to the optional result and is disrupted. Place a disrupted marker on the unit or stack. An already disrupted unit that fails this check must lose the strength points per this rule but suffers no additional ill-effect.
- Passed check: The affected unit or stack loses the number of strength points indicated and remains in place.
11.6 Loss Priorities
After determining the total (i.e., mandated and optional) number of strength points to be lost, they are distributed using the following priorities:
- The lead unit always loses the first point.
- If loss points still remain, additional loss points are assessed against all armor and infantry-class units involved in the combat (from any and all stacks, not just the one with the lead unit). The owning player distributes them at his discretion so long as each such unit in the combat takes at least one loss point. No unit may be eliminated until every other such unit has taken at least one strength point loss.
- If loss points still remain, each artillery-class unit loses one point.
If loss points still remain, the loss priority cycle is repeated. HQ units, if present, lose a strength point (which would eliminate them) only after every other unit in the hex has been eliminated.
11.7 Retreats
Units are retreated by the owning player. Retreating units must retreat the full number of hexes indicated from the firing enemy unit. A stack of retreating units can be split up by the owning player if so desired. If terrain prevents a unit or stack from retreating, it must stand and take optional losses in strength points and suffer a disruption. If possible, units must retreat towards a friendly supply source. Units can only retreat through an enemy zone of control if no other path is available.
Units cannot retreat across major rivers. Infantry-class units may retreat across an un-bridged minor river hexside with no additional losses. Armor and artillery-class units may retreat across an un-bridged minor river hexside but lose one additional strength point per river hexside crossed. This loss is assessed against the entire stack, not each unit. Units may retreat across bridges with no losses. However, if these bridges are in an interdiction zone, the retreating unit or stack loses a number of strength points equal to the current movement point penalty in effect from the interdiction. Any artillery unit that is forced to retreat is marked as fired.
Units forced to retreat off the edge of the map are not eliminated. If possible, they return on the exit hex during their next Player Phase. If this hex is enemy-occupied, the affected units return at the nearest hex not in an enemy zone of control and closest to their supply source.
If no other path of retreat is available, units may retreat through enemy ZOC. In this case, the enemy units whose ZOC have been entered may conduct a fire attack against the retreating units. A unit cannot end its retreat in an enemy ZOC; it must continue to retreat until it reaches a non-controlled hex, even if this means retreating farther than the indicated result. If a unit is surrounded and suffers an optional result, it must make a proficiency check.
11.7.1 Retreat Opportunity Fire
When retreating units enter an enemy ZOC, those units whose ZOC have been entered may conduct a special opportunity fire combat. All units whose ZOC have been entered may fire. The firing player designates fire against the retreating unit or stack, without reference to any combat modifications such as terrain shifts and DR modifiers. All results obtained against the target unit or stack are taken as strength point losses. Retreating units may not return fire.
11.8 Advance After Combat
If all defending units are eliminated or forced to retreat in combat (hasty or prepared), all attacking non-artillery class units can advance after combat. This option must be exercised immediately before the next combat is resolved. The length of the advance is equal to the distance of the defender's required retreat. When a defending unit is eliminated, the attacker may advance a distance equal to the total of any unfulfilled mandatory and/or optional results (do not count the defender's hex when calculating the number of additional hexes the attacking units may advance in this case).
For Example. The German player has three steps of units in a combat and incurs a 2/4 CRT result. Two steps must be eliminated per the 2 portion of the CRT result. The surviving step will seek to retreat four hexes per the 4 portion of the CRT result, but is eliminated in the first hex it enters as a result of being hit due to retreat opportunity fire (Case 11.7.1). The attacker can advance up to three hexes in addition to the defender's hex.
Advance after combat is calculated in hexes, not movement points. The first hex entered must always be the hex vacated by the defender. Advances after the defender's hex need not follow the path of retreat, but may be conducted in any direction depending on the unit type of the advancing units.
If following the exact path of retreat of the defending unit or stack, an advancing unit may ignore all enemy ZOC. If the advancing unit deviates from the path of retreat, it may have to stop upon entering the first enemy zone of control.
Units have different capabilities in advance after combat:
- Armored/Mechanized units may conduct an advance up to the maximum number of hexes permitted. If they deviate from the path of retreat, Soviet armored units must stop upon entering the ZOC of a German armored or artillery-class unit. German armored units which deviate from the path of retreat are forced to stop only if they enter the ZOC of a Soviet armored unit.
- Motorized units may conduct an advance up to the maximum number of hexes permitted, but must stop at the first enemy ZOC entered if they deviate from the path of retreat.
- Infantry-class units may only enter the vacated hex of the defender.
- Cavalry units may advance up to two hexes subject to enemy ZOC.
No unit may advance across an un-bridged major or minor river hexside. Units may advance across bridge hexsides.
If all defending units are destroyed by bombardment before a planned hasty attack is conducted, the attacking units advance into the defender's hex and can continue to move if any movement points remain. Note: The MP cost for the Hasty Attack must still be paid, however. If all defending units are destroyed by bombardment before a planned prepared attack is conducted, the attacking units roll an unmodified attack on the Combat Results Table and take the total of all mandatory and optional results as an advance; at a minimum, attacking units always advance into the defender's hex provided the terrain permits (again, not across un-bridged major or minor river hexsides).
Comprehensive Combat Example of Play
The German player announces he will mount a prepared attack against Soviet units defending an elevated hex. The Soviet defenders include a 5-5 infantry regiment (proficiency rating 5) stacked with a 4-8 antitank regiment (proficiency 4). The Germans are attacking from two hexes: one with a 6-12 and a 5-12 motorized infantry battalion, and another hex with a 12-10 tank battalion stacked with a 7-10 mechanized infantry battalion.
The German player designates the 12-10 tank battalion (proficiency 8) as his lead unit. He designates two artillery units within range to support the attack with a bombardment. The Soviet player selects the 5-5 infantry regiment as his lead unit. He designates a 4(3)4 artillery regiment to support the combat.
There is no counter-battery fire so the Soviet player uses his supporting artillery unit to conduct defensive bombardment. He decides to bombard the hex without the German tank battalion to avoid the one column shift for firing at armored targets. He selects the top unit of the other stack (the 6-12 motorized battalion) to bombard and uses the 3 column on the Bombardment Table with no die roll modifications. The roll is a 6 which results in a "No Effect".
Now the German player conducts bombardment. With seven factors firing, he uses the 7 column on the Bombardment Table choosing to attack the top Soviet unit (the 5-5 infantry regiment). The die roll of 6 gives a result of 1 which is immediately applied to the target unit.
Now the Soviet player conducts regular fire combat. He can fire at either of the attacking stacks; he chooses to fire at the armored stack. He now totals his strength points. The infantry regiment fires with 4 (after its 1 point loss from the bombardment) and the antitank regiment with 4. His total is 8 so the 8 column on the CRT is used. There are no modifications since the firing units are in supply and the unit proficiency of the Soviet lead unit is inferior to the German lead unit, which means no unit proficiency DRM is awarded to the Soviet player. A roll of 10 yields a result of 1/3.
The German player must distribute the one mandatory result as a strength point loss. This must come from the lead unit, the tank battalion. The German player elects to make a proficiency check. Using the proficiency rating of the lead unit, a single die is rolled. The result is 8 which is equal to or less than the lead unit's proficiency rating so the check has been passed. This means that the 3 optional result has to be taken as strength point losses. However, the German units can still conduct combat and advance after combat. For these losses, the German player chooses to take the first from the lead unit, the second from the accompanying 7-10 mechanized infantry battalion, and the third from either unit (in this case it comes from the 6-12 infantry unit).
Errata (2011), 11.8 (correction): the printed sentence "For these losses, the German player must take the first from the lead unit..." is corrected to read "the German player chooses to take (not must)", as applied above.
The German player can now conduct his fire combat. Modifications to the attack are in order. The lead German unit has a greater proficiency than the lead Soviet unit (8 vs. 5), so a +2 DRM is awarded. The attacking stack with a tank battalion and a mechanized infantry battalion generates a +1 combined arms DRM, a total of 3 DRMs will be used. Now the total strength of the German units is calculated: 27. The German units will fire on the 20 column of the CRT because the defending units are on elevated terrain (this moves the attack from the 25 column to the 20 column). The German roll of 7, modified to 10, gives a 2/4 result.
Errata (2011), 11.8 (correction): the German player has 26 (not 27) steps. The printed total of 27 is corrected to 26 here; the column used is unchanged.
The Soviet player must first allocate the mandatory strength point losses. The first goes to the lead unit (the infantry unit) and the second goes to the antitank regiment. For the optional result, the Soviet player elects to retreat and surrender the elevated hex. During his retreat, the Soviet player has to enter the ZOC of the 6-12 and 5-12 German motorized infantry battalions. Those two units fire at the retreating Soviet stack with a strength of 11 with no modifications. Rolling on the 10 column of the CRT, a 5 gives a result of -/1. The Soviet stack must lose a single combat point because all losses, mandatory and optional, are extracted as step losses during retreats. The Soviet player subtracts one point from his infantry regiment (Soviet player's choice) and completes the retreat of four hexes. The German player now conducts an immediate advance after combat. All attacking units can advance a maximum of four hexes; the motorized units must stop upon entering the first Soviet ZOC if they deviate from the Soviet's retreat path, but the panzer and mechanized infantry battalions can advance four hexes in any direction (after entering the defender's hex) unless they encounter the ZOC of a Soviet tank unit.
Errata (2011), 11.8 (correction), as printed in the addenda: "Fifth paragraph, fourth sentence should be deleted (the Soviet player fires defensively against all attacking units, not just against a particular stack)." This sentence is not reproduced in the printed text above; it could not be matched unambiguously to a single sentence in the fifth paragraph, so the paragraph is left as printed.
Fire Combat Results Table (11.4)
Results are shown as Mandatory Loss / Optional. Active player optional results: No Proficiency Check, retreat the number of hexes indicated (if conducting a hasty attack, movement ends); Failed Check, lose the number of strength points indicated, may not fire during this combat (may have fired previously), may not advance after combat, and is disrupted; Passed Check, lose the number of strength points indicated, may conduct combat and advance after combat. Non-active player optional results: No Proficiency Check, retreat the number of hexes indicated; Failed Check, lose the number of strength points indicated and is disrupted (an already disrupted unit suffers no additional ill-effect); Passed Check, lose the number of strength points indicated and remain in place.
| Die Roll | 1 | 2 | 3 | 5 | 8 | 10 | 12 | 15 | 20 | 25 | 30+ |
|---|---|---|---|---|---|---|---|---|---|---|---|
| 10+ | /1 | /1 | /2 | 1/3 | 1/3 | 1/3 | 2/3 | 2/3 | 2/4 | 2/4 | 2/4 |
| 9 | /1 | /1 | /1 | /2 | 1/3 | 1/3 | 1/3 |
Counter-Battery Table (12.3.2)
| Die Roll | 1 | 2 | 3 | 4 | 6 | 8 | 10 | 12+ |
|---|---|---|---|---|---|---|---|---|
| 10 or more | S | S | S1 | S1 | S1 | S1 | S1 | S2 |
| 9 | S | S | S | S1 | S1 | S1 | S1 | S1 |
| 8 | S | S | S |
Results: S = target unit suppressed: place a fired marker on the unit. 1 or 2 = reduce target unit by the number of strength points indicated. Modifiers (cumulative): +1 die roll modification if a friendly unit is adjacent to the target hex; 1 column to the left if the target unit is Entrenched.
Non-active player optional results are as listed under 11.5.2.
Combat Modifications Chart
Column Shifts (cumulative)
- 1 left: Defender in Elevated terrain
- 1 left: Defender in Swamp terrain
- 1 left: Defender in Village terrain
- 1 left: Defender in Entrenchment
- 2 left: Defender across Minor River
Die Roll Modifiers (cumulative)
- Initiative: +1 held 3 consecutive turns; +2 held 5 consecutive turns
- Armor Superiority: +2 (see Section 11.4)
- Lead Unit Proficiency: +1 if 1-2 greater than opponent; +2 if 3-4 greater; +3 if 5 or more greater
- Supply Status: -1 organic supply; -2 out of supply
- German Combined Arms Attack: +1 (active player only)
- Multi-hex Prepared Attack: +1 from 4 hexes; +2 from 5 hexes; +3 from 6 hexes (active player only)
- Engineer Leads vs Entrenchment: +1 (active player only)
12.0 Artillery
Artillery units can conduct ranged attacks against enemy units.
12.1 Artillery Attacks
Any artillery unit with a range factor can conduct bombardment. These units are the only ground units which do not have to be adjacent to enemy units to execute combat. Artillery units can also conduct regular fire combat, but cannot conduct both in the same Player Phase (unless the unit is defending, see below). Other special characteristics of these units include:
- They are restricted when moving into enemy ZOC (see Section 10.2).
- They conduct one bombardment mission per game turn. However, mechanized and non-mechanized artillery units cannot bombard together (since they are active during separate segments of the turn).
- Artillery units (of any kind) may not bombard if adjacent to any enemy unit unless the artillery unit is stacked with a friendly non-artillery unit. An artillery unit may, of course, conduct defensive fire combat against any attacking enemy unit.
- If an artillery unit is engaged in fire combat without being stacked with a non-artillery unit, the artillery unit fires with only one-half its factors. In this case all results suffered by the artillery unit are treated as mandatory results. If the artillery unit survives, the owning player retreats the artillery unit 2 hexes (place a fired marker on the unit). Attacking units may advance, ignoring the artillery unit's ZOC (rotate the affected artillery unit 90 or 180 degrees to indicate the loss of its ZOC), a number of hexes equal to the CRT result (mandatory and optional losses combined).
Artillery combat is conducted during either Player Phase. Whenever an artillery unit conducts bombardment or a counter-battery mission, it is marked with a fired marker.
12.2 Fired Artillery
Artillery units which have already fired have their movement allowance halved. German artillery units can move up to one-half of their movement allowance and still conduct bombardment with half their factors (use a moved marker to indicate such a unit). Soviet artillery units which use any movement points or German artillery units which move more than half of their movement allowance have a fired marker placed on them. The exception is rocket artillery, which can move its full movement allowance before or after conducting bombardment. Rocket artillery units are marked "Fired" but can still perform movement.
Any artillery unit that is forced to retreat is marked as fired.
Artillery units may never move adjacent to an enemy unit and then engage in direct offensive fire combat in the same Player Phase; however, if a German artillery unit began the Phase with a stack which is conducting a hasty attack, it may conduct bombardment in support of the hasty attack, movement points permitting. (Note: This is the only way any artillery may participate in a hasty attack. The artillery unit still pays the hasty attack MP cost, even if "dropped off" to conduct fire at range.)
12.3 Artillery Missions and Procedures
While artillery units may initiate only one bombardment mission per turn, they may always conduct defensive fire in response to an enemy hasty or prepared attack (Section 11.2, step 6). Additionally, artillery units may conduct fire combat at units retreating into their ZOC as many times as the situation arises in a turn. These types of fire do not result in a fired marker being placed nor does a fired marker prohibit these kinds of fire. Artillery units can perform one of the following missions during each game turn:
12.3.1 Bombardment
Artillery units can conduct bombardment during either Player Phase; non-mechanized artillery during the non-mechanized combat segment and similarly mechanized artillery during the mechanized combat segment. All targets must be within range. To determine range, the hex of the firing unit is not included, but the target hex is. For defensive bombardment, range is measured to the friendly unit under attack. Additionally, targets must be within two hexes of a friendly unit. The hex being bombarded does not have to be the subject of a hasty or prepared attack during the same Player Phase.
Pick a target hex which is within the range of the artillery unit and also within two hexes of a friendly unit. Each bombardment is directed at a single unit. If using the fog of war rules, hidden enemy units in a stack may be bombarded but the actual target unit is chosen at random (roll a die, flip a coin, etc. Play nice!). Headquarters units may not be subjected to bombardment. If selected at random, pick another unit in the stack or the top unit if the headquarters unit is the only hidden unit. Individual artillery units may not split their fire against different units in the hex, but the fire of more than one artillery unit may be combined against a single enemy unit.
After the inactive player conducts counter-battery fire (see below), determine the total bombarding factors and find the corresponding total at the top of the Bombardment Table. Roll a single die and cross-index the die roll to find the result. If hit results remain should the first unit be eliminated by the bombardment, the excess are applied to another unit (selected at random if more than one is present). If needed, repeat this process until all bombardment hits are applied or no defending units remain, whichever occurs first.
Bombardment is more effective if conducted against a target adjacent to a friendly (or spotting) unit. If no spotting unit is available, there is a -1 DRM.
If successful, artillery bombardment can inflict strength point losses and disrupt target units. A number result equals the number of strength points lost by the target unit. A "D" result disrupts the target unit.
12.3.2 Counter-Battery
Artillery units that are not adjacent to enemy units (in this case, artillery units really means artillery units; mortar and rocket units may not conduct counter-battery fire, nor can they be subjected to counter-battery fire) can be used for counter-battery fire. Artillery units firing counter-battery can do so regardless of when the attack is taking place (non-mechanized or mechanized phase). The results of the counter-battery attack are implemented immediately. A successful result will prevent the enemy artillery unit from carrying out its assigned mission.
At any time during either Player Phase when either player indicates that one of his artillery units will fire, the opposing player allocates any friendly artillery unit(s), not adjacent to an enemy unit, that will conduct counter-battery against the firing unit. The player's counter-battery artillery unit(s) must be in range of the targeted enemy artillery unit (which can be beyond the two hex limit from a friendly unit used for bombardment) and must pass a proficiency check. If successful, the player conducting counter-battery totals the number of attacking factors (more than one unit may participate) and finds the appropriate column on the Counter-battery Table. An "S" result indicates that the enemy artillery unit has been suppressed and a fired marker is placed on the affected unit. Numerical results indicate the number of strength points lost by the target unit. All units conducting counter-battery fire have a fired marker placed on them.
If a counter-battery unit fails its proficiency check, that unit may try again later in the turn to fire counter-battery when circumstances permit. It may continue attempting counter-battery missions until it passes a proficiency check (as long as no enemy units have moved adjacent). A failed attempt to conduct counter-battery fire does not result in a fired marker being placed on the unit.
Example of play. Two Soviet 51st Army artillery units (total of 10 factors, both with a proficiency of 4) are designated for counter-battery duties when the German player states that he will use an artillery battalion to support a key attack. However, only one of the units passes its proficiency check and can actually fire. This unit (strength of 6) rolls a 7 on the Counter-battery Table which suppresses the German unit. The German unit cannot bombard and both the firing and targeted unit have "fired" markers placed on them.
13.0 Disruption
As a result of bombardment or regular fire combat, a unit may become disrupted.
13.1 Disruption Effects
Once disrupted, a unit suffers the following effects:
- Its movement allowance is halved.
- It loses its zone of control.
- Disrupted units may not conduct hasty or prepared attacks.
- If defending, does not fire first in the combat sequence. It can fire second, however. This is the only time that attacking units fire first.
- It cannot fire at enemy units retreating through an adjacent hex.
- Cannot spot for artillery.
If a stack of units contains both disrupted and undisrupted units, the entire stack is not considered to be disrupted. Such a mixed stack retains its ZOC and its ability to fire first (with the entire strength of the stack) in defensive combat.
When disrupted, place a "Dis" marker on the unit. This may not be removed until the next Recovery and Replacement Phase (see Section 17.1).
14.0 Supply
In order for units to move and fight at full effectiveness, they must be able to trace a supply line to a valid supply source.
14.1 Supply Status
Each unit is always in one of three supply statuses: regular supply, organic supply, or out of supply. Supply is determined in the Supply Determination Segment in each Player Turn.
14.2 Regular Supply Status
Units are in regular supply if they can trace a valid supply line to a supply source. Units trace supply through headquarters units.
Errata (2011), 14.2 (clarification): Enemy units and ZOC block supply lines unless occupied by a friendly unit.
14.2.1 Soviet Supply
For Soviet units, a valid supply line includes two segments. The unit must first trace a supply line to its division headquarters (or corps headquarters in the case of tank and mechanized corps) which cannot exceed eight hexes for non-motorized units and fifteen hexes for tank and motorized units. The second segment is traced from the division/corps headquarters to an army headquarters. This portion of the supply line can be of any length. In order to be part of a valid supply chain, army headquarters must be able to trace a supply line of any length to the north or east (behind Soviet lines) map edges.
Soviet independent units trace the first segment of supply directly to any Soviet division or corps headquarters, and then to any army headquarters.
The Soviet 4th Cavalry Corps and 1st and 13th Guards Rifle Corps headquarters act as army headquarters for their subordinate units for supply purposes. These corps headquarters trace supply to friendly map edges as do army headquarters.
Errata (2011), 14.2.1 (clarification): the three Soviet HQ units mentioned in the last paragraph (4th Cavalry Corps, 1st and 13th Guards Rifle Corps) can also supply any other units of the 51st Army (white on dark brown).
14.2.2 Rumanian Supply
For Rumanian units, a valid supply line includes two segments. The unit must first trace a supply line to its division headquarters which cannot exceed eight hexes. The second segment is traced from the division to its corps headquarters. This portion of the supply line can be of any length. In order to be part of a valid supply chain, corps headquarters must be able to trace a supply line of any length to the south or west (south of the Don River) map edges.
Rumanian independent units trace the first segment of supply directly to any division headquarters that in turn traces supply to a corps headquarters.
14.2.3 German Supply
German units trace supply to their division headquarters. This supply line cannot exceed ten hexes. The division headquarters must in turn trace a supply line of any length to the south or west (south of the Don River) map edges. German independent units may trace supply directly to any division headquarters.
14.3 Organic Supply Status
Units which were in regular supply the preceding Player Turn, but which now cannot trace a supply line to an appropriate division or corps headquarters (or if they can, the divisional/corps headquarters cannot trace to an In Supply army headquarters) or which trace a supply line exceeding allowable limits, are considered to be using organic supply. Units in organic supply status are assumed to be consuming stocks carried with the units and are marked with an Organic Supply marker.
14.4 Out of Supply Status
Units which were drawing organic supply the preceding Player Turn, but which still cannot trace a supply line to an appropriate division or corps headquarters (or if they can, the divisional/corps headquarters cannot trace to an In Supply army headquarters) or which trace a supply line exceeding allowable limits, are considered to be out of supply. These units flip their Organic Supply marker over to the Out of Supply side.
14.5 Effects of Supply Status
The following effects apply according to a unit's supply status:
- Movement
- Regular Supply: no effect
- Organic Supply: no effect
- Out of Supply: one-half movement
- Combat
- Regular Supply: no effect
- Organic Supply: -1 DRM for all combat, including artillery bombardment
- Out of Supply: -2 DRM for all combat, including artillery bombardment
14.5.1 Out of Supply Effects
Units never are lost or suffer attrition due to their supply status. If a disrupted unit is out of supply, add one to its disruption recovery die roll. Units may remain out of supply indefinitely (i.e., units are not eliminated solely for being out of supply).
15.0 Entrenchments
All undisrupted units (except company-sized and headquarters units) can build entrenchments. Units do not have to be in supply to build entrenchments. The number of entrenchment markers that can be in play is limited by the countermix.
15.1 Entrenchment Construction
At the start of the unit's Player Phase, each building unit must remain in place, not moving or engaging in combat. If this occurs, place an entrenchment construction marker (shovel image) on the unit. If the building unit becomes disrupted or comes under attack (not bombardment), then the marker is removed. At the start of the unit's next Player Phase, the marker is turned over to its entrenchment side ("F" with circle).
15.2 Entrenchment Effects
Units must expend half of their movement allowance to leave entrenchments.
Units in an entrenchment gain a one column shift to the left for all combat, including hasty and prepared attacks as well as bombardment.
15.3 Removal of Entrenchments
An entrenched marker remains in place as long as a friendly unit remains in the hex. Any friendly unit moving into the hex gains the benefit of being entrenched. Whenever the hex is vacated of all friendly units the entrenchment marker is removed.
16.0 Special Units
The following units have unique abilities or limitations in the game.
16.1 Anti-Aircraft (AA) Units
All air units conducting bombardment subtract one from their die roll if attacking a hex where an enemy antiaircraft unit is present. Air units conducting Interdiction total the number of antiaircraft units present in the potential interdiction zone and modify their die roll by -1 for each AA unit present.
German antiaircraft units include the famous 88mm antiaircraft guns that proved very effective when used in a ground role against enemy tanks. Anytime a German antiaircraft unit is in a hex attacked by a Soviet force which includes a tank unit, an additional mandatory loss result is added to the combat result obtained by the German player. This mandatory loss result must be taken by a Soviet tank unit present in the attack.
16.2 Engineer Units
Engineer units possess the special capabilities described below:
16.2.1 Assault Combat
During combat against a defender in entrenchments, the attacking force receives a +1 DRM during combat resolution if an engineer unit is present. If this capability is used, the engineer must be the attacking force's lead unit.
16.2.2 Bridging
Soviet and German engineer units can build and destroy bridges. To build a bridge, an engineer unit must begin its Player Phase on the desired hex and remain there throughout the entire phase. At the end of the phase, the bridge is completed if the building unit passes a proficiency check. To destroy a bridge, the engineer unit must begin adjacent to, or move to, the bridge and expend six movement points if motorized and three movement points if non-motorized. An engineer may blow a bridge if out of supply, as long as it has the requisite number of MP. Markers are provided for new and destroyed bridges.
16.3 German Relief Convoy
The three Relief Convoy markers provided represent 800 vehicles carrying approximately 3000 tons of supplies bound for the beleaguered Sixth Army. The following rules apply to these units:
- These are treated as infantry-class units, but move as motorized units with the movement factor indicated on the counter.
- They may never enter an enemy ZOC even if friendly units are present.
- Convoy markers have no stacking value, but there may never be two convoy markers in the same hex. Additionally, any other unit traveling through a hex occupied by a Convoy marker may not do so at the road rate.
- They have no combat value or capability to absorb loss requirements. If a Soviet unit moves through a hex occupied solely by a Convoy, the Convoy is destroyed and cannot be replaced.
The movement of the Convoy is important for victory determination. See Module 19.0.
17.0 Recovery and Replacement Phase
During this phase, disrupted units may attempt to recover. Additionally, both players receive and immediately assign replacements to augment the strength of eligible units.
17.1 Disruption Removal
Each disrupted unit attempts to become undisrupted separately. To remove its disruption marker, the unit must pass a proficiency check. If the unit is out of supply, add one to the die roll.
17.2 Replacements
There are two types of replacements in Wintergewitter, scheduled and combat attrition.
Scheduled replacements appear on the Turn Record Track. These are always infantry-class replacements.
The second type of replacements are from combat attrition. During each game turn, the strength point losses for each nationality are recorded. For replacement purposes, losses are tracked by three types: armor, infantry and artillery. Once the loss totals are known, players use the calculations below to determine how many combat attrition replacement points are available for each type:
- Soviet losses multiplied by 0.25
- German losses multiplied by 0.50
- Rumanian losses multiplied by 0.25
Use the rounding convention on all resulting fractions. Indicate the calculated number of combat attrition replacement points available to each type with the markers provided.
Errata (2011), 17.2 (clarification): Artillery units are any with the artillery icon (motorized or non-motorized). Infantry units are any with an infantry (mechanized, motorized, or non-motorized) icon. Armor units are any with a tank/assault gun icon. Note that some units not specifically labeled as infantry, artillery or armor will not be able to receive replacements (rocket, AA, cavalry, AT, engineer, reconnaissance).
17.2.1 Assignment of Replacements
Infantry replacements may only augment infantry-class units. Armor replacement points may only augment armor-class units. Artillery points may only augment artillery-class units. If not used immediately during the Replacement Phase, they are lost.
To receive replacements, a unit must be in regular supply status. Units can receive an unlimited number of replacements per turn, up to their original strength. Simply flip the unit or modify its strength marker to reflect its new strength.
Units that have been destroyed may re-enter play through the use of replacement points. Units returned in this manner enter during the Replacement Phase and are placed on or adjacent to their headquarters unit, but not in an enemy ZOC. If the headquarters unit is in an enemy ZOC, the unit may be placed adjacent to any other unit of the same division. Independent units may use any headquarters. However, if a unit is destroyed during the turn and is not reentered into play during the next Recovery and Replacement Phase, it is considered permanently lost and is removed from play.
A headquarters unit, if lost, automatically returns during the next Replacement Phase and appears adjacent to any of its subordinate units. No replacement points are expended. However, if all of its subordinate units are permanently lost the HQ may not be replaced and is also permanently out of play.
Subject to the limitations/requirements of this rule, the Soviet player may allocate replacements to any of his eligible units, Ring or Regular force units, regardless of the source of any losses that created the replacement points (i.e., losses that lead to replacements from Ring Force units do not have to be allocated only to other Ring Force units).
Remember, German Sixth Army units may never receive replacements.
Example of play. The Soviet 302nd Rifle Division bore the brunt of the German attack on turn one and suffered heavy losses. Altogether, nine infantry strength points (including an entire 5-5 infantry regiment) and one artillery-class strength point were lost. During the Replacement Phase it is determined that the 302nd Division will receive two infantry replacement points (9 x .25 = 2.25 rounded down to 2) and no artillery replacement points (1 x .25 = .25 rounded down to 0). The Soviet player decides to allocate one of the infantry points to one of the division's infantry regiments still in play and takes the other point to reconstitute the destroyed infantry regiment. This unit is placed on or adjacent to the divisional HQ unit.
18.0 Fog of War
In order to preclude Wintergewitter from becoming an exercise in opportunism by two players possessing perfect intelligence on enemy units, a method of introducing some of the uncertainty and tension of war is required.
18.1 Limited Intelligence
These rules are an attempt to interject what is generally known as the "fog of war":
- Neither player may look at an enemy unit's strength marker except during combat resolution.
- Un-stacked units on the map may be observed if they are not covered by any type of game marker.
- A stack of units must display its largest unit, measured by remaining strength points, on top. The owning player chooses which unit will be displayed if more than one unit possesses equal strength. Units under the largest (top) unit are hidden.
- If the unit is entrenched, it is hidden, even if it is the top unit.
- Players may not make any types of notes to track enemy strength or locations.
Players can attempt to bombard units even if their exact identity is not known, assuming the bombarding player wishes to do so rather than target the top-most unit of a stack. If more than one hidden unit is stacked together, the bombarding player randomly selects which unit will be bombarded (simply have the owning player place them in some sort of container and let the bombarding player pick one, or roll a die).
During combat resolution, the identity and strength of all engaged units is revealed to the enemy player.
19.0 Scenarios
Wintergewitter has four scenarios. The first, We Are Coming!, simulates the first three days of the German relief attack and serves as a good introductory scenario. The second, Hoth's Last Gasp, covers the crucial period from 16-19 December 1942 when the 57th Panzer Corps made its last attempt to break through to the Sixth Army. There are also two campaign scenarios. The first covers the entire period of the relief attack from 12-23 December. The second is a campaign scenario variant with optional German units that allows the players to explore the results of a maximum German effort.
19.1 We Are Coming!
Scenario start: AM 12 December Scenario end: PM 14 December
19.1.1 Soviet Set-Up
The Soviet player sets up first.
Soviet ground units: No units may start entrenched, reflecting the tactical surprise gained by the Germans and the lack of defensive preparations by the Soviets.
51st Army:
- Army HQ unit, within 1 hex of hex 4030.
- 4th Cavalry Corps HQ unit, within 2 hexes of hex 1836.
- 61st Cavalry Division, within 5 hexes of start line between hexes 1045-2042.
- 81st Cavalry Division, within 2 hexes of hex 1832.
- 302nd Rifle Division, within 5 hexes of start line between hexes 2142-2840.
- 126th Rifle Division, within 5 hexes of start line between hexes 2940-3747.
- 91st Rifle Division, within 5 hexes of start line between hexes 3847-4842.
Independent Units:
- 254th Tank Brigade (2 units), hex 4514.
- 51st Army independent units (5 antiaircraft regiments, 4 engineer battalions, 4 antitank regiments, 1 mortar regiment, 3 antitank brigades, 1 artillery regiment, 2 artillery brigades, 2 rocket brigades, 1 rocket battalion, 2 motorized infantry battalions, 2 infantry brigades) may be stacked with/adjacent to any of the formations of the 51st Army (all with one or distributed among any of those comprising the 51st Army).
- 85th Tank Brigade (2 units) and the 149th Antitank Regiment must be assigned to the 4th Cavalry Corps and/or the 81st Cavalry Division.
Errata (2011), 19.1 (Soviet Set Up): the 51st Army independent unit listing as printed above got garbled. The accurate at-start list is: 5 AA brigades, 4 engineer battalions, 1 AT regiment, 4 AT brigades, 1 mortar brigade, 1 artillery brigade, 1 artillery regiment, 2 rocket artillery brigades, 1 rocket artillery battalion, 2 infantry regiments. These units may set up with any at-start Soviet unit other than those of the Ring Force and the cavalry formations (as the latter already have designated 51st Army units that set up with them). The 149th AT unit that sets up with the 4C HQ and/or 81st Cavalry Division is a regiment (not brigade; the counter is correct).
Reserve units: These formations may not move until:
- Released per the Turn Record Track.
- Attacked by German or Rumanian ground units.
- Enemy units end a Player Phase within 5 hexes of any subordinate unit of the particular formation.
Once released, they may move without further restriction.
- 4th Mechanized Corps (16 units), within 2 hexes of hex 1817.
- 13th Tank Corps (14 units), within 2 hexes of hex 3929.
- 235th Tank Brigade (2 units), hex 3812.
- 234th Tank Regiment (1 unit), hex 3912.
- 87th Rifle Division (5 units), within 1 hex of hex 3816.
- 300th Rifle Division (5 units), within 1 hex of hex 3410.
- 4th Guards Rifle Division (5 units), within 1 hex of hex 2503.
- 315th Rifle Division (5 units), within 1 hex of hex 1915.
The following will also release based upon a DR whenever a German unit comes within 10 hexes of any of their subordinate units:
- 7th Tank Corps (12 units), within 2 hexes of hex 2616.
- 38th Rifle Division (5 units), within 1 hex of hex 3711.
The turn following a German unit's coming within 10 hexes of a subordinate unit's set up hex as described above, the Soviet player rolls a die, during the Stalingrad Pocket Phase, and modifies it as follows:
- +1 if the German player then has more VP than the Soviet player.
- +1 if any Soviet Ring Army unit has been activated.
- +1 if Operation Thunderclap has been initiated (Section 5.2).
If the modified DR exceeds the number of hexes between the German unit's closest incursion and the unit's set up hex, all Soviet units of the formation are permanently released. If the modified DR is less than or equal to the number of hexes determined above, the formation remains in reserve for now. Perform a release DR whenever the occasion arises as per this rule.
Note: See Section 19.3 for deployment of Soviet Ring Force units.
Soviet air units:
8th Air Army (all ready at game start):
- 235th, 268th, and 287th Fighter Divisions (IAD).
- 202nd and 226th Ground Attack Divisions (SHAD).
- 270th Bomber Division (BAD).
- 289th Mixed Division (SAD).
Reinforcements: See Turn Record Track.
19.1.2 German Set-Up
The German player sets up second.
German ground units:
- 6th Panzer Division, less its reconnaissance battalion (total 15 units): Starts within 3 hexes of the start line between hexes 1046-2043. 6th Panzer Division reconnaissance battalion begins in hex 2641.
- 23rd Panzer Division: The German player may select units totaling 23 stacking points from the division's 15 total units. Units selected start within 2 hexes of hex 2841. The remaining units go into the division's force pool and enter according to the schedule on the Turn Record Track.
- The 57th Panzer Corps HQ unit and the 3 Relief Convoy units begin within 1 hex of 1652.
- The following independent units may start within any of the start areas above: 3/57 and 651 Motorized Engineer Battalions, II/Lehr Panzer Battalion.
Rumanian ground units:
- VI Corps: HQ unit and Corps' 2 independent units, within 1 hex of hex 1945.
- 8th Cavalry Division (5 units), within 2 hexes of start line between hexes 2942-3450.
- 18th Infantry Division (8 units), within 2 hexes of start line between hexes 2143-2541.
- VII Corps: HQ unit, hex 4053.
- 5th Cavalry Division (6 units), within 2 hexes of start line between hexes 3550-4047.
- 4th Infantry Division (10 units), within 2 hexes of start line between hexes 4343-4843.
- Independent units: 7th Motorized Artillery Regiment, in any VII Corps unit area; 57th Cavalry Battalion, hex 4246; 57th Engineer Battalion, hex 4443.
German air units: Elements of IV and VIII Fliegerkorps:
- I Gruppe/JG 52
- I and II Gruppe/ZG 1
- I and II Gruppe/SG 1
- I, II and IV Gruppe/STG 2
- I, II and IV Gruppe/STG 77
- I and II Gruppe/KG 51
- I and II Gruppe/KG 55
All start in ready status. Reinforcements: See Turn Record Track.
Conditional Reinforcements: Group Christea (Rumanian VII Corps, 4 units) enters on hex 4831 following the game turn when VII Corps units first gain control of hex 4831.
19.1.3 Victory Conditions
German:
- A decisive victory if he controls Verkhne-Kumsky (hex 2428) at scenario end.
- A marginal victory if he has 75 stacking points across the Aksai River between hexes 2331 and 3431.
Soviet:
- A decisive victory if he holds Verkhne-Kumsky and there are less than 50 stacking points across the Aksai between hexes 2331 and 3431.
- A marginal victory if he holds Verkhne-Kumsky.
Note: If both players score a marginal victory the game ends in a tie.
Historical note: In the actual battle, the Germans successfully pushed the bulk of the 6th and 23rd Panzer Divisions across the Aksai but were unable to hold Verkhne-Kumsky, thus gaining a marginal victory.
19.2 Hoth's Last Gasp
Scenario start: AM 16 December Scenario end: PM 19 December
19.2.1 Soviet Set-Up
The Soviet player sets up first.
Soviet ground units: (some units with reduced strength; indicated with -X arm (armor points), -X inf (infantry points), and -X art (artillery points). Losses are allocated in any way desired among the units of the parent formation.)
51st Army:
- Army HQ unit, anywhere north of hexrow xx24.
- 4th Cavalry Corps HQ unit, hex 1436.
- 61st Cavalry Division (-4 inf, -1 art), within 2 hexes of 1935.
- 81st Cavalry Division (-2 inf), within 2 hexes of 1537.
- 91st Rifle Division (-1 inf), within 4 hexes of 4441 but behind 12 December start line.
- 126th Rifle Division (-4 inf), within 2 hexes of 3836.
- 302nd Rifle Division (-8 inf, -2 art), within 1 hex of 3433.
- 13th Tank Corps (-5 arm, -9 inf), within 1 hex of 3431, 3428, and 3127.
- 4th Mechanized Corps, 235th Tank Brigade, 234th Tank Regiment, 254th Tank Brigade (-10 arm, -12 inf, -3 art), within 1 hex of 2129, 2428, 2728.
- 87th Rifle Division, within 1 hex of 3223.
- 300th Rifle Division, within 1 hex of 1721.
Independent Units:
- 85th Tank Brigade (2 units) and 149th AT Brigade with any 4th Cavalry Corps, 61st and/or 81st Cavalry Division units.
- 5 antiaircraft regiments, 4 engineer battalions, 5 antitank brigades, 1 mortar regiment, 1 antitank regiment, 1 artillery regiment, 2 artillery brigades, 2 rocket artillery brigades, 1 rocket artillery battalion, 2 motorized infantry battalions, and 2 infantry brigades start in any of the areas above. Subtract 2 armor points, 1 infantry point, and 10 artillery strength points from any combination of these units.
Reserve units: These may not move until:
- Released per the Turn Record Track.
- Attacked by German or Rumanian ground units.
- Enemy units end a Player Phase within 5 hexes of any subordinate unit of the particular formation.
Once released, they may move without further restriction.
- 4th Guards Rifle Division, within 1 hex of hex 2503.
- 315th Rifle Division, within 1 hex of hex 1915.
The following will also release based upon a DR whenever a German unit comes within 10 hexes of any of their subordinate units:
- 7th Tank Corps (12 units), within 2 hexes of hex 2616.
- 38th Rifle Division (5 units), within 1 hex of hex 3711.
The turn following a German unit's coming within 10 hexes of a subordinate unit's set up hex as described above, the Soviet player rolls a die, during the Stalingrad Pocket Phase, and modifies it as follows:
- +1 if the German player then has more VP than the Soviet player.
- +1 if any Soviet Ring Army unit has been activated.
- +1 if Operation Thunderclap has been initiated (Section 5.2).
If the modified DR exceeds the number of hexes between the German unit's closest incursion and the unit's set up hex, all Soviet units of the formation are permanently released. If the modified DR is less than or equal to the number of hexes determined above, the formation remains in reserve for now. Perform a release DR whenever the occasion arises as per this rule.
Note: See Section 19.3 for deployment of Soviet Ring Force units.
Soviet air units:
8th Air Army. Roll a die for each of these units. With a DR of 1 the unit is placed in the flown box; otherwise the units are ready at start:
- 235th, 268th, and 287th Fighter Divisions (IAD).
- 202nd and 226th Ground Attack Divisions (SHAD).
- 270th Bomber Division (BAD).
- 289th Mixed Division (SAD).
Reinforcements: See Turn Record Track.
19.2.2 German Set-Up
The German player sets up second.
German ground units:
- 6th Panzer Division (-2 arm, -4 inf, -1 art), within 2 hexes of 2531 and/or 2334.
- 23rd Panzer Division (-1 arm, -2 inf, -1 art), within 2 hexes of 3131 and/or 2937.
- 17th Panzer Division, see Turn Record Track.
- The 228th Assault Gun Battalion, 3/57 and 651 Motorized Engineer Battalions, and II/Lehr Antiaircraft Battalion set up with any division above.
- The 57th Panzer Corps HQ unit and the 3 Relief Convoy units begin within 5 hexes of 1652.
Rumanian ground units:
- VI Corps: HQ unit and Corps' 2 independent units, within 2 hexes of 2043.
- 8th Cavalry Division (-1 inf), within 2 hexes of 3141.
- 18th Infantry Division (-1 inf), within 1 hex of 1941.
- VII Corps: HQ unit, hex 4146; 4 independent units (7th Motorized Artillery Regiment, Gruppe Bischof, 57th Cavalry Battalion, 57th Engineer Battalion) within 3 hexes of 4146.
- 5th Cavalry Division (-1 inf), within 2 hexes of 3542 but south of Aksai River.
- 4th Infantry Division, within 2 hexes of start line between hexes 4343-4843.
Errata (2011), 19.2 (Rumanian Set Up, VII Corps): ignore the reference to "Gruppe Bishof," both here and elsewhere in the rules.
German air units: Elements of IV and VIII Fliegerkorps:
- I Gruppe/JG 52
- I and II Gruppe/ZG 1
- I and II Gruppe/SG 1
- I, II and IV Gruppe/STG 2
- I, II and IV Gruppe/STG 77
- I and II Gruppe/KG 51
- I and II Gruppe/KG 55
10 units are in a ready status, the remainder in the flown box. Reinforcements: See Turn Record Track.
Conditional Reinforcements: Group Christea (Rumanian VII Corps, 4 units). Enters on hex 4831 following the game turn when VII Corps units first gain control of hex 4831.
Errata (2011), 19.2 (Axis Set Up): Mechanized infantry unit Eule (incorrectly labeled as part of the 14th Panzer Division) starts this scenario stacked with the 57th Panzer Corps HQ or any Rumanian unit. The Eule unit is not part of the 14th Panzer Division; the designation is to be ignored.
19.2.3 Victory Conditions
German
- Decisive Victory: 100 stacking points across the Myshkova River between hexes 2223 and 3524.
- Marginal Victory: 50 to 99 stacking points across the Myshkova River between hexes 2223 and 3524.
Soviet
- Decisive Victory: No German units across the Myshkova River between hexes 2223 and 3524.
- Marginal Victory: 49 or fewer German stacking points across the Myshkova River between hexes 2223 and 3524.
Historical note: In the actual battle, the Germans managed to get elements of 6th Panzer across the Myshkova at Vasilevka (hex 3424) but with less than 30 stacking points resulting in a Soviet marginal victory.
19.3 Operation Wintergewitter
Scenario start: AM 12 December Scenario end: PM 23 December
19.3.1 Soviet Set-Up
The Soviet player sets up first.
Ground units: See Case 19.1.1. Air units: See Case 19.1.1. Reinforcements: See Turn Record Track.
Soviet Ring Forces: These forces are set up within their designated starting areas adjacent to the Stalingrad Pocket, within 3 hexes of the Pocket.
- 21st Army: Army HQ unit, 52nd Guards Rifle Division (5 units), 293rd Rifle Division (5 units), 2 independent units.
- 57th Army: Army HQ unit, 15th Guards Rifle Division (5 units), 422nd Rifle Division (5 units), 143rd Rifle Brigade, 156th Motorized Rifle Regiment, 61st and 90th Tank Brigades, 35th Tank Regiment, 9 other independent units.
- 64th Army: Army HQ unit, 36th Guards Rifle Division (5 units), 29th, 157th, 169th, and 204th Rifle Divisions (each 5 units), 96th, 97th, 149th, 154th Rifle Brigades, 66th Naval Infantry Brigade, 38th Motorized Brigade, 56th Tank Brigade, 166th Tank Regiment, 7 other independent units.
Errata (2011), 19.3.1 (Soviet Ring Forces): the 154th Rifle Brigade is NOT part of the Ring Force; it is one of the Independent 51st Army units that set up per Section 19.1. The 96th, 97th, 149th Infantry, 66th Naval Infantry, 38th Motorized Infantry and 56th Tank are regiments (not brigades). Also in the 64th Army set-up, 166th Tank is a brigade (not a regiment). The counters are correct. (The printed text above is left as printed; the errata's unit types and the 154th exclusion apply.)
19.3.2 German Set-Up
The German player sets up second.
German ground units: See Case 19.1.2. Rumanian ground units: See Case 19.1.2. German air units: See Case 19.1.2. Reinforcements: See Turn Record Track. Conditional Reinforcements: See Case 19.1.2.
German Sixth Army Attack Group: 14th Panzer Division (8 units). See Section 5.2.
19.3.3 Victory Conditions
Victory is determined at the conclusion of the 23 December PM turn. The victory point total of the German player is compared to that of the Soviet player. This net result (which may be a negative number) is compared to the table below to determine victory.
The German player gains victory points (VPs) for the following actions:
- 1 if any German unit ever advances to within 18 hexes of the Stalingrad Pocket.
- 1 if any German unit ever advances to within 5 hexes of the Pocket.
- 1 if during any time in the game a corridor is opened into the Pocket (defined as a path of hexes free of Soviet units and their ZOCs; Axis units block Soviet ZOCs for this purpose). This VP is not awarded if the corridor exists at the end of the game.
- 1 for each Relief Convoy marker which enters the Pocket.
- 1 for each Soviet Mandated Attack not carried out (only if the Soviet player is the Initiative player in a turn).
- 5 if a corridor exists at the conclusion of the game.
The Soviet player gains victory points for the following actions:
- 1 for every 50 German strength points destroyed at the end of game. This is determined by taking the original strengths of German units and comparing them to their game-ending strength levels. The difference is the number of strength points lost.
- 1 for each German Mandated Attack not carried out (only if the German player is the Initiative player in a turn).
- 1 if the German player commences Operation Thunderclap and fails to open a corridor into the Pocket.
Victory Margin Table
| VP Total | Result |
|---|---|
| 8 | German decisive victory |
| 5 | German significant victory |
| 2 | German marginal victory |
| 1 | Draw |
| 0 | Soviet marginal victory |
| -1 | Soviet significant victory |
| -2 | Soviet decisive victory |
Historical note: In game terms, the battle resulted in a Soviet marginal victory with the Germans crossing the Myshkova River and approaching to within 18 hexes of the Pocket to gain 1 VP and the Soviets badly battering the 57th Panzer Corps by destroying over 50 German strength points to gain 1 VP.
20.0 Operation Gross
Wintergewitter: the German Maximum Effort Variant
This scenario depicts a maximum German effort to relieve the Pocket. It allows the German player to employ formations and assets which were not present in the actual battle. In each case a plausible case can be made that they easily could have been used in the relief attack had an all-out effort been desired. To maintain game balance, there is a victory point penalty associated with the use of these forces.
This scenario uses all elements of Scenario 19.3 with the following exception:
20.1 German Optional Units
The following groups of optional forces are available:
- 57th Panzer Corps support units (2/40, 5/46, 602, and 844 Artillery Battalions, and 203 Assault Gun Battalion). The four artillery battalions were assigned to the relief attack from the First Panzer Army, which was then becoming mired in the Caucasus Mountains. A combination of lack of transport and delay in releasing the units by their original headquarters meant that they did not actually arrive in the area of the game map until after the failure of Operation Winter Storm. The assault gun battalion was an asset of the Fourth Panzer Army which, though available, does not appear to have been actually employed. If this group of units is used, they start on Turn one in any German set-up area.
- 15th Luftwaffe Field Division (5 units plus 4 independent units from the 57th Antiaircraft Regiment: 96, 2/61, I/26, I/61 Antiaircraft Battalions). This unit was attached to the 57th Panzer Corps for Operation Winter Storm, but was not used because of concerns that its level of training was not satisfactory. Players wishing to explore the impact of these units may start them on Turn one within one hex of hex 1652.
- 16th Motorized Division (17 units). Unlike the 15th Luftwaffe Field Division, the 16th Motorized was an experienced formation that was near full strength. Since summer, this formation was guarding the 4th Panzer Army's right flank, patrolling the Kalmuck Steppe. While assembling his force to launch Operation Wintergewitter, Field Marshal von Manstein requested that he be given this formation. His request was refused and the division remained in the vicinity of the town of Elista, only 48 hours' march from the battle to punch through to the Sixth Army. If this powerful formation is used, it may begin on AM 12 December anywhere behind the 12 December start line.
20.2 Compensatory Soviet Air Units
Add the following three Soviet Air Units to the at-start Soviet forces should any of the German Optional units be put into play:
- 220th and 283rd Fighter Divisions (IAD).
- 228th Ground Attack Division (SHAD).
20.3 Soviet Ring Army
The Soviet player may release one unit from each attacked Ring Army per turn. No die roll is performed, as this is automatic, and the unit to be released is chosen by the Soviet player. The unit(s) may be released as long as each (non-breached) hex of the Pocket in that Army's sector is occupied by an infantry or armor unit of the Ring Army.
20.4 Victory Conditions
Victory is determined as in Scenario 19.3 with the following addition:
The Soviet player receives 2 VP if the German player uses the 16th Motorized Division, and 1 VP each if the German player employs the 15th Luftwaffe Field Division and/or the 57th Panzer Corps support units.
Historical note: Players wanting to take this German dream scenario one step farther may employ the 17th Panzer Division from the start of the scenario. Historically, this unit was withheld by Hitler to buttress the weak German defenses north of the area on the game map and was not committed until after the commencement of Operation Winter Storm.
Detailed Sequence of Play
Chart as printed in the rules.
-
Air Operations Phase
- A. Air Allocation Segment
- Soviet player secretly places any of his ready air units in the boxes on his Air Operations Chart.
- German player does the same with his ready non-fighter units.
- Both Air Operations Charts are revealed; the German player can now place his ready fighter units in any of his mission boxes.
- B. Air Combat Segment (perform for each mission box with a fighter unit assigned to air superiority)
- If the fighter unit is in an Air Superiority box that corresponds to a mission by enemy aircraft, the fighter unit performs a proficiency check; units failing the check are placed in the flown units box; those passing go to step 2.
- If escorts are present, determine which set of fighters has gained the bounce.
- Player with the bounce may designate engagements and resolve combat.
- Non-advantage player may return fire with surviving aircraft.
- If intercepting aircraft survive, they may engage the mission force. Fire is simultaneous.
- C. Perform bombardment
- Select a target unit. If more than one hidden unit is present in a single hex, the target unit is chosen at random if the top unit is not desired.
- Total the number of ground attack factors present; apply modifications per the Bombardment Table. The presence of antiaircraft units in the target hex modifies the attack.
- Results from the Bombardment Table are applied immediately.
- The German player may withhold Ju-87 (Stuka) units for later use in his movement and/or combat phase(s).
- A. Air Allocation Segment
Source note: the Detailed Sequence of Play chart is reproduced from the printed chart text, with its numbering as printed.
Errata Summary (Against the Odds addenda, 18 October 2011)
The following addenda items concern counters and the Turn Record Track rather than rule text. They are recorded here and are not applied to the printed rules above.
- Counters: the Rumanian 7th Corps HQ unit carries a Corps HQ indicator (not Division); the Soviet 91st Rifle Division HQ carries a Division size indicator (not Brigade); the Soviet 13th Army HQ carries an Army size indicator (not Corps); the German Eule mechanized infantry unit is not part of the 14th Panzer Division (ignore that designation); the 742 Engineer Battalion of the Independent 51st Army is a motorized unit.
- Turn Record Track: disregard the notation for the 13th Guards Rifle Corps HQ unit on turn 11; all 16 units of the Soviet 2nd Guards Mechanized Corps arrive on turn 9 (not just the HQ). Note: the printed turn 9 entry reads "2nd Gds Mech Corps (all 18 units)"; the addendum's figure of 16 is recorded as issued.
- The addenda's magazine-article corrections (map and illustration captions) are not rules and are not reproduced.