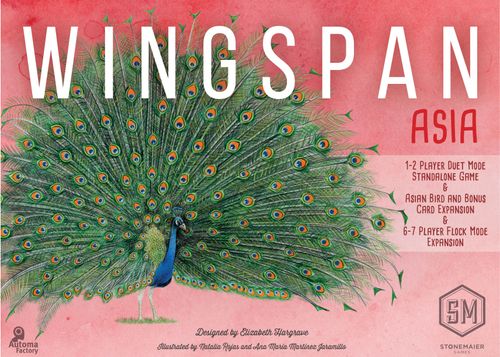
Wingspan Asia
Wingspan Asia Rulebook
Table of Contents
Table of Contents
- Components
- Setup
- Flock Mode (6-7 Players)
- Overview
- Game End and Scoring
- The Four Actions
- Option 1. Play a Bird From Your Hand
- Option 2. Gain Food and Activate Forest Bird Powers
- Managing the Birdfeeder
- Managing Food Tokens
- Option 3. Lay Eggs and Activate Grassland Bird Powers
- Managing Egg Tokens
- Types of Nests
- Option 4. Draw Bird Cards and Activate Wetland Bird Powers
- Managing the Bird Deck
- Bird Powers
- End of the Round
- Scoring End-of-Round Goals (Original Rules for Base Game)
- Bonus Cards
- Other Notes
Components
- Rulebook and Appendix
- 90 bird cards
- 14 bonus cards (3 repeated from base game with updated lists)
- 1 Duet map and Flock round-end goal board (double sided)
- 1 Flock turn-order dial (double sided)
- 6 Duet end-of-round goal tiles
- 30 Duet tokens (15 per player)
- 5 food dice
- 1 birdfeeder board
- 1 bird tray
- 2 player mats (double sided)
- 16 action cubes (8 in each color)
- 30 egg miniatures
- 81 food tokens
- 1 reference tile (double sided)
- 1 scorepad
- 1 first-player token
- 2 swift-start guides for Duet mode (2 players)
Setup
Global Components
- Bird cards. Shuffle the bird cards into a deck. Place it next to the bird tray, then populate the tray with 3 face-up bird cards.
- Supply. Place all food tokens and egg miniatures in the supply. These are accessible to all players.
- Birdfeeder. Roll the food dice onto the birdfeeder board.
- Bonus cards. Shuffle the bonus cards into a deck and place it on the table.
- Goal tiles. Shuffle the goal tiles without looking at them (they're double-sided). Place 1 goal tile (either side; see page 15) on each of the 4 blank spaces on the goal board. Return extra goal tiles to the box.
Player Setup
A. Each player receives:
- 1 player mat (use the inside section of the mat as shown in these images; the exterior section is only used when playing with the Oceania Expansion)
- 8 action cubes of one color
- 2 random bonus cards
- 5 random bird cards
- 5 food tokens (1 of each type: invertebrate, seed, fish, fruit, rodent)
You may keep your hand of cards private or public throughout the game.
B. You have 10 resources: 5 cards and 5 food. You must discard 5 of them and keep 5 (any combination). You will probably want to keep food tokens shown in the upper left of the bird cards you selected. For example, you might keep 2 bird cards and 3 food, or you might keep 4 bird cards and 1 food.
C. Choose 1 bonus card to keep and discard the other. You may look at your bonus cards while selecting which birds to keep (and vice versa).
D. Randomly select the first player and give them the first-player token.
Note: If you are using the Swift Start guide, your cards and food are pre-selected by the guide.
You may combine these bird cards and bonus cards with the Wingspan core game and other expansions (and vice versa); the Wingspan Asia cards have an R in the bottom right corner to differentiate them. If you already know how to play Wingspan, there are no new rules to learn in this expansion unless you're playing in Duet or Flock mode (the instructions for which are found in red and blue boxes); there are some new bird powers described in the Appendix.
Duet Mode (2 players)
The Asia Expansion includes a new Duet mode for exactly 2 players. It includes all other setup steps as shown on this page, but the following replaces step 5 (Goal Tiles):
- Duet map and Goal tiles. Use the Duet map and Duet end-of-round goal tiles. The goals are double-sided and marked with red corners. Choose 4 at random and put them in the 4 slots below the Duet map. Return extra goal tiles to the box.
- Duet tokens. Place 1 Duet token in your player color on each of the 15 bird slots on your player mat. You will place a Duet token on the Duet map each time you play a bird.
The setup shown is for the new Duet mode. A standard game would have the goal mat from the original game at (5), and no Duet tokens placed on the player mats.
Flock Mode (6-7 Players)
This expansion enables 6- and 7-player games (Flock mode) when combined with the base game. Plan for a Flock mode game to last about 2 hours on your first try — longer if there are inexperienced players in your group.
Overview
Flock mode requires 2 simultaneous active players to speed up gameplay. You are still competing as individuals, just as you do in the base game. You will be assigned to a group that has its own bird tray and birdfeeder, and you will only use that group's resources throughout the game. You will interact across groups in other ways, though: the whole table shares end-of-round goals, pink "Once Between Turns" powers, and any bird powers that affect other players.
Setup
Split the players into 2 groups at the same table (3+3 for a 6-player game or 3+4 for a 7-player game). These groups remain fixed for the entire game.
Replace all Global Components setup steps with the following:
- Turn-order dial. Place the turn-order dial in the middle of the table. The dial has two pieces; make sure that both pieces have the correct side facing up (6 or 7 players). Distribute the player action cubes to players around the table in exactly the same order as the colors on the dial (players may want to sit accordingly if they have a favorite color).
- Bird cards. Shuffle the bird cards into a deck; you will need to combine bird cards from the base game and/or another expansion to have enough for a 6-7 player game). Split the deck in half, place it next to a bird tray for each group, then populate each tray with 3 face-up bird cards.
- Supply. Place all food tokens and egg miniatures in the supply. These are accessible to all players.
- Birdfeeders. Each group has their own birdfeeder populated with 5 dice. a. If playing with the Oceania Expansion, each group uses 2 nectar dice and 3 regular food dice.
- Bonus cards. Shuffle all available bonus cards (except the Historian; see page 16) into a single deck and place it on the table for both groups to share.
- Goal tiles. Use one set of goal tiles for the entire table (use standard goal tiles, not the Duet goal tiles with red corners). Shuffle the goal tiles without looking at them (they're double-sided). Place 1 goal tile (random side up) on each of the 4 blank spaces on the new Flock mode goal board (on the back side of the Duet map). Return extra goal tiles to the box.
Player Setup
Proceed with all standard player setup steps as described on page 2. Then rotate the turn-order dial so the star points to the player with the first-player token (purple in this 7-player example).
Group Notes
- Other than assigning players to a certain set of dice and cards, the groups do not have any meaning in the game.
- Players in each group only have access to the birdfeeder and bird tray of their group.
- If a bird power refers to "any die," you only have access to your group's dice.
Overview
Wingspan is played over 4 rounds. During each round, players take turns—proceeding clockwise—until each player has used all of their available action cubes.
Turn Structure
On your turn, you will take 1 of 4 actions, as shown on the left side of your player mat:
- Play a bird from your hand (page 6)
- Gain food and activate forest bird powers (page 7)
- Lay eggs and activate grassland bird powers (page 8)
- Draw bird cards and activate wetland bird powers (page 9)
Designer's note: Your first few turns will be very simple as you work to attract some birds to your wildlife preserves. You may even select the same action multiple times, which is absolutely allowed!
To play a bird from your hand onto a habitat, place an action cube on the PLAY A BIRD spot above the column where you will play the bird. The "play a bird" row is one of the four major actions of the game, even though it's much narrower than the other three. Pay the bird's food and egg cost, then place the bird on your mat, triggering that bird's white "When Played" power (if any).
The Gain Food, Lay Eggs, and Draw Bird Cards actions follow the same 3-step process (numbers noted on player mat image):
- Choose a habitat on your player mat and place an action cube on the leftmost exposed slot in that row. Gain the benefit of that slot.
- Move your action cube from right to left, activating any birds with a brown "When Activated" power in that row. Using each power is optional.
- When the action cube reaches the far left, leave it there (the number of cubes here may impact teal "Round End" powers). Your turn is over.
IMPORTANT: The eggs at the tops of columns 2-5 are the cost of playing a bird (see page 6). You do not pay eggs when going benefits from the three habitats.
Round Structure
When all players have placed all of their action cubes, the round is over. Follow these steps in order:
- Use round-end bird powers for birds on your player mat.
- Score the end-of-round goal.
- If Round 4 is over, use game-end powers and then count final scores. Otherwise, continue to step 4.
- Remove all action cubes from your player mat.
- Discard and replace all cards in the bird tray.
- Pass the first player token clockwise to the next player.
Use 1 of your action cubes to mark your score on the end-of-round goal. As a result, you will have 1 fewer action cube to use each round:
- Round one: 8 turns per player
- Round two: 7 turns per player
- Round three: 6 turns per player
- Round four: 5 turns per player
Designer's note: Players have fewer actions as the game progresses, but the bird powers create powerful combinations as birds accumulate in each row of the player mats.
Duet Mode
Pass the first player token to the player who came in second on the end-of-round goal. If the players tied, then pass it to the other player.
Flock Mode
After passing the first player token to the left, move the turn-order dial so that the star points to the new first player.
Game End and Scoring
The game ends at the conclusion of Round 4. After activating yellow "Game End" powers, use the scorepad to add together the following:
- Points for each face-up bird card on your player mat (printed on the cards)
- Points for each bonus card (printed on the cards)
- Points for end-of-round goals (shown on the goal board)
- Points for nectar (if playing with the Oceania Expansion)
- 1 point for each:
- egg on a bird card
- food token cached on a bird card
- card tucked under a bird card
The player who has the most points wins. In the case of a tie, the player with the most unused food tokens wins. If players are still tied, they share the victory.
This is a detailed rulebook, but you can learn the entire game by using the Swift-Start cards and guides. We recommend using these guides for your first game in Duet mode.
Duet Mode Swift-Start Guides and Cards
The easiest way to learn Wingspan is by following the Swift-Start guides. Distribute 1 guide to each player, with the first player getting the Player A guide. Proceed with all setup steps in this rulebook as normal, except for selecting birds and food tokens. Instead, the guides will instruct which cards and food each player starts with. This Swift-Start learning process uses the 6 Swift-Start cards marked with red corners.
These player guides explain the 4 main actions to both players by walking them through their first few turns.
After learning the game, shuffle the various Swift-Start cards into their respective decks. They're marked on the corners in case you'd like to pull them out to teach new players using this system.
The base game of Wingspan also includes a Swift-Start guide and 10 cards (with gray corners) to aid with teaching the game to larger groups.
TIP: When selecting bird cards, think about how they will help you get more cards or food early in the game. "When Activated" (brown) powers can be especially helpful!
The Four Actions
Each turn, you will take one action. This section describes each action in more detail.
Option 1. Play a Bird From Your Hand
Before choosing to play a bird from your hand, consider its habitat, food requirements, and egg cost. Each bird has habitat and food requirements, shown in the upper left-hand corner of the card. Additionally, there may be an egg cost shown at the top of the column in which you're playing the bird (there is no egg cost for the first column). If you cannot afford to pay the full cost, you cannot play the bird.
When you choose to play a bird, do the following:
-
Select a bird card in your hand that you want to play, and decide on the habitat where you will play it. The three habitats are:
- Forest
- Grassland
- Wetland
If multiple habitat symbols are shown on the bird card, you can choose which habitat (row) to place it in. Your player mat limits you to a maximum of 5 birds in each habitat.
-
Place an action cube at the top of the column in which you will play the bird, and pay the egg cost shown there. You will always play a bird into the leftmost open spot in the chosen row. Your first bird in each row does not have an egg cost. To play a bird in column 2 or 3, you must discard 1 egg to the egg supply. In columns 4 or 5, you must discard 2 eggs.
-
Pay the bird's food cost. Discard food tokens to the supply (these tokens must be from next to your player mat, not food tokens cached on bird cards, a concept that will be explained later). The 5 types of food are:
- Invertebrate
- Seed
- Fish
- Fruit
- Rodent
Wild: If a bird's food requirement includes a wild icon, you can use any of the 5 types of food for it.
No food: A crossed-out circle means a bird does not have a food cost.
Or: This icon in bird costs and elsewhere in Wingspan means "or" (e.g., pay 1 fish or 1 fruit).
When playing birds, you may spend any 2 food tokens as if they are any 1 food token. For example, if you need 1 fish, you could use any other 2 food tokens instead. This exchange cannot be used during other parts of the game.
-
Place the bird and move your action cube to the left side of the "PLAY A BIRD" row.
-
If the bird has a white "When Played" power, you may use that power. Other powers are not used when the bird is played. Playing a bird is the only action that does not activate a row of birds. In Duet mode, place a duet token on the map (see page 10).
Designer's note: These food types are very generalized. For example, the symbol for invertebrates is a caterpillar, but some invertebrate-eaters specialize in flying or swimming insects instead or even shellfish.
Option 2. Gain Food and Activate Forest Bird Powers
Food is primarily used to play bird cards. Your options for which food to gain are shown on the dice in the birdfeeder, which will repeatedly get depleted and refilled throughout the game.
When you choose to gain food, do the following:
-
Place an action cube in the leftmost exposed slot in the "GAIN FOOD" row on your player mat and select that number of dice from the birdfeeder.
For each die that you select:
- Remove the die from the birdfeeder and put it on the table.
- Gain 1 food token matching the icon on the die and place it next to your player mat. Your food tokens are public information.
You always gain 1 food token per die. With the die face that shows the wild icon, gain 1 token of either type (not 2 tokens).
-
If the slot where you placed your action cube shows a card-to-food bonus conversion, you may discard at most 1 bird card from your hand to gain an additional food. This is optional. When you gain this extra food, you must choose among the dice that are remaining in the birdfeeder.
-
Activate any "When Activated" (brown) powers on your forest birds, from right to left. All powers are optional. End your turn by placing your action cube on the left side of the "GAIN FOOD" row.
Example: Gain 1 food token from a die, then you may discard 1 bird card to gain another food token from a die. Next, you may activate the power on the bird card.
Managing the Birdfeeder
The birdfeeder board holds the available food dice (up to 5). The dice removed from the birdfeeder when a player gained food will remain outside the birdfeeder until it is refilled.
If the birdfeeder is ever empty, roll all 5 dice again. If the dice in the birdfeeder all show the same face (including if there is only 1 die) and you are about to gain food from the birdfeeder for any reason, you may first roll all 5 dice again. (The wild face counts as its own unique face.)
Managing Food Tokens
There is no limit to how many food tokens you can have by your mat or on your birds (some bird cards allow you to cache food tokens on them until the end of the game), nor is there a limit to food tokens in the supply. In the unlikely event that any type of food token is unavailable in the supply, use a temporary substitute.
Option 3. Lay Eggs and Activate Grassland Bird Powers
Eggs are part of the cost of playing bird cards in columns 2-5. Also, each egg on the bird cards on your player mat is worth 1 point at the end of the game.
When you choose to lay eggs, do the following:
-
Place an action cube in the leftmost exposed slot in the "LAY EGGS" row on your player mat and lay that number of eggs.
To lay an egg, gain an egg token from the supply (color doesn't matter) and place it on a bird card that has space for it, according to its egg limit. The egg will stay there for the rest of the game, unless discarded.
You can lay eggs on any combination of birds (including all on 1 bird), but each bird has an egg limit. A bird's egg limit is shown by the egg icons. A bird card can never hold more than this number of eggs.
It is possible that you will have more capacity to lay eggs (based on your player mat) than you have spaces on your birds. Any excess beyond your egg limit is lost.
-
If the slot where you placed your action cube shows a food-to-egg bonus conversion, you may pay at most 1 food token to lay an additional egg. This is optional.
Example: Lay 2 eggs, then you may pay 1 food to lay another egg. Next, you may activate the power on the bird card.
-
Activate any "When Activated" (brown) powers on your grassland birds, from right to left. All powers are optional. End your turn by placing your action cube on the left side of the "LAY EGGS" row.
Managing Egg Tokens
There is no limit to the egg supply. In the unlikely event that no eggs remain in the supply, use a temporary substitute.
Types of Nests
Each bird has a nest icon beneath its score. These nest icons can be important for end-of-round goals and bonus cards. The 4 types of nests are:
- Platform
- Bowl
- Cavity
- Ground
Star nests are wild. (These birds build unusual nests that don't fit into the four standard types.) These are powerful, because they can match any other nest type for goals, bonus cards, and bird powers.
Designer's note: Egg limits in Wingspan are all proportionate to the number of eggs birds actually lay...but scaled down for the game. The birds represented in the game by cards with a maximum of 6 eggs may actually lay 15 or more eggs in a year!
Option 4. Draw Bird Cards and Activate Wetland Bird Powers
The cards available for you to draw are the 3 face-up cards on the bird tray and the top card of the bird deck.
When you choose to draw cards, do the following:
-
Place an action cube in the leftmost exposed slot in the "DRAW CARDS" row on your player mat, and draw the number of cards shown there from either the face-up cards on the bird tray or the bird deck. There is no limit on how many cards you can have in your hand.
-
If the slot where you placed your action cube shows an egg-to-card bonus conversion, you may discard at most 1 egg from a bird on your mat to draw an additional card. This is optional. Remove 1 egg from one of your bird cards and return it to the egg supply.
Example: Draw 1 bird card, then you may discard 1 egg to draw another card. Next, you may activate the power on the bird card.
-
Activate any "When Activated" (brown) powers on your wetland birds, from right to left. All powers are optional. End your turn by placing your action cube on the left side of the "DRAW CARDS" row.
Designer's note: The map at the bottom of each bird card shows in which continents it lives.
Managing the Bird Deck
As you draw face-up cards, they are not immediately refilled. Instead, wait until the end of your turn before refilling empty spaces on the bird tray. If the face-down deck is ever emptied during the game, reshuffle all discarded bird cards to form a new deck.
At the end of each round, discard any remaining face-up cards and replenish them with 3 new bird cards. The discard pile is kept face-up.
Duet Mode Gameplay
When you play a bird onto your player mat, place the Duet token from that spot onto an unclaimed space on the Duet map that matches the bird you played.
"Matching the bird" means:
- The space must be in the region of the Duet map that corresponds to the habitat where you played the bird.
- The symbol on the space must correspond to the bird you played:
- To use a nest space, the bird must have that nest symbol.
- Star nests are wild and can match any nest symbol on the Duet map.
- To use a food space, you must have spent that food.
- If you use the 2-for-1 food rule to play a bird, treat it as if you converted those two foods into the food you needed for the bird. Thus, you can use a space for the required food, not the 2 foods you spent to get that required food.
- The 50+ cm and <50 cm spaces correspond to the bird's wingspan.
- Note that it is not enough for a bird to have the correct habitat or food on the card; you must have played the bird in that habitat and used that food when playing the bird.
Do I place a token?
- Place a token on the map whenever you play a bird. This will usually occur through taking the "PLAY A BIRD" action, but bird powers that allow you to play a bird (e.g., "play another bird in this habitat") also count.
- Remember, the Duet tokens on each space of your player mat are only there as a reminder to use them, not a requirement for play. For example:
- Bird powers that move a bird do not cause a new Duet token to be placed on the Duet map.
- Some birds in other expansions allow you to play a bird on top of another bird. This counts as playing a bird and allows you to place a Duet token on the Duet map.
- In the unlikely event that you play more than 15 birds in a game (using all the Duet tokens), use a substitute.
Only one player can use each space.
If you cannot place a Duet token in a matching space or do not wish to, you may place your Duet token in the reset space on the lower left of the board instead. On a later turn, at any time on your turn, you may remove that Duet token to reset the bird tray or the birdfeeder.
BONUS: Some spaces on the Duet map have bonuses. If the space that you use has an egg, card, or food die on it, you gain the item shown.
Example: The Brown Shrike was played above in the grassland habitat of the player mat, so the player may place their Duet token on an unoccupied space in the grassland region with any of the following symbols: invertebrate, rodent, bowl nest, <50 cm, or left facing beak. In this example the white player placed their Duet token on a bowl nest symbol in the grassland region.
Flock Mode Gameplay
The 2 players that the turn-order dial points to are the active players. They take their turns simultaneously.
When both active players have completed their turns, rotate the turn-order dial clockwise. There are now 2 new active players who take their turns.
- To avoid confusion, be sure to wait for both active players to finish their turns before moving the turn-order dial. To help with this, active players should announce when they are done with their turns.
Continue until all players have completed their turns.
Interactions with the Oceania Expansion
Nectar: All players need access to nectar as a resource. Split the dice from the Oceania Expansion between the two birdfeeders (2 nectar dice and 3 regular dice per birdfeeder).
Score nectar with friendly ties, like the end-of-round goals: more than one player can be in first place, and second place is still awarded to the player(s) who have the next-highest amount of nectar.
Special circumstances for 7-player games
In rounds 2 and 4, everyone has an odd number of turns. This will cause the person to the right of the first-player token to have 1 cube left at the end of the round when everyone else has finished their turns. They take 1 last turn alone at this point.
The 2 players on the edges of the 4-player group will be active players on the same turn for half of their turns, which might cause issues if they are both interacting with the dice or the bird tray. On these turns, the active players should resolve their turns one after the other, instead of simultaneously.
- Rounds 1 and 3: the star points to the first active player (marked "1,3" on dial)
- Rounds 2 and 4: the non-star is the first active player (marked "2,4" on dial)
On these turns, if the first active player draws cards, the bird tray refills at the end of their turn, before the second active player takes their turn.
EMU: Gain all the seed from your group's birdfeeder. When you distribute seed, you may distribute it to anyone at the table.
Bird Powers
Powers on bird cards fall into various categories:
WHEN ACTIVATED (BROWN): These powers may be activated from right to left whenever you use the corresponding habitat.
Cache: This refers to putting a food token on a bird (the bird is saving the food for later). You cannot spend that food token; instead, it is worth 1 VP at the end of the game. If you run out of food tokens, you can cache cards instead (use discarded cards).
The predator power icon indicates that the bird has a predator power.
The flocking icon indicates that the bird's power involves tucking other bird cards under it to represent the creation of a flock. Each tucked card is worth 1 VP at the end of the game.
Wingspan: The wingspan of each bird is used for comparison for some bird abilities.
ONCE BETWEEN TURNS (PINK): These powers may be triggered on opponents' turns. You can only use a pink power once between each of your own turns (if an opponent triggers it). We recommend telling other players what the power is, and what activates it. Players should help each other notice when a bird with a pink power should be activated.
WHEN PLAYED (WHITE): These powers may be activated only when a bird is played (never again after you play the bird).
The Appendix from the base game and from each expansion contains descriptions of all bird powers.
Bird powers are always optional. For example, if you do not want to spend a card by tucking it under a flocking bird, you do not have to do so.
ROUND END (TEAL): These powers may be activated at the end of each round (i.e., up to 4 times per bird).
- Resolve them in player order, starting with the player who went first for the round.
- If you have more than one bird with a teal "Round End" power, you may resolve your birds' powers in any order.
- Round end powers do NOT activate "Once Between Turns" (pink) powers.
GAME END (YELLOW): These powers activate only once, at the end of the game. Activate these powers after completing all end-of-round steps in round 4. If you have more than one bird with a yellow "Game End" power, you may activate them in any order. These actions do not trigger birds with pink "Once Between Turns" powers.
Flock Mode — Powers That Interact With Other Players
In general, your bird powers that interact with other players interact with the whole table, not just your group.
"Once Between Turns" (Pink) Powers
Your pink powers never activate while you are the active player, even though another player is taking a turn at the same time. They reset each time you become an active player. Any active player at the table can trigger your pink power—not just players in your group.
"All Players" and "Other Players" Powers
If you activate a power that gives things to "all players" or "other players," it affects all players at the table, including the other active player. However, the other active player is only affected after finishing their turn. They cannot use any resources gained from your power on their turn.
- In a 7-player game, on the occasional turns when the 2 active players must take sequential turns (see page 11), the second active player still must wait until they have resolved their turn before taking advantage of the other player's power.
Some powers involve choosing from a set of cards or dice in turn order (e.g., the Ruby-throated Hummingbird from the base game). For these powers:
- Each group chooses from a separate set of cards or dice.
- Within the group that did not activate the power, turn order starts with the active player after they have finished their own turn. However, that player still only gains the resources that "all players" get.
- In a 7-player game, if there is no active player in your group when this type of power is activated, treat the player in your group who will be first player next as the first player.
"Another Player" Powers
If you activate a power that has you choose a single other player, you can choose anyone at the table.
If a power refers to a player on your left or right, use whoever is on your left or right (regardless of which group they're in).
End of the Round
When players have placed all their available action cubes (1 cube per turn), the round is over. At round end:
- Use round-end bird powers for birds on your player mat.
- Score the end-of-round goal for the round you just completed.
- If Round 4 is over, use game-end powers and then count final scores. Otherwise, continue to step 4.
- Remove all action cubes from your player mat.
- Discard and replace all cards in the bird tray.
- Pass the first player token clockwise to the next player.
Duet Mode End of Round
At the end of the round, players will each place a player cube to score, as in the base game (page 15). Points are only awarded to the player who contributes the most to each end-of-round goal:
- The player who comes first on the goal places a cube in the space marked above the goal tile and gets the points marked there.
- The player who comes second on the goal places their cube below the tile and gets zero points.
- The player who comes second on the goal also gets the first-player token for the next round.
- Ties are friendly: Both players get the points. In the case of a tie, the first-player token goes to the player who did not have it this round.
At the end of the game, find your largest contiguous group of Duet tokens on the Duet map. Score 1 point for each Duet token in your largest contiguous group.
- Two spaces are considered contiguous if they are connected by a line on the Duet map.
Example: In the board snippet, the white player receives 4 points and the black player receives 3 points.
Interactions with other expansions:
Europe:
The Greylag Goose, Cetti's Warbler, and Eurasian Green Woodpecker have the power that they count double toward end-of-round goals. You may place 2 Duet tokens when you play them. The tokens must go on different spaces. (One or both can go on the reset space.)
Birds that are placed sideways (e.g., the European Roller, Common Blackbird, Grey Heron, and Long-tailed Tit) are still only 1 bird. Place only 1 token for them.
Oceania:
If you spend nectar as a wild, you may treat it as the food you spent it as. If you spent it as nectar (for a bird that requires a nectar), you may treat it as any food on the Duet map.
Flock Mode End of Round
When scoring end-of-round goals, ties are friendly: For example, if 2 players are tied for first place, they both get full points, and second place is still available.
- Pass the first-player token to the left. Move the turn-order dial so that the star points to this player. This indicates the 2 starting players for the next round.
Scoring End-of-Round Goals (Original Rules for Base Game)
The base game includes a double-sided goal mat and a set of goal tiles. End-of-round goals are based on how many birds or eggs you have in a given habitat or nest type. To indicate the points you score from that goal, each player must place an action cube on the goal board (even if you score 0 points). The board has 2 sides, each using a different scoring method. Green is the default, but we recommend the blue side for new players.
Green: Majority of the Targeted Item
This method uses the side of the goal board that has spaces for first, second, and third place.
At the end of the round, count your quantity of the targeted item. Players compare their results and place their action cubes based on their rank order.
If players tie, place both cubes on the tied place, and do not award the next place. At game end, add the points for that place and the next place(s), then divide by the number of players who tied and round down (4th place scores 0 points).
For example, when using the goal that scores 5, 2, or 1 points, if two players tie for 1st place, each gets 3 points (5 + 2 divided by 2 players, rounded down). Do not award 2nd place to another player.
You must have at least 1 of the targeted items to score points for a goal. For example, you must have at least 1 grassland bird to score points for the "most birds in the grassland habitat" goal.
If you finish in 4th or 5th place, you must still place an action cube on the goal board in the space marked 0.
Blue: One Point Per Targeted Item
This method uses the side of the goal board that has rankings 5-4-3-2-1-0 next to the space for each goal.
At the end of the round, count your quantity of the targeted item. Score 1 point per item, up to a maximum of 5 points. Use an action cube to mark your score on the goal. If you do not have any of that item, you must still place an action cube on the goal board in the space marked 0.
For Game-end scoring, see page 5. For details on each goal, see Appendix.
Bonus Cards
As described in Setup, each player starts the game with 1 bonus card (selected from 2 random cards). There are also several birds in the deck that allow you to gain additional bonus cards. The Photographer, Cartographer, and Anatomist bonus cards are also available in the core Wingspan game; you can discard the originals, as the new versions have more detailed descriptions.
At the end of the game, score the bonus cards you have in your hand. See the Appendix for more information about scoring each type of bonus card.
Other Notes
Historian Bonus Card: If you mix this expansion with the base game, you'll probably want to leave out the base game's Historian card: There are no birds named after people in this expansion.
There is a growing movement to change English common bird names that are based on people's names—the birds that would qualify for the Historian card. The collectors, explorers, funders, and friends memorialized in birds' common names are almost always North Americans and Europeans, no matter where the birds are from. Worse, some of those people had unsavory histories in addition to (or as part of) their ornithological exploits. As I was putting this expansion together, I wasn't excited about many of my options for birds named after people. I decided not to force them to be included just to make the distribution of cards work for the Historian card. —Elizabeth Hargrave.
Wingspans: Wingspan measurements are not as widely used in Asia as they are in North America and Europe, and we could not find reported wingspans for many birds. (Instead, many Asian ornithologists measure a single wing.) Where necessary, we've done our best to extrapolate a wingspan from available data.