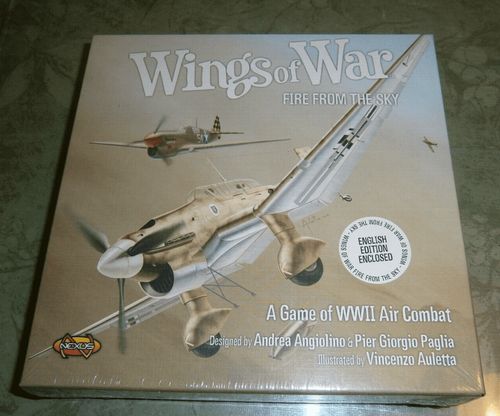
Wings of War: Fire from the Sky
Wings of War: Fire from the Sky Rulebook
Table of Contents
Table of Contents
Object of the Game
The object of Wings of War is to take to the skies in a fighter plane and defeat your opponents in aerial combat – although certain scenarios will have other, more specific objectives to accomplish. While you are learning the game, you should play a simple dogfight, in which one group of planes is trying to shoot down an opposing group of planes. The winner is the player or team of players that destroys their opponents' planes, before being shot down themselves. When you are comfortable with the game mechanics, you can either play one of the scenarios presented at the end of this booklet or invent one of your own.
Game Materials
Each game set of Fire from the Sky contains:
- 30 airplane cards
- 6 decks of maneuver cards (102 cards)
- 2 anti-aircraft gun/target cards, 3 anti-aircraft gun/troop cards and 3 bomb cards
- 222 damage tokens
- 104 markers
- 6 airplane consoles
- 2 rulers for determining range.
Number of Players and Planes
Wings of War requires at least two players, each controlling one plane. However, we recommend that for a faster, more action-packed game, there should be at least four total planes. (A game with only two total planes can involve a lot of chasing and not much shooting!) The setup instructions below assume you will be playing a two-player game, with each player controlling two planes. Each plane plots maneuvers, fires, and takes damage separately. If you are playing with more than two players, divide the players as evenly as possible into two teams. Each player uses one plane in a four- or six-player game. For three-player games, two players can take one plane each and form a team against a third player, who controls two planes. With five players, play with two teams of three planes each, with the most experienced player taking two planes instead of one.
Cards
The game includes Axis airplane cards (12), Allied airplane cards (18), maneuver cards (102), anti-aircraft gun / troop cards (3), anti-aircraft gun / target cards (2), and bomb cards (3).
Markers, Tokens, and Counters
Damage Tokens: "A" damage, "B" damage, "C" damage, "D" damage (back), normal damage, right rudder jam, left rudder jam, engine damage, hit crewman, smoke, fire, explosion.
Speed Markers: speed marker (back), blank, low speed, high speed, Stuka.
Counters: climb counter, artillery counter, numeric counter (altitude/fuel), smoke counter, flame counter.
Airplane Console
The airplane console has spaces for the first programmed maneuver, the second programmed maneuver, damage tokens, special damage counters, and unused maneuver cards. It also holds the current speed marker, fuel counters, climb counters, altitude counters, and unused speed markers.
Setup
Choose a flat surface, 90 x 90 cm. (≈36 x 36 in.) in area to play on. A table, carpet, or floor section will work, as long as the boundaries are well defined. Divide the four groups of damage tokens according to the letter on the back and place them into four different cups or in four groups facedown on the table.
Each player chooses two airplane cards and places them in front of himself, with the planes facing his opponent. Each player, for each of his planes, also takes a console and a set of maneuver cards that match the blue letter on his airplane card. Don't take the altitude cards (the ones with the red arrows, numbered 17 and 18). Just take maneuver cards 1 through 16 of each deck. Each player also takes four speed markers for each plane: two High-Speed markers and two Low-Speed markers.
To start, choose your planes. Some of the planes use the same maneuver deck as other planes, so make sure you don't use planes that require more decks of a given type than you have. Remember you have one "E" maneuver deck, one "F" deck, one "G" deck, one "H" deck, and two "I" decks.
For your first game, we suggest you choose your planes from among the following:
- The Kawasaki Ki-61-I KAIc or the Reggiane Re.2001 CN Falco II (both of which use the "E" deck).
- The Kawasaki Ki-100-Ib Goshikisen (which uses the "F" deck)
- The Bell P-400 Airacobra (which uses the "G" deck), and
- The Curtiss P40-F Warhawk (which uses the "H" deck).
These four options are roughly equal in terms of maneuverability and firepower. The I deck is used by dive bombers. Its use will be explained in the optional rules.
Use planes with a green card back (Allied) against planes with a black card back (Axis). The planes also have a green or black frame on their front above the plane data, so that players can tell which side they belong to during the game.
Before starting, each player chooses a maneuver card for each of his planes and places it facedown on the first space on the console for that plane. Neither steep maneuvers (the ones with the symbol) nor Immelmann turns (the ones with the symbol) can be chosen during the preparation of the game. Each player also places a speed marker (either a High-Speed or a Low-Speed marker) facedown on top of the facedown maneuver card.
Game Turn
Each turn is composed of three phases: planning, moving, and firing. Players perform each of these phases simultaneously with each other player. Conclude each phase before proceeding to the next one. After all firing is resolved, start a new turn with a new planning phase.
Planning
At the start of the turn, players choose an unused card from their planes' maneuver decks. This card will be the maneuver that each plane will perform in the next turn, after the one already planned.
Place the card facedown in the second space of the console, with a speed marker facedown on top of it.
The maneuver indicated by the card in space 1 will be performed this turn; the card in space 2 will be performed next turn.
Cards with a symbol represent a steep maneuver. You cannot use two steep cards in a row; at least one non-steep card must be played before another steep maneuver can be used.
A steep maneuver with a short arrow is called a stall.
The card with a symbol is an Immelmann turn. To play the Immelmann, you must play a straight move (one with the symbol) just before performing the Immelmann and another straight just after the Immelmann. Your plane must be moving at High Speed when you perform the straight before the Immelmann (so that the blue arrowhead at the rear of the plane matches the blue arrowhead on the straight; see below). Your plane must be moving at Low Speed when you perform the straight after the Immelmann (so that the blue arrowhead at the rear of the plane matches the white arrowhead on the straight; see below).
If a player plans an illegal maneuver because he fails to follow these restrictions, when the illegal maneuver is revealed, replace it with a straight card and take an "A" token of damage, representing the stress on the structure of the airplane. If the maneuver is correct but the speed marker is not, replace the marker with an appropriate one and take an "A" damage token.
Movement
When all the players have planned their moves, they simultaneously reveal their first maneuver cards and the speed markers on them. Each player puts his maneuver card in front of his airplane card so that the line at the base of the arrow matches the little blue line in front of the plane. Then he takes the airplane card and puts it on top of the maneuver card, so that the blue arrowhead on the rear of the plane matches the arrowhead of one of the two arrows on the card: the arrow with a white arrowhead if a Low-Speed marker was on the card, the arrow with a blue arrowhead if a High-Speed marker was on the card. The maneuver card and the speed marker are placed back among the available ones. The facedown maneuver card in the second space of the console is moved to the first space together with the speed marker on it.
An airplane that leaves the playing area is eliminated from the game. An airplane has left the playing area if, at the end of a maneuver, its central red dot is outside the playing area.
It is possible that a maneuver will take an airplane briefly outside the playing area, but return it to the playing area at the end of the maneuver. This is allowed as long as the plane ends the maneuver inside the playing area.
Firing
After all planes have moved using their maneuver cards, the players check to see if anyone can shoot. Take the ruler and place one end of it on the red dot at the center of the airplane. If an edge of the ruler can reach any point of an enemy airplane card while staying within the front firing cone of the firing airplane card (the pale arc between the two red lines), the airplane can fire at the enemy plane. Planes can fire at a single target each round, choosing one if there are several possible targets. It is possible that two planes can fire at each other. Firing is not mandatory.
If the target airplane card is reached by the first half of the ruler, the shot is at short range. The target airplane takes as many tokens of each specific letter as are indicated beside the short range symbol on the shooting plane's card. If the target is reached by the second half of the ruler, the shot is at long range. Take the tokens indicated beside the long-range symbol.
Planes may not fire through other planes, enemy or friendly. If it is not possible to reach any point of a target card without the edge of the ruler crossing another card, then the firing plane's aim is blocked (although it may be able to shoot at a different target).
If, at the end of a maneuver, two airplane cards overlap, neither of the two airplanes can fire at the other. They can, however, still fire at other planes. Other planes can shoot at the overlapping planes using the normal rules. The overlapping planes don't block each other's aim nor the aim of the planes firing at them.
Game Example: This example shows a duel between a Curtiss P40-F Warhawk and a Kawasaki Ki-100-Ib Goshikisen. In the movement phase, the Warhawk turns to the left while the Goshikisen executes a sideslip to the right with a steep maneuver. After moving, the Warhawk can fire at close range. Since the Warhawk card shows B B B at short range, the player controlling the Goshikisen must take three "B" damage tokens. If it was a long-range shot, he would have drawn only one "A" and one "B" tokens. The Goshikisen cannot fire since the Warhawk is outside the Goshikisen's firing cone.
Game Example: When the Yakoklev Yak-1 fires, a target at short range takes one "A" token and one "C" token. A target at long range takes a single "C" token.
Damage
When an airplane is fired at, the owner of the targeted plane takes the appropriate number of damage tokens marked with the indicated letter(s) and secretly looks at them.
The player keeps all damage tokens together, facedown, in the proper area of the target plane's console, adding up the damage points on the tokens.
When the total damage (indicated by adding up the numbers on the tokens) sustained by the plane reaches or exceeds the green number on the airplane card, the airplane is eliminated. Reshuffle all its damage tokens into their token groups of origin.
The targeted player must also note any special damage indicated by symbols at the center of the damage tokens. For the basic game, only explosions, indicated by the explosion symbol, count. They mean that the target plane has exploded, and it is eliminated from play. Other types of special damage are discussed in the optional rules on pages 9–10.
All damage is resolved simultaneously, after all airplanes that wish to fire have done so. Therefore, a plane that is shot down may still fire in the same phase in which it is eliminated.
Victory
The last player or team with planes in the playing area, after all enemy planes have exited or been eliminated, wins the game.
If you are playing several games, the winning player or team scores 1 point for each enemy aircraft leaving the playing area, 2 points for every enemy airplane shot down, and –1 point for each of its own airplanes shot down. This score can be used to compare victories across different games.
Optional Rules
Once you are familiar with the basic rules, you may want to use the following rules for more fun and realism. You can use some or all of these rules as you see fit, but all the players must agree to them before the start of the game.
Aim
When a plane is firing at the same enemy plane with the same weapon (within the same firing cone) for consecutive turns, it can fire with more accuracy. From the second consecutive turn of fire onward, the target must take an additional "A" token of damage from fire from that shooter. (Only one additional token is taken each turn — i.e., if there is fire for a third or fourth consecutive turn, the target still takes only one additional "A" token each time it is shot.)
Acceleration
It is more realistic if planes cannot choose to change speed each turn. If you use this optional rule, at the start of the game each player takes four speed markers for each plane: a High-Speed, a Low-Speed, and two blank speed markers. Each player should place one of the speed markers faceup in the appropriate section of the console for each of his planes. Begin with either the High-Speed or Low-Speed marker and keep the other three markers facedown.
During each planning phase, the player must place a facedown speed marker on the maneuver card he is placing on the console, as per the normal rules. He can never place the faceup marker which is already on the console — only one of the unused two. He can place the unused High-Speed or Low-Speed marker, if he wants the plane to change speed, or he can place a blank marker if he just wants to pretend to change speed.
When all the players have planned their moves, they simultaneously reveal any speed marker that is on the first maneuver card planned. A player who reveals a blank marker places it facedown among the available ones. A player who reveals a Low-Speed or a High-Speed marker replaces the current faceup speed marker with it and returns the former speed marker facedown among the available ones. When everybody is done with markers, they reveal their first maneuver cards. At this point, movement continues as normal, that is, each player takes his airplane card and puts it on top of the maneuver card, so that the blue arrowhead on the rear of the plane matches the arrowhead of one of the two arrows on the card: the white arrowhead if the Low-Speed marker is faceup on the console, and the blue arrowhead if the High-Speed marker is faceup on the console.
If a player plans an illegal move because the maneuver card does not have an arrow matching the plane's speed, when it is discovered, replace the illegal card with a straight card and use it at that speed. The plane takes an "A" token of damage.
If you use both Acceleration and Special Damage optional rules (on pages 9–10), the effect of engine damage changes. In that case, a plane with engine damage cannot plan with the High-Speed marker, except with a dive card if the optional Altitude rules (on pages 11–13) are in use. If the plane is at High Speed when it is hit, or it goes to High Speed as a consequence of a dive or a Split-S, it must plan with a Low-Speed marker in one of the next two planning phases.
Illegal Moves
When a player plans an illegal move (for example, two steep maneuvers in a row, or a Low Speed–only maneuver at High Speed), at the moment in which that maneuver has to be performed, the plane goes out of control and is eliminated. The plane counts as shot down by the enemy team for victory conditions.
Tournament Rule
To decrease the amount of luck in the game, take the explosion tokens out of each group of damage tokens.
Fuel
Decide how many points of fuel each plane has at the start of the scenario: for example, 40 points of fuel. Each plane can have a different amount of fuel available for the dogfight. In real life, a plane's fuel level depended on many factors, including the plane model, the distance from the home airfield, the use of additional fuel tanks, and so on.
You can account for fuel use by placing altitude counters in the Fuel section of the console. Each time you execute a Low-Speed maneuver, take away one fuel point. Each time you execute a High-Speed maneuver, take away two points. Any plane that is still on the table when it reaches zero fuel points is eliminated and scored as shot down.
Disruption
If an airplane takes at least 1 point of damage in a turn, it loses any Aim and Tailing advantages for the next round (if those optional rules on pages 8 and 10–11, respectively, are in use). Damage tokens doing "0" damage don't cause disruption.
Shoot at the Real Thing!
When firing, the ruler must reach the illustration of the enemy airplane, not just the edges of its card. Likewise, only the illustration of the plane blocks firing.
Special Damage
Some damage tokens have symbols beside the number of damage points. These symbols indicate special damage to the target airplane. Some special damage results have to be announced to the other players immediately, while some may (and should!) be kept secret. Where appropriate, players announce the special damage and place the proper damage tokens or counters in the Damage section of the airplane console. However, even when the special damage must be announced, do not tell the other players the amount of damage points on the token(s).
Tokens with the right rudder jam symbol indicate that one rudder of the plane is jammed. This special damage is kept secret. The next two cards that the airplane plans cannot be maneuvers to the left (those that have an arrow pointing left in the lower left corner of the card). Any maneuvers already selected are carried out as placed.
Tokens with the left rudder jam symbol indicate that one rudder of the plane is jammed. This special damage is kept secret. The next two cards that the airplane plans cannot be maneuvers to the right (those that have an arrow pointing right in the lower left corner of the card). Any maneuvers already selected are carried out as placed.
Tokens with the hit crewman symbol indicate that a member of the crew is hit. In scenarios with single-seater planes (all the planes in the Fires from the Sky and in the The Dawn of World War II sets are single-seaters, apart for the ones using the I maneuver deck), this special damage means that the pilot is wounded. This special damage is announced, and for the rest of the game, the turn sequence is altered as follows: During the movement phase, all wounded pilots perform their move and then immediately plan their next maneuver. Then, all non-wounded pilots execute their maneuvers. Then, fire is resolved normally. All non-wounded pilots plan their next maneuver during the next turn's planning phase as normal. In this way, non-wounded pilots are better able to react to the plans of wounded pilots.
If a wounded pilot is wounded again, the airplane is immediately eliminated.
Tokens with the engine damage symbol indicate that the engine is damaged. This special damage is kept secret. The plane cannot plan with a High-Speed marker for the rest of the game. If an airplane takes a second engine damage token, the plane is eliminated.
Tokens with the smoke symbol indicate that the airplane leaves a smoke trail. The player must announce this special damage. To keep track of it, the targeted player places six smoke counters in the Damage section on the airplane console. He will discard one counter at the end of each of the next six turns. The airplane can't perform tailing (see below) until all smoke counters are removed. The smoking airplane can be tailed normally. If a smoking plane takes a second smoke damage token, treat it as a fire damage token (see below), discard all smoke counters, and take six flame counters instead.
Tokens with the fire symbol indicate that the airplane has caught fire. The player must announce this special damage. The targeted player takes six flame counters and places them in the Damage section on the airplane console. Each turn, before revealing his maneuver, the player removes a flame counter and takes an "A" damage token. Only damage points and explosions are taken into account; all other special damage results are ignored. In addition, the plane smokes and, as a result, cannot perform tailing (see below) until the flame counters are removed.
A plane can take more than one type of special damage, whether at the same time or over the course of several shots. If a plane takes two fire damages, two left jams, or two right jams at the same time, just count one of them. Double damage from pilot, smoke, and engine damages have special effects, as detailed above. If a plane takes a counter-tracking type of damage (such as fire or smoke damage) that it is already suffering from, ignore the older damage result and begin tracking the new one. (For example, if you take fire damage and are already suffering from fire damage, start tracking the fire damage with six counters in your damage area, regardless of how many flame counters were previously in your damage area.)
Tailing
Sometimes a pilot is in an advantageous position in which he can anticipate the actions of his adversary. This is called tailing. Check for it before each planning phase.
To see if tailing is possible, use the ruler to connect the center dot of an airplane with the center dot of any plane(s) in front of it. The plane at the rear is attempting to tail, while the plane ahead of it is being tailed. Tailing is possible if the following three conditions are met: 1) The ruler reaches both dots, 2) the ruler passes through the front side of the tailing airplane card and the rear side of the tailed airplane card, and 3) the ruler does not cross any other airplane card in between. If a plane can tail two or more enemies, it must choose only one.
The player of the tailed plane must secretly show the first planned card facedown on his console to the tailing player, and only to him, before the tailing player selects his own maneuver card during the planning phase. The tailed player shows just the first card, not the speed marker that is on it.
If the tailing player controls more than one plane, he must plan the moves for all his non-tailing planes before looking at any maneuver cards of planes he is tailing.
Fly by Instinct
Once you place cards and speed markers facedown on the airplane console during your planning, you may not look at them again until it is time to reveal them to all the players.
Running Out of Damage Tokens
If a group of damage tokens is totally exhausted:
- You can take a "C" token instead of a "B" token.
- You can take a "B" token instead of a "C" token.
- You can take two "A" tokens instead of a "B" token or a "C" token, and you can take two "C" or two "B" tokens instead than a "D" token. Ignore any special damage on the first token.
- You can take a "B" token or a "C" token instead of an "A" token, or you can take a "D" token instead than a "B" or a "C" token, halving the damage points of the token (round fractions down). To remember that tokens' damages are halved, keep them in a separate pile.
Another option you can use if a pile of damage tokens is exhausted is to have each player write down his total damage for each plane, and any special damages still affecting each plane, on a piece of paper. Then, reshuffle all the damage tokens into their respective piles.
Another simple option is to buy The Dawn of World War II set, where you can find further "A", "B" and "C" piles of damage tokens.
Flying Patrols
Players can use one maneuver deck to fly multiple planes with the same maneuver letter. Instead of placing maneuver cards on the airplane console, players can plan their moves by writing down, for each plane, the card number of the maneuver card they want to use. A given plane cannot use the same number as was used for its previous maneuver.
Example: A Reggiane Re.2001 Falco II (maneuver deck "E") wants to start the game with a straight, then plan another straight. It can write "2" for the setup and then "1" in the first planning phase, since the card numbers for the two straight maneuvers are "1" and "2." The deck can be kept in common with other E-moving planes also in play.
Advanced Rules
Altitude
To introduce altitude into the game, include all the rules in this section.
Each player takes two special maneuver cards — a climb card and a dive card — and adds them to his plane's maneuver deck. These cards have red arrows. These two cards are used in planning in the same way as all other maneuver cards, but they have special effects.
Each plane starts the game at a certain altitude, agreed on by the players before the start of the game. Place a number of altitude counters on each plane's console so that their sum represents its altitude. We suggest that you choose similar altitudes for all planes involved.
Each type of plane has a maximum altitude that it can reach and a climb rate that indicates the number of climb counters that the plane must accumulate before it gains another level of altitude. The minimum altitude for flying planes is 0, provided they have at least one climb counter on them. At 0 level without climb counters, a plane is considered grounded - see page 13.
| Airplane | Top Altitude | Climbing Rate |
|---|---|---|
| Kawasaki Ki-61-I-KAIc / Ki-61-I-KAId / Ki-61-II KAIb Hien | 12 | 3 |
| Kawasaki Ki-100-Ib Goshikisen | 12 | 3 |
| Supermarine Spitfire Mk.II / Mk.IIb | 12 | 3 |
| Nakajima Ki-43-IIb Hayabusa | 12 | 4 |
| Dewoitine D.520 | 11 | 3 |
| Hawker Hurricane Mk.I / Mk.IIb | 11 | 3 |
| Kawasaki Ki-61-Ib Hien | 11 | 3 |
| Messerschmitt Bf.109 E-3 / E-4 / E-6 / E-7 | 11 | 3 |
Dive
When a plane performs a dive maneuver, it descends one level of altitude. Adjust the altitude counters so that their sum is one less than it was before the dive, and remove any climb counters that the plane has on its console.
If a plane dives to level 0, discard all the climb counters it has except for one. If it has none, place one climb counter on it.
The dive card looks like a straight, but it is not considered a straight as far as other rules are concerned, and so, for example, a plane cannot plan a dive, then an Immelmann turn, and then a straight, since it must do a straight before the Immelmann, and a dive is not considered a straight.
Climb
When a plane executes a climb, give it a climb counter. When the number of climb counters is equal to the climb rate indicated on the table on the previous page, the plane gains one level of altitude. Remove all of the climb counters, and adjust the altitude counters so that their sum is one higher than before the climb.
Example: A Reggiane Re 2001 Falco II (climb rate of 3) is at level 7 of altitude. In past turns it accumulated one climb counter. When the plane executes a new climb, it gets a second climb counter. When, later in the game, it executes another climb, it gets a third climb counter. Since its climb rate is 3, the plane goes immediately to altitude level 8 and removes all climb counters.
The climb card looks like a stall, but it is not a stall as far as other rules are concerned.
Immelmann Turns
The Immelmann turn is executed as in the basic game, but the plane also receives a climb counter as soon as it is executed.
Split-S
The Split-S is a downward Immelmann turn. Use the standard Immelmann card. When it is planned, it must have a stall before it and a straight after it (the preceding stall, rather than preceding straight, is what distinguishes the two maneuvers – which use the same card – from each other). Your plane must be moving at High Speed when you perform the straight after the Split-S (so that the blue arrowhead at the rear of the plane matches the blue arrowhead on the straight). When a Split-S is executed, the plane loses a climb counter. If it has none, it loses one altitude level and takes a number of climb counters equal to the climb rate of the plane minus one.
Example: A Reggiane Re 2001 Falco II (climb rate of 3) is at altitude level 8 and has no climb counters. It plans a stall and then a Split-S. When the airplane executes the Split-S, it goes immediately to altitude level 7 and takes two (3 − 1) climb counters. A Bell P-39D (climb of 4) would take three climb counters (4 − 1) instead.
If a plane at 0 altitude loses its last climb counter because of a Split-S, it crashes to the ground and is eliminated.
Blocked Aim
When an airplane fires at a target at the same altitude, only airplanes that are also at that altitude block its aim. Only the altitude level counts, not the number of climb counters on the airplanes.
Firing
When a plane fires at a target that is one level of altitude higher or lower than itself, treat short-range shots (half a ruler) as if they were long range. Planes cannot fire at targets that are one level of altitude higher or lower than they are and also more than half a ruler of distance away. Planes also cannot fire at targets that are two or more altitude levels away.
Other Optional Rules and Altitude
If you use other optional rules with the Altitude rules, you must read this section.
Acceleration: When a dive or a Split-S is executed, and the Low-Speed marker is faceup on the console of that plane, replace it with the High-Speed marker, no matter what the planning of the markers is. When a climb or an Immelmann turn is executed, and the High-Speed marker is faceup on the console of that plane, replace it with the Low-Speed marker, no matter what the planning of the markers is.
Fuel: When you execute an altitude maneuver, don't take into account the speed marker. Dives use one point of fuel, and climbs use two points of fuel.
Tailing: A plane can tail an enemy at the same level or one level lower at one ruler's distance. Planes on a higher level or more than one level lower cannot be tailed.
Altitude Optional Rules
Some or all of these rules can be included in a scenario if the Altitude rules are in use.
Overdive
The dive is a steep maneuver, but a plane can plan one just after a stall if it follows the dive with a straight. This sequence—stall, dive, straight—is called an overdive.
At the moment of executing the dive, the plane loses an altitude level and all the climb counters it had. After it performs the following straight, it loses another altitude level.
An overdive can also be used to pass from level 2 to level 0. In that case, the airplane keeps one climb counter. Airplanes at 1 or 0 level cannot execute overdives. If they plan one by mistake, they crash to the ground and are eliminated.
Landings, Takeoffs, and Crashes
At the game's start, if you want to have a landing field in the game, set its limits. It should be at least 9 x 27 cm. (≈4 x 11 in.) in area. Draw it on the gaming surface or use a sheet of paper of the right shape.
This region could represent a real airfield or just a flat area where somebody is waiting for rescue.
Landing: To land, a plane must be at 0-level altitude with one or more climb counters. The plane must execute the following three maneuvers in order: first, perform a dive to discard all climb counters (the plane touches the ground), then a straight, and finally a stall. The plane has then landed.
Takeoff: To take off, the landed plane must start with its red dot inside the landing field. Then it must execute the following three maneuvers in order: first a stall, then a straight (it is still on the ground at this point), then a climb to gain a climb counter (it is now flying). If a player has a landed plane with its red dot inside the airfield and wants to pretend to take off without doing so, just plan any non-stall maneuver. Such a plane can't be moved or turned that turn.
Crashes: If a grounded plane ends a maneuver with its central red dot outside the landing field while it is taking off (after the stall or the straight) or landing (after the dive, the straight, or the stall), it crashes. It takes three "A" damage tokens if it happens with the stall, or three "C" tokens if it happens with the straight. Take into account damage points, explosions, and fire, but ignore other types of special damage. The plane is grounded and must remain completely still for the remainder of this turn and all of the next turn. If it is not destroyed, it can then be moved or turned, and it may start a new takeoff if it can get back inside the airfield. If a plane loses its last climb counter while it is at 0 level and its red dot is out of the landing field (due to bad planning), it crashes. It takes four "C" tokens of damage. Take into account damage points, explosions, and fire, but ignore other special damages.
Maneuvering Planes on the Ground: The owner of a grounded plane can perform a maneuver and turn the plane card every three turns, starting three turns after it landed. To turn, put a finger on any point of the plane card and then turn the card around that point. While on the ground, planes cannot fire, but they can be fired at. Move it before the maneuvers of flying planes for that turn are revealed.
Fire on the Ground: A plane cannot take off if it has flame counters. If the "A" token taken for the fire damage is "0" damage, the pilot or the ground personnel are managing to extinguish part of the fire. In that case, remove an additional flame counter. At the end of the turn, if a burning, grounded plane overlaps one or more grounded planes that are not on fire, those non-burning planes catch fire and each takes six flame counters.
Collisions
Two overlapping planes collide if 1) they are both at the same altitude and 2) they either both have climb counters (no matter how many) or they both have no climb counters.
Each colliding plane takes a "C" damage token for each airplane, enemy or friend, that it collides with. Take into account damage points and explosions and ignore other types of special damage.
Anti-Aircraft Guns
Anti-aircraft (AA) guns are placed on the table at the start of the game and they may never move or turn.
Anti-aircraft guns use the D damage tokens. They have no arc of fire. They start the game with an "artillery" counter on them, at the center of the card, showing that they are loaded.
If an anti-aircraft gun is loaded at the beginning of a turn, it can fire during that turn. At the end of the planning phase, just before maneuvers are revealed, the player controlling the gun can place the artillery counter anywhere on the table, so long as the edge of the counter is no more than 2 rulers of distance away from the red dot at the center of the gun card. The artillery counter may not be placed above the AA gun card. In the firing phase of the next turn, if one or more airplane cards (friend or foe) overlap at least part of the artillery counter, each of them takes a D damage token. The counter is then removed from the table.
Artillery fire is simultaneous with all other types of fire.
At the end of the first planning phase after the AA fire has exploded, the gun begins to reload. Take the artillery counter and place it on the side of the appropriate gun card. The next turn, at the end of the planning phase, put the counter in the center of the card to show that the gun is reloaded and ready to fire. From the next turn, the artillery can fire and the counter can be again put on the gaming field.
Example: At the start of turn 7, an AA gun is loaded and a Yakoklev Yak-1 has a Straight maneuver planned. The Yak-1 plans a Right Sideslip, then the gunner places the artillery token on the table. In the moving phase, the Yak-1 executes the Straight. In the firing phase, nothing happens and any plane overlapping the artillery counter is not harmed by it. In the planning phase of turn 8, the Yak-1 plans a Left Sideslip; in the moving phase it executes the Right Sideslip and overlaps the artillery counter; in the firing phase the artillery counter is removed and the Yak-1 takes a D token of damage. If the Yak-1 did not overlap the counter, the counter would be removed anyway, without giving damages to anything. In the planning phase of turn 9, the artillery counter is put on the side of the gun card. In the planning phase of turn 10 it is moved to the center of the card. At the end of the planning phase of turn 11 the counter can be put on the game field again within 2 rulers from the gun.
Planes in the air can strafe AA guns, inflicting the same damage as they would on an enemy plane, depending on the range of fire. Damage tokens are kept faceup beside the AA gun card. When a gun suffers 10 or more points of damage, or if it takes an explosion token, it is silenced and counts as eliminated for scenario purposes.
Friendly Artillery Fire
Anti-aircraft artillery fire is more interesting and authentic when the guns are controlled by a player who is not controlling any aircraft. Friendly aircraft were sometimes shot at by mistake, and this is more likely to happen in the game if the player controlling the artillery does not also control planes.
Anti Aircraft Guns Optional Rules
This section includes optional rules for AA guns that can be used in specific scenarios.
Adjusting the Aim
Normally, when an artillery counter is placed on the table, it will explode in the next turn, after two maneuvers are executed. But if this rule is used, at the beginning of a turn when the counter is already on the table, the aim may be adjusted. At the end of the planning phase, the owner of the gun can move the counter up to one ruler of distance (of course, he must also stay within the two-ruler range of the gun). If the counter is moved, it will not explode in the firing phase of that turn but on the next one.
The owner may also touch the counter, leave it where it is, and declare that it is "delayed." Treat it as if it had been moved. The counter will explode in the turn after the one in which the player has declared that it is "delayed."
The owner may also retire the counter and put it back at the center of the gun. This means that the gun is not aiming any more and that it will be able to shoot in the planning phase of the next turn, starting the procedure again.
Tailing Under Friendly Artillery Fire
If the optional tailing rule is in use (see page 10), a situation could arise in which the artillery benefits unfairly from the information gained by a tailing airplane. This could happen if the same player controlling an AA gun also controls a plane tailing an enemy airplane in range of his gun. ("In range of the gun" means that the target airplane is in a position where it can somehow move over a spot where an artillery counter can be placed.) If such a situation arises, use the following procedure.
First, the tailed plane plans its move at the same time as all the planes not involved in the tailing. Second, the player controlling the AA gun decides whether or not he will shoot the gun and, if he chooses to shoot, places the artillery counter. If the counter is already there, he decides whether to adjust the aim or delay the explosion. Third, the owner of the tailed aircraft shows its first maneuver to the tailing player. Last, the tailing player selects his own maneuver card.
Solitaire Scenarios and Anti-Aircraft Guns
When playing a solitaire (single player) scenario, use the following rules for enemy anti-aircraft guns.
Do not fire the gun as soon as it is loaded, as per the multiplayer rules. Instead, wait one round, then shoot as soon as any part of an enemy airplane card is within range of the gun (two rulers of distance). Do not place the counter as per the multiplayer rules. Instead, draw an A damage token to see if the aim of the AA battery is correct. If it is a 2 damages token (with special damages or not) the shot hits the plane: ignore the result on the A token and draw a D damage token instead. If the damage number on the A token is not 2, the aim is wrong and the shot is wasted. In both cases, put back the A token with the other A tokens and mix them. Do not fire at a target if any point of the airplane card is within a half-ruler of distance of a friendly airplane. If more than one target can be shot at by the AA gun, choose one randomly, unless the scenario you are playing provides a specific rule stating which airplanes are more important targets. (For example, two-seaters may be seen as more important for artillery to shoot at than fighters.)
Anti-Aircraft Guns and Altitude Optional Rules
This paragraph includes new rules that must be used if you plan to play with both the AA Guns and Altitude rules (page 13).
When placing the artillery counter on the table, the player must declare the altitude at which the shot is aimed (minimum level 1, maximum level 5). Only planes at that level are affected; those overlapping the counter but flying at different altitudes are not. Subtract a half-ruler of range for each additional level after level 1: The counter can be put at up to two rulers of distance at altitude 1, one and a half ruler's distance at level 2, one ruler at level 3, and a half-ruler at level 4. At level 5, the counter must overlap some part the gun card. (This rule supersedes the rule on page 14 that the artillery counter may not be placed above the gun card itself.)
If the "Adjusting the Aim" optional rule (page 14) is in use together with the altitude rules, the player may either moving the artillery counter or declare it to be one altitude level higher or lower. The effect is the same, so the counter explodes in the turn after that.
Two-Seaters
Some two-seater planes are included in this set for more varied scenarios such as reconnaissance, bombing runs, and such. All the planes in this box using the I maneuver deck are two-seaters. The second person in the crew is the observer, sitting at the back of the pilot. This section provides rules for them.
Second Arc of Fire
All the two-seater planes in this box have two different sets of firing data on their card, with an arrow that shows which arc of fire they refer to: an up arrow for the front machine gun (left column), and a down arrow for the rear machine gun (right column).
The observer follows the same rules of firing, but uses the arc on the rear of the airplane. Two-seaters can fire at two different targets after each move. One target must be in the front arc of fire, as for fighters. The other target must be in the rear arc.
If a two-seater takes jamming damage, only the gun which was shooting when the jam damage card was drawn is considered jammed.
Observer Wounded - Special Damages
If the optional "Special Damages" rules are being used, a hit crewman result may effect either the pilot or the observer of a two-seater.
If a hit crewman token is drawn, draw an A damage token to determine who is effected. If it is a 2 damage token or higher (with or without special damages) the special damage concerns the pilot; apply the normal rule for a pilot being wounded. If it is a 0 or a 1 damage token, the observer of the two-seater plane is wounded instead. This special damage is kept secret. The plane can no longer fire the machine guns in the rear arc of fire. If a two-seater plane has a mission, when you plan the scenario you should decided beforehand if the mission can be performed by a plane with an incapacitated observer or not (for example, some cameras could be used by the pilot). If an explosion token is drawn when determining who is effected, both the pilot and the observer are wounded. Apply both the pilot wounded and the observer wounded rules. In all cases, ignore the damage on the A token, put it back with the other A tokens, and mix them. A second observer wounded damage result on a two-seater has no additional effect.
Aim
If you use the Aim optional rule, the bonus is given to a two-seater plane only if it fires at the same enemy plane in the same firing arc for multiple consecutive phases, not if the target plane moves into the plane's other firing arc.
Example: For example, a Douglas SBD-3 Dauntless shoots a Kawasaki Ki-61-Ib Hien in its front arc of fire, and then shoots it again at short distance during the next turn in the same front arc. During the second turn the Hien takes two damage tokens: the regular B token plus an A token for the Aim bonus. If after the next maneuver the Hien is in the rear arc of the Dauntless, the latter can fire again. However, the Dauntless will not get an Aim bonus since the Hien is in a different firing arc.
Blind Spots for Rear Guns - Optional Rule
If you want to add more realism and make two-seaters less powerful, use the Blind Spot rule. It applies to any rear gun, no matter if the plane has one or two arcs of fire.
The rear machine gun of two-seater planes has a blind spot just at the rear of the tail. Use the ruler to connect the center of the two-seater plane with the center of the would-be target in the rear arc. If the ruler passes over the rear edge of the two-seater airplane base, and if the first half of the ruler touches any point of the target base, firing is not possible.
If you use the optional altitude rules, the blind spot is effective only against targets at the same or lower altitude: Ignore it if the target is at a higher level.
Two-Seaters and Optional Ace Rules
When you use the Ace rules in The Dawn of World War II (page 14 of that rulebook) with two-seater aircraft, you can decide that the ace is the pilot, the observer, or both. Maneuver and Evasion abilities can only be given to pilots. Personal, Technical, and Combat abilities can be given to an observer as well as a pilot. A pilot's combat abilities apply only to the front arc of fire, while an observer's abilities apply only to the rear arc of fire.
If a two-seater airplane shoots down an enemy aircraft, both the pilot and observer are awarded a victory, no matter who fired the killing shot. If you use the "Campaign Rules: Awarding Victories" on page 16 of The Dawn of World War II rulebook, keep track of the pilot and the observer's victories separately, since the crew could partially change between different games. In addition, check separately for the number of campaign games they have to miss if they are both wounded.
Scenario Rules
These rules can be added to play specific scenarios.
Level Bombing
If you want to play a bombing scenario with a non-dive bomber, use the rules in this section.
How to Bomb: Before beginning the game, the players mutually agree on the load of the bomber, if it is not already specified by the scenario text. It can be a single load or it can be divided into several groups of bombs. Each group is worth a certain amount of damage points to the target (or victory points for the scenario).
Before revealing any maneuver, the bomber can decide to drop one or more groups of bombs, or even all the load. If he does so, take a bomb card that represents all the bombs dropped in that turn.
Execute the maneuver and, before weapon fire is resolved, place the bombs into play. If the last maneuver of the bomber was a stall, place a stall in front of the airplane and then place the bomb card so that the arrow on its rear matches the one at the rear of the stall card. If the last maneuver was not a stall, place a straight in front of the plane. Use the long arrow if the plane is at High Speed, the short one if it is at Low Speed.
A soon as the bombs are placed on the table, they hit the ground. If the red dot on a target card is totally covered by the bomb card, the target takes full damage (or the player scores full victory points). If the red dot is not totally covered but even a little part of the target card is, the damage (or the score) is halved (round down). If none of the target card is covered, the bombs missed. In any of the three cases, remove the bomb card. It is strictly forbidden to take any kind of measurement during the game apart from those required to check firing, tailing, and such. You cannot take measurements to evaluate if your bombs will strike the target or not.
Bombs cannot be dropped immediately after an Immelmann or Split-S.
Example: A Reggiane Re 2001 Falco II has a 250 Kg. bomb considered a single load. The player will earn 4 victory points in the scenario if he can hit a specific building with the bomb. The plane gets in front of the target card and, after a right turn of 60° at altitude 4 and High Speed, it drops the bombs. In the same phase, the player places a straight in front of the Falco II and a bomb card matching the point of the long arrow on it. Since the altitude is 4, two counters are placed on top of the bomb card, along the front side. In the next two movement phases, the player places a straight in front of the bombs and then moves the bombs matching the point of the long arrow, taking away a counter. At the end of the second movement phase, the bombs land. Since the bomb card overlaps part of the target card, but not the red dot, the player receives only 2 victory points.
Level Bombing and Altitude
If you are playing with Altitude, also use the following rules.
A bombing can be made at any altitude above level 0.
If the plane is at altitude 1 when it drops the bombs, they hit the ground immediately. Use the same rules provided above. If the plane is above altitude 1 when bombs are dropped, place one or more counters on the bomb card when it is placed on the table. Place one counter if the altitude is 2 or 3, two counters if it is 4–6, three counters if it is 7–10, and four counters if it is above altitude 10. The bombs don't hit the ground when they are placed on the table, and they are not removed. Instead, in each subsequent movement phase, they are moved again with the same maneuver card with which they were placed (stall, short straight, or long straight), and a counter is taken away each time. The bombs have no effect on any other card (target, airplane, or whatever) while they are in the sky. When you move the bombs and take away the last counter, the bombs hit the ground with the effects explained in the above section.
To help remember the speed of the bombs, place the counters along the front side of the bomb card if a long arrow has to be used, at the center if a short arrow must be used, and along the rear side if a stall is required.
Dive Bombing
All the two-seater planes in this box are also dive bombers, as indicated by the dive-bomber symbol on the plane card. Dive bombers cannot execute level bombing: they can execute standard dive bombing instead (see below). The Junkers Ju 87 Stuka can choose between standard dive bombing and vertical dive bombing (see "Vertical Dive Bombing" on page 18).
Before beginning the game, the players mutually agree on the load of the bomber, if it is not already specified by the scenario text. It can be a single load or it can be divided into several groups of bombs. Each group is worth a certain amount of damage points to the target (or victory points for the scenario).
Standard Dive Bombing: Dive bombers have two special dive cards with the dive symbol on them. They are added to the maneuver deck even if Altitude rules are not in use. The next card planned after one of these dive cards must be either the other dive card or a high speed non-steep maneuver.
Before revealing any maneuvers, if both its last executed maneuver and its next planned maneuver are special dives, the bomber can decide to drop one or more groups of bombs, up to its entire load.
When a special dive card is used, the player may decide to put a Stuka speed marker on it. If the previous card is a special dive with a Stuka marker on it, the second special dive card must have a Stuka marker on it too. When executing a special dive maneuver with a Stuka marker, do not move the airplane card. Leave it where it is. (The Stuka is diving almost straight down.)
When a Stuka decides to drop one or more groups of bombs after a special dive card with a Stuka marker on it, do not use a bomb card. If the red dot on a target card is totally covered by the airplane card, the target takes full damage (or the player scores full victory points). If the red dot is not totally covered but even a small part of the target card is, the damage (or the score) is halved (round down). If no part of any target card is covered, the bombs missed.
Apart from the fact that the airplane card is not moved and the effects of bombing are determined by the target being covered by the airplane card, not bomb cards, vertical dive bombing works exactly like standard dive bombing in every respect.
The planned maneuver is executed and then, before resolving any firing, a bomb card is placed in front of the plane card, with its rear side lining up with the front side of the airplane. As soon as the bombs are placed on the table, they hit the ground. If the red dot on a target card is totally covered by the bomb card, the target takes full damage (or the player scores full victory points). If the red dot is not totally covered but even a small part of the target card is, the damage (or the score) is halved (round down). If no part of any target card is covered, the bombs missed.
Standard Dive Bombing with Altitude: When the altitude is used, replace the above "Standard dive bombing" rule with the following:
The two special dive cards with the dive symbol on them are used as dives. The next card after one of these dive cards must be either the other dive, a high speed non-steep maneuver, or a climb. If the climb is used immediately after at least two consecutive special dive cards, you can decide to gain one level of altitude instead of the one climb counter you would usually get for a climb card.
Before revealing any maneuver, if the bomber's planned maneuver is one of the special dives and the plane's altitude is 1 or 2, the bomber can decide to drop one or more groups of bombs, up to the entire load. The maneuver is executed, the altitude is adjusted to 1 or 0 and then, before resolving any firing, a bomb card is placed in front of the plane card, with its rear side lining up with the front side of the airplane (see picture above). A soon as the bombs are placed on the table, they hit the ground. If the red dot on a target card is totally covered by the bomb card, the target takes full damage (or the player scores full victory points). If the red dot is not totally covered but even a small part of the target card is, the damage (or the score) is halved (round down). If no part of any target card is covered, the bombs missed.
Vertical Dive Bombing: The Junkers Ju 87 Stuka can either use standard dive bombing or vertical dive bombing. At the start of the game, each Stuka receives two special "stuka" speed markers.
Full Load (Optional Rule): A bomber that still has to drop its bombs is considered to be at full load. It cannot do Immelmann turns, must put at least two non-steep maneuvers (instead of one) between steep maneuvers, and its Climb rate is increased by one.
As soon as the bombs are dropped, these restrictions no longer apply. However, if at that moment the plane has enough Climb counters to gain an altitude level, leave it at its current altitude level and discard one counter.
Example: A Reggiane Re 2001 Falco II (Climb rate of 3) has a 250 Kg. bomb and flies at an altitude of 1 with two Climb counters from previous turns. It plays a Climb. Since it still has to drop the bomb, its Climb ability is considered 4 instead than the normal 3. It gets a third Climb counter instead than gaining an Altitude level. In the next turn, the Reggiane drops the bomb. Its Climb rate goes back to 3, but it does not gain a level because of its three counters. Instead, it discards one of them, going down to two counters.
Photo Recon
During a photo recon mission scenario, a plane can be equipped with a camera. Place one or more target cards in the gaming field.
To take pictures of a target, the plane must pass over it, and at some point the airplane card or the maneuver card must overlap the red dot at the center of the target card. At that moment, the plane must be moving at Low Speed.
If Altitude rules are in use, the picture must be taken at an altitude of 3 or less.
Strafing
In some scenarios, targets can be defined as ground troops. Planes in the air can strafe these targets, inflicting the same damage they would on an enemy plane, depending on the range of fire. Damage tokens are kept faceup beside the troop card. When a troop card suffers 5 or more points of damage, or if it takes an explosion token, it is silenced and counts as eliminated for scenario purposes. In addition, it can no longer fire at enemy airplanes. Troop cards ignore other types of special damage besides explosions.
If an airplane's red dot is within one ruler of distance of a troop card (even overlapping the card), the plane can be shot at by infantry fire. The plane takes a single "A" token, regardless of the distance. Take into account both the damage points and special damage results, as if it were fire from another airplane. Each troop card can make a single shot each round. If there are several possible targets, the player controlling the card chooses one of them.
If Altitude rules are in use, the troop card can fire as if it were a 0-altitude plane. It fires at a range of one ruler if the target plane is at 0 altitude and half a ruler if it is at altitude 1. Firing is impossible if the plane is at an altitude of 2 or more. The altitude difference affects the range of the aircraft in the same way. A 1-altitude plane fires at the troop card at long range if it is within half a ruler, and a 2-altitude plane may not fire at a troop card.
Bombers cannot strafe targets in the same turn in which they drop bombs.
Cloud Cover (Optional Altitude Rule)
If Altitude rules are in use, players can agree that there is cloud cover at a certain altitude. This altitude should be above the starting altitude of all the planes involved.
When a plane reaches the altitude of the cloud cover, it stops moving on the table. The player keeps on planning maneuvers as normal, but the airplane card stays in the same position it reached after the climb. It cannot fire, be fired upon, or collide with other planes.
The maneuvers of the plane that climbed into the cloud cover are kept stacked in order (or written down) until the plane executes a dive or a Split-S. In that round, the player takes the pile of the maneuvers planned since the climb and executes all of them immediately, in the order he planned them. If the plane exits the gaming surface at the end of any maneuver card, the plane is out of the game. If not, as soon as the plane executes the dive or the Split-S, it is back under the cloud level and can fire, be fired at, and collides normally.
Scenarios
Provided Scenarios
The scenarios on the pages that follow can be played with the materials included in this box. The playing area lengths and widths listed below are suggested minimums. Length is given as the distance from the Axis to the Allied side of the table. The Axis and Allied sides are always opposite each other. In the first four scenarios, featuring a dogfight with no special mission, it is advisable to vary the starting positions, putting the teams on adjacent sides or even mixing the planes of different teams on the same side of the table.
Axis planes have a black card back, Allied planes have a green one. Using Allied planes on one side and Axis ones on the other is not mandatory, but it helps players tell friends from foes.
Every scenario states which rules are needed. Any optional rules can be added if all the players agree to do so before the start of the game.
Inventing New Scenarios
After you are familiar with the game, feel free to invent your own scenarios, using the ones presented here as examples. If you own multiple sets, you can design far richer gaming situations. First of all, take into account the firepower of planes involved: "B" and "C" damage tokens are equivalent in average damage and on average cause double the damage of "A" tokens, while a "D" damage token cause twice as much damage as a "B" or a "C." For example, a B B D | B C firing Bell P-39D Airacobra has the same average firepower as a C C C C | C C firing Kawasaki Ki-61-II KAIb. Also take note also of the number of damage points each plane can sustain and each plane's maneuverability. (A plane's maneuverability is determined mostly by the number of different maneuver cards in its maneuver deck and the difference in length between the High-Speed and Low-Speed arrows on the cards, a greater difference meaning greater maneuverability.) The pilots of planes that are weaker overall can receive one or more ace skills to compensate.
Please share new scenarios, optional rules, and ideas with us at the Wings of War discussion group: http://games.groups.yahoo.com/group/wow_nexus/
Rising Sun Patrol
Two patrols attack each other on the front
Players: 2–4, divided evenly into two teams according to the "Number of Planes and Players" sections at the beginning of this rulebook on page XX. With three players, one player takes both planes of one side and his opponents take one opposing plane each.
Gaming Surface: Length: 90 cm. (≈36 in.) Width: 90 cm. (≈36 in.)
Axis Player(s): A Kawasaki Ki-61-I KAIc Hien and a Kawasaki Ki-100-Ib Goshikisen, at half-ruler distance from the Axis side.
Allied Player(s): Lieutenant Norbert C. Ruff's Bell P-400 Airacobra and a Curtiss P40-F Warhawk, at half-ruler distance from the Allied side.
Rules Needed: Basic rules. If Altitude rules are in use, agree on the starting altitudes of the planes.
Winning Conditions: The winner is the side with planes in the air when all enemy planes exit the playing area or are shot down.
Ambush!
A patrol finds an isolated enemy and attacks him
Players: 3
Gaming Surface: Length: 90 cm. (≈36 in.) Width: 90 cm. (≈36 in.)
Axis Players: A Kawasaki Ki-61-I KAId Hien, at half-ruler distance from the Axis side.
Allied Player: A Curtiss P-40B Warhawk and a Curtiss P-40C Warhawk at half-ruler distance from the Allied side.
Rules Needed: Basic rules. If Altitude rules are in use, agree on the starting altitudes of the planes.
Winning Conditions: The winner is the side with planes in the air when all enemy planes exit or are shot down.
Variants: Alternatively, the Axis player takes a Kawasaki Ki-61-II KAIb Hien. The Allied player wins if he destroys the Hien, if the Hien exits the table from his own side before any Allied planes are destroyed, or if it leaves the table from any other side. The Axis players wins if he destroys at least one Allied plane: after doing so, he can leave the table from the Axis side without penalty.
As another alternative, the Axis player takes a Kawasaki Ki-61-I KAId Hien. The Allied player should then take a Curtiss Tomahawk Mk.IIb and a Yakovlev Yak-1. As in the variant above, the Axis player wins if he destroys at least one enemy plane and exits from its side or if he destroys both enemy planes. The Allied player wins if he destroys the Hien, if it leaves the table from the wrong side, or if it leaves before destroying an Allied plane.
A Solitary Challenge
Two isolated fighters patrolling over the front meet each other and engage in a duel
Players: 2
Gaming Surface: Length: 80 cm. (≈32 in.) Width: 80 cm. (≈32 in.)
Axis Player: A Kawasaki Ki-61-II KAIb Hien at half-ruler distance from the Axis side.
Allied Player: A Bell P-39D Airacobra at half-ruler distance from the Allied side.
Rules Needed: Basic Rules. If Altitude rules are in use, agree on the starting altitudes of the planes.
Winning Conditions: The player who exits the gaming field or is shot down loses. The other player is the winner.
Variants: The Axis player can take a Kawasaki Ki-61-I KAIc Hien or a Kawasaki Ki-100-Ib Goshikisen. The Allied player can take a Bell P-400 Airacobra, a Curtiss P40-F Warhawk, or a Reggiane Re.2001 CN Falco II.
Alternatively, the Axis player can take a Kawasaki Ki-61-Ib Hien. The Allied player should then choose betweeen a Curtiss P-40B Warhawk, a Curtiss P-40C Warhawk, a Curtiss Tomahawk Mk.IIb, or a Curtiss Kittyhawk Mk.I. As another alternative, if you use the Flying Patrols optional rule, or if you own more than one set of Fire from the Sky, you can feature a Yakovlev Yak-1 against a Reggiane Re.2001 Falco II. With the same system, more than two people can play while taking several groups of planes as the Axis and Allied forces are matched in this scenario: i.e. two Curtiss P-40F Warhawk against a Kawasaki Ki-61-I KAIc Hien and a Kawasaki Ki-100-Ib Goshikisen; or a Kawasaki Ki-61-II KAIb Hien, a Kawasaki Ki-61-I KAIc Hien and a Kawasaki Ki-100-Ib Goshikisen against a Bell P-39D Airacobra, a Bell P-400 Airacobra and a Curtiss P40-F Warhawk. Experienced players are encouraged to play the A Solitary Challenge scenario with two planes each, instead than flying a single plane per side.
Holes in the Sand
A patrol is sent to attack some ground troops on a beach
Players: 2–4
Gaming Surface: Length: 120 cm. (≈48 in.) Width: 90 cm. (≈36 in.)
Axis Player(s): A Kawasaki Ki-61-I KAIc Hien and a Kawasaki Ki-100-Ib Goshikisen, at half-ruler distance from the Axis side.
Allied Player(s): Lieutenant Norbert C. Ruff's Bell P-400 Airacobra and a Curtiss P40-F Warhawk, at half-ruler distance from the Allied side.
Rules Needed: Basic rules. Strafing. If Altitude rules are is in use, planes start at altitude 3.
Winning Conditions: Choose which side is attacking. Then place two troop cards ("A"-firing, 5 points of damage sustainable) at one ruler distance from the defending side, each at an equal distance from the closest neutral side of the game field and the same distance from each other (30 cm from the closet neutral side and 30 cm away from each other, for example). The game ends when all the planes of one side have been shot down or have exited the gaming surface. Every damage point inflicted to a troop card is a victory point, up to a maximum of 5 per card. Each player loses 12 points for each of his planes that have been destroyed or leave the gaming field, but the attacking player can leave from his side without any penalty if both the infantry cards are eliminated. The side scoring more points wins.
Dive on Target
A dive bomber with escort attacks an enemy target
Players: 2–4
Gaming Surface: Length: 120 cm. (≈48 in.) Width: 90 cm. (≈36 in.)
Axis Player(s): A Junkers Ju 87 Stuka and a Reggiane Re.2001 Falco II, at half-ruler distance from the Axis side at an altitude of 5.
Allied Player(s): 1 target card at one ruler distance from the center of the Allied side; a Curtiss P40-B Warhawk and a Curtiss P40-C Warhawk, at half-ruler distance from the Allied side at an altitude of 5.
Rules Needed: Basic Rules. Altitude. Two Seaters. Dive Bombing.
Winning Conditions: The dive bomber has a single load of bombs inflicting 10 points of damage if the bombs hit the center of the target card, and 5 if it hits part of the card but not the center. The game ends when all the planes of one side have been shot down or have exited the gaming surface. The target card can be bombed but not strafed. Every damage point inflicted to the target card is a victory point. Each player loses 12 points for each of his planes that are destroyed or leave the gaming field, but Axis planes can leave from their side without any penalty if the target card suffers any points of damage. Each player loses 4 points for each of his planes that is damaged but not destroyed at the end of the game (whether it exits the table or not). The side scoring more points wins.
Variants: The Axis player can use an Aichi D3A1 Val and a Kawasaki Ki-61-Ib Hien instead.
As an alternative, have the Allied attack with a Douglas SBD-3 Dauntless / A-24A Banshee and a Curtiss P40-F Warhawk. The ground target is placed by the Axis player, who defends it with a Kawasaki Ki-61-Ib Hien and a Kawasaki Ki-100-Ib Goshikisen.
Air Support
Planes from both sides are involved in a ground battle
Players: 2–6
Gaming Surface: Length: 120 cm. (≈48 in.) Width: 90 cm. (≈36 in.)
Axis Player(s): An "A"-firing troop card and an anti-aircraft gun at a one ruler distance from the Axis side and at least a one ruler of distance from the neutral sides; an Aichi D3A1 Val, a Kawasaki Ki-61-I KAIc Hien, and a Kawasaki Ki-61-II KAIb Hien at a half-ruler distance from the Axis side at an altitude of 3-5.
Allied Player(s): An "A"-firing troop card and an anti-aircraft gun at a one ruler distance from the Allied side and at least a one ruler of distance from the neutral sides; a Douglas SBD-3 Dauntless / A-24A Banshee, Lieutenant Norbert C. Ruff's Bell P-400 Airacobra, and a Curtiss P40-F Warhawk at a half-ruler distance from the Allied side at an altitude of 3-5.
Rules Needed: Basic Rules. Altitude. Two Seaters. Strafing. Anti-Aircraft Guns. Dive Bombing.
Winning Conditions: Starting with the Axis player, both players take turns placing their ground cards. The starting altitude for each plane is between 3 and 5: the Allied player chooses first for each of his planes, then the Axis player chooses. Dive bombers have a single load of bombs inflicting 10 points of damage if the bombs hit the center of the infantry target card, and 5 if it just hits part of the card but not the center. The game ends when all the planes of one side have been shot down or have exited the gaming surface. Every damage point inflicted to a troop card is a victory point, up to a maximum of 5 per card. Every damage point inflicted to a non-silenced anti-aircraft gun card is a victory point, while a silenced card (8 or more damage points) it is worth a total of 10 victory points. Each player loses 12 points for each of his planes that is destroyed or leaves the gaming field, but a player can leave from his side without any penalty if both the enemy target cards are destroyed. The side scoring more points wins.
Blasted Ground
A couple of dive bombers attacks ground target meeting fierce resistence from enemy planes
Players: 2–6
Gaming Surface: Length: 120 cm. (≈48 in.) Width: 90 cm. (≈36 in.)
Axis Player(s): 2 Aichi D3A1 Val and a Kawasaki Ki-61-II KAIb Hien, at half-ruler distance from the Axis side at an altitude of 5.
Allied Player(s): 1 target card, 2 "A"-firing troop cards, and 1 anti-aircraft gun at a one ruler distance from the Allied side and at least a one ruler distance from the neutral sides; a Yakoklev Yak-1, Kapitan Ivan Vasilevich Bochkov's Bell P-400 Airacobra, and a Curtiss Tomahawk Mk.IIb at a half-ruler distance from the Allied side at an altitude of 5.
Rules Needed: Basic Rules. Altitude. Two Seaters. Strafing. Anti-Aircraft Guns. Dive Bombing (Level bombing in a variant).
Winning Conditions: Dive bombers have a single load of bombs inflicting 10 points of damage if the bombs hit the center of the target card, and 5 if it just hits part of the card but not the center. The game ends when all the planes of one side have been shot down or have exited the gaming surface. Every damage point inflicted to the target card is worth 1 victory point to the attacking side, up to a maximum of 8. Every damage point inflicted to a troop card is a victory point, up to a maximum of 5 per card. Every damage point inflicted to a non-silenced Anti-Aircraft Gun card is worth 1 victory point to the attacking side, while if it is silenced (8 or more damage points) it is worth a total of 10 victory points to the attacker. Each player loses 12 points for each of his planes that are destroyed or leave the gaming field, but Axis planes can leave from their side without any penalty if the target card suffers 10 points of damage or more. The side scoring more points wins.
Variants: With 5 planes, use two Junkers Ju 87 Stukas and a Reggiane Re.2001 Falco II against Lieutenant Norbert C. Ruff's Bell P-400 Airacobra and a Curtiss P40-F Warhawk. Or 2 Aichi D3A1 Vals and a Kawasaki Ki-61-Ib Hien against Lieutenant Norbert C. Ruff's Bell P-400 Airacobra and a Curtiss P40-F Warhawk. Or 2 Aichi D3A1 Vals and a Kawasaki Ki-61-I KAIc Hien against a Bell P-39-D Airacobra and a Curtiss P40-F Warhawk.
As an alternative, use 2 Junkers Ju 87 Stukas and a Reggiane Re.2001 Falco II against a Bell P-39D Airacobra and a Curtiss P40-F Warhawk. The Reggiane has a bomb that can be dropped with level bombing rules as a single load, inflicting 6 damage points if the bombs hit the center of the target card, and 3 if it just hits part of the card but not the center. The Reggiane cannot bomb from a height above 4.
As another alternative, have the Allied player attack with 2 Douglas SBD-3 Dauntless / A-24A Banshees and a Curtiss P40-C Warhawk. The ground troops belongs to the Axis player, who defends with a Kawasaki Ki-61-I KAIc Hien and a Kawasaki Ki-61-II KAIb Hien.
Raid Over Malta
A dive bomber with escort attacks an enemy target
Players: 1
Gaming Surface: Length: 90 cm. (≈36 in.) Width: 90 cm. (≈36 in.)
Axis (human) Player: A Junkers Ju 87 Stuka and a Reggiane Re.2001 Falco II, at half-ruler distance from the Axis side at an altitude of 5.
Allied (virtual) Player: 1 "A"-firing troop card at a one ruler distance from the Allied side and at a one ruler distance from the left side of the table; 1 "A"-firing troop card at a one ruler distance from the Allied side and a one ruler from the right side of the table; one anti-aircraft gun card at a one and a half ruler distance from the Allied side and at a one and a half ruler distance from the left side of the table; one anti-aircraft gun card at a one and a half ruler distance from the Allied side and at a one and a half ruler distance from the left side of the table.
Rules Needed: Basic Rules. Altitude. Two Seaters. Strafing. Anti-Aircraft Guns. Dive Bombing. Level Bombing. Solitaire Scenarios and Anti-Aircraft Guns.
Winning Conditions: The Stuka has a single load of bombs inflicting 10 points of damage if the bombs hit the center of the target card, and 5 if it just hits part of the card but not the center. The Reggiane has a bomb that can be dropped with level bombing as a single load, inflicting 6 damage points if the bomb hits the center of the target card, and 3 if it just hits part of the card but not the center. The Reggiane cannot bomb from a height above 4.
The game ends when all the ground cards are silenced or when all planes have been shot down or have exited the gaming surface. Every damage point inflicted on a troop card is worth 1 victory point to the attacker, up to a maximum of 5 per card. Every damage point inflicted on a non-silenced anti-aircraft gun card is worth 1 victory point to the attacker, while if it is silenced (8 or more damage points) it is worth a total of 10 victory points to the attacker. The attackers loses 12 points for each of his planes that are destroyed or leave the gaming field from a side other than his own and 3 points for each plane that is damaged but not destroyed at the end of the game. He also loses 2 points for each ground card that is undamaged at the end of the game. He wins if his final score is positive.
Variants: The Axis side is a virtual player and the Allied side is human, with an Allied Junkers Ju 87 B-2 Stuka and a Reggiane Re.2001 CN Falco II with no bombs.