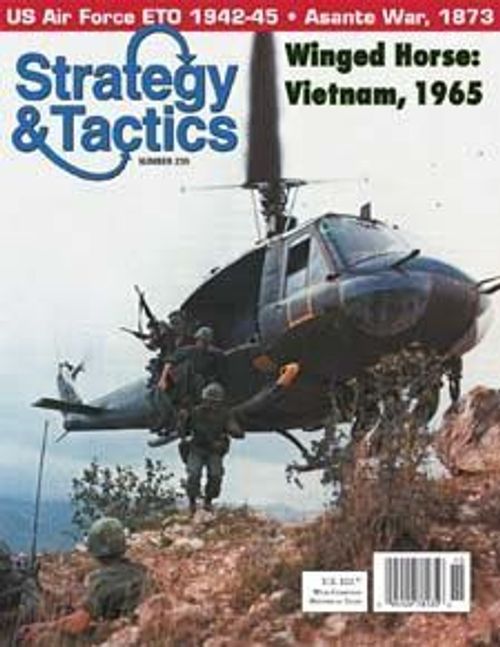
Winged Horse: Campaigns in Vietnam, 1965-66
Winged Horse: Campaigns in Vietnam, 1965-66 Rulebook
Table of Contents
Table of Contents
- 1.0 INTRODUCTION
- 2.0 COMPONENTS
- 3.0 SET UP
- 4.0 SEQUENCE OF PLAY
- 5.0 REINFORCEMENTS & REFITTING
- 6.0 REORGANIZATION
- 7.0 REGULAR GROUND MOVEMENT
- 8.0 STACKING
- 9.0 ZONES OF CONTROL
- 10.0 COMBAT
- 11.0 AIR OPERATIONS
- 12.0 US NAVAL BOMBARDMENT
- 13.0 AIRMOBILE MOVEMENT & AIR ASSAULT
- 14.0 Helicopter Transports & LZ Markers
- 15.0 SUPPRESSION
- 16.0 LOGISTICS
- 17.0 STATIC UNITS, BASES & CITIES
- 18.0 RIVERINE OPERATIONS
- 19.0 ALLIED FIREBASES & SPECIAL FORCES CAMPS
- 20.0 FOG O’ WAR, DUMMY UNITS & SOGs
- 21.0 BORDERS
- 22.0 POLITICAL & MILITARY VICTORY POINTS
- 23.0 VICTORY CONDITIONS
- 24.0 US 1st Air Cavalry Unique Rules
- 25.0 Errata
1.0 INTRODUCTION
Winged Horse: The Vietnam War, 1965-66 (WH) is a two-player, intermediate complexity, strategic-level simulation of the critical campaigns fought during the early stage of the massive US intervention into the Second Indochina War. One player controls the Communist forces, the other player controls the Allied forces.
2.0 COMPONENTS
2.1 Game Equipment
A complete set of WH includes the following components: one game map, this rules set and 280 die-cut counters. Players will also need to provide themselves with a six-sided die.
2.2 Game Map
The game map shows the Republic of Vietnam and adjoining regions as they were in 1965-66. A hexagonal (“hex”) grid has been superimposed on the map to regularize the movement of units across it and to delineate terrain types. Units are placed in hexes, move from hex to hex, and must remain within the hex boundaries at all times.
The Republic of Vietnam (South Vietnam) is further divided into areas. The I, II, III and IV Corps Zones (dark and light tints) are used by the Allied player. The B-1, B-2, B-3, B-4, Saigon and Delta Fronts (red-dot boundaries) are used by the Communist player. The Corps Zone and Military Region boundaries are different for the Allied and Communists; at some places they overlap; at other places they run separately. Those boundaries have effects on the following game functions: political and military victory points and ARVN, ROK, ANZAC and VC movement.
2.3 Units Types & Markers
There are two basic types of counters in the game: “units,” which represent military formations, and “markers,” which are used to record various game functions and serve as memory aids. All ground units of both sides are divided into two general categories: mobile and static.
Mobile units have only one number on them, their combat factor, which is used on both attack and defense. Mobile units are, under certain restrictions, free to move around the map to conduct operations. All mobile units of both sides have movement factors of six (6), which aren’t printed on any of those counters. Note that Communist supply units have no numbers printed on them other than their placement or reinforcement entry codes. They are nonetheless considered a special sub-category of mobile unit. Likewise, there are also unique rules governing the mobility of the two Allied SOG detachments and the two Allied riverine units.
Static units never move from their hex of placement or entry. They have three numbers printed on them: their attack factor (usually zero), their defense factor, and their movement factor (again, always zero). Static units never attack; they only defend.
Notice that some Allied garrison units are printed with that side’s colors on their fronts but have Communist colors on their reverses. Those units, once placed, are never removed from the map during play. They’re simply flipped from side to side to indicate which side controls their hex at any given time. (That’s not true for the other, Communist, garrison units included in the counter-mix.)
Also note, whenever a rule is said to apply to “mobile” units, it also applies to units identified below as “special-mobile,” unless otherwise excepted.
Unit Sizes
- XX = division
- X = brigade
- III = regiment or group
- II = battalion or squadron
Unit Abbreviations
Allied
- ANZ = Australia New Zealand Task Force
- C = Air Cavalry
- Cap = Capital Division
- M = Marine
- NPFF = National Police Field Force
- RAG = River Assault Group
- ROK = Republic of Korea
- TF = Task Force
Communist
- Cam = Cambodia
- Spr = Sapper
Allied Controlled Force Color Schemes
- Black on olive drab = United States
- Black on dark leaf-green = Army of the Republic of Vietnam (ARVN)
- Black on gray = Australian/New Zealand
- Black on sky blue = Republic of Korea
Communist Controlled Force Colored Schemes
- White pennant on red background = North Vietnamese Army (NVA)
- Black pennant on red background = National Liberation Front (Viet Cong)
2.4 Game Scales
Each hex represents 25 miles (40 kilometers) from side to opposite side. Each game turn represents one week.
3.0 SET UP
3.1 The game can be played in two scenarios, the “Short Scenario” and the “Long Scenario.” Both scenarios share the same initial game turn (III October 1965) and set up. The Short Scenario ends at the finish of Game Turn V (III November 1965), while the long scenario concludes at the end of Game Turn 20 (II March 1966).
Players choose which scenario they will play and which side they will command. They then place the units for their side as described below and in the order listed. Other units, received later in the scenario (reinforcements), are temporarily placed in the appropriate space on the Turn Record Track. Play starts with the first game turn and continues until the final turn of the scenario being played, or until one player wins a sudden death victory, or until one player concedes, whichever occurs first.
3.2 Units may generally be set up anywhere in their designated areas. They may not be set up in the same hexes as enemy units or in enemy controlled base or city hexes. Likewise note normal stacking limits generally apply during set up. All Communist units initially set up on the Turn Record Track should be placed there face down. All Allied units initially placed on that track should be placed there face up. Specific exceptions to the general strictures given above are noted below.
3.3 Saigon isn’t considered part of the Allied III Corps or the Communist Saigon Front for purposes of initial deployment.
3.4 Friendly Forces
Each player controls more than one contingent (or nationality, etc.) of forces. In general, all units on one side are completely friendly to each other, may stack and conduct combat together, use each other’s supply, etc. Exceptions will be noted in the rules at the appropriate places.
3.5 Allied Set Up
The Allied player always begins and completes his side’s set up prior to his opponent starting the Communist side’s set up. All Allied units are deployed with their front sides up.
First, all Allied units that have a Roman numeral “I,” “II,” “III” or “IV” printed on their reverse sides should be set up in those respective corps zones. For example, the ANZAC regiment may be set up anywhere inside Allied Corps Zone III (not in Saigon, though, and not in any hex containing a printed Communist base area).
Also note, in this category, the ROK Capital Division and its firebase may only be deployed into the same coastal hex within Allied Corps Zone II, indicated by the word “Coast” also appearing on their reverse sides.
Also, by way of special exceptions in this category, note the ARVN RAG riverine unit may only begin set up in a river or coastal hex of Corps Zone IV. Last, note that the US Special Forces Camps and the two US firebase counters marked with Roman numerals on their reverse sides may not be set up in city hexes or in hexes containing printed Allied base symbols. Nor may an SF base camp occupy the same hex as a firebase counter (and vice versa).
All Allied units with an Arabic number on their reverse sides should temporarily be placed within the reinforcement holding boxes on the Game Turn Record Track corresponding to those numbers. For example, the ROK 2nd Marine Brigade should be placed in the box for Game Turn 2.
All Allied units with the word “Start” printed on their reverse sides should be temporarily set aside in one pile, off the map but within easy reach of the Allied player. Similarly, all US and ROK units with the abbreviation “BD” on their reverse sides (BD=Breakdown), and large white dots in their front upper-right corners, should also be set aside. Likewise set aside the three LZ markers.
Place the SN ARVN 0-2-0 garrison unit in hex 2313. Place the SS ARVN 0-2-0 garrison unit in hex 2214. Place the four ARVN units with “Saigon” printed on their reverse sides into one or both of those Saigon hexes, decided on a unit-by-unit basis by the Allied player.
Place an ARVN 0-1-0 garrison unit in every city hex in South Vietnam other than the two Saigon hexes, with their Allied front sides showing upward. (Also see 25.2.)
Place the two ARVN units printed “Any SVN” on their reverse sides in any non-city, non-Communist base hexes inside South Vietnam.
Note all Allied garrison units should always be positioned as the top unit in their hexes whenever more than one Allied unit is stacked in their hexes.
Last, place all Allied units with specific four-digit hex ID numbers printed on them directly in those hexes. For example, the US 1st Cavalry Division always starts set up in hex 4023 along with its firebase counter. (Note that Special Forces Camp “A” falls into this category.)
3.6 Communist Set Up
The Communist player should only begin his side’s set up after his opponent has completed the set up of the Allied side. Further, the Allied player should turn away from the map and the Turn Record Track all during the Communist side’s set up.
First, place face up a VC 0-2-0 garrison unit in each of the 12 Communist base area hexes within South Vietnam. Next place an NVA 0-2-0 garrison unit, also all face up, in each of the 25 Communist base area hexes that lie in North Vietnam, Laos and Cambodia. Note that all those Communist garrison units should always be positioned as the top unit in their hexes whenever more than one Communist unit is stacked in their hexes.
Place the four Communist supply units with “A” (for “Anywhere”) face down in any Communist base hexes in North Vietnam, Laos and/or Cambodia, but no more than one per hex. Place the other four supply units into the boxes on the Game Turn Record Track that correspond to the turn of entry number printed in the upper-left corner of each of them (3, 7, 11 and 19).
Place the NVA 1st Division face down in the Game Turn 9 box of the Turn Record Track. Place the NVA 5th Division face down in the Game Turn 5 box of the Turn Record Track. Place the NVA 308th Division face down in the Game Turn 16 box of the Turn Record Track.
Place the NVA 2nd Division face down in any Communist base hex in the B4 Military Region. Place the NVA 3rd Division face down in any Communist base hex in the B1 Military Region. Place the NVA 9th Division in any Communist base hex in the Saigon Military Region. Place the NVA 304th Division in any Communist base hex inside Laos. Place the NVA 325th Division in any Communist base hex inside Cambodia.
Next place two “1” strength NVA infantry regiments into one or two Communist base hexes within the Delta Military Region. Then place a “1” strength NVA infantry regiment face down in each of the five boxes no the Turn Record Track marked “1 x NVA Regiment” (1, 3, 7, 11 and 20). Then sort the remaining NVA infantry regiments into two piles, one for the “1” strength units and another for the “2” strength units, and set them aside face up and within easy reach.
Place the 10 Communist dummy units, face down and no more than one per hex, in any of that side’s base hexes printed anywhere on the map.
Next the Communist player should take all 28 of the VC infantry regiments included in the counter-mix and turn them face down in front of him. He should then randomly select and place, face down and without looking at their strengths, one of those regiments into every box on the Turn Record Track marked “1 x VC Regiment” (total nine: Game Turns 2, 4, 6, 8, 11, 12, 14, 17 and 19). He should next randomly select and place one or two of those regiments, face down and without looking at their strengths, into every Communist base hex(es) in South Vietnam (all in base hexes, normal stacking OK). When he’s finished deploying the VC infantry regiments, every Communist base hex must have at least one, but no more than two, such units in it.
3.7 Marker Placement
Put all four victory point (VP) markers near, but not on, the Victory Point Record Track printed on the mapsheet. Place the Game Turn marker into the Game Turn 1 box on the Turn Record Track. Put all the Suppressed markers into a pile within easy reach off to the side of the mapsheet.
4.0 SEQUENCE OF PLAY
The game is played in a series of segmented steps called “game turns.” Each game turn is divided into two “player turns,” the Communist player turn and the Allied player turn. Each player turn is further divided into distinct segments called “phases.” All actions take place in a prescribed order of phases, which, taken altogether, is called the “sequence of play” (see the outline below).
4.1 Sequence of Play
I. Communist Player Turn
- A. Communist Reorganization, Reinforcement & Refit Phase
- B. Communist Movement Phase
- C. Communist Combat Phase
- D. Communist Suppression Marker Removal Phase
II. Allied Player Turn
- A. Allied Reorganization, Reinforcement & Refit Phase
- B. Allied Movement Phase
- C. Allied Bombardment Phase
- D. Allied Combat Phase
4.2 Ending a Turn
At the end of every game turn’s step II.D. advance the Game Turn marker one box along the Turn Record Track. To determine how to end a game, see rule 3.1.
4.3 First Turn Communist Surprise
During the Allied Bombardment Phase of Game Turn 1, that player may commit no more than one air or naval strike marker to any given hex, and no Allied units may use air mobile or air assault movement. Further during Game Turn 1, the US 1st Air Cavalry Division may not attack or provide defensive support, though it defends normally in its firebase hex. See section 24.0 for more details concerning that division.
5.0 REINFORCEMENTS & REFITTING
5.1 Reinforcements are new units first received after play has begun, during the course of the game. They enter the map by being placed, by the player receiving them, in the Reorganization, Reinforcement & Refit Phase of his player turn(s). Refitting is the process by which eliminated units may be returned to play. Reorganization is a process by which divisional units may be broken down into their component regiments or brigades or, alternately, the process by which such component sub-units may be recombined to a divisional organization.
5.2 A player receives reinforcements from the Turn Record Track as indicated by the Arabic numbers printed on those counters or by the notes printed on the track itself.
5.3 Placing Reinforcements
Arriving reinforcements are entered into play only via the use of certain designated hexes. They may not be placed in an enemy occupied hex or prohibited terrain. Players may delay the introduction of reinforcements until a later turn if they desire, or if all placement hexes are unavailable. Reinforcements may move and fight normally in the turn they are brought into play. Placing them on the map doesn’t count against their movement for the turn. Normal stacking limits apply during reinforcement entry.
5.4 Allied ground unit reinforcements are placed in any Allied main base hexes printed on the map that are under friendly control and aren’t under siege at that time. ARVN units may also be placed in Saigon (north and/or south) under the same restrictions. The single US riverine reinforcement unit may enter via any river and/or coastal hex that’s not occupied by any enemy unit(s) at that time. Air and naval support markers are simply placed into the pile of other such units that’s kept off map (see 3.6).
5.5 NVA reinforcements, both supply and combat units, may enter play via any Communist base areas printed on the map in North Vietnam and Laos (not Cambodia) that are friendly controlled and not under siege at that time. Note that Communist base areas in Cambodia, other than the above unit-entry restriction, function normally in all other ways for the Communist player.
5.6 VC reinforcements are taken from the boxes on the Turn Record Track, where they were placed earlier according to the instruction given in rule 3.6, paragraph eight. VC reinforcements may be entered, no more than one per Communist base hex per turn, in any friendly controlled and unbesieged Communist base hexes printed on the map in South Vietnam.
5.7 Siege & Other Restrictions
Neither side’s entering units may be placed in an otherwise eligible entry hex while that hex is “under siege.” An entry hex is considered to be “under siege” whenever one or more enemy mobile units is/are in one or more of the hexes immediately adjacent to it. No reinforcements may be placed in a base hex that’s enemy occupied.
Communist base hexes used for placing NVA units must also be able trace an unbroken line of hexes, none of which contain enemy mobile or static units, no matter how long or convoluted, to the north edge of the map. Base hexes in South Vietnam don’t have to meet that requirement for purposes of VC placement.
5.8 Mobile Unit Refits
During each of your side’s Reorganization, Reinforcement & Refit Phases throughout the game, you may potentially return to play the mobile units you previously lost in combat. Whenever one or more of your mobile units is eliminated in combat, check the Unit Returns Table (URT) printed near the middle of the mapsheet, roll a die for each such unit, and apply any applicable die roll modifier(s) listed beneath the table. That final result, when cross-indexed on the URT, will tell how many game turns in the future, if at all, that unit will reenter play as if it were a reinforcement. Place returning units in the appropriate boxes of the Turn Record Track. During that game turn’s friendly Reorganization, Reinforcement & Refit Phase, return the unit(s) to play. For example, it’s Game Turn 5 and the URT calls for a unit to be returned two turns later. The unit is received during the friendly Reorganization, Reinforcement & Refit Phase of Game Turn 7. Also note units may be permanently eliminated by the URT.
5.9 Returning refit units are placed exactly as if they were friendly reinforcements for that turn. If a URT result calls for a unit to be placed as a reinforcement on a turn after the scenario ends, it isn’t received.
5.10 Division Breakdown
If a division is broken down as a result of combat, that division counter isn’t rolled for on the URT. Instead, that counter is temporarily set aside and full combat resolution takes place among its component brigades. For example, if a US divisional counter receives a shattered result, that counter is replaced on the map, in the battle’s location hex, with its three component brigades, one of which is then eliminated by the combat result (and is then immediately rolled for on the URT). The Allied player can re-use that division counter as a higher echelon unit only when (if) the eliminated brigade is refit back into play.
5.11 US & ARVN Garrison Unit Refits
Whenever a garrison (static) unit of either side is eliminated, it isn’t run through the normal URT refit process. If an ARVN or US garrison unit is eliminated, simply flip it over in place so its VC counterpart unit is now in place in that same hex. In turn, if the Allied player counterattacks and retakes that hex, the then eliminated VC garrison unit would again simply be flipped back so its ARVN or US counterpart unit is back in place in that same hex. That process may take place any number of times during each match.
5.12 VC & NVA Garrison Refits
Whenever a VC garrison is eliminated in a Communist base hex printed on the map in South Vietnam, simply set aside that unit until such time (if ever) a Communist Player Turn Reorganization, Reinforcement & Refit Phase begins and there are no Allied ground units in that hex. That being the case, the eliminated Communist garrison unit is immediately placed back into its original hex. The same procedure is used for eliminated NVA garrison units in Communist base hexes in North Vietnam, Laos and Cambodia. Note, though, NVA garrison units may never be refit into Communist base hexes in South Vietnam, while VC garrison units may never do so into Communist base hexes outside that country.
5.13 US & ARVN Firebases
These units, though static, go through the normal mobile unit refit process described in 5.8 whenever they’re eliminated in combat. Further, they need not be replaced into their original hex; they could instead be placed in any non-city, non-SF base camp, non-Allied base hex anywhere in South Vietnam that aren’t occupied by any enemy units at that time.
5.14 Communist Supply Units
These units, once consumed or otherwise eliminated, may not reenter play in any way.
5.15 Treat Communist dummy units as belonging to the NVA for purposes of their URT die roll modifier. For purposes of actual refit placement back onto the map, the Communist player may treat them as NVA or VC, decided by him on a unit by unit basis.
5.16 Areas of Placement Restrictions
All VC units, as well as ARVN, ROK and ANZAC units, are restricted to moving only within their areas of placement. That means, at the start of play, those units are restricted to moving only within the Military Region or Allied Corps Zone, respectively, in which they were placed during set up. Note, though, in the case of VC and ARVN units, those initial restrictions don’t carry over throughout the game as units are eliminated and then refit back into play. That is, each time an eliminated VC unit or ARVN unit is refit back into play, it’s still restricted to moving in only its “area of placement”; however, exactly what that area constitutes is figured afresh each time a given unit makes a new appearance in play.
Further, during set up as well as during refit placement on the map, players shouldn’t concern themselves if, for instance, the VC B4 Regiment ends up appearing in the B2 Military District. The game system is such that VC regiments are treated generically in terms of the IDs they carry on their counters. Simply judge a VC unit’s “area of placement” by where it is actually located on the map each time it makes and appearance (or reappearance) onto the map.
In the case of ROK and ANZAC units, however, no matter how many times they are eliminated and then refit back into play, they must always only be placed back in their original Allied Corps Zone, which is zone II for the ROK and III for the ANZAC. Similarly, when the ROK 2nd Marine Brigade arrives as a reinforcement on Game Turn 2, it may only be placed, and must remain in, II Corps.
6.0 REORGANIZATION
During your own side’s Reorganization, Reinforcement & Refit Phases throughout the game, and also sometimes owing to combat results, players may choose (or be required) to replace on the map division-sized units with their component brigades or regiments, and vice versa. Breaking down divisions, and combining sub-units to reform divisions, is termed “reorganization.” The NVA Divisional Components Chart printed on the mapsheet, and the notes beneath it, give the details for unit types and locations where these procedures may occur.
6.1 Breaking Down
To break down a division (XX), remove its unit-counter from the map and replace it, in the same hex, with the number and type of brigades or regiments indicated on and beneath the Components Chart. That is done generically for NVA divisions and specifically for US and ROK divisions.
6.2 Combining
To combine sub-units into a division, those brigades or regiments must be in the same main base or firebase hex. Remove the brigades or regiments from the map and replace them in the same hex with the proper division if US or ROK, or with any division of appropriate strength if NVA.
6.3 Suppression
Suppressed NVA divisions may break down. The resulting regiments are all suppressed. Suppressed regiments may not combine. (See section 15.0 for more on suppression.)
6.4 Restrictions & Strictures
Among Communist units, only NVA units may break down and/or combine. NVA break downs may potentially take place anywhere on the map. NVA rebuilds may only take place in Communist base hexes (anywhere on the map) that aren’t under siege at that time, during Communist Reorganization, Reinforcement & Refit Phases.
US and ROK divisions may potentially breakdown anywhere on the map, but only into their respective component brigades or regiments. US and ROK combining may only take place in Allied main base and/or firebase hexes that aren’t under siege at that time, during Allied Reorganization, Reinforcement & Refit Phases.
VC, ARVN and ANZAC units never breakdown or combine. Neither player may break down or combine units during initial deployment.
7.0 REGULAR GROUND MOVEMENT
7.1 During the movement phase of your player turns you may potentially move all, some, or none of your mobile units. Each mobile unit may be moved as many or few hexes as you want, as long as its movement factor—always six for all mobile units on both sides—isn’t exceeded.
7.2 General Movement Strictures
Unused movement points may not be accumulated from turn to turn, nor may they be transferred in any way from unit to unit. Move each unit individually from one hex to another immediately adjacent hex; no skipping of hexes is allowed. Once a unit has been moved, and your hand withdrawn from it, that unit may not be moved again that phase unless your opponent permits it.
7.3 I Go; You Go
During your movement phases only your own units may be moved. No enemy movement occurs during your movement phases.
7.4 Communist Movement Costs
Each hex entered by Communist mobile units, including supply and dummy units, costs one movement point (MP) to enter. In-hex and hexside terrain types and water barriers have no effect on that process. (Exception: see 7.12 below.) Note, though, no Communist mobile unit may ever be moved into a hex that contains one or more enemy units.
7.5 Communist Sea Movement
Communist mobile units may cross all-sea hexsides provided that, as they do so, they move directly from one land hex directly to another land hex. For example, a Communist mobile unit could move from 3226 to 3326 for one MP.
7.6 Allied Movement Costs
The costs for entering each hex during an Allied mobile unit’s move is shown on the Terrain Effects Chart printed on the mapsheet. An Allied mobile unit may always move a minimum of one hex per friendly movement phase, by expending its entire movement factor (six) at the very start of its move and provided it isn’t moving into prohibited terrain or a hex containing an enemy unit.
7.7 Prohibited Movement
No unit of either side may ever enter a hex containing enemy units of any kind or terrain that it isn’t allowed to enter according to the Terrain Effects Chart.
7.8 Allied Road Movement
When moving along a road, from one road hex to another through a hexside traversed by the path of that road, Allied mobile units pay only one-half (0.5) MP per hex entered, regardless of other terrain(s) in the involved hexes.
7.9 Trail Movement
When moving along a trail, from one trail hex to another trail hex to another through a hexside traversed by the path of that trail, Allied mobile units pay only one MP per hex entered, regardless of other terrain(s) in the involved hexes.
7.10 Trail & Road Strictures
Though they are permitted to move along the hex paths of trails and roads, Communist units never benefit from those features as do Allied units. Allied units may mix road and/or trail and/or cross-country movement during any and all portions of their movement, as long as their total of six MP per move isn’t exceeded, even fractionally.
7.11 Rivers
Note that, unlike many other wargames, rivers run through hexes, not along hexsides. There is no extra cost involved with normal ground movement when either sides’ mobile units enter, leave, or move along, rivers. Allied mobile units pay two or three movement points for each river hex entered, depending on the terrain in each such hex (see the Terrain Effects Chart). For details on “riverine movement,” see section 18.0.
7.12 Communist A-Shau & Ia Drang Valley Movement
The general rule here is Communist mobile units may enter any number of hexes belonging to these valleys at no cost. Further, the directionality of their entering such hexes has no bearing on this bonus. That is, the movement cost of each valley hex is zero, no matter if it’s entered from an adjacent valley or non-valley hex.
The presence of one or more Allied ground units in one or more valley hexes, however, prevents this kind of free Communist movement until such time as that presence is removed, judged on a valley by valley and moment by moment basis. While Allied units are present in a valley, Communist units there pay the normal one MP per hex movement rate. Also note Allied movement into valley hexes is always judged based on the other terrain present in those hexes.
7.13 Communist Supply Unit Movement
Communist supply units must always start and end their side’s movement phases in one or another of their side’s main base hexes printed anywhere on the map. That is, they may only move from friendly controlled Communist base area hex to another.
8.0 STACKING
8.1 Stacking is the term used to describe having more than one friendly unit in the same hex at the same time. Stacking applies only to land units, but within that category it applies to both mobile and static units. The general stacking limit for both sides is six units. Suppressed markers, LZ markers, as well as Allied air, naval and helicopter counters, don’t count for stacking.
8.2 The six-high stacking limit applies only at the end of each phase, enemy or friendly. That is, you may move, retreat and/or advance-after-combat into and through any given hex, with any number of units, over the course of a phase, as long as the stacking limit is met at the end of each phase. If any hex is found to be over-stacked at the end of any phase, the opposing player is allowed to eliminate (and check for its refit on the URT) the minimum number of mobile units necessary to bring that hex back into limits. (In such cases the Communist player may look to see which Allied mobile units he’s removing, but the Allied player must choose blindly.)
8.3 Friendly and enemy units may never be stacked in the same hex at the same time.
8.4 Within the territorial strictures set out elsewhere in these rules, units of different forces on the same side may stack together. For example: US, ARVN and/or ROK units may be in the same hex at the same time.
8.5 Initial Deployment
Units must be deployed within stacking limits during initial deployment. No breaking down or combining is allowed during set up.
8.6 Units vs. Divisions
The stacking limit is given in terms of units, not divisions. Each divisional (XX) unit-counter in the game is considered the stacking equivalent of three “units.” All the other units in the game—including garrisons, supply, SF base camps, firebases, regiments, brigades, etc.—each count as one unit for stacking purposes.
8.7 With one exception, neither player will ever have more than one static unit in a given hex at any one time. If there is a static unit in a hex, stacked there with mobile units, the static unit must always be kept as the top unit in that stack. The exception to this rule is the US 1st Air Cavalry Division and its firebase; for details on that, see section 24.0.
8.8 Communist Supply Unit Stacking
There may never be more than one Communist supply unit in any given hex at the end of any phase.
9.0 ZONES OF CONTROL
Unlike many wargames, no units in this design have a “zone of control.” (If you don’t know what that term means, don’t worry about it.)
10.0 COMBAT
10.1 Combat occurs between adjacent opposing units at your discretion during your side’s combat phases throughout the game. The player whose turn it is, is considered the “attacker,” and the other player is considered the “defender,” regardless of the overall strategic situation. Combat is resolved using the Combat Results Table (CRT) printed on the mapsheet.
10.2 Attacking & Defending
Combat occurs only if the attacking player chooses to fight. You may choose to attack with some, none, or all of your eligible units. You may combine more than one unit into a single attack; however, no attack may have as its objective enemy units in more than one hex. If a given friendly unit is adjacent to more than one hex containing enemy units, it may attack only one of those hexes. Each of your units may attack only once per friendly combat phase. If you have more than one unit in a hex, those units could attack into different enemy occupied hexes, decided by you on a unit by unit basis.
10.3 All units defending in the same hex must defend together as if they were one combined unit. The defender may not withhold units from a defense.
10.4 Attacks are resolved one at a time; the resolution of one battle must be completed before that of the next is begun.
10.5 The attacker need not declare all his attacks beforehand, nor need he announce which of his units are attacking which defenders, until the actual time of each battle’s combat resolution.
10.6 Units with printed attack factors of “0,” as well as Communist supply units, may never attack, nor may they be in any way involved in the attacks other friendly units might launch from their hex in terms of satisfying losses that may be mandated by those attacks’ combat results.
10.7 Combat Resolution Sequence
-
The attacker states which of his units will be attacking which defending hex.
-
Determine the supply status of all involved Communist units.
-
Determine the combat odds by totaling the attack strengths of all involved attacking units, and then dividing that total by the total defensive strength of the involved defending units.
If the attacker’s total is greater than the defender’s total, any remainders are dropped after the division and a “1” is set next to the result of that division in order to create a ratio. That is the ratio that determines which CRT odds column will be used. For example, if the attacker had 14 combat strength points and the defender had five, the combat odds would be found by dividing 14 by five, which comes out to 2.8 to 1. In that case, the .8 remainder would be dropped to get an odds ratio of 2:1 (read as “two to one”). If the defender’s combat strength was greater than the attacker’s, round up any remainder.
-
Find the correspondingly labeled odds column on the CRT, roll a die and cross index that result underneath that column.
-
Immediately apply the combat result and then go on to resolve the next combat, if any.
10.8 Combat multipliers may increase the defensive combat strength of units involved in a given battle. Such modifiers include terrain (both manmade and natural, see the “Combat Effects” column of the Terrain Effects Chart), and the expenditure of “attack supply” (see rule 16.6).
10.9 If more than one terrain multiplier applies, use only the single best one. For example, a base located in doubling terrain would only double the defenders, not triple or quadruple them.
10.10 Attacking Communist mobile units may have their combat strength halved as a result of being out of supply. If a unit would be both halved and doubled, then use its printed combat strength.
10.11 “Combat results” are the outcomes of combat. They are explained beneath the CRT on the mapsheet.
10.12 Advance After Combat
Whenever a combat result empties a defending hex of all units, while one or more involved mobile units survived that combat on the attacker’s side, the attacker may decide to conduct an “advance-after-combat,” with one or more of those surviving units, into the vacated defender hex. That’s a special, one-hex move that costs no MP. The decision to make an advance must be made immediately at the end of each battle and before the resolution of the next is begun. Normal stacking limits and other terrain and area prohibitions still apply.
10.13 Attacking into Restricted Area
Otherwise eligible units may attack across borders at all times, though they may be restricted from advancing across them. For example, an ARVN division restricted to Allied Corps Zone III could attack across any of the borders of that zone (both zonal and international), but it could not advance after combat across them.
10.14 All-Sea Hexsides
No units may attack across all-sea hexsides or into all-sea hexes.
10.15 ARVN armored cavalry units generally have their combat factors halved when attacking into, or defending in, any terrain other than clear. The exception is, if they are defending in a road hex, or attacking along a road, they are not halved no matter what other terrains are involved.
10.16 Enveloping Attacks
In general, an envelopment attack bonus is achieved whenever a defending Allied hex is attacked by two Communist forces from hexes directly opposite each other, or by three attacking Communist forces with an empty hex between each of them, or by more than three attacking Communist forces. Enveloping an Allied defender awards the Communist a one column rightward odds shift for that battle.
Note that it’s not enough to simply have units present in hexes adjacent to a defender; to gain the envelopment bonus the stipulated Communist forces must actually be taking part in the attack on that Allied defender. Also note the Communist never gets this bonus when attacking into city, firebase, SF base camp, or Allied main base hexes.
The Allied player is only awarded an envelopment odds shift attack bonus if the 1st Air Cavalry is involved; see 24.3 for those details.
11.0 AIR OPERATIONS
11.1 The Allied Player has three types of air units—TAC, SAC and helicopter—which he can employ to bombard Communist units. All air units function in basically the same manner, though with special capabilities, as noted below. Each bombarding unit represents one point of bombardment strength. Each bombarding unit may perform one mission per game turn.
11.2 Bombardment units may be reused from turn to turn; they are not permanently expended simply by being sent on a mission. The only combat result that affects them is a “BFL,” and even that is temporary. See the Bombardment Results Table printed on the mapsheet and the notes beneath it.
11.3 Air units only affect enemy movement or combat in terms of the results given on the BRT. Air units are placed on the map only when executing missions.
11.4 Bombardment takes place only during the Allied Bombardment Phase. At that time the Allied player may place any, some, or up to 10 of his available bombardment unit(s) in any hex(es) containing enemy mobile units, including dummies and/or supply. All bombardment markers to be used that phase must be placed prior to beginning the resolution of any of the resultant bombardments. Bombardments are then resolved one at a time with one die roll made per bombarded hex. There are no regional, zonal or aerial restrictions concerning the placement of bombardments. Note, though, no more than 10 bombardment points may ever be applied to any one bombardment.
11.5 Bombardment Procedure
-
The Allied player designates the bombardment to be resolved.
-
Total the number of bombardment points involved in that bombardment attack; locate that corresponding column on the BRT; roll a die and cross index that result beneath the previously selected column heading.
-
Apply the result, then remove the involved bombarding units from the map, placing them off to the side within easy reach.
11.6 Bombardments are flown against enemy occupied hexes, not individual units or stacks within such hexes. If there is more than one defending unit in a hex, conduct just one attack against all the units within that hex.
11.7 The Communist player only reveals units in a hex being bombarded if the bombardment result calls for one or more of them to be broken down and/or eliminated. If a dummy marker is eliminated, it is treated as a real unit in that it is removed from the map and is checked for on the URT.
11.8 Air Unit Types
All air units function in the same general way, with the following exceptions.
Whenever the SAC unit bombards, alone or in conjunction with other air/naval units, subtract one from that die roll. All results modified to less than one are considered to be “TE*” (*with collateral damage). The presence of a SAC unit in a bombardment force that caused “collateral damage” also effects the number of political points the Communist player will receive. See the notes beneath the BRT on the mapsheet and the last paragraph of 25.1.
Helicopters may only bombard enemy units in hexes adjacent to one or more friendly ground units (static and/or mobile).
11.9 Terrain Shifts & Bombardments
Bombarded Communist units receive the odds shifts noted on the Terrain Effects Chart when being bombarded. For example, units being bombarded in a jungle hex would receive a one column leftward shift on the BRT. If more than one such shift applies, use only the single best one. If a shift causes a bombardment’s strength to shift left off the BRT, that bombardment result is automatically “NE.”
11.10 Static Immunity
Note that all Communist static units are entirely immune to the effects of bombardment.
12.0 US NAVAL BOMBARDMENT
The lone US naval bombardment unit represents gun support from offshore warships. That unit is treated generally like an air unit for bombardment purposes, but it may only be used against coastal hexes and, as with SAC units, it may not be used to satisfy a BFL result.
13.0 AIRMOBILE MOVEMENT & AIR ASSAULT
13.1 Airmobile and air assault qualified units have the “infinity” (propeller) symbol printed beneath their unit-type box. They are eligible to make “airmobile moves” and “air assaults.” They may also move using normal ground movement. Note the rules in this section don’t apply to the US 1st Air Cavalry Division. For those rules, see section 24.0. (For the definition of “unit” as used in this section, see rule 8.6 above.)
13.2 Airmobile and/or air assault moves are conducted from a starting hex to a landing (terminal) hex. Units using these forms of movement may move over any kind of terrain and/or enemy units; however, any eligible unit that conducts an airmobile and/or air assault move may not conduct any other movement that same phase.
13.3 Airmobile Movement
To use airmobile movement, an otherwise eligible Allied unit must start its move in a friendly controlled city or Allied main base printed on the map, or in a hex containing a firebase or Special Forces camp or LZ marker. That being the case, the selected unit may then be moved to any other such hex anywhere on the map. This is all done during the Allied Movement Phase.
13.4 Unbesieged Limits
The Allied player may move a maximum of three airmobile units to and/or from any given main base, firebase, Special Forces camp or city hex or LZ that’s not under siege at the time. That is, a total of three units could enter and/or leave a given hex via airmobile movement, or any combination. For example, you could move two airmobile units into an unbesieged hex and move one airmobile unit out of that same hex in a single movement phase.
13.5 Besieged Limits
The Allied player may make a maximum of one airmobile unit move into or out of any friendly controlled Allied main base, firebase, Special Forces camp, city hex or LZ marker that’s under siege at that time. That is, if an airmobile move’s starting or landing hex, or both, is/are under siege, then only one unit may airmobile move into or out of it (total) in a single Allied Movement Phase.
13.6 Air Assault
An air assault is conducted as follows. An eligible unit must start in a hex containing an Allied main base, city, firebase, LZ marker or Special Forces camp. It doesn’t matter if the departure hex is under siege. The air assaulting unit is then placed on any hex within six hexes of that starting hex. The landing hex doesn’t have to be an Allied main base, firebase, Special Forces camp, city or have an LZ marker in it.
A maximum of one unit may air assault out of any given departure hex during an Allied Movement Phase. No other airmobile or air assault movement may be conducted into or out of that departure hex during that same movement phase. Similarly, no more one unit may be landed in a hex via air assault during any single Allied Movement Phase, no matter if they originate in different departure hexes.
Additionally, a unit may use air assault movement if it doesn’t start the movement phase in an Allied main base, city, firebase, Special Forces camp or LZ hex. In that case, however, it must end that move in a hex containing one of those facilities and that’s located no more than six hexes away from its starting hex.
13.7 Further Strictures
The Allied player may not conduct both an airmobile move and an air assault move into or out of the same hex during the same movement phase.
14.0 Helicopter Transports & LZ Markers
14.1 In order to enable the kind of moves described above in section 13.0, helicopter units must be diverted from their bombardment role. Each helicopter marker so committed may air move up to three eligible brigades or regiments during an Allied Movement Phase. For example, one helicopter unit could air move one eligible US brigade and two eligible ARVN regiments, etc. The Allied player must designate and set aside the appropriate number of helicopter markers from among his pile of available helicopters. A helicopter unit used to move one, two or three eligible units will then not be available for bombardment that same player turn.
Note that the air mobile and air assault moves described above are only possible when enabled by the commitment of helicopters to actually carry out the moves with eligible units. Further, helicopter units may not be used fractionally for transport. If you commit one for that purpose, and then only move one or two eligible ground units with it, the entire helicopter unit is still considered to have been used up on that mission.
14.2 If an aerially moved unit is eliminated, nothing happens to the helicopter unit that transported it. The transported and eliminated ground unit is checked on the URT according to the normal rules.
14.3 Landing Zone (LZ) Markers
The Allied player has three Landing Zone (LZ) markers for use on the map. LZ markers are placed at the start of each Allied Movement Phase. Simply place them, no more than one per hex, in any hexes not occupied by a Communist unit or stack. The Allied player doesn’t have to place an LZ if he doesn’t want to, and may move a deployed LZ marker from its hex to any other hex at the start of any of his movement phases or remove it from the map. LZ markers allow airmobile eligible units to make airmobile moves to and from their hex as if it were an Allied main base hex.
LZ markers have no effects on stacking or combat. If a Communist unit occupies a hex containing an LZ marker, it is removed from the map. It may be reused on the following turns. It’s also allowed to place LZ markers during a given turn and then simply end up not using one or more of them during that turn.
15.0 SUPPRESSION
15.1 Communist units are always in one of two states, “combat effective” or “suppressed.” Combat effective units function normally within the scope of the rest of the rules. Suppressed units may not move or attack, though they continue to defend normally while suppressed. Suppressed units are indicated by having a Suppressed marker placed atop them. Combat effective units become suppressed due to certain results on the BRT.
15.2 During the Communist Suppression Marker Removal Phase of each game turn, that player should remove all such markers from atop his units anywhere on the map. Recovery from suppression is automatic. Note, though, there is nothing to prevent a given Communist unit or stack from being bombarded and suppressed across multiple game turns. Communist static units, as well as all types of Allied units, are never suppressed.
16.0 LOGISTICS
16.1 Allied units in the game are always and everywhere considered fully supplied. Communist units exist in three supply states: out of supply (OOS), supplied, and attack supplied.
16.2 Lines of Supply
To determine the supply state of Communist units, trace a line of supply (LOS) from their hexes to a supply source. A line of supply is a path of hexes, no longer than six hexes in length, from the Communist unit or stack in question back to a supply source hex. When counting LOS length, don’t count the hex the tracing unit is in; do count the hex in which the supply source is located. Other than that, LOS may be traced into and/or through any hexes on the map, even ones occupied by one or more Allied units. They may also be traced across all-sea hexsides (but not into or through all-sea hexes).
16.3 Supply Sources
Communist units located in Communist base hexes printed on the map are always in supply while in those hexes. The same is also true of Communist units located in the 57xx hex row. Communist units not in any of those hexes must trace their LOS to a friendly controlled Communist base hex that’s within six hexes of their location. Note that the VC Military region restriction doesn’t apply to those units’ LOS tracing.
Note the same valley movement bonus given in rule 7.12 is available as an LOS tracing bonus, and with the same Allied unit presence restriction.
Also note the 57xx hex row supply is available only to units within that hex row; units outside that hex row may not trace their LOS into it, except to the base in 5713.
16.4 Supply Effects
Supplied Communist units function normally, as described throughout these rules.
Communist mobile units found to be OOS at the start of their movement have their movement factor halved to three that entire phase, even if they move back into supply during the course of that move.
The supply status of Communist mobile units involved in an attack should be checked as part of that battle’s resolution process (see section 10.0). Attacking units found to be OOS at that time have their attack factors halved. If more than one unit is to be halved in a given attack, add up all those units’ combat factors and make just one grand division. Round down any remainder. There may be both supplied and unsupplied units involved in the same combat.
Note that Communist defensive combat strength is always full; it’s never effected by supply state.
16.5 Communist Static Unit Supply. Note that, due to the nature of their organization and placement restrictions on the map, Communist static units never need to have LOS traced for them.
16.6 Attack Supply
In order to make use of this kind of supply, attacking Communist units must be in supply as explained above. That being the case, if there is a Communist supply unit located in a Communist base hex that’s no more than six hexes away from a given unit or stack of attacking Communist units, that player may decide to “burn” that supply unit by removing it permanently from the map. (And, yes, supply units may provide attack supply to units attacking from their own hex.)
That removal having been carried out, the effect is to double the attack strength of all the involved Communist units in the attack being supported with that kind of supply. A burned supply unit may provide attack supply to more than one hex of attacking Communist units, provided they’re all involved in the same attack and all are within six hexes of the supply unit. If a stack is being given attack supply, not all the units in it need be attacking, nor are all attacking units in that hex required to be involved in the same attack. Some could attack elsewhere using another supply unit, or by simply using regular supply, or attack while OOS, etc. Attacks may contain any mix of both attack supplied and/or regularly supplied and/or OOS Communist units.
16.7 Communist supply units have no combat value of their own, though they do count for stacking. Their sole function is to provide attack supply. If stacked with other Communist units, and that stack is attacked, the supply unit must be the last mobile unit given up to satisfy any combat result loss requirements. If alone in a hex when attacked, they are automatically eliminated; no die roll is made (though that’s not true for bombardments; resolve those normally).
17.0 STATIC UNITS, BASES & CITIES
17.1 All cities and bases of both sides printed on the map have static garrison units in them, representing regional and local forces, armed forces garrisons and other self-defense units.
17.2 Control of South Vietnamese Cities & Allied Main Bases
Whenever the Communist player gains control of a South Vietnamese city or Allied main base hex, as a last step in that battle, flip over the US or ARVN static garrison unit located there. A Communist counterpart garrison unit is printed on the reverse of each such Allied unit. That flipped over unit immediately begins functioning as a Communist static unit in that same hex. That process also reverses itself the instant the Allied player regains control of such hexes; and that process may occur and reoccur in any given hex(es) any number of times throughout a game. The URT is not consulted in relation to the elimination of such units; the conversion process is immediate and automatic.
17.3 Control of Communist Bases
The same garrison conversion process doesn’t occur when the Allied player gains control of a Communist base hex. In that case, simply set aside the eliminated Communist garrison unit. If any subsequent Communist Reorganization, Reinforcement and Refit Phase begins without there being one or more Allied units in a previously captured Communist base hex, the Communist garrison unit is immediately returned to that hex, and the base instantly resumes all normal functions for that side until such time, if ever, it is again captured by Allied forces. Note again, in terms of when an eliminated Communist garrison unit is returned to play, the URT is never consulted; it’s all dependent on the control status of the lost garrison unit’s base hex.
17.4 Garrisons & Bombardment
Communist garrison units are never eliminated due to any bombardment result. Likewise, suppression has no effect on them since they never move or attack.
17.5 Garrisons & Supply
Garrison units need no supply. Due to their placement on the map, they are always functionally in supply.
17.6 Garrisons & Stacking
Garrison units count normally for stacking. There may never be more than one garrison unit in a hex at one time.
17.7 Garrisons & Combat Result
A garrison unit in a hex being attacked must always be the very last unit given up to satisfy any combat result loss requirements.
18.0 RIVERINE OPERATIONS
18.1 The Allied player has two riverine units. They are treated exactly as mobile land units, with the following exceptions.
18.2 Riverine units may move only on river and/or coastal hexes. They pay one movement point per hex entered, regardless of the terrain in the hex. When moving along a river, they may only move along the course of the river, that is, across hexsides traversed by the river as printed on the map. When moving along the coast, they may not cross all-land hexsides.
18.3 Riverine units participate normally in combat, except they may only attack units on adjacent river and/or coastal hexes. Again, though, they may only attack along the course of the river, and may not attack from one coastal or river hex to another across an all-land hexside.
19.0 ALLIED FIREBASES & SPECIAL FORCES CAMPS
19.1 Allied Firebases
Firebases are treated in all respects as static units. They have the following special capability:firebases double the defense strength of all friendly units stacked with them. They don’t, though, double their own printed defense strength. Note that firebases don’t have I.D. numbers on them corresponding to any of the Allied divisional numbers. In general, any Allied unit may use any firebase, as there was a lot of flexibility in moving units through them, etc. Also note, however, firebases aren’t backprinted with Communist counterpart units. When a firebase unit is eliminated in combat, it’s removed from the map and a regular URT check is made for it. No firebase may ever be set up in any hex containing an Allied garrison unit (cities and main base hexes) or Special Forces camp.
19.2 Special Forces Camps. SF camps have a special intelligence function. That is, the instant a Communist unit or stack moves next to an SF camp, that player must immediately reveal that force to the Allied player. Turn all such Communist units face up and keep them that way while they remain adjacent to the camp. The Allied player is free to look through such stacks at all times. Note that SF camps have no defense-enhancing abilities, nor are they ever returned to play once they’re eliminated.
19.3 The Allied player may never stack firebases and SF camps in the same hexes, nor may firebases and/or SF camps be stacked in the same hex as Allied main bases or cities. Firebases and SF camps count for stacking.
20.0 FOG O’ WAR, DUMMY UNITS & SOGs
20.1 The Communist player may always fully examine stacks of Allied units on the map as well as those on the Turn Record Track. Communist mobile units should always be deployed face down while on the map or the Turn Record Track. Whenever there’s a static unit in a hex with one or more mobile units, on either side, that static unit should always be positioned as the top unit in that stack.
20.2 The Allied player may only look beneath the top unit of a Communist stack (to look at their printed sides) during the resolution of ground combat or bombardment against that stack. Even then, such examination is only made after the attack/bombardment is declared and Allied units committed to it. The Allied player may not call off an attack or bombardment once it has been declared. After an attack or bombardment, any Communist mobile unit survivors in a stack should immediately be turned face down again.
20.3 Both players are always allowed to examine the terrain in a hex under a force of enemy units.
20.4 Communist Dummy Units
The Communist player has 10 dummy units available at the start of play in both scenarios. In general, they count as mobile units: they are deployed face down; they count for stacking; they have movement factors of six, when eliminated their return is checked for on the URT, etc. They may not attack, however, and they have no combat values of their own. On the offensive, their presence doesn’t prohibit real Communist units stacked with them from attacking. They may not be given up to satisfy offensive combat losses. On the defense, dummies are eliminated (and checked for on the URT) as soon as an Allied attack declaration into their hex causes them to be revealed or when a bombardment result calls for them to be eliminated.
During initial set up there may not be more than one dummy unit deployed per hex (see 3.6, paragraph seven). That restriction is done away with, though, once play begins. After that, the Communist player may stack normally with his dummies. He may even create and move around stacks containing nothing but dummies.
20.5 Allied SOG Markers
The US “Delta” (a.k.a. “Detachment B-52”) and ARVN 77 SOG markers represent “special operations groups,” which were primarily used for long range recon during this period of the war. The Allied player may stop play at any time in order to place a SOG marker anywhere on the map, other than hexes in North Vietnam, which contain one or more Communist units at that time (otherwise keep the SOG markers off the map). The Allied player may then examine all Communist units in that hex. The marker is then removed from the map. Each marker may be used once per game turn at any time.
21.0 BORDERS
21.1 The following strictures are in place throughout play concerning borders.
NVA units may move and attack anywhere on the map. VC units may only move within their military region, though they may attack through any kind of border hexside. Similarly and in general, ARVN ground units, as well as ROK and ANZAC units, may only move within their corps zone of placement. US ground units may generally not move out of South Vietnam, but see 22.4 for important exceptions. Borders. ARVN units may not move out of the Military Region in which they are placed. The exceptions are: the two airborne brigades (1, 2), the two marine brigades (147, 248) and the SOG marker.
21.2 Allied bombardments may always take place anywhere on the map.
21.3 Units may always attack across border hexsides, though they’re limited in their ability to advance after combat in the same ways as described above for regular movement.
22.0 POLITICAL & MILITARY VICTORY POINTS
22.1 Players gain political and/or military victory points (PVP & MVP) for various game occurrences. Each player uses the marker-counters provided to track his own MVP and PVP on the Victory Point Track printed near the center of the mapsheet. All MVP and PVP totals are zero at the start of play of both scenarios. The PVP and MVP totals of both sides are always kept in the open and are known by both players.
If either player’s MVP and/or PVP totals go beyond 50, record that fact on a piece of paper and start that marker over again in the “1” space of the track.
If either player’s MVP and/or PVP totals fall below zero, remove the corresponding marker from the Turn Record Track and keep track of the negative totals on a piece of scrap paper until such time as that game ends or the player ‘in the hole’ pulls himself back into positive territory.
22.2 Players gain or lose VP for the various occurrences as listed on the Victory Point Tables printed on the mapsheet. The tables tell how many points are gained or lost, and at what time in the game turn those changes are to be recorded.
22.3 The PVP value of each city and base printed on the map is shown in the center of those hexes. For example, the PVP value of the city of Hue, in hex 5317, is three.
22.4 Broadening the War
The Allied player may, on a country-by-country and game-turn-by-turn basis, make decisions to “broaden the war.” Essentially, that’s done by deciding to send US units (only) into Laos and/or Cambodia and/or North Vietnam. Remember: merely attacking across a border hexside into, or bombarding within, the territory of one or more of those countries is in no way prohibited and is not considered a broadening of the war. For more details on this, see the VP Tables printed on the mapsheet as well as 25.1.
23.0 VICTORY CONDITIONS
23.1 There are two types of victory in WH, military and political. Victory is generally determined at the end of the game, though certain conditions arising during the course of a game may end play and give a player an automatic “sudden death” victory.
23.2 Types of Victory
Throughout the course of the game, players score MVP and PVP. At the end of the game, players check to see what kind of victory they may have attained through accrual of those VP. A player may gain either a military or political victory, or perhaps even both at the same time, each judged according to its own conditions.
23.3 Military Victory
At the end of the game, the player who has at least 25 more MVP than his opponent has won this kind of victory. If neither player has that point margin, neither player is considered to have won this kind of victory.
23.4 Political Victory
At the end of the game, the player who has at least 25 more PVP than his opponent has won this kind of victory. If neither player has that point margin, neither player is considered to have won this kind of victory.
23.5 Decisive Victory
At the end of the game, the player who has won both a military and political victory, as described above, has won this kind (the best kind) of victory.
23.6 Draw
A draw occurs if: 1) neither player gains any victory; or 2) if one player gains a military victory and the other a political victory.
23.7 Sudden Death Decisive Victory
If, at the end of any game turn, one player has 30 or more MVP and 30 or more PVP than his opponent, the game ends at that time and that player has won a sudden death decisive victory (a.k.a. a “monstrous-fine victory”). The other side’s national morale is considered to have collapsed.
23.8 Communist Sudden Death Military Victory
If, at the end of any game turn, the 1st Air Cavalry Division counter, along with its firebase and all three of its component brigade counters, are all off the map, play stops and the Communist player is awarded a military victory at that time. He has just overturned a significant part of historic US military doctrinal and organizational evolution.
Note that it doesn’t matter if any of the units listed above are located on the Turn Record Track, there awaiting their time for reentry as refits. If all the units described above are “off the map,” this victory condition comes into force.
23.9 Explanation of Victory Levels
Draw: the war will probably last another decade (historic outcome).
Military Victory: you maintain a strong presence in Southeast Asia; the issue will likely be decided in your side’s favor by the end of the 1960s.
Political Victory: your side has won the hearts and minds of the South Vietnamese people; the issue will likely be decided in your favor by the end of the 1960s.
Decisive: your side has won the Cold War in Asia.
24.0 US 1st Air Cavalry Unique Rules
24.1 The 1st Air Cavalry Division and its component brigades are unique in that: 1) they are the only static units in the game that are able to attack; 2) they never advance after combat; 3) they can attack enemy units up to six hexes away from their firebase hex; 4) when it attacks with one or more other US units, that attack may thereby be considered enveloping; and 5) it can give “defensive support” to other friendly units that are being attacked up to six hexes away from its firebase location hex.
24.2 Combat
The 1st Air Cavalry, whether as a division or broken down into brigades, defends normally. When attacking it may project its combat factor against enemy units in hexes up to six hexes away from its firebase hex. When counting range, count from the base to the enemy occupied hex. Don’t count the base hex; do count the enemy occupied hex. That attack range may be traced into and across all terrain types, water bodies, and/or enemy occupied hexes. When the 1st Cavalry attacks, all terrain effects are still taken into account. The 1st Cavalry suffers combat losses in the same way as normal attacking units, in both ranged and adjacent attacks.
24.3 Enveloping Attack
The only time the Allied player can gain the enveloping attack bonus (one column right odds shift) is when the 1st Air Cavalry Division or its brigade elements constitute at least half of the combat factors involved in an Allied attack. Even then, the bonus is not available when the attacked hex is a city or Communist base hex. Within those strictures, however, the 1st may generate the bonus whether attacking alone or in conjunction with other friendly units. To gain the bonus when attacking alone, however, the divisional counter must be on the map and conducting just that one attack.
24.4 Defensive Support
During any game turn after the first, provided no enemy mobile units are in any hexes adjacent to its firebase at that instant, the Allied player may commit the 1st Air Cavalry to provide defensive support to any other friendly unit or stack within its six hex range that’s being attacked by enemy units in that game turn’s Communist attack phase. To do so, the Allied player simply announces the defensive commitment of the 1st after the Communist player has declared an attack, and he then adds in the 1st Air Cavalry’s attack factor (yes, attack factor) when calculating the defense strength of the hex being attacked.
If the 1st Air Cavalry has been broken down into its component brigades, each brigade could support a different friendly defense. In any game turn in which the 1st Air Cavalry Division, or any of its component brigades, provided defensive support to another friendly unit, that component, or the whole division if it was used in that way, may not attack during that game turn’s Allied Combat Phase. Use an inverted Suppression marker(s) atop the 1st if you need an on-map memory aid in this regard.
24.5 Alternative Deployment
At the start of play the 1st was historically completing its initial deployment into hex 4023; however, the locale chosen for that deployment wasn’t written in the stars. The division could easily have been set up elsewhere in South Vietnam. Accordingly, by mutual agreement of both players at the start of a game, the Allied player may choose to deploy the 1st and its accompanying firebase counter into any non-city, non-main base, non-firebase, non-SF base camp hex in South Vietnam.
Note the Communist player isn’t given any compensatory VP for this change. That’s due to the fact he’s already unrestricted in terms of deciding to follow or abandon the Communist strategy used historically during this period of the war.
24.6 Note the airmobile and air assault rules in sections 13.0 and 14.0 don’t in any way apply to the 1st Air Cavalry Division and its component brigades. In particular, the 1st and its brigades, once on the map, are tied to operating out of their own firebase; they may in no way be transferred, refit, or moved about so as to operate from any other firebase or main base or city or LZ hex.
25.0 Errata
25.1 Mapsheet Errata
Ignore the last two entries on the Communist Victory Point Table printed on the mapsheet. In their place, substitute these three lines:
| Communist | Political Points | Military Points | Notes |
|---|---|---|---|
| US Enters Cambodia | +5 | No Change | Gain immediately, then once per game turn. |
| US Enters Laos | +5 | No Change | Gain immediately, then once per game turn. |
| US Enters NVN | +5 | No Change | Gain immediately, then once per game turn. |
In the second line of the definition of the “S” (Suppression) bombardment result printed beneath the Bombardment Results Table (BRT) on the mapsheet, change the second line to read: “It may not move or attack during the next Communist player turn, but it defends normally.”
Also beneath the BRT, at the end of the third line of explanation under “*Collateral Damage,” add the words “or zero” to the end of that line (and see 11.8 for more details).
25.2 Counter Errata
There is one 0-1-0 ARVN/VC backprinted garrison unit missing from the counter-mix. As with all the other units of that category, it should be in ARVN colors on its front side and VC colors on its reverse. Players should make one up from any available blank counter. We’ll publish an additional counter in an upcoming issue.
The countersheet erroneously shows the 2/101 Airborne Brigade being deployed in 1965. That unit should be the 1/101 Airborne Brigade (the 2/101 appeared in November 1967). Since the strengths are the same for both units, that discrepancy has no impact on the game. We’ll publish a corrected replacement counter in an upcoming issue.