Wing Leader: Victories C3i #29 Scenarios
Wing Leader: Victories C3i #29 Scenarios Rulebook
Table of Contents
Table of Contents
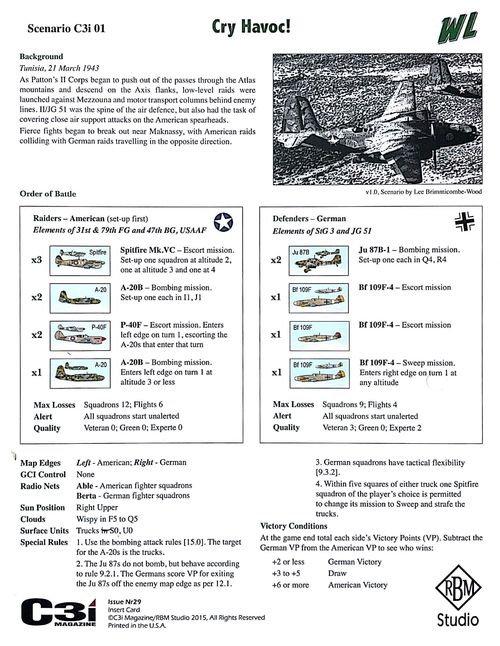
Scenario C3i 01: Cry Havoc!
Background: Tunisia, 21 March 1943. As Patton's II Corps began to push out of the passes through the Atlas mountains and descend on the Axis flanks, low-level raids were launched against Mezzouna and motor transport columns behind enemy lines. II/JG 51 was the spine of the air defence, but also had the task of covering close air support attacks on the American spearheads.
Fierce fights began to break out near Maknassy, with American raids colliding with German raids travelling in the opposite direction.
Order of Battle
Raiders – American (set-up first) Elements of 31st & 79th FG and 47th BG, USAAF
Max Losses: Squadrons 12; Flights 6 Alert: All squadrons start unalerted Quality: Veteran 0; Green 0; Experte 0
- x3 Spitfire Mk.VC – Escort mission. Set-up one squadron at altitude 2, one at altitude 3 and one at 4.
- x2 A-20B – Bombing mission. Set-up one each in I1, J1.
- x2 P-40F – Escort mission. Enters left edge on turn 1, escorting the A-20s that enter that turn.
- x1 A-20B – Bombing mission. Enters left edge on turn 1 at altitude 3 or less.
Defenders – German Elements of StG 3 and JG 51
Max Losses: Squadrons 9; Flights 4 Alert: All squadrons start unalerted Quality: Veteran 3; Green 0; Experte 2
- x2 Ju 87B-1 – Bombing mission. Set-up one each in Q4, R4.
- x1 Bf 109F-4 – Escort mission.
- x1 Bf 109F-4 – Escort mission.
- x1 Bf 109F-4 – Sweep mission. Enters right edge on turn 1 at any altitude.
Set-Up and Special Rules
- Map Edges: Left – American; Right – German
- GCI Control: None
- Radio Nets: Able – American fighter squadrons; Berta – German fighter squadrons
- Sun Position: Right Upper
- Clouds: Wispy in F5 to Q5
- Surface Units: Trucks S0, U0 (the printed card shows "in" struck through before "S0"; it is transcribed here as struck)
Special Rules
- Use the bombing attack rules [15.0]. The target for the A-20s is the trucks.
- The Ju 87s do not bomb, but behave according to rule 9.2.1. The Germans score VP for exiting the Ju 87s off the enemy map edge as per 12.1.
- German squadrons have tactical flexibility [9.3.2].
- Within five squares of either truck one Spitfire squadron of the player's choice is permitted to change its mission to Sweep and strafe the trucks.
Victory Conditions
At the game end total each side's Victory Points (VP). Subtract the German VP from the American VP to see who wins:
- +2 or less: German Victory
- +3 to +5: Draw
- +6 or more: American Victory
Scenario C3i 02: Supercharge
Background: Egypt, 4 November 1942. The second day of Operation Supercharge saw a general breakthrough on the ground. 51st Division and 4th Indian Division cleared the anti-tank screen, allowing 1st Armoured Division to get through. Abandoning the Italian divisions in the South, Rommel ordered a withdrawal to Fuka. Throughout the day the Western Desert Air Force maintained a continual bombardment and strafing of the mass of vehicles retreating along the coast road. The hairpins climbing the escarpment at Fuka and Mersa Matruh proved a deathtrap for the Axis. German and Italian fighters were thrown in to stem the tide of Allied bombing. Small clashes developed all over the sky.
Order of Battle
Defenders – Axis Elements of Fliegerführer Afrika and 3° Stormo
Max Losses: Squadrons 9; Flights 4 Alert: All squadrons start unalerted except for intercept squadrons Quality: Veteran 4; Green 0; Experte 2
- x1 Bf 109F-4 – Intercept mission. Enters left edge on turn 1 at any altitude.
- x2 Bf 109F-4 – Sweep mission. Set-up two squares apart in columns A to K at any altitude.
- x1 Bf 109F-4 – Intercept mission. Enters turn 3 in any square on the map at altitude 9 or higher.
- x1 MC.202 – Sweep mission. Enters left edge on turn 1 at altitude 3 or less.
Raiders – Allied (set-up first) Elements of Western Desert Air Force
Max Losses: Squadrons 12; Flights 6 Alert: All squadrons start unalerted (except intercept) Quality: Veteran 3; Green 0; Experte 1
- x1 Boston III – Bombing mission. Set up in S6.
- x2 Kittyhawk II – Escort mission. Set up escorting Boston squadron and/or Hurricanes.
- x2 Hurricane Mk.IIC – Strafing mission. Set up in Y3, Z3.
- x1 Spitfire Mk.VB – Sweep mission. Set up in columns R to Z at altitude 5 or higher.
- x1 Kittyhawk II – Intercept mission. Enters turn 2 in any square on the map at altitude 10 or higher.
Set-Up and Special Rules
- Map Edges: Left – Axis; Right – Allied
- GCI Control: Allied – GCI 3; Axis – GCI 5
- Radio Nets:
- Able – Allied intercept squadron and GCI
- Baker, Charlie, Dog, Easy – Each Allied non-Intercept fighter squadron has a separate radio net
- Friedrich – German Intercept squadrons and GCI
- Gustav, Heinrich, Ida – Each Axis non-Intercept fighter squadron has a separate radio net
- Sun Position: Above
- Clouds: Wispy in I3 to S3
- Surface Units: Trucks in I0, K0; Lt Flak A in J0
Special Rules
- Use the bombing attack rules [15.0]. Only Allied squadrons can bomb or strafe.
- The Bf 109 squadron and the Spitfire squadron have tactical flexibility [9.3.2].
- Assign Axis Veteran markers to the Bf 109 units.
- Assign an Allied Veteran marker to the Bostons.
Victory Conditions
At the game end total each side's Victory Points (VP). Subtract the Axis VP from the Allied VP to see who wins:
- +2 or less: Axis Victory
- +3 to +6: Draw
- +7 or more: Allied Victory