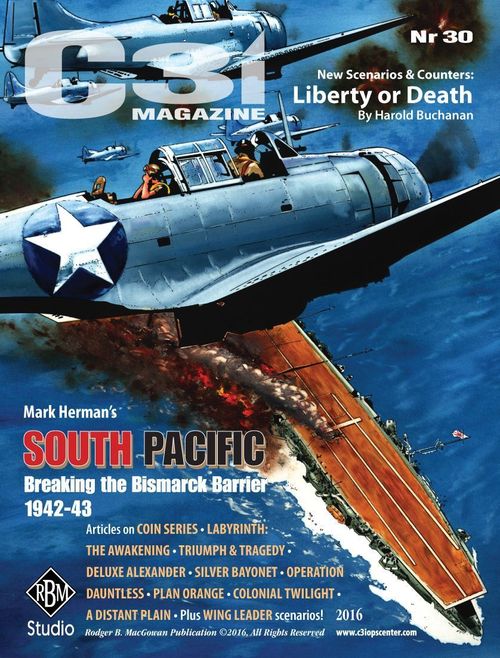
Wing Leader: Supremacy C3i #30 Scenarios
Wing Leader: Supremacy C3i #30 Scenarios Rulebook
Table of Contents
Table of Contents
Scenario C3i 03: Operation Meridian
Sumatra, 24 January 1945. With the sinking of the Tirpitz in November 1944 the surface threat in European waters evaporated, allowing the Royal Navy to redeploy the bulk of its carriers to the Pacific. As the vessels that would form the British Pacific Fleet gathered in the Indian Ocean the opportunity was taken to work up the force with strikes on oil refineries in Sumatra that were vital to the Japanese war effort. Despite a large and successful fighter sweep, large numbers of Japanese Army Air Force fighters, many flown by instructors attached to training units, rose to challenge the largest Royal Navy strike of the war.
Order of Battle
Raiders - British (set-up first) Elements of Task Force 63
47th Naval Fighter Wing (Add Wing leader)
- x2 Corsair Mk.II - Sweep mission. Set-up in H11, I11.
- x1 Corsair Mk.II - Escort mission. Set-up in C9.
- x2 Hellcat F Mk.II - Escort mission. Set-up in E8, F8.
- x4 Avenger Mk.III - Bombing mission. Set-up in C6, D6, E6, F6.
- x1 Corsair Mk.II - Strafing mission. Set-up in H6, with ATGR load.
Max Losses: Squadrons 12; Flights 6 Alert: No squadrons start alerted Quality: Veteran 2; Green 1; Experte 0
Defenders - Japanese Elements of Japanese Army Air Force
- x2 Ki-43-IIa - Intercept mission. Set-up separately on or left of column Q at altitude 12 or less.
- x2 Ki-43-IIa - Intercept mission. Set-up separately on or left of column U at altitude 8 or less.
- x1 Ki-43-IIa - Intercept mission. Enter on Turn 9 on or right of column Q at altitude 6 or less.
- x1 Ki-43-IIa - Intercept mission. Enter on Turn 9 on or right of column P at altitude 8 or less.
Max Losses: Squadrons 9; Flights 5 Alert: All squadrons start alerted Quality: Veteran 1; Green 1; Experte 2
Map and Set-up
Map Edges: Left - British; Right - Japanese GCI Control: Japanese - GCI 4 Radio Nets:
- Ich - Japanese squadrons and GCI
- Able - British sweep fighters
- Baker - British escorts
Sun Position: Right Upper Clouds: Wispy in A12-Z12 Surface Units: Heavy Flak A in T0; Light Flak A in U0; Refinery in U0, V0; Balloons in U2, V2
Special Rules
- Japanese squadrons have tactical flexibility.
- The British must assign at least one Veteran marker to an Avenger squadron.
- TBF squadrons can make steep angle attacks.
Victory Conditions
At the game end total each side's Victory Points (VP). Subtract the Japanese VP from the British VP to see who wins:
| Difference (British VP minus Japanese VP) | Result |
|---|---|
| +22 or less | Japanese Victory |
| +23 to +26 | Draw |
| +27 or more | British Victory |
Aftermath
Though outnumbered the Japanese fighters gave a good account of themselves, narrowly failing to reach the bombers. The flak proved more impressive than effective and, in a well coordinated attack, the Royal Navy inflicted significant damage on the refineries.
Scenario C3i 04: Here Comes the Beast
Rabaul, 11 November 1943. After the failure of the Operation Ro attacks on the Bougainville invasion force and the IJN defeat at Empress Augusta Bay, the Combined Fleet sortied a strong cruiser force to Rabaul to attack the US invasion. An initial carrier strike from Saratoga and Princeton succeeded beyond American expectations, crippling the cruiser force. Despite this the Japanese continued to shuttle troops to Bougainville and a repeat carrier strike, this time including Task Force 50.3 which operated the Navy's first SB2C Helldiver squadron, aboard the Bunker Hill. Nicknamed "the beast" for its size and troublesome carrier handling characteristics it was uncertain whether the new dive-bomber would be an effective replacement for the venerable SBD Dauntless.
Order of Battle
Defenders - Japanese Elements of Imperial Japanese Navy
201 Air Group (Add Wing leader)
- x2 A6M5 - Intercept mission. Set-up wing leader in I9.
204 Air Group (Add Wing leader)
- x2 A6M5 - Intercept mission. Set-up wing leader in D3.
253 Air Group (Add Wing leader)
- x2 A6M5 - Intercept mission. Set-up in I4, I5.
Max Losses: Squadrons 9; Flights 5 Alert: All squadrons start alerted Quality: Veteran 3; Green 1; Experte 3
Raiders - American (set-up first) Elements of Air Groups 12 & 23, USN
- x2 F6F-3 Hellcat - Sweep mission. Set-up in P11, Q12.
- x2 F6F-3 Hellcat - Escort mission. Escorts SB2Cs.
- x2 F6F-3 Hellcat - Escort mission. Escorts TBFs.
- x3 SB2C - Bombing mission. Set-up in U8, V8, W8.
- x3 TBF - Bombing mission. Set-up in W5, X5, Y5.
Max Losses: Squadrons 8; Flights 4 Alert: No squadrons start alerted Quality: Veteran 5; Green 0; Experte 1
Map and Set-up
Map Edges: Left - Japanese; Right - American GCI Control: Japanese - GCI 4 Radio Nets:
- Ich, Ni, San - Each Japanese wing has its own radio net with GCI
- Able - American sweep fighters
- Baker - SB2Cs and escorts
- Charlie - TBFs and escorts
Sun Position: Above Clouds: Wispy in L7-O7, H12-K12, T12-W12 Surface Units: Heavy Flak A in F0; DD2 in G0; Aux 2 in F0; CL1 in G0; CL2 in H0; DD1 in H0
Special Rules
- Ships are dead in the water [14.1.3].
- The surface is sea.
- TBFs carry Improved Torpedoes (see reverse of ADC).
- Veteran squadrons have tactical flexibility.
Victory Conditions
At the game end total each side's Victory Points (VP). Subtract the Japanese VP from the American VP to see who wins:
| Difference (American VP minus Japanese VP) | Result |
|---|---|
| +20 or less | Japanese Victory |
| +21 to +24 | Draw |
| +25 or more | American Victory |
Aftermath
The Americans pressed their attack home, heavily damaging two cruisers and sinking two more destroyers. In the face of heavy losses the Impreial [sic - printed "Impreial" on the card; intended "Imperial"] Navy soon abandoned attempts to supply or reinforce the embattled troops on Bougainville.