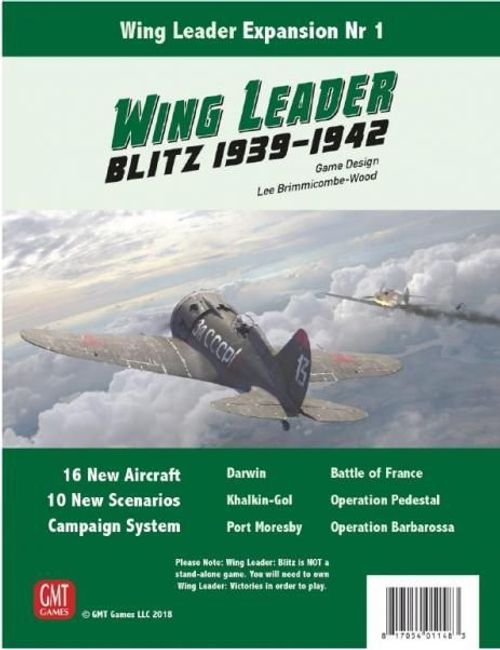
Wing Leader: Blitz 1939-1942
Wing Leader: Blitz 1939-1942 Rulebook
Table of Contents
Table of Contents
- Campaign Rules: The Attack on Kiev
- C1.0 Players
- C2.0 Components
- C3.0 Campaign Setup
- C4.0 Game Sequence Summary
- C5.0 Target Phase
- C6.0 Sortie Generation Phase
- C7.0 Planning Phase
- C8.0 Raid Phase
- C8.1 Scenario Type
- C8.2 Revealing the Effort Marker
- C8.3 Attacker's Order of Battle
- C8.3.1 Escort Formation
- C8.4 Defender's Order of Battle
- C8.5 Dividing Fighter Squadrons
- C8.6 Conditions
- C8.7 Special Rules for the Campaign Scenario
- C8.8 Flak Defences (Bombing Scenarios Only)
- C8.9 Conditions
- C8.9.1 Sun
- C9.0 Post-Raid Sequence
- C10.0 Victory Phase
- C11.0 End of Campaign Turn
- Scenarios
- B01 Buffalo Wings
- B02 In the Cauldron
- B03 The Old Guard
- B04 Operation Tapir
- B05 Rocket Attack
- Mini-Campaign: Operation Pedestal
- B06 Operation Pedestal: Morning
- B07 Operation Pedestal: Day
- B08 Operation Pedestal: Evening
- Campaign Annex: Additional Order of Battle
- B09 Port Moresby
- B10 Yanks over Darwin
- Which ADC to Use?
- Campaign Game Tables
- Aircraft Card Notes
Campaign Rules: The Attack on Kiev
C1.0 Players
The Attack on Kiev campaign requires two players: German and Soviet.
C2.0 Components
To play the campaign, the players need a copy of Wing Leader: Victories. They also need the following components, which are supplied in Wing Leader: Blitz:
- The rulebook
- The campaign map
- A Campaign Turn marker
- A front line marker
- German and Soviet effort markers (3 of each)
- German and Soviet sortie markers
- German and Soviet raid markers
- German and Soviet Campaign Victory Points (CVP) markers, x1 and x10
New Markers. Various new markers are included which can be used in normal games of Wing Leader:
- Bomb Hit markers, in various denominations, used to indicate the total bombing hits on a target.
- Loss x3 and Loss x5 markers, representing the loss of 3 and 5 aircraft respectively. They can be used in place of the normal loss markers.
- Rigid and Flexible Doctrine markers, which can be used to indicate parts or squadrons to which that doctrine applies.
C3.0 Campaign Setup
Set up the campaign as follows:
- Place the campaign map on the table next to the normal map.
- Place the front line marker in the Start space of the Advance Table.
- Place the Campaign Turn marker in the Start space of the Campaign Turn Track.
- Place the German and Soviet sortie markers in the Start space of the Sortie Table.
- Place all CVP markers on the 0 space of the CVP Track.
- The German player places the three Experte markers anywhere in the German Planning Box.
- The Soviet player places one Experte marker in the Soviet Planning Box.
C4.0 Game Sequence Summary
The following summarises the sequence of play for the campaign game. Carry out these phases and segments in the order given.
-
German Target Phase
- a. The Soviet player places a Soviet effort marker on each of three possible Soviet targets.
- b. The German player chooses a target to raid.
-
German Sortie Generation Phase
- a. Generate the German fighter and bomber sorties.
- b. Generate the German Veteran markers.
- c. From the second Campaign Turn onward, after sortie generation, move the German sortie marker one space to the left.
-
German Planning Phase
- a. Assign the fighters to Attack and Defence.
- b. Assign the Veteran markers to units.
-
Soviet Target Phase
- a. The Soviet player announces whether he will raid (the Soviet player may do so no more than four times per campaign).
- b. If the Soviet player raids, the German player places a German effort marker on each of the three possible German targets.
- c. If he raids, the Soviet player chooses a target to raid.
-
Soviet Sortie Generation Phase
(The printed source numbers this phase a, c, d; the letter b is absent in the original and is not supplied here.)
-
Soviet Planning Phase
- a. Assign the fighters to Attack and Defence.
- b. Assign the Inexperienced markers to units.
-
German Raid Phase
- a. Determine the type of raid: interception or bombing.
- b. Reveal the Soviet effort marker on the target and determine whether there is a Soviet ambush or reinforcement.
- c. Both players take their counters for the attacker's and defender's order of battle and place their units on the Group Board.
- d. The German player may divide the fighter squadrons into sections.
- e. Assign the Experten to units.
- f. The German player assigns the attacking fighter units to Search and Escort.
- g. The German player rolls for escort formation.
- h. The defender rolls for flak defences.
- i. The German player places the conditions.
- j. Set up and play the German raid.
-
German Post-Raid Sequence
- a. In interception scenarios the defender rolls for flak losses.
- b. Both sides add fighter and bomber loss markers to the appropriate Loss boxes on the map; losses may move the sortie markers to the right.
- c. Remove the effort markers and the raid target markers from the campaign map.
Special Rules for the First Campaign Turn. Several rules apply only to the first Campaign Turn. (1) Sortie markers do NOT move to the left in the Sortie Generation Phase [C6.3]. (2) Inexperienced markers must be assigned to the Yak-1 squadrons before any other type of squadron [C7.2].
C5.0 Target Phase
In the Target Phase, the defender must place effort markers on the targets, and then the player who is raiding chooses which of these targets to attack. The placement of effort markers is described below, but first these rules explain how the players choose targets.
Front line. The front line marker defines the German and Soviet front areas that each side may attack. (Map labels: German Front Area and Soviet Front Area.)
C5.1 Choosing Targets
The German player MUST choose a target to raid in his Target Phase. The Soviet player MAY choose a target to raid in his Target Phase; he is not obliged to do so. However, the Soviet player may not raid more than four times in an entire campaign. If he has already raided four times, he may not choose a target to raid.
To choose a target, consult the Advance Table on the campaign map. This is a large arrow running from left to right. The table is divided into areas by white lines. In the middle of each line there is a space for the front line marker. In the initial setup the front line marker is placed on the leftmost line, in the space marked "Start."
The two areas immediately adjacent to the front line are the front areas. The area to the left of the line is the German front area, and the area to the right is the Soviet front area.
In each front area there are three German targets and three Soviet targets. Each target has the following properties:
- Target Type. This indicates the counter used for the target in the raid scenario.
- Target Side. A red star indicates a Soviet target (a target defended by the Soviet player); a black cross indicates a German target.
- Target Depth. A green burst means the target is an Advanced target; a blue arrow indicates a target in the Rear Area.
- Target CVP. This indicates the CVP the raiding player gains for damaging the target. There are three numbers: the first is for Heavy Damage, the second for Catastrophic Damage and the third for Fatal Damage.
- Bomber on Raid. This indicates the type of bomber used when raiding the target.
- Multiplier. Some targets have a multiplier. Normally, one target marker is placed during setup of the raid scenario. If a multiplier is shown, then two target markers of that type are placed.
- Flak. Some targets have a flak indicator. This shows that they may have additional flak protection.
In the Target Phase the German player raids across the front line and must choose a Soviet target from the three in the Soviet front area. If the Soviet player decides to raid, he acts in the same way, choosing a target in the German front area. Players may not choose targets outside the designated areas.
The German player indicates his target with the German raid marker; the Soviet player indicates his with his own raid marker.
Target. The targets on the map show campaign information that is very different from the target markers used in the scenarios.
C5.2 Placing Effort Markers
Before the German player chooses his target, the Soviet player places the three Soviet effort markers, effort side visible, on the three possible targets against which the German player may raid. He does not reveal the values on the hidden side of the marker until the Raid Phase [C8.0].
Similarly, when the Soviet player chooses a target, the German player places three German effort markers.
C6.0 Sortie Generation Phase
In the Sortie Generation Phase the players generate the units they use for attack and defence in that Campaign Turn. They also determine the types of aircraft used and the number of Veteran and Inexperienced markers in play.
The Sortie Table, on the map, is divided in two: the upper part is German, the lower part is Soviet. Each half of the table shows three groups of numbers. These are:
- Fighters. The number of fighter squadrons generated.
- Bombers. The number of bomber squadrons generated.
- Veteran. (German only) Next to the spade symbol is the number of Veteran markers generated for the German player.
- Inexperienced. (Soviet only) Next to the heart symbol is the number of Inexperienced markers generated for the Soviet player.
The German player uses only the numbers in the German half of the space currently occupied by the German sortie marker.
The Soviet player uses only the numbers in the Soviet half of the space currently occupied by the Soviet sortie marker.
C6.1 Fighter Sorties
Take the indicated number of fighter squadrons from the counters. Take whole squadrons, but if a half (0.5) is indicated, take a section.
The German player may designate one squadron composed of Bf 109F-4. All remaining squadrons are Bf 109F-2. Take the cards for the Bf 109F-2 and Bf 109F-4 when you take the counters.
The Soviet player has two numbers indicated, separated by a dot. He must roll on the Soviet Fighter Table, applying the indicated modifiers, to determine which types of squadron they are. The die roll will result in two aircraft types, separated by a dot. Take the fighter squadrons of each of these aircraft types, matching them to the side of the dot on which they appear.
The I-16s are I-16 Type 24. The I-153, Yak-1 and MiG-3 are standard variants of these aircraft. Take the cards for these aircraft when you take the counters.
C6.2 Bomber Sorties
The German player MUST generate bomber sorties. The Soviet player generates them only in turns in which he chooses to raid.
Take the indicated number of bomber squadrons from the counters. As with fighters, take whole squadrons, but if a half (0.5) is indicated, take a section.
The type of bomber used against the raid target is indicated on the target, and is as follows:
- He 111. Use the He 111H-1.
- Ju 88. Use the Ju 88A-4.
- Ju 87. Use the Ju 87B-1.
- IL-2. Use the single-seat IL-2 "Ilyusha."
- SB. Use the standard variant of the SB.
- DB-3. Use the standard variant of the DB-3F.
Take the cards for these aircraft when you take the counters.
(Map labels of the Sortie Table: German Fighters, German Bombers, Veteran Markers, Inexperienced Markers, Soviet Fighters, Soviet Bombers.)
The Soviet and German markers on the Sortie Table indicate how many bomber and fighter squadrons can be used in that Campaign Turn, and how many Veteran and Inexperienced markers are in play.
C6.3 Adjusting the Sortie Table
From the second Campaign Turn onward, after each player has generated sorties and taken the squadron counters, move the sortie marker one space to the left.
The German player may not move his sortie marker further left than the current Campaign Turn marker, above the Sortie Table.
The Soviet player may move his sortie marker further left than the current Campaign Turn marker, but not beyond the leftmost space of the Sortie Table.
C7.0 Planning Phase
In the Planning Phase the players decide how to allocate their forces to attack or defence.
C7.1 Planning Boxes
Each player has a Planning Box on the map. In the Planning Phase they place squadron and section counters in the Attack and Defence spaces of their boxes. When placing counters in these spaces, do NOT divide squadrons into sections.
Bomber counters are always placed in the Attack space. Fighter counters are divided between the Attack and Defence spaces. Players are not obliged to place fighters in a space and may leave it empty if they wish. Unused squadron and section counters are returned to the available counters.
C7.2 Veteran and Inexperienced Markers
The Sortie Table indicates the number of Veteran markers for the German player and Inexperienced markers for the Soviet player. After placing the squadrons in Attack and Defence, take the appropriate markers and place them on the squadrons and sections. Markers may be placed on fighter and bomber counters.
Inexperienced markers must be placed on squadrons, not on sections. Furthermore, only in the first Campaign Turn, they must be placed on Yak-1 squadrons before any other type of squadron.
Example of Planning Boxes: the German player has 3.5 fighter squadrons and 2 bomber squadrons and divides them between Attack and Defence.
Attack Fighter Assignment. Yes, players may choose not to assign any fighter squadrons to Attack, sending the bombers to attack unsupported.
Crew Quality. Remember that bombers may receive crew-quality markers. For the German player, Veterans make the bombers more robust and accurate. However, Inexperienced markers give the Soviet player worse bombing results.
C8.0 Raid Phase
In the Raid Phase the players take the forces they have assigned to attack and defence, set up a raid scenario, and play it through to the end.
There is a German Raid Phase every Campaign Turn. There is a Soviet Raid Phase only in turns in which the Soviet player decides to raid. In the German Raid Phase the German player is the attacker and the Soviet player the defender; the reverse applies in the Soviet Raid Phase.
C8.1 Scenario Type
First, the players determine the type of scenario. If the defender has no fighter counters in the Defence space, it is a Bombing scenario. Otherwise, the defender rolls a die and consults the Scenario Type Table. He modifies the result depending on whether the defender is German and on the number of squadrons in the Defence space of the Planning Box. The result is that the scenario is either a Bombing or an Interception scenario.
If it is an Interception scenario there are no surface targets. The attacker must fly the bombers off the map. In a Bombing scenario, the surface targets that must be bombed are placed on the map.
C8.2 Revealing the Effort Marker
The defender turns his effort marker over on the raid target. If the revealed marker reads "No Effect," do nothing further. If it reads "Ambush," place a single squadron in interception or a section in ambush [C8.10.4, C8.11.5].
If the Soviet effort marker shows the profile of an aircraft, the Soviet player places one additional squadron counter in the Defence space of the Soviet Planning Box. The counter must be a squadron of the type indicated on the right side of the dot [C6.1]. If insufficient squadron counters of that type remain, add a section counter instead.
Weapon Loads. According to rule 15.1, the Soviet player may choose to equip the IL-2s with ATGR weapon loads.
C8.3 Attacker's Order of Battle
The attacking player takes his squadron and section counters assigned to the Attack space of the Planning Box, and places a Group Board, with ID and Chase markers for each squadron. He places any crew-quality markers on the table, and may assign the Experten in the Planning Box to any squadron or section. The German player (only) may assign the Experten to bomber squadrons [C8.7].
After placing the Group Board, the attacker places a Bombing mission marker on each bomber squadron. The Soviet player may declare that any IL-2 unit (only) has been assigned a Strafing mission.
The attacker must then place a Search or Escort marker on each of his fighter units (choosing which marker to place).
C8.3.1 Escort Formation
After placing the Search/Escort markers, the attacker rolls to determine whether the escort forms up with the bombers. For each escort squadron or section, roll a die and consult the Escort Formation Table. The German player uses the German column, the Soviet player the Soviet column.
The die result is shown on the left: the unit forms up, will be late, or will fail.
- Failure. That squadron or section does not take part in the scenario.
- Late. That squadron or section is placed as a Search squadron, but must enter the map in Turn 1 or later [C8.10.3, C8.11.4].
- In Formation. That squadron or section is placed as an escort.
Make the formation die rolls separately for each squadron or section. Some units may form up while others do not.
C8.4 Defender's Order of Battle
The defender takes his squadron and fighter counters assigned to the Defence space of the Planning Box, and places a Group Board, with ID and Chase markers for each squadron. He places any crew-quality markers on the table, and may assign the Experten in the Planning Box to any squadron or section.
After placing the Group Board, the defender places an Interception mission marker on each fighter squadron.
C8.5 Dividing Fighter Squadrons
The German player (only) may divide any or all of his fighter squadrons into sections before placing them on the Group Board, if the available counters allow it. The division takes place when the Group Board is placed, not when the squadrons are assigned to the Attack or Defence spaces.
Each squadron divides into two sections. If the parent squadron was Veteran, both sections are Veteran. Assign the Experten after the squadron has been divided.
C8.6 Conditions
The following conditions apply to the orders of battle in the raid scenario.
- Placement. Attackers always place first, defenders second.
- Map Edges. The German map edge is always Left and the Soviet map edge is always Right.
- GCI. German GCI applies only if the German player is the defender; the Soviet player has none. The German GCI value equals the value printed in the circle below the front line marker. If there is no value, the German player has no GCI.
- Radio. Only German bombers and fighters have radio. Soviet fighters have no radio.
- Radio Nets. Bombers and escorts share the same radio net as the late Search squadrons [C8.3.1]. Each German Search or Interception squadron or section has its own radio net, although squadrons in one group all share the same single radio net. Interception squadrons and sections are also connected to GCI. Soviet fighters have no radio nets.
- Doctrine. German fighters use Flexible doctrine. Soviet fighters use Rigid doctrine.
- Max Losses. The maximum loss values are as follows: German squadrons 8; German sections 4. Soviet squadrons 12; Soviet sections 6.
- Alert. All defending squadrons begin on Alert. No attacking squadron begins on Alert.
C8.7 Special Rules for the Campaign Scenario
The following special scenario rules apply to all campaign raid scenarios:
- Bombing. If the scenario is a Bombing scenario [C8.1], use the rules for bombing attacks [15.0]. Otherwise they are not in effect.
- Tactical Flexibility. German fighter squadrons have tactical flexibility [9.3.2].
- Determination. All Soviet units receive a +1 modifier to dice rolls for cohesion.
- Bombing Profiles. Steep-angle bombing is not permitted. Glide bombing attacks are not permitted, except by German squadrons against Bridge and Bunker targets.
- Ramming Attacks. If the Soviet player rolls double 1s when rolling on the Air Combat Table, a desperate ramming attack is made. Ramming attacks occur only where a Soviet primary fighter is a fighter squadron. In addition to any other hit in combat, you gain one ramming hit against the German and a Soviet primary fighter. When confirming losses for ramming hits, use a Firepower of 3.
- Hunting from the Clouds. When chasing, a German fighter squadron (only) ignores the clouds in its own hex when tracing line of sight to another hex. This effect is not reciprocal, so a German squadron may benefit from cloud modifiers to enemy chase dice rolls while ignoring its own. Note that intervening clouds, or clouds in the target hex, affect chase dice rolls normally.
- Experten Bombers. A bomber squadron that receives an Experte marker gets no benefit in air combat. It does, however, receive a +1 modifier to bombing dice rolls in Bombing scenarios, and moves the squadron's bombing row up by 1 in Interception scenarios [C9.4].
C8.8 Flak Defences (Bombing Scenarios Only)
In Bombing scenarios, the defender rolls a die and checks the result on the Flak Defence Table, referring to the column of the defending side. Take the indicated flak counters from those available.
C8.9 Conditions
All surface hexes are land [4.1]. Determine the Sun and clouds as follows.
C8.9.1 Sun
The raiding player rolls a single die and consults the result on the Sun Position Table. The column next to the die roll indicates a direction of the Sun. Place the Sun accordingly.
C8.9.2 Clouds
The raiding player rolls a single die. If he rolls 1, place a Haze marker on the map at altitude 1. If he rolls 2 to 6, do not place this marker. Instead, place cloud markers at an altitude level equal to the die roll result. The attacking player takes six Thin cloud markers. For each marker he rolls two dice and consults the result on the Cloud Table. The column next to the result indicates one or two columns on the map.
If one column is indicated, place the cloud marker in that column at the altitude obtained previously. If two columns are indicated, place the marker on the boundary between the two columns.
Roll for each cloud marker in this way until all of them have been placed on the map. If a marker obtains the same column as a previous marker, exclude it. Since the raiding player may not place markers in the same columns twice, fewer than six cloud markers may be placed on the map.
C8.10 Setting Up an Interception Scenario
After determining the weather conditions, set up the scenario. There are no surface targets in the raid scenario. The attacker places his squadrons on the map first, then the defender.
C8.10.1 Bombers
Bomber squadrons are placed according to [5.3]. Place them in hexes as follows:
- Bombers are placed within 5 hexes of the friendly map edge.
- Bombers are placed at any altitude from 3 to 6, in level flight, facing the opposite map edge.
- Bombers are placed in formation in different hexes at the same altitude.
C8.10.2 Escorts
Escort squadrons that have successfully formed up with the bombers [C8.3.1] are placed according to rule [5.3]. Escort squadrons are not placed as Groups.
C8.10.3 Search
(The printed heading reads "Ricera," an apparent typo for "Ricerca" [Search].)
Search squadrons are placed according to [5.3]. Place them in hexes as follows:
- Search squadrons are placed in different hexes within 12 hexes of the friendly map edge.
- Late escorts that are placed as Search [C8.3.1] enter the map from the friendly map edge in Turn 1 or later. No more than one squadron or section may enter per game turn.
- Search squadrons are placed or enter at any altitude from 0 to 9, facing the opposite map edge. Search squadrons that enter the map choose their altitude in the turn of entry.
- Search squadrons must be placed more than 3 columns away from all bombers.
- The German player may place two Search units, one of which must be a squadron and not a section, in formation as a Group. Place a Group Commander marker on the Group Board of one of the units (or turn an Experte into a Group Commander, as appropriate). The German player may place only one Search group in a raid scenario; the Soviet player may not place groups.
- Apart from units that are part of a Search group, Search squadrons may not be placed in the same hex as, or adjacent to, another Search squadron.
C8.10.4 Interception
Interception squadrons are placed according to [5.3]. Place them in hexes as follows:
- If the revealed effort marker reads "Ambush" [C8.2], place a single squadron or section in ambush. An ambushing unit may be placed anywhere on the map, facing right or left, provided it is not in or adjacent to a hex containing another unit, friendly or enemy.
Units not in ambush are placed as follows:
- Place no more than half the number of non-ambush interception squadrons (count sections as half a squadron) in different hexes within 12 of the friendly map edge. The minimum number of squadrons placed in this way is one.
- The remaining squadrons enter the map from the friendly map edge in Turn 1 or later. No more than one squadron or section may enter per turn.
- Interception squadrons are placed facing the opposite map edge.
- If the raid target depth is Advanced, interception squadrons are placed or enter at altitudes from 0 to 2.
- If the raid target depth is Rear, interception squadrons are placed or enter at altitudes from 0 to 8.
- Interception squadrons may not be placed in the same hex as, or adjacent to, another interception squadron.
- After placing all interception squadrons (ambush and non-ambush), place the Vector markers. Squadrons that enter after Turn 1 place Vector markers in the turn of entry.
C8.11 Setting Up a Bombing Scenario
After determining the weather conditions, set up the scenario. The defender places his surface targets first. Then the attacker places his squadrons on the map, before the defender places his squadrons.
C8.11.1 Placing Surface Targets
The defender selects a counter corresponding to the raid target from the box (take two such targets if multiples are indicated) and then places the surface targets on or between columns K to P. If he has two targets, place them within two hexes of each other.
Place the flak units in or adjacent to the target hex.
If the surface target was bombed in an earlier Campaign Turn, retrieve the bombing markers from the target on the campaign map and place them on the target in play.
C8.11.2 Bombers
Bomber squadrons are placed according to [5.3]. Place them in hexes as follows:
- Bombers are placed within 5 hexes of the friendly map edge.
- Bombers are placed at any altitude from 0 to 6, facing the opposite map edge.
- Bombers are placed in formation in different hexes at the same altitude.
C8.11.3 Escorts
Escort squadrons that have successfully formed up with the bombers [C8.3.1] are placed according to rule [5.3]. Escort squadrons are not placed as groups.
C8.11.4 Search
Search squadrons are placed according to [5.3]. Place them in hexes as follows:
- Search squadrons are placed in different hexes within 12 hexes of the friendly map edge.
- Late escorts that are placed as Search [C8.3.1] enter the map from the friendly map edge in Turn 1 or later. No more than one squadron or section may enter per turn.
- Search squadrons are placed or enter at any altitude from 0 to 9, facing the opposite map edge. Search squadrons that enter the map choose their altitude in the turn of entry.
- Search squadrons must be placed more than 3 columns away from all bombers.
- The German player may place two Search units, one of which must be a squadron and not a section, in formation as a group. Place a Group Commander marker on the Group Board of one of the units (or turn an Experte into a Group Commander, as appropriate). The German player may place only one Search group in a raid scenario; the Soviet player may not place groups.
- Apart from units that are part of a Search group, Search squadrons may not be placed in the same hex as, or adjacent to, another Search squadron.
C8.11.5 Interception
Squadrons in interception are placed according to [5.3]. Place them in hexes as follows:
- If the revealed effort marker reads "Ambush" [C8.2], place a single squadron or section in ambush. An ambushing unit may be placed anywhere on the map, facing right or left, provided it is not in or adjacent to a hex containing another unit, friendly or enemy.
Units not in ambush are placed as follows:
- If the raid target depth is Rear, place all interception squadrons in different hexes within 12 hexes of the friendly map edge.
- If the raid target depth is Advanced, place all interception squadrons in different hexes within 6 hexes of the friendly map edge.
Non-ambush interception squadrons are placed facing the opposite map edge, at altitudes from 0 to 8. However, at least half of those squadrons must be placed at no higher than altitude 4.
Interception squadrons may not be placed in the same hex as, or adjacent to, another interception squadron.
After placing all interception squadrons (ambush and non-ambush), place the Vector markers.
C8.12 Playing a Raid Scenario
After placement, play the raid scenario through to the end.
If it is a Bombing scenario, place the bomb-hit markers on the targets to indicate the hits. The markers come in various bomb-hit denominations, and more than one marker may be used to indicate the total.
When the scenario ends, do not determine a winner. Instead, proceed to the post-raid sequence [C9.0].
Hit Markers. Hit markers may be used to record the cumulative damage on the target. Since the largest number is 20, a two-hit marker is used here to indicate that the total is 22.
C8.12.1 Creating Experten
During play of a raid scenario, new Experten may be created. Two events can cause an Experte to appear.
- In a single air combat with fighters on both sides, one side inflicts 3 losses on the other.
- In a single air combat with fighters on both sides, one side has a differential of -2 or less, and that side inflicts more losses than its opponent.
When calculating losses, include those caused by dispersed units that turn over to the loss side [10.6.1].
If one of the above occurs, the side that meets the conditions rolls a die. On a result of 1-4 nothing happens; on 5-6 an Experte appears. Place an Experte on one of the fighter squadrons or sections that took part in the combat. If all fighter squadrons or sections of that side already have an Experte, nothing happens.
C8.12.2 Losing Experten
If an Experte is lost through crew losses [10.7.3], OR the squadron/section is removed from the game because its total losses equal or exceed the Maximum Loss value [10.6], there is a chance that the Experte is killed or captured. Roll a die and consult the column for the attacker or defender, depending on which side the Experte is on.
| Die roll | Attacker | Defender |
|---|---|---|
| 1-2 | Survived | Survived |
| 3-4 | Lost | Survived |
| 5-6 | Lost | Lost |
If the Experte survives, set the marker aside for now. It will return to the Planning Box at the end of the Campaign Turn [C11.0]. If the Experte was lost, it has been wounded, killed or captured, and is removed from the game for the rest of the campaign.
C9.0 Post-Raid Sequence
After the raid scenario ends, proceed as follows, in the order given:
C9.1 Flak (Interception Scenarios)
In an Interception scenario the defender must check for flak losses. The defender rolls on the Flak Table to determine how many losses, if any, he inflicts on the raiding bombers. Roll a die and modify it if the target bears the flak symbol. Refer to the die result in the Interceptor Losses column, using the German column if the Germans are defending and the Soviet column if the Soviets are defending.
The result is the number of losses inflicted on the attacking bombers. The defender places this number of loss markers on the attacker's Group Board, on the bomber squadron records. He may distribute the markers as he wishes among the bomber squadrons, but may not exceed the Maximum Losses value of any squadron.
C9.2 Losses
The players resolve the effects of losses on the sortie markers. The German player removes all loss markers from the German Group Board and places them in the German Losses Box on the map. For every five full-value loss markers in the German Losses Box, proceed as follows:
- Return 5 loss markers to the box.
- Move the German sortie marker one space to the right on the Sortie Table.
The Soviet player removes all loss markers from the Soviet Group Board and places them in the Soviet Losses Box on the map. For every 15 full-value loss markers in the Soviet Losses Box, proceed as follows:
- Return 15 loss markers to the box.
- Move the Soviet sortie marker one space to the right on the Sortie Table.
C9.3 Assessing Raid Damage to the Target (Bombing Scenarios)
After recording losses, proceed as follows:
- Return all flak unit markers from the map to the box, together with any bomb-damage markers on them.
- Remove the effort markers from the campaign map.
- Remove the raid target marker and place any bomb-hit markers on that target on the campaign map (if there were two targets, place the bomb-hit markers on each target in two separate groups).
- Assess the damage level to the raid target according to the total hits on that target (14.1.1). The damage level will be Light, Minor, Heavy, Catastrophic or Fatal.
C9.4 Assessing Raid Damage to the Target (Interception Scenarios)
After recording losses, proceed as follows:
- Remove the effort markers from the campaign map.
- For each bomber squadron that is not broken and that exited the map, roll two dice and consult the Raid Damage Table. Cross-reference the row of the dice result with the column of the nationality of the attacking squadron. Move up or down the rows depending on the attacking squadron and the target of the attack. Rows may not be moved beyond the top or bottom of the table. The final row after all movements indicates the number of bomb hits on the target. Halve this value (rounding up) if the squadron is dispersed or if it is a section. If there are multiple targets, choose a target for each bomber squadron before rolling to determine the bomb hits.
- Remove the raid target marker and place any bomb-hit markers on that target on the campaign map. If there were multiple targets, place the bomb-hit markers on each target in separate groups. Squadrons and sections that are broken receive no bomb hits.
- Assess the damage level to the raid target according to the total hits on that target (14.1.1). The damage level will be Light, Minor, Heavy, Catastrophic or Fatal.
C9.5 Damage to Airfields
If the raid target was a Soviet airfield and the damage level is Heavy or higher, move the Soviet sortie marker as follows:
- Heavy: 1 space to the right
- Catastrophic: 2 spaces to the right
- Fatal: 3 spaces to the right
Similarly, if the raid target was a German airfield and the damage level is Heavy or higher, move the German sortie marker by the same amount. The marker may not be moved beyond the rightmost space on the Sortie Table.
If the airfield had been damaged in an earlier Campaign Turn, move the sortie marker only if the damage level has increased, and only by the amount of the increase in damage level.
C9.6 Returning Markers
Both players return the following to the box:
- Squadron and section counters.
- Veteran and Inexperienced markers.
- Broken, Disorganized, Dispersed, Bomb Load and Ammunition markers.
- ID and Mission markers.
- Flak barrage markers.
- Cloud and Sun markers.
C9.7 Experten Markers
Both players set aside the Experte markers used in the raid scenario. They return to the Planning Box only after all raids have been carried out for that turn (it does not matter where they were placed in the box).
C9.8 Total CVP
The attacking player adds up the Campaign Victory Points (or CVP) gained for attacking the raid target. Note that only the raid target (or targets, if there were several) gives CVP. Any other surface unit in the raid scenario, such as flak, gives no CVP.
Each target on the map has Target CVP values indicated by three numbers. The first number indicates the CVP gained for achieving a Heavy damage level; the second for a Catastrophic damage level; the third for a Fatal damage level.
The damage-level CVP are cumulative, so if the player achieves Fatal damage he gains the CVP for the Heavy, Catastrophic and Fatal damage levels. If a target was damaged in an earlier Campaign Turn, the player gains CVP only for the new damage level.
CVP are added to the total from previous turns. The CVP Track is used to indicate the CVP totals. Each player has two markers: an x1 that indicates the units total and an x10 that indicates the tens. Add CVP to the total and move the markers accordingly.
C10.0 Victory Phase
In the Victory Phase the German player determines whether the front line advances or whether he has won the campaign. Carry out the following actions in the order given:
The German player rolls two dice and adds the results.
Then take the German CVP total and subtract the Soviet CVP total to obtain a net CVP value. Check this against the Advance Modifier Table to obtain an advance modifier. Add this modifier to the dice roll.
Check the modified result against the value printed beside the front line marker. If it is lower than that value, there is no effect. If the sum is equal to or higher than the printed value, the front line advances.
When the front line advances, proceed as follows:
- Remove all bomb-damage markers from the targets on the Advance Table on the campaign map.
- Move the front line marker one space to the right. This indicates the new front line and defines new German and Soviet front areas.
- If the front line marker reaches the space marked END, the campaign ends immediately and the German player wins a decisive victory.
Note that a campaign marker can only advance to the right, in the direction of the arrows. It never moves to the left.
If you are in Campaign Turn 6, after determining whether the front line advances, the campaign ends immediately and the victory is determined. Look at the line occupied by the front line marker. Above the line is shown the victory level, which ranges from a Soviet campaign victory to a German campaign victory.
C11.0 End of Campaign Turn
If the campaign has not ended in the Victory Phase, proceed as follows, in the order given:
- Place any Experte markers that were set aside after the raid: the German Experten in the German Planning Box, and the Soviet Experten in the Soviet Planning Box.
- Move the German sortie marker one space to the right on the Sortie Table (do not move the Soviet sortie marker).
- Move the Campaign Turn marker one space to the right on the Campaign Turn Track and begin a new Campaign Turn.
You are now ready to play the Attack on Kiev campaign.
Scenarios
Each scenario below gives its dateline, its order of battle and special rules, its victory conditions and its printed outcome. The labels of the Italian booklet are translated; the unit codes, sizes and map references are as printed.
B01 Buffalo Wings
Burma, 23 December 1941
Japanese reconnaissance spotted dozens of aircraft at Mingaladon, Kyedaw and the Tenasserim airfields. Reading this as a prelude to a British airlift to Malaya, the Japanese Army attacked. Several bomber groups headed for Rangoon: one aimed at the bridge and another at Mingaladon airfield. The attackers flew toward their targets with their escorts miles behind. The Flying Tigers and the RAF scrambled every available aircraft. When the Buffaloes reached 20,000 feet they sighted the large formations. Sergeant Bargh of the 67th Squadron radioed "Devil, we're being invaded!" before attacking them.
Order of Battle
Defender – Allied Elements of the AVG and 67th Squadron RAF
- P-40B – Interception mission. Placed on or left of column J at altitude 10.
- P-40B – Interception mission. Placed on or left of column H at altitude 11.
- Buffalo Mk. I – Interception mission. Placed in columns N, O or P at altitude 11.
- Buffalo Mk. I – Interception mission. Placed in Q10.
Maximum Losses: Squadrons 10, Sections 5 Alert: All squadrons begin on Alert Quality: Veteran 1; Inexperienced 1; Experte 0
Attacker – Japanese (places first) Elements of the 62nd and 77th Sentai, JAAF
- Ki-21-IIa – Bombing mission. Placed in N9, O9, P9.
- 77th Sentai (add a Group Commander)
- Ki-27a – Search mission. Placed on or right of column S at altitude 10 or lower.
Maximum Losses: Squadrons 12; Sections 6 Alert: No squadron begins on Alert Quality: Veteran 2; Inexperienced 0; Experte 0
Map Edges: Left – Allied; Right – Japanese GCI Control: Allied – GCI 5 Radio: Japanese fighter squadrons have no radio Radio Nets: Able – all P-40B squadrons and GCI; Baker – all Buffalo squadrons and GCI Sun Position: Top Left Clouds: Thin in C9–R9
Special Rules
- The Buffalo squadron and section are placed facing right or left, at the Allied player's choice.
- There are only two Ki-21 squadron counters. Use the Ki-21 section counter for the third bomber squadron, treating it as a squadron.
- The Ki-21s drop their bombs when they reach column K. Do not roll for a bombing attack. Instead, score 4 VP for each non-broken, non-dispersed bomber that drops its bombs; and zero VP for each broken bomber squadron that drops its bombs.
- The Japanese score no VP for exiting bombers from the map.
- The Japanese player must assign Veteran markers to the fighters.
Victory Conditions At the end of the game add up the Victory Points (VP) of each side. Subtract the Allied VP from the Japanese VP to determine the winner:
- +6 or less: Allied Victory
- +7 to +10: Draw
- +11 or more: Japanese Victory
Outcome A confused battle took place over Rangoon, as the Buffaloes closed on the bombers, which were in turn being chased by the Japanese fighters. Then the AVG arrived and attacked the bombers from the front and side. Although both sides claimed more victories than they had achieved, the Allies came out on top. Rangoon was nonetheless destroyed and Mingaladon heavily damaged.
B02 In the Cauldron
Belgium, 11 May 1940
Because of the indecision of the French High Command, French day bombers only began flying sorties the day after the German invasion. It was clear that the fundamental bottleneck was the Albert Canal in Belgium, which German troops had crossed on the first day. If the Allies destroyed the bridges over the canal, and the fords over the River Maas, the German advance would be slowed. The first to plunge into the cauldron were the bombers of GB I/12 and GB II/12 on the morning of 11 May.
Order of Battle
Attacker – French (places first) Elements of Groupement 6 and GC II/6
- LeO 451 – Bombing mission. Placed in E3.
- LeO 451 – Bombing mission. Placed in D3.
- M.S.406 – Escort mission.
- M.S.406 – Close Escort mission.
- MB.152C.1 – Search mission. Placed in column A or B at altitude 8 or lower.
Maximum Losses: Squadrons 12; Sections 6 Alert: No squadron begins on Alert Quality: Veteran 3; Inexperienced 0; Experte 0
Defender – German Elements of IV Fliegerkorps
- Bf 109E-1 – CAP mission. Placed in column K at any altitude.
- Bf 109E-1 – Interception mission. Placed on or right of column S at altitude 7 or lower.
- Bf 110C-1 – Interception mission. Enters in Turn 2 on or left of column D at altitude 6 or lower.
Maximum Losses: Squadrons 9, Sections 4 Alert: All squadrons begin on Alert Quality: Veteran 2; Inexperienced 0; Experte 1 Map Edges: Left – French; Right – German Doctrine: French squadrons use Rigid doctrine. German squadrons use Flexible doctrine. GCI Control: None Radio Nets: Anatole – French escorts Bertrand – French Search squadrons Charlotte – German fighters Sun Position: Top Left Clouds: None Surface Units: Bridge at M0; Light Flak B at M0
Special Rules
- Use the bomber attack rules [15.0].
- Fighter squadrons have tactical flexibility [9.3.2].
- The French close-escort section, while it bears an Escort mission, may roll to chase enemy units in the Chase Phase only if in the same or an adjacent hex.
- Assign one of the German Veteran markers to the Bf 110C squadron.
Victory Conditions At the end of the game add up the Victory Points (VP) of each side. Subtract the German VP from the French VP to determine the winner:
- +6 or less: German Victory
- +7 to +8: Draw
- +9 or more: French Victory
Outcome The Germans had placed anti-aircraft guns around the bridges. The combination of intense anti-aircraft fire and the fighter cover was able to repulse the first attack. A second sortie later in the day was able to cause only light damage to one bridge.
B03 The Old Guard
Amiens, 5 June 1940
5 June was the day of maximum effort for the Armée de l'Air, and it had some success in delaying the German advance. The day began with a dawn attack against the enemy bridgehead at Amiens, into which the 14th Panzer Corps was pouring. The target was bombed successfully and the bombers were withdrawing when a mixed force of Luftwaffe fighters attacked the raiders. Many of the French airmen were veterans with 750 hours or more of flying, and the average age of a pilot officer was in the mid-thirties. However, these old Chasseurs were combative and could still show their young German opponents a few tricks.
Order of Battle
Attacker – French (places first) Elements of GBA 18 and 19, and GC I/4
- Bre 693 – Bombing mission. Placed in K4, L4.
- Hawk 75A-2 – Escort mission.
Maximum Losses: Squadrons 9; Sections 4 Alert: All squadrons begin on Alert Quality: Veteran 3; Inexperienced 0; Experte 1
Defender – German Elements of IV Fliegerkorps
- Bf 109E-1 – Interception mission. Placed adjacent to a bomber squadron.
- Bf 110C-1 – Interception mission. Placed two or more hexes from both bombers, at altitude 5 or lower.
Maximum Losses: Squadrons 8 Alert: No squadron begins on Alert Quality: Veteran 2; Inexperienced 0; Experte 0 Map Edges: Left – French; Right – German Doctrine: French squadrons use Rigid doctrine. German squadrons use Flexible doctrine. GCI Control: None Radio Nets: Anatole – French escorts Berta – Bf 109 squadrons Charlotte – Bf 110 squadron Sun Position: Horizon Left Clouds: Thin in A3–F3
Special Rules
- The bombers carry no bomb loads, having already bombed.
- The bombers are returning to base [9.2.6].
- The bombers cannot escape.
- German squadrons may not be placed in the same hex as a French squadron.
- French fighter squadrons have tactical flexibility [9.3.2].
- The French score no VP for exiting bomber squadrons.
Victory Conditions At the end of the game add up the Victory Points (VP) of each side. The side with more VP wins. In case of an equal number of VP, the result is a draw.
Outcome The French Hawks counter-attacked and drew the Germans into a violent clash. The bombers were able to escape without damage, while the Germans lost seven fighters, gaining only one victory in return.
B04 Operation Tapir
Paris, 3 June 1940
As the final stage of the Dunkirk drama unfolded, French intelligence revealed that the Germans were about to launch Operation Paula, a massive raid on Paris and airfields near the capital. It was to be the prelude to the German offensive against the Weygand Line. A defence plan, Operation Tapir, was organised against the raid. Aircraft were to shadow the raid and guide the fighters by radio in contact with the Eiffel Tower. The Germans, however, were jamming the frequency, and the take-off signal was sent too late. As large formations of bombers headed for Paris, escorted by fighters, the French squadrons took off in an uncoordinated manner to meet the enemy.
Order of Battle
Defender – French Elements of Groupement 21, 22 and 23
- D.520 – Interception mission. Placed in columns K to O at altitude 10 or lower. Must not be placed in or adjacent to the hex of another squadron.
- M.S.406 – Interception mission. Enters in the second game turn on or right of column T at altitude 7 or lower.
- MB.152C-1 – Interception mission. Placed in columns H to L or W to Z at altitude 7 or lower. Must not be placed in or adjacent to the hex of another squadron.
- M.S.406 – Interception mission. Placed in N2.
- M.S.406 – Interception mission. Placed in S3.
Maximum Losses: Squadrons 9 Alert: All squadrons begin on Alert Quality: Veteran 4; Inexperienced 0; Experte 2
Attacker – German (places first) Elements of Luftflotte 2 and 3
- He 111H-1 – Bombing mission. Placed one each in Q7, R7, S7.
- Do 17Z-2 – Bombing mission. Placed one each in X8, Y8, Z8.
- Bf 109E-1 – Escort mission. Placed escorting the He 111s, no more than 2 hexes from a bomber.
- Bf 109E-1 – Escort mission. Placed escorting the Do 17s.
- Bf 110C-4 – Search mission. Placed in Q10.
Maximum Losses: Squadrons 9; Sections 4 Alert: No squadron begins on Alert Quality: Veteran 3; Inexperienced 0; Experte 1
Map Edges: Left – French; Right – German Doctrine: French squadrons use Rigid doctrine. German squadrons use Flexible doctrine. GCI Control: French – GCI 6 Radio Nets: Anatole, Bertrand, Célestin, Désiré, Eugène, Franck, Gaston – each French squadron has a separate radio net, shared with GCI. Heinrich – He 111 escorts Ida – Do 17 escorts Josef – German Search squadron Sun Position: Above Clouds: Scattered in C6–L6
Special Rules
- French squadrons are placed facing right or left, at the French player's choice.
- At placement no French Vector marker may be closer than three hexes to another Vector marker.
- German fighters have tactical flexibility [9.3.2].
Victory Conditions At the end of the game add up the Victory Points (VP) of each side. Subtract the French VP from the German VP to determine the winner:
- +5 or less: French Victory
- +6 to +10: Draw
- +11 or more: German Victory
Outcome The chasseurs reached the attackers in disorder, and there were numerous small clashes between them and the escorts. The German bombing was ineffective, but neither did the defenders, despite their 2:1 claimed-kill ratio, damage the enemy.
B05 Rocket Attack
Mongolia, 20 August 1939
Despite their early successes, the Japanese airmen were exhausted after the fighting against the Soviets, and aircraft replacements were beginning to thin out. Many veteran airmen had been wounded or had had to leave the front line, and less experienced airmen remained in their place. The Soviets seemed to grow ever stronger, and on 20 August they launched a series of massive attacks in support of a ground offensive against the Japanese Sixth Army. These attacks struck targets on the banks of the Khalastin-Gol River, to soften the ground defences there. The Japanese response was slow, but in the afternoon a well-escorted attack began to take shape toward the Soviet command post on the Hamar-Daba heights.
Order of Battle
Defender – Soviet Elements of the 22nd IAP, VVS
- I-16 Type 10 – CAP mission. Placed in I7, J8, K8.
- I-153 – CAP mission. Placed in M9.
Maximum Losses: Squadrons 11; Sections 5 Alert: All squadrons begin on Alert Quality: Veteran 2; Inexperienced 1; Experte 1
Attacker – Japanese (places first) Elements of the 11th and 61st Sentai, JAAF
- Ki-21-Ia – Bombing mission. Placed in T6.
- Ki-27b – Escort mission.
- 11th Sentai (add a Group Commander)
- Ki-27b – Search mission. Placed in R9, S9.
- Ki-27b – Search mission. Placed in T9.
Maximum Losses: Squadrons 9; Sections 4 Alert: No squadron begins on Alert Quality: Veteran 0; Inexperienced 2; Experte 1
Map Edges: Left – Soviet; Right – Japanese Doctrine: Soviet squadrons use Rigid doctrine. Japanese squadrons use Flexible doctrine. GCI Control: None Radio Nets: No squadron has radio Sun Position: Top Left Clouds: Scattered in J11–Q11
Special Rules
- Ki-21 squadrons return to base if Broken [9.2.6].
- Place the Soviet Inexperienced marker on an I-16 squadron.
- The Inexperienced I-16 squadron carries an ATGR weapon load.
- A squadron equipped with ATGR may not drop them. If the squadron is the primary fighter in an air combat and carries an ATGR load, it uses it – remove it from the Group Board. For that combat the I-16 squadron has a -1 dice modifier in air combat if attacking and -2 if defending. However, it also has a Firepower of 5 for that combat.
Victory Conditions At the end of the game add up the Victory Points (VP) of each side. Subtract the Soviet VP from the Japanese VP to determine the winner:
- +3 or less: Soviet Victory
- +4 to +5: Draw
- +6 or more: Japanese Victory
Outcome The raid was intercepted by the fighters of the 22nd IAP, led by Major Aleksandr Nikolayev, and a combat began at 5,000 metres that then descended to 2,000. The interceptors included a section of I-16s equipped with RS-82 rockets, and in the ensuing combat they claimed two kills with these weapons, which persuaded some of the Japanese fighters to return to base. In reality the rocket hits were fortuitous, but they were able to frighten the opponents. However, the Japanese fighters at least distracted the interceptors long enough to allow the bombers through.
Mini-Campaign: Operation Pedestal
Mediterranean, 12 August 1942
With Malta at the end of its tether and close to surrender for lack of supplies, the Royal Navy concentrated its aircraft carriers to get a supply convoy through. In Operation Pedestal the carriers would cover the convoy through the dangerous Sicilian Narrows. After repelling a Luftwaffe raid on 11 August, the convoy faced a meticulously prepared attack by the Italo-German forces the following day.
How to Play Operation Pedestal The next three scenarios – Operation Pedestal: Morning, Day and Evening – may be played in two ways. The Day and Evening scenarios may be played as stand-alone scenarios, or the three scenarios may be played as a mini-campaign, in chronological order.
The rules for the mini-campaign are as follows.
Surface Targets Place the surface targets in each scenario as follows:
- DD 4 (Ledbury) in D0
- Aux 3 (Deucalion), Aux 3 (Clan Ferguson) in E0
- DD4 (Bramham), CA 2 (Nigeria) in F0
- DD 1 (Foresight) in I0
- BB 1 (Rodney), CV 2 (Indomitable) in J0
- DD 3 (Lightning), CA 1 (Manchester) in K0
Bomb hits against a surface target in one scenario must be kept for the following scenario; however, any ship that is damaged Severely or Fatally should be removed from the game for the remaining scenarios.
Damage to the Carriers If CV 2 suffers Heavy, Severe or Fatal damage, then remove one section of Sea Hurricanes and one of Martlets from the initial placement of the remaining scenarios.
(The mini-campaign text prints "Grave" (severe) alongside "Pesante" (heavy), and "Grave" is also used for the damage level in the Victory paragraph below. Both terms are translated as printed, as "Severe" and "Heavy".)
Victory Do not calculate the victory in each scenario. Instead, at the end of all three scenarios determine the damage levels to the targets Aux 3 and CV 2. The Axis gains 1 point for each target with Severe Damage and 2 for each Fatal damage. Then consult the following table:
- If the Axis gains 2 points or fewer, the English win.
- If the Axis gains 3 points, the result is a draw.
- If the Axis gains 4 points or more, the Axis wins.
B06 Operation Pedestal: Morning
Order of Battle
Defender – English Elements of the Fleet Air Arm, RN
- Fulmar Mk.I – Interception mission. Placed in L3.
- Sea Hurricane Mk.IB – Interception mission. Placed in K2, M5, Q7, S8.
Maximum Losses: Sections 4 Alert: All squadrons begin on Alert Quality: Veteran 2; Inexperienced 0; Experte 0
Attacker – Axis (places first) Elements of LG1
- Ju 88A-4 – Bombing mission. Placed in U7, V7, W7.
Maximum Losses: Squadrons 8 Alert: Not applicable Quality: Veteran 0; Inexperienced 0; Experte 0
Map Edges: Left – English; Right – Axis GCI Control: English – GCI 4 Radio Nets: Able – Fulmar section Baker – Sea Hurricane sections Sun Position: Top Right Clouds: Thin in F8–J8
Special Rules
- Use the bomber attack rules [15.0].
- The surface is sea [4.1].
Surface Units
- DD 4 (Ledbury) in D0;
- Aux 3 (Deucalion), Aux 3 (Clan Ferguson) in E0;
- DD4 (Bramham), CA 2 (Nigeria) in F0;
- DD 1 (Foresight) in I0;
- BB 1 (Rodney), CV 2 (Indomitable) in J0;
- DD 3 (Lightning), CA 1 (Manchester) in K0.
B07 Operation Pedestal: Day
Introduction and Outcome
Mediterranean, 12 August 1942
The Regia Aeronautica's forces in Sardinia prepared the attack. When the convoy crossed the 10th meridian it entered the range of the Axis fighters, and several waves of Italian bombers were launched. Despite the preparation, the co-ordination of the attacks was poor. Some bombers arrived without escort and suffered losses from the Fleet Air Arm. Although the torpedo aircraft pressed the attack despite heavy anti-aircraft fire, they scored no hits.
If you play this scenario as part of the mini-campaign, rather than on its own, expand it with the forces in the campaign annex (after the Evening scenario).
Order of Battle
Defender – English Elements of the Fleet Air Arm, RN
- Fulmar Mk.I – Interception mission. Placed in N2, Q8.
- Sea Hurricane Mk.IB – Interception mission. Placed in K4, O6.
- Martlet Mk.II – Interception mission. Placed in M6, P3.
Maximum Losses: Sections 4 Alert: All squadrons begin on Alert Quality: Veteran 3; Inexperienced 0; Experte 1
Attacker – Axis (places first) Elements of the Regia Aeronautica
- SM.79-III – Bombing mission. Placed in V7.
- Re.2001 Falco II – Search mission. Placed in Y8, Z8.
- CR.42 Falco – Ground Attack mission. Placed in X1.
- CR.42 Falco – Escort mission. Escorts the CR.42s.
- SM.79-III – Bombing mission. Enters in Turn 4 in Z1, in line astern.
- MC.202 Folgore – Escort mission. Escorts the SM.79s entering in Turn 4.
- Re.2001 Falco II – Search mission. Enters in Turn 6 from Z6.
Maximum Losses: Squadrons 9; Sections 4 Alert: No squadron begins on Alert Quality: Veteran 0; Inexperienced 3; Experte 0 Map Edges: Left – English; Right – Axis GCI Control: English – GCI 4 Radio Nets: Able – Fulmar sections Baker – Sea Hurricane sections Charlie – Martlet sections Domodossola – initial SM.79s and escorts Empoli – CR.42s and escorts Firenze – SM.79s and escorts entering in Turn 4 Genova – Re.2001 Search squadron Sun Position: High Clouds: Thin in E8–J8, P4–U4
Surface Units DD 4 in D0; 2x Aux 3 in E0; DD4, CA 2 in F0; DD 1 in I0; BB 1, CV 2 in J0; DD 3, CA 1 in K0.
Special Rules
- Use the bomber attack rules [15.0].
- The surface is sea [4.1].
- All SM.79 squadrons entering in Turn 4 must carry a torpedo load [15.1].
- SM.79 losses are worth 1 VP instead of 2 VP.
- Axis fighter squadrons (including fighter-bombers) operate at their fuel limit [13.3].
- Axis bombers may not circle [13.3].
Victory Conditions At the end of the game add up the Victory Points (VP) of each side. Subtract the English VP from the Axis VP to determine the winner:
- +0 or less: English Victory
- +1 to +4: Draw
- +5 or more: Axis Victory
B08 Operation Pedestal: Evening
Introduction and Outcome
Mediterranean, 12 August 1942
With the defending fighters dispersed after repelling the Italians, a Luftwaffe attack was able to severely damage a merchant ship. However, a subsequent attack by German torpedo bombers caused no damage.
After noon the attacks on the convoy moved out of range of the Sardinian airfields, but came within range of the Stukas based in Sicily. In the late afternoon further attacks began. This time the Axis was determined to eliminate the aircraft carriers, whose fighters had so far repelled the heaviest attacks launched against the convoy.
Order of Battle
Defender – English Elements of the Fleet Air Arm, RN
- Fulmar Mk.I – Interception mission. Placed in K2, O3.
- Sea Hurricane Mk.IB – Interception mission. Placed in L2, R8, O6.
- Martlet Mk.II – Interception mission. Placed in M5.
Maximum Losses: Sections 4 Alert: All squadrons begin on Alert Quality: Veteran 3; Inexperienced 0; Experte 1
Attacker – Axis (places first) Elements of Fliegerkorps II and the Regia Aeronautica
- Ju 87B-2 Picchiatello – Bombing mission. Placed in U6.
- MC.202 Folgore – Escort mission. Escorts the Picchiatelli.
- SM.79-III – Bombing mission. Placed in W1, X1.
- MC.202 Folgore – Escort mission. Escorts the SM.79s.
- CR.42 Falco – Ground Attack mission. Placed in T1.
- Re.2001 Falco II – Escort mission. Escorts the CR.42s.
- Ju 87B-1 – Bombing mission. Enters in Turn 1 in Z6, in line astern.
- Bf 109F-4 – Escort mission. Escorts the Ju 87s entering in Turn 1.
- SM.79-III – Bombing mission. Enters in Turn 2 from Z1.
- Re.2001 Falco II – Escort mission. Escorts the SM.79s entering in Turn 2.
Maximum Losses: Squadrons 9; Sections 4 Alert: No squadron begins on Alert Quality: Veteran 2; Inexperienced 2; Experte 1
Map Edges: Left – English; Right – Axis GCI Control: English – GCI 4 Radio Nets: Able – Fulmar sections Baker – Sea Hurricane sections Charlie – Martlet section Domodossola – Picchiatelli and escorts Empoli – CR.42 and escorts Firenze – SM.79s and escorts entering in Turn 2 Heinrich – Ju 87Bs and escorts entering in Turn 1 Sun Position: Top Left Clouds: Thin in H7–N7
Surface Units DD 4 (Ledbury) in D0; Aux 3 (Deucalion), Aux 3 (Clan Ferguson) in E0; DD4 (Bramham), CA 2 (Nigeria) in F0; DD 1 (Foresight) in I0; BB 1 (Rodney), CV 2 (Indomitable) in J0; DD 3 (Lightning), CA 1 (Manchester) in K0.
Special Rules
- Use the bomber attack rules [15.0].
- The surface is sea [4.1].
- All SM.79 squadrons must carry a torpedo load [15.1].
- One of the Axis Veteran markers must be assigned to the Bf 109F squadron.
- The Bf 109F squadron has tactical flexibility [9.3.2].
- Axis bombers may not circle [13.3].
Victory Conditions At the end of the game add up the Victory Points (VP) of each side. Subtract the English VP from the Axis VP to determine the winner:
- +12 or less: English Victory
- +13 to +16: Draw
- +17 or more: Axis Victory
Outcome This time the fighters were unable to stop the attack. The carrier Indomitable was heavily damaged and the destroyer Foresight sunk. Nevertheless, as the carriers withdrew as planned to return to Gibraltar, only one of the 14 merchant ships of the convoy had been lost. A furious night action in the Strait of Sicily reduced the survivors that reached Malta to just 5 merchant ships, including the vital American tanker Ohio. It would nonetheless be enough to break the siege.
Campaign Annex: Additional Order of Battle
Introduction This annex expands the Operation Pedestal: Day scenario to include the subsequent German attacks. It expands the scenario only when played within the mini-campaign and not as a stand-alone scenario.
Defender – English Elements of Fleet Air Arm, RN
- Sea Hurricane Mk.IB – Interception mission. Enters in Turn 25 in J1.
- Sea Hurricane Mk.IB – Interception mission. Enters in Turn 26 in J1.
Maximum Losses: Sections 4 Alert: All squadrons begin on Alert Quality: Veteran 1; Inexperienced 0; Experte 1
Attacker – Axis (places first) Elements of Fliegerkorps II
- Ju 88A-4 – Bombing mission. Enters in Turn 11 in Z7, in line astern.
- Bf 109F-4 – Escort mission. Escorts the Ju 88s entering in Turn 11.
- He 111H-6 – Bombing mission. Enters from Z1 in Turn 26.
- Bf 110C-4 – Escort mission. Escorts the He 111 entering in Turn 26.
Maximum Losses: Squadrons 9; Sections 4 Alert: No squadron begins on Alert Quality: Veteran 2; Inexperienced 0; Experte 0
Radio Nets: Heinrich – Ju 88s and escorts Ida – He 111 and escort
Special Rules This annex also applies the following special rule, in addition to the others: 7. The He 111 squadron must carry a torpedo load [15.1].
B09 Port Moresby
New Guinea, 1 June 1942
After the inconclusive carrier battle in the Coral Sea, the Japanese abandoned their planned amphibious invasion against Port Moresby. While the Japanese Navy concentrated on Operation Midway, the task of suppressing the growing air power in New Guinea fell to the Tainan Air Group operating from Rabaul and from the forward base at Lae. Opposing the Japanese were the 35th and 36th Fighter Squadrons, flying Airacobras. Both sides were operating at the limit of the long logistics chain made up of improvised bases, so by the end of May both sides were exhausted. On 1 June the Japanese launched a final attempt to put the airfields of Port Moresby out of action.
Order of Battle
Defender – American Elements of the 8th Fighter Group, 5th Air Force
- P-39D – Interception mission. Placed in K9, I8.
- P-39D – Interception mission. Placed in F5, G6.
Maximum Losses: Squadrons 8 Alert: All squadrons begin on Alert Quality: Veteran 0; Inexperienced 2; Experte 0
Attackers – Japanese (places first) Elements of the Tainan Air Group, IJN
- A6M2 – Escort mission.
- A6M2 – Search mission. Placed in Q10.
- G4M1 – Bombing mission. Placed in U8, V8.
Maximum Losses: Squadrons 9; Sections 4 Alert: No squadron begins on Alert Quality: Veteran 3; Inexperienced 0; Experte 2
Map Edges: Left – American; Right – Japanese GCI Control: American – GCI 5 Radio Nets: Able – all P-39D squadrons and GCI Ni – Japanese escort squadron San – Japanese Search squadron Sun Position: Above Clouds: Thin in R12–X12; Scattered in Q5–V5, H4–K4
Surface Units Airfield in E0; Heavy Flak A in E0
Special Rules
- Use the bomber attack rules [15.0].
- Japanese fighter squadrons have tactical flexibility [9.3.2].
Victory Conditions At the end of the game add up the Victory Points (VP) of each side. Subtract the American VP from the Japanese VP to determine the winner:
- +4 or less: American Victory
- +5 to +8: Draw
- +9 or more: Japanese Victory
Outcome The Japanese came out on top in the air combat, losing a single bomber and shooting down three fighters. Nevertheless the bombing was ineffective, and the continued strong American opposition made clear that the exhausted Japanese force was not succeeding in its aim of eliminating the presence of the 5th Air Force from New Guinea.
B10 Yanks over Darwin
Northern Australia, 30 July 1942
In the summer of 1942, the Japanese Navy organised a series of raids against northern Australia, mainly against the port and airfields of Darwin. With an invasion of Australia seeming a real possibility, Darwin was heavily reinforced with radar and a complete USAAF fighter group. The Japanese can hardly ever have considered the attacks on Darwin as anything but an economy-of-force operation, but the effective interception network, together with an aggressive American response, meant that the Japanese raids were never free of risk or losses.
Order of Battle
Defender – American Elements of the 49th Fighter Group, 5th Air Force
- P-40E – Interception mission. Placed in L15, M15.
- P-40E – Interception mission. Placed in P4, Q4.
- P-40E – Interception mission. Placed in G14, H13.
Maximum Losses: Squadrons 8 Alert: All squadrons begin on Alert Quality: Veteran 1; Inexperienced 1; Experte 0
Attackers – Japanese (places first) Elements of the Imperial Japanese Navy
- G4M1 – Bombing mission. Placed in W13, X13, Y13.
- A6M2 – Escort.
- A6M2 – Search mission. Placed in S15.
Maximum Losses: Squadrons 9; Sections 4 Alert: No squadron begins on Alert Quality: Veteran 5; Inexperienced 0; Experte 1
Map Edges: Left – American; Right – Japanese GCI Control: American – GCI 5 Radio Nets: Able – all P-40E squadrons and GCI Ni – Japanese escort squadrons San – Japanese Search squadron Sun Position: Above Clouds: Thin in M12–T12; Scattered in A10–F10, J8–M8
Surface Units Port in H0; Heavy Flak D in H0
Special Rules
- Use the bomber attack rules [15.0].
- Japanese fighter squadrons may exit from any map edge.
- Japanese fighter squadrons have tactical flexibility [9.3.2].
Victory Conditions At the end of the game add up the Victory Points (VP) of each side. Subtract the Japanese VP from the American VP to determine the winner:
- +4 or less: Japanese Victory
- +5 to +8: Draw
- +9 or more: American Victory
Outcome Although the 8th Fighter Squadron, positioned low, narrowly failed to reach an attacking position, the 7th and 9th Squadrons were well placed to intercept the bombers high above. The skilful Japanese escorts held off the fighters, but it was clear that further missions against Darwin would continue to meet significant opposition.
Which ADC to Use?
Scenarios may name aircraft models that are variants of an ADC card, or are alternative names for that model. This list helps find the correct ADC. The left column lists the models of this expansion and the right column lists the ADC where you can find that model. Where a model is a variant, that variant is also listed.
| Model | ADC |
|---|---|
| Airacobra IA | P-39D variant |
| B-71 | SB variant |
| Bre 691 | Bre 693 variant |
| Bre 693 | Bre 693 |
| D-3800 | MS.406 variant |
| D.520 | D.520 |
| DB-3, DB-3F, DB-3T | DB-3F |
| Fulmar Mk.I, Fulmar Mk.II | Fulmar Mk.I |
| Hawk 75A-1 | P-36A Hawk variant |
| Hawk 75A-2, A-3, A4, A-5 | P-36A Hawk variant |
| I-153 | I-153 |
| I-153P | I-153 variant |
Campaign Game Tables
(Table labels as printed in the Italian booklet, translated.)
Sun Position (roll one die, then consult the result)
| Die roll | Result |
|---|---|
| 1 | Horizon Left |
| 2 | Top Left |
| 3 | Above |
| 4 | Above |
| 5 | Top Right |
| 6 | Horizon Right |
Cloud Table (roll two dice, then consult the result)
| Die roll | Columns |
|---|---|
| 2 | E–F |
| 3 | G–H |
| 4 | K |
| 5 | L |
| 6 | I–J |
| 7 | M–N |
| 8 | Q–R |
| 9 | O |
| 10 | P |
| 11 | S–T |
| 12 | U–V |
Soviet Fighters (roll one die to determine the Soviet fighter types, as printed)
| Die roll | Result |
|---|---|
| 1 or less | I-16 * Yak-1 |
| 2 | I-16 * Yak-1 |
| 3 | I-16 * MiG-3 |
Escort Formation (roll for each escort squadron or section)
| Result | German | Soviet |
|---|---|---|
| Fails | 1-2 | 1-2 |
| Late | 3 | 3-4 |
| In Formation | 4-6 | 5-6 |
Advance Modifier (subtract the Soviet CVP from the German CVP to obtain the net CVP value)
| Net CVP | Modifier |
|---|---|
| 2 or less | +0 |
| 3–6 | +1 |
| 7–10 | +2 |
| 11–13 | +3 |
| 14–16 | +4 |
| 17–19 | +5 |
| 20–22 | +7 |
| 23 or more | +9 |
Scenario Type (roll one die, then consult the result)
| Die roll | Result |
|---|---|
| 5 or less | Bombing scenario |
| 6 or more | Interception scenario |
Modifiers to the die roll:
- +2: the defender is German
- +1: the defender has 3 or more squadrons in the Defence space
Flak Defences (roll one die)
| Die roll | German defender | Interceptor losses | Soviet defender | Interceptor losses |
|---|---|---|---|---|
| 1-2 | 1 x Lt Flak A | 1 | None | 0 |
| 3-5 | 2 x Lt Flak A | 2 | 1 x Lt Flak A | 1 |
| 6-7 | 1 x Lt Flak A, 1 Hvy Flak A | 3 | 2 x Lt Flak A | 2 |
| 8 | 2 x Lt Flak A, 1 Hvy Flak A | 5 | 1 x Lt Flak A, 1 Hvy Flak A | 3 |
Die modifier: +2 if the target bears the flak symbol.
Raid Damage to the Target (Interception Scenarios)
For each bomber squadron that exits the map, roll dice and find the row indicated by the roll, cross-referenced with the column for the nationality of the bomber squadron. Shift the rows for each of the following, as printed (the printed caption reads "columns," but the shift is applied to rows as in C9.4):
| Shift | Condition | Dice roll | German squadron | Soviet squadron |
|---|---|---|---|---|
| Up 1 | Ju 88A-4 squadron | – | 12 | 9 |
| Up 1 | Veteran squadron | 12 | 8 | 6 |
| Up 1 | Squadron has an Experte | 9-11 | 6 | 4 |
| Down 1 | Inexperienced squadron | 6-8 | 5 | 3 |
| Down 1 | Ju 87A-4 or IL-2 squadron | 3-5 | 4 | 2 |
The result indicates the hits on the target. Halve the hits if the squadron is disorganised or is a section, as printed.
Sortie Table (values by sortie-marker space; the leftmost column is the start space)
| Row | Start | 2 | 3 | 4 | 5 | 6 | 7 | 8 |
|---|---|---|---|---|---|---|---|---|
| German Fighters | 5.5 | 4.5 | 4 | 3.5 | 3 | 3 | 2.5 | 2 |
| German Bombers | 3 | 2 | 2 | 2 | 2 | 1.5 | 1.5 | 1 |
| German Veteran markers | 5 | 4 | 4 | 3 |
Campaign Turn Track: Start, then Turns 1 to 6.
Front line victory levels (printed along the Advance Table, from left to right): Decisive Soviet Victory; Soviet Victory; Draw; German Victory; Decisive German Victory. The map prints the roll values 8+, 10+, 12+ and 14+ against the front-line positions of the Advance Table, and GCI values 4, 5 and 6 against the same positions (see C8.6).
Map Planning and Loss Boxes
- German Planning Box: Attack and Defence spaces.
- German Losses box: move the German sortie marker one space to the right for every 5 losses.
- Soviet Planning Box: Attack and Defence spaces. If the effort marker shows an aircraft symbol, add one reinforcement squadron to the Defence space of this box (the type shown on the right side of the dot).
- Soviet Losses box: move the Soviet sortie marker one space to the right for every 15 losses.
Map Legend
- Target types: Airfield (Aeroporto), Bridge (Ponte), Troops (Truppe), Tanks (Carri Armati), Artillery (Artiglieria), Trucks (Autocarri), Railhead (Deposito Ferroviario).
- Advanced target: green burst. Rear target: blue arrow.
Aircraft Card Notes
(Card names as printed. "Caratteristiche" gives the introduction date and the card's special capabilities. Abbreviations are kept as printed: ATGR, AT Cannons, Firepower (Potere di Fuoco), Protection (Protezione), Torpedoes (Siluri).)
Italy
| Card | Characteristics | Variants |
|---|---|---|
| Re 2001 Falco II | Feb 1942 | This card also represents the Re.2001 CB fighter-bomber. |
| Mc 200 Saetta | Aug 39; Drop Tanks | The Mc.200 Saetta card represents the Mc.200CB (available from 1942), which carried bombs and drop tanks. |
| Mc.202 Folgore | Jul 41; Drop Tanks | The Mc.202 Folgore card represents the base model and the later Mc.202AS and Mc.202CB, which could carry bombs and drop tanks. Can carry a bomb load only from 1942 onward. |
France
| Card | Characteristics | Variants |
|---|---|---|
| LeO 451 | Jul 39 | |
| Bre 693 | Mar 40 | This card also represents the very similar Bre 691. |
| MB.152C1 | Oct 39 | MB.151C.1: first production variant. Some were used in the Battle of France. |
| M.S.406 | Apr 39 | D-3800: version built under licence for Swiss service, entered service in August 1940. |
| D.520 | Apr 40 |
USSR
| Card | Characteristics | Variants |
|---|---|---|
| DB-3F (IL-4) | Torpedo +1; Gen 40 | This card represents all the principal variants of the series, including the DB-3 that entered service in 1937, the torpedo bomber DB-3T and the rebuilt DB-3F. The DB-3F was renamed IL-4 in March 1942. |
| SB | 1936 | This card represents all the principal variants of the series, including the Czechoslovak Avia B-71. |
| I-153 "Chaika" | Aug 39; ATGR 3 | This card represents all the principal variants of the series. I-153 P: armed variant with cannons, built in small numbers, entered service in February 1940. Increase Firepower to 2. |
| I-16 Type 5 "Ishak" | Nov 36 | I-16 Type 4: initial production batch, in service from 1935. I-16 Type 10: improved variant, in service from 1937. Increase Firepower to 1. I-16 Type 12, 17: cannon-armed variants, in service from 1939. Increase Firepower to 2. |
| I-16 Type 24 "Ishak" | Nov 39; ATGR 3; Drop Tanks | I-16 Type 27: cannon-armed variant. Increase Firepower to 2. I-16 Type 28, 29: improved variants. |
| MiG-3 | Feb 41; ATGR 3 |
Japan
| Card | Characteristics | Variants |
|---|---|---|
| Ki-27b Nate | Drop Tanks; Rear View | Ki-27a: initial production variant, entered service in July 1938. This variant cannot carry bombs. Remove the Drop Tanks and Rear View capabilities. |
| Ki-43-I-a Hayabusa "Oscar" | Apr 41; Drop Tanks; Rear View | Ki-43-Ia, Ib: this card represents all the initial variants. Ki-43-Ic: main production version, in service from October 1942. Increase Firepower to 1. |
| A6M2 Zero "Zeke" | Jul 40; Drop Tanks; Rear View | - |
Great Britain
| Card | Characteristics | Variants |
|---|---|---|
| Fulmar Mk. I | Drop Tanks; Rear View | Fulmar Mk. II: improved variant, in service from January 1941. |
| Hurricane Mk. I | Dec 37 | Sea Hurricane Mk.I: naval variant, entered service in July 1941. |
| Hurricane Mk. IIC | Jun 41; Drop Tanks | Sea Hurricane Mk.IIC: naval variant, entered service in May 1942. Hurricane Mk.IIA, Mk.IIB: variants armed with machine guns, entered service in September 1940. Reduce Firepower to 1. Hurricane Mk.IID: anti-tank variant, entered service in June 1942. Reduce Firepower to zero. Add AT Cannons. Hurricane Mk.IV: ground-attack variant, entered service in late 1943. Add AT Cannons and ATGR 12. |
| Spitfire Mk.VB | Drop Tanks | Spitfire Mk.VA: machine-gun armed variant, built in limited numbers. Reduce Firepower to 1. Spitfire Mk.VC: later variant, with numerous secondary improvements. |
United States
| Card | Characteristics | Variants |
|---|---|---|
| P-39D Airacobra | Feb 41; Drop Tanks; Rear View | P-39D: this card also represents the P-39F. Airacobra IA: export variant in British service, with a 20 mm cannon in place of the 37 mm. Also known as the P-400 in US service. |
| P-36 A Hawk | Apr 38 | Hawk 75A-1: export fighter used by France, in service from May 1939, known as the Mohawk Mk.I in British service. Hawk 75A-2: also represents the export variants A-3, A-4 and A-5, known as the Mohawk Mk.II, Mk.III and Mk.IV in British and Indian service. Increase Firepower to 1. |
| F-4F4 Wildcat | Dec 41; Drop Tanks | F-4F3 Wildcat: initial variant, entered service in August 1940. In British service this was the Martlet Mk.I, Mk.II and Mk.III. Reduce Firepower to 1. Martlet Mk.IV: British variant, entered service in July 1942, renamed Wildcat Mk.IV. FM-1 Wildcat: model built by General Motors. The British named it Martlet Mk.V or Wildcat Mk.V. Reduce Firepower to 1. |
| P-40B Warhawk | Jun 41; Drop Tanks | P-40B: this card represents the P-40B and C, known as the Tomahawk Mk.II in British and Commonwealth service. Tomahawk Mk.I: initial variant in British and Commonwealth service, from May 1941. It lacked armour and self-sealing tanks. Reduce Protection to 3. |
| P-40E Warhawk | Aug 41; Drop Tanks | Kittyhawk Mk.IA: the name for the P-40E in British and Commonwealth service. P-40D: initial version, produced in limited numbers, known as the Kittyhawk Mk.I in British and Commonwealth service. |
Germany
| Card | Characteristics | Variants |
|---|---|---|
| Bf 109E-4 "Emil" | Jun 40 | Bf 109E-1, E-3: initial variants, which entered service in February 1939. The initial variants cannot carry bombs and have Protection 3. Reduce Firepower to zero. Bf 109E-7: long-range variant able to carry additional fuel. Add Drop Tanks. |
| Bf 110C-4 | Jul 40; Drop Tanks; Rear View | Bf 110C-1, C-2, C3: initial variants of the C series, entered service in January 1939. The initial variants cannot carry bombs and have Protection 4. Reduce Firepower to 1. Bf 110C-7: fighter-bomber variant. Increase bomb strength to 20. |
| Fw 190A-2 | Oct 41; Drop Tanks; Rear View | The printed variant note reads "Fw 109A-1" (apparently a typo for Fw 190A-1, not corrected here): initial production version, available only in small numbers from July 1941. |