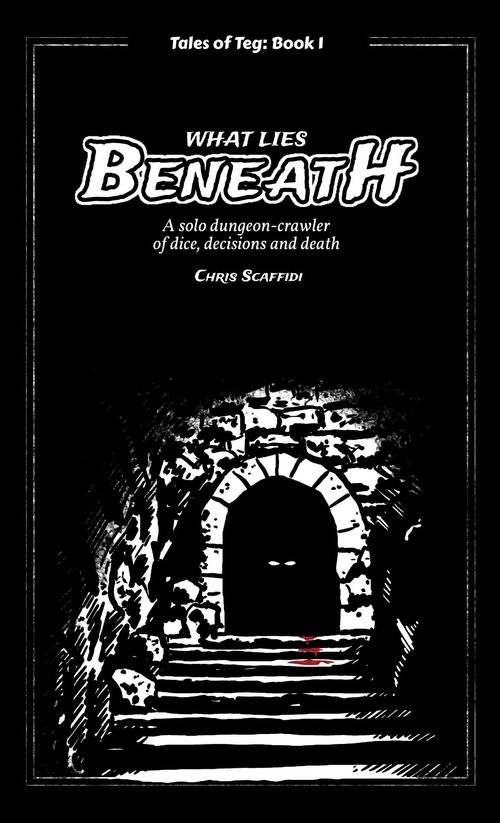
What Lies Beneath
What Lies Beneath Rulebook
Table of Contents
Table of Contents
Overview
In this game, you play the role of a hero who must escape a crypt, find a cure for a mysterious disease, and perhaps discover and defeat those who caused your unfortunate situation.
All game-play instructions appear in this font (that you are reading). As you read, you may skip narrative story line, which appears in the following font:
You are starting to remember your identity. Slowly.
This book consists of numbered Encounters, such as E1 (on the previous page), which you will not read in order. Each Encounter may direct you to read the next Encounter, or to choose among several options.
Some of these options will only be available to you if you possess a certain Item or if you pass a test involving dice. Failing such tests may result in harm to you, as indicated by a statistic called "Vigor." Your Vigor may increase without limit or decrease.
If your Vigor ever becomes 0 or negative, you die and lose the game. If you die, restart from the beginning with a new character. You lose everything from your old character, except your unspent Experience Points (XP) from your old character. You may spend XP to upgrade your new character, as described at the end of this book in the Rules Reference and Arcana Appendix (which also summarizes all the rules).
Your goal is to find your way through this book to a page that states "Survival" or, even better, "Victory." The book has several paths to survival and victory – and many paths to death.
Components
You need:
- The Character Sheet: photocopy the last page or download & print a PDF from ferventworkshop.com
- 6 six-sided dice (preferably ½", around 13 mm)
- Pencil and eraser
Setup
Roll 2 dice. If you roll doubles, reroll 1 die until your dice have 2 different values. Look at the table below and select 1 of the 2 corresponding rows. Copy your class, starting Hit, Dex, Wit, and Vigor statistics to your Character Sheet. Leave name, XP and Enc blank.
| Roll | Class | Hit | Dex | Wit | Vigor |
|---|---|---|---|---|---|
| 1 | Bard | 2 | 1 | 2 | 8 |
| 2 | Berserker | 2 | 1 | 1 | 16 |
| 3 | Druid | 1 | 2 | 2 | 6 |
| 4 | Rogue | 1 | 2 | 2 | 8 |
| 5 |
(In the printed table the Roll column shows a single die face, 1 through 6; the die faces are pictures in the book and are given here as numbers.)
- Hit will aid you in combat tests (which involve rolling dice to achieve a certain threshold).
- Dex will aid you in dexterity tests (which involve physically flicking a die).
- Wit will aid you in intellectual tests (which involve solving dice puzzles).
- Vigor is your health. If it becomes 0 or negative, you're dead.
- XP are your experience points, which you'll have opportunities to spend on leveling up (or to boost a new character if you die).
- Enc is a spot to write the Encounter that you are about to read, if you need to pause the game and restart later.
Rules for Hit Tests
Hitting is a test of whether you can roll at least 1 die greater than or equal to a threshold, in order to defeat a foe in combat. For example, the test [Hit @ 2] in E2 translates to "test your Hit skill at level 2," which means that you need to roll a 2 or higher.
Your character's Hit statistic indicates the number of dice that you get to roll. For example, a Wizard with a Hit of 1 would roll 1 die, while a Warrior with a Hit of 2 would roll 2 dice. Certain Items allow you to manipulate the dice after you roll them.
If at least 1 rolled die equals or exceeds the target threshold, then you succeed. Otherwise, you fail.
Example: A hero with a Hit of 2 might roll two dice (shown as pictures in the book) when facing a [Hit @ 3] test. Although the first die doesn't meet the threshold (3), the second die equals or exceeds the threshold, so the hero succeeds.
The Encounter indicates the consequences of succeeding or failing. For example, E2 indicates that you gain 1 XP if you succeed, and you lose 1 Vigor if you fail. XP signifies your growing understanding of your situation – and of how to emerge victorious. You would update your Character Sheet accordingly.
Some Encounters have a consequence for success but none for failure, or vice versa.
Some Encounters indicate that you should turn to another Encounter if you succeed or fail the test. In that case, do not continue with the rest of the options on the current Encounter. Instead, immediately turn to the indicated Encounter. (You'll see an example of this in a few pages.)
Rules for Dex Tests
Dexterity challenges you to flick a die from a distance.
Stack 2 dice on top of one another. These 2 dice are your target. Place a third die at the indicated number of inches from the target, measured from the center of the dice. (1 inch equals 25.4 mm.) Note that the edge of your Character Sheet provides a ruler. Certain Items allow you to manipulate the dice after you set them up.
Example: The test [Dex @ 4] in E3 directs you to stack 2 dice as a target, then place a third die 4 inches from the target.
Flick the die with your finger toward the target. Your goal is to strike the target with the flicked die, without knocking the top die off the stack.
(It is acceptable if your flicked die simply brushes the target and moves forward. It is also acceptable if the top die moves. What matters is whether the flicked die makes any contact with the target, and whether the top die comes in contact with the table.)
Your Dex statistic indicates the number of attempts that you get. If your first try knocks the target stack over or you miss entirely, reset the target and take your next attempt.
Example: A hero with a Dex of 1 would try 1 time, while a hero with a Dex of 2 could try 2 times.
If any attempt strikes the target, without causing the top die of the target to fall, then you succeed. If all your tries miss the target or knock it over, then you fail the test.
Alternative rules: If you prefer not to flick, refer to the Alternative Dexterity Rules in the Rules Reference for another way to do dexterity tests. (The Rules Reference is not included in this preview.)
Rules for Item and Tag Tests
Item and Tag tests are simple: you succeed if you have the indicated requirement. Otherwise, you fail.
Example: You succeed at [Item CP1] if you have Item CP1 written on your Character Sheet. If you do not have it, you fail.
Other tests will depend on your achievements or events earlier in the book. These are called Tags.
Example: If you defeat a certain powerful enemy, the book might direct you to gain "Tag ENEMY123," which you would write in the Tags section of your Character Sheet. A subsequent Encounter might then test [Tag ENEMY123], and you would succeed at this test if you have that Tag.
Unless indicated otherwise, you have a choice of whether to use the Item or the Tag. For example, E4 offers the option of using your crypt key to unlock the door. You may choose not to do it. Options always have [square] brackets.
However, occasionally an Encounter will specifically direct that you must do something if you have a certain Tag. For example, maybe killing ENEMY123 wasn't such a good idea. His allies might decide to cause you some harm later in the book.
Examples: The statement, "If you have Item CP1, gain 1 XP" is not an option. Similarly, "If you have Tag ENEMY123, go to E666" means that you must go as instructed (if you have the Tag) – it's not an option.
Mandatory instructions are always explicitly stated in the Encounter's text (without square brackets).
Rules for Wit Tests
Wit is a test of whether you can put a specified number of dice in sequence (also known as a "run").
Example: [Wit @ 4] in E5 asks you to roll 4 dice and manipulate them into a sequence such as the following (dice shown as pictures in the book): four dice showing 1, 2, 3, 4; or four dice showing 2, 3, 4, 5; or four dice showing 3, 4, 5, 6. As another example, [Wit @ 3] challenges you to roll 3 dice and manipulate them into a sequence, such as three dice showing consecutive values, shown in the book as three example runs.
Roll the indicated number of dice. You get Wit actions to then manipulate the dice into a sequence. Any sequence is acceptable. (Note that a sequence does not "wrap" from 6 to 1.)
Example: A hero with a Wit of 2 gets 2 actions. A hero with Wit of 1 gets to perform only 1 action.
You may choose from the actions below. You may choose an action more than once (if your Character has sufficient Wit to do multiple actions).
- (Re) Roll 1 die.
- Flip 1 die (turn it upside down).
- Increase 1 die by 1. A 6 remains a 6, as values do not "wrap."
Example: You might roll four dice (shown as pictures in the book). As a hero with 2 Wit, you'd get 2 actions. For example, you can:
- Increase or flip a die. Your dice are now different (shown as pictures in the book).
- Then flip one die. Your dice are now a valid sequence of 4 dice (shown as pictures in the book), so you've succeeded the test.
If you manipulate the dice into sequence with your allowed number of actions (or fewer), then you succeed. If you fail to manipulate the dice into sequence within your allowed number of actions, then you fail.
Reminder of Wit Actions (printed on the Character Sheet): Roll 1 die / Flip 1 die / Increase 1 die.
Preview Encounters
The Encounters below are reproduced as printed in the preview. Encounters that the preview marks "Not included in this preview" are listed as such.
E1
You dream you are in a chapel. Small, high-pitched voices sing an ancient song. You draw in the scent of stone and incense.
Yet a sense of unease washes through you. The comforting smell is a veil. The core is more macabre. Dream yields to waking confusion. A grave. Dust, bones and dried death. A flickering torch. Underground. A crypt.
In the near darkness, you remember nothing, not even your name. You wait, listening for anything to provide answers. Nothing.
The flesh of your arm aches. You touch it. Leathery. A rough, tumor-like growth covers your forearm. The weak torchlight sparkles from its surface, as if from a wound. Yet it feels dry. The flesh around it throbs, as if infiltrated by a stealthy, spreading infection.
You catch a wisp of a breeze, heavy with the stench of rot. You gag. Yet a breeze suggests a way out. You take the torch, determined to get out of here alive.
- [Continue] Proceed to the next encounter. Go to E2 (next page).
E2
You stumble out of the crypt and immediately trip on your weak legs, sending a few skulls clattering into the darkness as you fall prone to the ground. Suddenly, a rat hisses into your face.
On the page below, notice that you have 2 options.
The first option, starting with [Hit @ 2], offers you the opportunity to try hitting the rat. The rules for hitting appear on the next page. If you succeed in hitting the rat, you gain 1 XP. If you fail, you lose 1 Vigor as the rat gnaws on you for a little while.
The second option, starting with [Continue], simply directs you to proceed to the next Encounter (E3).
When you see a list of options, like this, proceed through them in order. Each option is optional, except that if you reach the last option, then you must take that option.
For example, you could try to hit the rat (and succeed or fail), and then continue on to the next option (and proceed to E3). You don't have to hit the rat. You can just decide to skip the first option and go to the last option (by fleeing to E3). It's your choice.
- [Hit @ 2] Attack the rat? Success: Gain 1 XP. Failure: Lose 1 Vigor.
- [Continue] Get up and flee. Go to E3.
E3
You enter a tunnel of rough-hewn rock alternating with bricks. Slippery goo drips down the walls. Your torchlight glistens from a bit of metal wedged into the rocks. Examining it, you see a key.
On the page below, notice that you have 2 options.
The first option, starting with [Dex @ 4], offers you the opportunity to dexterously pull the slippery key from the rocks. The rules for dexterity tests appear on the next page.
If you succeed, you gain an Item, "CP1," which abbreviates the words "crypt passkey 1." This book uses abbreviations and acronyms to reduce guessing what they mean, when you see them referenced elsewhere in the book.
Upon gaining the key, write "CP1" on your Character Sheet's Items section, look up "CP1" in the Arcana Appendix to learn what this Item does, and write whatever notes on your Character Sheet will help you remember the Item's function.
Your pockets and belt suffice for carrying all Items that you'll encounter – don't worry about capacity. You may have only 1 of each Item (e.g., one CP1), unless indicated otherwise in the Arcana Appendix.
If you fail, there are no consequences for this particular option. Just go to the next option.
As with E2, you can choose to skip the first option and just go to the last option (proceeding to E4).
- [Dex @ 4] Retrieve the key? Success: Gain Item CP1.
- [Continue] Follow the tunnel. Go to E4.
E4
As you creep through the tunnel, you observe a metal door built into the wall beside you. The door is half your height – about as tall as a weefolk, such as the goblins who live in the mountains or the gnomes in the forests of this magic world, Teg. A massive bar crosses the door, sealed with a padlock the size of your fist – or, to a weefolk, the size of two fists.
If your character is a druid or a wizard, you also notice that you have a crystaline tooth in your pocket. Gain Item WTF1, and refer to the Arcana Appendix for details. (You do not gain this Item if your character is not a druid or a wizard.)
Now, notice that you have 2 options below.
The first option, starting with [Item CP1], offers you the opportunity to unlock the door, provided that you have the specified Item (the key from E3). The rules for Item tests appear on the next page.
Items are not "used up" unless the Arcana Appendix indicates that they are "single use."
If you can unlock the door, and you decide to do so, you immediately turn to E8, without proceeding to the second option below.
If you lack the Item, there are no failure consequences. Just go to the next option.
As with earlier Encounters, you can choose to skip the first option and just go to the last option (proceeding to E5). In other words, even if you have the key, you can choose not to use it.
- [Item CP1] Unlock the door? Success: Go to E8.
- [Continue] Proceed along the tunnel. Go to E5.
E5
The cavern divides. Two arches extend over the openings, each etched with barely-visible runes not written in the common tongue.
The darkness beyond one or both openings echoes with the sound of rushing water and – unless your imagination lies to you – a soft buzz.
Note that you have 3 options below.
The first option, starting with [Wit @ 4], offers you the opportunity to decipher the runes. If you succeed, immediately turn to the indicated Encounter (E33), rather than continuing with the other options.
If you choose not to use the first option, or if you fail the first option's test, then continue to the second or third options. These allow you to proceed to the left or the right tunnel.
- [Wit @ 4] Decipher the runes? Success: Go to E33.
- [Continue] Enter the left-hand tunnel? Go to E11.
- [Continue] Enter the right-hand tunnel? Go to E22.
E6
You wake in a small cell behind a padlocked portcullis. Bones litter the ground. Moonlight streams between two bars in the ceiling.
Every part of your body aches. You find that your foes have searched you.
The preview of your adventure ends here. For the entire game, available as a hyperlinked PDF, visit https://ferventworkshop.itch.io/what-lies-beneath
E7
Not included in this preview.
E8
It takes a bit of jimmying and jiggling, but at last you get the padlock open. Expecting the little door's hinges to be old and rusty, you pull hard and find it pops open easily.
The tiny room behind the door was apparently pressurized, as a blast of air hits your face with an audible WHOOSH. This air carries a black mist, similar to the goo that entirely covers the walls, ceiling and floor of the tiny room beyond the door. This mist blasts onto your arms and face as the door pops open.
The goo bonds to your skin. Its surface strongly resembles the strange tumor on your arm, and you feel a similar ache wherever the goo has touched you.
Gain 1 KARMA Tag. You may refer to the Arcana Appendix for details on how Karma affects you.
Also gain 1 XP.
- [Continue] Try to avoid gooey black ooze in the future. Go to E5.
E9
Not included in this preview.
E10
Not included in this preview.
E11
You enter the left-hand tunnel. A wet wind rushes against your face. Perhaps this is the source of the breeze that you felt in the crypt.
The tunnel wall to your right recedes, and the floor falls away in that direction. You hear a dripping pool of water somewhere in the inky darkness as you edge along, testing your footing.
The path grows slick and steeply slopes downward.
- [Dex @ 3] Proceed down this treacherous path? Success: Go to E14. Failure: Go to E19.
- [Continue] Retreat to the other tunnel? Go to E22.
E12
The alligator sweeps your feet with its tail. As you fall, it snaps its rasping jaws against your throat and face. You attempt to shove it off, but your hands slip among the bones of the ribcage into where the lungs should be. Meanwhile, the beast's claws slice into your belly.
Fortunately, the pile of gold suddenly slips like a landslide, flowing toward the window-like exits. You pour into the corridor beyond, but the mighty beast doesn't fit through the opening and remains on the other side. You find yourself laying in a puddle of coins.
Lose 5 Vigor. Gain Item BHG.
- [Continue] The huge alligator can't follow you through the window. You're safe, for now. Go to E16.
E13
You strike the alligator skeleton repeatedly. Bones fly from its torso and skull. It swings its tail toward you, which you leap over to avoid. You land, planting your feet in position to kick its groin. The pelvis shatters as your kick connects, and the brittle cracking echoes throughout the room.
When silence finally returns to the room, you pick through the treasures. You find a great deal of gold coins – which you're unlikely to spend in a crypt!
In addition to a sword, you find a resplendent crown. Burnished metallic ornaments adorn the sides of the crown, each glowing with a blue light. When you touch it, your mind comes alive with imagination.
Gain Items BHG, WPN and CJI.
- [Item SJA] Search the treasure using your magic? Success: Go to E66.
- [Wit @ 5] Search the treasure using your wits? Success: Go to E67.
- [Continue] Exit the chamber? Go to E16.
E14
Although the path steepens, and you find yourself largely sliding on your rear, you manage to control your descent without falling off the edge of the narrow path. You arrive at a large platform beside a pool of dark water. A wooden staircase spirals upward to your left. Darkness far above you obscures the staircase's destination.
Several boxes covered with dusty runes sit on the platform, most of them open. You gingerly search through them, alert for threats, and you discover that most contain tiny flasks, each with a wax insignia shaped like a skull. One flask has a bit of fluid.
- [Wit @ 3] Decipher the runes? Success: Go to E49.
- [Dex @ 6] Return up the narrow, slippery path to the arches, in order to reach the right-hand tunnel? Not included in this preview.
- [Continue] Climb the spiral staircase? Not included in this preview.
- [Continue] Wade into the pool? Go to E21.
E15
Passing through the opening, you find yourself in a short tunnel, which is slippery with black goo, filling you with caution.
The tunnel rises for a while, then descends again into a cavern so large that darkness swallows the ceiling. Concentrated goo, smelling of minerals and rotten meat, inches down the walls into rough-hewn trenches along the floor.
The goo flows into a wide pool, surrounded by steep but shallow sides. A glowing orb floats with lavender light atop the black ooze.
The wall ahead has a gap, indicating an exit from the room.
- [Item SJA] Investigate the orb? Not included in this preview.
- [Dex @ 5] Try to grab the orb from the goo pool? Success: Go to E40. Failure: Go to E24.
- [Continue] Ignore the orb and leave? Go to E35.
E16
You exit into a corridor lined with chests. Their locks look small and easily smashed. Although some chests have runes in the shape of flasks or other items, many also have runes of warning.
- [Item SJA] Only open the safe chests? Not included in this preview.
- [Continue] Open some chests that look promising? Go to E28.
- [Continue] Ignore the chests; follow the corridor? Go to E44.
E17
Not included in this preview.
E18
Not included in this preview.
E19
You lose your footing and slide off the floor into the darkness. Jagged rocks slash your body as you plummet down a steep grade over an incredible distance.
With a final rough bounce off your feet at the bottom of the rocky slide, you belly flop into a pool of cold water. Submerged, you see no light and thrash around until you somehow find the surface. You desperately fill your lungs with air. Above, the chamber's high ceiling rises into inky blackness.
Lose 3 Vigor.
- [Continue] The waters sweep you forward. Go to E21.
E20
Not included in this preview.
E21
Shocked by the cold water, you can't fight a strong current that sweeps you into the dark distance. Your torch is long gone, but you find yourself washed into a dark tunnel lit by other torches. The water starts to pour through grates in the floor, becoming only waist-deep, and you find that you can stand.
An opening in the wall beckons ahead. But as you push forward through the dark waters, you notice two glistening flickers in the torchlight. Eyes?
They approach. A reptilian head glides by your side, swivels, and turns toward you for a second pass. A hiss whistles through the tunnel.
An edible snake, something you could prepare by torch fire? Perhaps. If you don't become dinner first.
- [Hit @ 5] Attack and eat the snake? Success: Gain 2 Vigor. Failure: Lose 1 Vigor.
- [Continue] Grab a fresh torch and exit via the opening? Go to E15.
E22
You step into the right-hand tunnel. Arcing, it becomes a spiraling ramp down, with a space to your right. As you proceed, the space widens into a vast gulf, revealing a massive chamber. The spiraling ramp hugs the wall of this chamber. You creep downward.
The buzzing pauses. Torch light moves along the floor of the chamber, astonishingly far beneath you. You hear voices echoing below.
- [Wit @ 3] Search for a dark area of the ramp and hide for a while? Success: Go to E53. Failure: Go to E56.
- [Dex @ 2] Quietly continue down the ramp? Success: Go to E50. Failure: Go to E56.
E23
Bloodied and swollen, you sink to the ground. The beast transforms to a weefolk. The two of them drag you away as you lose consciousness.
Lose 2 Vigor.
- [Continue] If you're still alive… Go to E6.
E24
You bend over the pool and barely touch the orb. It bobs and scoots away from you. Reaching further, you lose your balance and reflexively thrust a hand into the dark stench and cold muck below.
Before you can pull your arm out, a surge of ache floods your body. The orb bobs farther away, now well out of reach.
Gain 1 KARMA Tag.
- [Continue] Leave the room. Go to E35.
E25–E27
Not included in this preview.
E28
The chests' symbols only very roughly indicate the possible contents, such as indicating the presence of an Item. Each chest may be booby trapped.
You may open chests in the order below. You may skip any chest(s). For each chest that you choose to open, roll 1 die, add your number of KARMA Tags (if any), and subtract your number of WARD Tags (if any). The result is called your "fate."
If your fate is 3 or less, you get the indicated benefit from the chest. If your fate is 4 or more, a trap reduces your Vigor by 1, and you do not gain the benefit.
Example: If you have 2 KARMA and 1 WARD, and then you roll a 4 (shown as a die picture), your fate is 4+2-1=5, and you lose 1 Vigor from a trap within this chest. You may continue with the next chest.
If you gain KARMA or WARD Tags from Chests #2 or #3, each Tag affects your fate in subsequent rolls. Remember that you only may have 1 of each Item, unless the Arcana Appendix indicates otherwise.
- [Chest #1] Gain 1 Vigor
- [Chest #2] Lose 1 KARMA Tag
- [Chest #3] Gain 1 WARD Tag
- [Chest #4] Gain Item BAM
- [Chest #5] Gain Item SHD
- [Chest #6] Gain Item WPN
- [Continue] Stash your treasures and continue. Go to E44.
E29–E32
Not included in this preview.
E33
The runes are a mixture of two languages. Older, more eroded symbols are gnomish script with a rhyming chant to ward off danger.
Gain 1 WARD Tag.
Scrawled beneath these is newer graffiti in a goblish script, with runes for "Water" and "Down" on the left-hand tunnel. The right-hand tunnel's runes indicate "Beast Training" and "Down."
- [Continue] Enter the left-hand tunnel, labeled "Water" and "Down?" Go to E11.
- [Continue] Enter the right-hand tunnel, labeled "Beast Training" and "Down?" Go to E22.
E34
Not included in this preview.
E35
As you leave the chamber, you slip in a gooey patch of the tunnel, staggering against the wall – and stumble right through it as if through a mirage.
You find yourself in a chamber adorned with splendid objects. At the center of the room lays the skeleton of an alligator, sparkling slightly. Gems, swords, and gold coins shimmer in an enormous heap.
As you approach the pile, the alligator skeleton suddenly begins to rise. It rasps and rattles. Sharp teeth and claws glisten with a yellow hue in the light reflected by the gold. You look back and find that the wall is thickly covered with goo. The only obvious exits are window-like openings beyond the skeleton.
- [Hit @ 5] Fight the alligator skeleton? Success: Go to E13. Failure: Go to E12.
- [Dex @ 3] Try to dash past the alligator skeleton? Success: Go to E16. Failure: Go to E12.
- [Continue] Search the gooey wall behind you for an opening so you can reverse course? Not included in this preview.
E36–E39
Not included in this preview.
E40
You kneel above the pool, gasping against the fetid vapors. As you lift the orb, ooze drips off the bottom and the orb's light fades. Experimenting, you gently touch it to the pool's surface, and the orb draws ooze upward. As the ooze vanishes upon the surface of the orb, the glow briefly reappears.
Gain Item OPL.
- [Continue] Exit the room. Go to E35.
E41–E43
Not included in this preview.
E44
The corridor continues to a massive door with a spring. As you push against it, you find that your arm with the tumor has grown weaker.
The preview of your adventure ends here. For the entire game, available as a hyperlinked PDF, visit https://ferventworkshop.itch.io/what-lies-beneath
E45–E48
Not included in this preview.
E49
Unlike the runes that you previously saw on the arches, the boxes' annotations are written in a tidy goblish script.
The large label reads, "Karma Cleanser" along with a price indicated in goblish coins. Small text explains that the flask contains a type of healing potion for removing certain moral adhesions that can attract evil fates.
Gain Item SFKC.
- [Continue] Climb the staircase? Not included in this preview.
- [Continue] Wade into the pool? Go to E21.
E50
You sneak along the ramp, watching your step to avoid tripping or accidentally making noise. You reach a flat area at the bottom of the ramp, where you conceal yourself behind a pile of boxes.
Weefolk hold the torches. Each wears a red cap. One, with a long beard, is lecturing the other. The speaker opens a small satchel, withdraws a handful from within, and throws sparkling dust at the other – who suddenly transforms into a naked buzzing beast that flies upward.
Gain 1 XP.
- [Item MDI] Greet them both in a friendly fashion? Not included in this preview.
- [Dex @ 3] Cower against the boxes, to hide from the beast overhead? Not included in this preview.
- [Hit @ 4] Attack them? Success: Go to E60. Failure: Go to E23.
E51–E52
Not included in this preview.
E53
You pause quietly for what seems like a very long time. Afraid to peer out, where you might be seen, you hide yourself but remain tense in case of a fight. Voices echo, then gradually fade.
- [Continue] You're alone with the boxes. Go to E61.
E54–E55
Not included in this preview.
E56
As you step along the ramp, you fail to notice a large fissure in the ramp's stone. The edge of the path crumbles, showering the vast chamber far below. You slip off the edge, tumbling into a heap of stone.
A bearded face swims into your confused sight, as well as the buzzing wings of a beast-man-thing. They strike you, and you begin to black out.
If you have fewer than 2 WARD Tags, lose 2 Vigor.
- [Hit @ 4] Frantically flail at your foes. Success: Go to E60. Failure: Go to E23.
E57–E59
Not included in this preview.
E60
With a battle cry, you launch yourself at the foes. They look up in surprise.
You meet their flurry of buzzing and blade with your own swings and kicks. The bearded one tries throwing a handful of black goo at your face, but you dodge, then tackle him and thrust your fist deep into his throat. He gurgles blood up into his beard.
The winged one leaps onto your back, stinging. You punch it in the face, and it careens against the wall. It transforms into a small goblish being. The two lie still on the floor. From your foes' bodies, you retrieve a dagger.
Lose 1 Vigor from battle wounds. Gain Item WPN.
You also find a puzzling amulet. You turn it about, noticing that it glows redly when near to your tumor. You experiment with it, touching it to other things such as your fallen foes' bodies.
- [Wit @ 3] Do you learn what the amulet does? Success: Gain Item SJA.
- [Continue] Take a look at the boxes. Go to E61.
E61
Runes annotate the boxes stacked near the bottom of the ramp. On the opposite side of the large chamber, a small set of stairs leads to a single arch.
The preview of your adventure ends here. For the entire game, available as a hyperlinked PDF, visit https://ferventworkshop.itch.io/what-lies-beneath
E62–E65
Not included in this preview.
E66
You paw through the pile, periodically touching your amulet to sense the presence of any magical treasures. For the most part, all you find is more gold, which is essentially heavy trash in your current circumstances.
- [Continue] But you do find one item of interest. Go to E67.
E67
You find a mask resembling a hideous gargoyle. It's bundled in a robe adorned with runes indicating powerful magic. In the reflection of a mirror, also buried among the treasure, you see a blurry face similar to your own – but perhaps less haggard than you feel. The robe causes your body to appear healthier and blurrier. This outfit, it seems, creates an appearance approximating that of the viewer.
Gain Item MDI.
- [Continue] Proceed through the window-like exit. Go to E16.
Preview Ending
Encounters E68–E241 are not included in this preview. For the entire game, available as a hyperlinked PDF, visit https://ferventworkshop.itch.io/what-lies-beneath
Rules Reference and Arcana Appendix: not included in this preview.