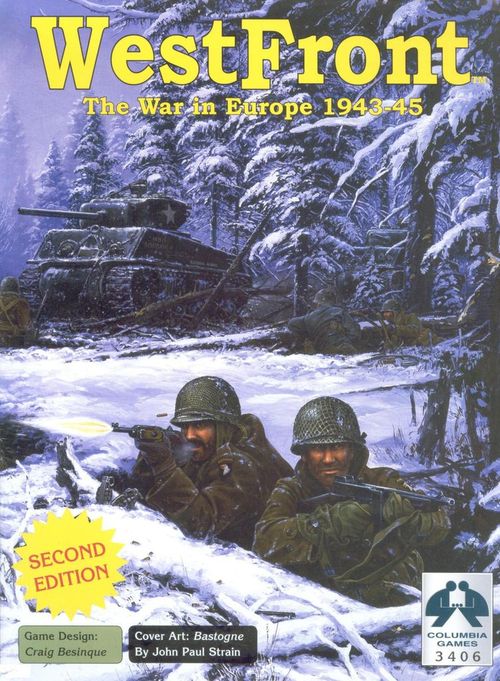
WestFront II: The War in Europe 1943-45 – Second Edition
WestFront II: The War in Europe 1943-45 – Second Edition Rulebook
Table of Contents
Table of Contents
- Overview
- 1.0 The Map
- 2.0 The Units
- 3.0 Starting Play
- 4.0 Sequence of Play
- 5.0 Headquarters
- 6.0 Movement
- 7.0 Combat
- 8.0 Hex Control
- 9.0 Railroads
- 10.0 Supply
- 11.0 Production
- 12.0 Weather
- 13.0 Airpower
- 14.0 Paratroops
- 15.0 Seapower
- 16.0 Strategic Objectives
- 17.0 Victory
- Scenarios
- Introductory Scenario — 'Husky' Example Game: The Invasion of Sicily
- Game Charts
Overview
The Mapboard
The mapboard depicts the western half of the European theater in WW2. The mapboard is divided into hexagons, called "hexes", to determine location and movement. Terrain features affecting play include: rivers, forests, mountains, marshes, cities, ports, and railways.
Norway, Sweden, Switzerland and Eire are out of play. These areas come into play in EuroFront, which covers the entire war in Europe 1939-45. Axis units cannot enter Britain or North Africa.
The Units
Wooden blocks, called units, represent German corps and Axis minor armies (black blocks) and Allied corps or minor armies (blue blocks). A die-cut, adhesive label identifying a unit's type and strength must be attached to each block. Put Allied labels on the blue blocks, and Axis labels on black blocks.
Units in play normally stand upright, with their labels facing the owning player. This provides simple yet elegant Fog of War in that players cannot see the type or strength of opposing units.
The seven basic unit types are: Armor, Mechanized Infantry ("Mech"), Infantry, Cavalry, Static, Forts, and Headquarters. As each unit-type has a fixed movement rate and firepower rating, these numbers are not shown on the label.
The large numbers surrounding the unit symbol show the unit's strength, called Combat Value ("CV"). Units gain and lose strength in steps of 1CV. A unit's current strength is the number along its top edge when standing upright.
Game Scenarios
For game purposes, the Western Front campaign is divided into scenarios, each covering a 6-month period of the war. A scenario can be played in a sitting (4-6 hours), and two or more scenarios can be joined for longer games. The winner of a scenario is determined by Victory Points (VPs), which are awarded for current Production Levels and HQ steps remaining in play, and subtracted for eliminated friendly units.
Each scenario has a VP handicap which is added to / subtracted from Allied VPs, relating VP totals to historical results.
Game Turns
A month consists of a Production segment followed by two Fortnights of play. Production involves adding replacement steps to units in play, and rebuilding destroyed units into 1CV units, or cadres. Control of economic objectives on the map yields Production Points, which are used to "pay" for these builds. Both players perform production simultaneously.
A Fortnight consists of two alternate Player-Turns. The Allies always take the first Player-Turn.
The player taking the current Player-Turn is called the Active Player (the other player is Passive). A Player-Turn usually begins by activating one or more HQ units. Each activated HQ, depending on its current strength, exerts command over all units within a Command Range of 0-3 hexes, enabling these units to move.
Combat
Battles occur when both players have units in the same hex. During combat, units are revealed to the opponent. Battles are not necessarily settled immediately. They sometimes continue for several months until one side retreats or is destroyed. Combat may occur in any ongoing Battle at the option of the Active player, and must occur on the first turn of a Battle. Any combat occurring outside Command Range is fought by the active player at a disadvantage.
A round of combat consists of an exchange of fire: airpower first, then defensive fire, and finally offensive fire. Enemy fire results in unit attrition. Forced retreats (repulses) may occur in cases of River, Air, or Sea Assaults.
Weather
Weather exerts an influence in the game. During most of the year the weather is Dry, however, during midwinter it is Mud, which reduces the command, movement, and combat abilities of both sides. November and February weather can be either Dry or Mud, determined by die roll.
Commentary
In July 1943, as the struggle in Russia reached its climax at Kursk, the Allies had just cleared North Africa and secured control of the Mediterranean, inflicting a mini-Stalingrad on the Axis in Tunisia. Southern (as well as northern) Europe was now exposed to Allied invasion, adding thousands of miles of coastline for the Axis to defend, as Allied air and sea supremacy slowly strangled the Reich.
Marshall and the U.S. Joint Chiefs single-mindedly advocated a concentrated effort on Roundup, the direct assault on northern France planned for 1943. Churchill and the British chiefs, more respectful of German military potency and painfully aware of British manpower limitations, doubted its viability, judging a further "softening up" of the Axis necessary before the final confrontation. This British peripheral strategy was adopted for 1943, and the Allies proceeded into Italy, knocking it out of the war and diverting German forces from both Russia and France.
The Allied invasion of France in June 1944 was probably the most ambitious military operation ever attempted. Though Germany had been retreating in Russia for over a year, Overlord's success sealed the fate of the Third Reich, as Rommel and Von Rundstedt openly admitted.
Allied success in Normandy was not assured, as many assume today. Eisenhower and Churchill, while publicly optimistic, harbored secret fears that were nearly realized when the central 'Omaha' landing narrowly averted disaster. The feared German counterattack never materialized thanks to German command woes and a brilliant Allied deception scheme that fatally delayed the German reaction.
Scenarios
WestFront scenarios are not only interesting stand-alone games, but are designed to be linkable, so that the entire campaign, or any segment of it may be played out. When desired, games can always be continued into the following scenario.
Map Clarifications / Errata
Naples W1 is a forest hex. Its eastern hexside is also forest. A patch sticker is included in the game. Please trim and apply the sticker.
Mallorca belongs to Spain not Britain.
The hexside between Rotterdam and Brussels is a Sea (no land movement).
1.0 The Map
1.1 Orientation
The Axis player sits at the eastern edge of the board, and the Allied player opposite. The east mapedge is the Axis home mapedge, and the west mapedge is the home mapedge for the Allies.
Norway, Sweden, Switzerland, and Eire, are out of play (these nations enter play in EuroFront). Axis units are prohibited from Africa and Britain.
1.2 Hexes
The mapboard is divided into "hexes" which determine the location and movement of units. Partial hexes on the map edges and part-land/part-water hexes are playable. Hexes can be identified by the cities or towns they contain, or by a direction (see compass rose) and distance from a city or town.
1.3 Terrain
Terrain features that affect play are listed below and summarized on the Terrain Effects Chart (back cover). A hex or hexside is considered to be of the terrain type constituting the majority of the land area on that hex or hexside. The terrain of a hex affects movement, combat, and "stacking" (maximum number of units allowed in a hex). Hexside terrain limits movement into (and out) of battles, referred to as the Engagement Limit (6.33).
1.31 Clear
Clear terrain allows unimpeded movement. Engagement limit is two (2) units per hexside, and stacking is four (4) units per hex.
1.32 Forest
Forest terrain does not impede movement. Passive units have double defense: they only lose one step for every two hits in combat. Engagement limit is one (1) unit per hexside, and stacking is four (4) units per hex.
NOTE: Naples W1 is a forest hex, including its eastern hexside.
1.33 Hill
Hill terrain is the same as Forest.
1.34 Marsh
All units (except cavalry) must stop upon entering a Marsh hex. Passive units have double defense in combat. Engagement limit is one (1) unit per hexside, and stacking is three (3) units per hex. All units in marshes fire offensively at SF. Sea invasions into marsh hexes are prohibited.
1.35 Mountain
Mountains halt movement (except cavalry), and provide double defense. Engagement limit is one (1) unit per hexside, and stacking is two (2) units per hex. Sea invasions and paradrops are prohibited into mountains.
Alpine (High Mountain) hexsides (white) are impassable.
1.36 Rivers
Rivers follow hexsides. They do not impede movement, except Engagement limit is one (1). Attempts to initiate battles across rivers, called River Assaults, are subject to Repulse (see 7.5).
1.37 Seas
Seas are impassable except across Straits or by Sea Movement (see 15.2). Dotted sea areas show Shoals, into which sea invasions are prohibited.
1.38 Lakes
Lakes hexes and hexsides are always impassable. Sea Movement is prohibited on Lakes.
1.39 Straits
Straits (shown by crossing arrows) are treated as rivers, except that units crossing must start on one side, and stop on the other.
Normal (2-hex) Supply lines (10.3) are traceable across Straits just as across rivers, regardless of sea control.
Sea Movement, Sea Invasions, and Sea Supply are prohibited through straits if either adjacent land hex is enemy controlled.
EXAMPLE: Sea Movement into or out of Antwerp is impossible if either Ostende or Rotterdam is enemy controlled.
Straits shown in red are Rail Ferry Straits across which rail movement is possible (see 9.23).
1.4 Cities
Cities do not affect movement or stacking (this is governed by the terrain of the hex). There are two types of cities on the map: Major and Minor Cities.
1.41 Major Cities
Large black (or red) dots containing white numbers are Major Cities. All units defending Major Cities have Double Defense (7.3) and DF firepower or better.
EXCEPTION: Rome is an open city, providing no defensive benefits.
Major Cities contribute to the Production Level of the controlling player. Two reinforcement or newly rebuilt cadre units may arrive in a Major City per Production Phase.
Victory Cities. Major cities in black squares (e.g., Paris). Axis reinforcements and rebuilt cadres may arrive in these.
The largest defending unit (only) has Triple Firepower (TF) and receives Fortress Supply (10.5), enabling it to survive indefinitely (at any strength) without a supply line.
1.42 Minor Cities
Small circled dots are Minor Cities. They provide no production or defensive benefit. One arriving reinforcement or newly rebuilt cadre unit may arrive in a Minor City per Production Phase.
1.43 Towns
Small black (or red) dots indicate towns. They have no game function except to help name locations.
1.44 Home Cities
Defined as any Major or Minor City within Home Territory (e.g., Germany for German units). Reinforcements and rebuilt units are deployed in Home Cities (Axis: also in Victory Cities).
1.45 Ports
Coastal cities or towns with an anchor symbol are Ports, used for Sea Movement and Sea Supply (see 15.0).
Large symbols show Major Ports. Small symbols show minor ports. Black port symbols show naval bases, which control the adjacent sea area (see 15.1).
Ports bordering on two sea areas have a double-crossbar port symbol.
1.5 Resource Centers
Resource-producing hexes in the game (e.g., Lille, Metz, the Ruhr) are identified with a pick (mineral) or oil derrick symbol and a production value.
When located in the same hex as a Production City, Resource value is added to the city value. Axis-controlled resource centers produce double their rated production value.
For example: Lille has a City Production of 1, plus a mineral value of 1. This would yield 2PPs for the Allies, but 3PPs for the Axis, since the mineral (but not city) value is doubled.
1.6 Railroads
Principal railroads are indicated by red-dashed lines. These provide a supply source for units, and allow rapid unit redeployment via Rail Movement (9.2).
Rail Entry hexes are map edge hexes where rail lines enter the map.
AARHUS W1 - ODENSE RAILROAD: The hexside between Aarhus W1 and Odense (Denmark) can be crossed by rail movement or by Straits movement (1.39).
1.7 National Boundaries
These are shown by black dashed-dotted lines.
NOTE: The three hexes east of Austria are in Hungary (nation not noted).
1.46 Fortresses
Cities/towns with a hexagon around them (e.g., Malta and Gibraltar) are Fortresses. Combat is always mandatory (except Blitz Combat) when engaging an enemy controlled fortress (see 7.15).
All units defending a fortress have Triple Defense (7.35).
1.8 Front Boundary
Running through eastern Germany is the East Front boundary line. This is ignored in WestFront games.
1.9 Zones and Areas
Along some map edges are non-hexed areas called Zones, containing Districts (circles), Regions (squares) and Routes (lines connecting them).
In WestFront, all Zones are out of play for all purposes. They are used when playing EuroFront.
RED SPANISH CITIES/TOWNS: Red cities/towns are Republican in the EuroFront Spanish Civil War scenario. The red color has no separate function in WestFront.
RESOURCE CENTERS: The rated value of Resource Centers are doubled for the Axis player because they were so crucial to the blockaded, resource-starved German economy.
2.0 The Units
2.1 Nationality
One die-cut adhesive label must be attached to the face of each block. Examine the blocks carefully and cover any minor imperfections with the label. One or two extra blocks are included.
German units are black blocks with gray labels (black labels for SS units). The Axis player also controls 10 Italian units, which have beige/olive labels, and 12 Nationalist Spanish units (yellow labels) and 2 Portuguese units.
Allied units are blue blocks with olive (US), bronze (British), or tan (Commonwealth) labels.
2.2 Unit Types
A unit's type is shown by the symbol in the center of its label. There are seven basic types of unit: Armor, Mechanized Infantry ("Mech"), Infantry, Cavalry, Static, Forts, and Headquarters (HQ). A unit's type determines its Speed and Firepower, as shown in the Table.
2.21 Armor
Armor units move three (3) hexes in dry weather and fire DF on offense and defense. Armor units represent units with large concentrations of tanks.
2.22 Mechanized
Mech units move three (3) hexes in dry weather and fire SF on offense and DF on defense. Mech units represent highly motorized units with extra tank support.
2.23 Infantry
Infantry units move two (2) hexes in dry weather and fire SF on offense and defense. Allied Infantry units are motorized and move three (3) hexes.
2.24 Cavalry
Cavalry units move three (3) hexes in dry weather and fire SF on offense and defense. Cavalry are the only units which can move through mountain and marsh hexes and move two (2) hexes in mud. Only the Axis player has Cavalry.
2.25 Static
Static units are moveable by Supreme Command only (strategically or by normal land movement). They represent low-grade troops with minimal equipment.
Static units have a 0CV cadre step. If engaged alone at zero strength, they are automatically eliminated in combat.
2.26 Fort
Fort units represent heavily fortified troops such as the Atlantic Wall. They move by rail or sea only (supreme command required), but never when engaged. Forts are reduced to cadre strength if moved.
Fort units fire SF on offense and TF on defense. They have triple defense which also protects smaller friendly units in combat: when a fort unit is the largest unit in a battle it absorbs 3 hits before losing a step (otherwise the largest unit takes hits normally).
If unsupplied, Fort units lose TF and triple defense, but can only be reduced to 1cv (not eliminated) by supply attrition. Only 1 fort unit can occupy a hex.
2.27 Headquarters
HQ units move two (2) hexes in dry weather and have no firepower. Their purpose is to command the movement of other units (see 5.0).
SPEED: The maximum number of hexes a unit can move per movement phase.
FIREPOWER: The relative offensive effectiveness of the unit in combat. Units with Double Firepower (DF) cause enemy losses twice as fast as units with Single Firepower (SF).
COMBAT VALUE: The "CV" of a unit not only relates to numbers, but also to morale, leadership, doctrine, etc. An eliminated unit has not been "wiped out to the last man", but has lost military cohesion.
UNIT SIZE: German units are corps, which at full strength had over 50,000 men. Italian units are armies of about double that size. Allied units are corps. They averaged almost 50,000 fighting men plus almost as many support troops. "Mech" units represent highly motorized units with extra tank support. "Static" units are low-grade troops with minimal equipment.
2.3 Combat Value (CV)
Around the unit symbol of each unit label is a series of numbers (usually 4:3:2:1) representing strength or Combat Value (CV) of the unit.
Units normally stand upright with the labels facing the owning player. The current CV of each unit is indicated by the number on the top edge. When units are engaged in combat, they are tipped forward to lie flat, with the current CV remaining on the "top" edge from the owning player's point of view.
2.4 Step Reduction
Most units can have 1-4 possible levels, or "steps" of CV. Units can lose CV in combat and regain CV by production. When units sustain hits, they are rotated counter-clockwise so that their new (lesser) CV is on the "top" edge. Units reduced below their lowest CV step are removed from play, but can be rebuilt as Cadres (11.42).
GERMAN SS CORPS: Because of Hitler's favoritism, SS units always received the first, most, and best equipment. This is simulated by increasing the firepower of SS units, but keeping their building step cost the same as regular units.
FORT UNITS: These units represent forces manning heavy fortifications like the Atlantic Wall.
STATIC UNITS: These represent corps detachments of low-grade auxiliary or training troops used for coastal or home defense.
SPAIN AND PORTUGAL: Spanish and Portuguese units appear in play only if a Declaration of War is made upon them. See 16.4.
2.5 Identity Codes
In the lower left-hand corner of each unit label (at full-strength orientation) is a historical identification number. German, and Allied units are Corps ("84" means "84th Corps"). Italian and minor units are Armies (or equivalent).
In the upper right corner of most units, a setup code is printed in a deliberately subtle typeface. This information is relative to the start of the war in 1939 and is used when playing EuroFront.
A number code represents the month of the war in which the unit arrives in the game. A single letter code indicates units which start 1939. The letter corresponds to a location on the EuroFront order of battle cards. A two letter code in ALL CAPS, refers to an event during the game, such as FR code for French Revolt (see 16.31).
Although the setup codes are used primarily in EuroFront, they can often be used as a short-cut to setting up WestFront scenarios because they determine which units are future reinforcements.
2.6 Special Units
2.61 Amphibious
Amphibious units have enhanced sea invasion capabilities and attached beachheads (see: 15.5). They move and fight like Infantry but have a higher cadre cost.
2.62 Mountain
Mountain units fire DF in mountains. They move like Infantry but have higher costs.
2.63 Paratroop Corps
Paratroop units have special air movement capabilities (see: 14.0). They fire SF offensively and DF defensively.
2.65 SS Units
German SS units (black labels) have enhanced firepower: the SS Armor unit fires TF; the SS Mech unit fires DF offensively / TF defensively. SS mountain units fire TF in mountains. They have normal building costs for their type, but only one SS step may be rebuilt per Production.
2.66 Italian Units
Italian units are Restricted to Italy (including Sicily and Sardinia), Yugoslavia, (and adjacent hexes). They may Surrender (16.1) once any Italian ports are Allied controlled.
2.67 Tito
The Allied Tito unit can appear suddenly in Yugoslavian mountain hexes, and has special powers within that country (see 16.32).
2.68 Volunteers
Italian and French volunteers can arrive to fight on the Allied side under certain specified conditions. See 16.31 & 16.1.
3.0 Starting Play
3.1 Scenarios
3.11 Six Month Scenarios
WestFront includes four individual scenarios, each based on 6-month intervals of the overall war. Summer scenarios run from June through November; Winter scenarios run from December through May. Playing time is 3-4 hours, winter scenarios being shorter. At the end of every scenario, Victory conditions (17.0) are checked for a result.
3.12 One Year Scenarios
Two consecutive WestFront scenarios can be played in succession (playing time: 6-8 hours). Simply continue playing the game into the following scenario under the following conditions:
- Ignore Starting Forces and Startlines given for the next scenario. Continue using current forces and positions.
- Note any changes in Basic Production PPs. Changes are shown by the bracketed PP number given. For example, [+10] means add 10 PPs to that player's Production Level.
- Note any changes in Air Firepower, and scenario special rules that apply.
- Do Production for the 1st month.
- Continue play into the new months, checking for Victory as usual at the scenario end.
3.13 Extended Games
Due to the modular nature of WestFront scenarios, if a game ends in a Marginal Victory, or is just too interesting to quit, players can always continue the game by following the same procedure as for One Year games.
3.14 Campaign Game
The full campaign can be played out. Play each Summer and Winter scenario in sequence, observing the rules noted in 3.12. At the end of each scenario, players calculate Victory Points, and declare a winner if a Decisive Victory (only) has been scored. Otherwise, continue play.
3.2 Starting Play
3.21 Initiative
In all scenarios, the Axis sets up first, but the Allies move first. To save time, both players may deploy simultaneously, but Allied player has the last adjustment.
IMPORTANT: in the first month of a game, Production is omitted because it is factored into the Starting Forces given.
3.22 Startlines
A mini-map included in the scenario description shows the Startline. Summer Startlines are printed on the mapboard and labeled by year ("S44").
Land hexes immediately on either side of the applicable Startline are Axis and Allied Frontline hexes, respectively. To begin a scenario, players must occupy each Frontline hex with at least one unit. Remaining units are deployed in supplied hexes, according to the Deployment option chosen (see below).
3.23 Free Deployment
Consulting the scenario Starting Forces tables, players select their starting forces from the available countermix. Starting Forces are specified by a number of units and a total CV for each unit-type. That is, if a scenario lists Armor: 12 units at 38CV, the player can choose individual armor unit strengths, as long as there are 12 armor units totaling 38CV.
IMPORTANT: German SS units cannot start a scenario at greater CV than the average German unit of that type.
Surplus units in the currently available countermix (i.e., excluding future reinforcements) begin the scenario eliminated but can be rebuilt (and are counted against VP totals if not rebuilt). Reinforcement units that enter play in a specific month are also listed (first month reinforcements begin play in a valid arrival location -- see 11.6).
3.24 Historical Deployment
The Husky (S'43) and Overlord (S'44) scenarios have optional historical deployments with specified unit strengths and locations. City units must be set up in or adjacent to that City, and Nation units within that nation.
3.25 Semi-Historical Deployment (recommended)
In a Semi-historical deployment, unit location assignments are somewhat relaxed, allowing greater fog of war. Historical unit CVs are still used, but North units (see OB cards) may deploy freely within that area (France, Germany, Czechoslovakia and northwards), and South units likewise in the South (Iberia, Italy, Austria, Hungary, Yugoslavia and North Africa).
SCENARIO RECOMMENDATIONS: We recommend that new players familiarize themselves with the system by playing the "Husky" introductory scenario. It uses only a few units and a small part of the board, but incorporates most of the rules concepts.
Two beginning players might also consider playing Summer '43: Husky-Avalanche. It involves relatively equal forces and straight-forward strategies.
An experienced player teaching a beginner should play the Axis in W'44. The rookie will get a lot of instant gratification, but the game will still be challenging for the veteran player. Most importantly there will no further invasion and opposed landings in W44, the hardest part to master in this game as the Allied player. For beginners, using Historical Deployments can provide a useful guide to a reasonable, balanced Axis setup (which otherwise can be a somewhat overwhelming initial decision).
4.0 Sequence of Play
4.1 Game Month
Game scenarios are subdivided into six Months of play. Each Month begins with Production, followed by two Fortnights of play, each consisting of one Player-Turn per side.
4.2 Production
Both players execute Production simultaneously, in the following order:
- Determine Production Level
- Add Replacement steps to units in play
- Build and deploy Cadres
- Deploy any Reinforcements
4.3 Weather Determination
Certain months have variable weather. During these months, each Fortnight begins with a random weather roll (12.0). Weather affects command, movement, and combat.
4.4 Player-Turn
The Allied player has the first Player-Turn of each month.
The player taking a turn is termed the Active Player; the opponent is the Passive Player. Each Player-Turn is divided into Phases which must be played in sequence.
4.41 Command Phase
To begin a Command phase, the Active player activates (turns flat, face-up) any number of HQs desired.
NOTE: In the event a Declaration of War is to be made on neutral Spain or Portugal, this must be done before activating any HQs.
HQs may optionally be activated as Blitz HQs (place BLITZ marker upon activation). Blitz HQs expend two steps to command second (Blitz) Movement and Combat phases in that Player-Turn.
4.42 Movement Phase
Any units within Command Range (5.3) of an active HQ can move one to three hexes, depending on their speed and the terrain entered. Units not under command may not move. All movement must be completed before beginning the Combat Phase. Following movement, HQs may Mobilize (5.41) and Deactivate, or remain active for combat (5.42).
If the Supreme HQ is active, Strategic Rail or Sea Movement (6.53) may occur. The Supreme HQ may also command normal movement of units not otherwise under command (6.52).
4.43 Combat Phase
At the Active Player's option, a round of combat may occur in any or all existing Battles. Combat must occur in all battles initiated this Movement Phase and in certain other situations. Battles may be fought outside the Command Range of any active HQ, but are fought as Unsupported Combat, only inflicting half losses on passive units, while suffering full losses from enemy fire.
The Active Player selects Airstrike hexes (combat required), then selects all other Battles where combat is desired. All units in those battles are then revealed. Active Battles are resolved in any order (Active Player's choice).
Combat Round steps:
- Active Player rolls for Airstrikes (if any). Losses are applied.
- Passive Player rolls for Defensive Fire. Losses are applied.
- Active Player rolls for Offensive Fire. Losses are applied.
- Active HQs (except Blitz HQs) are Deactivated (lose a step and return upright). Blitz HQs lose a step and remain activated for the Blitz phases to follow.
4.44 Blitz Movement Phase
All units under command of a Blitz HQ (5.7) can move again up to their normal movement range (except those just moved strategically). The HQ itself may not move. Blitz Movement must be completed before beginning the Blitz Combat Phase. Blitz HQs may now Mobilize and Deactivate if desired.
4.45 Blitz Combat Phase
In battles within Command Range of an active Blitz HQ (5.7), another supported Combat Round can be resolved. Unsupported Combat is allowed in any battle during a Blitz Phase. After battles are resolved, Blitz HQs Deactivate in their current hex.
4.46 Supply Phase
The supply status of enemy units (only) is examined. Each unsupplied unit is immediately reduced by one step. Friendly units are not affected. See 10.0.
4.47 Politics Phase
Revolt (16.3) and Surrender (16.1) can occur during the Politics phase.
THE GAME MONTH
PRODUCTION — Determine Production Level; Add Replacement steps to units in play; Build and deploy Cadres; Deploy any Reinforcements.
FORTNIGHT I — Weather Determination; Allied Player-Turn (see below); Axis Player-Turn.
FORTNIGHT II — Repeat Fortnight I Procedure.
THE PLAYER-TURN
COMMAND PHASE — Declaration of War; Activate HQs.
MOVEMENT PHASE — Move units under command; Mobilize HQs (optional); Sea/Invasion Movement Interdiction (passive die-roll).
COMBAT PHASE — Target Airstrikes; Select Active Battles; Resolve Each Active Battle (Offensive Airstrike; Defensive Fire; Offensive Fire); Deactivate HQs (reduce Blitz HQs).
BLITZ MOVEMENT PHASE (if any) — Repeat Movement Phase.
BLITZ COMBAT PHASE (if any) — Repeat Combat Phase.
SUPPLY PHASE — Paradrop Linkup check (if applicable); Sea/BH Supply Interdiction (passive die-rolls); Enemy Unit Supply Attrition.
POLITICS PHASE — Revolt/Surrender.
5.0 Headquarters
5.1 Headquarters
HQs are specialized units with the unique ability to mobilize friendly forces and support them in combat. The "strength" of HQ units is called Command Value, denoted in Roman numerals (e.g. III). HQs lose strength by exercising command (and can also take losses from combat and supply attrition), and can be rebuilt by production.
The Allies have 5 "Army Group" HQs, each with maximum CV of III. The Axis has 5 "Army Group" HQs, mostly with maximum CV of II. The Axis also has a Supreme HQ of III CV maximum (see below), and the Allies have two of these.
HQs move, defend hexes, and absorb combat losses like other units, but do not fire in normal ground combat. HQs can never voluntarily engage enemy units.
HQs have a "Ø" step. If an HQ falls to Ø strength, it remains in play with a Command Range of zero, meaning it can command only units located in its own hex. If it loses that step, it is eliminated but may be rebuilt as a "Ø" step cadre.
5.2 HQ Activation
During the Command Phase, the Active player may activate one, some, or all HQs by revealing them (tipping them forward, face-up). HQs engaged in Battle Hexes may activate normally.
Inactive HQs remain upright in hidden mode, and can move like any other unit if under command of another activated HQ.
5.21 Deploying HQs
When activating, an HQ may Deploy (move one hex) but only into a Friendly hex (ownership at the beginning of any Phase determines hex control throughout that Phase, see 8.0).
EXCEPTION: HQs cannot Deploy in Mud weather. They can only activate in their current location.
Deploying HQs cannot Engage. Engaged HQs can Disengage when they deploy, but must take immediate Pursuit Fire if the deploy move is a Retreat (no friendly units remain in the battle - 6.42).
Deploying HQs can temporarily overstack, but stacking limits must be observed when the upcoming Movement Phase is completed.
HQ ACTIVATION: The HQ II unit deploys 1 hex (to Paris) and activates. It has Command Range 2 hexes. All units within 2 hexes are under command and may move, except unit X since the enemy hex blocks command range to it. All friendly units under command may move. If the HQ doesn't mobilize, it will give combat support to all units within range.
5.3 Command Range
Activated HQs have a Command Range (in hexes) equal to their Command Value (CV). Command Range cannot be traced through impassable hexes/hexsides or enemy-controlled hexes (hex control as determined at the beginning of a Phase, lasts throughout that phase). Only friendly units within Command Range (termed "under command") are able to move during a Movement Phase.
GERMAN HQ UNIT: The Allies have more powerful HQs than the Axis.
5.4 HQ Roles
After commanding movement, active HQs may be used in either a Mobile or Combat role, depending on when they deactivate.
5.41 Mobile HQs
After commanding movement, Mobile HQs Deactivate (see below) and then take their normal move of 1-2 hexes (this is in addition to the one hex moved to Deploy). Being deactivated during the Combat Phase, they cannot provide combat support.
MOBILE HQS: Mobile HQs are most useful in retreats, exploitation, and general advances, where firepower is secondary.
5.42 Combat HQs
Combat HQs forego the option to mobilize. They remain active through the Combat Phase to provide Airpower and Combat Support to any units within their command range. Units without combat support fight at half-effectiveness (see: 7.4). After combat, Combat HQs deactivate in their current hex.
COMBAT HQS: Combat HQs are preferred in pitched battles where causing enemy casualties or obtaining a breakthrough is the object. Combat HQs need not be the same HQs that commanded the movement of units. Any active HQ within command range of friendly units can provide combat support.
5.43 Deactivating HQs
When an HQ finishes commanding, it is Deactivated by reducing it 1CV and returning to upright (hidden) mode. Deactivated HQs can not move again that turn (even in Blitz Movement).
ACTIVATING Ø CV HQS: Activating an HQ Ø will automatically eliminate the HQ on deactivation. Given the high cost of rebuilding HQ cadres, only a desperate situation would warrant this tactic.
RAILING HQS: Players can move an HQ by rail under the command of the SHQ. It cannot activate in the same turn it moves (Movement follows command).
5.5 HQ Airpower
All HQs have an Airpower capability, equal to their current CV. During combat, each active HQ can conduct one Airstrike into one Active Battle within Air Range (equal to the HQs Command Range, but unaffected by terrain or hex control). See 13.0, Airpower, for details.
HQ AIRPOWER: The attached Airpower of HQs gives them powerful offensive capability, but only when employed in a Combat Role.
5.6 Supreme HQs
The Axis has one Supreme HQ (SHQ): OKW. The Allies have two: AF and SHAEF. They do not function like other HQs.
SUPREME HQS: Supreme HQs are useful for commanding "oddball" movement of units in remote fronts or rear areas and are essential for strategic movement of units by rail or sea.
5.61 Supreme Moves
Supreme HQs have two Supreme Moves per CV, hence a SHQ III has six (6) Supreme Moves. These moves can be used to move units that are located anywhere on the mapboard or to move units strategically by Rail or Sea (see 6.5).
5.62 SHQ Mobilization
After commanding movement, Supreme HQs may Mobilize or remain active to command an Airstrike. SHQs can mobilize using normal or strategic (rail or sea) movement (this does not count against their quota of "supreme moves"). Mobilizing a SHQ further using additional Rail or Sea Moves is possible by reserving Supreme Moves for this.
5.63 SHQ Airstrikes
Supreme HQs that forego Mobilization can initiate a "Strategic Airstrike" at double Air Range. That is, a Supreme HQ III has Air Range of six (6) hexes. Airstrike firepower (13.14) is the same as other HQs.
5.64 SHQ Combat Support
Supreme HQs cannot provide combat support. Units they move must receive support from other Active HQs or fight unsupported in combat.
5.65 SHQ Invasions/Paradrops
SHQs can command invasions and paradrops. SHQ Paradrop Range is the same as SHQ Air Range. SHQ Invasion Range is normal.
5.66 THQs (Spanish)
A THQ is a minor SHQ. In WestFront only the Spanish have a THQ (JDN).
THQs command only 1 supreme move per CV and airstrike range is equal to CV (not double).
THQs cannot command invasions or paradrops, and they always cost only 5 PPs per step/cadre. THQs, like SHQs, do not provide combat support.
5.7 Blitz Command
An HQ can be activated for Blitz Command, identified with a Blitz HQ marker. Blitz HQs are committed to expending two steps in order to command a second movement and combat phase in the same Player-Turn.
A Blitz HQ functions like any other HQ, except it must remain active (no mobilization) throughout the first Movement and Combat phases, so as to be active for the upcoming Blitz phases.
IMPORTANT: Supreme HQs cannot Blitz.
After the first Movement and Combat Phases are completed, a Blitz HQ is reduced one step and the Blitz marker is removed. The HQ may not move at this time. It remains active at reduced strength to command during the Blitz Movement Phase. All units within its (now reduced) Command Range are eligible to move again.
Blitz HQs may Mobilize after Blitz Movement, or remain active to provide Airpower and Combat Support during a Blitz Combat Phase.
Unsupported Combat is allowed in any battle during a Blitz Phase (but at least one Blitz HQ must be activated for Blitz Phases to occur).
Blitz HQs are deactivated by reducing them a second step and returning them to upright (hidden) mode.
BLITZING: Blitz HQs allow any breakthroughs obtained in combat to be exploited before the opponent can react. If no breakthrough is obtained, a second combat phase may still be obtained, so all is not lost.
It is important to remember that while an HQ can be worn down rapidly (expending up to 4 command steps per month by Blitzing in each turn), it can only be rebuilt one step per month, like any other unit.
5.8 HQ Disruption
In Mud weather, all HQs are Disrupted and cannot deploy.
EXCEPTION: OKW SHQ in Berlin and Allied SHQs in London are exempt from weather disruption.
Disrupted HQs function at one CV less than their actual value. That is, a disrupted HQ III has an effective Command Range of 2 hexes, and only 2CV of Airpower. A disrupted HQ Ø has no command ability at all.
6.0 Movement
6.1 Movement Procedure
All movement is commanded by activated HQs. All units under command (within Command Range of an active HQ) can move. Other units may not move, unless they are commanded by a Supreme HQ.
Units are moved individually, one hex at a time, for 1-3 hexes, depending on their Speed, weather conditions, and terrain crossed. All units except cavalry must stop upon entering a mountain or marsh hex.
Units can only move once per Movement Phase. Units that move strategically cannot move again during the Blitz Movement.
Attacking units should not be revealed as they engage. This means both Attacking and Defending units will be upright at the beginning of the Combat Phase, serving to identify this as a newly-initiated battle (which requires mandatory combat).
Merely adding additional units to an existing battle (hexside and stacking limits must be observed) does not make combat mandatory.
6.2 Stacking Limits
Any number of units may pass through a hex during movement, but the Stacking Limits below must be observed at the end of a movement phase.
Any number of units may also pass through a hexside, except when entering or leaving a Battle Hex.
6.21 Terrain Stacking
Terrain determines the stacking limit of a hex.
- Clear: 4 units
- Forest: 4 units
- Hill: 4 units
- Marsh: 3 units
- Mountain: 2 units
In Battle Hexes, both players may occupy the hex up to the limits noted.
6.22 Overstacking
Players may not voluntarily overstack hexes.
EXCEPTION: HQs may temporarily overstack when deploying, as long as stacking limits are observed after movement.
If a hex becomes overstacked due to a Repulse (7.51), units in excess of stacking limits are Unsupplied (owner's choice of unit must lose 1 cv during the next Enemy Supply Phase).
6.3 Engagement
6.31 Engaging
A unit that enters a hex containing enemy units is Engaging. Units that engage must stop movement in the hex. Units that enter a hex containing only enemy units are initiating a new battle, referred to as Attacking.
6.32 Disengaging
Whenever a unit voluntarily leaves a Battle Hex by normal commanded movement, it is Disengaging. Disengaging is never forced by combat (but see Repulses, 7.51).
Disengaging units may only move from the Battle Hex directly into an adjacent Friendly hex, never into an Enemy hex or a Disputed hex. Units are then free to complete their move as usual except they may never re-engage enemy units that same Movement Phase.
If an engaged unit has no adjacent Friendly hexes to disengage into, it must remain in the Battle.
TERRAIN & MOVEMENT: In most cases, hex terrain has no effect on the movement of units. Exceptions are Mountain and Marsh, where a unit (except cavalry) must stop even if the hex is not defended. Hexside terrain (unless impassable) has no movement effect except when a hex is defended, when hexside limits apply.
DISENGAGING: Units in combat are engaged and limited in their ability to disengage (leave the battle hex). Note that after a breakthrough and exploitation, for example, which leaves a friendly unit controlling hexes to the enemy rear, it may be possible to "disengage" units from an adjacent battle directly forward into such controlled hexes.
6.33 Battle Hexsides
There is a limit to the number of units that can enter or leave a Battle across the same hexside in one Movement Phase (there is no limit on movement across non-battle hexsides).
A maximum of two units may engage/disengage across a Clear terrain hexside per Movement Phase. Only one unit may engage/disengage across any other hexside terrain type in one Movement Phase.
Both engaging and disengaging contribute toward the hexside limits noted. That is, if a unit disengages through a forest hexside, no other unit can engage through the same hexside during that movement phase.
6.4 Retreats
6.41 Rearguards
A player wishing to Disengage all friendly units from a battle must designate one unit as the Rearguard, which is then subject to Pursuit Fire from all enemy units in the battle.
The Rearguard must remain in the battle hex during movement, being placed on top of the enemy units to identify it as such. After all other friendly movement is completed, Pursuit Fire is made on the Rearguard by enemy units in the hex. The Rearguard (assuming it survives enemy pursuit) then Disengages and completes its movement normally.
NOTE: at least one unit must remain in a battle throughout a Movement Phase to avoid a Retreat. Disengaging all units from a battle while Engaging with new units constitutes a Retreat and an Attack (newly-initiated battle with forced combat). This may also change who is the Original Defender in the Battle.
6.42 Pursuit Fire
In Pursuit Fire, each pursuing unit rolls one die per CV, as for normal combat fire. However, the Firepower of a pursuing unit does not depend on its type, but on its relative speed (under current terrain and weather conditions) when compared to the Rearguard unit.
Faster pursuing units have Double Firepower (DF). Equally-fast pursuing units have Single Firepower (SF). Slower pursuing units do not fire at all. Each 'hit' scored reduces the unit by 1CV.
All defensive advantages due to terrain, such as Double Defense in Forests, apply to pursuit fire on the Rearguard. Pursuit firepower is not affected by Weather or Terrain.
Elimination of a Rearguard has no effect other than loss of the unit.
NOTE: Complete all other movement before resolving Pursuit Fire.
PURSUIT FIREPOWER
| Pursuer | Firepower |
|---|---|
| Faster | Double (DF) |
| Equal | Single (SF) |
| Slower | None |
REARGUARDS: Armor, Mech, and Cavalry units make ideal rearguards, as their superior speed makes them relatively immune to Pursuit Fire. They also make ideal pursuers, for the same reason. In Mud, cavalry excels in pursuit.
6.5 Supreme Command
6.51 Supreme Moves
Supreme HQs do not function like other HQs. They do not have Command Range, they cannot provide Combat Support, and they cannot Blitz.
Instead, activated SHQs have two (2) Supreme Moves per CV (e.g., a SHQ III has six such moves), which can be used to move friendly units that are located anywhere on the map. The commanded units need not be in supply.
6.52 Supreme Land Moves
Supreme Moves can be used to command units to make normal land moves, including Engaging, Disengaging, and Retreating. As usual, each unit can only be moved once per Movement Phase, but units making Supreme land moves (not rail) can move again during a Blitz Movement Phase if in Command Range of a Blitz HQ.
6.53 Strategic Movement
Strategic Movement is special high-speed movement expending one or more Supreme Moves to move a unit by rail or sea.
- RAIL: units can make one Rail Move of up to 10 hexes (9.2) per Supreme Move.
- SEA: units can make one Sea Move within the same sea area (15.2) per Supreme Move.
Units can make multiple Rail or Sea moves by expending one Supreme Move per Strategic Move, but Rail and Sea moves cannot be combined in the same Turn. Units moved strategically cannot move again that Turn (even under Blitz Command).
Units can never engage by Strategic Movement. They can disengage but not Retreat by Strategic Movement.
SUPREME COMMAND: Supreme HQs may command units to move and attack by land movement, but remember they do not provide combat support to ground units (although they do have enhanced airpower range). Supreme HQs can move Unsupplied units, even units that have been "pocketed". Normal HQs, unless they too are inside the same pocket, are usually unable to trace command to enveloped forces. A die should be used to record the expenditure of Supreme Moves as they will often be intermixed with normal HQ moves during movement.
SUPREME MOVES: The distinction between Supreme Moves and Strategic Moves is important. A Supreme Move is any move commanded by an SHQ, which can be a strategic rail or sea move or simply a normal move commanded by the SHQ. A Strategic Move is always a Rail or Sea move.
ACTIVATING SHQS: Commanding Supreme Moves twice per month (in both Fortnights) is possible but expensive. The Supreme HQ must be activated and reduced by 1cv each time, but can only be built up one step in the Production turn.
7.0 Combat
7.1 Battles
7.11 Battle Hexes
Battles begin when the Active player moves units into a hex containing only enemy units. This is termed Attacking. A hex containing friendly and enemy units is defined as a Battle Hex.
7.12 Original Attacker & Defender
The player who initiates a battle is termed the Original Attacker for as long as it lasts. The other player is the Original Defender. The distinction between Original Attacker and Original Defender is very important because the latter maintains control of a Battle Hex for supply and other purposes until Retreat or elimination. To maintain this distinction, units of the Original Defender are always turned upright in the Battle Hex after combat, while those of the Original Attacker always remain revealed (face-up).
7.13 Assigning Airstrikes
HQs have attached airpower (see: 13.0). At the beginning of a Combat Phase, each active HQ can assign one Airstrike to any battle within its Air Range. This must be done before battle activation (while the Original Defender is still upright and hidden). No more than one Airstrike can be allocated to a Battle Hex in a Combat Phase.
Airstrikes are allocated by placing an Airstrike marker in the desired Battle Hex. The marker must have the same value as the Airstrike CV.
7.14 Active Battles
Active Battles are those in which combat will occur this Combat Phase. The active player indicates which battles are active by tipping forward (face-up) all unrevealed units so that their current CV faces the opposing units (see diagram). Generally, combat is optional. The Active Player may activate none, some, or all battles, keeping in mind that those fought beyond Command Range of an active HQ are Unsupported Combat. See: 7.4.
7.15 Mandatory Combat
In three cases, combat is mandatory, and such battles must be activated and fought.
- New Battles: where a new battle is initiated by an Attack during the preceding Movement Phase, at least one round of combat must be fought. Such battles are automatically active. Moving new units into an existing battle does not force combat, but they must be revealed if they belong to the Original Attacker.
- Airstrike Battles: allocating an Airstrike to a battle makes combat mandatory (friendly ground units must be present).
- Fortress Battles: in Gibraltar or Malta, combat is mandatory for the Original Attacker (but optional for the Original Defender). Fortress battles must be activated every Player-Turn of the Original Attacker, even if this results in Unsupported Combat (no hits possible).
EXCEPTION: Fortress combat is not mandatory during a Blitz Combat Phase.
ACTIVE BATTLE: Armor 3cv and Mech 4cv engage an enemy Infantry 3cv unit.
SINGLE/DOUBLE/TRIPLE FIRE: The terms Single Fire, Double Fire and Triple Fire are sometimes confusing. Firepower is not the number of dice rolled (unit CV determines this) but rather the die roll number(s) which cause hits (SF hits on 6, DF hits of 5 and 6 and TF hits of 4, 5 and 6).
ATTACKING & ENGAGING: A clear distinction must be drawn between engaging and attacking. Entering/leaving a battle hex is engaging/disengaging. Attacking is engaging into a new battle.
ORIGINAL ATTACKER & DEFENDER: A clear distinction must be drawn between the Original Attacker and Original Defender and the "attacker" and "defender" in a combat round. The Original Defender controls the Battle Hex (for command and supply purposes) throughout the battle. When the Active Player, the Original Defender in a battle may wish to counterattack and initiate combat that Turn, but this would give the Original Attacker the benefits of Defensive Fire and terrain defense, as per 7.23. For example, if the Original Defender in a Major City elects to activate a battle, the Original Attacker gets Defensive Double Fire and has Double Defense. The Original Defender has normal Offensive Fire and sacrifices the benefits of Double Defense for that Combat Round.
7.2 Combat Rounds
7.21 Combat Resolution
A "round of combat" is executed in each Active Battle, on a battle-by-battle basis, in any order desired by the Active Player (north to south works well). After the Combat Round is completed, the Original Defender's units in that battle should be turned upright again.
7.22 Sequence of Fire
A round of combat is resolved as follows for each Active Battle:
- Active player executes an Airstrike (if any), and losses are applied.
- Passive player executes Defensive Fire, and losses are applied.
- Active player executes Offensive Fire, and losses are applied.
- Original Defender's units are returned upright, signaling the end of the Combat Round for that battle. The next Active Battle (if any) is then resolved.
7.23 Counter-Attacks
Battles can continue from one Player-Turn to another. Each Player-Turn, the Active Player can choose to Activate the battle or not. If the battle is activated, terrain benefits apply to the passive player for that Combat Round.
EXCEPTION: Fortress Terrain benefits apply only to the Original Defender.
EXTENDED BATTLES: Battles are usually not resolved in one Combat Round. They often extend over several Player Turns, even over several months. Players must learn to manage a succession of battles along the front over time, feeding reinforcements into critical battles, retreating before collapse occurs in others, keeping reserves to plug holes in the front, and counter-attacking where the enemy is weak.
7.3 Combat Fire
7.31 Executing Fire
To execute Airstrike, Defensive, or Offensive Fire, each unit "fires" once, in any order desired by the owning player. To "fire" a unit, roll one die per CV (roll 3 dice for a 3CV unit). Depending on the unit's Firepower, certain numbers rolled will score "hits", reducing the CV of enemy units in the battle.
7.32 Firepower
Units rated SF (Single Firepower) score "hits" on 6. Infantry and Cavalry normally fire SF.
Units rated DF (Double Firepower) score "hits" on 5 and 6. Armor normally fires DF. Hence a 3CV Armor unit rolls three (3) dice and each 5 or 6 rolled would score one hit.
Terrain can modify a unit's Firepower.
- All units in Marshes fire just SF on Offensive Fire.
- All units in Major Cities fire at least DF on Defensive Fire.
- Mountain units fire DF in Mountain terrain (except in mud).
- The largest defender (Original Defender only) of a Fortress fires TF.
Airstrikes can be SF, DF, or TF, depending on side and scenario (13.14).
7.33 Applying Losses
For every "hit" scored, an enemy unit is normally reduced by one step (1CV). Active units in combat always apply full losses. Defending (passive) units in combat may only have to apply partial losses because of terrain and other benefits (see: 7.34, Double Defense).
Losses must be applied to the strongest (highest CV) units present at the instant of fire. The owning player may choose which of several units of equal CV will take a loss. When a 1CV unit (or Ø level HQ) takes a hit, it is eliminated and removed from play, but may be rebuilt as a Cadre during Production (11.0).
7.34 Double Defense
In Forest, Hill, Marsh, or Mountain terrain, in Major Cities, and in any terrain during Mud turns, defending (passive) units have Double Defense, meaning they take only a 1CV loss for every two hits scored in the Combat Round.
"Half-hits" carry over from Airstrikes to normal combat, and from one unit's fire to another within the same Combat Round. A unit which has taken a half-hit must take the next half-hit to complete the full hit. Leftover half-hits at the end of a Combat Round are forfeit.
7.35 Triple Defense
In Fortresses (Gibraltar or Malta), passive units of the Original Defender (only) have Triple Defense (i.e., against enemy Airstrikes and Offensive Fire). This means they take a 1CV loss for every three hits. A unit which has taken a third-hit must take the next third-hit until a full hit is applied. Leftover partial hits at the end of a Combat Round are forfeit. Triple Defense also occurs when defending units with Double Defense are attacked by units with Unsupported Combat (7.4) and when a Fort unit is the largest defending unit in a battle.
COMBAT EXAMPLE: A battle is initiated in Clear terrain between three defending Allied units (Armor 3cv, Infantry 3cv, and Infantry 2cv) and two German units (Armor 4cv and Mech 4cv). Since this is a new battle, combat is mandatory.
AIRSTRIKE COMBAT: The Axis player has a 2cv Airstrike at SF. This is resolved first. Two dice are rolled, and assuming a roll of <3, 6>, one hit is scored. The Allied player must take that hit from a 3cv unit, and naturally chooses the 3cv Infantry which is reduced to 2cv.
DEFENSIVE FIRE: The Allied player now fires all three defending units. The Armor 3cv (DF) scores one hit <2,3,6> and the two Infantry 2cv units score one hit <2,4> and <3,6>. The first hit is taken from the Mech 4cv, and the second from the Armor 4cv.
OFFENSIVE FIRE: The Axis, which has combat support from an active HQ in range, now fires. The Armor 3cv scores two hits at DF <3,5,5> and the Mech 3cv misses at SF <3,4,5>. The first hit must be taken from the Allied Armor 3cv (the strongest unit) and the second can be taken from any of the units which are all at 2cv.
This ends the combat phase. The three Allied units (Armor 2cv, Infantry 2cv, and Infantry 1cv) are now turned upright to signify they are the Original Defenders.
DOUBLE DEFENSE: Only passive units in a Combat Round have the benefit of Double or Triple defense. Example: The Axis player initiates a battle for the city of Lille. Combat is mandatory that round. The Allied player has Defensive Fire and Double Defense. In the next Player-Turn, the Allied player adds two more units to the hex and chooses to counter-attack. In this round, the Axis player has Defensive Fire and Double Defense (not the Allied player).
RECORDING HALF-HITS: A one-eighth rotation of a unit can serve to temporarily indicate a "half-hit" taken.
APPLYING LOSSES: As a general rule, all hits must be applied if possible. This means if a fort and infantry are both at 1 CV and a 1 hit is applied, it must be taken by the infantry.
7.4 Unsupported Combat
During a Combat Phase the Active Player may elect to have combat in a battle outside the Command Range of an active HQ. This is termed Unsupported Combat. In such battles, defending (passive) units have Double Defense.
Unsupported Combat versus units which already have Double Defense results in Triple Defense for the defending (passive) units.
Unsupported Combat is allowed during a Blitz Combat Phase, and it is mandatory when Blitzing units attack outside command range.
Unsupported Offensive Combat against Fortresses is ineffective, but still mandatory. No offensive hits can be scored, but the largest defender still has TF for Defensive Fire.
IMPORTANT: A player can engage in Unsupported Combat without activating any HQs in a turn. Obviously, no movement can occur, but a round of unsupported combat in battles of the active player's choice is still possible and the supply status of enemy units is checked.
7.5 Assaults
When all units attack (initiate a battle) from across a river, from the sea (Sea Invasion) or from the air (paradrop), they are conducting an Assault. In the initial combat round, Repulse is possible, forcing one or more attacking units to return to the hex they attacked from. However, If even one attacking unit is not conducting an Assault, there is no possibility of Repulse.
River/Sea/Air Assault battles should be marked during movement, so that a special procedure is followed in combat.
7.51 Repulses
Assaults are resolved during Defensive Fire. After any Airstrike is resolved, defending units fire, and score hits normally, but certain low numbers rolled also Repulse attacking units (see: Repulse Table).
For example, in a River Assault, each '1' or '2' rolled Repulses one attacking unit, forcing it back across the river to the hex it crossed from. Repulses are not Retreats; no Pursuit Fire is made.
Repulses are applied to the weakest (lowest CV) attacking units (owners choice of equal-CV units). All "hits" are applied to non-repulsed attackers if possible. Non-repulsed attackers now execute Offensive Fire.
Repulse only applies to the initial Combat Round of an Assault. Attacking units that are not Repulsed form a Bridgehead and from that point on the battle is treated like any other.
For Sea Assault details see 15.45. For Air Assaults see 14.4.
7.52 River Assaults in Mud
In Mud weather, River Assaults are more likely to be repulsed (1-3).
7.53 Combined Assaults
Combined Assaults occur when all attackers arrive by some form of assault (River/Sea/Air). In a Combined Assault, the lowest applicable Repulse number applies to all assaulting units.
REPULSE TABLE
| Assault | Repulse |
|---|---|
| River | 1-2¹ |
| Air (Para) | 1 |
| Sea (Amphib.) | 1² |
| Sea (Inf.) | 1-2² |
¹ 1-3 during Mud weather. ² Assumes Attacker Naval Supremacy.
COMBAT SUPPORT: Combat support from an active HQ represents logistical support for the attacking units. Such things as artillery and air preparation, and adequate planning and supplies greatly enhance the effectiveness of offensive operations. Without combat support, the attacker can expect high losses for meager results.
RIVER CROSSING (EXAMPLE): A player makes a River Assault across two river hexsides with a 3cv armor unit and a 4cv infantry. Defending is a 3cv infantry unit. After an Airstrike is conducted scoring one hit, the Defending (passive) player fires the (now) 2cv unit and rolls <1:6>, scoring one Hit and one Repulse. The weaker 3cv armor is repulsed, and the hit must be taken by the 4cv infantry. The (now) 3cv attacking infantry would then have Offensive Fire.
COMBINED ASSAULTS: Example: a 3cv Para makes an Air Assault to support a River Assault by two infantry units of 4cv and 3cv. Normally, River Assaults are repulsed on '1' or '2', but since an Air Assault only involves repulse at '1', the lower repulse of '1' applies to all units. Assuming a defending infantry at 3cv, and a Defensive Fire roll of <6:1:2>, only one hit and one repulse are scored instead of one hit and two repulses. The repulse would be taken by the 3cv Para or 3cv Infantry (lowest CV unit of the attacker's choice) and the hit must be taken on the 4cv infantry (the strongest remaining unit). Hence the attackers succeed in making a Bridgehead with two units when, without the Para support, both infantry units would have been repulsed.
8.0 Hex Control
8.1 Hex Control
Hex control is determined at the beginning of each phase (Command, Movement, Combat, Supply, Politics, and Production) and remains unchanged throughout that phase. This detail is extremely important to game play.
Hex control is determined by the position of units (and their ZOCs) at the start of a phase. Movement through a hex does not, in itself, affect its control (to gain control of a hex, units must remain in the hex or adjacent (8.2) until a new phase begins.
8.2 Zones of Control
Unengaged units have a Zone of Control (ZOC) which projects into unoccupied adjacent hexes. ZOCs do not extend across rivers, nor across impassable hexsides. Unsupplied and Engaged units have no ZOC.
8.3 Hex Control Status
Hexes can be either Friendly, Enemy, or Disputed.
8.31 Friendly Hexes
A hex occupied only by friendly units, or within the undisputed ZOC of friendly units. Battle Hexes are friendly to the Original Defender.
8.32 Enemy Hexes
Defined as any hex that is "friendly" to an opponent.
8.33 Disputed Hexes
An unoccupied hex into which both sides exert a ZOC is Disputed.
8.34 Prior Control
Unoccupied hexes not currently in any ZOC remain Friendly to the last side to control them. This rule requires memory, but its application is usually obvious in practice.
8.4 Control Effects
Hex control does not affect normal movement: units can move freely into and through Disputed hexes and vacant Enemy hexes. However, control of hexes has critical effects as follows:
- Command: HQs can Deploy only into Friendly hexes. Command Range can be traced through Friendly or Disputed hexes, never through Enemy hexes.
- Disengagement: units may only disengage directly into Friendly hexes.
- Strategic Movement: units can move strategically (by Rail or Sea) into/through Friendly hexes only.
- Supply: Supply lines can be traced through Friendly or Disputed hexes, but never through Enemy hexes.
- Rail Lines: Rail lines can be traced through Friendly hexes, never through Enemy or Disputed hexes.
HEX CONTROL: Allied units A and B control their own hexes, as does German unit Z. Hexes A1, A2, and A3 lie within the ZOC of unit A and are Friendly to the Allied player. Hex D1 and D2 are Disputed, lying within the ZOCs of units A and Z. Hex A4 is not a disputed hex because the ZOC of German unit Z does not extend across the river.
COMMAND RANGE: Command Range can always be traced through any hex containing an upright Friendly unit or a Friendly ZOC.
Allied unit A is engaged with the German unit so neither unit has a ZOC. Allied unit B projects a ZOC into 2 adjacent hexes (A1, A2) but not across the rivers or into the occupied (battle) hex.
Units B and Z are the Original Defenders (upright) and control their battle hexes. The units in both battles have no ZOC. Units A and C control their own and all adjacent unoccupied hexes (except those across rivers). Unit B can disengage into any adjacent hex except the other battle. The German armor unit can't disengage at all. If the Allied Armor was absent, hexes A1 and A2 would be disputed, (by the ZOC of Unit Z) but the German armor unit still could not disengage into either hex.
9.0 Railroads
9.1 Rail Lines
9.11 Rail Entry Hexes
Defined as a hex where a Rail Line enters the map on a map edge.
The Rail Line from Aarhus W1 to Odense is continuous across a bridge/causeway. Normal Rail Movement across this straits is allowed (or units may cross by normal cross-straits land movement).
9.12 Rail Line Control
A Rail Line is friendly as far as it extends within friendly territory from the Supply Origin (sidebar). Rail Lines are blocked by Enemy or Disputed hexes. In cases of doubt, the Railhead, or furthest extension of a friendly Rail Line, may be marked with a Railhead Marker at the beginning of any phase.
Friendly Rail Lines may be traced into friendly Battle Hexes. They may never be traced through Battle Hexes.
9.2 Rail Movement
Rail Movement is a form of Strategic Movement, possible only when the Supreme HQ is active. Each Rail Move expends one Supreme Move, see 6.5.
9.21 Rail Moves
A Rail Move consists of moving one unit on a friendly Rail Line ten (10) or less hexes along friendly Rail Lines. Units can make multiple Rail Moves (to move further than 10 hexes), but each Rail Move expends one Supreme Move.
NOTE: Under Allied Air Supremacy (begins June 1944), Axis Rail Movement is halved to 5 hexes per Rail Move.
Units cannot move strategically and normally in the same movement phase. Hence, to make a Rail Move, a unit must begin the movement phase located in a rail hex, move only through friendly rail hexes, and end its move in a friendly rail hex.
IMPORTANT: units cannot engage by Rail Movement.
9.22 Rail Disengagements
Although units cannot Engage, they can Disengage by Rail Move from a friendly Battle Hex (friendly rail lines do not extend into enemy Battle hexes). Disengagements by rail do count against the normal hexside limits. A Rearguard unit can never Retreat by Rail Move.
9.23 Rail Ferry Straits
Rail Movement is possible across some Straits (red). The current Rail Move ends upon reaching such a straits, one complete Rail Move is consumed crossing it, and another Rail Move may begin on the other side. These Rail moves may be linked.
9.3 Rail Supply
A hex is in Rail Supply when a friendly Rail Line runs into the hex. Remember that Rail Lines do run into (but not through) friendly Battle Hexes.
9.31 Rail/Sea Supply
Sea Lanes (see 15.3) extending across seas between friendly ports can provide Sea Supply which connects segments of friendly Rail Line.
A hex is in Rail/Sea Supply when it is in Rail Supply, Sea Supply or a combination of the two.
Cities and Resource Centers require Rail/Sea Supply to produce.
9.4 Railheads
RailHead markers may be placed at the beginning of any phase to indicate the furthest reach of Rail Line control.
9.5 Off-Map Rail Movement
Players can move by rail off-map between Rail Entry hexes on the home mapedge (only).
Units are considered to move 2 rail hexes off-map for every mapedge hex between the two Rail Entry hexes.
Offmap rail movement can be freely combined with normal on-map rail movement by counting rail hexes as usual. Rail Movement cannot end off-map; if insufficient rail moves are available to re-enter the map, offmap Rail Movement cannot be made.
Normal rail movement rules apply (units can disengage but not engage, etc.).
SUPPLY ORIGIN: AXIS: Berlin (provided it is in Rail Supply to another friendly Victory City). ALLIES: London (provided it is in Rail/Sea Supply to the Atlantic Ocean).
RAIL FERRY STRAITS: Rail Ferries (Red Straits) exist across the Messina-Reggio (Sicily) and Odense-Copenhagen (Denmark) Straits. Rail Supply and/or Rail Movement across other straits is not possible.
RAIL/SEA SUPPLY & PRODUCTION: A city in isolation cannot effectively produce war materials. Equipping a combat unit requires a large variety of products and/or resources, supplied in quantity, and usually from multiple sources.
10.0 Supply
10.1 Supply Status
Units in play are either Supplied or Unsupplied. To be Supplied, a unit must be able to trace a Supply Line to friendly Rail/Sea Supply at the Supply Check. Units that cannot do so are Unsupplied.
10.2 Supply Check
The supply status of a unit is determined during the enemy Supply Phase and continues unchanged until the next enemy Supply Phase (in effect, Supplied units carry enough supplies with them to last until the next supply check). This is extremely important to play.
10.3 Supply Lines
Supply Lines connect a unit to friendly Rail/Sea Supply. They can be no more than two (2) hexes in length and cannot be traced through enemy hexes or impassable terrain. They can only be traced through friendly hexes (including friendly battle hexes) or disputed hexes.
10.4 Supply Attrition
During the enemy Supply Check, each friendly unit determined to be Unsupplied immediately loses one step. 1 CV units (or 0 CV HQs/Statics) are eliminated.
10.5 Fortress Supply
Fortress hexes provide Fortress Supply to the largest defending unit (Original Defender only) which is exempt from supply attrition. The owner may choose which of equally strong (CV) units receive Fortress Supply, but all other units suffer normal supply attrition.
Steps cannot be added to units dependent on Fortress Supply during Production.
10.6 Beachhead Supply
BeachHeads deployed following Sea Invasions can also provide a limited Supply Source, even when engaged in offensive Battles. See 15.52.
10.7 Supply Interdiction
BeachHead and Sea Supply (see 15.52 & 15.3) through enemy controlled seas are subject to Interdiction (see 15.7), which may cancel the supply.
SUPPLY STATUS: Because Supply Status is only evaluated once per Fortnight (enemy Supply Phase) and remains constant otherwise, being Supplied is not the same as having a Supply Line. Hence a Supplied unit can cut loose from its Supply Line yet maintain Supplied status (has ZOC, no attrition) for a considerable time, right through the friendly Turn and most of the next enemy Turn (until the Supply Check). Thus, supplied units can use their ZOCs to disrupt enemy Supply or Rail lines even when they have no Supply Line of their own! Contrarily, an Unsupplied unit regaining a Supply Line does not regain Supplied status until the next Supply Check.
Production: to add replacement steps, a unit must have a Supply Line at that time (determine this at that time as hex control may change during the Supply and Politics phases). Remember: A unit's Supplied/Unsupplied status does not affect on its ability to build.
SUPPLY LINES: Supply Lines can always be traced through hexes with upright friendly units, and through unoccupied hexes in a friendly ZOC.
SUPPLY ATTRITION: Active units which move to an unsupplied location to cut enemy supply lines are not immediately hurt, but enemy units unsupplied by this maneuver do suffer immediate attrition. Players must be wary of situations where a few active units can envelop and pocket a large number of passive units, inflicting serious losses on the "bagged" units before they can respond.
SUPPLY EXAMPLE: The Allies have just moved units X and Y after a breakthrough at Lyon, cutting Axis Supply through those hexes. The Axis RailHeads are shown and the two Axis units (E, F) within 2 hexes are supplied. The Supply Line to these two units can pass through Bordeaux or Bordeaux E1 even though that hex is Disputed. However, the RailHead is back at La Rochelle because Rail lines cannot be traced through Disputed hexes. Axis units A, B, C, and D are all cut off and will be reduced one step in the upcoming Allied Supply Phase.
The Allies must be aware that their own position is somewhat vulnerable. If the Axis successfully engage the unit at Avignon (repulse is possible), Allied units X and Y would be reduced since the Allied RailHead would be at Avignon (Rail lines can enter friendly battles but may never pass through any battle). Attacking the Allied unit at Lyon SE1 from Grenoble would cut off unit X only but there no risk of repulse. The Axis might also attack Lyon or Clermont-Ferrand with the isolated units with the goal of retreating to friendly hexes on the other side on a subsequent turn.
11.0 Production
11.1 Production Phase
At the beginning of each month (except when beginning a game) players independently and simultaneously conduct the Production Phase:
- Determine Production Level
- Add Replacement Steps to units in play
- Build and deploy Cadres
- Deploy Reinforcements (if any)
11.2 Production Level
Production Level is the sum of Basic, City, and Resource Production. The initial Production Level for each side is noted in each scenario. As production centers are captured or lost, the current Production Level should be adjusted on the Game Record Sheet to reflect the change.
11.3 Production Points (PPs)
Each month players receive Production Points (PPs) equal to their current Production Level.
PPs are expended to build up the CV of units (including HQs), either by adding Replacement steps to units in play, or by rebuilding eliminated units into Cadres. PPs unused in Production are forfeit.
11.31 Basic PPs
Both sides receive Basic (automatic) Production PPs each month, which represent either off-board production (positive), or production allocated to other fronts or civilian purposes (negative).
Basic Production can change from one scenario to another, as noted on the Basic Production Chart.
11.32 City PPs
Major Cities have a production value, (the white number inside the black dot) representing the number of PPs they produce every month. To produce PPs, a Production City must be in Rail/Sea Supply (see: 9.3).
Cities that are embattled (but still in rail/sea supply) can produce.
11.33 Resource PPs
Controlled Resource Centers (oil or pick symbols) also produce PPs each month. They also may be embattled, but must be in Rail/Sea Supply to produce.
For the resource-starved Axis economy, Resource Centers produce double their rated amount. Hence, Gyor, an oil center rated at "1" PP per month, actually produces 2 PPs per month for the Axis player.
NOTE: Cities and Resources in out of play map areas do not produce PPs.
BASIC PRODUCTION (PPs)
| Scenario | S43 | W43 | S44 | W44 |
|---|---|---|---|---|
| Allies | 50 | 60 | 70 | 70 |
| Axis | -60 | -55 | -40* | -30* |
* Excludes Ore SeaRoute lost: -5 PPs.
SIMULTANEOUS PRODUCTION: Simultaneous production speeds play and promotes a desirable level of misinformation — with both players building at once, they can pay only limited attention to what the opponent is doing.
PRODUCTION SEQUENCE: The production sequence ensures that replacement steps cannot immediately be added to newly rebuilt cadres or arriving reinforcements.
BASIC PRODUCTION: Allied Basic Production is positive, representing off-board production from the British Empire, Canada and the USA, less production allocated to other theaters. In WestFront, Axis Basic Production is negative because on-map production is being transferred off-map to Russia, and allocated to U-Boats, air defense, etc. (elements outside the scope of this game). Overall Axis war production increased through 1943, due to Speer's rationalization of the German War economy, but fell thereafter due to the Allied strategic bombing campaign.
PP VALUES: The production system in WestFront is completely compatible with that in EastFront.
11.4 Building Units
11.41 Replacements
During Production, players may add one step to any unengaged units on the map, provided they have a secure (i.e., not interdictable) Supply Line (10.3) at that time.
Replacements cannot be added to new cadres or reinforcements in the same month they appear.
NOTE: A maximum of 1 SS step may be rebuilt per month.
11.42 Cadres
During Production, Cadres (1cv units) may be formed from eliminated units. The PP cost of a cadre is noted in the Cadre column on the Unit Cost Chart.
HQ cadres are treated like other units, except their lowest step is "Ø". Hence, building an eliminated HQ cadre costs 20 PPs, and each additional step is 10 PPs. Axis HQ costs increase in certain conditions.
11.43 Replacement Costs
See: Unit Cost Chart.
HQ costs increase in some cases.
- Overseas HQs. HQs in Sea Supply cost +5 PPs/step (+10 Cadre) to rebuild, unless they are in or adjacent to a friendly Major Port.
- Strategic Bombing. Beginning W'43, Axis HQs costs rise by 5 PPs/step (+10/cadre). See: 13.21.
- Ploesti. Beginning September 1944, Axis HQ costs rise by 5 PPs/step (cadres +10PPs). See: 16.6.
IMPORTANT: Units dependent on BH Supply may receive replacements but at double the normal cost per step. For HQs this is NOT cumulative with the Overseas HQ cost increases.
11.44 Beachheads
Eliminated BeachHeads (15.51) may be rebuilt to BH Prep status or advanced from BH Prep to BH Ready status for 20 PPs (not both) during Production.
11.5 Reinforcements
Reinforcements are new units scheduled to enter the game as noted in each scenario and on the OB cards. When the scheduled month arrives, they are deployed on the map during Production as noted in 11.6.
11.51 Advanced Arrival
The arrival month of one reinforcement unit may be advanced one month (per Production) either by reducing it 1CV or by paying its cadre cost in PPs.
11.52 Disbanding Units
During Production, players may voluntarily eliminate any friendly units. These are unavailable for rebuilding until the next Production.
11.6 Deploying Cadres & Reinforcements
Axis reinforcements and rebuilt cadres may arrive in any of the following locations: Victory Cities, German Home Cities, or Rail Entry hexes on the eastern mapedge.
Allied reinforcement and rebuilt cadre units may arrive in any controlled major port or (British units only) in British home cities.
A maximum of one new unit per Production can arrive in a Minor City or Rail Entry hex, and two units per Major City. Arrival locations must be in Rail/Sea Supply, and not embattled.
NOTE: Reinforcements arriving in the first month of a scenario are deployed as above during the initial scenario deployment.
REPLACEMENTS: Units can only rebuild one step per month because it takes time (training) as well as equipment to build a combat unit.
CADRE COSTS: Higher cadre costs reflect the price of having a unit completely destroyed in combat. It is much easier to rebuild a unit when its infrastructure (organization, support services, leaders, etc.) remains intact. Cheaper German cadre costs reflecting their superior training and leadership.
STATICS: Cadre cost is lower than their step cost because static cadres are only 0CV.
ALLIED HQ COSTS: Allied HQs on the European mainland cost 15 PPs per step (30/cadre) unless in a major port. HQs drawing BH supply are even more costly.
(See the Unit Data table under Game Charts, below, for the full per-unit-type PP cost of Replacement Steps and Cadres.)
12.0 Weather
12.1 Weather Determination
The months from March through October always have Dry weather. December and January always have Mud weather (see Game Record sheet).
The months of November and February have variable weather. During these months, each Fortnight begins with a Weather die roll. Each player rolls one die; the sum of the dice (even or odd) determines the weather for that Fortnight, as indicated in the Weather Table. The weather is re-rolled for the second Fortnight of the month, and may change.
12.2 Mud Effects
12.21 HQ Disruption
During Mud Turns, HQs are Disrupted and may not Deploy one hex to activate. Disrupted HQs effectively command at one level below their nominal Command Value (see: 5.8).
EXCEPTION: SHQs in Berlin (Axis) and London (Allies) are exempt from weather disruption.
12.22 Unit Mobility
Mud weather reduces all unit speeds to 1 hex per Movement Phase (except Cavalry; moves 2 hexes).
12.23 Terrain
During Mud weather, Marsh terrain rules (including hexside limits) apply in Clear and Forest terrain (except stacking remains unchanged at 4). Double Defense (or better) always applies in mud.
All units fire SF offensively during mud in all hexes. Airstrike Firepower is not affected by Mud weather (though HQ CV may be reduced by disruption).
12.24 Repulse
Mud weather increases the chances of a River Assault Repulse to 1-3.
12.3 Storms
During Mud weather months (November-February), Storms may occur. Storms affect Invasions and BeachHeads, but have no effect on Sea Movement and Sea Supply (except BH Supply) as ports are weather-proof.
A Weather die roll is made before each Fortnight of these months (even in December and January, when Mud is certain). All odd die rolls result in a Storm in one of the marine basins (see: Storm Table). All seas within that basin are affected for the duration of the Turn. Place the Storm marker in the appropriate area.
Invasions are impossible in Sea Areas affected by Storms. Storms also disrupt BeachHeads, temporarily negating their supply and port abilities. See: 15.54.
WEATHER TABLE
| Month | Even | Odd |
|---|---|---|
| November | Dry | Mud |
| December | Mud | Mud |
| January | Mud | Mud |
| February | Dry | Mud |
STORM TABLE
| Result | Storm |
|---|---|
| Even | None |
| 3 or 11 | Mediterranean Basin |
| 7 | Baltic Basin |
| 5 or 9 | Atlantic Basin |
MEDITERRANEAN BASIN: This includes the Alboran Sea, Western Mediterranean, Gulf of Lyon, Ligurian Sea, Tyrrhenian Sea, Central Mediterranean, Ionian Sea, and Adriatic Sea.
BALTIC BASIN: This includes the Skagerrak and Western Baltic Sea.
ATLANTIC BASIN: This includes the Atlantic Ocean, North Atlantic, Bay of Biscay, English Channel, Irish Sea, and North Sea. (The Norwegian Leads and Norwegian Sea are out of play in WF.)
WEATHER FATE: Using the weather roll system, neither player can affect the weather result: it is pure fate.
STORMS: Storms only occur in one basin at a time. BHs are completely incapacitated during storms, and invasions are impossible.
STACKING CONSIDERATIONS: Terrain changes due to weather do not reduce stacking limits.
13.0 Airpower
13.1 HQ Airpower
HQs have attached airpower resources. During Combat, each activated HQ may conduct one Airstrike in one Active Battle within Air Range. Airpower cannot attack enemy air power, and ground units cannot fire back at Airstrikes.
13.11 Air Range
Air Range is equal to Command Range, except it is not interrupted by enemy-controlled hexes or impassable terrain.
Supreme HQs active during Combat can initiate a Strategic Airstrike at double Air Range. That is, a Supreme HQ III has an Air Range of six (6) hexes. Airstrike firepower (13.14) remains unchanged.
13.12 Airstrike CV
The CV of the commanding HQ determines the strength of the Airstrike. One die is rolled per HQ CV. A HQ's airpower may not be divided into multiple Airstrikes.
13.13 Targeting
Airstrikes can only be made in Battles that will be fought this Combat Phase. Only one Airstrike may be applied to any one Battle per Combat Phase.
All Airstrikes must be allocated before defending units in any battle are revealed and combat begins. Place one Airstrike marker of the same strength as the active HQ in the designated battle hex. That is, given an HQ II, place an Airstrike "2" marker in the Battle Hex.
13.14 Airstrike Firepower
The Airstrike firepower (SF, DF, or TF) depends on the period of the war (scenario), becoming stronger for the Allies as time goes on, and weaker for the Axis.
Terrain and weather do not affect Airstrike Firepower (but Double Defense may apply).
13.15 Executing Airstrikes
Airstrikes are executed before Defensive fire. One die is rolled per Airstrike CV.
"Hits" are scored based on the current Airstrike Firepower (SF, DF, or TF), and are immediately applied to the passive units in the hex. All terrain and weather defensive benefits (such as double defense in Forest) apply. Partial "hits" from Airstrikes carry forward to normal land combat.
NOTE: Because Air Range can traverse enemy controlled hexes, Airstrikes can be made into battles that are fought as Unsupported Combat. As with attacks by ground units, such airstrikes are only half-effective.
13.16 Airpower Disruption
HQs are Disrupted (5.8) under certain conditions. HQ Disruption reduces effective HQ CV (and hence Air Range and Airstrike cv) by one, but Air Firepower (SF, etc) is unchanged.
13.2 Allied Air Power
13.21 Extended Air Range
Beginning Dec '43, Allied Air Range is increased to double the CV of the commanding HQ (triple for SHQs). The CV of the Airstrike itself (i.e., the number of dice rolled) is unchanged.
Strategic Bombing Campaign. Beginning Dec '43, Axis HQ costs increase by 5PPs/step (+10PPs/cadre).
13.22 Air Supremacy
In June '44, Allied Air Supremacy begins. There are several strategic effects.
- Axis movement are suppressed: all Axis unit speeds are reduced by one hex (minimum 1), and Axis Rail Moves are halved to 5 hexes each.
- All sea areas in the Atlantic Basin become Allied controlled, regardless of naval base ownership (e.g. Brest no longer controls the Bay of Biscay). All Axis seapower in that basin is lost.
- German Paras are grounded (14.7).
- The Axis Ore SeaRoute is lost (Axis -5 PPs, see 16.2).
AIR FIREPOWER
| Scenario | Axis | Allied |
|---|---|---|
| Summer 43 | SF | TF |
| Winter 43 | SF | TF† |
| Summer 44 | None | TF†* |
| Winter 44 | None | TF†* |
† Allied Extended Air Range. * Allied Air Supremacy.
AIR SUPPORT: Airstrikes are particularly useful for conducting River or Sea Assaults. Since the Airstrike is conducted first in a Combat Round, any hits will lessen the chance of repulse hits from Defensive Fire.
THE P-51 MUSTANG: The Winter of 1943-44 saw the advent of the American P-51 Mustang. With drop tanks, this effective fighter could escort long-range bombing missions completely to the target. The P-51 secured the skies over Europe for the Allies, and the mass bombing campaign became brutally effective.
14.0 Paratroops
14.1 Paratroops
Parachute corps have Paradrop capability. German Paras lose this ability when grounded (see: 14.7) and under Allied Air Supremacy.
14.2 Paradrop HQs
Any HQ (or SHQ) may command a Paradrop by expending all of its command ability (including airpower) for that Player-Turn (mark with Paradrop HQ marker). The Paradrop HQ must already be located in the same hex as the Para units commanded (may not Deploy). Blitzing Paradrop HQs must command two Paradrops, one in each phase.
14.3 Paradrop Hexes
During the Movement Phase, the Para unit may airdrop into any hex (except Mountain) within Air Range of the Paradrop HQ.
NOTE: when a Paradrop is commanded by an SHQ, Air Range is doubled. Extended Air Range does apply.
14.4 Air Assaults
A Paradrop attack into an enemy-occupied hex (starting a new battle) is defined as an Air Assault. These are treated just like River Assaults (7.5) except that the Para is only Repulsed with a die-roll of 1. If Repulsed, the Para unit must take an automatic 1CV step loss (plus any normal losses from defensive fire) and return to the hex it came from.
Paradrops into existing battles, or in combination with normal (non-assault) ground attacks, are not Air Assaults (no repulse).
14.41 Combined Assaults
When a Paradrop is combined with a River and/or Sea Assault, Repulse on all assaulting units is reduced to 1. See: 7.53.
14.5 Para Combat
Paras on the ground move and fight like normal (unmotorized) infantry, except with SF Offensive Fire and DF Defensive Fire. Paras receive no combat support from their Paradrop HQ, but can receive support from another active Combat HQ to which they can trace command.
14.6 Paradrop Linkup
A Para unit is Dispersed (place face down to indicate this) when airdropped, meaning it does not alter control of any hex, including the hex if occupies. Dispersal lasts throughout the Player-Turn of the paradrop until the friendly Supply Phase. Dispersal does not affect Para combat, but dispersed paras cannot move (e.g., Blitz Movement).
In the friendly Supply Phase (before enemy units are checked for supply) the Linkup status of airdropped Para units is checked (this is the only time a friendly unit is checked). Linkup allows the para to survive and recover from dispersion.
During the Paradrop Linkup check, dispersed Paras must satisfy one of the following conditions to achieve Linkup.
- Located in a friendly hex.
- Adjacent to an unengaged friendly hex (via a passable hexside).
- Located in an enemy (battle) hex with other friendly "ground" units (that were not also airdropped).
Linkup is the only way for a para unit to survive an airdrop. If Linkup occurs, the para recovers from Dispersal and regains normal control over its hex and a ZOC into adjacent hexes. If not, the Para unit is eliminated.
Note that supply for the paradropped unit is not an issue. For example, dropping into a port behind enemy lines is not sufficient to obtain Linkup and ensure para survival. Airdropped paras must make contact with friendly "ground" units, even if the ground units themselves are out of supply.
14.7 Grounding
German Paratroops may be grounded at any time by the Axis player. If grounded, they can no longer Paradrop, but their replacement cost drops to 6 PPs / step (cadres 9 PPs). German Paras are automatically grounded under Allied Air Supremacy (13.22) beginning S'44. Grounded Paras still have DF on Defensive Fire.
PARA REPULSE: Only 20-30% of a para corps is normally landed by parachute. The parachutists job is to secure airfields to allow the balance of the corps to land in gliders and air transports. A Para repulse indicates the initial wave fails to secure the necessary airfields and the operation is canceled. The 1cv hit upon Repulse reflects loss of the Paras already on the ground.
COMBINED ASSAULTS: Paradrops are useful for supporting River and Sea Assaults because they minimize repulse fire for all assaulting units, plus they add an extra unit to the assault, thereby reducing the chance of total repulse.
PARA DISPERSAL: Because of dispersal, Paras do not alter hex control on the turn they airdrop (which might otherwise allow a Blitzing unit to disengage 'forward' into a Paradrop hex), nor do they cut enemy rail lines or supply lines, unless they have linked up with other friendly units by the end of the Turn.
PARA LINKUP: Para units are notoriously light on logistics, especially heavy weapons and ammunition. Dropping paratroops into advanced positions to disrupt the enemy, hoping to establish a linkup (on a blitz move or with a simultaneous sea invasion), is a risky venture.
15.0 Seapower
15.1 Sea Control
Each sea area is controlled by a Naval Base (black anchor symbol). When the Naval Base is friendly a player can move, supply, or invade across that sea with complete security. If the Naval Base is enemy, there is a chance of enemy interference (see Sea Interdiction 15.7).
Naval Bases that control each sea are noted below, along with other ports on that sea. Major ports (larger symbol) are noted in bold. Sea Interdiction Values are noted in [brackets]. Multi-sea ports (bordering on two or three seas) have two or three crossbars on the anchor symbol.
Atlantic Basin
- Atlantic Ocean [3]: always Allied controlled. Ports are Cork, Vigo, Porto, Lisbon, Cadiz, Tangiers, Casablanca, and Gibraltar.
- North Atlantic [3]: controlled by Glasgow. Other ports are Belfast, Shetlands, and Orkneys.
- Irish Sea [3]: controlled by Liverpool. Other ports are Glasgow, Swansea, Bristol, Cork, Dublin, and Belfast.
- North Sea [2]: controlled by London. Other ports are Shetlands, Orkneys, Aberdeen, Edinburgh, Newcastle, Hull, Yarmouth, Ipswich, Dover, Calais, Ostende, Antwerp, Rotterdam, Hamburg, Amsterdam, and Bremen.
- English Channel [2]: controlled by Portsmouth. Other ports are Dover, Weymouth, Plymouth, Calais, Le Havre, Cherbourg, and Brest.
- Bay of Biscay [1]: controlled by Brest. Other ports are Lorient, Bordeaux, Bayonne, Bilbao, and Gijon.
Mediterranean Basin
- Alboran Sea [2]: controlled by Gibraltar. Other ports are Malaga, Almeria, Cartagena, Valencia, Barcelona, Mallorca, Tangiers, Melilla, Oran, and Algiers.
- Western Med. [1]: controlled by Algiers. Other ports are Mallorca, Bizerte, and Cagliari.
- Gulf of Lyon [1]: controlled by Marseilles. Other ports: Mallorca, Toulon, Sassari, and Barcelona.
- Ligurian Sea [2]: controlled by Genoa. Other ports are Toulon, Sassari, La Spezia, Livorno, Olbia, and Bastia.
- Tyrrhenian Sea [1]: controlled by Tunis. Other ports are Rome, Naples, Reggio, Messina, Olbia, Cagliari, Palermo, and Bizerte.
- Central Med [1]: controlled by Tripoli. Other ports: Tunis, Sfax, Malta, Palermo, Catania, and Benghazi (see sidebar).
- Ionian Sea [1]: always Allied controlled. Ports are Catania, Messina, Reggio, Taranto, and Benghazi (see sidebar).
- Adriatic Sea [2]: controlled by Trieste. Other ports: Brindisi, Bari, Termoli, Ancona, Venice, Fiume, Split, and Dubrovnik.
W. Baltic Basin
- Skagerrak [3]: controlled by Copenhagen. Other ports are Hamburg, and Aarhus.
- Western Baltic Sea [2]: controlled by Stettin. Other ports are Copenhagen, Hamburg, and Rostock.
Other Sea Areas
All other sea areas are out of play in WestFront (they come into play in EuroFront).
UNPLAYABLE SEA AREAS: In WestFront the Arctic Ocean, Norwegian Leads, Norwegian Sea, Indian Ocean, Red Sea and Persian Gulf are out of play.
STRAITS: Sea Movement, Sea Supply, and Sea Invasions through a Straits are prohibited if either adjacent land hex is enemy-controlled.
SHOALS: Sea Movement and Supply are possible through these hexes because controlled Ports have dredged channels.
SEA INTERDICTION VALUES: These values reflect local naval and air bases, and the accessibility of the sea area.
SEA MOVEMENT EXAMPLE: The Allies control Tunis, Malta, Taranto, and Benghazi. With AF SHQ activated, an Allied unit in Tunis sea-moves to Taranto. This is two Sea Moves (since two sea areas are crossed) but only costs one Supreme Move because of Allied Naval Supremacy. Both seas are Allied controlled (no Sea Interdiction).
BENGHAZI: The major port of Benghazi (North Africa) is located in the half hex NE of El Agheila. Benghazi is the Naval Base for the Ionian Sea and borders both the Ionian Sea and Central Mediterranean. Since Benghazi is a preferred location for Allied invasions into the Adriatic Sea, this half hex is a fully playable major port for the Allies.
15.2 Sea Movement
In WestFront there is a fundamental naval imbalance between the Allies and the Axis. The Allies have Naval Supremacy, which essentially entitles them to doubled sea movement and superior Sea Interdiction capability. In the SeaPower rules that follow, Allied capabilities are defined separately from Axis capabilities for that reason.
Sea Movement (like Rail Movement) is Strategic Movement, only possible when commanded by an activated Supreme HQ.
Units already located in a friendly port can move by sea across one or more adjoining sea areas to another friendly port (not embattled). Each sea area crossed costs 1 Sea Move.
Axis units (normal) move one sea. Supreme Move expended.
Allied units move one or two per Supreme Move expended. (Naval Supremacy).
Units cannot Engage by Sea Movement. They may Disengage, but not Retreat (but see 15.6). Sea Movement through enemy sea areas is subject to Interdiction (15.7).
ALLIED SEA MOVEMENT: Naval Supremacy doubles the distances (in sea areas) that Allied units can move by sea for one Supreme Move. It does not allow two units to move for one supreme move.
NAVAL PARITY: On the WestFront maps, the Sea Interdiction table has a column for Naval Parity which never applies in WestFront. Naval Parity exists earlier in the war; these numbers are used when playing EuroFront.
15.21 Port Capacity
The capacity of minor ports is 1, meaning only one unit can enter, or one unit can leave per Player-Turn via Sea Movement. Major port capacity is 2.
15.3 Sea Supply
Sea Lanes (Sea Supply lines) connect friendly ports across controlled seas. Hence, a friendly Rail Line can lead from the Supply Origin to a friendly port, then via a Sea Lane across one or more seas to another friendly port, from which another friendly Rail Line continues.
The term Rail/Sea Supply means rail supply including sea connections. Production sources require Rail/Sea Supply to produce.
15.31 Siege Supply
Sea Supply Lines, like Rail Lines, may be traced into but not through a friendly Battle Hex. Hence, a Sea Supply Line terminates at an engaged port.
Engaged (besieged) ports can only support one unit, at cadre strength (with friendly Naval Supremacy, one unit at any strength). Units defending Fortress hexes (Gibraltar or Malta) receive Fortress Supply (10.5) instead of Siege Supply.
SEA SUPPLY EXAMPLE: With Italy surrendered, the Allies begin W'43 with 8 units in Yugoslavia supplied via Split. The Germans counterattack and engage the port, but since the Allies have Naval Supremacy, they still maintain full Sea Supply into but not through Split. Units within 2 Hexes of Split are also supplied but the rail line emanating from Split is blocked.
NOTE: Allies are original defenders in the battle for Split.
15.4 Sea Invasions
Sea Invasions allow movement from a friendly port across one or more Sea Areas into a coastal hex (not just into another friendly port).
Sea Invasions are not Strategic Movement: they require the expenditure of all the movement command ability of a dedicated HQ for that turn.
15.41 Invasion Command
During the Command Phase, a player may activate one or more HQs for Sea Invasion. Invasion HQs must be in a port with the commanded unit(s) at the start of the Command Phase (they may not Deploy there), and should be marked with an Invasion HQ marker.
15.42 Invasion Movement
Each Invasion HQ commands the movement of one unit from that port to a coastal hex within the same Sea Area (Allied Naval Supremacy increases range to 2 Sea Areas). The Invasion HQ can command no other movement.
Sea Invasions are not allowed into mountain, marsh or shoal hexes, or through enemy-controlled straits. Cavalry and Fort units cannot Sea Invade.
Although multiple simultaneous Sea Invasions are possible (each commanded by a separate Invasion HQ), only one unit can Sea Invade a defended coastal hex per Movement Phase (simultaneous ground attacks/paradrops are allowed.) Undefended hexes may be Sea Invaded by more than one unit.
Until a port is captured, additional units can only be brought ashore by further Sea Invasions. Once a port has been captured, and is not embattled, units can be landed more efficiently by strategic Sea Movement.
INVASION COMMAND: Invasions are a costly form of movement in terms of HQ expenditure. However, Invasion combat support under Naval Supremacy may be very good (simulating naval gunfire support), often even better than land combat support (double range). The beaches are a good place to fight for both the Allies (good combat support), and the Germans as keeping the BeachHead engaged prevents cheap reinforcement and the landing of enemy HQs (HQs cannot enter an engagement).
15.43 Invasion Combat Support
An Invasion HQ can provide Combat Support to battles within Command Range and can assign an Airstrike to a battle within Air Range (13.11, 13.21).
For Invasion HQs, Command Range is traceable only across sea hexes/sea hexsides, including through enemy-controlled seas and through the sea portion of enemy controlled land hexes. It may not be traced into uninvadeable hexes or via enemy-controlled straits.
Axis Invasion HQ Command Range (normal) equals HQ CV, traced as above.
Allied (Naval Supremacy) Invasion HQ Command Range equals twice the HQ CV (i.e., 6 sea hexes for a HQ III) traced as above.
NOTE: Invasions into hexes beyond Invasion HQ Command Range are possible, but battles there are unsupported combat (and without airpower support).
TWO-WAVE INVASIONS: Blitz Two-wave invasions are the norm in WestFront. Firstly, there is the possibility of Repulse, and a second wave gives a second chance. Furthermore, it is almost always advisable to get maximum strength ashore as soon as possible, to withstand or deter enemy counterattacks on the Beachhead.
15.44 Blitz Invasions
Blitz Invasions. Invasion HQs can Blitz, allowing them during Blitz Movement to invade a second unit from the invasion port into the same target hex or a different one (must be marked in advance with Sea Assault marker). Blitz Invasion HQs must command as such throughout the Player-Turn (they cannot switch to normal or Paradrop command in the Blitz phase).
Allied (Naval Supremacy) Blitz Invasion HQs may command amphibious units (only) to make Long-Range Sea Invasions across 3 or 4 Sea Areas, which consumes their entire command capability for that turn. All Long-Range Invasion Movement is considered to occur during the Blitz Movement phase.
LONG-RANGE INVASIONS: Long-Range invasions are expensive but sometimes worth the surprise value. Combat support will most likely be unavailable.
SEA INVASION EXAMPLE 1: The Allies control London and Portsmouth. Allied Naval supremacy is in effect. An activated Allied HQ III and an amphibious corps are in Portsmouth. The amphibious unit is moved by sea to Esbjerg (Denmark), which is not defended. A BH is placed in the hex during the Supply Phase, providing an Allied supply source. Sea Movement could not be used because the unit is moving into an enemy controlled hex.
SEA INVASION EXAMPLE 2: In 1943, the Allies have an HQ II and an amphibious corps in Portsmouth. The HQ is activated as an Invasion HQ and the amphibious unit is moved by sea to invade Brest, which is Axis controlled but currently undefended. By capturing the port, the Allies establish a Sea Supply Line, so Brest (and any rail lines emanating from it) becomes an Allied supply source. Control of Brest also gives the Allies control of the Bay of Biscay.
15.45 Sea Assaults
Sea Invasions that initiate battles are Sea Assaults, subject to Repulse as for River / Para Assaults. During the initial round of Defensive Fire, low dierolls may repulse an assaulting unit (in addition to combat hits scored). A repulsed unit must return to its embarkation port. The Repulse number depends on the type of assaulting unit (amphibious are superior) and Naval Supremacy (friendly or enemy). See the table on the next page (sidebar) or the back cover of the rules.
Assaults do not occur (no chance of Repulse) if at least one unit attacks into the hex without Assaulting. Combined Assaults (7.53) can reduce the chance of Repulse. For example, adding an Air Assault reduces all Repulse numbers to 1.
Armor and Static units cannot Sea Assault (but can Sea Invade).
SEA ASSAULT VS SEA INVASIONS: The distinction between Sea Assaults and Sea Invasions is important. A Sea Assault is a specific type of Sea Invasion that initiates a new battle (subject to Repulse). Most unit types can Sea Invade or Sea Assault (Cavalry or Forts can do neither). Armor and Static units can invade but not Assault.
SEA ASSAULT EXAMPLE: In S'43, the Allies control Tunis, and have an HQ III and the 4cv US 6th amphibious corps there. A 3cv Italian army (Infantry) defends Licata. The Allies activate the HQ to command an invasion of Licata by sea. The 3 TF airstrike from the Invasion HQ scores two half-hits (hill terrain) on the defending Italian army, reducing it to 2cv. The Italian unit conducts Defensive Fire and rolls (2/6), scoring one hit but failing to repulse the invader. The Allied unit loses a step, then returns fire at 3 SF (its BH is not yet placed), scoring one ineffective hit. During the Supply Phase, the Allies place the US 6 BH in the hex to ensure supply for the invader.
BEACHHEAD SUPPORT: BHs represent the logistic and naval support for invasions. DF for Amphibious units in BHs represents ongoing naval gunfire support. Naval bombardment proved crucial in breaking up several panzer counterattacks well after D-Day. Units that invade non-port hexes without a BH are unsupplied until a normal supply line can be established to them. Until then they will be subject to supply attrition during the enemy Supply Phase.
15.5 Amphibious Units
Amphibious units have enhanced sea landing ability (reduced repulse number for Sea Assaults and Pursuit speed of 2 when Retreating by Sea Evacuation).
They also have an associated Beachhead (BH), which can serve as a supply source in the invaded hex (even if still enemy controlled), and which gives them DF firepower in that hex.
15.51 Beachheads
When an amphibious unit lands by Sea Invasion, its associated BH marker may be deployed in the invaded hex (even if it is an enemy Battle Hex) during any subsequent Allied Supply Phase that the amphibious unit is present.
The BH can only be deployed if it has "Ready" status (sea Ready box on map). BHs in "Prep" status (in Prep box) can be converted to "Ready" status (face-up) at a cost of 20 PPs during Production. If eliminated, the BH can be raised to "Prep" status for 20 PPs. BHs serve as a supply source for friendly units in the hex, even if the hex is embattled and enemy controlled.
Once deployed, the BH may not be moved. If enemy units enter the BH hex with no friendly units present, it is eliminated. BHs may be voluntarily disbanded and reduced to "Prep" status during Production (but cannot be made Ready in that same Production).
15.52 Beachhead Supply
The BH provides supply to all Allied units in its hex (even an enemy battle hex).
If the BH hex is friendly (even if embattled), units within 2 hexes can trace Supply Lines to the BH normally. Rail Lines, however, never connect to a BH.
BHs must be able to trace a Supply Line by sea to a friendly port. This BH Supply Line cannot pass through enemy controlled straits or shoals, and is subject to Sea Interdiction if it passes through enemy controlled seas (see: 15.7).
Units dependent on BH Supply may receive replacements during Production (not if engaged), but at double their normal step cost.
15.53 Mulberries
Deployed Beachheads that are not embattled function as temporary minor ports for Sea Movement: one unit can Sea Move in or out. A beachhead in the same hex as a port adds one to the port capacity of the hex. However, Rail Lines do not connect to a BH, and Sea Invasions cannot be launched from one.
15.54 Storms
BHs deployed in a stormy Sea Area lose all function during the storm.
15.6 Sea Evacuations
Sea Evacuation is the reverse of Sea Invasion. A unit (engaged or unengaged) can move by sea from any coastal hex to a friendly port, commanded by an "Invasion HQ" in the target port. If Retreating, the unit takes Pursuit Fire based on a speed of '1' (amphibious units use a retreat speed of '2').
BEACHHEAD SUPPLY: Invasions without Beachheads will suffer continual supply attrition until a port is captured. Players should not count on BH Supply in winter, because of Storms.
SEA EVACUATIONS: When a unit must move from a coastal hex back to a friendly port by sea and Sea Movement is impossible, a Sea Evacuation is required. For example: units cannot Retreat by sea movement, and units cannot sea move from a hex that is not a friendly port/BH. In either case, a Sea Evacuation is the only means of extracting the unit.
Example: In Summer 1944, the Allies control Portsmouth, with an HQ III there, and a 3CV amphibious unit and BH stalemated in Calais after invading. The Allies activate the HQ as an Evacuation HQ, and "reverse invade" the Amphibious unit back to Portsmouth. Since this is a retreat, the Germans get Pursuit Fire. A 3cv armor unit rolls 3SF (speed 2 in S'44) scoring 1 hit but a 2cv infantry (speed 1 in S'44), does not fire. The Amphibious unit returns to Portsmouth at 2cv and the BH is eliminated.
15.7 Sea Interdiction
Sea Movement, Invasion Movement, Sea Supply, and BH Supply are totally secure from enemy interference when passing through friendly controlled seas. However, when passing through enemy controlled sea areas, naval movement and supply are subject to Sea Interdiction.
15.71 Sea Interdiction Values
Each sea area has a Sea Interdiction Value (triangle), representing the defensibility of that sea area with forces based in the controlling Naval Base.
15.72 Sea Movement Interdiction
Sea and Invasion Movement through enemy seas may be Repulsed by enemy Sea Interdiction, or the units may be damaged. After all movement is complete in a Movement phase, the Passive player may attempt to Interdict any Sea or Invasion Movement through seas controlled by him.
For each unit passing through a sea area controlled by him, the Passive player rolls a number of dice equal to the Sea Interdiction value of that sea area. Certain numbers rolled will result in Repulse of or damage to the unit (see: Sea Movement Interdiction Table). Sea Movement is more likely to be interdicted than Invasion Movement (which is much more heavily escorted by naval forces).
If Repulse occurs, the repulsed unit returns to its port of departure. Any scheduled Airstrike on the target hex of an interdicted invasion is wasted, as no battle will take place that Combat phase.
Naval Supremacy strongly affects the chances of successful Sea Interdiction. Allied naval activities are less likely to be Interdicted, and Axis naval activities are much more so.
EXAMPLE. In S'43, the Axis control the Bay of Biscay from Brest. The Allies have invaded and control Lorient and attempt to Sea Move a unit there from Dover. The Axis player rolls one die for Sea Interdiction, obtaining (2), a successful interdiction despite Allied Naval Supremacy. The Allied unit returns to Dover.
15.73 Supply Interdiction
During the Supply Phase, the supply status of enemy units is checked. In WestFront, enemy sea lanes may pass through friendly controlled seas unless they are Interdicted. Each enemy port/BH that might be able to trace sea supply to Rail/Sea Supply is checked separately for Sea (or BH) Supply Interdiction.
For each such port/BH, the active player rolls a number of dice equal to the total Interdiction Value of all friendly seas that the potential enemy Sea Lane must cross to reach Rail/Sea Supply (using the most favorable route).
If any of these die results is "Repulse," Sea Supply to that port/BH is unusable for that supply phase (invert BHs). Sea Supply (port-based) is more likely to be interdicted than BH Supply. If all possible ports/BHs are interdicted, dependent enemy units are unsupplied.
ASSAULT REPULSES (Defensive Fire)
| Assault | Repulse |
|---|---|
| River | 1-2 (1-3 Mud) |
| Air | 1 |
| Sea — by Amph. units (FNS / ENS) | n/a / 1 |
| Sea — by Other units (FNS / ENS) | 1-4 / 1-2 |
MOVEMENT INTERDICTION (Passive Player Roll)
| Type | FNS | ENS |
|---|---|---|
| Invasions | R 1-3, H 4-6 | R 1, H 6 |
| Sea Moves | R 1-4, H 3-6 | R 1-2, H 5-6 |
SUPPLY INTERDICTION (Active Player Roll)
| Type | FNS | ENS |
|---|---|---|
| BH Supply | R 1-3 | R 1 |
| Sea Supply | R 1-4 | R 1-2 |
FNS: Friendly Naval Supremacy. ENS: Enemy Naval Supremacy. R: Repulse Numbers. H: Hit Numbers.
REMEMBER: In the table above FNS/ENS applies to the player rolling to interdict/repulse enemy movement or supply.
SUPPLY EXAMPLE: The Axis has 3 units on Sicily (X, Y, and Z). The Allies have just invaded Reggio (US 6th Amphibious), terminating Axis Rail Supply there as Rail Supply can never pass through battles. The Allies previously invaded Bari. Italy has Surrendered so the Allies control all seas in the Mediterranean Basin. In the Allied Supply Phase, Axis supply status is checked. Unit Z can trace a normal 2-hex Supply Line to the Railhead in Reggio. Units X and Y cannot, but may be able to obtain Sea Supply via Palermo, Messina or Catania. The Allies check Sea Interdiction for each port as follows (with Naval Supremacy, a roll of 1-4 interdicts Sea Supply):
Palermo: may trace Sea Supply through the Tyrrhenian Sea (1 die) to Axis Rail/Sea Supply at Naples. Allies roll a 2. Supply is interdicted.
Messina: may also trace through the Tyrrhenian Sea (1 die) to Naples. Allies roll a 4. Supply is interdicted.
Catania: The most favorable Sea Lane is through the Ionian and Tyrrhenian Seas to Naples (2 dice, one from each sea). Taranto does not have Rail/Sea Supply due to Allied unit A (assume no other Axis ports on the Ionian Sea). Allies roll a 2 and a 5. Supply is interdicted. Units X and Y suffer supply attrition.
16.0 Strategic Objectives
Capturing key objectives can have political, economic, or military effects.
16.1 Italian Surrender
Allied control of Italian ports may result in Italy suing for peace. At the end of any Allied Politics phase that the Allies control at least one Italian port, they may roll for Italian Surrender. If the dieroll is less than the number of Allied controlled Italian ports PLUS eliminated Italian units, Italy Surrenders.
RESULT: One Italian unit not in a German ZOC defects to the Allies (replace with Friuli unit at 1cv). All other Italian units are eliminated and may not be rebuilt (if no Italian unit defects, Friuli arrives as a 1cv Allied reinforcement next Production). There is no change of territory control until Conquest (see below).
Secondly, all Mediterranean Basin sea areas become Allied controlled regardless of Naval Base ownership. These effects are irreversible.
16.11 Conquest
After Surrender, if no Axis unit remains within Italian territory at the end of any Allied Politics phase, all Italian territory becomes Allied controlled.
16.2 Axis Ore SeaRoute
Allied control of Copenhagen cuts Axis sea communications through the Skagerrak, blocking its main delivery route for Swedish iron ore (by sea via Narvik, Norway).
RESULT: Reduce Axis Basic Production by 5 PPs.
IMPORTANT: The Axis Ore SeaRoute is automatically lost in S'44 due to Allied Atlantic Basin control (Air Supremacy).
16.3 Revolt
16.31 The Maquis
As the Allies gain control of French territory, the local Resistance may Revolt.
During any Allied Politics phase in which the Allies control French territory, they may roll one die for French Revolt. If the dieroll is less than the number of controlled hexes in France, it Revolts.
RESULT: The Allies may place the Maquis unit at 1CV in any French hex not in a German ZOC. It arrives in an unsupplied state (no ZOC) and functions as a non-motorized infantry corps (moves 2), subject to all normal rules.
16.32 Tito
During any Allied Politics Phase, the Tito unit can be raised at 2 CV in any mountain or hill hex in Yugoslavia (not Axis occupied). No Allied control of Yugoslav territory is necessary.
The Tito unit functions as an Allied mountain unit, with these special powers within or adjacent to Yugoslavia only:
- It can disengage into vacant mountain or hill hexes regardless of Axis ZOCs.
- It is immune to Pursuit Fire and Supply Attrition.
Tito arrives in an unsupplied condition (no ZOC), and is subject to all other game rules (command, supply, etc.)
16.4 Spain and Portugal
Spain and Portugal begin the game as neutral countries: they are out of play and their units are not deployed on the map.
In 2nd edition WestFront, the Allies have the option to re-enter Europe via Spain/Portugal instead of via Italy or elsewhere.
Before Allied units can enter Spain or Portugal, they must Declare War, activating that neutral. This is done at the beginning of the Command phase before activating HQs.
Important: a Declaration of War on Portugal is automatically a Declaration of War on Spain also (not vice-versa).
RESULT: Axis player deploys Spanish forces as desired within Spain (and Portuguese within Portugal if relevant).
Spain: HQs and infantry are at full strength, static units at 1 cv.
Portugal: infantry 1 cv, static 0 cv.
Once deployed, these units become normal Axis forces, commanded normally by Axis HQs. Spanish HQs can command Spanish units only.
Declarations of War have a Victory Point penalty (VPs may be gained by eliminating activated neutral units and capturing their ports).
Declaration of War VP Penalty
| Neutral | S'43 | W'43 | S'44+ |
|---|---|---|---|
| Spain | -12 VPs | -18 VPs | -24 VPs |
| Portugal | -2 VPs | -3 VPs | -4 VPs |
If the national capital (Madrid or Lisbon) is lost to the Allies, that nation is defeated: all units are removed and Conquest applies (see 16.11). Spain and Portugal can also Surrender as for Italy (see 16.1), except no units defect.
16.5 Army Group 'E'
The units shown below were located just off map in central Yugoslavia. If the Allies had invaded that part of Yugoslavia shown on-map, these units would have reacted.
RESULT: If Allied units (including Tito) have entered Yugoslavia, the units below can appear in any subsequent Axis Player-Turn in East map edge Rail Entry hexes within Yugoslavia or Hungary (unless Allied occupied, not just Allied controlled).
One Supreme Move is expended per unit arriving. They may stop there or continue by rail movement only (5 hexes of Rail Movement is considered already expended).
IMPORTANT: If Italy has surrendered, the Italian Army (9I) does not arrive with Army Group E.
Army Group 'E' consists of: HQ II, Mech Gp E. (Mech 2), 78 Cav Cps. (Cavalry 2), and IT 9th Army (Infantry 3).
NOTE: If the Allies never enter Yugoslavia, these units do not appear in the game.
16.6 Axis Oil Supply (Ploesti)
The Axis war effort was highly dependent on petroleum production, and Ploesti, Rumania was its major oil source. In September 1944, the Soviets captured Ploesti, crippling Axis Oil Production.
RESULT: Starting September 1944, Axis HQ costs rise by 5 PP (cadres +10 PPs).
16.7 The Iron Curtain
As the Soviets advanced northwards in the Balkans in Fall 1944, they overran the east mapedge from Yugoslavia northwards. Hence the east mapedge is progressively lost to the Axis as a home mapedge.
RESULT: In October 1944, the Sarajevo Rail Entry hex is lost to the Axis as a home mapedge hex (units can no longer arrive there by off-board rail movement or during Production).
Each successive month, one additional east mapedge RE hex, moving north (plus any intervening hexes) is also lost to the Axis as a home mapedge hex, until none remain to the Axis.
| Month | Hex Lost |
|---|---|
| October '44 | Sarajevo |
| November '44 | Vukovar E1 |
| December '44 | Gyor E1 |
| January '45 | Ostrava NE1 |
| February '45 | Posnan E1 |
| March '45 | Stettin E3 |
HOME MAPEDGES: The East mapedge is the home mapedge of the Axis player, the West mapedge is the home mapedge of the Allied player.
ITALIAN SURRENDER: In Summer 1943, as the tide of war approached Italy, Mussolini was deposed and replaced by the Badoglio government, which began secret negotiations with the Allies. In September 1943, as Allied landing craft approached the mainland, Italy officially switched sides. Most Italian forces were easily disarmed by the Germans, but some took up arms against the Nazis, for which many officers and men were executed. As agreed, the powerful Italian Navy left its anchorages at La Spezia, Taranto, and Trieste and steamed toward Malta. German air attacks sank the battleship Roma and damaged another, but most of the fleet arrived safely, giving the Allies complete naval dominance in the Mediterranean.
SWEDISH IRON: Swedish mines at Gallivare supplied about 30% of Germany's iron ore throughout the war, the bulk of it shipped from Narvik, Norway.
TITO: Unlike Soviet partisans, which drew off German security divisions, Tito's Army in Yugoslavia drew a crowd of several German combat corps. Without a similar threat in the game, these units would be available for other German uses.
THE RESISTANCE: As the Allies passed through France, a new French corps was raised and assigned to besiege the coastal forts in Brittany in which Germans still held out.
NOTE: The Maquis and Friuli "volunteer" units are non-motorized infantry (move 2).
DECLARING WAR — VP PENALTIES: The Allies were reluctant to Declare War on neutrals for moral reasons. There would be a price to pay in world disapproval. Although the Allies can gain VPs by killing activated neutral units and capturing ports, the VP penalty ensures that there is no major gain from Declaring War on neutrals. The penalty equals the VP value of that neutrals' forces, increasing over time because violation of neutrality became less and less justifiable as victory neared. Players must decide for themselves if the strategic benefits of landing in Iberia exceed the costs. Keep in mind that other Axis units are allowed to move into the invaded nations after the declaration of war.
Example: in W'43, the Allies Declare War on Portugal (and hence also Spain). They incur a VP penalty of -21 VPs. If they defeat and occupy both nations, the net VP gain amounts to only 5 VPs (+14 VPs for eliminated units, +12 VPs for cleared ports).
ARMY GROUP 'E': Axis Army Group 'E' occupied the southern Balkans from 1941. If the Allies had invaded the northern Balkans in 1943-44, this Army Group would have reacted in the defense of Croatia.
EASTFRONT & EUROFRONT: The Iron Curtain and Army Group 'E' rules deal with the "edge of the world" syndrome in an abstract but simple way. Our companion EastFront and EuroFront games eliminate the need for such rules by continuing the field of play to the east. EastFront covers the war in Russia, Poland and the Balkans from 1941-45. EuroFront introduces Scandinavia, the Urals, the Mideast and North Africa into play, along with all nations and military forces this could involve. Also included are national forces for all other European and Middle Eastern powers and diplomatic rules needed to cover the early-war campaigns in Poland, Scandinavia, the Low Countries, France, and the Balkans (1939-41), completing the portrayal of World War II in Europe and its possible 'what-ifs'.
PLOESTI OIL: The 'Achilles heel' of the Third Reich was petroleum. Ploesti's oil constituted about 40% of Germany's total (an equal amount was ersatz, made chemically from coal). After the Soviets overran Ploesti in September 1944, the Axis fuel situation deteriorated rapidly, affecting especially the Luftwaffe.
MAPEDGE PLAY CONSIDERATIONS: New Axis reinforcements and rebuilt cadre units can arrive in east (home) mapedge hexes, (but not if engaged or Allied occupied). Axis off-map rail movement (9.5) is also allowed between east (home) mapedge rail entry hexes (but cannot be used to enter engaged hexes). The Allies must protect their right flank as they move north in the Balkans by occupying all RE hexes or Axis units can appear there.
17.0 Victory
17.1 Victory Points
At the end of a scenario, victory is determined by tabulating Victory Points (VPs). Each side determines its Victory Points by the following procedure:
- PPs: Note the current Production Level (in PPs).
- HQ CV: Add 2 VPs for every friendly HQ CV in play. Subtract 4 VPs for every eliminated friendly HQ.
- Eliminated Units: Subtract 2 VPs per eliminated friendly unit (only 1 VP per Italian/activated neutral/static unit), and 1 VP for each unsupplied friendly unit.
NOTE: Units which began eliminated and were never rebuilt, and eliminated activated neutrals are counted. Future Reinforcements and unactivated neutrals are not.
- BeachHeads: Allies add 2 VPs for each Ready BH. Subtract 2 VPs for every eliminated BH.
- Allied Cleared Ports: A cleared port is an unengaged controlled port. The Allies receive VPs for cleared ports outside Britain, Gibraltar, Malta and North Africa.
| Region | Major Port | Minor Port |
|---|---|---|
| South | 2 VPs | 1 VP |
| North | 4 VPs | 2 VPs |
South = Italy, Corsica, Portugal, Spain, and Yugoslavia. North = France, Belgium, Holland, Germany, and Denmark.
NOTE: In W'43 the Allies cannot score more VPs for BeachHeads plus Cleared Ports than there are Allied units in the North at the end of the scenario.
- Attacked Neutrals. Subtract the following penalty from Allied VPs for Declaring War on a neutral:
| Neutral | S'43 | W'43 | S'44+ |
|---|---|---|---|
| Spain | -12 VPs | -18 VPs | -24 VPs |
| Portugal | -2 VPs | -3 VPs | -4 VPs |
This penalty represents -1/-1.5/-2 VPs per neutral unit activated for the Axis.
- Handicap. Add/subtract the scenario handicap from the Allied total VPs.
- S'43: -55 VPs
- W'43: -85 VPs
- S'44: -155 VPs
17.2 Victory Levels
The Victory Level (Decisive, Major, Marginal, or Draw) is based on the difference between the two adjusted VP Totals, as noted on the Victory Level Table.
- Decisive Victory is of immediate war-winning significance.
- Major Victory is probably enough to eventually win the war.
- Marginal Victory would give a significant, but not necessarily permanent advantage to that side.
Victory Levels
| VP Differential | Result | TPs |
|---|---|---|
| 0-5 | Draw | 1/1 |
| 6-15 | Marginal | 2 |
| 16-25 | Major | 3 |
| 26+ | Decisive | 5 |
17.21 Tournament Points
In Tournament play where a series of games is rated, the value of each result is given under TPs.
17.3 Campaign Game
When playing the Campaign Game, calculate Victory Points at the end of each scenario, and declare a winner if a Decisive Victory (only) has been scored. Otherwise, continue play into the next scenario.
If the game lasts into W'44 use the Victory Conditions from that scenario.
17.31 Victory Cities
The W'44 Victory Conditions are not based on VPs calculations, but on the control of Victory Cities. There are 13 Victory Cities, shown on the map as black squares (Berlin counts as two Victory Cities, Madrid is red).
17.32 W'44 Victory
The side controlling the most Victory Cities after May '45 wins. Victory Cities must be in friendly rail supply to count.
Each Victory City more than the closest rival equals one Victory Level (+1 = Marginal; +3 = Decisive).
WHO'S WINNING THE WAR? The victory conditions deliberately depend partially on factors not known precisely to the players, namely the number of HQ steps each player has in play. Players can never be exactly sure what they need to win, only what will help.
CLEARED PORTS: This rule encourages the Allied player to build up for the Overlord invasion even if the game is not continuing that far. Marshall and the Joint Chiefs threatened to switch US efforts to the Pacific if the buildup was not strictly pursued.
VICTORY LEVELS: We recommended that draws and even Marginal Victory games be continued into the next scenario.
VICTORY POINTS EXAMPLE (S'43): The Allies have a Production Level of 73, five HQs with total CV of 12 (24 VPs), and 1 eliminated unit (-2 VPs). They have 7 cleared minor ports in the Mediterranean Islands (7 VPs) and 4 cleared minor ports and a Major Port in Italy (6 VPs). They have 1 BH Ready (2 VPs).
Allied VPs: 73 + 24 - 2 + 13 + 2 = 110
The Allied player has a handicap of 55 in this scenario. His adjusted net VPs are:
Allied Net VPs: 110 - 55 = 55
The Axis player has a Production Level of 40, six HQs with total CV of 9 (18 VPs), 10 eliminated Italian/static units (-10 VPs) and one eliminated German unit (-2 VPs).
Axis VPs: 40 + 18 - 10 - 2 = 46
The VP difference between the two sides is therefore 9 in favor of the Allied player. This translates into an Allied Marginal Victory.
W'44 VICTORY EXAMPLE: The Axis can win W'44 by holding a perimeter that includes Berlin, Copenhagen, Prague, Vienna, and either Hamburg or Munich. This would give them 7 Victory Cities, leaving 6 maximum for the Allies (including Madrid). Historically, the Allies garnered 8 Victory Cities: Rome, Milan, Paris, Athens, Amsterdam, the Ruhr, Hamburg, and Munich.
Scenarios
Summer '43 — Operation 'Husky': The Invasion of Italy
AXIS — Units (CV): HQs 5 (10), Armor 7 (15), Mech 1 (2), Infantry 13 (19), Para 2 (4), Fort 5 (9), Static 15 (13), It. Inf. 6 (10), It. Mech 1 (2), It. Static 2 (1). Production 39. Air Power SF.
AXIS REINFORCEMENTS: Jul '43 — 51 Mtn Cps (Mountain 2). Jul '43* — HK Mtn Cps (Mountain 2). Aug '43 — 15 Mtn Cps (Mountain 1). Sep '43 — 5 SS Mtn Cps (SS Mtn 1). (* Starts in valid arrival location.)*
ALLIED — Units (CV): HQs 4 (10), Armor 1 (4), Mech 4 (13), Infantry 2 (6), Para 2 (2), Amphib. 4 (12), Mountain 1 (2). BHs 3 Ready, 0 Prep. Production 73. Air Power TF. Handicap -55.
ALLIED REINFORCEMENTS: Aug '43 — Polish Cps (Infantry 4). Sep '43 — SHAEF (SHQ 0). Oct '43 — Cdn 1 Cps (Mech 4).
S'43 Special Rules
-
SETUP. AXIS: Controls Denmark, Germany, Holland, Belgium, France (including Corsica), Italy (including Sardinia and Sicily), Austria, Czechoslovakia, and Yugoslavia. Deploy first (move second). ALLIES: Controls Britain, Gibraltar, Malta, and North Africa. Deploy second (move first). HISTORICAL DEPLOYMENT: See S'43 Order of Battle cards. SEMI-HISTORICAL DEPLOYMENT: See OB cards and 3.24. FREE DEPLOYMENT: See 3.23. At least one Italian unit must set up in France and one in Yugoslavia.
-
LATE START. This scenario begins in July 1943, one month late.
-
ITALIAN UNITS. All Italian units are restricted to being within, or adjacent to Greater Italy (Italy, Yugoslavia, and Med. Islands), see 2.66. Italy may Surrender (see 16.1).
-
ARMY GROUP 'E'. These four units may enter play if Allied units enter Yugoslavia. See 16.5.
S'43 SCENARIO NOTES: Husky is a good learning scenario, showing the technical but powerful nature of invasions. With a huge coastline to defend, Axis initial deployment is critical. Even with a good setup, the Allies will usually be able to land. Although Allied airpower be demoralizing, the Axis does have formidable counterattacking power and plenty of good defensive terrain to work with.
Winter '43 — Operation 'Avalanche': The Cassino-Anzio Stalemate
AXIS — Units (CV): HQs 5 (10), Armor 7¹ (15), Mech 1¹ (3), Infantry 13 (22), Para 2² (4), Mountain 4¹ (9), Fort 5 (9), Static 15 (16). Production 43 [+5]. Air Power SF. (¹ Includes one SS unit. ² Grounded.)
AXIS REINFORCEMENTS: Jan '44 — 75 Inf Cps (Infantry 1). Jan '44 — 80 Static (Static 0). Feb '44 — AOK Mech Cps (Mech 1). Feb '44 — 86 Static (Static 0). Apr '44 — PzrGp B (Armor 1). Apr '44 — 67 Inf Cps (Infantry 1).
ALLIED — Units (CV): HQs 5 (12), Armor 1 (4), Mech 5 (14), Infantry 4¹ (9), Para 2 (2), Amphib 5 (14), Mountain 1 (3). BHs 2 Ready, 1 Prep. Production 84 [+10]. Air Power TF². Handicap -85. (¹ Includes Friuli. ² Allied Extended Air Range.)
ALLIED REINFORCEMENTS: Dec '43 — US 7th Cps (Amphib 4). Dec '43 — US 5 BH (Ready). Jan '44 — US 8 Cps (Armor 3). Feb '44 — US 15 Cps (Armor 3). Feb '44 — US 19 Cps (Mech 4). Mar '44 — 12th Army Gp (HQ Ø). Mar '44 — US 7 BH (Ready). Apr '44 — US 20 Cps (Armor 3). Apr '44 — US 4 Cps (Mech 4). May '44 — US 12 Cps (Armor 3). (* Starts in Major Port.)*
W'43 Special Rules
-
SETUP. The Allies control Britain, Gibraltar, Malta, North Africa, Sicily, Sardinia, Corsica and Italy south of the startline. The Axis controls the rest of the map (except neutral Spain and Portugal). The Axis sets up first and moves second. Allied Naval Supremacy remains in effect. Italy has Surrendered. 1a) Semi-Historical Deployment. Select starting units as per the S'43 Historical OB card, modifying unit cv according to the Starting Forces chart above. Deploy units in the North or South, as per the Historical OB. S'43 Reinforcements can set up in either the North or South. 1b) Free Deployment. Select units and assign cv according to the chart above, Deploy freely. See 3.23.
-
ALLIED EXTENDED AIR RANGE. Allied Air Range is extended to double the HQ's CV / triple for SHQs (13.21). This also applies to Paradrops. Strategic Bombing. Beginning December, 1943, Axis HQ costs rise to 15 PPs/step (30 PPs/cadre).
-
OVERLORD BUILDUP. In this scenario only, the Allies cannot receive more VPs for BeachHeads plus Cleared Ports than the number of Allied units in the North at the end of the scenario (see 17.1).
-
ARMY GROUP 'E'. These three units (Italy has surrendered) may enter play if Allied units enter Yugoslavia. See 16.5.
Summer '44 — Operation 'Overlord': The Invasion of France
AXIS — Units (CV): HQs 5 (12), Armor 7¹ (17), Mech 2¹ (8), Infantry 15 (30), Para 2² (6), Mountain 4 (9), Fort 5 (13), Static 15 (17). Production 53 [+10]. Air Power None. Handicap N/A. (¹ One SS unit. ² Grounded. ³ Ore SeaRoute lost (-5 PPs).)
AXIS REINFORCEMENTS: Jul '44 — PzrGp Eber (SS Mech 4).
ALLIED — Units (CV): HQs 6 (16), Armor 5 (16), Mech 7 (26), Infantry 4¹ (12), Para 2 (4), Amphib 5 (18), Mountain 1 (3). BHs 3 Ready, 2 Prep. Production 94 [+10]. Air Power TF². Handicap -155. (¹ Including Friuli. ² Allied Air Supremacy.)
ALLIED REINFORCEMENTS: Jun '44 — 6th Army Gp (HQ Ø). Jul '44 — FF 1st Tk Cps (Armor 3). Aug '44 — US 13th Cps (Mech 4). Aug '44 — US 18th Cps (Mech 4). Sep '44 — US 3rd Cps (Mech 4). Sep '44 — US 16th Cps (Infantry 4). Oct '44 — US 21st Cps (Infantry 4). Oct '44 — Brit 3rd Cps (Infantry 4). Nov '44 — US 22nd Cps (Infantry 4). Nov '44 — US 23rd Cps (Infantry 4).
S'44 Special Rules
-
SETUP. The Allies control Britain, Gibraltar, Malta, North Africa, Sicily, Sardinia, Corsica, and Italy south of the S'44 Startline. The Axis controls the rest of the map. Italy has Surrendered. The Axis sets up first and moves second. 1a) Historical Deployment and Semi-Historical Deployment (recommended). See the O/Bs on the next page. 1b) Free Deployment. Both sides set up freely, using units and CVs as given in the Starting Forces chart above, except the Axis must occupy the Frontline (Italy) with Front units.
-
ALLIED AIR / NAVAL SUPREMACY. In S'44, Allied Air Supremacy begins, reducing Axis land and rail movement (see 13.22). Allied Naval Supremacy and Extended Air Range also remain in effect. Axis HQ costs are 15 PPs/step and 30 PPs/cadre (Strategic Bombing).
-
AXIS OIL SUPPLY. In September 1944, the Axis Oil Supply is lost: HQ costs rise +5 PPs (+10 PPs/cadre) to 20 PPs (40 PPs/cadre). See 16.6.
-
THE IRON CURTAIN. Beginning October 1944, the Axis begins losing its eastern home mapedge as the Red Army marches north offmap. See 16.7.
-
ARMY GROUP 'E'. These three units (Italy has surrendered) may enter play if Allied units enter Yugoslavia. See 16.5.
Winter '44 — Across the Rhine: The End in the West
AXIS — Units (CV): HQs 5 (10), Armor 5¹ (12), Mech 2² (5), Infantry 11 (20), Para 2³ (4), Mountain 3¹ (7), Fort — (—), Static 12 (15). Production 46 [+15]. Air Power None. (¹ One SS unit. ² Two SS units. ³ Grounded.)
AXIS REINFORCEMENTS: Dec '44 — FHH PzrCps (SS Armor 4).
ALLIED — Units (CV): HQs 7¹ (16), Armor 5 (14), Mech 10 (28), Infantry 10² (30), Para 2 (4), Amphib 5 (15), Mountain 1 (3). BHs 1 Ready, 3 Prep. Production 109 [+0]. Air Power TF³. Handicap N/A. (¹ Including AF & SHAEF. ² Includes Maquis & Friuli. ³ Allied Air Supremacy.)
ALLIED REINFORCEMENTS: Dec '44 — FF 3 Cps (Infantry 4).
W'44 Special Rules
-
SETUP. The Allies control Britain, France, Belgium, Holland west of the Startline, Gibraltar, Malta, North Africa and Italy south of the startline. The Axis controls the rest of the map (except neutral Spain and Portugal). The Axis sets up first and moves second. Allied Naval Supremacy remains in effect. Italy has Surrendered. 1a) Semi-Historical Deployment. Select starting units as per the S'44 Historical OB card, modifying unit cv according to the Starting Forces chart above. Deploy units in the North or South, as per the Historical OB. S'44 Reinforcements can set up in either the North or South. 1b) Free Deployment. Select units and assign cv according to the chart above, Deploy freely. See 3.23.
-
ALLIED NAVAL / AIR SUPREMACY. Both remain in effect (also Extended Air Range).
-
AXIS FUEL SHORTAGE. With Allied Strategic Bombing in effect and Ploesti lost (see 16.6), Axis HQs cost 20 PPs/step and 40 PPs/cadre.
-
BULGE SURPRISE. During any selected Axis Player Turn of this scenario, Axis armor units have normal offensive fire despite Mud weather.
-
THE IRON CURTAIN. The Axis is losing its eastern home mapedge as the Red Army marches north offmap in the Balkans. As W'44 begins they have reached Gyor E1. See 16.7.
-
ARMY GROUP 'E'. These three units (Italy has surrendered) may enter play if Allied units enter Yugoslavia. See 16.5.
-
VICTORY. Use the W'44 Victory Conditions which concern control of Victory Cities only (see 17.31).
NOTE: The Axis begins W'44 with 9 Victory Cities (Berlin counts as 2); the Allies with 2 (Paris and Rome).
W'44 SCENARIO NOTES: With the Russians in Budapest and Warsaw, the Allies are in a race for Berlin. Germany has a lot of good defensive terrain, but her capabilities are winding down.
Introductory Scenario — 'Husky' Example Game: The Invasion of Sicily
Axis Forces
| Location | Unit | CV |
|---|---|---|
| Palermo E1 | Armor | 3 |
| Catania | It. Inf | 1 |
| Palermo | It. Static | 1 |
| Reggio | OKW | HQ III |
| Reggio | Para | 2 |
| Reggio | Static | 2 |
Production 25. Air Power SF. Axis Reinforcements: none (for this example game).
Allied Forces
| Location | Unit | CV |
|---|---|---|
| Tunis | HQ (15) | III |
| Tunis | Amphib | 4 |
| Tunis | Mech | 4 |
| Tunis | Mtn | 2 |
| Bizerte | HQ (21) | III |
| Bizerte | Amphib | 2 |
| Bizerte | Armor | 4 |
| Bizerte | Infantry | 4 |
| Malta | SHQ (AF) |
BHs 2 Ready, 0 Prep. Production 73. Air Power TF. Allied Reinforcements: Aug '43 — Polish Cps (Infantry 4).
Husky Example Game Special Rules
-
SETUP. Use only a small part of the map including Tunisia, Malta, Sicily, and the Reggio hex in mainland Italy (which is considered an Axis build city for this introductory scenario only). The rest of the map is unplayable in this introductory scenario. Set up units as indicated in the tables above. Ignore Italian Surrender for this scenario.
-
LATE START. This scenario begins in July 1943, and ends two months later, at the end of August.
-
ALLIED NAVAL SUPREMACY. Allied Naval Supremacy is in effect.
-
GERMAN PARAS. The German Para unit is grounded (it cannot airdrop but is buildable for 6 PPs/step).
SCENARIO NOTES: The Allies are poised to invade Sicily, which is lightly defended by mixed Italian and German units. Italy is on the verge of collapse, which the Allies hope to hasten with a convincing victory. The Allies must invade and clear Sicily as rapidly and cheaply as possible. The Axis must try to hold the Sicilian ports without excessive losses.
HISTORICAL COMMENTARY: In July 1943, the Allies invaded the southeast coast of Sicily. The beaches were easily secured and an early counter-attack driven off. Though most Italian units showed little fight, the Germans fought stubbornly back to the Straits of Messina and evacuated to the mainland.
July I 1943 — Allied Turn
Command Phase. The Allies activate two Blitz Invasion HQs (Bizerte and Tunis) and also activate their SHQ (Malta) as a Paradrop HQ.
Movement Phase. The Allies invade Licata with unit A (Amphibious) from Bizerte. Because the Allies have Naval Supremacy, Licata is within Invasion Range (two seas) [15.4]. Both sea areas are Allied controlled [15.1], so Movement Interdiction [15.72] isn't a concern; Licata is undefended, so the invasion is not a Sea Assault [7.53], and cannot be repulsed.
The Allies also invade Catania with a Combined Air/Sea Assault [7.53] involving the Para unit H from Malta and amphibious unit D from Tunis. No alternate second wave hexes are indicated [15.44] so both follow-up units will invade the same hexes again.
Combat Phase. The Allies assign a IIICV airstrike to the assault battle [13.13]. The battle is supported because it is within Invasion Command Range of the active HQs [15.43].
Defending unit Z in Catania is revealed as an Italian 1CV infantry. The Allied airstrike scores two hits with (6/1/5) eliminating it even though it is in hill terrain with double defense [7.34]. Therefore, no defending repulse fire [15.45] can occur and the assault succeeds without repulse or loss. The Allies reduce both Blitz HQs to IICV without mobilizing and decline to mobilize the SHQ as it deactivates and loses a step [5.43].
Blitz Movement Phase. The Allied second invasion waves reinforce both hexes (with mountain unit E and armor unit B). No other movement is possible.
Blitz Combat Phase. Combat is skipped as there are no current battles. The Blitz HQs then reduce to 1CV and deactivate without mobilizing. As Allied unit A is Amphibious [15.5], the Allies may place its Beachhead [15.51] in its hex (Licata), which could then supply all units within two hexes as the hex is Allied-controlled. However, with a port secured at Catania (the assaulted hex) a BH is unnecessary for supply reasons. Nevertheless, the Allies place the BH anyway to act as an additional port, speeding up the onshore buildup.
Supply Phase. When unit Z was destroyed, the Axis railhead [9.4] reverted to Reggio (Messina disputed), leaving unit X in Palermo unsupplied, so it drops one step to 0CV [10.4].
July I 1943 — Axis Turn
Command Phase. The Axis activate OKW, allowing up to 6 Supreme Moves.
Movement Phase. The Axis move unit X to Palermo E1 and unit Y to Messina, conceding Palermo. They also move unit W (Para) from Reggio to Messina. With no battles, and all Allied units supplied, the Turn ends.
July II 1943
The Allies, low on HQs, pass their turn, activating no HQs. If there were any current battles, they could still be fought unsupported, but there are none. The Axis also pass.
August 1943 Production
Axis Production. For this example game, the Axis Production level is 25, the Allied 73. The German grounded Para is built one step (6 PPs), as is the OKW HQ (10 PPs). The (just eliminated) Italian 7th infantry is raised to cadre (6 PPs) in Reggio for a total of 22 PPs. The remaining 3 PPs are used to rebuild static unit X to 1CV.
Allied Production. The Allies add one step to all 3 HQs (35 PPs - the two in Tunisia for 10 PPs each and the SHQ in Malta for 15 PPs - overseas) [11.43]. They also build an infantry step (4 PPs), an amphibious step (4 PPs), a mountain step (5 PPs), and a para step (12 PPs), spending a total of 60 PPs. The rest are forfeit. With the capture of a port, all Allied units are in sea supply, so no rebuilding costs were doubled as would be necessary in BH supply. The Allied reinforcement unit I arrives in Tunis.
August I 1943 — Allied Turn
Command Phase. With semi-rejuvenated HQs, the Allies activate a IICV Invasion HQ in Bizerte. They also Activate their SHQ in Malta, allowing up to 4 Supreme Moves.
Movement Phase. Unit C in Bizerte invades into unit X's hex. Units (F & G) move by sea from Tunis and Sfax into the BH (Licata) and port (Catania). The two remaining Supreme moves are used to attack unit X with armor unit B (cancelling any possibility of repulse of sea invading unit C) and to attack Messina by land with mountain unit E. Note that although Messina is within Invasion Command Range [15.43] it is an uninvadeable (Mountain) hex so combat there is unsupported.
Combat Phase. Palermo becomes an Allied hex at the beginning of this phase (engaged unit X no longer exerts a ZOC). The invasion HQ is out of Air Range [13.11] of any battle, but the SHQ sends its Airstrike (2CV) against Messina. Allied Extended Air Range [13.21] is not yet in effect.
The Airstrike scores 1 hit. The defending units have triple defense (unsupported, mountains), so this is only a third of a hit. The Axis defenders score 2 hits with 6 DF, reducing the attacker to 1CV. The Allies lone SF remaining has no effect since two more hits minimum would be needed to reduce the Axis unit. The third of a hit from the airstrike is wasted.
In the other battle, the Italian static unit X misses with its 1 SF. The attackers return 4 DF and 4 SF, scoring 2 hits. The battle is supported by the Invasion HQ [15.41] but the Hill terrain provides Double Defense [7.34], so the static takes only one full hit. However, it is now 0CV, at which point an engaged static is automatically eliminated [2.25].
August I 1943 — Axis Turn
Combat Phase. The Axis pass their Player Turn, satisfied with their position and wishing to conserve their HQ steps.
August II 1943
Although the Allies still have a IICV HQ in Tunis, they elect to conserve HQ steps and pass. The Axis do likewise.
In the months that follow the Allies are likely to Sea Move the 15th Army HQ to Catania to support combat at Messina. Alternately they may choose to bypass Messina, and invade mainland Italy, hoping to isolate the Axis units in Messina and eliminate them without the hard fighting that occurs in mountain hexes. As long as Reggio is Axis controlled and in Rail Supply back up the boot of Italy, the defenders of Messina will be tough to dislodge. Once Rail Supply is cut, Axis Sea Supply will be subject to Interdiction. Even if Sea Supply gets though, the engaged port will support only 1 unit at 1 CV since the Axis do not have Naval Supremacy (15.31).
Game Charts
The Game Month
PRODUCTION — Determine Production Level; Add Replacement steps to units in play; Build and deploy Cadres; Deploy any Reinforcements.
FORTNIGHT I — Weather Determination; Allied Player-Turn (see below); Axis Player-Turn.
FORTNIGHT II — Repeat Fortnight I Procedure.
THE PLAYER-TURN
COMMAND PHASE — Declaration of War; Activate HQs.
MOVEMENT PHASE — Move units under command; Mobilize HQs (optional); Sea/Invasion Movement Interdiction (passive die-roll).
COMBAT PHASE — Target Airstrikes; Select Active Battles; Resolve Each Active Battle (Offensive Airstrike; Defensive Fire; Offensive Fire); Deactivate HQs (reduce Blitz HQs).
BLITZ MOVEMENT PHASE (if any) — Repeat Movement Phase.
BLITZ COMBAT PHASE (if any) — Repeat Combat Phase.
SUPPLY PHASE — Paradrop Linkup check (if applicable); Sea/BH Supply Interdiction (passive die-rolls); Enemy Unit Supply Attrition.
POLITICS PHASE — Revolt/Surrender.
Unit Data
| Unit Type | Speed Dry | Speed Mud | Firepower | Axis Step | Axis Cadre | Allied Step | Allied Cadre |
|---|---|---|---|---|---|---|---|
| Armor | 3 | 1 | DF | 8 | 12 | 8 | 16 |
| Mech | 3 | 1 | SF/DF¹ | 6 | 9 | 6 | 12 |
| Infantry² | 2 | 1 | SF | 4 | 6 | 4 | 8 |
¹ Offense/Defense. ² Allied Infantry moves 3 hexes in Dry (motorized). ³ DF in Mountain terrain. ⁴ Supreme Movement only. ⁵ Supreme Movement only (Forts). ⁶ Half (6/9) if grounded. ⁷ HQ costs sometimes increase (see 11.43).
Terrain Effects
| Terrain | Stacking | Hexside | Movement | Firepower | Defense |
|---|---|---|---|---|---|
| Clear | 4 | 2 | Normal | Normal | Normal |
| Forest/Hill | 4 | 1 | Normal | Normal | Double |
| Marsh | 3 | 1 | Stop | Offense SF | Double |
| Mountain | 2 | 1 | Stop | Normal | Double |
* Largest unit only. ** Original Defender(s) only.
ASSAULT REPULSES
| Assault | Repulse |
|---|---|
| River | 1-2 (1-3 Mud) |
| Air | 1 |
| Sea, by Amphib. (FNS / ENS) | n/a / 1 |
| Sea, by Other units (FNS / ENS) | 1-4 / 1-2 |
Hex Control
| Activity | Friendly | Disputed | Enemy |
|---|---|---|---|
| Deploy HQs into Hex | YES* | NO | NO |
| Move into Hex | YES | YES | YES |
| Engage into Hex | YES | N/A | YES |
| Disengage into Hex | YES* | NO | NO |
| Move By Rail | YES* | NO | NO |
| Trace Rail Supply Line | YES** | NO | NO |
| Trace Supply Line |
* Not if embattled. ** Into battlehex but not through.
MOVEMENT INTERDICTION (Passive Player Roll)
| Type | FNS | ENS |
|---|---|---|
| Invasions | R 1-3, H 4-6 | R 1, H 6 |
| Sea Moves | R 1-4, H 3-6 | R 1-2, H 5-6 |
SUPPLY INTERDICTION (Active Player Roll)
| Type | FNS | ENS |
|---|---|---|
| BH Supply | R 1-3 | R 1 |
| Sea Supply | R 1-4 | R 1-2 |
FNS: Friendly Naval Supremacy. ENS: Enemy Naval Supremacy. R: Repulse #. H: Hit #.
Starting Production Levels (PPs)
| Scenario | S43 | W43 | S44 | W44 |
|---|---|---|---|---|
| Basic | 50 | 60 | 70 | 70 |
| Allied Starting | 73 | 84 | 94 | 109 |
| Basic | -60 | -55 | -40 | -30 |
| Axis Starting | 39 | 43 | 53 | 47 |
Weather Effects
| Weather | Terrain | Command | Movement | Combat |
|---|---|---|---|---|
| Dry | Normal | Normal | Normal | Normal |
| Mud | Forest/Clear/Hill = Marsh; River Assault Repulses 1-3 | HQ Disrupted, can't deploy | 1 hex (Cav. 2 hexes) | Offense SF/Defense DD |