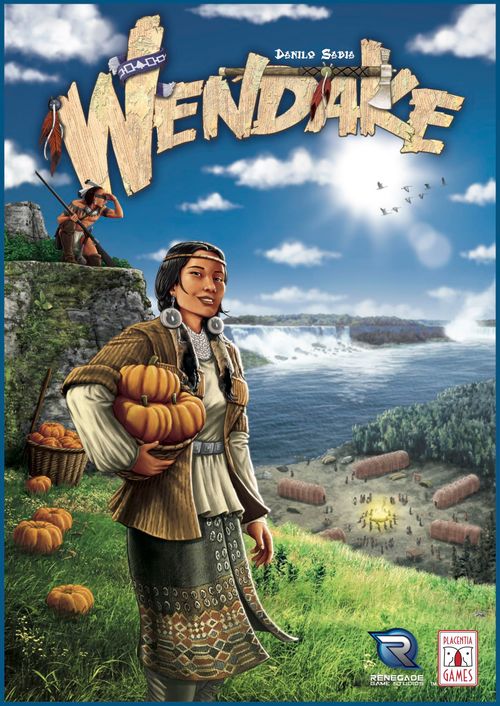
Wendake
Wendake Rulebook
Table of Contents
Table of Contents
Components
| Qty | Component | Notes |
|---|---|---|
| 4 | Game board panels | you will use 3 of them in each game, 2 to create the main Board and 1 as the Ceremonial Mask board |
| 4 | Scoring Type markers | they are placed on the Score Tracks |
| 4 | Score Track pieces | they must be assembled to create 2 pairs of Score Tracks |
| 71 | Action tiles | 36 Base Action tiles (9 per color) — Action side / Ritual side; 17 Level 1 Advanced Action tiles (brown); 17 Level 2 Advanced Action tiles (purple); 1 Ottawa Fire Action tile |
| 30 | Progress tiles | these can be bought by the players to score points and activate special effects |
| 28 | Woman tokens | (7 per color) |
| 28 | Hunter tokens | (7 per color) |
| 4 | Action boards | used by the players to organize their Action tiles, Action markers, Natives and other resources |
| 29 | Wooden Warriors | (7 per color + 1 black Mohawk) |
| 20 | Wooden Canoes | (5 per color) |
| 20 | Tribe disks | (5 per color) |
| 17 | Action markers | (4 per color + 1 black Ojibwa) |
| 4 | Summary tiles | |
| 100 | Wooden resources | 20 each: Leather, Fish, Pumpkins, Beans, Corn |
| 4 | Sacred Fire markers | |
| 5 | Swap tokens | |
| 1 | Cayuga token | |
| 1 | Wooden round marker | |
| 3 | Turtle tiles | |
| 54 | Cards | 36 Mask cards; 10 Tribe cards; 4 Ghost Player cards; 4 Summary cards |
| 36 | Beaver tokens | |
| 10 | Multiplier tiles | |
| 3 | Progress Price tokens | |
| 2 | Flag tiles | |
| 4 | Turn Order markers | |
| — |
Game Overview
In Wendake, you will be placed in the shoes of a chief of a Native American tribe. You will have to manage all of the most important aspects of their lives, earning points on the Economic, Military, Ritual, and Mask Tracks.
The core of the game is the action selection mechanic: you will have the opportunity to choose better and better actions over 7 game rounds, and the winner will be the player who can find the best combinations of actions and use them to lead their tribe to prosperity.
Game Terms
As you read these rules and play the game, it will be helpful to know how certain game terms are used:
- NATIVE: General term for any member of a Tribe. It can be a Warrior, a Woman, or a Hunter;
- TERRITORY: An area on the map where you can move your Natives;
- LAKE: An area on the map where you can place Canoes;
- HOME: The starting territory of a tribe. No opponent can enter another tribe's Home;
- PRODUCTIVE AREA: A space inside a territory that a Woman or a Hunter can occupy. The Native who occupies it can produce Vegetables or Beavers. It can also be occupied by a defending Warrior before a Woman or a Hunter reaches it;
- VEGETABLE RESOURCE: General term for Corn, Beans, or Pumpkins;
- ANIMAL RESOURCE: General term for Leather or Fish;
- RESOURCE: General term for Corn, Beans, Pumpkins, Leather, or Fish.
IMPORTANT: Beavers ARE NOT resources.
Setting Up the Game
1. Create the Main board by placing two halves of the map on the table, according to the number of players, as shown. Place the Ceremonial Mask board next to the Main board.
2. Place the Score Tracks near the Main Board (as shown in the illustration). Randomly assign one of the four Scoring Type markers to each Score Track, forming two random pairs. For your first few games, we recommend that you place the Mask and Military markers on one pair of Score Tracks and the Economic and Ritual markers on the other.
3. Sort the Progress tiles by Level and mix each group of tiles. Create three rows of random Progress tiles next to the board, with Level 1 tiles in the bottom row, Level 2 in the middle, and Level 3 tiles in the top row. Each row must have a number of tiles equal to two times the number of players in the game (so, a total of 12 tiles in 2-player games, 18 in 3-player games, and 24 in 4-player games). Return the unused tiles to the box. If at least 1 Alliance tile has been included, place the 2 Flag tiles nearby.
4. Shuffle the Mask deck and place it on its space on the Mask board. Reveal the first card and leave it face up near the deck, as the start of the discard pile.
5. Randomly determine the starting turn order and give the Turn Order markers to the players accordingly.
6. Each player takes an Action board, then chooses a Home territory and a color and takes the matching pieces:
- 9 Starting Action tiles
- 7 Woman tiles
- 7 Hunter tiles
- 7 Warrior pieces
- 5 Canoe pieces
- 4 Action markers
- 5 Tribe disks
- 1 Sacred Fire marker
- 1 Summary tile
- 1 Swap token
NOTE: THERE ARE 5 SWAP TOKENS IN THE GAME. ONE WILL REMAIN IN THE BOX UNLESS THE SENECA TRIBE IS IN PLAY (SEE TRIBES ON PAGE 16).
7. The players now choose Tribe cards. First, choose which side of the Tribe cards to use. On one side, all Tribe cards are the same. On the other, they show different starting material and any special abilities that Tribe can use during the game.
If you choose to use the back (the identical side), each player takes the starting game pieces listed: 1 Leather; 1 Fish; 1 Vegetable that matches the type produced by your Home territory; 2 Beaver tokens; 1 Mask card. If you choose to use the front (with different starting Resources), shuffle the Tribe cards and turn over one more than the number of players (so 4 cards in a three-player game, for example). Then, the last player (in turn order), chooses one of the face up Tribe cards and takes the starting pieces listed. The other players, going backwards in turn order, also choose cards until the "first" player selects one of the last two cards. Return all unused Tribe cards to the box.
8. Place:
- 1 Canoe in any Lake of your choice.
- 5 Warriors outside the Productive Areas of your Home territory.
- 5 Woman tiles and 5 Hunter tiles in 2 piles on the matching Productive Areas of your Home Territory.
- Keep your remaining 2 Warriors, 2 Women, and 2 Hunters (showing the grey side) in the Long House Area of your Action Board, and your other 4 Canoes near your board.
9. Place your Sacred Fire tile in the center space of your Action Board. Shuffle your eight other Starting Action tiles and place them randomly around your Sacred Fire tile, forming a 3 x 3 grid. All the tiles must have the Action side up (i.e., the side that does not have the "Ritual" showing).
10. Each player places one of their Tribe disks at the beginning of each Score Track. These will be called "Score markers".
11. Place your four Action markers on the Sages area of your Action Board.
12. Each player places their last Tribe disk in the Restore Area of the Ceremonial Mask Board. These are called "Mask disks".
13. Shuffle all of the Level 1 Advanced Action tiles face down (without looking at them). Randomly select 17 tiles for a 4-player game (if you don't have any promo or exclusive tiles, this will be all of the tiles in the box), 14 tiles for a 3-player game, or 11 for a 2-player game. Return the rest of the tiles to the box (without looking at them). Repeat the same procedure for the Level 2 tiles. Then, turn over the first 6 Level 1 tiles and place them near the board, easily visible to all players. Set the Level 2 tiles aside for the moment; they will be used later in the game.
14. Place the Turtle tiles on their spaces, as shown on the Mask board. You must place as many random Turtle tiles on each space as the number of players in the game. Return any unused Turtle tiles to the box without looking at them. (For 4 players, use 4 Turtle tiles of each type.)
15. Place the round marker on the "1" space of the Round Track on the Ceremonial Mask board.
Playing the Game
Wendake is played over seven rounds called "Years". Each Year is divided into two parts, which must be played in order:
1. Individual Player Turns — The players take turns, in Turn Order, until all players have had four turns. On your turn, you must choose to:
- TAKE 1 ACTION
- CHANGE TURN ORDER
2. Restore — After all Individual Player Turns are complete, prepare for the next Year by following these steps:
- NEW TURN ORDER
- ADJUST ACTION TILES
- RESTORE MASKS
- RESTORE PROGRESS TILES
- NEW YEAR BEGINS
1. Individual player turns
During this step, you will take your individual turns, starting with the first player and following the sequence of the Turn Order markers. Continue taking turns in this way until all players have had four turns.
Each turn, you must place one of your Action markers, choosing one of these two options:
1.A Take 1 Action
Choose one of the Action tiles on your Action Board and place your Action marker on it. Then you MAY immediately use any or all of the actions shown on that Action tile.
When using an Action tile, you must follow these rules:
- The first time you select an Action tile each Year, you may choose any tile. The second and third time that Year, you must choose another Action tile in the same column, row, or diagonal as your previously selected tile(s). IMPORTANT: AT THE END OF THE YEAR, ALL THREE OF YOUR ACTION MARKERS MUST FORM A LINE IN A SINGLE ROW, COLUMN, OR DIAGONAL.
- If the Action tile you chose shows more than one action, you can only use them in the order shown, from top to bottom (remember that using each action is always optional).
IMPORTANT: ACTION TILES CAN BE SELECTED IN ANY ORDER. YOU ARE NOT REQUIRED TO PLACE THE MARKERS GOING FROM TOP TO BOTTOM OR FROM LEFT TO RIGHT.
The Actions are described in the next chapter (see page 8).
1.B Change Turn Order
Instead of placing an Action marker on a tile, you may place it in the Turn Order Area on the Ceremonial Mask board to reserve a place in the new turn order. You must place it on the first empty space from the left. The new turn order will become effective at the beginning of Phase 2. Restore (see page 7).
IMPORTANT: EACH YEAR, YOU MUST CHOSE "OPTION A" THREE TIMES AND "OPTION B" ONE TIME. YOU CAN CHOOSE THE ORDER IN WHICH YOU CHOOSE THESE OPTIONS.
EXAMPLE: The turn order is Ringo, Paul, John, George.
Ringo chooses the Tan + 1 Movement Action tile, so he places an Action marker on it and immediately applies its effects (Tan first, then Movement). Then Paul chooses to become the first player and places his Action marker on the "1" space on the Ceremonial Mask board.
John chooses the Fishing + Military action and George chooses the 3 Movements action.
It's Ringo's turn again. He can choose any tile in the same row, column, or diagonal where he placed his first marker, so he could can choose any Action tile except Trade or Hunt + 1 Movement.
He chooses the Mask Ceremony action and immediately performs it. Paul's grid is still empty so he can choose any tile. He chooses the Sacred Fire action. John placed his first marker on the center of a side, so he can only choose from 4 actions (2 in the same row and 2 in the same column). He chooses Tan + 1 Movement. George chooses Hunt + 1 Movement.
On his next turn, Ringo chooses to become the second player, so he places his marker on the "2" space on the Ceremonial Mask board. Paul placed his marker in the center of the grid, so he can choose any other Action tile. He chooses Trade. John can only choose Harvest, as it's the third action in his right column, while George becomes the third player.
Now, Ringo, Paul, and George must place their last Action marker on the last Action tile available to them (based on their earlier choices), while John becomes the fourth player.
2. Restore
After the last player has placed (and resolved) their fourth Action marker, the restore phase begins. This phase is composed of 5 steps:
2.A New Turn Order
- Re-distribute the Turn order markers to the players according to the position of their Action markers in the Turn Order Area of the Ceremonial Mask board.
- Return those Action markers to the players. The new turn order takes effect immediately.
After Phase 1, the new turn order is Paul, Ringo, George, John.
2.B Adjust Action Tiles
All players remove the Action markers from their tiles and flip only the tiles they used over so that they show the opposite side. This means that if a tile already shows the Ritual side (because it was flipped over in a previous Year), it must be flipped back to the Action side.
IMPORTANT: YOU CAN LOOK AT THE ACTION SIDE OF YOUR RITUAL TILES AT ANY TIME.
All players move their Action tiles down 1 row, so that the top line of their Action grid is empty and the 3 tiles from their bottom row are now outside of the grid. If any of these 3 tiles (the ones that are now out of the grid) shows the Ritual side, they must be flipped back to the Action side.
The new first player MAY now set aside one of the 3 tiles below their grid and replace it with one of the 6 Advanced Action tiles near the board or with any Action tile they already set aside in previous Years.
Playing Hint: Normally, it's not a good choice to take back a tile you previously set aside, but sometimes it may be necessary to do it.
Paul decides to set aside his Trade tile from his grid. He takes the Level 1 tile Hunt + 1 Movement + Trade.
The new tile is added to the tiles below the player's grid. Then, whether a new tile was taken or not, they must shuffle the three tiles that are below their grid (including any new tile they just acquired) and place them in random order on the top line of their grid, all showing the Action side.
Playing Hint: The players can agree to have their tiles shuffled by the player before them in turn order and take them back after they're shuffled.
Paul has shuffled his tiles and placed them randomly in the top row.
If the first player took an Advanced Action tile, draw a new tile of the same Level and place it with the ones near the board so that there are 6 again. Either way the next player in turn order can choose to replace one of their tiles, following the steps above. Repeat this process until all players have had a chance to replace a tile (or decided not to).
ONLY AT THE END OF YEAR 3: After the last player has replaced a tile (or decided not to), remove all the Level 1 Advanced Action tiles near the board and replace them with 6 random Level 2 Advanced Action tiles.
2.C Restore Masks
Return all of the Mask disks in the Ceremonial Mask areas to the Restore Area.
All players take the Mask cards they used during the Year back into their hands (see "Mask Ceremony" on page 9).
2.D Restore Progress Tiles
Flip any used Progress tiles to the usable side (see "Progress Tiles" on page 14).
2.E New Year Begins
Move the Year marker one step to the right. If the Year marker was on "7", the game ends instead.
Special Action: Swap Tiles
Once per game, at any time, you can swap any 2 free tiles on your 3X3 grid (i.e., the tiles must not have Action markers on them). If you do so, return your Swap token to the box.
If you don't use this option, you will score 1 extra point at the end of the game.
The Actions
Canoe: You may put one Canoe into play on any Lake (the lake you choose does not change the effect of your Canoes). Canoes help you Trade and Fish.
Move: You may move your Warriors up to the total number of steps shown on the tile, following these rules:
- a. A Warrior can move to any adjacent territory except an opponent's Home.
- b. When your Warrior enters a territory, you must decide either to place it in a Productive Area as an Outpost, to prepare for the arrival of a Woman or Hunter, or outside of the Productive Areas to act as a Guard.
- c. If there are any of your opponents' Natives in the territory, you may decide to fight.
- d. Women and Hunters are never moved directly, but they can replace Warriors in Productive Areas.
See "Moving Warriors" and "Fighting" on pages 11 and 12 for details and examples.
Harvest: Each Productive Area where you have a Woman produces one of the Vegetable shown next to it, which is added to your personal supply.
Example: In this situation, George could Harvest 2 Corn, 1 Pumpkin, and 1 Bean; Hunt 2 Beavers; or Fish for 3 Fish.
Military: This action is split into two steps, which must be performed in order:
-
a. First, you may claim Turtle tiles. Count the Productive Areas occupied by your Women and Hunters and your Canoes in play and compare them to the Turtle tiles available. Turtle tiles give you extra points at the end of the game.
IMPORTANT: YOU NEVER GAIN 2 IDENTICAL TURTLE TILES. HOWEVER, YOU MAY GAIN UP TO 1 TURTLE TILE OF EACH KIND (WOMEN, HUNTERS, AND CANOES) EACH TIME YOU TAKE A MILITARY ACTION.
See "Turtle Tiles" on page 13 for details and examples.
-
b. Then, score 1 Point on the Military Track for each territory in which you have the most Guards (see "Moving Warriors" on page 10), including your Home territory. In case of a tie for the most, you don't score the point.
Example: George performs the Military action. He has no Turtle tiles yet. First, he counts the number of Productive Areas that are occupied by his Hunters or Women. He only has 2 Hunters in play, so he cannot take any Turtle tiles related to Hunters. He has 4 Areas occupied by Women, so he can choose either the "3 Women" or the "4 Women" Turtle tile. He chooses to take the "4 Women" tile. Then, he counts his Canoes in play: He has 3, so he takes the "3 Canoes" tile. Finally, he scores 2 Military points because he has the most Guards in 2 territories (one of which is his Home). NOTE: in one Territory he and Ringo both have 1 Guard, so he doesn't score a Military point for that Territory.
Hunting: You gain one Beaver token for each Productive Area where you have a Hunter.
IMPORTANT: YOUR HOME TERRITORY ALSO HAS PRODUCTIVE AREAS, SO YOU CAN ALWAYS GAIN AT LEAST ONE VEGETABLE AND ONE BEAVER, UNLESS YOU DECIDE TO LEAVE THEM EMPTY BY REMOVING THE LAST NATIVE DUE TO A TRANSFER (SEE PAGE 11) OR SMALLPOX (SEE PAGE 9).
IMPORTANT: EVEN IF YOUR HOME TERRITORY'S PRODUCTIVE AREAS HAVE MORE THAN ONE WOMAN OR HUNTER TILE, EACH PRODUCTIVE AREA STILL PRODUCES ONLY ONE RESOURCE OR BEAVER.
Tan Pelts: Discard all of your Beavers and gain 1 Leather for each Beaver discarded.
Fishing: You gain 1 Fish for each Canoe you have in play.
IMPORTANT: THERE'S NO LIMIT TO THE NUMBER OF RESOURCES OR BEAVERS IN THE GAME. IN CASE THE WOODEN ONES ARE NOT ENOUGH, YOU CAN USE THE MULTIPLIER TILES. IN ANY CASE, WE RECOMMEND THAT YOU DON'T ACCUMULATE TOO MANY RESOURCES, AS HOARDING IS NOT VERY USEFUL IN THIS GAME. THIS POPULATION HAD GREAT RESPECT FOR NATURE AND ITS FRUITS, AND DIDN'T TAKE MORE THAN THEY NEEDED!
Mask Ceremony: This action is split into two steps, which must be performed in order:
- a. First, draw one Mask card. You can either draw the top card of the deck or the top card in the discard pile. If you draw the last card from the discard pile, replace it by revealing the top card of the deck. If the Mask deck runs out, reshuffle it to create a new deck, then reveal the top card to start a new discard pile.
- b. Then, you may play a combination of Mask cards from your hand that match an empty space in the Ceremonial Mask Area (i.e., where there are no Mask disks). Place your Mask disk on the space and immediately score the indicated number of points on the Mask Track. Leave the cards you played in front of you, face up.
IMPORTANT: DURING A YEAR, YOU MAY TAKE THIS ACTION MORE THAN ONCE. EACH TIME, YOU MUST DRAW A NEW CARD AND ADD IT TO YOUR HAND, THEN YOU CAN MOVE YOUR MASK DISK TO AN EMPTY SPACE USING ONLY THE CARDS IN YOUR HAND. IN OTHER WORDS, YOU CAN ONLY USE EACH MASK CARD ONCE PER YEAR.
NOTE: THE SPACE WITH YOUR MASK DISK IS NOT EMPTY, SO YOU CANNOT PLAY THE SAME COMBINATION TWICE IN A ROW.
George and Ringo have these cards in their hands.
George takes the Mask Ceremony action and draws the top card from the deck. Now He has 3 different masks and places his disk on the matching space, so he scores 2 Mask points. (Action: THREE DIFFERENT MASKS)
Ringo takes the Mask Ceremony action, too. If he decides to draw the top card from the deck, he could end up with 3 different masks, but that space is already occupied by George's disk. Instead, he draws the face up card from the discard pile, and plays only the 2 identical masks, keeping the third one in his hand. He places his disk in the matching space and scores 2 Mask points. Then he turns over the top card from the deck to fill the now empty discard pile. (Action: TWO IDENTICAL MASKS)
Trade: This action is split into three steps. Each step can be performed only once, but none of them are mandatory. The chosen steps must be performed in the following order:
-
a. EXCHANGE: You may trade Resources with the Supply. You can trade one Resource for each Canoe you have in play. You can trade any kind of Resource for any other kind. They can be the same or different, in any combination. The only limit is the number of Canoes.
SMALLPOX: Exchange represents a trade between your Natives and the White Man. After the trade, you must reveal the top card of the Mask deck and look at the Blanket section. If it is infected by Smallpox, you must remove 1 of your Natives (of your choice) from the board including your Home and place it in your Long House Area (Women and Hunters must be placed on the grey side). If the blanket is not infected, nothing happens. The revealed card is placed face up on top of the discard pile. (The card shows either an UNINFECTED BLANKET or an INFECTED BLANKET.)
IMPORTANT: THE BLANKET ICONS DON'T HAVE ANY EFFECT DURING THE MASK CEREMONY ACTION.
-
b. BUY A PROGRESS TILE: You may purchase ONE Progress tile per action. Progress tiles are divided into 3 levels:
- Level 1 tiles cost 1 Leather, 1 Fish, and 1 Vegetable of your choice;
- Level 2 tiles cost 2 Leather, 2 Fish, and 2 DIFFERENT Vegetables of your choice;
- Level 3 tiles cost 3 Leather, 3 Fish, and 3 DIFFERENT Vegetables (i.e., 1 per kind).
When you buy a Progress tile:
- You immediately score 1, 2, or 3 points on the Economic Track;
- You immediately score 1, 2, or 3 points on the track indicated on the tile. If the tile indicates your highest or lowest track, and you have 2 or more scoring markers tied for that level, you can chose which of those markers to move.
- Each tile also has a special ability, which you can use once per Year. When you use the ability, flip your tile face down to show that you used it. It will be restored in phase 2.d-Restore Progress tiles, later in the Year.
-
c. BUY ECONOMIC POINTS: In the last step, you may spend up to 5 DIFFERENT Resources of your choice (return them to the supply) to score an equal number of points on the Economic Track.
Example: George has 4 Leather, 1 Fish, and 4 Corn. He has 3 Canoes in play.
a. Exchange — First of all, he can EXCHANGE as many Resources with the supply as he has Canoes, so he can exchange up to 3 Resources. He decides to give away 2 Leather and 1 Corn to take 1 Fish and 2 Beans. He must then turn over a Mask card and look at the Blanket section: If it's safe, nothing happens, but if it has smallpox, George must remove 1 of his Natives from the board and place it in his Long House Area. In either case, his Trade action continues.
b. Buy a progress tile — Then he can BUY A PROGRESS TILE. He decides to buy a level 2 tile. It costs 2 Leather, 2 Fish, and 2 different Vegetables (in George's case, 1 Corn + 1 Bean). The acquired tile allows George to immediately score 2 Economic points and then 2 Military points. From now on, he can use the tile's ability once per Year to move 2 steps at any time during his turn. He can also use this ability immediately if he wants to.
c. Buy economic points — Finally, he decides to BUY ECONOMIC POINTS by discarding 2 different Resources (1 Corn and 1 Bean): he scores 2 Economic points. He cannot spend his second Corn because all the Resources must be different.
Ritual: This action is never on the Action side of any Action tile, and is always present on the Ritual side of all Action tiles. It has two effects, which must be performed in order:
- a. First, take 2 Natives of your choice (the same or different) from your Long House Area and place them in your Home territory;
- b. Then, score points on the Ritual track equal to the type of Native the least of in your Home territory: Hunters, Warriors or Women.
Playing Hint: If you perform 2 Rituals in a row, you could score more points with the second one than with the first because the number of Natives in your Home territory has increased.
John has 2 Hunters, 1 Woman, and 5 Warriors in his Home. He decides to take the Ritual Action and moves 1 Hunter and 1 Woman from his Long House to his Home, so he now has 3 Hunters, 2 Women, and 5 Warriors. He scores 2 points (since he only has 2 Women, in his Home territory).
Sacred Fire: When you select this action, you can choose to activate any other Action tile on your grid (including Rituals) EXCEPT the 2 other tiles in the row, column, or diagonal you have already activated or that you want to activate for the current Year. Place your Fire marker on the activated tile to remember that you cannot select it later.
In short, you cannot activate the same tile twice in the same Year.
During Phase 2.b Adjust Action tiles, the tile marked with the Fire marker IS NOT flipped to the opposite side. Simply remove the Fire marker from it. The Sacred Fire tile, instead, must be flipped as normal.
Moving Rules
Only Warriors can be moved: your other natives cannot be moved directly, but they can replace a Warrior who has already reached their destination.
A Warrior can be placed in a territory in two ways:
-
a. Laid down inside a Productive Area as an "Outpost": Each Productive Area can only contain one Warrior at a time. Outposts cannot be moved.
Playing Hint: Outposts can be replaced by Women or Hunters at any time during your turn after the end of your Movement action.
Or
-
b. Standing up outside of the Productive Areas as a "Guard": There's no limit to the number of Guards you can have in a territory, as long as you have Warriors available (so, not counting the ones in your Long House Area).
Playing Hint: Your Guards can protect your Outposts, Women, and Hunters from your opponents' attacks (see "Fighting" on page 12).
You can use Action tiles or Progress tiles to move your Warriors, as follows:
1. Examples of forbidden movement. 2. George moves a Warrior into an adjacent territory and places it as a Guard. 3. George moves a Warrior directly onto a Productive Area in an adjacent territory and places it as an Outpost. John moves his Warrior into a Productive Area in the same territory, and it becomes an Outpost. 4. George transfers an Outpost back to his Home and replaces it with a Hunter.
1. Moving Warriors
1a. You can move your Warriors up to the total number of steps indicated on the Action or Progress tile you are using. You can distribute this amount among all your Warriors on the board (except for Outposts, as written above). For example, with a 3 Movement Action tile, you can move 3 different Warriors 1 step each, or 1 Warrior 1 step and another Warrior 2 steps, or 1 Warrior 3 steps.
1b. Each Warrior can move in 2 ways:
- Into any adjacent territory except an Opponent's Home.
- Inside the territory they occupy.
Into an adjacent territory: A Warrior can be placed as a Guard or directly as an Outpost in any territory adjacent to the one they occupy.
IMPORTANT: THE LAKES AND RIVERS BETWEEN TERRITORIES ARE IMPASSABLE. WARRIORS CANNOT MOVE ACROSS THEM.
Inside a Territory: A Warrior acting as a Guard can be moved into a Productive Area in the same territory to become an Outpost.
2. Transfering Natives
At any time during your turn except in the middle of an action, you may transfer any Outpost you control back to your Home territory and immediately replace it with a Woman or a Hunter (depending on what is depicted in the Productive Area the Outpost occupied).
IMPORTANT RULES ABOUT TRANSFERS:
- You can perform a transfer at any time during any of your turns EXCEPT during an action. In particular, you cannot move a Warrior, perform a transfer to move it back Home, and then move it again during the same Action.
- You may transfer your Outpost back Home but leave the Productive Area empty if you wish (without replacing the Outpost with a Woman or a Hunter).
- Each Productive Area can have only 1 Native at a time (Exception: Home territories, see page 8).
- Transfer can be performed only in this way. You are not allowed to transfer a Woman or Hunter from a Productive Area back Home.
Fighting
Fighting can only occur during a Move action (caused by an Action tile or a Progress tile), and only if your Warrior is in the same territory as another player's Natives (Warriors, Women, and/or Hunters).
1. You can attack another player's Guard with your Warrior. Both Warriors are injured and return to their Long House Areas.
2. If a Productive Area is occupied by an opponent's Native, you can attack it with a Warrior:
- 1a. If your opponent's Native is a Woman or a Hunter, it is injured and your opponent must place it in their Long House Area. Your Warrior remains inside the Productive Area as an Outpost;
- 1b. If your opponent's native is a Warrior, both Warriors are injured and must be placed in their Long House Areas.
3. If a player who occupies a Productive Area also has one or more Guards in the same territory, you must attack all of their Guards before you can attack the Native in the Productive Area. All Guards are Warriors, so when you injure one, your Warrior will be injured as well. Place all injured Natives (both yours and your opponent's) in their Long House Areas.
Ringo has a Hunter in a Productive Area with no Guards to defend it. George attacks it with a Warrior. The Hunter is injured and returns to Ringo's Long House Area. George's Warrior remains in the Productive Area as an Outpost.
Ringo has a Hunter in a Productive Area and 1 Guard to defend it. George cannot attack the Hunter, so he uses a Warrior to attack the Guard instead. Both George's Warrior and Ringo's Guard are injured and return to their Long House Areas. Then George attacks Ringo's Hunter with a second Warrior, as in the previous example.
In Short
YOU CAN:
- MOVE INTO ANY EMPTY PRODUCTIVE AREA, REGARDLESS OF YOUR OPPONENTS' GUARDS.
- PLACE WARRIORS AS GUARDS WITHOUT ATTACKING AN OPPONENT'S GUARD IF YOU DON'T WANT TO.
- ATTACK YOUR OPPONENT'S GUARDS, EVEN IF YOU DON'T WANT TO OCCUPY A PRODUCTIVE AREA IN THAT TERRITORY.
- USE A MOVEMENT TO ATTACK AN OPPONENT'S NATIVE USING A GUARD WHO IS ALREADY IN THE SAME TERRITORY.
- BEFORE OR AFTER ANY ACTION ON YOUR TURN, TRANSFER ANY OF YOUR OUTPOST WARRIORS BACK HOME AND REPLACE THEM WITH WOMEN OR HUNTERS (ACCORDING TO THE PRODUCTIVE AREAS THE WARRIORS OCCUPIED).
- BEFORE OR AFTER ANY ACTION ON YOUR TURN, TRANSFER ANY OF YOUR OUTPOST WARRIORS BACK HOME AND LEAVE THOSE PRODUCTIVE AREAS EMPTY.
- USE ONE ACTION TILE TO MOVE A WARRIOR AND CREATE AN OUTPOST, TRANSFER IT BACK HOME, THEN MOVE IT AGAIN USING A PROGRESS TILE AND TRANSFER IT BACK HOME AGAIN ON THE SAME TURN (OR VICE VERSA, SINCE YOU CAN USE PROGRESS TILES FIRST AND AN ACTION TILE LATER).
YOU CANNOT:
- MOVE AN OUTPOST.
- ATTACK AN OPPONENT'S NATIVE IN A PRODUCTIVE AREA IF THEY HAVE GUARDS IN THE SAME TERRITORY.
- MOVE A WARRIOR, TRANSFER IT BACK HOME, AND THEN MOVE IT AGAIN USING THE SAME ACTION, EVEN IF YOU HAVE STEPS REMAINING.
- REMOVE A WOMAN OR A HUNTER FROM A PRODUCTIVE AREA OUTSIDE YOUR HOME (EXCEPT DUE TO SMALLPOX).
The End of the Game
The game ends at the end of the 7th year.
Adding Up Your Score
- Reveal your Turtle tiles and assign the points shown on the indicated Score Tracks. Note that Level 5 Turtles allow you to choose between 2 tracks.
- For each pair of tracks, you only score the number of points indicated by the Score marker on the lower value.
- Add together your points from the two pairs of Score Tracks.
- Add 1 Point to your total if you still have your Swap token.
The player with the highest score is the winner. In case of tie, the winner is the tied player who has the lowest Turn Order marker.
Highlighted: the lower value for each pair of tracks.
Only Ringo used his Swap token. Paul scores 19 + 18 + 1 = 38 points, George scores 16 + 21 + 1 = 38 points, Ringo scores 17 + 19 = 36 points, John scores 18 + 15 + 1 = 34 points. Paul is the winner because his Turn Order marker is lower than George's.
How to Score Points
You can score points in 3 ways:
- By performing Actions:
- a. Economic: Trade action.
- b. Military: Military action.
- c. Mask: Mask Ceremony action.
- d. Ritual: Ritual action.
- Through Turtle Tiles.
- By acquiring Progress cards.
IMPORTANT: THE MAXIMUM SCORE ON EACH TRACK IS 25 POINTS. IT'S NOT POSSIBLE TO GAIN MORE.
Turtle Tiles
You can acquire Turtle tiles by performing the Military Action. They allow you to score points at the end of the game.
When you perform the Military Action, count your Canoes and Natives in Productive Areas to determine which tiles you are eligible for:
LEVEL 3 tiles: Each grants 1 point on the indicated Score Track.
- You can take this if you have Women in three or more Productive Areas (including the one in your Home);
- You can take this if you have Hunters in three or more Productive Areas (including the one in your Home);
- You can take this if you have three or more Canoes in play.
LEVEL 4 tiles: Each grants 2 Points on the indicated Score Track.
- You can take this if you have Women in four or more Productive Areas (including the one in your Home);
- You can take this if you have Hunters in four or more Productive Areas (including the one in your Home);
- You can take this if you have four or more Canoes in play.
LEVEL 5 tiles: Each grants 2 points on only one of the two Score Tracks listed, your choice.
- You can take this if you have Women in five or more Productive Areas (including the one in your Home);
- You can take this if you have Hunters in five or more Productive Areas (including the one in your Home);
- You can take this if you have all five Canoes in play.
Turtle Tile Rules
-
You can only gain one tile of each of the nine kinds.
Example: George already has a Level 3 Turtle tile for Women. One of his Women is injured by Paul, so he now has only 2 in Productive Areas. If in the future he has 3 Women in Productive Areas again, he doesn't gain another Level 3 tile for Women.
-
You can obtain more than one Turtle tile with a single Military action, but you can only take up to one tile each for Women, Hunters, and Canoes with each action.
Example: Ringo already has 2 Hunters and 2 Women in Productive Areas, and he has 4 Outposts in 3 other Productive Areas for Hunters and 1 Productive Area for Women. Before performing the Military Action, he transfers all his Outposts back Home and replaces them with Hunters and a Woman. Now he has 5 Hunters and 3 Women in Productive Areas, so he can take the Level 3 tile for Women and the Level 5 tile for Hunters. The next time he performs a Military action, he could choose to take the Level 4 tile for Hunters if he still has at least 4 Hunters in Productive Areas.
-
The number of tiles you have is public, but the points they award you must be kept secret until the end of the game! You only reveal them during the final scoring. Of course, you can look at your own tiles any time you want.
Progress Tiles
Progress tiles can be purchased with the Trade action (see Step B under "Trade" on page 9).
Each tile has three effects:
-
When you buy it, you immediately score 1, 2, or 3 points on the Economic Track, as shown on the tile;
-
When you buy it, you immediately score 1, 2, or 3 points on the Score Track shown on the tile. If the tile says "Lowest" or "Highest", it could be the Economic Track again. To determine your Lowest or Highest track, look for the one where your Score marker is on the lowest or highest value. In case of a tie, you can choose which of those tracks to score the points on. Remember that the points awarded on the Economic track in step 1 must be assigned first!
IMPORTANT: IF ONE OR MORE OF YOUR TRACKS IS AT 25, THAT'S SURELY THE HIGHEST ONE. SO YOU SHOULD EARN POINTS THERE, BUT SINCE YOU CANNOT GO OVER 25 YOU WON'T SCORE ANY POINTS FOR THE HIGHEST TRACK.
-
Once per Year, you can flip over your tile to use the ability shown on it. Some tiles are usable only at specific moments, while others can be used at any point during your turn. All used tiles are restored during phase 2.d: Restore Progress Tiles.
Level 1 Progress Tiles
| Track | Ability |
|---|---|
| MILITARY | At any point during your turn, you may move one Warrior 1 step. |
| MILITARY | ALLIANCE: Take one Flag tile of your choice. If someone else already took one, you must take the other one. If you already have one, put the other one back in the box (you cannot be allied with both the English and the French!). When you perform the Military Action, you count all of your ally's territories as if you have one more Guard of your color in that territory. This means that you can have the majority of Guards in a territory where there aren't any Guards. |
| RITUAL | At any point during your turn, you may activate this tile to perform the actions on your chosen Action tile in the order you want, instead of from top to bottom. |
| RITUAL | When you perform a Ritual action, you score 1 additional point, then you can Move one Warrior 1 step. |
| MASK | When you perform the Mask Ceremony action, draw two Mask cards instead of one, then discard one card from your hand (it does not have to be one of the two just drawn). |
| MASK | When you perform the Mask Ceremony action, you can place your Mask disk on a space that is already occupied (this means you could choose the same space twice in a row). |
| LOWEST | When you perform the Trade action, you may purchase a Progress tile by paying one less Resource of your choice. |
| LOWEST | When you perform the Trade action, you can exchange two more Resources during the Exchange phase. In addition, you don't have to draw a card to check for Smallpox. |
| HIGHEST | At any point during your turn, gain one Animal Resource of your choice from the supply. |
| HIGHEST | At any point during your turn, you may spend one or two different Animal Resources to score the same number of points on any one Score Track of your choice. |
Level 2 Progress Tiles
| Track | Ability |
|---|---|
| MILITARY | At any point during your turn, you may move your Warriors up to 2 steps in total (you must move them at the same time). |
| MILITARY | When you perform a Transfer, you may place one of your Outposts in its territory as a Guard instead of moving it back Home. |
| RITUAL | When you perform a Ritual action, you score points equal to the highest number of Warriors, Women or Hunters in your Home territory, instead than in the normal way. |
| RITUAL | At any point during your turn, you may move 1 point between any two Score Tracks of your choice. |
| MASK | Before performing a Mask Ceremony action, put all the Mask cards you already played this Year back in your hand. |
| MASK | When you perform the Mask Ceremony action, you can use one of your Mask cards as if it was the type of your choice. |
| LOWEST | At any point during your turn, you may exchange three Resources without taking a Trade action. In addition, you don't have to draw a card to check for Smallpox when making this trade. |
| LOWEST | When you perform the Trade action, you may purchase a Progress tile by paying two fewer Resources of your choice. |
| HIGHEST | At any point during your turn, gain one Animal and one Vegetable Resource of your choice from the supply. |
| HIGHEST | At any point during your turn, you may spend up to three different Vegetable Resources to score the same number of points on any one Score Track of your choice. |
Level 3 Progress Tiles
| Track | Ability |
|---|---|
| MILITARY | At any point during your turn, you may move your Warriors up to 3 steps in total (you must move them at the same time). |
| MILITARY | ALLIANCE: Take one Flag tile of your choice. If someone else already took one, you must take the other one. If you already have one, put the other one back in the box (you cannot be allied with both the English and the French!). When you perform the Military Action, you count all of your ally's territories as if you have one more Guard of your color in that territory, and you win in the case of a tie, in all the territories. This means that you can have the majority of Guards in a territory where you don't have any Guards at all and your opponents each have up to one Guard each. |
| RITUAL | When you perform a Ritual action, you may put one additional Native from your Long House Area in your Home territory, then you score 1 additional point. |
| RITUAL | At any point during your turn, put one Native of your choice from your Long House Area in your Home territory. |
| MASK | When you perform the Mask Ceremony action, you score 1 additional Mask point (even if you didn't place your Mask disk on any space). |
| MASK | When you perform the Mask Ceremony action, you may score as if you have one additional Mask card in your hand, of any type you choose. |
| LOWEST | At any point during your turn, flip any one of your Action tiles to the opposite side. |
| LOWEST | When you perform the Trade action, you may purchase a Progress tile by paying three fewer Resources of your choice. |
| HIGHEST | At any point during your turn, gain two Resources of your choice and one Beaver from the supply. The two Resources can be identical or different. |
| HIGHEST | At any point during your turn, you may spend up to five different Resources to score the same number of points on any one Score Track of your choice. |
Tribe Abilities
CAYUGA: At the beginning of the game, take the Cayuga token and place it in your Long House. When they are attacked by an opponent's Warrior, your Women return Home instead of going to your Long House.
NOTE: THIS ABILITY DOES NOT APPLY TO SMALLPOX.
FOX: During the Trade action, you may purchase up to 2 Progress tiles.
MOHAWK: You start the game with the black Warrior in your Home, in addition to your 5 normal Warriors. If he is attacked by an opponent's Warrior, the black Warrior returns Home instead of going to your Long House. The attacking Warrior is injured as normal.
IMPORTANT: IF THE BLACK WARRIOR ATTACKS AN OPPONENT'S WARRIOR, HE RETURNS HOME AS ABOVE, BUT HE CANNOT MOVE AGAIN DURING THE CURRENT ACTION.
OJIBWA: At the beginning of the game, take the black Action marker instead of one of your color. When you decide to use it, you can immediately use another Action marker. This means that once per Year, you can take 2 Actions in a row.
ONEIDA: You start the game with one Level 1 or Level 2 Progress tile of your choice, chosen from those not used in the game. You do not score any Victory Points given by this tile.
ONONDAGA: You start with 6 Natives of each kind in your Home instead of 5.
OTTAWA: Your Sacred Fire tile is never flipped to the Ritual side.
SENECA: You start with 2 Swap tokens, so you can swap tiles twice during the game. Each unused token is worth 1 point at the end of the game.
SHAWNEE: You start with 1 warrior less (4 instead 5). You need 1 less Woman, Hunter, or Canoe to take Turtle tiles.
TUSCARORA: Leave your Hunters with the grey side up even when they are in play. If your Hunter is attacked by an opponent's Warrior, they will fight back: the attacking Warrior is injured and must be placed in your opponent's Long House area.