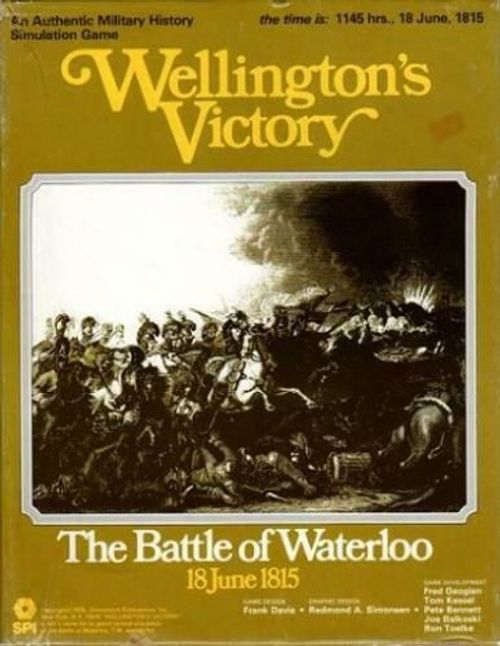
Wellington's Victory: Battle of Waterloo Game – June 18th, 1815
Wellington's Victory Rulebook
Table of Contents
Table of Contents
- 1.0 Introduction
- 2.0 Game Equipment
- 3.0 Setting Up the Game
- 4.0 Sequence of Play
- 5.0 Movement
- 6.0 Facing
- 7.0 Formation
- 8.0 Infantry Formations
- 9.0 Stacking
- 10.0 Terrain
- 11.0 Fire Combat
- 12.0 Shock Combat
- 12.1 How to Calculate the Percentage Ratio for Shock Combat
- 12.2 How to Calculate the Differential for Shock Combat
- 12.3 Shock Combat Inhibitions and Prohibitions
- 12.4 How Cavalry Units Execute Shock Combat
- 12.5 How Cavalry Charges Effect Movement & Morale
- 12.6 Shock Combat Results Table
- 12.7 Explanation of Shock Combat Results
- 12.8 How Retreats Are Executed
- 13.0 Morale
- 14.0 Command
- 15.0 Optional Rules
- 16.0 The Scenarios
- 17.0 Player's Notes
- 18.0 Designer's Notes
- 19.0 Bibliography
1.0 Introduction
Wellington's Victory is a grand tactical simulation of the Battle of Waterloo which occurred on June 18, 1815 at a minor crossroads south of Brussels, Belgium. The game enables Players to recreate the decisive encounter between history's two most renowned commanders, Sir Arthur Wellesley, Duke of Wellington, and Napoleon Bonaparte, Emperor of France.
Wellington's Victory is not a simple game; there are a great number of rules and concepts that will, at first, be unfamiliar to a large majority of Players. For this reason, the basic game rules are presented in the front of this booklet followed by later sections covering additional optional rules, design rationale, and tips on how to play the game effectively. To learn the game initially, the basic rules should be read thoroughly. The Players should then set up one of the limited scenarios each of which recreates an important segment of the entire battle. Once familiar with the basic course of play via a scenario or two, Players are encouraged to utilize any or all of the optional rules as they simultaneously "graduate" to the final scenario encompassing the entire day-long struggle between Napoleon's Armee du Nord and its dogged Anglo-Dutch and Prussian foes.
2.0 Game Equipment
2.1 The Game Map
The game map is composed of four separate 22" x 34" mapsheets, which, when placed together, form the battlefield of Waterloo. A hexagonal grid pattern is printed on the game map to regulate movement and location of the playing pieces and to calculate ranges which effect fire and shock combat. There are several different types of terrain indicated on the map, all of which are explained in the Terrain section of the rules and the Terrain Key printed on the map.
2.2 Game Charts and Tables
Various visual aids are provided with the game to simplify and illustrate certain game functions. All of the following aids are printed on the game map; the Relative Firepower Table, the Shock Combat Results Table, the Terrain Key, the Army Morale Records and the Game-Turn Track. The use of these graphic aids is explained in the appropriate rules sections.
2.3 The Playing Pieces
There are 2,000 back-printed playing pieces, called "counters" in Wellington's Victory. Most of these are Informational Counters. Informational counters include Strength counters, Routed counters, Disordered counters, Special Formation counters used to distinguish Skirmish, Square, and Extended Line combat formations, and various counters used to distinguish Fire and Shock attacks on the map and record information on the Game-Turn and Army Morale Tracks. All of these Informational counters are used to convey information about the status of a given combat unit. The actual military units in the game — the infantry battalions, cavalry regiments, artillery batteries and historical commanders — are represented by Organizational Counters. Organizational Counters contain information indicating the historical designation and original strength and effectiveness of each unit. In addition, Organizational Counters are colored according to nationality.
2.31 Combat units (including infantry battalions, cavalry regiments and artillery batteries) are often represented by two counters when deployed on the map; the Organizational Counter and a Combat Strength Counter, which is always placed under the Organizational Counter and represents the actual strength of the unit at the present time. The Combat Strength Counter may be changed as the strength of the unit is reduced by combat. Players should note that the "strength" printed on the Organizational Counter is the original and maximum strength of that unit; however, the unit's current strength may not necessarily be that which is printed on the Organizational Counter. A unit's strength is always the strength of its Combat Strength Counter.
2.32 All of the counters are printed on both sides. Each side of an Informational Counter is used to convey different information concerning the strength, status, or formation adopted by an accompanying Organizational Counter. Similarly, each side of an Organizational Counter represents a different status or formation which the unit may assume without requiring the use of an accompanying Informational Counter. Whatever a unit's status is at any given time is indicated by facing the appropriate side of the counter up (away from the map surface).
2.33 All infantry counters are printed on both sides, one of which represents the unit in column formation while the reverse side of the same counter represents the same unit in line formation.
2.34 All cavalry units are printed on both sides, although there is only one voluntary cavalry formation which is represented by the face of the counter on which the unit's Strength, Effectiveness and Movement Allowance is printed. On its reverse side, each cavalry unit is distinguished as either Light cavalry (Lc) or Heavy cavalry (Hc). Note: This distinction has no effect on the play of the game; the relative combat value of different cavalry units is expressed by the unit's Effectiveness Rating.
2.35 All artillery battery counters are printed on both sides one of which represents the battery limbered while the reverse side of the same counter represents the same battery unlimbered.
2.36 All command counters are printed on both sides one of which represents the command's full compliment of officers and aides while the reverse side of the same counter represents the reduced effectiveness of that command due to battle casualties and fatigue.
2.37 Sample Units
Note: The symbol for Horse Artillery is a combination of the Cavalry symbol and the Artillery symbol. Horse Artillery is either limbered or unlimbered.
Sample Infantry Unit — Front (Column Formation): Command Designation, Battalion 2/105, Brigade 2/1/I, Division, Regiment, Corps, Combat Strength 5-4-4, Effectiveness Rating, Movement Allowance.
Back (Line Formation): Command Designation, Battalion 2/105, Brigade 2/1/I, Division, Regiment, Corps, Combat Strength 5-3-3, Effectiveness Rating, Movement Allowance.
Sample Cavalry Unit — Front: Command Designation, Brigade 2/I, Division, Regiment 3 La, Corps, Combat Strength 3-4-6, Effectiveness Rating, Movement Allowance.
Back: Command Designation, Brigade 2/I, Division, Regiment 3 La, Corps, Light Cavalry (Lc).
Sample Artillery Unit — Front (Limbered): Command Designation, Division 2/I, Corps, Crew Combat Strength 1-5-3, Crew Effectiveness Rating, Movement Allowance.
Back (unlimbered): Command Designation, Division 2/I, Corps, Gun Strength 8-2-0, Battery Class, Movement Allowance.
Sample Command Unit — Front (Full Strength): Command Designation, Name Quiot, Brigade, Corps, Division 1/1/I, Command Radius 2-6, Movement Allowance.
Back (Depleted): Command Designation, Name Quiot, Brigade, Corps, Division 1/1/I, Command Radius 1-6, Movement Allowance.
2.38 Summary of Markers
Front / Back pairs: Artillery Fire Marker ("Fire") / Infantry Fire Marker ("Fire" in a box with an X); Army Demoralization Marker ("Dm") / blank.
Other markers (listed as pairs of illustrations described in the booklet): Army Record Marker (000), Army Record Marker (00), Army Record Marker (0); Skirmish Company (1-5-5) / Ammunition Depleted ("Ammo Dplt"); Skirmish Company (1-5-5) / Charge Zone Marker (diagonal arrow); Skirmish Company (1-5-5) / Extended Line Formation Marker (horizontal arrow); Skirmish Company (1-5-5) / Square Formation Marker (open square); Skirmish Company (1-5-5) / Artillery Crew (1-5-5); Game Turn Marker; Disordered ("Dis") / Routed ("Rtd"); Combat Strength Marker 1 / Combat Strength Marker 2; Combat Strength Marker 3 / Combat Strength Marker 4; Combat Strength Marker 5 / Combat Strength Marker 6; Combat Strength Marker 7 / Combat Strength Marker 8.
2.4 Definition of Terms
Combat Strength: The Combat Strength (also referred to as Original/Maximum Strength) which is printed directly on the Organizational combat unit counters indicates the initial strength of a given unit as recorded on the morning of June 18, 1815. There are two basic types of strength represented; manpower and guns. The Combat Strength of infantry and cavalry units (also called the Troop Strength) indicates the approximate original manpower of that unit with each Strength Point representing one hundred men. The Combat Strength of an artillery unit (also called the Gun Strength) indicates the original gun strength of that battery with each Strength Point representing one gun or howitzer. The Combat Strengths of units engaged in combat are used to determine the relative firepower and shock capacity of those units. The Combat Strength of a unit may be reduced by combat. Whenever a unit's strength is reduced below its Original Maximum Strength, the unit's current strength is indicated by placing an appropriate Combat Strength Marker directly beneath the Organizational Counter (i.e. the unit itself). For example, when an infantry unit with an Original Strength of "5" suffers a loss of one Strength Point due to Enemy fire, the Owning Player would immediately place a Combat Strength Marker directly under that unit to indicate that the unit's current strength is reduced to "4."
Effectiveness Rating: The Effectiveness Rating of a combat unit represents the relative quality and combat efficiency of the unit expressed as a numerical rating ranging from one to six. Only infantry, cavalry, skirmish and artillery crew formations possess an Effectiveness Rating. Like Combat Strength, the Effectiveness Rating printed on a combat unit represents the original (although not necessarily the maximum) effectiveness of that unit at the start of the battle. This original Effectiveness Rating is modified during play to account for terrain effects, formation and strength changes as well as the influence of leadership upon the unit. Note: The concept of unit morale is also reflected by a unit's Effectiveness Rating.
Movement Allowance: The Movement Allowance represents the mobility of a unit in terms of Points. Basically, a unit expends one Movement Point for each hexagon of clear terrain it enters. Note that a unit's Movement Allowance may be altered according to the formation adopted by that unit.
Class Rating: All infantry and artillery units are assigned a Class Rating between "1" and "3" which is primarily an indicator of the relative firepower a unit is capable of delivering due to differences in training or equipment. An infantry unit derives its Class Rating directly from its original (printed) Effectiveness Rating. An infantry unit with a printed Effectiveness Rating of five or six is considered a Class 1 (Elite) unit. An infantry unit with a printed Effectiveness Rating of three or four is considered a Class 2 (Line) unit. An infantry unit with a printed Effectiveness Rating of one or two is considered a Class 3 (Militia) unit. Note: The Class Rating of an infantry unit also determines the skirmish capability of that unit.
The Class Rating of an artillery unit (known as the Battery Class) is printed directly on the unlimbered battery counter and indicates the battery's predominant ordnance. The predominant ordnance of Class 1 batteries are 12 lb guns. Class 2 batteries primarily employ either 8 lb or 9 lb guns. Class 3 batteries primarily employ 4 lb or 6 lb guns. Note: The Class Rating of an artillery unit is only printed on the unlimbered side of the battery counter. The Effectiveness Rating of the battery crew is printed on the limbered side of the battery counter.
Command Radius: Each Command unit (representing brigade, division, corps, or army level chain of command personnel) has a Command Radius printed on both sides of the counter. The Command Radius of a Command unit describes a radius (or range) of hexes within which that Command unit effectively controls subordinate Command and/or combat units. For example, the Command Radius of a brigade-level Command unit is two (2). All combat units of this brigade which are within two hexes of the brigade Command unit are considered in Command Control. Note: A Command unit may occasionally be called a "Commander" although the unit symbolizes more than a single individual. The Player should simply consider the brigade command unit and the "brigade commander" as interchangeable terms.
Facing: Facing concerns the orientation of a unit within a hexagon. The Facing of a unit determines its front, flanks and rear for Combat and Movement purposes.
Formation: Formation is a broad term used to describe either the physical deployment or the Morale status of a given unit at a given time in the game. The formation of a unit may be changed either voluntarily or involuntarily at different times during the game, however, a unit may be in only one formation at any given time. The repertoire of different formations which a unit may voluntarily adopt varies with the unit's type and class. There is only one voluntary cavalry formation. An artillery battery unit may voluntarily adopt either limbered or unlimbered formation. An infantry battalion-sized unit may voluntarily adopt either column, line or square formation. In addition, Class 1 and 2 infantry battalions may detach Troop Strength Points to operate as independent "company-sized" skirmish formations. A unit's voluntary formation is superceded when the unit is forced to adopt an involuntary formation of disorder or rout which represents the temporary Morale status of the unit. The formation adopted by a unit may effect the unit's Facing, Movement and Combat capabilities.
2.5 Game Scale
Each hexagon on the map represents approximately 100 yards of terrain on the actual battlefield. Each infantry unit represents either a battalion or a company-sized detachment. Each cavalry unit represents a regiment. Each artillery unit represents a battery. Each Game-Turn represents 15 minutes of real time.
2.6 Inventory of Game Parts
A complete game of Wellington's Victory includes:
- One Rules Booklet
- Three different Combat unit Counter Sheets (one French, one Anglo-Allied and one Prussian)
- Two identical Combat Strength Marker Sheets
- Four different Game Map Sections
- One Plastic Die
- Two Game Boxes
If any parts are missing or damaged, please write:
Customer Service Simulations Publications, Inc. 44 East 23rd Street New York, N.Y. 10010
Questions regarding the rules of the game will be answered if accompanied by a stamped, self-addressed envelope, and if phrased to be answered by a simple one word answer. Send rules questions to the above address.
3.0 Setting Up the Game
GENERAL RULE:
The four map sections have been designed so that they overlap each other when placed together. Players should note that certain scenarios may be played on two map sections thus requiring less space, overall.
PROCEDURE:
The four map sections are identified by letter: A, B, C, or D. Section A is the upper left; Section B, the upper right; Section C, the lower left; and Section D, the lower right. When setting up all four map sections, the northernmost hex row on Section C is placed on top of the southernmost hex row on Section A. Similarly, the top hex row on Section D is placed above the bottom hex row on Section B. The westernmost (or left-hand) hex rows on Sections B and D are placed above the easternmost hex rows on Sections A and C. If placed correctly, the 0101 hex will be visible on all four map sections and roads will be properly aligned where map sections overlap. Note that a hex is identified by Map Section and number; thus Hougemont is located in hex C2903 and the farm of La Haye Sainte is located in hex A4528.
The many counters should be sorted into their brigade or divisional organization as fully as permitted by the component trays. This, to say the least, will greatly facilitate play.
4.0 Sequence of Play
GENERAL RULE:
Wellington's Victory employs an asymmetrical, reciprocating sequence of play in which each of the two Players is alternately considered the active or Phasing Player. The game is played in sequenced turns called Game-Turns. Each Game-Turn consists of thirteen strictly sequenced Phases. There are basically two different types of Phases which occur in a Game-Turn; regular Phases and reciprocal Phases. During a regular Phase, one Player is considered the Phasing Player while his opponent, who is not active, is considered the non-Phasing Player. During a reciprocal Phase both Players alternately participate according to the restrictions outlined in the appropriate rules section. In the following sequence outline, only the two Fire Phases are reciprocal phases and are so named. The Player controlling the force named in the title of a regular Phase is considered the Phasing Player during that Phase. The Scenario rules dictate a starting point in the sequence outline and how victory is determined.
CASES:
4.1 Game-Turn Sequence Outline
-
French Command Phase: The French Player must announce and execute command decisions concerning the committment of French reserve forces (see 14.0) and/or the initiation of any French cavalry charges (see 12.4).
-
French Rally Phase: The French Player must rally all eligible French units which are either disordered or routed. After all eligible French units which remain routed must be retreated as explained in the Morale rules (see 13.0).
-
Allied Facing/Formation Phase: The Allied Player must execute a morale check for each Allied unit which is in the Charge Zone of a French cavalry unit as explained in the Morale rules (see 12.52 and 13.0). After all required Allied morale checks have been executed, the Allied Player may change the facing and/or formation of any or all of the Allied units on the map within the restrictions of the Facing and Formation rules (see 6.0 & 7.0).
-
Allied March Phase: The Allied Player may move all, some, or none of the Allied units within the limits and restrictions of the Movement rules (see 5.0). The Allied Player may bring scheduled reinforcements onto the map during this Phase as explained by the Scenario Reinforcement rules. The non-Phasing (French) Player's units may not move during this Phase.
-
French Shock Phase: The French Player may now resolve French infantry and cavalry shock attacks according to the procedures and restrictions of the Shock Combat rules (see 12.0).
-
Reciprocal Artillery Fire Phase: During this Phase both the French and Allied Players may fire all, some or none of their artillery units. The Players alternate firing one unit at a time until all desired artillery fire is executed according to the procedure and restrictions of the Fire Combat rules (see 11.0).
Note: Phases 8-12 basically repeat the activities executed during Phases 1-5, however, the Players' roles are now reversed; the Allied Player now executes the activities required of the French Player during the earlier Phases and vice-versa. Note also, that there are no additional Fire Phases until the middle of the next Game-Turn.
-
Allied Command Phase
-
Allied Rally Phase
-
French Facing/Formation Phase
-
French March Phase
-
Allied Shock Phase
-
Game-Turn Phase: The Game-Turn Marker should be advanced one space (15 minutes) on the Game-Turn Record Track to mark the passage of one Game-Turn.
5.0 Movement
GENERAL RULE:
During the March Phase, the Phasing Player may move as many or as few of his eligible units as he desires. Units may be moved in any direction or combination of directions. A given unit's movement, however, is always restricted by the unit's Movement Allowance, as well as by restrictions imposed by Movement, Terrain, Command and other rules sections. For this reason, it is essential that Players thoroughly read the entire rules booklet before attempting to play a Scenario.
PROCEDURE:
During the March Phase, the Phasing Player may move his units in any order he desires. Eligible units may be moved either individually or in stacks. Once the Player begins moving a particular unit or stack he must complete its movement before another unit or stack may be moved. Each unit or stack is moved separately, tracing a path of contiguous hexes through the mapsheet hex grid. As each unit enters a hex, it must pay a portion of its Movement Allowance, a number of Movement Points that will vary according to the terrain the unit encounters and the formation the unit has adopted.
CASES:
5.1 General Movement Restrictions
5.11 During the March Phase, only the Phasing Player's units may be moved; he may choose to move all, some or none of his eligible units. Units controlled by the non-Phasing Player must remain stationary during the March Phase.
5.12 During the March Phase, units may be prohibited from being moved by the Command rules (see 14.0).
5.13 Movement is basically calculated in terms of Movement Points. The number of Movement Points expended by a unit during a single March Phase may not exceed its total Movement Allowance (Exception: see 5.2). A unit may expend any portion of its Movement Allowance, but unused Movement Points may not be accumulated from one March Phase to the next or transferred from one unit to another.
5.14 The total distance (in hexes) which a given unit may move in a single March Phase will vary according to the terrain in the hexes the unit enters and the terrain along the hexsides the unit crosses in tracing its Movement path through the hex grid. Each unit expends one or more Movement Points from its Movement Allowance to enter a given hex. See the Terrain Rules and the Terrain Key (10.0) for a complete summary of how terrain effects Movement.
5.15 The formation adopted by a unit may alter the unit's Movement Allowance as well as modify the effect of terrain upon the unit's Movement capabilities (see Case 10.2).
5.16 A unit may freely enter a hex occupied by another Friendly unit at no additional Movement Point cost. A unit may, however, be inhibited from moving through a hex occupied by a Friendly unit (see 9.1 and 9.4). A unit may also be inhibited from stacking in a hex already occupied by a Friendly unit (see 6.33, 9.1 and 9.4).
5.17 A unit may never enter a hex occupied by an Enemy combat unit during the March Phase (Exception: see 9.19).
5.18 A unit may be fired on when it attempts to leave a minimum range Enemy Fire Zone (see 11.23 and 11.24).
5.19 Except for the restrictions of Cases 5.17 and 5.18 a unit's movement is not inhibited by the presence of Enemy units. There are no Zone of Control restrictions on Movement.
5.2 Grand Tactical Movement
5.21 During the March Phase, any unit controlled by the Phasing Player may expend a number of Movement Points equal to double its normal Movement Allowance providing the unit meets the following criteria:
A. The unit is eligible to move normally (i.e. the unit is in command control and is not routing).
B. The unit remains at least nine hexes from any Enemy unit throughout the March Phase (i.e. the unit must begin the March Phase at least nine hexes from the nearest Enemy unit and must remain at least nine hexes from any and all Enemy units throughout its movement).
5.22 A unit which exercises the Grand Tactical Movement option is not required to expend exactly double its normal Movement Allowance. It may spend fewer Movement Points if desired.
5.23 Grand Tactical Movement is considered regular movement except for the doubling of the unit's Movement Allowance. Therefore, a unit is subject to all standard Movement rules during a March Phase in which it employs Grand Tactical Movement.
6.0 Facing
GENERAL RULE:
Facing deals with the general orientation of a unit or stack of units within the hex it occupies. The direction in which a unit is "faced" indicates the unit's general march direction for movement purposes and the unit's field of fire for combat purposes. Facing restrictions vary according to a unit's type, Formation, and Morale status. In general, however, all units except units which possess all-around facing must be oriented in a single, unambiguous direction whenever on the map (see Procedure).
PROCEDURE:
Each unit is oriented so that the front (top of the counter when print is right-side up) is facing the vertex between two hexsides. These two hexsides describe the unit's front and are known as the unit's frontal hexsides. The two hexsides located directly opposite these, and which form part of the perimeter of the same hex, describe the unit's rear and are referred to as the unit's rear hexsides. The remaining two hexsides describe the unit's flanks and are called the unit's flank hexsides. The orientation of each unit on the map, then, will describe the front, flanks, and rear of the unit for all required purposes.
Facing example (Infantry unit in Column Formation): a hex with FRONT at the top, FLANK on each side, and REAR at the bottom, containing a sample unit (2/29, 1/4/1, 5-4-4).
CASES:
6.1 Units Which Are Exempt from Facing Restrictions
6.11 The following units are always considered to possess all-around facing regardless of how the unit is oriented in the hex it occupies:
A. Infantry units in Skirmish formation B. Infantry units in Square formation C. Command units D. Disordered units (Exception: see 6.13) E. Routed units F. Artillery Crews
6.12 A unit which possesses all-around facing has no flanks or rear. The unit is considered to be facing all six hexes which are adjacent to the hex it occupies.
6.13 An unlimbered artillery unit which is disordered retains its normal two-hexside facing.
6.2 How a Unit's Facing May Be Changed
6.21 During the Facing/Formation Phase, the Phasing Player may reorient any unit he controls. There is no Movement Point cost to reorient a unit during the Facing/Formation Phase.
6.22 A unit may not change facing and formation in the same Facing/Formation Phase (Exception: see 7.43).
6.23 During the Movement Phase, a unit must expend Movement Points to change facing. A unit may change its orientation within a given hex to any desired direction at a cost of one Movement Point.
6.3 How Facing Effects Movement
6.31 As a unit moves, it may only enter one of the hexes it faces. A unit or stack may never move directly into a hex to its flank or rear. If such movement is desired, the unit must first be reorientated in the hex it presently occupies so that it now faces the desired direction of movement.
6.32 All units stacked within the same hex must face in the same direction; i.e. the facing of all units in any one hex must be the same.
6.33 A unit which enters or remains in the same hex with another Friendly unit is required to expend one Movement Point, if necessary, to ensure that its facing conforms to that of all other Friendly units remaining in that hex at the end of the March Phase.
6.34 At the end of each Phase, any unit found to be ambiguously faced is automatically disordered.
6.4 How Facing Effects Fire Combat
6.41 A unit may only fire through its frontal hexsides (Exception: see 6.42).
6.42 A unit which possesses all-around facing may fire in any direction.
6.43 A unit may be fired upon from any direction. A unit which is fired upon through either of its flank hexsides is automatically considered a Class 1 (Enfilade) Target. (Exception: see 10.62 and 10.63). A unit's Target Class is not modified when the unit is fired upon through either its front or rear hexsides. If a Line of Fire leading to a unit bisects a flank hexside and a frontal or rear hexside, the unit is not considered an Enfilade Target.
6.44 A unit may be fired upon if it attempts to change its facing within a Minimum Range Enemy Fire Zone (see 11.23).
6.5 How Facing Effects Shock Combat
6.51 A unit may only execute a Shock attack through its frontal hexsides (Exception: see 6.52).
6.52 A unit which possess all-around facing may execute a Shock attack in any desired direction.
6.53 A unit may be subjected to a Shock attack from any direction. A unit which is subjected to a Shock attack through either a flank or rear hexside is automatically considered disordered if it is not already in a disordered or routed state.
6.54 A charging cavalry unit projects a Charge Zone through its frontal hexsides which effects the Morale and Movement capability of Enemy units (see 12.5).
7.0 Formation
GENERAL RULE:
In Wellington's Victory, formation is a broad term used to describe either the physical deployment, or morale status of a given unit at a given time. The formation of a unit may be changed either voluntarily or involuntarily at different times during the game, however, a unit may be in only one formation at any given instant. The repertoire of different formations which a unit may adopt varies with the unit's type and class. The formation adopted by a unit may effect the unit's Facing, Movement and Combat capabilities.
7.1 How a Unit's Formation May Be Changed
7.11 During the Facing/Formation Phase, the Phasing Player may alter the formation of any unit he controls (Exception: see 7.14). The process of changing a unit's facing or formation during the Facing/Formation Phase is not considered Movement and there is no Movement Point cost to effect a formation change during the Facing/Formation Phase.
7.12 A unit may not change both its facing and formation in the same Facing/Formation Phase (Exception: see 7.43).
7.13 A Player may never voluntarily change a unit's formation at any time except during the Facing/Formation Phase (Exception: see 7.42).
7.14 There are two involuntary formations which reflect a unit's morale status; Disordered and Routed. A unit in either involuntary formation may not change formation during the Facing/Formation Phase. An involuntary formation may only be changed during the Rally Phase (see 13.0).
7.15 A unit may be forced to adopt an involuntary formation at any time as a result of shock combat, a Morale check, or the terrain the unit occupies or crosses during any Phase (see 10.25, 10.31 and 10.71).
7.16 A unit may be fired upon when it attempts to change formation within a Minimum Range Enemy Fire Zone (see 11.23).
7.2 Infantry Formations
There are four different voluntary infantry formations; column, line, square, and skirmish order. Although infantry units are governed by general restrictions of Cases 7.0, 7.1, 7.5 and 7.6, additional restrictions which are only applicable to infantry formations are fully detailed in Case 8.0.
7.3 Cavalry Formations
There is only one voluntary cavalry formation which is represented by the face of the counter on which the cavalry unit's Strength, Effectiveness and Movement Allowance is printed. Thus, at any given time a cavalry unit will either be disordered, routed, or in cavalry formation. A cavalry unit may only initiate a charge if it is in cavalry formation.
7.4 Artillery Formations
7.41 There are two voluntary artillery formations: limbered and unlimbered. An artillery battery may adopt either formation without requiring the use of a special formation marker. Each artillery battery is back-printed so that one side of the counter represents the unit in limbered formation and the other side of the counter represents the unit in unlimbered formation. To change from one formation to the other the artillery unit is simply inverted during the Facing/Formation Phase (see also 7.42).
7.42 An artillery unit may only limber during the Facing/Formation Phase but may unlimber during either the Facing/Formation Phase or the March Phase. There is no Movement Point cost to change formation during the Facing/Formation Phase, but in order to unlimber during the March Phase, the artillery unit must expend one Movement Point over and above the Movement Point total expended by the unit's Movement (see also 7.43).
7.43 Each time an artillery unit changes formation, it is also permitted a free change of Facing at no additional Movement Point cost. Thus, unlike other units, an artillery battery is allowed to change both its Facing and Formation in the same Facing/Formation Phase.
7.44 An artillery battery in limbered formation may move but may not fire. An artillery unit in unlimbered formation may fire but may not move. An artillery battery in either limbered or unlimbered formation may change its Facing during the Facing/Formation Phase. An artillery battery may not move, fire, or change Facing or Formation unless it is properly "crewed" (see 7.45).
7.45 The unlimbered side of an artillery battery unit indicates the original Gun Strength and Class of the battery unit. The limbered side of an artillery battery unit indicates the Combat Strength and Effectiveness Rating of the original artillery crew attached to the battery. The artillery crew of a battery is always represented by a separate counter which is stacked directly under the battery unit itself. An artillery crew may be represented by either an Artillery Crew Marker or an Infantry Skirmish Formation Marker of the same nationality as the battery unit it serves (see 7.46).
7.46 At the start of a Scenario, each artillery battery is deployed on top of an Artillery Crew Marker which bears the same nationality and Effectiveness Rating indicated on the limbered side of the battery unit. This Marker represents the original, trained crew attached to the battery. Any time after the start of a Scenario, the original crew of a battery may be replaced by any Artillery Crew or Infantry Skirmish Formation which is the same nationality as the battery unit. When an Infantry Skirmish Formation is used to crew a battery, the battery is always considered disordered (see 7.47).
7.47 An Artillery Crew may be disordered or routed. An artillery battery may never be routed. An artillery battery is automatically disordered under any of the following conditions:
- An artillery battery is automatically disordered whenever its crew is disordered.
- An artillery battery remains disordered as long as an Infantry Skirmish Formation is used as the battery crew.
- An artillery battery is automatically disordered when it enters an Obstructed hex or crosses an Obstructed hexside during any Phase.
Whenever an artillery battery is disordered, a Disorder Marker is placed on top of the battery unit itself, rather than on top of the marker which represents the battery's crew. While disordered, a battery may not change Formation and fires using the Disordered Formation line of the Fire Combat Results Table. A disordered battery may only move if it is limbered. A disordered battery may change its Facing during the Facing/Formation Phase, regardless of whether it is limbered or unlimbered.
7.48 For Movement purposes, an artillery battery unit is subject to all additional Movement Point costs dictated by Terrain. For Fire Combat purposes, an artillery battery unit is always considered a Class 3 Target (Exception: see Cases 10.62, 10.63, 11.31 and 11.32). An artillery battery unit is never effected by Shock Combat.
7.49 For all purposes, an Artillery Crew is treated like an Infantry Skirmish Formation except as noted below:
- An Artillery Crew has no inherent Fire capability.
- An Artillery Crew may never execute a Shock attack. An Artillery Crew is always considered disordered when it defends in Shock Combat.
- An Artillery Crew reacts to a Morale check as if it was a formed unit (see 13.1).
- When an Artillery Crew is attached (stacked directly under) a horse artillery battery, its Movement Allowance is raised to six Movement Points. At all other times an Artillery Crew possesses a Movement Allowance of five Movement Points. An Artillery Crew may always move independently treating Terrain like a Skirmish formation (see 10.28).
7.5 Involuntary Formations
7.51 Disorder and Rout are involuntary formations which reflect a unit's physical disorganization or temporary state of Morale at a given time during the game.
7.52 When a unit becomes Disordered or Routed, the appropriate Morale marker is immediately placed on top of the unit.
7.53 A unit's voluntary formation is superceded by an involuntary formation which the unit is forced to adopt. For example, when an infantry unit in square formation becomes disordered, the unit immediately becomes a disordered formation and is no longer considered in square formation. Thus, the Square formation marker should be removed from the unit and replaced by a Disordered marker (see also 7.54).
7.54 All units stacked in the same hex automatically adopt the same involuntary formation at the instant any unit in the hex is disordered or routed (see 9.45).
7.55 An infantry skirmish formation is always considered a disordered formation. Thus an infantry skirmish formation can never be disordered but can be routed (see 8.49).
7.56 An artillery battery unit can be disordered but cannot be routed. An artillery crew can be either disordered or routed (see 7.47 and 7.49).
7.57 A Command unit may neither be disordered or routed. When a Command unit is stacked with a Combat unit which is forced to execute a disordered or routed retreat, the Command unit automatically accompanies the retreating Combat unit(s).
7.58 There is a separate rules section covering Morale in full detail (see 13.0).
7.6 Formed and Unformed Units
7.61 All infantry formations except disordered, routed and skirmish formation are considered formed. Thus, an infantry unit in line, column, square, or extended line formation is considered a formed unit. Infantry units which are disordered, routed or in skirmish formation are considered unformed.
7.62 A cavalry unit which is neither disordered or routed is considered formed. A cavalry unit which is either disordered or routed is considered unformed.
7.63 A Command unit is always considered an unformed unit.
7.64 An Artillery Crew which is neither disordered or routed is considered a formed unit. An artillery battery which is not disordered is considered a formed unit.
8.0 Infantry Formations
GENERAL RULE:
There are four voluntary infantry formations: column, line, square, and skirmish order. Each infantry battalion-sized unit is back-printed so that one side of the counter represents the unit in column formation and the other side of the counter represents the unit in line formation. In general, to change from column formation to line formation or vice-versa, an infantry unit is simply inverted during the Facing/Formation Phase. Because the linear deployment of large battalions requires more space than that represented by a single hex, a special Extended Line Formation Marker is used to represent the line formation of these larger battalions. An infantry square formation is represented by placing a Square Formation Marker on top of an infantry unit in column formation during the Facing/Formation Phase. An infantry skirmish formation is represented by a Skirmish Formation Marker which actually represents one Infantry Troop Strength Point in a loose, irregular fighting order rather than the "shoulder-to-shoulder" order employed in the other three infantry formations. During the Facing/Formation Phase, an infantry battalion may detach a varying number of Troop Strength Points to operate in skirmish formation according to the Class of the battalion-sized unit. Infantry units may only change formation or detach skirmish Troop Points during the Facing/Formation Phase. Infantry units which are routed or disordered may only change formation during the Rally Phase.
CASES:
8.1 Column Formation
The Column Formation of an infantry battalion is represented on the front of the battalion unit itself. In general, a Column Formation represents an infantry battalion deployed on a front of one or two companies. The Movement Allowance of an infantry battalion in Column Formation exceeds its Line Formation Movement Allowance by one Movement Point. The Effectiveness Rating of an infantry battalion in Column Formation is equal to or greater than its Effectiveness Rating in Line Formation. For Fire Combat, a Column Formation's firepower is generally inferior to that of a Line Formation possessing the same Troop Strength and Effectiveness Rating. A Column Formation is normally considered a Class 1 Target for Fire Combat purposes. Only infantry battalions may adopt Column Formation.
8.2 Line Formation
The Line Formation of an infantry battalion is represented on the back of the battalion unit itself. In general, a Line Formation represents an infantry battalion deployed in two or three ranks (see 11.42). A Line Formation is normally considered a Class 2 Target for Fire Combat purposes. Only infantry battalions may adopt Line Formation. Certain battalions require the use of a special marker when they adopt Line Formation (see 8.3). A Line Formation is automatically disordered when stacked in the same hex as any unit except another Line Formation or a Command unit (Exception: see 8.44 and 9.41).
8.3 Extended Line Formation
When an infantry unit adopts line formation, the use of a special Extended Line Formation Marker is required under either of the following circumstances:
- If the infantry unit is a British, King's German Legion (KGL), or Class 1 or 2 Hanoverian battalion with a current Troop Strength of four or more.
- If the infantry unit is not listed in #1 (above), and its current Troop Strength is six or more.
If either of these circumstances is applicable, refer to the following Procedure. If neither of these circumstances is applicable, the unit's line formation is represented without an Extended Line Formation Marker.
PROCEDURE:
During the Facing/Formation Phase, when an infantry unit described in either #1 or #2 (above), adopts line formation, the Phasing Player must immediately place an Extended Line Formation Marker in one of the two hexes adjacent to the unit's flank hexsides. When positioning the marker, the arrow is pointed toward the infantry unit in order to distinguish the fact that the marker represents part of the adjacent unit and that this unit-marker combination represents a single infantry battalion in line formation.
*Example: a diagram shows a hex grid with the labels Maximum Range, Fire Zone, Minimum Range, Fire Zone, Flank Hexside (both sides), containing a single unit (1/23Fu, 4/4/II, 6-5-3) in one hex and an Extended Line Formation Marker (arrow) in the adjacent flank hex, captioned "Single Unit in Extended Line Formation."
8.31 An Extended Line Formation represents a single formed infantry battalion deployed in two adjacent hexes in line formation (see 8.33).
8.32 An Extended Line Formation is automatically disordered when any of the following circumstances occurs:
- An Extended Line Formation is automatically disordered when it is stacked with any unit other than a Command unit in either of the two hexes it occupies (Exception see Case 8.44 and 9.41).
- An Extended Line Formation is automatically disordered if either hex it occupies is an Obstructed Terrain hex.
- An Extended Line Formation is automatically disordered when it crosses or attempts to deploy across an Obstructed Terrain hexside.
- An Extended Line Formation is automatically disordered when it attempts to execute a Shock attack.
- An Extended Line Formation is automatically disordered when it changes its Facing.
- An Extended Line Formation is automatically disordered under any circumstance which would cause any other formed unit to become disordered.
8.33 At the instant an Extended Line Formation becomes disordered or routed, the Extended Line Formation Marker is immediately removed from the map and the appropriate Morale Status Marker is immediately placed on top of the unit itself. Thus, an Extended Line Formation ceases to occupy two hexes at the instant it becomes disordered or routed. The unit itself is then simply considered a disordered or routed formation.
8.34 At the instant the current Troop Strength of a battalion is reduced below the Strength which mandates the use of an Extended Line Formation Marker, the marker is immediately removed from the map.
8.35 An Extended Line Formation possesses a unitary Movement Allowance and moves as a single unit (the Movement Allowance of the battalion unit in line formation is used). During the March Phase, a unit in Extended Line Formation pays the highest Movement Point cost for any terrain it enters or crosses. For example, when an Extended Line Formation which occupies hexes A3117 and A3017 enters hexes A3118 and A3018, it expends two Movement Points due to the fact that part of the unit crossed a Contour hexside while moving from a lower level of elevation to a higher level.
8.36 An Extended Line Formation may be fired upon in either hex it occupies using the normal Observation and Target Classsification procedures (see 11.35). An Extended Line Formation may only fire as a line formation if the target unit can be observed from both of the hexes occupied by the Extended Line Formation (see 11.43).
8.37 An Extended Line Formation may be attacked in Shock Combat in either hex it occupies:
- When an Extended Line Formation is attacked through a frontal hexside the attack is resolved against either the hex occupied by the battalion unit or the hex occupied by the marker from an adjacent hex occupied by the attacking unit(s).
- When an Exxtended Line Formation is attacked through a flank or rear hexside, it is automatically disordered. If the Shock attack is executed against the hex occupied by the marker, the marker is immediately removed from the map and the attacking unit(s) must immediately enter that hex and resolve the Shock attack against the hex occupied by the disordered battalion unit (the attacking unit may freely adjust its Facing when it enters the hex formerly occupied by the marker if necessary to enable it to attack the battalion unit itself).
- When an Extended Line Formation executes a Shock attack, it is automatically disordered and the marker is immediately removed from the map. However, if the stated defending unit is adjacent to the hex formerly occupied by the marker, the battalion unit may be freely repositioned in the hex the marker had occupied in order to resolve the Shock attack.
8.38 For all Combat purposes, an Extended Line Formation is always treated as a single unit which possesses its full (current) Troop Strength and Effectiveness in each of the two hexes it occupies. When an Extended Line Formation is fired upon its Target Class is based upon the terrain actually traversed by the Line of Sight. Similarly, when an Extended Line Formation participates in Shock Combat, its Effectiveness Rating is modified to account for the terrain which would normally effect the Differential. An Extended Line Formation is also treated as a single unit for Morale purposes; the unit's Morale benefits from the presence of terrain or a Command unit in either of the two hexes occupied by the unit.
8.4 Skirmish Formation
During the Facing/Formation Phase, infantry Troop Strength Points representing "company-sized" infantry skirmish formations may be detached from or reincorporated into battalion-sized infantry units controlled by the Phasing Player.
Note: Although detachment and reincorporation of skirmish formations may only be executed during the Facing/Formation Phase, the procedure is not considered a change of Formation. Thus, a battalion may change either its Facing or Formation during the same Phase in which it detaches or reincorporates skirmish formations.
PROCEDURE:
When Troop Points are detached from a battalion the battalion's current Troop Strength is reduced by one Point for each Troop Point it detaches. Detached Troop Points are individually represented by Infantry Skirmish Formation Markers of the same nationality as the battalion from which they were detached. The Skirmish Formation Marker(s) (henceforth called "skirmish companies") are placed on top of all of the units stacked in the hex occupied by the battalion from which the skirmish companies were detached.
During the Facing/Formation Phase a skirmish company may be reincorporated into a battalion-sized unit of the same nationality which occupies a hex adjacent to the hex occupied by the skirmish company (see 8.42 and 8.44).
Note: Skirmish companies are designated by nationality but are not designated as belonging to specific infantry units. Thus, in accordance with the following rules, an infantry battalion may reincorporate any skirmish company of the same nationality, however see Cases 8.42 and 8.44 for additional information.
8.41 A Class 1 infantry battalion may detach any part or all of its Troop Strength into skirmish companies. A Class 1 battalion which detaches all of its Troop Strength into skirmish companies is removed from the map and an equivalent number of skirmish companies are replaced in the hex the battalion occupied. A battalion which detaches all of its Troop Strength into skirmish companies may never be reformed as a battalion-sized unit.
8.42 A Class 1 infantry battalion may reincorporate any skirmish company of the same nationality during the Facing/Formation Phase. The reincorporated skirmish company is removed from the map and the current Troop Strength of the battalion is raised accordingly. A Class 1 infantry battalion may not reincorporate a skirmish company if it possesses its original (printed) Troop Strength.
8.43 A Class 2 infantry battalion may detach a maximum of one skirmish company. A Class 2 battalion may only detach a skirmish company if the battalion possesses its original (printed) Troop Strength. A Class 2 infantry battalion may never detach a skirmish company if its current Troop Strength is less than its original (printed) Troop Strength (Exception: see 8.44).
8.44 A Class 2 infantry battalion may reincorporate a maximum of one skirmish company providing that its current Troop Strength is at least one Point less than its original (printed) Troop Strength. The reincorporated skirmish company is placed between the battalion counter and the current Troop Strength Marker of that battalion. When a skirmish company is reincorporated into a Class 2 battalion, the battalion's current Troop Strength marker is not changed. However, when a skirmish company is reincorporated into a Class 2 battalion, it is considered to be part of the battalion rather than a separate unit. Thus, the Strength and Effectiveness Rating of the battalion is raised by one for all Combat and Morale purposes. During a subsequent Facing/Formation Phase, a Class 2 battalion stacked on top of a reincorporated skirmish company may detach that same company (even though the battalion's current Troop Strength is less than its original (printed) Troop Strength). Note: Because a skirmish company that is reincorporated into a Class 2 battalion is not considered a separate unit, it does not violate Case 9.41 which prohibits infantry in different formations from being stacked in the same hex. Note also that a Class 2 battalion may never reincorporate more than one skirmish company.
8.45 A Class 3 battalion may neither detach or reincorporate skirmish companies.
8.46 A routed battalion may neither detach or reincorporate skirmish companies. Routed skirmish companies may not be reincorporated into an infantry battalion. Disorder and Command Control have no effect on a battalion's ability to detach or reincorporate skirmish companies.
8.47 In addition to the restrictions of Case 5.0, the Movement of skirmish companies is restricted as follows:
- A skirmish company may never voluntarily move more than five hexes from an infantry battalion of the same nationality. Note: A skirmish company is not required to remain within five hexes of an infantry battalion of the same nationality at all times; it is simply prohibited from voluntarily moving further than five hexes from a battalion of the same nationality.
- A skirmish company may never voluntarily enter the Minimum Range Fire Zone of a formed Enemy infantry battalion.
- A skirmish company may enter any hex at a cost of one Movement Point.
- A skirmish company is exempt from Command Control restrictions.
8.48 In addition to the restrictions of Case 12.0, the Shock Combat capabilities of skirmish companies are restricted as follows:
- A skirmish company may never execute a Shock attack against a formed Enemy unit. Skirmish companies may only execute Shock attacks against disordered, routed, and skirmish formations.
- Skirmish companies receive no benefit from being stacked with a Command unit while involved in Shock Combat.
- A skirmish company treats a "Dr" or "Dr1" result as an "R" result. A skirmish company is neither disordered or routed by a Shock Combat result of "D1" (although the loss of one Troop Point is mandatory).
- A skirmish company is automatically considered a disordered formation for Shock Combat purposes.
8.49 In addition to the restrictions of Case 13.0, a skirmish company's Morale is effected by the following special rules:
- During the Rally Phase, routing skirmish companies controlled by the Phasing Player are automatically rallied if not in the Fire Zone of an Enemy unit (i.e. a skirmish company may be rallied in a hex which is not occupied by a Friendly Command unit).
- When a skirmish company's Morale is checked, if the modified die roll exceeds the skirmish company's Effectiveness Rating (5), the skirmish company routs.
- The die roll used to check a skirmish company's Morale is raised by one (1) if the skirmish company is out of ammunition.
8.5 Square Formation
A Square Formation represents a rectangular formation of four to six ranks which an infantry battalion would adopt when it was threatened by Enemy cavalry.
8.51 The Square Formation of an infantry battalion is represented by placing a Square Formation Marker on top of the battalion unit in Column Formation.
8.52 During the Facing/Formation Phase, a formed infantry battalion in either Column or Line Formation may adopt Square Formation; when a battalion in Line or Extended Line Formation adopts Square Formation, it changes first to Column and then to Square during the same Facing/Formation Phase. An Extended Line Formation may form Square in either hex it occupies. Disordered or routed battalions may not adopt Square Formation.
8.53 A battalion may not adopt Square Formation in an Obstructed Terrain hex.
8.54 When any battalion adopts Square Formation, all infantry battalions stacked in the same hex must automatically adopt the same formation. Thus, a single Square Formation Marker is used in each hex occupied by one or more battalions in Square Formation.
8.55 A Square Formation possesses all-around Facing.
8.56 A Square Formation possesses no Movement Allowance (i.e. an infantry battalion may not move in Square Formation).
8.57 A Square Formation is automatically disordered when it executes a Shock attack. A cavalry unit is automatically disordered when it executes a Shock attack against a hex occupied by an infantry Square Formation. In addition, the Effectiveness Rating of the topmost infantry battalion in Square Formation is increased by two (2), when defending against a Shock attack made by an Enemy cavalry unit (see 12.2).
8.58 A Square Formation is normally considered a Class 1 Target for Fire Combat purposes.
8.59 Only infantry battalions may adopt Square Formation although skirmish companies may be reincorporated into battalions in Square Formation (see 8.42 and 8.44).
9.0 Stacking
(Vertical Arrangement of Units)
DEFINITION:
Generally, the act of placing more than one unit in a hex by stacking them one above another is called "Stacking." Conversely, dividing a stack of two or more units into its component units is accomplished by "unstacking" the units. In the game, Stacking is generally used to concentrate strength for Shock Combat and to facilitate compliance with Command Control restrictions.
GENERAL RULE:
During the March Phase (only), the Phasing Player may reorganize the units he controls by stacking or unstacking units which occupy the same hex. Stacking or unstacking operations never expend Movement Points.
CASES:
9.1 Maximum Stacking Limitations
9.11 The total number of Combat Strength Points which may be stacked in a single hex at any given instant is limited according to the types of units being stacked and the terrain in the occupied hex. These maximum Stacking limits are prescribed as follows:
A. The maximum number of infantry and/or artillery Strength Points which may occupy a Clear terrain hex is eighteen (18). B. The maximum number of cavalry Strength Points which may occupy a Clear terrain hex is twelve (12). C. The maximum number of Strength Points which may occupy an Obstructed terrain hex is nine (9).
9.12 The Stacking limit assigned to a given type of terrain is continually in effect at all times throughout the game. A unit may never enter a hex in violation of the Stacking limit at any time during the game (Exception: see 9.13).
9.13 The Stacking limit of a given hex may be violated at any time within the restrictions of the following penalties:
A. All units stacked in a hex in violation of the Stacking limit are automatically disordered at the instant the violation occurs. If the units involved are already disordered (or in skirmish formation), they are automatically routed. B. The maximum number of Combat Strength Points which may participate in Fire or Shock Combat in a given hex may not exceed the assigned Stacking limit of that hex (see 10.74 and 11.14).
9.14 A unit's current Combat Strength is counted for Stacking purposes. All Troop and Gun Strength Points which are stacked in a hex count against the Stacking limit of that hex.
9.15 Command units do not possess a Combat Strength and do not count against the Stacking limit. An unlimited number of Command units may be stacked in any given hex.
9.16 Informational counters which do not represent troops or guns do not count against the Stacking limit.
9.17 For Stacking purposes, horse artillery is considered an artillery formation, not a cavalry formation.
9.18 Friendly units of different nationalities may be stacked in the same hex. All non-French units are considered Friendly to each other. No other unit nationality is considered Friendly to the French units.
9.19 Opposing Troop Strength Points may never occupy the same hex at any time during the game. Friendly Troop Strength Points may enter or occupy a hex containing only Enemy Gun Strength Points.
9.2 How Stacking Effects Movement
9.21 Stacking and unstacking operations are only permitted during the March Phase. During all other Phases, the order in which units are stacked may not be altered.
9.22 There is never any additional Movement Point cost to stack or unstack units within a given hex.
9.23 A stack of units may be fired upon if its stacking order is rearranged within a Minimum Range Enemy Fire Zone (see 11.23).
9.3 How Stacking Effects Facing
All Friendly units stacked in the same hex must face in the same direction; the Facing of all Friendly units in any one hex must be the same.
9.4 How Stacking Effects Formation
9.41 Infantry units in different formations may never be stacked in the same hex at the end of any Phase except the Friendly Facing/Formation Phase. When infantry units in different formations are stacked in the same hex during the Friendly Facing/Formation Phase, they are exempt from the restrictions of Cases 9.46 and 9.47.
9.42 A cavalry formation may never be stacked in the same hex as an infantry or artillery formation. For this purpose, horse artillery is considered an artillery formation, not a cavalry formation (see 9.43).
9.43 For Stacking purposes, artillery batteries and artillery crews are considered in skirmish formation regardless of whether the artillery is limbered or unlimbered. Infantry in skirmish formation may freely stack with artillery. Infantry Troop Strength Points which are not in skirmish formation may never be stacked in the same hex as an artillery battery unit.
9.44 Command units may freely stack with any formation.
9.45 All units stacked in the same hex automatically adopt the same involuntary formation (Disorder or Rout) at the instant any unit in the hex is Disordered or Routed. In addition, any unit which enters a hex containing an involuntary formation immediately adopts the same involuntary formation itself. Therefore, when any unit becomes disordered or routed the appropriate involuntary formation marker should be placed on top of the topmost unit in the same hex.
9.46 A Line Formation is automatically disordered when stacked in the same hex as any unit except another battalion in Line Formation and/or a Command unit (Exception: see 8.44 and 9.41).
9.47 An Extended Line Formation is automatically disordered when it is stacked with any unit other than a Command unit in either of the two hexes it occupies (Exception: see 8.44 and 9.41).
9.5 How Stacking Effects Fire Combat
9.51 Only the top combat unit stacked in a hex may engage in Fire Combat. Units stacked beneath another combat unit may never fire (Exception: see 9.54).
9.52 Strength Point losses resulting from infantry or artillery fire are inflicted on the topmost combat unit in the target hex. If the topmost combat unit is reduced to zero Strength Points, it is immediately removed from the map and any additional loss is inflicted on the new topmost combat unit in the target hex. If a Fire result calls for losses in excess of the total number of Strength Points in the target hex, all Strength Points in the target hex are eliminated and the excess loss is ignored.
9.53 If a Command unit is the topmost unit in a hex, the topmost combat unit stacked under the Command unit(s) may fire and suffer losses. Command units stacked in a hex never inhibit a combat unit from firing or suffering the result of fire directed at that hex. The effect of fire on Command units is explained in Case 11.33.
9.54 More than one skirmish company may fire from the same hex (see 11.14).
9.6 How Stacking Effects Shock Combat
9.61 Units stacked in the same hex engage in Shock Combat as a single, indivisible group.
9.62 All of the Troop Points stacked in a hex are totalled into a single combined strength and this combined strength is used to determine the Percentage Ratio involved in a given Shock Combat.
9.63 When stacked units engage in Shock Combat, the Effectiveness Rating of the topmost defending unit is subtracted from the Effectiveness Rating of the topmost attacking unit in order to determine the Differential used to resolve the Shock Combat.
10.0 Terrain
GENERAL RULE:
The terrain features printed on the map(s) represent the physical characteristics of the Waterloo battlefield including the farm and village dwellings, roads, streams, woods and the very contur of the ground itself. These terrain features have varying effects upon the Movement and Combat capabilities of the combat units which are thoroughly explained in the following Cases.
CASES:
10.1 Terrain Features
10.11 All of the terrain features depicted on the map are graphically identified on the Terrain Key (see map D).
10.12 There are three distinct types of hexes characterized by different terrain features; Clear terrain hexes, Soft Cover hexes and Hard Cover hexes. A hex which contains a building symbol is always considered a Hard Cover hex. A hex which contains even a tiny bit of woods symbology is always considered a Soft Cover hex. A hex which contains no woods or building symbology is always considered a Clear terrain hex regardless of the symbology superimposed along any of the hexsides which form the perimeter of that hex.
10.13 There are four distinct type of hexsides characterized by different terrain symbology; Soft Cover hexsides (representing woods, hedges, ditches or abatis — a man-made obstacle;, Hard Cover hexsides (representing low stone walls), Impassable hexsides (representing unfordable water obstacles or high, unbroken masonry walls), and Contour hexsides (representing a 10% gradient in the slope of the ground).
10.14 For the sake of brevity, Hard and Soft Cover terrain features are often referred to as "Obstructed terrain hexes" or "Obstructed terrain hexsides" in many of the following rules.
10.15 In order to clarify the abstraction of ground contour in the game the terrain has been divided into five distinct levels of elevation. These five levels of elevation are distinguished by different shades of color. The hexside(s) which divide different levels of elevation are called Contour hexsides. Elevation Level 0 encompasses all terrain below 110 meters above sea level. Elevation Level 1 encompasses terrain between 110-120 meters above sea level. Elevation Level 2 encompasses terrain between 120-130 meters. Elevation Level 3 encompasses terrain between 130-133 meters and Elevation Level 4 encompasses terrain higher than 133 meters above sea level. The effect of elevation on Movement and Combat is fully described in the following rules sections.
10.2 How Terrain Effects Movement
10.21 Regardless of formation, all units must expend at least one Movement Point to enter a Clear terrain hex during the March Phase. To enter other types of hexes and/or cross certain types of hexsides a unit may be required to expend more than one Movement Point unless the formation adopted by the unit exempts the unit from the additional Movement Point cost dictated by the terrain (see 10.28).
10.22 A unit must expend two Movement Points to enter an Obstructed terrain hex.
10.23 A unit must expend one additional Movement Point to cross an Obstructed terrain hexside. This cost is added to the Movement Point cost dictated by the terrain in the hex the unit enters after crossing the Obstructed hexside. For example, an infantry unit in column formation must expend three Movement Points to enter a Soft Cover hex by moving across a Soft Cover hexside.
10.24 A unit must expend one additional Movement Point to cross a Contour hexside if, and only if, the unit is moving from a lower level of elevation to a higher level. For example, a unit in column formation must expend four Movement Points to enter a Soft Cover hex on Elevation Level 2 by crossing an Obstructed Contour hexside from an adjacent hex on Elevation Level 1. There is no additional Movement Point cost to cross a Contour hexside when moving from a higher elevation level to a lower level.
10.25 A unit which enters a hex through a hexside traversed by either a Primary or a Secondary road must pay the Movement Point cost dictated by the other terrain in the hex being entered and the hexside crossed. However, if the Player desires, such movement may be accomplished at a cost of only one Movement Point for each hex entered through a road hexside providing the following restrictions are observed:
A. The Stacking limit assigned to any hex entered via the road movement exemption is automatically reduced to nine Strength Points for the duration of the March Phase. Note: Overstacking under Case (9.13) is prohibited in a hex entered via the road movement exemption.
B. A formed unit is automatically disordered at the instant it employs the road movement exemption.
A "Dis" (Disordered) marker is illustrated here.
Note: When a series of units employ the road movement exemption, a Disorder marker may only be required on the leading unit(s) unless additional markers are needed to avoid confusion.
10.26 A unit may only cross a Stream hexside by employing the road movement exemption. Stream hexsides which are not traversed by a road are considered Impassable hexsides.
10.27 Regardless of formation, no unit may cross an Impassable hexside.
10.28 Command units and infantry in skirmish formation may enter any hex at a cost of one Movement Point (i.e. they ignore all additional Movement Point penalties imposed by terrain).
10.29 Movement which takes place during any Phase other than the March Phase does not require the expenditure of Movement Points and is therefore exempt from additional Movement Point penalties imposed by terrain.
10.3 How Terrain Effects Formation
10.31 A formed unit is automatically disordered when it enters an Obstructed Terrain hex or crosses an Obstructed Terrain hexside during any Phase.
10.32 An Extended Line Formation is automatically disordered if either hex it occupies is an Obstructed Terrain hex. An Extended Line Formation is automatically disordered when it crosses or attempts to deploy across an Obstructed Terrain hexside.
10.33 An infantry battalion may not adopt Square Formation in an Obstructed Terrain hex.
10.34 Disorder may not be removed from a unit which occupies an Obstructed Terrain hex during the Rally Phase. Rout may be removed from a unit which occupies an Obstructed Terrain hex during the Rally Phase (see 13.2).
10.4 How Terrain Effects Stacking
10.41 The maximum number of infantry and/or artillery Strength Points which may occupy a Clear terrain hex is eighteen (18).
10.42 The maximum number of cavalry Strength Points which may occupy a Clear terrain hex is twelve (12).
10.43 The maximum number of Strength Points which may occupy an Obstructed hex is nine (9).
10.44 The maximum Stacking limit assigned to a given type of terrain may be violated in accordance with Case (9.13). Note: see also (10.74).
10.5 How Terrain Effects Observation
COMMENTARY:
The ability of a unit to see another unit on the map depends upon the Facing of the sighting unit and the terrain that lies between the hex occupied by the sighting unit and the hex occupied by the unit the sighting unit is attempting to observe. In order to determine whether one unit can observe another unit the Player should carefully follow the entire procedure described below:
PROCEDURE:
-
Determine the Facing of the sighting unit. A unit's field of vision is limited by its Facing. A unit may only see through hexsides which it faces. A unit may never trace a Line of Sight (LOS) through its flank or rear hexsides. A unit which possesses all-around Facing may see in any direction.
-
Determine the Line of Sight between the sighting unit and the unit it is trying to observe. This is accomplished by visualizing a perfectly straight line drawn from the center of the hex occupied by the sighting unit through the center of the hex occupied by the unit to be observed. If the Player finds it difficult to visualize this Line of Sight, he should hold a ruler over the map, aligning it between the center of the two hexes.
-
Determine if the Line of Sight is blocked (preventing observation) or clear (permitting observation). Once the Line of Sight between the two units is established, the Player must determine if any hex traversed by this Line of Sight contains blocking terrain. There are three different types of blocking terrain; Elevated hexes, Obstructed hexes and Occupied hexes. Any hex which contains blocking terrain may interrupt the LOS, allowing a unit to see into that specific hex, but preventing observation beyond that hex along the LOS. The presence of blocking terrain does not automatically interrupt the Line of Sight. Whether blocking terrain actually interrupts or blocks the LOS depends upon the elevation of both the sighting unit and the unit it is attempting to observe. To determine if the LOS between two units is blocked, the Player consults the following Cases.
10.51 If the two units occupy hexes which are at the same level of elevation, either unit may observe the other unless any one of the following conditions occurs:
- The Line of Sight traverses any hex which is on a higher elevation level than either of the two units.
- The Line of Sight traverses either an Obstructed hex or a hex occupied by one or more Troop Strength Points which is on the same level of elevation as the observing units.
- Both of the units occupy hexes on a descending slope (see 10.53).
10.52 If the two units occupy hexes on different levels of elevation, the Line of Sight is automatically blocked if it traverses any hex which is on a higher elevation level than both of the observing units. If the LOS is not blocked by higher terrain, use the following procedure to determine whether or not the two units can observe each other:
PROCEDURE:
-
Determine which of the two units is at the higher level of elevation. Regardless of which unit is on higher ground, the observation procedure is always initiated in the hex occupied by the higher unit (even when the lower unit is attempting to observe the higher unit in order to fire at it). If the higher unit can observe the lower unit according to the following procedure, the lower unit can also observe the higher unit.
-
Count the number of hexes (directly following the LOS) from the hex occupied by the higher unit (inclusive) to the last hex which is higher than the hex occupied by the lower unit (inclusive). When making this count, consider any Obstructed hex or any hex occupied by one or more Troop Strength Points higher than its actual level, unless it is the hex actually occupied by the lower observing unit. Note that if the LOS traverses an Obstructed or Occupied hex which is considered higher than both of the observing units, the LOS is automatically blocked. For step #5 the Player must keep in mind the total number of hexes counted in step #2.
-
Now, count the number of hexes (still following the LOS) from the first hex which is at the same level of elevation as the lower observing unit (inclusive) to the hex actually occupied by that unit (inclusive). Keep this total in mind and proceed to step #4.
-
Next, determine the difference in elevation between the hex occupied by the higher unit and the hex occupied by the lower unit. If the higher unit, for example, is on Elevation Level 3 and the lower unit is on Elevation Level 0, the difference is three (3) levels of elevation. Now multiply the hex count obtained in step #3 by the elevation difference obtained in this step. Keep this total in mind and proceed to the next, and last, step.
-
Subtract the total obtained in step #4 from the original hex count total obtained in step #2. If the result is either a negative number or zero, the two units mutually observe each other.
EXAMPLE (Illustrating Observation Procedure when units occupy hexes at different levels of elevation):
Suppose the French Player wishes to determine if his artillery battery unlimbered in hex A4732 (located on Elevation Level 3) can observe a British skirmish formation which occupies hex A4726 (located on Elevation Level 2 and designated "The Sandpit"). First, the French Player checks the French battery's Facing to make sure the British unit is within the battery's field of observation. Assuming it is, the French Player next determines that his battery is on the higher elevation thus the LOS will be traced from hex A4732 (inclusive) to hex A4726 (inclusive). Now, along this LOS, only hex A4732 (the hex occupied by the French battery) is higher than the target hex. Thus, the hex count obtained in step #2 of the Observation Procedure is one (1). Next, the French Player counts the number of hexes (still following the LOS) from the first hex which at the same level of elevation as the lower British unit (hex A4731), inclusive, to the hex actually occupied by the lower British unit (inclusive). The French Player therefore counts the following hexes; A4731, A4730, A4729, A4728, A4727, and A4726, yielding a total of six (6) hexes. Proceeding to step #4 of the Observation Procedure, the French Player determines that the observing battery unit is one level of elevation higher than the British skirmish formation's position. So, he multiplies the hex count obtained in step #3, (6) by the elevation difference (1), obtaining a total of six (6). Finally, he subtracts this total (6) from his original hex count of (1) yielding a result of negative five (-5). As the final result is not a positive number, he determines that the French Battery and the British skirmish formation may mutually observe each other.
Notice, however, that if hex A4730 was occupied by a Troop Point, or if it was an Obstructed hex, the LOS between hex A4732 and A4726 would be determined differently. In these circumstances, hex A4730 would be considered one level of elevation higher than its actual level. Thus hex A4730 would be considered on Elevation Level 3 instead of Level 2. This in turn would mean that during Step #2 of the Observation Procedure, the French Player would have counted the following hexes; A4732, A4731, and A4730 — the last hex which would be considered higher than the hex occupied by the lower British unit. When the total obtained in Step #3 (which would now be four including hexes A4729, A4728, A4727, and A4726) was multiplied by the elevation difference (1), and this result was subtracted from the Step #2 total (3), the result would be (-1) indicating that the obstruction in hex A4730 does not block the LOS between hex A4732 and hex A4726.
10.53 When two units occupy hexes at the same level of elevation, the LOS between these two units is automatically considered blocked if both of these units occupy hexes on a descending slope. Use the following procedure to determine if a unit occupies a position on a descending slope:
PROCEDURE:
-
Visually, or with the aid of a ruler, extend the LOS so that it passes directly through the center of the hexes occupied by the observing units.
-
Regardless of the actual Facing of the observing units, consider each unit to be facing the other along the LOS.
-
Now examine the position of each unit. If there is descending terrain (any hex which is at a lower level of elevation) closer to the rear than to the front of the unit (as defined in step #2), the unit is considered to occupy the descending slope. Note: When making this determination, if the LOS passes directly along a hexside between descending terrain and terrain which is no lower than the observing unit consider neither hex to contain descending terrain.
-
If there is no descending terrain within two hexes of a unit's rear (as defined in step #2), the unit is not considered on a descending slope regardless of the result obtained in step #3.
10.54 In any case in which the LOS passes directly along a hexside between a hex that blocks the LOS and a hex which does not block the LOS, the LOS is considered blocked.
10.55 Except as noted in Case 10.54, hexside terrain features (including all Soft and Hard Cover hexsides, Stream hexsides, Contour hexsides and Impassable hexsides) never block the Line of Sight. Note, however, that hexside terrain features may effect Fire Combat (see 10.63).
10.56 A Line of Sight may always be traced into a hex containing blocking terrain. If the blocking terrain within a given hex interrupts the LOS then the LOS is considered to end in that hex; it may be traced no further and observation beyond that hex is impossible.
10.57 Units which occupy adjacent hexes always observe each other (if the units' Facing permits observation).
10.6 How Terrain Effects Fire Combat
10.61 A unit may never fire at a target unit it is unable to observe (Exception: see 11.34).
10.62 Regardless of all other considerations, a unit which occupies a Hard Cover hex is always considered a Hard Cover target (Target Class #5) for Fire Combat purposes. Similarly, a unit which occupies a Soft Cover hex is always considered a Soft Cover target (Target Class #4) for Fire Combat resolution.
10.63 For Fire Combat purposes, all Hard and Soft Cover hexsides shield a target unit located directly behind the Obstructed hexside. A hex protected by an Obstructed hexside is indicated by the hexside symbology which "points" into the protected hex. For example, hex A5323 is protected by Soft Cover hexsides which form its north, south, southeast and southwest boundaries. Regardless of other considerations, a unit which occupies a hex protected by a Hard Cover hexside is automatically considered a Hard Cover target if it is fired on along a Line of Sight which crosses the Hard Cover hexside. Similarly, a unit which occupies a hex protected by a Soft Cover hexside is automatically considerred a Soft Cover target when fired at through the protective hexside which forms part of the boundary of the hex the target unit occupies. Note that a unit is never protected by a hexside which does not enclose the hex the unit actually occupies.
10.64 If a unit can be considered either a Hard or Soft Cover target, it is simply considered a Hard Cover target.
10.65 A unit which is shielded by a skirmish formation is automatically considered a Soft Cover target (see 11.34).
10.66 The Strength (or firepower) of units which occupy different hexes may never be combined for the purpose of Fire Combat. The Strength (or firepower) of units stacked in a single hex may not be combined for the purpose of Fire Combat (Exception: see 11.14).
10.7 How Terrain Effects Shock Combat
10.71 A formed unit is automatically disordered when it executes a Shock attack into an Obstructed hex or across an Obstructed hexside. This disorder takes effect immediately, before either defensive fire or the Shock attack itself is resolved.
10.72 A Shock attack may never be executed across an Impassable hexside.
10.73 The Troop Strengths of units which occupy different hexes may never be combined for the purpose of Shock Combat. The Troop Strengths of all units stacked in the same hex must be combined when units in that hex are involved in Shock Combat (Exception: see 10.74).
10.74 The maximum number of Strength Points which may actively defend a given hex may not exceed the Stacking limit assigned to that hex. The maximum number of Strength Points which may participate in a Shock attack may not exceed the Stacking limit assigned to the hex occupied by the defending unit(s). Excess Strength Points stacked in a hex as allowed by Case 9.13 may not actively participate in Shock Combat although they are effected by the result of that combat.
10.75 The Effectiveness Rating of a unit is modified to account for the effect of Terrain on Shock Combat as noted on the Shock Combat Results Table (see 12.23).
10.76 A Cavalry unit which cannot observe any Enemy troops within its projected Charge Zone may not charge (see 12.41).
10.77 A cavalry Charge Zone never extends into an Obstructed hex. A cavalry Charge Zone does extend across Obstructed hexsides.
10.78 A cavalry unit may never enter an Obstructed hex during the Shock Phase. A cavalry unit is automatically disordered if it crosses an Obstructed hexside during the Shock Phase (see 12.46).
11.0 Fire Combat
GENERAL RULE:
During the Reciprocal Fire Phases, both Players may fire all, some, or none of their eligible units by alternately firing one unit at a time until all desired, permissable fire has been executed in accordance with the Fire Porcedure and the Fire Combat rules. In addition, during any Phase, a unit may immediately fire at an Enemy unit which is within its Minimum Range Fire Zone if that Enemy unit attempts to change its Facing, Formation, or Stacking position, or exit from that Fire Zone. At all times, a unit can only fire at an Enemy target unit which it can observe.
PROCEDURE:
Regardless of when Fire Combat occurs, each eligible unit must fire separately. When a unit fires, it is considered to be executing a Fire attack. To execute a Fire attack, a Player must identify which of his units is firing and which Enemy unit is the target. The Fire Routine is then used to resolve the fire of each of the attacking units, and any result is immediately applied to the target before any additional units are granted an opportunity to fire.
An Infantry Fire Marker ("Fire" in a box with an X) is illustrated here.
At the beginning of each Reciprocal Fire Phase, either Player rolls the die to determine which Player will receive the opportunity to fire first. If the result is even, the French Player initiates fire. If the result is odd, the Allied Player fires first. The Player who receives the opportunity to fire first then selects an eligible unit which occupies a position on either flank of his army (usually the easternmost or westernmost unit which is eligible to fire in the current Phase). This unit is indicated by the appropriate colored Fire Marker provided in the countermix. The Player who fires first now resolves a Fire attack executed by the indicated unit if he desires that unit to fire. If not, he may pass by that unit and, moving toward the opposite flank of his army, he may replace the Fire Marker on the first eligible unit he wishes to fire. After he has resolved one Fire attack, the opposing Player receives the opportunity to select on which flank he will initiate fire. The Second Player follows the same procedure until he has resolved one Fire attack. The first Player is now allowed to fire a second unit (still proceeding down the length of his army from the flank where he initiated fire). After this second attack, his opponent fires a second unit following the same procedure. This procedure is then repeated with each Player alternately firing one unit at a time until all desired, permissable fire has been executed.
Note: Players are instructed to resolve attacks directly down the length of each army as this makes it easy to remember (with the aid of the Fire Marker) which units have fired and which remain eligible to fire. Note also that fire is not considered simultaneous. Fire results effect the target unit immediately, before it or any other unit has the opportunity to return fire.
There is no special procedure or sequence required to resolve Fire attacks which occur during a Phase which is not a Reciprocal Fire Phase. Units may fire, for example, in any desired order, at an Enemy unit which attempts to change formation within their Minimum Range Fire Zones. Each unit eligible to fire in these circumstances must still fire separately with immediate effect upon the target unit.
FIRE ROUTINE:
Step 1: The attacking Player determines the Class of the Target Unit. Whenever a unit is fired upon it must be categorized in one of five different Target Classes according to the following schedule:
Target Class 1: All Column and Square Formations; Enfiladed Target (see Case 11.31); Massed Target (see Case 11.32). Target Class 2: All Cavalry Formations and Infantry Line Formations. Target Class 3: All Skirmish, Routed and Artillery Formations. Target Class 4: Any target unit protected by Soft Cover (see Case 10.62 and 10.63). Target Class 5: Any unit protected by Hard Cover (see Case 10.62 and 10.63).
Note: Any unit which can be considered an Enfilade or Massed Target and cannot be considered in either Target Class 4 or 5 is automatically categorized in Target Class 1.
Step 2 The attacking Player determines the Range between the firing unit and the target unit. Irrespective of the LOS, Range is defined as the fewest hexes between the two units counting the target hex, but not counting the firing hex. Range is now compared to the following schedule which informs the Player on which horizontal line of the Fire Combat Results Table he should locate the Strength of the Firing unit in Step #3.
| Unit Type | Minimum Range | Medium Range | Maximum Range |
|---|---|---|---|
| Infantry | 1 hex | None | 2 hexes |
| Artillery | 1, 2 hexes | 3, 4 hexes | 5-8 hexes |
Note: The Class of an artillery battery has no effect on the battery's range.
Step 3: The attacking Player locates the Strength of the firing unit on the appropriate horizontal line of the Fire Combat Results Table according to the following criteria:
A. If an infantry unit is firing at Minimum Range (1 hex), the Player locates the unit's Troop Strength on the horizontal line which describes the unit's formation. The horizontal line titled "Maximum Infantry Range" is always used to resolve an infantry Fire attack executed at a range of two hexes regardless of the firing unit's formation.
B. If an artillery unit is firing at Minimum Range (1 or 2 hexes), the Player locates the unit's Gun Strength on the horizontal line titled "Minimum Artillery Range." If an artillery unit is firing at Medium Range (3 or 4 hexes), the Player locates the unit's Gun Strength on the horizontal line titled "Medium Artillery Range." The unit's Full Strength is located on the line titled "Maximum Artillery Range" if the unit is firing at a range of 5-8 hexes.
C. The horizontal line titled "Disordered Formations" is always used when the firing unit is disordered.
D. Normally, only the topmost unit in a stack is permitted to fire. However, the Troop Strength of all infantry Skirmish formations stacked in a hex is totalled and this total strength is located on the horizontal line titled "Skirmish Formations" when resolving a Fire attack executed by multiple Skirmish companies stacked in the same hex.
E. The maximum Troop or Gun Strength Points which may execute a Fire attack from a single hex is nine (9).
F. Routing formations may never fire.
Step 4: The attacking Player determines the Class of the Firing Unit. All infantry and artillery units are assigned a Class Rating between "1" and "3" which is primarily an indicator of the relative firepower a unit is capable of delivering. The Class Rating of an artillery unit is printed directly on the unlimbered side of the battery. The Class Rating of an infantry unit is derived from the unit's original Effectiveness Rating according to the following schedule:
Effectiveness Rating = Class Rating
- 1 or 2 = Class 3
- 3 or 4 = Class 2
- 5 or 6 = Class 1
- All Skirmish Companies = Class 1
The Fire Combat Results Table provides a separate vertical results column to account for the Class of the Firing unit under each horizontal Strength listing.
Step 5: The attacking Player now rolls one die. The number rolled is first located under the appropriate Target Class. When the die roll is located under the appropriate Target Class, the Player traces a horizontal line across the table to his right, stopping in the vertical column which correctly accounts for the Strength, Formation and Class of the Firing unit as well as the Range. The number indicated where line and column intersect is the number of Strength Points eliminated from the target unit.
FIRE ROUTINE EXAMPLE
During the Reciprocal Artillery Fire Phase, the French Player wishes to execute a Fire attack with the VI Corps artillery battery which occupies hex B2531 against a Prussian infantry battalion in square formation which occupies hex B2726. First, the French Player determines that the Prussian square formation is automatically considered a Class 1 Target. Next, the French Player determines that the range from the firing unit to the target unit is six hexes. Because a range of six hexes is considered within the Maximum Range of the French artillery battery, the French Player will utilize the horizontal line titled "Maximum Artillery Range" on the Relative Firepower Table. The French Player now determines the current Gun Strength of the VI Corps battery as seven Gun Strength Points. Thus, the attack will be resolved using the "6-9" Strength column and the "Maximum Artillery Range" line on the Fire Combat Results Table. The French Player must now determine the Class of the VI Corps battery which he obtains directly from the Class Rating printed on the unlimbered side of the artillery battery. Because the VI Corps artillery is a Class 1 battery, the "1" column describing the Class of the Firing Unit is located beneath the "6-9" Strength column on the Fire CRT. The French Player now resolves the attack by rolling the die and locating the die roll number where the vertical Strength and Class of the Firing Unit intersects the Target Class 1 section of the Fire CRT. For example, if the French Player rolls a "5," two Troop Strength Points would be eliminated from the target.
CASES:
11.1 Restrictions on Fire Combat
11.11 A unit is never required to fire. A permissable Fire attack is always executed at the option of the Player who controls the eligible unit.
11.12 Only artillery batteries which are "crewed" and unlimbered are eligible to fire during the Reciprocal Artillery Fire Phase. Only infantry formations are eligible to fire during the Reciprocal Infantry Fire Phase. In addition, both infantry and artillery formations are eligible to fire at an Enemy unit within minimum range if that Enemy unit attempts to change Facing, Formation or Stacking position, or leave the hex it occupies (see 11.23).
11.13 The following unit types or formations may never fire:
- Command units
- Cavalry units
- Routing formations
- Units without ammunition
- Limbered artillery batteries
- Artillery Crews
11.14 Normally, only the top combat unit stacked in a hex may execute a Fire attack. However, as many as nine Strength Points of infantry in Skirmish formation may fire from a single hex. Skirmish companies stacked in the same hex may not fire separately; the Troop Strength of all of the companies stacked in the same hex is totalled and the attack is resolved using the "Skirmish Formation" line of the Fire Combat Results Table.
11.15 A unit may only fire once during a Reciprocal Fire Phase. During any other Phase, a unit may fire as often as it is eligible to do so.
11.16 A unit may not fire at a target unit it cannot observe. A unit may never fire through its flank or rear hexsides.
11.17 A unit's Strength may never be divided for Fire Combat purposes. A unit's current Troop or Gun Strength is always used for Fire Combat purposes.
11.18 Unless stacked with a Command unit, a unit must always fire at the closest Enemy target unit, if it fires at all. If two Enemy targets are equidistant, a unit must fire at the lower Enemy Target Class. If targets of the same class are equidistant, the Player may freely choose between those targets. The Player may always freely choose the target when the firing unit is stacked with a Command unit.
11.19 Command Control has no effect on a unit's ability or eligibility to fire.
11.2 Fire Zones
11.21 Any unit which is capable of Fire Combat projects a Fire Zone into every hex it can observe which is within its Maximum Fire Range. For example, a crewed, unlimbered artillery battery projects a triangular Fire Zone through its frontal hexsides into every hex it can observe which is within eight hexes of the hex it occupies. (see diagram at right).
A hex-grid diagram illustrates a triangular "FIRE ZONE" projecting from a unit through its frontal hexsides.
11.22 A unit's Minimum Range Fire Zone includes every hex within its Fire Zone which is also within its Minimum Fire Range. For example, a crewed, unlimbered artillery battery projects a Minimum Range Fire Zone through its frontal hexsides into each hex it can observe which is within two hexes of the hex it occupies. The Minimum Range Fire Zone of an infantry formation is limited to a range of one hex.
11.23 Any unit which is capable of executing a Fire attack may immediately fire at an Enemy unit which is within its Minimum Range Fire Zone if that Enemy unit attempts to change its Facing, Formation, or Stacking position, or leave the hex it occupies. When a Player wishes to attempt any such maneuver by units he controls which are within an Enemy unit's Minimum Range Fire Zone, he should declare his intention, giving his opponent the opportunity to fire at the concerned unit in its present position before the unit's maneuver is executed.
11.24 Although Shock Combat is executed and resolved while opposing units occupy adjacent hexes, the attacking unit(s) is considered to be attempting to enter the hex occupied by the defending unit(s). Thus, a unit which initiates a Shock attack from within an Enemy unit's Minimum Range Fire Zone may be fired upon by all eligible units before the Shock attack itself is resolved. The attacking unit(s) is fired at in the hex it occupies, not the hex occupied by the defending unit(s). If, after this fire, the Shock attack allows the attacking unit(s) to advance into the hex formerly occupied by the defender, the attacking units cannot be fired at by Enemy units while making this advance.
11.25 A unit cannot be fired on for being forced to adopt an involuntary formation while within an Enemy unit's Minimum Range Fire Zone. Only a voluntary formation change makes a unit susceptable to fire.
11.26 A unit which is forced to retreat from a hex within an Enemy unit's Minimum Range Fire Zone may be fired upon before it actually leaves the hex it occupies.
11.27 Routed formations may not be rallied in a hex within the Fire Zone of an Enemy unit.
11.28 Disordered formations may not be rallied in a hex within an Enemy unit's Minimum Range Fire Zone.
11.3 Special Targets
11.31 A target unit which is not protected by Hard or Soft Cover is automatically considered a Massed Target (Target Class 1) if the total number of Troop Strength Points stacked in the hex it occupies is greater than nine (9).
11.32 A target unit which is not protected by Hard or Soft Cover and which does not possess all-around Facing is automatically considered an Enfilade Target (Target Class 1) if it is fired on through either of its flank hexsides.
11.33 A Command unit never blocks a Line of Sight; the topmost combat unit stacked under any number of Command units may fire and be fired upon. Command units are only vulnerable to fire under the following conditions:
- Each Command unit stacked in a hex is vulnerable when any Troop or Gun Strength Point in that hex is eliminated by Fire Combat. For each Command unit present, the Player rolls one die. If the hex received fire from a range of five or more hexes, the Command unit is affected if the Player rolls a "six" (6). If the hex received fire from a range of four or less hexes, the Command unit is affected if the Player rolls either a "five" (5) or "six" (6).
- If there are no combat units stacked in the same hex, the topmost Command unit (only) may be fired on directly being considered a Class 5 Target.
- A full-strength Command unit is immediately inverted as a result of "effective" fire. A Command unit which is already in a reduced state of effectiveness cannot be further effected by fire.
11.34 In general, a unit which cannot be observed cannot be fired upon. However, whenever a Class 3 Target is fired on from a range of five or more hexes, the topmost unit directly behind the target hex (along the LOS) may be attacked separately as a Screened Target (Target Class 4) under the following conditions:
- The firing unit, and both of the target units must be on the same level of elevation and none of these units may occupy a hex on a descending slope (see 10.53).
- The Screened Target unit must occupy a hex which is traversed by the LOS (ignoring the presence of the Class 3 Target) and which is adjacent to the hex occupied by the Class 3 Target.
- If both of the preceding conditions are satisfied, the firing unit may actually execute two separate Fire attacks; one against the Class 3 Target and one against the Class 4 Target. Both attacks are assumed to expend the same round of ammunition (i.e. the two attacks are considered one attack for purposes of Ammunition Supply).
- A unit may never attack targets in more than two hexes as a result of a single Fire attack.
11.35 An Extended Line Formation is vulnerable to fire in both hexes it occupies. A unit which can observe either hex occupied by an Extended Line Formation may fire at the line formation which is normally considered a Class 2 Target.
11.36 Strength Point losses resulting from infantry or artillery fire are generally inflicted on the topmost combat unit in the target hex. If the topmost combat unit in the target hex is an artillery battery, however, Troop Strength Points stacked underneath the battery unit, if any are present, are vulnerable to fire executed from a range of four or less hexes (see 11.54).
11.4 Special Firing Formations
11.41 Normally, only the top combat unit stacked in a hex may execute a Fire attack. However, as many as nine Strength Points of infantry in Skirmish formation may fire from the same hex (see 11.14).
11.42 There are two different types of Line formations; Two Rank Line formations and Three Rank Line formations. Only British, King's German Legion (KGL), and Class 1 and 2 Hanoverian battalion-sized infantry units form Two Rank Line formations. All other infantry battalions form Three Rank Line formations whenever they adopt Line or Extended Line formation. Note: In the game, an Extended Line formation is simply considered a Line formation which occupies two adjacent hexes although historically, the British Army used the term "extended order" to describe an attenuated Skirmish formation.
11.43 An Extended Line formation may only fire as a Line formation if the target unit can be observed from both of the hexes occupied by the Extended Line formation. If the target unit cannot be observed from both hexes, the horizontal line entitled "Disordered Formations" is used to resolve a Fire attack made by an Extended Line formation.
11.44 An artillery battery is only eligible to fire under the following conditions.
- The battery unit must be the topmost combat unit in the hex it occupies.
- The battery unit must be unlimbered.
- The unit stacked directly under the battery unit must be either an Artillery Crew or a Skirmish Company of the same nationality as the battery unit. This unit is considered the battery crew (see 7.46).
- The battery must possess at least one round of ammunition (see 11.6).
If all of the above conditions are satisfied, the artillery battery may fire. Units stacked under an artillery battery unit (limbered or unlimbered) may never fire.
11.45 If a Skirmish Company is acting as the crew for an artillery battery, the horizontal line titled "Disordered Formations" is used to resolve a Fire attack executed by that artillery battery.
11.46 Although one or two howitzers were employed in each battery depicted in the game, only one British horse battery (Bull's) consisted wholly of howitzers. Bull's battery may fire normally at any target unit it can observe. In addition, Bull's battery (only) may fire at a target unit it cannot observe under the following conditions:
- The target unit must be located in Bull's Fire Zone at a range of five to eight hexes.
- The target unit may not be adjacent to an Allied unit.
- Bull's crew may not be a Skirmish company.
If all of the above conditions are satisfied, the horizontal line titled "Disordered Formations" is used to resolve Bull's Fire attack.
11.47 One British horse battery (Whinyate's) was equipped to fire rockets. Due to the unreliability of these weapons, the horizontal line titled "Disordered Formations" is used to resolve any Fire attack executed by Whinyate's battery. In addition, Whinyate's battery may not be fired by a Skirmish company crew.
11.5 Effect of Fire Combat
11.51 The numerical result on the Fire CRT is the number of Strength Points eliminated from the target unit.
11.52 Regardless of the type of the firing unit, if the target unit is an infantry or cavalry unit, the Fire result represents the number of men (in 100s) killed and/or wounded.
11.53 If an artillery formation is fired on from a range of five or more hexes, the Fire result represents the number of guns eliminated (by counter-battery fire) from the target (battery) unit. Counter-battery fire cannot eliminate Troop Strength Points (personnel) stacked in the same hex as the target battery unit.
11.54 If an artillery formation is fired on from a range of four or less hexes, the Fire result only effects Troop Strength Points stacked in the target hex. The artillery battery itself is not effected although the usual result is the elimination of the artillery crew unit which must be stacked directly under the battery to enable it to fire. If there are no Troop Strength Points in the target hex, the fire is considered to have no effect.
11.55 For each Point of combat loss the Combat Strength of the target unit is reduced by one. To indicate this, place a Combat Strength marker which reflects the new current Strength of the affected unit directly beneath the Organizational counter which represents the unit. For example, if counter-battery fire eliminates one gun from a French artillery battery which possesses an original eight-gun Strength, a Combat Strength counter with a value of "7" would immediately be placed directly under the French battery unit. Henceforth, that battery would be represented by two counters — the Organizational counter and the Combat Strength marker indicating the current Gun Strength of the battery. Note: Combat Strength markers are never placed under full-strength units. A Combat Strength marker is only used to indicate the current Strength of a unit which no longer possesses the full, original Strength printed on the Organizational marker.
11.56 When a unit's Strength is reduced to zero, it is immediately removed from the map. A unit with a Strength of one Gun or Troop Point is simply eliminated to comply with a required Strength Point loss (see 9.52).
11.57 Whenever a unit's Strength is reduced by Fire Combat, an immediate Morale check is required (see 13.0).
11.58 A Player must immediately reduce his Army Morale Level by one Point for each Troop Point eliminated by Fire Combat (see 13.0). Army Morale is not effected by the elimination of Gun Strength Points.
11.6 Ammunition Supply
11.61 Only artillery and infantry skirmish formations are affected by Ammunition Supply restrictions.
11.62 Whenever an infantry skirmish formation fires, a Fire Combat Resolution die roll of "six" causes the firing unit(s) to run out of ammunition. To indicate this, immediately place an Ammo marker on top of the units in the hex.
11.63 While out of ammunition a unit may move and participate in Shock Combat but may not fire under any circumstances.
11.64 Any skirmish formation which enters or leaves a hex containing an Ammo marker is automatically considered out of ammunition (and should be so marked).
11.65 At the beginning of the Friendly Command Phase, an Ammo marker is removed from any hex if it is possible to trace a supply line no longer than five hexes in length from the hex containing the marker to a hex occupied by an infantry battalion of the same nationality as the unsupplied skirmish formation(s). This supply line may not be traced across an Impassable hexside or into a hex within a Minimum Range Enemy Fire Zone unless occupied by a Friendly combat unit. If no such Supply line exists, the skirmish formation(s) remain out of ammunition and the Ammo marker is left in place. When an Ammo marker is removed, all skirmish formations in the hex are considered fully resupplied with ammunition.
11.66 Each artillery battery unit expends one "round" of ammunition each time it fires, regardless of range or target class. Artillery ammunition is represented by a Combat Strength marker which is stacked directly under the counter representing the current Gun Strength of a battery unit. Like other Combat Strength markers, the marker used to represent the ammunition supply of a given battery is considered an integral part of the battery unit (i.e. the ammunition marker accompanies the battery and cannot be moved or transported by itself). Artillery ammunition cannot be "captured" or used or destroyed by Enemy units. Note: In order to avoid confusion between the marker representing a battery's Gun Strength and the marker representing its ammunition, the Player may stack the ammunition marker directly under the battery crew unit.
11.67 Unless stated otherwise in the Scenario rules, each artillery battery's ammunition supply is limited according to the Class of the battery. Class 1 batteries are supplied with eight (8) rounds of ammunition at the start of any Scenario. Class 2 and 3 batteries are supplied with six (6) rounds of ammunition. Note: A Combat Strength marker is only used to represent the ammunition supply of a battery which has expended at least one round.
11.68 Unlike skirmish formations, there is no provision for resupplying an artillery battery with ammunition. When an artillery battery has exhausted all of its supply of ammunition, an "Ammo Depleted" Marker should be substituted for a Strength Marker used to indicate the battery's ammunition supply level.
Friendly artillery batteries stacked in the same hex may transfer ammunition from one battery to another under the following conditions only:
- The hex must be occupied by at least one artillery crew.
- The batteries must be of the same class, type and nationality.
- No battery may move "carrying" more than its initial ammunition supply.
11.69 A skirmish or artillery crew formation which is forced to check Morale while out of ammunition is penalized (see 13.0).
11.7 Relative Firepower Table / Fire Combat Results Table
(see the map)
12.0 Shock Combat
COMMENTARY:
Shock Combat represents the psychological and less frequent physical confrontation which occurs when opposing units close within range permitting hand-to-hand combat. Although Shock Combat is executed and resolved while opposing units occupy adjacent hexes, the attacking unit(s) is considered to be attempting to enter the hex occupied by the defending unit(s).
GENERAL RULE:
Shock Combat may only occur between opposing combat units which occupy adjacent hexes during the Shock Combat Phase. Shock Combat is initiated and resolved at the option of the Phasing Player in any sequence he desires. His units are used to attack; units controlled by the non-Phasing Player must defend if attacked. No unit is granted the opportunity to retreat before combat during a Shock Combat Phase.
SHOCK COMBAT RESOLUTION PROCEDURE:
-
Compare the total Troop Strength Points of the attacking unit(s) to the total Troop Strength Points of the defending unit(s) and express the Attacker's total as a percentage of the Defender's total. This percentage ratio is rounded down in favor of the Defender to the nearest percentage ratio indicated on the left side of the Shock Combat Results Table. For an explanation of how to determine the percentage ratio see Case 12.1.
-
Subtract the Effectiveness Rating of the topmost combat unit in the defending force from the Effectiveness Rating of the topmost combat unit in the attacking force to determine the Shock Combat Differential (see 12.2). Locate this number (which may be either positive or negative) along the Differential line at the top of the Shock Combat Results Table.
-
The attacking Player now rolls one die. The number rolled is first located under the appropriate Percentage Ratio. When the die roll is located under the appropriate Percentage Ratio the Player traces a horizontal line across the table to his right, stopping in the vertical column corresponding to the Differential determined in Step #2. The result indicated where line and column intersect effects either the attacking or defending force or both according to the explanation given in Case 12.7.
Example:
During the French Shock Combat Phase, the French Player wishes to execute a Shock attack using nine Troop Strength Points in skirmish formation against an adjacent hex occupied by four British Troop Strength Points in skirmish formation. To determine the Percentage Ratio, the defending British Troop Strength total (4) is divided into 100 times the attacking French Troop Strength total (100 x 9 = 900 divided by 4 = 225) and the result is rounded down to express the attacking Strength as a percentage of the defending strength (i.e. 225% is rounded down to 200%). Thus, the Percentage Ratio used to resolve the attack is 200%. To determine the Shock Combat Differential, the Effectiveness Rating of the top British skirmish company (5) is subtracted from the Effectiveness Rating of the top French skirmish company (5), yielding a Differential of "0." The French Player then rolls one die and locates the die roll at the intersection of the "0" Differential Column and the 200% Percentage Ratio line on the Shock Combat Results Table. For example, if the French Player rolls a "5," the result would be "Dr" indicating that the British force suffers a disordered retreat and the French force unaffected. As the British force is a skirmish formation, it is routed by the "Dr" result. Thus, the Anglo-Allied Player immediately places a Rout marker on top of the force which is then retreated three hexes. Following this retreat and the resolution of any Allied Morale checks it necessitates, the entire French attacking force must advance into the hex vacated by the British rout. Note: According to Case 12.24, the Effectiveness Rating of both opposing skirmish formations should have been reduced by two when determining the Shock Combat Differential. Because the final Differential would have remained "0," this step was omitted in this Example.
CASES:
12.1 How to Calculate the Percentage Ratio for Shock Combat
12.11 A unit's Strength may never be divided or modified for Shock Combat purposes. A unit's current Troop Strength is always used to determine the percentage ratio for Shock Combat. Gun Strength Points are ignored when calculating the percentage ratio.
12.12 To determine the percentage ratio of a given Shock attack, the defending Troop Strength total is divided into 100 times the attacking Troop Strength total. The result of this division is an expression of the attacking Troop Strength as a percentage of the defending Troop Strength. This percentage is then rounded down to the nearest percentage ratio shown on the Shock Combat Results Table.
EXAMPLE:
A French infantry battalion with a current Troop Strength of five (5) is executing a Shock attacking against two British Troop Strength Points in skirmish formation. To determine the Percentage Ratio for this combat, multiply the French Troop Strength (5) by one hundred (5 x 100=500) and divide this total by the British Troop Strength (2) as follows (500 ÷ 2 = 250). The result of 250 is then rounded down to a Percentage Ratio of 200%.
12.2 How to Calculate the Differential for Shock Combat
12.21 The Effectiveness Rating of the topmost combat unit in the defending hex is subtracted from the Effectiveness Rating of the topmost combat unit in the attacking hex in order to determine the Differential for a given Shock attack.
12.22 The Effectiveness Rating of a combat unit is always reduced by one for each Strength Point of difference between a unit's current Troop Strength and its original, maximum Troop Strength. For example, if an infantry battalion's original Troop Strength is five and its original (printed) Effectiveness Rating is four, its Effectiveness Rating is reduced to two if its current Troop Strength is three. Note: A unit's Effectiveness Rating may never be reduced below zero.
12.23 When determining the Differential of a given Shock attack, a unit's Effectiveness Rating is further modified according to the following schedule:
- For Shock Combat, modify the Effectiveness Rating of the top attacking unit as follows:
- −2 if Disordered
- +1 if stacked with Command unit
- +1 Cavalry Impetus Bonus
- For Shock Combat, modify the Effectiveness Rating of the top defending unit as follows:
- −6 if Routed
- −2 if Disordered
- −1 vs. attacking unit on higher elevation
- +1 vs. attacking unit on lower elevation
- +1 if stacked with Command unit
- +1 if protected by Soft Cover
- +2 if protected by Hard Cover
- +2 if in Square vs. Cavalry
Note: Multiple modifications cumulatively modify a unit's Effectiveness Rating. A unit gains no benefit if stacked with (only) depleted (i.e. inverted) Command units.
12.24 Artillery crews and skirmish formations are always considered disordered for Shock Combat purposes.
12.25 A unit is automatically considered disordered if attacked through either its flank or rear hexsides.
12.26 A cavalry unit is automatically disordered when it attempts to execute a Shock attack against an infantry square formation.
12.27 A disordered cavalry unit receives no Impetus Bonus (see 12.48).
12.28 A defending unit which would be "protected" against a Fire attack made by an Enemy unit (according to the restrictions of Case 10.63), is considered protected by the same terrain against a Shock attack executed by that same Enemy unit.
12.29 Skirmish, routed and disordered formations receive no benefit for being stacked with a Command unit when involved in Shock Combat.
CASES:
12.3 Shock Combat Inhibitions and Prohibitions
12.31 A unit is never required to attack during the Shock Combat Phase. A permissable Shock attack is always executed at the option of the Player who controls the eligible unit (Exception: see 12.44).
12.32 Only combat units controlled by the Phasing Player are eligible to attack during the Shock Combat Phase (Exception: see 12.4).
12.33 The following unit types or formations may never execute a Shock attack:
- Command units
- Artillery battery units
- Artillery Crew units
- Routing formations
12.34 A unit (or stack) may only execute a Shock attack against an adjacent Enemy occupied hex which it faces. A unit may never execute a Shock attack through its flank or rear hexsides. A unit which possesses all-around Facing may execute a Shock attack against any adjacent Enemy occupied hex.
12.35 A unit (or stack) may execute more than one Shock attack during the same Shock Combat Phase. A unit may be attacked more than once during a single Shock Combat Phase. A unit may never, however, execute a Shock attack after receiving a retreat or rout result for the remainder of the Shock Combat Phase.
12.36 Terrain affects Shock Combat in several ways (see 10.7).
12.37 Command Control has no effect on a unit's ability to execute a Shock attack (Exception: see 12.4).
12.38 Special Shock Combat restrictions are imposed on certain unit types and formations such as cavalry, skirmish formations, Command units, etc. These restrictions are explained in the appropriate rules sections.
12.39 A given Shock attack may involve units in two hexes; one hex which is occupied by one or more attacking units and one hex which is occupied by one or more defending units. Attacking units which occupy different hexes must make separate Shock attacks. Defending units which occupy different hexes must be attacked separately.
12.4 How Cavalry Units Execute Shock Combat
Cavalry units are subject to all of the standard Shock Combat rules. However, cavalry units possess special Shock Combat capabilities as explained in the following rules.
12.41 During the Command Phase, the Phasing Player may initiate a charge by any cavalry unit he controls which meets all of the following requirements.
- The unit must be in Command Control.
- The unit must be formed (i.e. it is neither disordered or routed).
- The unit must be able to observe a hex occupied by at least one Enemy Troop Strength Point and this hex must be located within the observing cavalry unit's projected Charge Zone.
A cavalry unit which is controlled by the Phasing Player and which meets all of these requirements may initiate a charge according to the following procedure:
CHARGE INITIATION PROCEDURE:
-
The cavalry unit immediately makes an unmodified Morale check (see 13.0). If the cavalry is neither disordered or routed as a result of this Morale check, it is considered to have initiated a Charge. A cavalry unit which is either disordered or routed as a result of the Morale check required to initiate a charge obeys the result of that Morale check. A disordered or routed cavalry unit may not initiate a charge (although once initiated, a cavalry unit which is subsequently disordered during the Shock Combat Phase is not prohibited from completing its charge).
-
When a cavalry unit initiates a charge, it immediately projects a Charge Zone through its frontal hexsides for a range of six hexes. A cavalry unit's Charge Zone is identical to the Fire Zone projected by an unlimbered artillery battery except that it extends into all hexes except Obstructed terrain hexes and across all hexsides except Impassable hexsides. Furthermore, like an artillery Fire Zone, a Charge Zone is divided into three range categories; Minimum Range which encompasses Charge Zone hexes within one or two hexes of the charging cavalry unit; Medium Range which encompasses Charge Zone hexes within three or four hexes of the cavalry unit; and Maximum Range which encompasses Charge Zone hexes within five to six hexes of the cavalry unit. Whenever a cavalry unit initiates a charge, the Player who controls the charging cavalry unit(s) should immediately place three Charge Zone markers on the map to indicate the unit's Charge Zone exactly as illustrated in the following example.
CHARGE ZONE EXAMPLE:
A hex-grid diagram divides a triangular Charge Zone into Minimum, Medium, and Maximum Range bands, bordered by Charge Zone direction-arrow markers.
-
Once the Phasing Player places the Charge Zone markers on the map, he may resume administering other Command Phase operations, including initiating additional cavalry charges. The Phasing Player may initiate as many charges as he desires during the Command Phase. Note: Cavalry units may never move during a Command Phase. All cavalry charges are executed during the Shock Combat Phase (only).
-
Cavalry units stacked in the same hex may not initiate or execute separate charges. To initiate a charge, the topmost cavalry unit in a hex is the only unit required to check Morale. If this Morale check permits the topmost unit to initiate a charge, all of the cavalry units stacked under the checking unit are required to join the charge. Cavalry units stacked in a single hex must charge as a single, indivisable stack. If the topmost unit is disordered or routed as a result of its Morale check, all of the units stacked under the checking unit adopt the checking unit's Morale status and no charge may be initiated or executed by any unit in that hex.
-
During any March or Shock Combat Phase, a cavalry unit controlled by either Player which is formed and in Command Control may initiate a charge (using the Charge Initiation Procedure) whenever an Enemy Troop Strength Point enters a hex which the cavalry unit can observe which is located within that cavalry unit's Minimum Range Charge Zone. A charge which is initiated in any Phase other than the Command Phase is designated an "Opportunity Charge." An Opportunity Charge is always executed during the first Shock Combat Phase following the Phase in which the Opportunity Charge is initiated even if this necessitates executing the Opportunity Charge during the Enemy Player's Shock Combat Phase. If an Opportunity Charge is initiated during a Shock Combat Phase, it is executed during that same Phase according to the Charge Execution Procedure.
CHARGE EXECUTION PROCEDURE:
During the Shock Combat Phase, the Phasing Player may execute infantry Shock attacks and previously initiated cavalry charges in any order he desires. In doing so, units must be utilized either individually or in stacks. Once a given unit or stack is used for Shock Combat, that unit must conclude its Shock Combat activity before another unit or stack is utilized.
Generally, units controlled by the non-Phasing Player may not execute Shock attacks or cavalry charges during the Shock Combat Phase. However, whenever a Troop Strength Point controlled by the Phasing Player enters a hex located within the Minimum Range Charge Zone of a formed Enemy cavalry unit, the non-Phasing Player may immediately initiate an Opportunity Charge (by simply declaring his intention aloud). When an Opportunity Charge is declared by the non-Phasing Player during the Shock Combat Phase, the Phasing Player's activity is temporarily interrupted. In addition to the normal restrictions which govern the initiation of an Opportunity Charge, the non-Phasing Player is restricted in that he may only initiate and execute one Opporunity Charge at a time during the Shock Combat Phase. Therefore, he may utilize only one cavalry unit (or stack) to respond to the movement of a given unit or stack controlled by the Phasing Player.
When an Opportunity Charge is declared during a Shock Combat Phase, the Shock Combat activity temporarily becomes a reciprocal procedure similar to the procedure used in the Reciprocal Fire Phase (i.e. both Player alternate moving one hex at a time until neither Player's unit(s) may move any further. Note that the unit(s) which initiates an Opportunity Charge is moved one hex before the opposing unit(s) is allowed to resume the movement which was interrupted by the declaration of the Opportunity Charge.
When a unit or stack executing an Opportunity Charge during the Shock Combat Phase enters a hex within the Minimum Range Charge Zone of a formed cavalry unit controlled by the Phasing Player, he may also declare an Opportunity Charge as long as he is content to postpone other Shock Combat activity while he executes the eligible unit's Opportunity Charge.
EXAMPLE OF CHARGE EXECUTION PROCEDURE:
During the French Shock Combat Phase, the French Player wishes to execute a charge initiated during the French Command Phase by Vial's brigade consisting of the 6th and 9th Cuirassier regiments which are stacked with the brigade Command unit in hex A3832 at the start of the French Shock Combat Phase. The Charge Zone projected by Vial's brigade is enclosed within the triangle described by hexes A3832, A3826 and A3229. Because it has initiated a charge, Vial's brigade is required to move at least two hexes. The French Player begins by moving the brigade into hex A3732 where it must now attack two British Troop Strength Points in skirmish formation which occupy hex A3631. As a result of this attack, the British skirmish formation is eliminated and the French cavalry brigade is required to enter hex A3631. When the French brigade enters hex A3631, the Anglo-Allied Player declares that Grant's British cavalry brigade which occupies hex A3830 from where it is able to observe the French brigade, is initiating an Opportunity Charge. At this point, the French Player's activity is temporarily interrupted to allow the Morale check which Grant's brigade must perform. If Grant's brigade is neither disordered or routed as a result of this Morale check, its Opportunity Charge is initiated and the appropriate colored Allied Charge Zone markers are immediately deployed on the map to depict Grant's Charge Zone. Immediately after placing these markers, the Anglo-Allied Player may move Grant's brigade one hex. If the Anglo-Allied Player desires, he may move Grant's brigade into hex A3731 at which point Grant's brigade is required to attack Vial's brigade. The brigade which is not forced to retreat as a result of this attack may finish executing its charge immediately after the Shock Combat between Grant and Vial is resolved. Note: In this example, Grant's brigade which is controlled by the non-Phasing Player executed the Shock attack against Vial's brigade because the British brigade moved adjacent to the French brigade in a manner which required it to execute a Shock attack in accordance with Case 12.44. During a Shock Combat Phase in which both Players are resolving charges by alternately moving one hex at a time, a required Shock attack is immediately executed by the Player who is currently moving his cavalry. Each time one of the Players moves his cavalry into a new hex, he must execute a required Shock attack before his opponent's cavalry are permitted to enter a new hex. Note also that French units are not required to check Morale in hexes within Grant's Charge Zone. Units are only required to check Morale if they occupy a hex within the Charge Zone of an Enemy Cavalry unit during the Friendly Facing/Formation Phase (see 12.52).
12.42 A cavalry unit may never execute a Shock attack without first initiating a charge. Once a cavalry unit initiates a charge, it is required to move a minimum of two hexes during the Shock Combat Phase in which its charge is executed.
12.43 A cavalry charge never requires the expenditure of Movement Points. In executing a charge, a cavalry unit is permitted to move six hexes, however, when this six hex limit is exhausted, a cavalry unit executing a charge may continue to advance into an unlimited number of hexes that are vacated as a direct result of a Shock attack executed by the cavalry unit.
Example:
The Charge Zone of a French cavalry brigade is enclosed within the triangle described by hexes A3832, A3826, and A3229. During the French Shock Combat Phase, the French cavalry brigade, having previously entered five hexes, enters hex A3229 at which point it is required to execute a Shock attack against a British skirmish formation which occupies hex A3228. Although the French cavalry has already entered six hexes, it must execute the required Shock attack and advance into hex A3228 if the British skirmish formation is eliminated or retreated as a result of the Shock attack. If, upon entering hex A3228, the French cavalry is required to execute a Shock attack against a British infantry battalion in Square Formation which occupies hex A3227, the French cavalry must execute the attack although the cavalry have already entered seven hexes and have, in fact, exited the original Charge Zone. The French cavalry could continue to advance into an unlimited number of hexes vacated as a result of Shock attacks it is required to execute.
12.44 When executing a charge, a cavalry unit is required to execute a Shock attack whenever it Faces an Enemy unit which occupies an adjacent hex which is not an Obstructed hex. When a cavalry unit which is executing a charge Faces more than one Enemy occupied hex, it is only required to execute a Shock attack against one Enemy occupied hex (a Shock attack may only be executed against one Enemy occupied hex at a time). A cavalry unit which has suffered a Shock Combat result of "Dr," "Dr1," or "R," may not execute a Shock attack and is therefore exempt from this restriction.
12.45 In executing a charge, a cavalry unit may only enter a hex outside of its Charge Zone as a direct result of a Shock attack executed by the cavalry unit from a hex within its Charge Zone.
12.46 In executing a charge, a cavalry unit may never enter an Obstructed hex or execute a Shock attack against Enemy units which occupy an Obstructed hex. A cavalry unit may never enter an Obstructed hex during a Shock Combat Phase except in compliance with a "Dr," "Dr1," or "R" Shock Combat result.
12.47 In executing a charge, a cavalry unit is automatically disordered at the instant it fulfills any of the following conditions:
- The cavalry unit either moves or attempts to execute a Shock attack across an Obstructed hexside.
- The cavalry unit attempts to execute a Shock attack against a hex occupied by an Enemy artillery battery or an infantry square formation.
- The cavalry unit enters a hex occupied by one or more Friendly Troop or Gun Strength Points: Note: Troop Strength Points are automatically disordered when a Friendly cavalry unit enters the hex they occupy while executing a charge. Note: Troop Strength Points which are already disordered or in skirmish formation become routed when a Friendly cavalry unit enters the hex they occupy while executing a charge (treat such units as if they were routed as a result of checking Morale, not as if they received an "R" result in Shock Combat).
- The cavalry unit is formed and changes its Facing while executing a charge.
- A cavalry unit is automatically disordered in the last hex it enters in executing a charge (i.e. any cavalry unit which executes a charge is automatically disordered at the end of its charge movement).
Note: A disordered cavalry unit suffers no additional penalty when it is again disordered for any of the reasons given above. However, a disordered cavalry unit becomes routed if it receives a result which would normally disorder it when it is forced to check its Morale (see 13.0).
12.48 For Shock Combat purposes (only), a cavalry unit which is executing a charge receives an Impetus Bonus. The Effectiveness Rating of an undisordered cavalry unit which is executing a charge is raised by one (1) when calculating the Differential for Shock Combat. Note: A cavalry unit only receives an Impetus Bonus when it participates in Shock Combat while it is formed and is executing a charge.
12.5 How Cavalry Charges Effect Movement & Morale
COMMENTARY:
The following rule accounts for the fact that a cavalry unit executing a charge is moving faster than the standard rate at which other non-charging formations march and maneuver.
12.51 The Movement Point cost for any Movement, Facing, or Formation change is doubled if the Phasing unit is within six hexes of an Enemy cavalry unit which has initiated a charge (regardless of whether or not the Phasing unit is within the cavalry unit's Charge Zone). Note: Facing or Formation changes executed during the Facing/Formation Phase do not require the expenditure of Movement Points and are therefore unaffected by this rule. Similarly, all Movement which occurs in any Phase except a March Phase requires no Movement Point expenditure and is therefore exempt from this restriction.
COMMENTARY:
The following rule accounts for the psychological strain imposed on units deployed directly in the path of charging Enemy cavalry.
12.52 During the Facing/Formation Phase (only), the topmost unit in each hex which is located within the Charge Zone of an Enemy cavalry unit which has initiated a charge must check its Morale before any unit's Facing or Formation is altered. The die roll used to check Morale is raised by two (2) if the checking unit occupies a hex within the Minimum Range Charge Zone of an Enemy cavalry unit. The die roll is raised by one (1) if the checking unit occupies a hex within the Medium Range Charge Zone of an Enemy cavalry unit. The die roll is unmodified if the checking unit occupies a hex within the Maximum Range Charge Zone of an Enemy cavalry unit. A unit which occupies a hex within the Charge Zone of more than one Enemy cavalry unit is only required to make one Morale check due to the Enemy cavalry threat.
12.53 Routing formations and infantry in square formation are not required to check Morale in accordance with Case 12.52.
12.6 Shock Combat Results Table
(see the map)
12.7 Explanation of Shock Combat Results
As a result of Shock Combat, Troop Strength Points may be eliminated, Command units may be depleted (inverted), and combat units may become disordered or routed and forced to retreat. Gun Strength Points are not effected by Shock Combat. As in Fire Combat, Troop Strength Points eliminated in Shock Combat are removed from the topmost combat unit in the affected force (which may be either the attacking or defending force or both) in accordance with Case 9.52. Unlike Fire Combat, a unit which suffers losses or is forced to retreat as a result of Shock Combat is not required to check Morale (the Shock Combat result determines the Morale of both the attacking and defending units). However, a unit is required to check Morale whenever an adjacent Friendly unit is forced to retreat as a result of Shock Combat. It may be fired at when it executes a Shock attack from a hex within an Enemy unit's Minimum Range Fire Zone and/or when it is forced to retreat out of a hex within an Enemy unit's Minimum Range Fire Zone. All units which participate in a Shock attack must immediately occupy the attacked hex if the defending unit(s) is eliminated or forced to vacate the hex as a result.
12.71 A Shock Combat result of "*" has no effect.
12.72 An attacking or defending unit which receives a "D1" result is disordered and loses one Troop Strength Point; No Morale check or retreat is required (or permitted).
12.73 An attacking or defending unit which receives a "Dr" result is disordered and must immediately retreat three hexes although it suffers no Strength Point loss. Adjacent Friendly units must immediately check Morale adding one to the Morale Check die roll (see 13.0).
12.74 An attacking or defending unit which receives a "Dr1" result is disordered, loses one Troop Point and must immediately retreat three hexes. Adjacent units must immediately check Morale adding one to the Morale check die roll.
12.75 An attacking or defending unit which receives an "R" result is routed, loses two Troop Points and must immediately retreat three hexes. Adjacent Friendly units must immediately check Morale adding one to the Morale check die roll.
12.76 A disordered formation which receives a "Dr" or "Dr1" result treats that result as an "R" result. Skirmish formations are always considered disordered formations for Shock Combat purposes. A routed formation automatically receives an "R" result when it is attacked although the Shock Combat is resolved according to the regular procedure to determine the result received by the attacking unit(s). In addition, the routing formation's loss is doubled to four Troop Strength Points. The routing formation is forced to retreat an additional three hexes each time it is attacked.
12.77 A Shock attack may be executed with a percentage ratio of less than 50% using the 50% Ratio results. A Shock attack may be executed at a Differential which exceeds +6 using the +6 results.
12.78 When a Shock attack is executed at a Differential of less than −2, the attacking unit(s) automatically suffers a "Dr" result and the defending unit(s) is unaffected. When a Shock attack is executed at a Differential of −2 or better, and a Percentage Ratio of 400% or greater, the defending unit(s) automatically suffers an "R" result and the attacking unit(s) is unaffected.
12.79 Each Command unit stacked in a hex is vulnerable when any Troop Strength Points in that hex are eliminated in Shock Combat. For each Command unit present, the Player rolls one die and inverts that Command unit if a "5" or "6" is rolled. A Command unit which is already inverted cannot be affected by shock combat. If there are no combat units stacked in the same hex, a Command unit is automatically inverted and retreated three hexes if an Enemy Shock attack is executed into the hex. The attacking unit(s) suffer no effect from such an attack.
12.8 How Retreats Are Executed
12.81 Units are forced to retreat either as a result of Shock Combat or due to a rout reaction to a Morale check (see 13.0).
12.82 A routing formation which is not rallied during the Friendly Rally Phase must retreat six hexes at the end of that Rally Phase. In all other cases, a mandatory retreat is three hexes in length.
12.83 When a unit is forced to retreat, all Friendly units stacked in the same hex are also forced to retreat. Units stacked together must be retreated as a single group. Stacked units may never be divided during a retreat.
12.84 Retreat movement does not expend any Movement Points and is not subject to Terrain or Facing Movement Point costs (units which are forced to retreat are either disordered or routed and thus possess all-around Facing).
12.85 Retreating units may never enter a hex occupied by Enemy Troop Strength Points or retreat across an Impassable hexside. Retreating units with no permissable path of retreat are eliminated in the last permissable hex they enter or occupy.
12.86 Retreating units may never enter a hex occupied by Friendly Troop Strength Points if another permissable path of retreat is available. Friendly units stacked in a hex entered by a retreating unit are automatically disordered and forced to retreat three hexes (treat these units exactly as if they received a "Dr" Shock Combat result).
12.87 A unit which is forced to retreat off the map is eliminated.
12.88 All retreats are executed by the Player who controls the retreating unit(s). Units must retreat along the straightest permissable path. Retreating units may swerve around Friendly and/or Enemy occupied hexes and Impassable hexsides but may not turn to avoid retreating off the map. In determining the path of retreat, French units must retreat southward whenever possible. Non-Prussian Allied units must retreat north whenever possible. Prussian units must retreat east whenever possible. In anomalous situations, the direction of retreat may be determined by a die roll.
12.89 A unit may be fired on when it is forced to retreat out of a hex within an Enemy unit's Minimum Range Fire Zone (see 11.26).
13.0 Morale
COMMENTARY:
Morale, which Napoleon deemed to be three times as important as numerical strength on the battlefield, is reflected on two different levels in Wellington's Victory. The concept of Unit Morale is based on the Effectiveness Rating assigned to every infantry battalion, cavalry regiment, skirmish company and artillery crew. On a higher level, the concept of Army Morale is used to determine the outcome of each of the Scenarios. At any time during the game, an individual Combat unit possesses "Good Morale," or is either Disordered or Routed. Disorder and Rout are involuntary formations which reflect a unit's temporary physical and/or psychological disorganization. The attrition of Friendly Troop Strength through Combat or Fatigue forms a steady drain on each army's overall Morale eventually resulting in the army's Demoralization.
GENERAL RULE:
The Scenario rules assign an initial Army Morale level to each army which is recorded on the appropriate Army Morale Record (printed on the Game Map) at the start of the Scenario. During the game, the markers on this Record are used to reflect changes in the army's Morale level in accordance with the rules pertaining to Army Morale. Throughout the game, the effect of Combat on individual units is determined when required in accordance with the rules pertaining to Unit Morale.
CASES:
13.1 Unit Morale
MORALE CHECK PROCEDURE:
A "Rtd" (Routed) marker is illustrated here.
Whenever a unit is required to check Morale, the Player who controls the unit rolls one die. The die roll is then modified according to Case 13.18, and the modified result is compared to the current Effectiveness Rating of the checking unit. If the checking unit is "unformed" (i.e. it is either a Skirmish or Disordered Formation), it is automatically routed if the modified die roll exceeds its current Effectiveness Rating. If the checking unit is formed (i.e. it is neither a Skirmish or Disordered Formation), it becomes disordered if the modified die roll exceeds its current Effectiveness Rating by three or less; it becomes routed if the modified die roll exceeds its current Effectiveness Rating by four or more.
Example:
During the Reciprocal Artillery Fire Phase a French Class 2 battalion loses one Troop Point due to Enemy artillery fire, forcing the unit to check Morale. The original Effectiveness of the French battalion (4) is reduced by one due to the fact that its current Troop Strength is one point less than its original (printed) Troop Strength. Thus the battalion's current Effectiveness Rating is three (3). The French Player rolls the die obtaining a "4." Because the die roll exceeds the battalion's current Effectiveness Rating by "1," the French battalion is disordered. Note that if the French battalion was already disordered, it would rout as a result of the described Morale check.
13.11 The topmost Combat unit stacked in a hex is immediately required to check Morale under any of the following circumstances:
- Whenever one or more Troop Strength Points are eliminated from the hex occupied by the checking unit as a result of a single Enemy Fire attack.
- Whenever a Friendly unit executing a disordered or routed retreat first occupies an adjacent hex (Exception: see 13.12).
- Whenever the unit is not in Square Formation and occupies a hex within the Charge Zone of an Enemy cavalry unit during the Facing/Formation Phase (see 12.52).
- Whenever one or more Gun Strength Points are eliminated by a single Enemy Fire attack, the topmost Combat unit stacked under the effected battery unit must immediately check Morale.
- Whenever all of the Friendly Troop Strength Points in an adjacent hex are eliminated or forced to retreat as a result of Enemy Fire or Shock attacks.
13.12 Command units, artillery battery units, and routing formations are never required to check Morale. Other units are excused from a mandatory Morale check under the following conditions:
- A Formed unit is never required to check Morale due to the presence of a routing skirmish formation in an adjacent hex. Disordered formations must check Morale when a routing skirmish formation first occupies an adjacent hex.
- A Formed infantry battalion is not required to check Morale when a Friendly battalion with a higher Class Rating occupies an adjacent hex while executing a disordered or routed retreat. For example, a British Class 2 battalion is not required to check Morale when a Hanoverian Class 3 battalion routs in an adjacent hex. A disordered battalion is never excused from a mandatory Morale check due to differences in Class.
13.13 When checking a unit's Morale, the modified die roll is always compared to the current Effectiveness Rating of the checking unit (see 12.22).
13.14 Regardless of the circumstances which requires it, a mandatory Morale check is always executed by the topmost Combat unit which is stacked in a hex. If the checking unit is forced to adopt an involuntary formation as a result of its Morale check, all of the Combat units stacked under it automatically adopt the same involuntary formation.
13.15 The effect of Combat on all Command units stacked in a hex is always resolved before the topmost Combat unit checks Morale.
13.16 Units which rout as a result of a Morale check must immediately retreat three hexes. Units which are disordered as a result of a Morale check are not required to retreat (see 12.8).
13.17 Disorder and rout may only be removed during the Rally Phase (see 13.2).
13.18 The die roll used to check a unit's Morale is modified according to the following schedule:
- −2 if protected by Hard Cover
- −1 if protected by Soft Cover
- −1 if stacked with a Command unit
- +1 if out of Ammunition
- +1 if the elimination of a Friendly unit (either from the same hex or a hex adjacent to the checking unit) mandates the Morale Check
- +1 if adjacent to a Friendly unit executing a disordered or routed retreat
- +1 if within the Medium Range Charge Zone of an Enemy cavalry unit
- +2 if within the Minimum Range Charge Zone of an Enemy cavalry unit
Note: For Morale purposes, a unit gains the benefit of any available Cover regardless of the position of this Cover in relation to the cause of the Morale check. Charge Zone penalties are only applicable during the Facing/Formation Phase. Disordered and skirmish formations gain no benefit for being stacked within a Command unit when forced to check Morale. Note that disorder has no direct effect on a unit's Morale other than to make it more susceptable to rout. A unit gains no benefit if stacked with (only) depleted (i.e. inverted) Command units.
13.2 How Disordered and Routed Formations Are Rallied
During the Rally Phase, the Phasing Player removes Disorder and/or Rout markers from units he controls according to the restrictions of the following Cases.
13.21 During the Rally Phase, the Phasing Player must remove Disorder markers from each Friendly occupied hex which is not an Obstructed Terrain hex and is not within the Minimum Range Fire Zone of an Enemy unit. Disorder markers may never be removed from Obstructed Terrain hexes or hexes within the Minimum Range Fire Zone of Enemy units. A unit's Facing may be changed to any desired direction when a Disorder marker is removed from the hex it occupies (Exception: see 7.46 and 9.3).
13.22 Immediately after all eligible Disorder markers are removed, the Phasing Player must remove Rout markers from each hex occupied by a Friendly skirmish formation which is not within the Maximum Range Fire Zone of an Enemy unit. Routing skirmish formations are not required to be stacked with a Command unit in order to be rallied. When skirmish formations are rallied, they recover "Good Morale" immediately.
13.23 Immediately after all eligible skirmish formations are rallied, the Phasing Player must remove Rout markers from all other Friendly units which meet both of the following requirements:
- The hex the unit occupies is not within the Maximum Range Fire Zone of an Enemy unit.
- The hex is occupied by a Command unit which bears the same nationality, or the same Brigade, Division, or Corps designation as the routing unit(s). Note: A depleted Command unit is capable of rallying units within these restrictions.
13.24 When a Rout marker is removed from a unit which is not in skirmish formation, it is immediately replaced with a Disorder marker. Thus a routing infantry battalion or cavalry regiment takes two complete Game-Turns to recover "Good Morale."
13.25 A Rout marker may be removed from a unit which occupies an Obstructed Terrain hex.
13.26 After all eligible units are rallied, all remaining routing formations are retreated six hexes by the Phasing Player (see 12.8).
13.27 Disordered and routing formations remain Involuntary Formations until rallied. Involuntary Formations possess all-around Facing and are exempt from Command Control restrictions. Involuntary Formations gain no Morale or Shock Combat benefit when stacked with a Command unit.
13.28 Disordered formations may move (retaining their full Movement Allowance), and may execute Fire and Shock attacks.
13.29 Routed formations may never move during the March Phase. Routed formations are only moved to execute a required retreat. Routing formations may never execute Fire or Shock attacks. Routing Troop Strength Points are considered eliminated for Army Morale purposes (see 13.3).
13.3 Army Morale
Army Morale Record markers illustrated: 000, 00, 0.
COMMENTARY:
Army Morale is a quantitative enumeration of the relative endurance capacity of each army which is the base determinant of Victory for each Scenario. The Scenario rules assign an initial Morale total (quantified in Morale Points) to each army which is recorded on the appropriate Army Morale Record at the start of the Scenario. During the game, the markers on this Record are used to reflect changes in the army's Morale level effected by the attrition of Friendly Troop Strength and Command Points and/or the capture of certain geographical objectives. When brigade-sized formations are committed or deactivated, the Phasing Player records the effect of these activities on his Record of Committed Units. During the first Command Phase of each hour, the Phasing Player adjusts the Morale level of his army to reflect the effect of battle fatigue on the portion of his army which is presently committed against the Enemy. The Records for both the French and Anglo-Allied armies are printed directly on the game map. There is no Record for the Prussian Army. During the Scenarios which utilize Prussian units, Prussian Track markers are used on the Allied Records to separately distinguish the Morale and committment of the Prussian Army.
13.31 One Morale Point is immediately subtracted from the appropriate Army Morale Record total for each Friendly Troop Strength Point which is eliminated or routed. One Morale Point is immediately added to the appropriate Army Morale Record total for each routing Friendly Troop Point which is rallied. Note: Routed Troop Strength Points which retreat off the map may never be rallied. Disorder has no effect on Army Morale.
13.32 One Morale Point is immediately subtracted from the appropriate Army Morale Record total for each Friendly Command Point which is eliminated. For example, when a full-strength Divisional Command unit which possesses four Command Points becomes depleted (inverted), its value is reduced to two Command Points. Thus two Command Points are considered eliminated for Army Morale purposes.
13.33 During the first Command Phase of each hour, the Phasing Player subtracts one Morale Point from his Army Morale Record total for each brigade-sized formation currently committed (see 14.3). Each hourly Game-Turn has been distinguished on the Turn Record Track to remind Players to adjust Army Morale levels for currently committed brigades.
13.34 There are two geographical objectives which either army derives Morale Points for occupying; the geographical objective of Hougomont (hex C2903) is worth fifteen (15) Morale Points; the geographical objective of La Haye Sainte (hex A4528) is worth ten (10) Morale Points. Both of these objectives are occupied by the Anglo-Allied Army at the start of each Scenario and the Morale Point value of both objectives is included in the Initial Morale Point total assigned to the Anglo-Allied Army in the Scenario rules. During the game, when either objective is occupied by a French unit, the appropriate number of Morale Points are immediately subtracted from the Anglo-Allied Morale Record and added to the French Morale Record. If an Anglo-Allied unit recaptures either objective, the appropriate Morale value is immediately reassigned to the Anglo-Allied Army Morale Record and subtracted from the French. Throughout the game, whenever either objective changes hands, the Morale Point value of the objective is similarly reassigned to the army which presently occupies the objective.
13.4 Army Demoralization
At the instant an army's Morale level reaches zero, the army, and all of the individual units associated with that army, become demoralized. Two markers are used to distinguish Army Demoralization; a Demoralization Marker is placed in the appropriate box of the Army Morale Record and a Disorder Marker of the appropriate color is placed on the current Game-Turn on the Turn Record Track to distinguish the Game-Turn during which Demoralization occurred. The effects of Army Demoralization are explained in the following cases.
13.41 The Hougomont, La Haye Sainte, and Placenoit Scenarios cease at the end of the first Game-Turn in which either or both armies are demoralized. When the Scenario ends, the Player who controls the undemoralized army is considered the victor. If both armies are demoralized, the Scenario is considered a drawn battle.
13.42 During the full-length historical Battle of Waterloo Scenario (and the Optional Early French Assault Scenario), game play continues, regardless of demoralization, until the end of the fiftieth Game-Turn (2130 hrs.), or until no committed, opposing units remain on the map. When play continues beyond the first Game-Turn in which one or more armies are demoralized, the effects of Demoralization, as explained in the following Cases, are imposed during the remainder of the game.
13.43 During each Friendly Command Phase subsequent to the instant of Demoralization, the current Effectiveness Rating of each infantry and cavalry unit in a demoralized army is reduced by one: This reduction is not indicated by any marker; the Players must mentally record the reduced Effectiveness of demoralized units whenever reference to a unit's Effectiveness Rating is required. Note: This reduction has no effect on Unit Class for Fire Combat purposes but does effect all Shock Combat and Morale procedures. Note also, that the Effectiveness Rating of a unit may never be less than zero.
13.44 Following Demoralization, the Army Morale Record of a demoralized army accumulates Morale Points as a negative total in accordance with the restrictions of Cases 13.31, 13.32 and 13.33 (Exception: see 13.45). Note: Morale Points due to the elimination or rout of Friendly Troop Strength Points are added to the Morale Record of a demoralized army: Morale Points may never be subtracted from the Morale Record of a demoralized army. In adjudicating Victory, it is important to remember that the Morale level of a demoralized army represents a negative total (see 13.47).
13.45 During the first Command Phase of each hour, the Phasing Player adds two Morale Points to the Morale Record of a demoralized army for each brigade which remains committed (see 14.3).
13.46 Routing formations of a demoralized army may never be rallied.
13.47 When play ceases according to the restrictions of Case (13.42), the final Morale totals of the Anglo-Allied and Prussian armies are combined and this combined total is compared to the final Morale total of the French Army. If both totals are positive, the army with the greater total is considered the victor. If both totals are negative, the army with the smaller total is considered the victor. If both a positive and negative total exists, the army with the positive total is considered the victor. The Level of Victory is determined by the Net Difference between the Morale Point totals according to the following schedule:
| Net Morale Point Difference | Level of Victory |
|---|---|
| Less than 50 | Marginal |
| Less than 100 | Substantial |
| More than 100 | Decisive |
| More than 200 | Overwhelming |
14.0 Command
COMMENTARY:
In Wellington's Victory, the concepts of leadership and army management are simulated through the use of historical brigade, division, corps and army Command units. Command units do not possess a Combat Strength and are not considered Combat units although Combat units may benefit when stacked with a Command unit for Combat and/or Morale purposes. A Command unit's primary function, however, involves its ability to commit, control, and deactivate Combat units thus enabling these units to move and engage or disengage from Combat.
GENERAL RULE
The Scenario rules determine which Command units are initially deployed within each army and the number of brigades each army has committed at the start of the Scenario. At the beginning of the game, the designated Command units are deployed on the map as specified by the Scenario rules and the initial total of committed brigades is recorded on the appropriate army's Record of Committed Units. During the game, when brigades are committed or deactivated (as permitted by the Scenario rules), additional Command units may be deployed or removed from the map and the markers on the appropriate Record of Committed Units are adjusted to reflect the current total of committed brigades within each army. Throughout the game, units may only voluntarily enter or leave the map in accordance with the Brigade Committment and Deactivation rules, and may only move in accordance with the Command Control rules. The Brigade Committment, Deactivation and Command Control rules are uniformly based on the Command Designations rules.
CASES:
14.1 Command Designations
Each unit has a Command designation printed on either side of the unit counter. Command designations express the organization of each corps, division, brigade and regiment within each army. Each unit is uniquely identified by its complete Command designation (in conjunction with its type and nationality). The regiment, brigade, division or corps to which a given unit is attached is denoted by the appropriate portion of its Command designation.
14.11 The Command designation of a French infantry unit identifies the unit's corps, division, brigade, regiment and battalion. The Command designation of a French cavalry unit identifies the unit's corps, division, brigade and regiment. The Command designation of a French artillery battery unit identifies the unit's corps and division. The Command designation of a French Command unit identifies the unit's corps, division and/or brigade. The letter codes used in French Command designations are as follows: Infantry; Ch-Chasseur, Gr-Grenadier, IG-Imperial Guard, Lt-Light infantry, Ti-Tirailleur, Vo-Voltigeur; Cavalry; Ca-Carabinier, Ch-Chasseur a Cheval, Cu-Cuirassier, Dr-Dragoon, Ge-Gendarme, Gr-Grenadier a Cheval, IG-Imperial Guard; Artillery; IG-Imperial Guard, R-Reserve. Note: Players will notice that Command designations within the French Army are never duplicated except in the 1st Divisions of infantry and cavalry both of which are attached to the I Corps. The affiliation of the Combat units in these divisions is discernable from the symbols used to distinguish Unit Type. The affiliation of the Command units in these divisions is as follows: 1st Division of infantry; Alix, Quiot and Bourgeois. 1st Division of cavalry; Jacquinot, Bruno and Gobrecht.
14.12 The Command designation of an Anglo-Allied infantry unit identifies the unit's corps, division, brigade, regiment and/or battalion. The Command designation of an Anglo-Allied cavalry unit identifies the unit's corps, division, brigade and regiment. The Command designation of an Anglo-Allied artillery battery unit identifies the unit's corps, division and battery commander. The Command designation of an Anglo-Allied Command unit identifies the unit's corps, division and/or brigade. The letter codes used in Anglo-Allied Command designations are as follows: Infantry; Fu—Fusilier, Gd—Foot Guard, Hl—Highland, Jg—Jaeger, Lt—Light infantry, Lw—Landwehr, Mi—Militia, Rf—Rifle; Cavalry; Ca—Carabinier, Dr—Dragoon, DrGd—Dragoon Guard, Hu—Hussar, LDr—Light Dragoon, LGd—Life Guard, RHGd—Royal Horse Guard; Organizational abbreviations; Cav or Cv—cavalry, R—Reserve Corps; Nationality abbreviations; Bw—Brunswick, N or Ne—Netherlands. Note: Distinct nationalities within the Anglo-Allied Army are also differentiated by color. Because of the similarity of Command designations among different nationalities, the Anglo-Allied Player must carefully coordinate the appropriate Combat and Command units. For example, there is both a British and a Hanoverian brigade designated "3/2/II." The British brigade is commanded by Adam. The Hanoverian brigade is commanded by H. Halkett. The divisional commander of both brigades is the British commander Clinton.
14.13 The Prussian Army was organized by corps, brigade and regiment (divisional organization was not employed). The Command designation of a Prussian infantry unit identifies the unit's corps, brigade, regiment and battalion. The Command designation of a Prussian cavalry unit identifies the unit's corps, brigade and regiment. The Command designation of a Prussian artillery battery unit identifies the unit's corps, brigade and battery number. The Command designation of a Prussian Command unit identifies the unit's corps and/or brigade. The letter codes used in Prussian Command designations are interpreted as in the Anglo-Allied Army except the Prussian landwehr is coded by region as follows: E—Elbe, K—Kurmark, N—Neumark, P—Pomeranian, S—Silesian, W—Westphalian.
14.14 Command designations do not appear on artillery crews and infantry skirmish formations.
14.15 For all Command purposes, battery, battalion and regimental designations may be ignored. The rules governing Command Control and Brigade Committment and Deactivation utilize only the army, corps, division and brigade designations. Note: Command designations express the internal chain of command among units attached to a given corps. Each brigade Command unit is considered subordinate to its divisional Command which is in turn subordinate to the corps Command. Combat units are directly subordinate to the lowest Command unit named in the Combat unit's Command designation and indirectly subordinate to any other Command unit named in the Combat unit's designation and/or Command unit of the same nationality as the Combat unit. All corps, division and brigade Command units are subordinate to army Command units within the same army. An understanding of this chain of command is useful for maximizing the Player's grasp of the Command Control and Brigade Committment and Deactivation rules.
14.2 Command Control
Command Control simulates the strict control which commanders exerted over combat formations attached to their command. In the game, a Combat unit must be in Command Control in order to move or change its Facing or Formation voluntarily. Command Control does not effect a unit's ability to participate in either Fire or Shock Combat (Exception: see 14.24). Command units, artillery crews, and routing, disordered or skirmish formations are completely exempt from Command Control restrictions.
14.21 A Combat unit is considered in Command Control under either of the following circumstances:
- The Combat unit occupies a hex which is within the Command Radius of the lowest Command unit named in the Combat unit's Command designation. For example, Bolton's British foot artillery battery is considered in Command Control when it is within four hexes of the British 2nd Division Command unit Clinton which possesses a Command Radius of four (hexes).
- The Combat unit occupies a hex which is also occupied by any Command unit named in the Combat unit's Command designation and/or any Command unit of the same nationality as the Combat unit (regardless of its Command Designation). For example, Bolton's British foot artillery battery is considered in Command Control when it occupies a hex which is also occupied by Hill, Clinton, or any other British Command unit.
14.22 A Combat unit is not required to trace a path of hexes leading to an appropriate Command unit in order to be considered in Command Control. The only requirement is that the Combat unit be within the number of hexes denoted by the Command Radius of the Command unit. This Radius includes the hex occupied by the Combat unit but excludes the hex occupied by the Command unit.
14.23 A Combat unit which is considered in Command Control at the beginning of a given Phase is automatically considered in Command Control for the remainder of that same Phase. The Command Control status of the Phasing Player's Combat units is determined during the Facing/Formation Phase and at the start of the March and Shock Combat Phases. Command Control never affects units controlled by the non-Phasing Player.
14.24 A cavalry unit must be in Command Control in order to initiate a charge. The Command Control status of a cavalry unit is determined at the instant it attempts to initiate a charge (see 12.4).
14.3 Brigade Committment and Deactivation
The rules governing Brigade Committment and Deactivation simulate the importance of army maintenance against the withering effect of fatigue during a long, grueling battle like Waterloo. In the game, each infantry and cavalry brigade must be "committed" into battle before any unit attached to the brigade may move or change its Facing or Formation voluntarily. During the game, a continuous tally of committed brigades within each army is maintained on the appropriate Record of Committed Units. During the first Command Phase of each hour, the Phasing Player adjusts the Morale total of his army to reflect the effect of battle fatigue on the portion of his army which is presently committed against the Enemy. At the end of the first Command Phase of each hour, the Phasing Player may deactivate any brigade he controls which meets the necessary requirements. At the instant a brigade is committed, the brigade Command unit may be deployed on top of any Combat unit attached to the brigade. At the instant a brigade is deactivated, the brigade Command unit is removed from the map where it remains until its brigade is committed again.
14.31 An infantry or cavalry brigade may be committed in three different ways:
-
During the Command Phase, the Phasing Player may commit a brigade if any Combat unit attached to the brigade occupies a hex within the Command Radius of any Command unit named in the brigade unit's designation or any army Command unit of the same nationality as the Combat unit. For example, the 1st infantry brigade of the French 1st Division could be committed during a French Command Phase if any battalion occupied a hex within the Command Radius of Napoleon, Ney, D'Erlon or Alix. At the instant the brigade is committed, the French Player would deploy Quiot (the brigade commander) on top of any battalion attached to the 1st infantry brigade. He would then raise the total on the French Army Record of Committed Units by one.
-
A brigade is automatically committed at the instant any Combat unit attached to the brigade is required to check Morale.
-
A brigade is automatically committed at the instant any Combat unit attached to the brigade enters the map in accordance with the Scenario Reinforcement rules.
14.32 The Scenario rules may restrict which brigades may be committed during the course of the Scenario. In addition, the Scenario rules may restrict which Command units may be deployed on the map at the start of the Scenario and which Command units may be deployed during the course of the Scenario. Within these restrictions, during the Command Phase, the Phasing Player may deploy any Command unit which was never previously deployed on the map on top of any Combat unit which bears the same corps, division or brigade designation if that Combat unit occupies a hex within the Command Radius of any higher ranked Command unit named in the Combat unit's designation. For example, during the French Command Phase, Alix (the commander of the 1st French Infantry Division), could be deployed on top of any Combat unit attached to the 1st infantry Division which occupied a hex within the Command Radius of Napoleon, Ney, or D'Erlon.
14.33 The French Army possesses two army Command units, Napoleon and Ney, both of which are designated Armee du Nord. The Prussian Army possesses two army Command units, Blucher and Muffling, both of which are designated Army of the Rhine. The Anglo-Allied Army possesses one army Command unit, Wellington, who also commands the Reserve Corps of the Anglo-Allied Army.
14.34 Skirmish companies may only be detached from infantry battalions attached to committed brigades.
14.35 Artillery crews are never committed, deactivated, or subject to Command Control restrictions.
14.36 At the end of the first Command Phase of each hour, the Phasing Player may deactivate any infantry or cavalry brigade he controls which meets either of the following requirements:
- All of the Combat units attached to the brigade occupy hexes within the Command Radius of the brigade Command unit and no unit attached to the brigade is within eight hexes of an Enemy unit.
- All of the Combat units attached to the brigade, including the brigade Command unit, exited the map from the same road hex and no Enemy unit has also exited the map via the same road hex (see 14.37 and 14.38). Note: Skirmish formations originally attached (or detached) from a given brigade are ignored for Brigade Deactivation purposes.
14.37 No unit may exit the map until at least one army is demoralized. Once a single army is demoralized, any unit may exit the map within the restrictions of Case 14.38.
14.38 A unit may only exit the map from a road hex which is adjacent to the edge of the map. Undemoralized units may exit the map from any road hex. Demoralized units must exit the map according to the appropriate retreat restrictions in Case 12.88. A unit must expend one Movement Point to exit the map and is subject to all standard Movement and Command Control restrictions until it physically exits the map. Skirmish, artillery and routing formations are permanently removed from all further consideration after exiting the map. Other units which exit the map are stacked adjacent to the exit hex until deactivated, or until an Enemy unit exits the map from the same road hex, thus prohibiting any units which exited from that road hex from being deactivated for the remainder of the game. A unit may never reenter the map subsequent to exiting. No Movement or Combat may occur between opposing units which exit the map from the same road hex. Victory is determined in accordance with Case 13.4. Note: It seems advisable to clarify the fact that opposing units which exit the map from the same road hex may never be deactivated as this is intended to simulate a pursuit situation which a Player would utilize to prevent retreating units from gaining respite after exiting the map. Note, however, that brigades which exit the map may be deactivated in accordance with Case 14.36 until an Enemy unit exits the map from the same road hex.
14.39 The Phasing Player may only deactivate brigades at the end of the first Command Phase of each hour, after the effect of battle fatigue on committed brigades has been subtracted from his Army Morale Record. Brigades may never be deactivated before or after the first Friendly Command Phase of each hour. The total on the appropriate Record of Committed Units is reduced by one at the instant a brigade is deactivated.
15.0 Optional Rules
GENERAL RULE:
The following Optional Rules may be used individually or collectively by mutual agreement of both Players at the start of the game.
CASES:
15.1 Game-Turn Limitation
Each March Phase should be limited to 15 minutes of real time.
15.2 Sequence of Play Optional Rules
15.21 In playtesting, we found that some Players preferred to perform Facing and Formation operations for each unit or stack immediately before moving that particular unit. Therefore, if Players desire, the Facing/Formation Phase may be deleted and each unit's Facing or Formation may be changed at no Movement Point cost during the March Phase immediately prior to initiating a given unit's Movement. Note, however, that Morale checks required by Case 12.5 must still be resolved to the beginning of the Friendly March Phase.
15.22 As an alternative to the die roll used to determine which Player executes the first attack in each Fire Phase, the advantage of the Allied defensive posture is better simulated by allowing the Allied Player to execute the first attack in each Fire Phase. However, since during the latter part of the game, the French enjoy the defensive advantage against the Prussians, after Game-Turn 24 allow the Allied Player to execute the first attack on the western flank while the French Player executes the first attack on the Eastern flank.
15.3 Formation Optional Rules
15.31 The following Class 1 infantry battalions may never detach skirmish companies:
A. All battalions attached to either the 1st or 2nd Divisions of the French Imperial Guard. B. British Highland (Hl) battalions.
15.32 All Class 1 or 2 British, KGL and Hanoverian battalions of six or fewer Troop Strength Points may adopt a four-rank line formation which is simply represented by placing a Square Marker on top of the unit in line formation (i.e., no Extended Line Formation Marker is used). For Fire purposes this formation is considered a Three-Rank Line Formation, and a Class 2 Target. For Shock Combat purposes, the unit is considered in Square formation.
15.33 During the Friendly Command Phase, any formed Class 2 infantry battalion that possesses less than half of its original Troop Strength may be removed from the map and replaced by an equal number of Troop Strength Points in skirmish formation.
15.34 Line and column infantry formations may freely stack in the same hex. Note, however, that Extended Line formations may only stack with Command units.
15.35 During the Facing/Formation Phase, Anglo-Allied artillery crews may be incorporated into Friendly infantry battalions according to the restrictions of Case 8.44.
15.36 For all purposes, all Hanoverian and Silesian Class 3 infantry battalions are considered Class 2 units. Note: It was very difficult to ascertain the quality of these troops which may well have been higher than the Class Rating assigned in the Standard Rules. Thus, for play balance or historical study, reevaluate these units using the French Class 2 infantry battalion as a model.
15.4 Optional Stacking and Observation Rules
15.41 A Player may never examine any unit stacked under an Enemy Troop Strength Point.
15.42 Skirmish companies of different nationalities may not be stacked in the same hex. Note: This rule is only included to minimize the potential problems involved in the ammunition restrictions (see 11.6).
15.5 Fire Combat Optional Rules
15.51 A unit which executes a Shock attack may not subsequently fire in the same Shock Combat Phase.
15.52 Any non-disordered artillery battery may increase its maximum range to twelve hexes. An artillery battery which executes a Fire attack at a range of more than eight hexes uses the "Disordered" line on the Relative Firepower Table to resolve the attack.
15.53 When an artillery crew is eliminated by a Fire attack, it is simply inverted (i.e., it becomes a skirmish company). An artillery crew is removed from the map when eliminated by Shock Combat.
15.6 Shock Combat Optional Rules
15.61 Skirmish formations may execute a maximum of one Shock attack per Shock Combat Phase.
15.62 A cavalry unit may initiate a charge if it can observe a Friendly Command unit within its projected Minimum Range Charge Zone and that Command unit can observe an Enemy Troop Strength Point within the cavalry's Maximum Range Charge Zone.
15.63 In executing a charge, a cavalry unit may "pick up" a Friendly Command unit in any hex it enters.
15.64 All heavy cavalry units must move at least six hexes when executing a charge unless forced to retreat as a result of Combat or Morale.
15.7 Optional Morale Rules
15.71 All skirmish formations except French, British, King's German Legion and Prussian units add one to the die roll when required to check Morale. Naturally, this is in addition to other circumstances which may raise or lower the die roll (see 12.52 and 13.18).
15.72 During the Allied Facing/Formation Phase, any infantry formation which is neither British nor KGL but which occupies a hex adjacent to an infantry battalion attached to the 1st or 2nd Division of the French Imperial Guard must check Morale. The die roll used to resolve this Morale check is increased by two after all other modifications are accounted for.
15.8 Optional Command Rules
15.81 All British and KGL artillery batteries are considered in Command Control in any hex within Wellington's Command Radius.
15.82 The Brunswick Command unit is always deployed in a depleted status due to the death of the Duke of Brunswick at the Battle of Quatre Bras on June 16, 1815.
15.83 Napoleon's infamous lethargy on June 18, is simulated by deploying the Command unit in a depleted status.
15.9 Optional Scenario Rules
15.91 Wellington may be deployed in hex A3027 at the start of Scenario 16.1. Wellington should be removed from the map during the Allied Command Phase of Game-Turn 16 (1300 hrs) during the Hougomont Scenario (only).
15.92 For historical accuracy, Napoleon should be deployed in hex C4621 (Rossomme) at the start of Scenario 16.4.
15.93 Gneisenau, the Prussian Chief of Staff, actually delayed his army's arrival in support of Wellington by at least one hour. Thus, for play balance and historical study, change the arrival time of the Prussian II and IV Corps to Game-Turn 20 and the arrival of the Prussian I Corps to Game-Turn 30 in Scenarios 16.4 and 16.5. Note that the Prussian Morale total is raised to (140) when this rule is utilized.
15.94 Use the following guidelines to adapt Scenario 16.4 for multiple Players:
A. Each infantry corps in the French Army should be commanded by a separate Player. One additional Player representing Napoleon (and Ney) should command the French cavalry corps and the Imperial Guard. French cavalry formations may be reassigned to subordinate corps commanders.
B. The I and II Corps of the Anglo-Allied Army may be commanded by a single Player. A second Player representing Wellington commands the Anglo-Allied Reserve Corps. If a third Player is available, he should be placed in charge of the Allied cavalry and is represented by Uxbridge on the game map.
C. The Prussian Army can probably be managed by a single Player. However, if extra Players are available, each commands a Prussian corps.
D. Players may only communicate (in writing) when the Command Radius of their Command units overlap. Players may communicate verbally only when their Command units are stacked in the same hex. No communication is allowed except during the Friendly Command Phase.
16.0 The Scenarios
COMMENTARY:
Wellington's Victory is presented as a series of five distinct Scenarios each of which can be played as a separate game. We recommend that Players use the Hougomont Scenario (16.1) to gain a basic familiarity with the game system. This is a relatively short Scenario which excludes the use of cavalry. It thus provides a very challenging and highly playable Introductory Game. The second Scenario entitled La Haye Sainte (16.2) actually simulates the main French assault which historically was shattered by the dramatic charge of the British heavy cavalry brigades. The introduction of cavalry and numerous combat formations in this Scenario rapidly acquaints the Player with the tactical complexities he will face when he turns to the full-length historical Scenario. Before then, however, we recommend the Player familiarizes himself with the strengths and weaknesses of the Prussian Army via the Plancenoit Scenario (16.3) which simulates the tense battle Napoleon waged to protect his exposed right flank. After this, Players will usually proceed directly to the historical Battle of Waterloo Scenario (16.4), a 40 turn game that is particularly suitable for multiple Player adaptation. The final Early French Assault Scenario (16.5), focuses on the most intriguing alternative available to Napoleon which might well have reversed the outcome of history's most famous battle and robbed Wellington of his most glorious victory.
GENERAL RULE:
Each Scenario represents a distinct game possessing special rules governing the length, deployment, reinforcements and victory conditions applicable to the situation which it simulates. The initial deployment positions for all the units which participate in a given Scenario are extracted from the Initial Deployment Display (16.6) as modified by the Scenario's Initial Deployment rules. Unless specifically contradicted by the Scenario rules, all units are deployed possessing their original, maximum Strength and Effectiveness. Infantry battalions are deployed in column formation. Artillery batteries may be deployed either limbered or unlimbered with an appropriate Crew Marker and a full supply of ammunition. The Stacking rules must be observed in the Initial Deployment and are effected by the terrain in which they initially deploy. Only the specified units are deployed at the start of the Scenario. Additional Combat or Command units may be deployed during the Scenario in accordance with the Scenario rules and the restrictions of Case 14.3.
16.1 Hougomont
At dawn on June 18, the torrential rain which had soaked the Belgian countryside throughout the previous day began tapering off. Seventy thousand French troops, constituting the bulk of Napoleon's Armee du Nord which two days earlier had vanquished the Prussian Army of the Rhine at Ligny, now expected to exploit their initial victory by destroying the unsupported and inexperienced Anglo-Dutch forces which the Duke of Wellington had deployed across the Brussels-Charleroi highway a few miles south of an inconsequential hamlet called Waterloo.
That morning at his headquarters at Le Caillou, Napoleon discussed the impending battle with his subordinates while awaiting the arrival of several French corps which had bivouacked further south. Disagreeing with the French generals whom Wellington had consistently defeated in Spain, Napoleon insisted that his opponent was a poor commander and that the English troops were much inferior to the French. The battle which Napoleon envisioned would resemble le petit dejeuner — Wellington's army would be devoured as easily as a light continental breakfast!
Although Napoleon's plan of battle depended on D'Erlon's assault to pierce Wellington's center as soon as the ground was sufficiently dry to permit the full employment of the French cavalry and artillery, in the meantime, Wellington might be induced to expend his reserve strength against a French diversionary attack. Shortly before noon, Napoleon dispatched orders to his II Corps commander, Reille, to initiate this diversion against the farm of Hougomont. Within an hour, 1500 French light infantry had fallen in the first of many assaults on the fortress-like position which was rigorously defended by the elite companies of the British 1st Division. Throughout the afternoon, the intended diversion claimed a rising toll of French casualties as the II Corps stubbornly persisted the attack against the nearly impregnable objective. At sundown, the British still held the chateau and the adjoining walled garden. Perhaps as many as 7,500 French corpses occupied the surrounding orchards in solemn testimony to the courage and determination displayed by French troops throughout their long ordeal at Waterloo.
16.11 Scenario Length
The Scenario begins at the start of Game-Turn 11 (1145 hrs) and ends at the conclusion of Game-Turn 30 (1630 hrs) or at the end of the first Game-Turn following either Army's demoralization.
16.12 Initial Deployment
French: All French Combat units are deployed according to the Initial Deployment Display. The only French Command units which may be deployed at the start of the Scenario are Reille and Pire which may be deployed on top of any Combat unit attached to the 6th Division. French Command units attached to the 6th and 9th Divisions may be deployed during the Scenario in accordance with Case 14.3. No other Combat or Command units may be deployed on the map at any time during the Scenario.
Allied: All Anglo-Allied Combat units are deployed according to the Initial Deployment Display. Each Allied Command unit coded for the Hougomont Scenario on the Initial Deployment Display is deployed on top of any Allied Combat unit bearing the same Corps, Division or Brigade designation at the start of the Scenario. No other Combat or Command units may be deployed on the map at any time during the Scenario.
16.13 Initial Morale and Brigade Committment
French: The French Initial Morale total is (70). There are no French brigades committed at the start of the Scenario.
Allied: The Allied Initial Morale total is (65). There are four Allied brigades committed at the start of the Scenario.
16.14 Special Rules
- No unit may voluntarily move more than eight hexes from hex C2903.
- Brigades may never be deactivated during the Scenario.
- The Allied Army is automatically demoralized if a French unit occupies hex C2903 at the end of any Game-Turn.
- This Scenario is played on Maps A and C (only).
16.15 Victory Conditions
- Victory is determined in accordance with Case 13.41 (Exception: see 16.14).
- If neither army is demoralized by the end of Game-Turn 30, the Scenario is automatically considered an Allied victory.
16.2 La Haye Sainte
The advance of D'Erlon's Corps, supported by a French grand battery of almost seventy guns and Milhaud's cuirassiers, commenced at 1330 hrs. La Haye Sainte, a less substantial replica of Hougomont situated immediately west of the Brussels highway and less than 300 yards south of Wellington's main position, was merely a secondary objective of this major French assault. D'Erlon's primary objective was nothing less than to break Wellington's center and continue driving up the Brussels road until the French infantry was strongly established in the village of Mont St. Jean. At that point, Napoleon undoubtedly intended to sweep away any remaining Allied resistance by unleashing the rest of the French cavalry and, if necessary, the irresistible power of the Imperial Guard.
Initially, the rout of Bylandt's Netherlandish brigade which had inadvertently deployed on the foreward slope and been rapidly decimated by the French artillery, heralded an Anglo-Allied disaster. But minutes later, D'Erlon's infantry reached the crest of Wellington's position and was shattered by a rapid series of withering volleys delivered by the unshaken British infantry of Picton's 5th Division.
Badly disordered and unable to deploy under this fire, the French infantry then became the helpless target of the simultaneous charges of Somerset's and Ponsonby's heavy cavalry brigades. Within seconds, three of the four French infantry divisions were routing southward closely pursued by the overzealous British cavalry. Ultimately, the British pursuit became overextended as the troopers forged headlong into the French grand battery. Before turning north to return to the shelter of the Allied lines, the cavalry had achieved magnificent results including the rout of 15,000 infantry of which more than 3,000 surrendered, and the disablement of some forty French guns which would remain silenced for the duration of the battle. The French, however, quickly took revenge on the exhausted British cavalry. Countercharged and pursued back across the valley, half the British troopers were slain by the French light cavalry that had been unleashed by Jacquinot. For the remainder of the day, both the British heavy cavalry brigades and their demoralized French victims were hors de combat. But, the British charge had gained Wellington what he needed most. Time.
16.21 Scenario Length
The Scenario begins with the Reciprocal Artillery Fire Phase of Game-Turn 18 (1330 hrs) and ends at the conclusion of Game-Turn 38 (1830 hrs) or at the end of the first Game-Turn following either army's demoralization.
16.22 Initial Deployment
French: The following French artillery batteries are initially deployed on Map A within five hexes of hex D5101: I, II, 1/I, 2/I, 3/I, 4/I, 1/I (1st Cavalry Division), 13/IVc, and 14/IVc. All other French Combat units are deployed according to the Initial Deployment Display. The only French Command unit which may be deployed at the start of the Scenario is Ney which may be deployed on top of any Combat unit attached to the 2nd Infantry Division. French Command units attached to the I Corps, IV Cavalry Corps and the 5th Infantry Division may be deployed during the Scenario in accordance with Case 14.3. No other Combat or Command units may be deployed at any time during the Scenario.
Allied: All Anglo-Allied Combat units are deployed according to the Initial Deployment Display. The following Allied Command units may be deployed on top of any Anglo-Allied Combat unit bearing the same corps, division or brigade designation: Wellington, Prince of Orange, Uxbridge, Ompteda, Kempt and Weimar. Other Anglo-Allied Command units coded for the La Haye Sainte Scenario may be deployed during the Scenario in accordance with Case 14.3. No other Combat or Command units may be deployed at any time during the Scenario.
16.23 Initial Morale and Brigade Committment
French: The French Initial Morale total is (155). There are no French brigades committed at the start of the Scenario.
Allied: The Allied Initial Morale total is (155). There are three Allied brigades committed at the start of the Scenario.
16.24 Special Rules
- No unit may voluntarily move west of hex row 3600 on Map A or C.
- No unit may voluntarily move east of hex row 1800 on Map B or D.
- The Allied Army is exempt from the Morale penalty imposed by Case 13.33 on Game-Turn 32 (only).
- On Game-Turn 18 (only), all French infantry units may execute Grand Tactical Movement in accordance with Case 5.2 but ignoring the restriction that prohibits Movement within eight hexes of an Enemy unit (i.e., French infantry units may expend double their normal Movement Allowance regardless of their proximity to Enemy units).
16.25 Victory Conditions
- Victory is determined in accordance with Case 13.41.
- If neither army is demoralized by the end of Game-Turn 38, the Scenario is automatically considered an Allied victory.
16.3 Plancenoit
The Prussian intervention at Waterloo took Napoleon completely by surprise. Despite rumors that Blucher would attempt to reinforce Wellington, Napoleon remained convinced that, after Ligny, the Prussians would be unable to resume the offensive for an extended period of time. As insurance, Napoleon had dispatched Grouchy's corps to pursue the Army of the Rhine and prevent it from endangering the battle against Napoleon.
Unfortunately for the French Emperor, Grouchy's pursuit was mismanaged and beginning at 1630 hrs, Napoleon faced a double battle against both Wellington and Blucher. Due to the lateness of the Prussian arrival, however, Napoleon maintained the hope of defeating Wellington before the Prussians overwhelmed his exposed right flank. Thus, the dramatic Franco-Prussian struggle for Plancenoit coincided with the heroic but futile French cavalry charges and the climactic advance of the Imperial Guard infantry against Wellington's troops to the north. At approximately 8:00 p.m., the Guard columns were repulsed from the ridge between Hougomont and La Haye Sainte, and the French Army, exhausted from its ordeal against Wellington and demoralized by the Prussian threat upon its flank and rear, began to rapidly disintegrate. Wellington, at the scene of the rout of the French Guard, raised his hat, signalling a general advance to his army as well as history's most famous military victory.
16.31 Scenario Length
The Scenario begins at the start of Game-Turn 30 (1630 hrs) and ends at the conclusion of Game-Turn 50 (2130 hrs) or at the end of the first Game-Turn following either army's demoralization.
16.32 Initial Deployment
French: All French Combat and Command units attached to the VI Corps and the 3rd and 5th Cavalry Divisions are deployed within four hexes of hex D1501. Additional French units may only be deployed in accordance with Case 16.34.
Prussian: All Prussian Combat and Command units attached to the IV Corps except units attached to the 13th and 14th Brigades are deployed west of the Paris Wood within four hexes of hex B3125. The remainder of the IV Corps, followed by the II Corps, are deployed east of the Paris Wood on contiguous road hexes between hex B3719 and hex B5414. Note: This second group of Prussian units must be deployed in accordance with Case 9.11 using the maximum permissable Stacking to ensure that all units are deployed on the map at the start of the Scenario. No additional Prussian units may be deployed on the map at any time during the Scenario.
16.33 Initial Morale and Brigade Committment
French: The French Initial Morale total is (64). There are eight French brigades committed at the start of the Scenario.
Prussian: The Prussian Initial Morale total is (110). There are twelve Prussian brigades committed at the start of the Scenario.
16.34 Special Rules
- This Scenario is played on Maps B and D (only).
- Prussian units may not enter a non-road hex east of the 3000 hex row on Map B which is more than ten hexes from a French unit.
- Units may never cross a Stream hexside. All Stream hexsides are considered Impassable, even where crossed by a road.
- During the first French Command Phase in which a Prussian unit is west of the 1500 hex row on Map D, the French Player is required to act as follows:
A. Deploy all of the Combat and Command units attached to the 3rd Division of the Imperial Guard on the westernmost hex row of Map D between hexes D0110 and D0118 (inclusive). Note: The infantry battalions may be deployed in skirmish or column formation. Once deployed on the map, all of the units attached to this division are considered committed and are subject to all of the standard game rules. B. Raise the current French Morale total by (32). C. Raise the total number of committed French brigades to ten.
-
French units may never voluntarily exit the map. Prussian units may voluntarily exit the map from any road hex on the western edge of Map D (only). A Prussian unit must expend one Movement Point to exit the map.
-
During the first French Command Phase following a Phase in which a Prussian unit voluntarily exited the map, the French Player is required to act as follows:
A. Deploy all of the Combat and Command units attached to any single brigade from the 2nd Division of the Imperial Guard in accordance with the restrictions given in #4A (above). B. Raise the current French Morale total by (14). C. Raise the total number of committed French brigades to eleven.
-
Brigades may never be deactivated during the Scenario.
-
French units must retreat toward the southwest. Prussian units must retreat toward the northeast.
16.35 Victory Conditions
- The French Army is automatically demoralized at the instant the cumulative total of Prussian Troop Strength Points that have voluntarily exited the map exceeds thirty.
- If the French Army is not demoralized in accordance with #1, victory is determined according to Case 13.41.
- If neither army is demoralized by the end of Game-Turn 50, the Scenario is automatically considered a French victory.
16.4 The Battle of Waterloo
16.41 Scenario Length
The Scenario begins at the start of Game-Turn 11 (1145 hrs) and ends at the conclusion of Game-Turn 50 (2130 hrs) or the end of the first Game-Turn in which no committed opposing units remain on the map.
16.42 Initial Deployment
French: All French Combat units are deployed according to the Initial Deployment Display. The only French Command units which may be deployed at the start of the Scenario are Napoleon and Ney each of which may be deployed on top of any French Combat unit. All of the remaining French Command units are deployed during the Scenario in accordance with Case 14.3.
Anglo-Allied: All Anglo-Allied Combat units are deployed according to the Initial Deployment Display. The following Anglo-Allied Command units may be deployed on top of any Anglo-Allied Combat unit bearing the same corps, division or brigade designation: Wellington, Prince of Orange, Uxbridge, Mitchell, Byng, Maitland, Kielmansegge, Ompteda, Kempt and Weimar. All of the remaining Anglo-Allied Command units are deployed during the Scenario in accordance with Case 14.3.
Prussian: No Prussian units are deployed on the map at the start of the Scenario. All Prussian units enter the map in accordance with Case 16.44.
16.43 Initial Morale and Brigade Committment
French: The Initial French Morale total is (350). There are no French brigades committed at the start of the Scenario.
Anglo-Allied: The Initial Anglo-Allied Morale total is (325). There are 7 Anglo-Allied brigades committed at the start of the Scenario.
Prussian: The Prussian Initial Morale total is (0). There are no Prussian brigades committed at the start of the Scenario.
16.44 Special Rules
- During the Allied Command Phase of Game-Turn 24 (1500 hrs), if the Anglo-Allied Army is not demoralized, the Allied Player is required to act as follows:
A. Record a total of 125 Prussian Morale Points as a separate total on the Allied Morale Record. B. Record a total of 15 committed Prussian brigades as a separate total on the Allied Record of Committed Units.
- During any Allied March Phase subsequent to the end of Game-Turn 24 (1500 hrs), Combat and Command units attached to the Prussian II and IV Corps may begin deploying on Map B within the following restrictions:
A. Prussian units may never voluntarily enter a non-road hex east of the 3000 hex row on Map B which is more than ten hexes from a French unit. Within this restriction, Prussian units may enter any hex on the eastern edge of Map B, paying the normal Movement Point cost for each hex entered. Subject to the standard rules, Prussian units may utilize Grand Tactical Movement and Road Movement upon entering the map (see 5.2 and 10.25). B. Prussian units are automatically considered in Command Control on the Game-Turn in which they enter the map. C. Prussian Class 1 (Fusilier) battalions may enter the map in skirmish formation. Prussian Class 2 and 3 battalions must enter the map in column formation. Skirmish companies may not be detached from Class 2 battalions which are not deployed on the map. D. No unit attached to the II Corps may enter the map until every unit attached to the IV Corps is deployed on the map.
-
During any Allied March Phase subsequent to the end of Game-Turn 34 (1730 hrs), Combat and Command units attached to the Prussian I Corps may begin deploying on Map B under the same restrictions as the II and IV Corps except that units attached to the I Corps may enter on the northern or eastern edge of Map B.
-
To a considerable degree, the Prussian Army's participation in this Scenario is dependent on the Morale of the Anglo-Allied Army as detailed in the following rules:
A. If the Anglo-Allied Army is demoralized prior to the Allied Command Phase of Game-Turn 24, no Prussian units may enter the map and Prussian Morale is completely ignored for all purposes including victory determination.
B. During the first Allied Command Phase following the demoralization of the Anglo-Allied Army, all Prussian brigade Command units which are beyond the Command Radius of either of the two Command units designated Army of the Rhine must be removed from the map. All of the brigades attached to these Command units as well as all Prussian brigades which are not deployed on the map are automatically deactivated.
C. Once a Prussian brigade is deactivated, it may only be committed when one of its attached Combat units is forced to check Morale or occupies a hex within the Command Radius of either Army of the Rhine Command unit during the Allied Command Phase. Prussian brigades which are deactivated before entering the map may never be committed for the remainder of the game.
D. Prussian brigades may never be voluntarily deactivated prior to the demoralization of either the French, Prussian or Anglo-Allied Army.
-
If not already demoralized, the Anglo-Allied Army is exempt from the Morale penalty imposed by Case 13.33 on the first hourly Allied Command Phase following the first instance in which a French Strength Point is eliminated by Prussian artillery fire. If already demoralized, the Anglo-Allied Army is subject to the Morale penalty imposed by Case 13.45.
-
During any Allied Command Phase, the Prussian Command unit Muffling may be deployed on top of any Anglo-Allied Combat unit within Wellington's Command Radius. Note that Muffling has absolutely no Command capacity over any unit attached to the Anglo-Allied Army (historically, Baron Muffling served as the Prussian liason officer attached to the Anglo-Allied Army). In all other respects, Muffling is treated like any other Command unit and possesses army level Command capacities over any unit attached to the Prussian Army.
-
Infantry brigades attached to the French Imperial Guard may only be voluntarily committed by Napoleon according to the restrictions of Case 14.3.
-
At the instant an infantry battalion attached to either the 1st or 2nd Division of the French Imperial Guard is routed, all French units within eight hexes of the hex in which the rout occurred are required to check Morale. Morale is checked in each hex occupied by a French unit beginning with the hex closest to the hex in which the rout occurred and continuing outward for a range of eight hexes in all directions. The die roll used to resolve each Morale check is raised by three (3).
16.45 Victory Conditions
Victory is determined at the end of the game in accordance with Case 13.47, however, the final Allied and French Morale totals are increased by three points for each captured Enemy artillery battery. At the end of the game, an artillery battery is considered captured if it is stacked in the same hex as an Enemy Troop Strength Point or if no Friendly Troop Strength Points remain on the map.
16.5 The Early French Assault
16.51 Scenario Length
The Scenario begins at the start of Game-Turn 1 (0915 hrs) and ends at the conclusion of Game-Turn 50 (2130 hrs) or the end of the first Game-Turn in which no committed opposing units remain on the map.
16.52 Initial Deployment
French: All French Combat units attached to the I Corps and the 3rd, 5th, 13th and 14th cavalry divisions are deployed within four hexes of hex D0216. All French corps Command units as well as Napoleon and Ney are deployed in hex C5030. Additional French units may only be deployed in accordance with Case 16.54.
Anglo-Allied: Anglo-Allied units are deployed as specified in Case 16.42.
Prussian: No Prussian units are deployed on the map at the start of the Scenario. All Prussian units enter the map in accordance with Case 16.44.
16.53 Initial Morale and Brigade Committment
French: The Initial French Morale total is (399). There are 26 French brigades committed at the start of the Scenario.
Anglo-Allied: As specified in Case 16.43.
Prussian: As specified in Case 16.43.
16.54 Special Rules
- During any French March Phase, Combat and Command units attached to the French II, VI, IIIc, and Imperial Guard (IG) corps may begin deploying on Map C within the following restrictions:
A. French units may only enter Map C on hex C5031 and must employ the Road Movement exemption during the March Phase in which they enter the Map (see 10.25). B. French units are automatically considered in Command Control on the Game-Turn in which they enter the map. C. French corps may enter and deploy onto the map in any order the French Player desires, however, each corps must be entirely deployed before any unit attached to a different corps may enter the map. D. French infantry battalions must enter the map in column formation and are automatically disordered upon entering hex C5031. Skirmish companies may not be detached from French battalions which are not deployed on the map.
-
During any French Command Phase, French brigades may be committed or deactivated in accordance with Case 14.3, however, French brigades may not be deactivated while off the map until one army is demoralized.
-
During the first ten Game-Turns (only), the following special rules are enforced:
A. No Anglo-Allied brigade may be voluntarily committed. B. The normal Movement Points costs imposed by terrain are doubled. The effects of Cases 10.25 and 10.28, however, remain unaltered. C. All artillery and cavalry formations remain disordered until the Friendly Rally Phase of Game-Turn 11.
- All of the restrictions of Case 16.44 are considered in effect throughout the Scenario.
16.6 Initial Deployment Display
The initial deployment for all Prussian Combat units and all Command units are specified in the Scenario rules. The Initial deployment for all of the French and Anglo-Allied Combat units which participate in a given Scenario are extracted from the explanation provided in the Deployment Key on the center pages of this folder.
17.0 Player's Notes
Wellington's Victory was designed to reward the use of a well-conceived, imaginative plan of battle, and sound combined arms tactics appropriately applied by each of the three distinct armies represented in the game. It is hoped that the following notes will enable Players who are unfamiliar with Napoleonic warfare to grasp the fundamental concepts and tactics which decided battles during the first two decades of the Nineteenth Century. To greatly enhance your appreciation of the game, the designer urges Players to supplement the following playing guide by fully utilizing the information presented by the many authors listed in Section 19.0.
17.1 Grand Tactics
Although the situation depicted in the game must be considered a "set-piece" battle wherein two-thirds of the engagable forces are fixed in position by the initial deployment and the physical limitations of the game map preclude strategic outflanking maneuvers, the grand tactical problems of army management and battle conception remain wholly the responsibility of the Players. In comparison with purely tactical considerations, these grand tactical decisions are overwhelmingly more important in determining the outcome of any game but are particularly decisive within the context of the full-length historical and hypothetical Scenarios. The Player's conception or overall plan of battle is the single most important decision he faces. The problem entails a myraid of subordinate decisions but is summarized in the process of selecting which objectives to attack or defend and when and which units will be committed to assault or defend the chosen objectives. In order to develop an apropriate battle plan the Player must appreciate 1) the strategic situation of each army; 2) the impact of Brigade Committment and Fatigue on Army Morale; 3) the topography of the battlefield; 4) the proper tactical role of infantry, cavalry and artillery. Each of these topics is discussed below.
1) THE STRATEGIC SITUATION
The French Army bears the burden of attack. In the historical Scenario, the initial French Morale, although superior to that of the Anglo-Allied Army, is far outweighed by the Morale total of the combined Allied armies. Thus, it is imperative for the French to move as rapidly as possible to defeat the Anglo-Allied Army. If this is accomplished early, the Prussian intervention will be deterred permitting the French to magnify their victory by a rigorous pursuit of Wellington's Army. If Wellington's defeat is delayed, the French will face the strain of a double battle against both of the Allied armies.
The Anglo-Allied Army has little offensive power as it contains many brittle militia battalions and is inferior to the French in cavalry and artillery arms. The major advantage held by Wellington's Army is its excellent defensive position which it cannot afford to relinquish until the French Army approaches demoralization. If the French artillery is established anywhere along Wellington's original ridge-top position, the Anglo-Allied Army will find no second line of defense and will eventually be driven off the northern edge of the map.
Like their allies, the Prussian Army is inherently weak. But unlike Wellington, Blucher's Army can only aid the Allied cause by a sustained offensive to relieve the pressure upon Wellington, and, if possible, to cut the French line of retreat which can greatly magnify the consequences of the French Army's demoralization. The Prussian cavalry, spearheaded by their hussar regiments, forms the core of the Prussian offensive capacity.
2) THE IMPACT OF BRIGADE COMMITTMENT AND FATIGUE ON ARMY MORALE
In Wellington's Victory, the conservation of Army Morale is undermined by combat losses and battle fatigue. While the effect of casualties upon Army Morale is easily understood, the impact of battle fatigue has generally been disregarded. As a result, simulated battles become unrealistically bloody and the crucial concept of maintaining fresh reserves is dissipated. In Wellington's Victory, however, the premature committment of reserves produces a serious drain on Army Morale which can ultimately mean the difference between victory and defeat. From the outset, Players must acknowledge the fact that each army's endurance capacity is limited to a maximum of 8-10 hours of combat, irrespective of the added strain imposed by routs and losses. This endurance capacity can only be extended by careful observance of the principle of economy of force. Thus, an army's infantry and cavalry brigades should be committed only when required while simultaneously an effort should be made to force the opposing army to commit itself more rapidly. On a tactical level, Brigade Committment must be viewed in terms of its overall efficiency. The injurious effect upon Army Morale is the same when a strong brigade of Class 1 infantry battalions is committed as when a weak brigade of militia is committed. The Player must decide whether to employ his best formations early in the day or to maintain them as a strong reserve capable of breaking the enemy when on the verge of demoralization, or if necessary, to cover his army's retreat and thus deny the enemy the advantage of a successful pursuit.
3) THE TOPOGRAPHY OF THE BATTLEFIELD
Although the importance of Wellington's reverse slope deployment upon the outcome of the battle is universally acknowledged, a survey of many Waterloo accounts conveys the erroneous impression that most of the battlefield was flat and featureless. In fact, however, the terrain was rather uneven and the presence of a large number of gullys, plateaus, sunken roads and enclosed farms, provided many covered infantry positions and hindered the employment of cavalry on many parts of the battlefield. Because of the detailed nature of the game maps, the importance of terrain in Wellington's Victory is almost unparalleled among boardgames.
Perhaps the single most important concept for a Player to understand are the rules concerning Observation. Spend a half hour studying the Observation rules and working out hypothetical "observation problems" on the map. This will save both troops and playing time once you begin an actual game. Once the Player becomes familiar with the Observation procedure, he will seldom have to refer to it but will instead develop the ability to judge ground slope effects on Observation by eye. Nevertheless, at times it will prove convenient to have this procedure available on Map D as well as in the Rules booklet.
The second most important concept is an understanding of the effectiveness of firepower against formed troops. Exposed column or line formations will suffer grievously within the Fire Zone of either enemy infantry or artillery (there is almost no chance involved in inflicting losses on these Target Classes!). Thus, the Player must never unnecessarily expose formed infantry or cavalry within range of enemy artillery (see 17.2). Fortunately, there is an abundance of covering terrain which almost totally negates the effectiveness of firepower including Hard and Soft Cover hexes and hexsides as well as sheltered positions on descending slopes and/or the "dead ground" behind an elevation rise. All formed units should be held in such positions until needed.
The third important terrain effect concerns cavalry which cannot be effectively employed against units defending in Obstructed terrain hexes and is substantially less effective when employed in terrain frequently broken by Obstructed terrain hexsides (the majority of which represent steep-banked roads).
4) THE TACTICAL ROLES OF ARTILLERY, CAVALRY AND INFANTRY
As emphasized in my Designer's Notes, artillery firepower dominated the Napoleonic battlefield. This was primarily due to the limited range and mobility of formed infantry which was extremely vulnerable to artillery at ranges which precluded any effective response. Because artillery provides the major source of offensive and defensive firepower, it is always deployed on commanding ground whenever possible. An interlocking network of artillery Fire Zones is virtually impregnable against a frontal assault. Artillery is, however, extremely vulnerable to flank attacks, particularly when executed by cavalry. Because of its mobility, cavalry is the supreme shock weapon although like infantry, it is extremely vulnerable to artillery firepower. Because of its vulnerability, cavalry is unable to hold or occupy positions within the Fire Zone of enemy artillery. Thus cavalry is best utilized in direct support of advancing infantry and artillery which, as a combined arms force, succeeds in taking ground through a combination of shock and firepower. In both attack and defense, cavalry defeats infantry and artillery by maneuvering against the flanks of these slower formations, although its ability to do so is negated by the enemy's use of infantry square formations and interlocking Fire Zones.
Because of its vulnerability to firepower, formed infantry must be shielded by terrain and Friendly skirmish lines whenever possible. Defensively, the main role of formed infantry is to support its skirmish line and firmly occupy a position that must not be relinquished. In order to do this, the infantry must be adequately and closely supported by both cavalry and artillery. On the offensive, the infantry must be similarly supported while an advancing skirmish line provides both the shield and spearhead of the assault.
17.2 Tactics
The effective tactical employment of infantry, cavalry and artillery in Wellington's Victory is an extremely complex subject which can only be touched upon in the following few paragraphs.
From a tactical viewpoint there are basically four different types of units; cavalry, artillery, formed infantry and infantry skirmishers. Each of these has a completely different role to play. Most of the battle is going to be fought by the skirmishers, the cavalry and the artillery. Formed infantry, because of its vulnerability to fire must play a secondary, supporting role, at least until the enemy's firepower and Morale is sufficiently weakened by attrition.
When formed infantry must advance, it must do so in column formation (to ensure maximum mobility) and the Stacking limit must be exploited to the greatest extent possible. A French brigade column can be formed by detaching the brigade's skirmish companies so that 16-18 Troop Strength Points in battalion-sized formations can advance as a single stack. This reduces the number of targets the enemy can fire at to one; it simplifies Command Control; it retains maximum Shockpower and is easily screened by its detached skirmish companies. If one or two battalions are retained at full-strength and stacked at the top of the brigade column (which is also accompanied by a Command unit), the formation will possess a high level of Morale which can be retained during its advance by keeping a full-strength battalion in the topmost position of the stack. Of course, such columns should be spaced at intervals to preclude the communicability of a morale failure from one column to another. These intervals are filled by advancing cavalry, artillery and skirmishers to support the assault as well as guard the flanks of the heavy infantry formations.
Infantry tactics must also be suited to the specific types of terrain. In general, formed infantry is least efficient in either attacking or defending Obstructed terrain features like towns and woods. These objectives must be assigned to skirmish formations which retain a high level of Morale in Obstructed terrain and are thus extremely difficult to dislodge. A skirmish company (with ammunition) is impossible to rout when it defends a Hard Cover position like Hougomont (hex C2903). It can only be dislodged by Shock Combat which will be extremely difficult without very favorable "odds." In order to successfully assault such a position (assuming it is held by an adequate defending strength), it is necessary to isolate the garrison and thus prevent it from being resupplied with ammunition.
Line formation is the most effective fire formation but is ill-suited to Movement or Shock Combat. In addition, the Morale of most infantry is reduced in line formation. It is most effectively employed as a stationary defensive formation immediately behind an elevation rise. Square formation must be utilized against cavalry charges but will be unable to withstand any attack accompanied by supporting artillery. Skirmish formation is the most effective offensive and defensive infantry formation but detached skirmish companies are extremely vulnerable to cavalry in unobstructed terrain.
Cavalry is a short-winded, but highly effective assault weapon which can be used to disorder the enemy's line immediately prior to an attack by supporting Friendly infantry. The infantry, in fact, relies on the cavalry to destroy the enemy's skirmish and artillery defense and until this is achieved, an infantry assault is almost doomed to failure. It is important to emphasize the fact that infantry, cavalry, and artillery must always be coordinated in a successful advance. Because of the cavalry's short Opportunity Charge range, it must remain within two hexes of units it is responsible to support. Like infantry, cavalry is most effective offensively in heavy brigade-sized formations which carry tremendous Shockpower. Note, however that cavalry formations of more than nine Strength Points are classified as Massed Targets. Note also, that because cavalry must make a successful Morale check in order to charge, combat losses rapidly diminish cavalry's reliability. Thus, fresh regiments must be retained to lead brigade-level charges. Finally, cavalry should never be squandered against infantry squares or used in frontal assaults against steadily-manned artillery batteries. If conserved long enough, cavalry are the most effective arm to pursue and destroy a demoralized army.
Against a frontal attack, artillery is generally able to defend itself, assuming good crew morale. But, artillery can be rapidly destroyed by enemy cavalry or skirmish formations that attack the battery in flank. Thus, a battery's flanks should be guarded by Obstructed terrain and Friendly skirmish formations at all times. In open terrain, skirmishers provide little safety against cavalry and batteries are best protected by the Minimum Range Fire Zones of other Friendly batteries. Under no circumstances can a battery survive without the immediate support of Friendly infantry (and cavalry, if available). These supporting units, however, must be shielded as far as possible from the firepower of enemy artillery and/or the threat of enemy cavalry. Whenever within 12 hexes of the enemy, batteries should end the March Phase unlimbered and ready for action. A final hint concerns counter-battery fire. If you take the time to study the Relative Firepower Table, you will notice that this tactic should be used against the smaller Anglo-Allied batteries but is almost ineffective (and wasteful of ammunition) when employed against the larger French batteries. If this seems unfair, I suggest you skip the following Designer's Notes!
18.0 Designer's Notes
For openers, Wellington's Victory is, of course, a misnomer plagiarized from Beethoven's paean for the Duke's 1813 triumph at the Battle of Vittoria in Spain. In retrospect, it seems I continued to plagiarize quite freely while designing this game so I will immediately refer those interested in the game design to my sources which are listed in Case 19.0. At the outset, I would also like to acknowledge the help I received from all of the people whose names appear in the Design Credits. Throughout most of the year I spent working on it, the game continued to evolve and be immeasurably improved through the criticism and suggestions generously contributed by many playtesters and members of the SPI R&D staff.
Getting down to nuts and bolts, I will begin by saying that I cannot claim that Wellington's Victory is an accurate simulation of the Battle of Waterloo. Like Wellington, I believe that an accurate account (much less a game) never has or will be produced on the subject of Waterloo. No soldier, historian, or game designer knows or fully understands exactly what occurred that Sunday afternoon more than a century and a half ago. All I can therefore claim is that the game accurately reflects my own carefully constructed interpretation of the events of June 18, 1815. I am grateful that our exhaustive playtesting indicates that when the game is played effectively, it does in fact resemble a reasonably accurate working model of the actual battle. Which is not to say that the game slavishly recreates an inevitable historical result. To my own surprise, after months of playtesting which produced an almost unbroken string of Allied victories, I was soundly defeated commanding Wellington's forces in the full-length historical Scenario by a French Player who correctly utilized Napoleon's tactics and simultaneously avoided the grand tactical errors which cost Napoleon his empire. Thus, despite its title, the game offers both the Wellington Player and his opponent a fairly equal chance for victory. I must admit, however, that play balance was never a high priority in terms of the overall design of the game. From the outset I was primarily concerned with the game as a teaching device which would enable Players (including myself) to gain a better understanding of the nature of Napoleonic battle tactics. Although I was well acquainted with Napoleonic military history and the interpretation of Napoleonic tactics reflected in numerous "miniatures" rulebooks, I found many unanswered questions when I actually began my own attempt to translate these tactics into game mechanics suitable for the "cardboard armies" which would eventually be deployed on the Wellington's Victory map. Unfortunately, despite considerable research, I was forced to formulate my own answers for most of the questions I raised. Thus, the game is almost totally the product of my own "educated" guesswork. This guesswork has at least helped me to better understand those remarkable passages that dramatically describe the confrontation between the enthusiastic bluecoated columns and the ominously silent redcoated lines that awaited them at Waterloo. I hope the game, despite its myriad abstractions, simplifications, and probable distortions, will similarly illuminate its subject for many other gamers interested in this era.
A Napoleonic battle like Waterloo was an exceedingly complex affair. A victory like Wellington achieved required a masterful appreciation of terrain; careful coordination of infantry, cavalry and artillery as equally effective arms; a precise sense of when to withhold and when to commit the all-important but usually scant reserve formations, and, above all, a realistic appraisal of the Enemy's capacities, the ability to divine his intentions, and the unerring capacity for selecting the appropriate countermeasure. The intent of Wellington's Victory is to demonstrate how these considerations determined the outcome of history's most remembered battle.
Having outlined my interpretation of the decisive characteristics of a Napoleonic battle, we can now examine the game design as it is reflected in the rules booklet.
Note: The following Designer's Notes sub-sections are numbered by the designer to correspond to the rules sections they discuss (2.1-2.5 correspond to Case 2.0, Game Equipment).
[2.1] The Game Map
was the second component I designed which like the Relative Fire Table (which was the first) was never revised. For good reason. The original playtest map, based on Fortescue's atlas map with a scale of 100 yards to the hex, required almost a month of full-time labor. In addition to this immense amount of labor, translating the Fortescue map onto a hex field required some distortion, so do not take the map too literally. Actually, the minor distortion which resulted from superimposing a contour map on a hex grid is far outweighed by the ability to portray terrain effects on observation more naturally. Notice I said naturally, not "more realistically." The observation rules are probably no more realistic than those achieved by employing more conventional map symbology such as ridge and/or crest hexes and hexsides. The simple fact is that I have never been able to relate that terminology to nature and I suspect many Players share this problem since despite its common usage, Line of Sight rules based on blocking terrain crest and ridge hexsides have produced cabinets of game questions. The contour map used here, in conjunction with the (hopefully) simple Observation procedures, is a new alternative. As the required artwork is quite difficult and expensive, I hope Players find this effort worthwhile.
The other map features are also handled rather differently. The concept of Hard and Soft Cover had already been evolved when the Relative Firepower Table was designed. The broken terrain features which disorder formations and frustrate cavalry evolved from cross-referencing the details of various battle accounts with my own extensive library of Napoleonic "miniatures" rules. Of course, even the "miniaturists" were bypassed by my liberalization of terrain effects on charging cavalry and skirmish formations. Summarizing, the map reflects my preference which is not to torture Players with having to memorize a wide variety of terrain effects and different Movement Point costs. As one of my favorite designers often says, "It all comes out in the wash anyway!"
[2.2] The Game Charts and Tables
are individually complex but are few in number and are conveniently printed directly on the map which is indicative of another of my prejudices. The map area utilized for these charts was similarly used for the Key and Scale of the original source map and the deleted terrain was not contested on June 18 in any case. Unfortunately, no similar space was available on the north edge of the map, thus the Combat Tables have been reproduced on a separate sheet for the convenience of the Allied Player. The conceptualization of these Tables is discussed in later sections of these Notes.
[2.3] The Playing Pieces
are probably the most complex design employed to date in a boardgame. While writing this, I have yet to see an example of the finished components but I trust that the tremendous artistic effort exerted for Wellington's Victory will reward Players with a countermix so colorful and attractive that they will be extremely reluctant to duplicate Napoleon's "cannon-fodder" tactics.
[2.4] The Definition of Terms
section of the rules introduces many of the most important design features of Wellington's Victory including the concepts of Effectiveness and Class Ratings used to reflect qualitative difference between units of the same type.
[2.5] The Game Scale
was simply determined in accordance with effective fire ranges while the time scale of 15 minutes per Game-Turn was chosen to promote a proper tempo for grand tactical decisions such as Brigade Commitment.
[3.0] Setting Up the Game
invokes two comments. First, I am glad that the four map sections can be connected without requiring the Player to trim the overlapping borders. I am unhappy, however, over the fact that we could not provide a Scenario which can be played on a single map section (I hope you have a large dining room table and are planning no dinner parties for the foreseeable future).
[4.0] The Sequence of Play
is undoubtedly the most controversial aspect of Wellington's Victory and was probably the most difficult element to design. As it is assymetrical, it is not only difficult to adapt to, but is also vulnerable to criticism from many who will perceive it as favoring either Wellington's or Napoleon's plan of battle. The truth is that it favors as well as undermines both of the opposing armies in distinct but subtle ways. The main justification for the assymetrical sequence stems from Wellington's commanding ridge-top position which permitted him to observe and react to every French threat as it occurred. The French disadvantage of moving first in the game (which then allows an Allied reaction prior to the Reciprocal Fire Phases), is actually less damaging than Napoleon's historical situation in which he was completely unable to observe the strength and position of the Allied units which Wellington would direct against each French thrust. Moreover, the assymetrical Sequence hinders Wellington as well by ensuring that the Anglo-Allied cavalry retain a basically defensive posture lest it be exposed to the awesome French artillery while preparing to charge. In contrast, the proper employment of the "freezing effect" of a French cavalry charge can totally negate the Allied infantry's capacity to react against the French combined arms assault. Thus, both Players operate within an appropriate framework to solve the differing problems their counterparts faced at Waterloo.
There are other interesting aspects to the Game-Turn Sequence such as the positioning of the Enemy Shock Combat Phase immediately after the Friendly March Phase. This concept, inspired by the similarly unusual Play Sequence of Frederick the Great, heightens the game's sense of simultaneity and completely replaces the more commonly employed Retreat Before Combat sub-system. The equally unique Facing/Formation Phase which I borrowed from miniatures rules greatly simplifies the usual system of requiring the expenditure of Movement Points for tactical maneuvers involving Facing and deployment. More importantly, it provides a proper framework for interrelating the reaction of infantry formations facing the threat of an Enemy cavalry charge. In summary, I expect the acceptability of Wellington's Victory will depend heavily on how Players react to its unusual Sequence of Play. I hope Players react favorably to this Sequence which forced its way into the game system despite the designer's heroic efforts to utilize a simpler, easier-to-assimilate, alternative.
[5.0] Movement
concerns the units' ability to enter Enemy Fire Zones for the purpose of self-destruction. Seriously, there are few new tricks employed here apart from Grand Tactical Movement which reflects the serene and steady advance of forces safely out of range of the Enemy. Unlike regular Movement which is considered to consume only one-third of the 15 minute Game-Turn, Grand Tactical Movement reflects more time spent in motion and less time spent reluctantly treading over the corpses of fallen comrades. Movement allowances are small and standardized because, among other reasons, everyone was strolling through shoulder-height crops and knee-deep mud and the atmosphere at the height of the battle probably made a blast furnace feel cool in comparison.
[6.0] Facing
forced another innovation when the designer realized that men firing at an oblique target from the second and third ranks of a battalion-sized formation would rapidly find themselves in the leading rank where they in turn would be peppered by those behind them. Furthermore, in adopting a two-hexside Facing, it became possible to more accurately distinguish the flanks of formed units which permitted a battalion to deploy into line formation on either its left or right flank with the aid of an Extended Line Formation Marker.
[7.0] The Formation Rules
reflect a wealth of information the bulk of which, unfortunately, cannot be substantiated from historical accounts unless one is willing and able to "read between the lines." Prior to Wellington's Victory, the subject of Napoleonic formations was consistently avoided by boardgame designers probably because there is so little trustworthy information available on this subject. On the other hand, there appears to be an abundance of misinformation and naivety concerning the tactical dexterity displayed on the Napoleonic battlefield. It is surprising to learn, for example, that Wellington's infantry spent most of the day in column or square formation, foresaking the famed British linear deployment except for brief crisis periods. Similarly, the histories emphasize that Napoleon's infantry abandoned the use of massed columns immediately after D'Erlon's unsuccessful assault and spent the remainder of the day harassing the British with annoying skirmish tactics supported by repeated cavalry charges and an almost incessant artillery bombardment. Moreover, this was no single aberration but was in fact typical of the infantry's role on the artillery dominated Napoleonic battlefield. The simple fact is that artillery made the employment of massed infantry formations suicidal as confirmed by the Prussian casualty toll at Ligny, two days prior to Waterloo. Wellington's realization of this fact formed the basis of his invariable reverse slope deployment which ensured his infantry a safe position out of view of the French artillerists.
In Wellington's Victory, the Formation and Fire Combat rules accurately convey the weakness and vulnerability of formed infantry units on a battlefield dominated by artillery, cavalry, and the ubiquitous hordes of infantry skirmishers. The fancy tactical evolutions which we missed in La Bataille de la Moscova will rarely be employed in Wellington's Victory once Players realize the problems inherent in deploying under fire or adequately protecting the flanks of the otherwise invulnerable "thin red line."
Of course, the treatment of both infantry and cavalry formations is simplified for the sake of playability. It would have been possible, for example, to include both line and column cavalry formations although the French cavalry never deployed during their infamously futile charges at Waterloo. Because the congested and broken terrain quickly disorders most cavalry charges in the game, the added complexity of linear cavalry formations was deleted while the Effectiveness Rating of the British and KGL light cavalry (which did charge in line) was raised to reflect the advantage of this superior formation. The unarmored British heavy cavalry retained an Effectiveness Rating equal to their armored French counterparts despite the linear formation the British probably adopted during their brief but decisive charge which shattered D'Erlon's Corps.
[9.0] Stacking
up to eighteen Strength Points per hex, although realistic, would certainly present a problem if Players frequently exploited this rule on restricted frontages. The game system, however, makes it highly unprofitable to advance massed formations on contiguous hexes as it increases the likelihood for a rout of truly epic proportions. Thus, I don't foresee any major physical problem arising from the rather generous Stacking limit. There are two or three other points which require a brief explanation. First, the brutal effectiveness of firepower against formed units made it unnecessary to deal with the penetrative effect of long range artillery fire. Second, the relaxation of the Stacking limit according to Case 9.13 will rarely be used and was only included to allow Players to reproduce the type of tactical blunder the French initiated at Blenheim. Finally, the rather ambiguous prohibitions upon the stacking of line formations was a simple way of dealing with the problems of interpenetration (i.e., the designer frowns on the practice of allowing units to advance through Friendly linear formations without some form of penalty).
[10.0] The Terrain Rules
were simply a lot of fun to write. Unfortunately, they aren't as much fun to read. Seriously, I tend to be a rather lazy designer and after conferring with Rich Berg and Terry Hardy concerning the system they used to divine the ridge lines on the Terrible Swift Sword map, I decided to use a contour map. One month later, I wished I had listened to Berg and Hardy, but it was too late. So now I had a map. All I needed were some Line of Sight rules. Ultimately (and I mean ultimately!), I came up with the Observation procedure which no one has read from beginning to end and lived to tell about. I think it works. Who knows? The other terrain features are more difficult to explain, but I'll try. The Hard and Soft Cover hexes simply represent either buildings or wooded terrain. Most of the Soft Cover hexsides along roads represent embankments adjoining sunken stretches of road. These sunken roads varied between two and twelve feet in depth and were serious obstacles to cavalry and formed infantry. In fact, the presence of these obstacles restricted the French cavalry attacks to the easternmost section of Wellington's line where they were repeatedly shattered by the combined firepower of the British horse artillery and the Allied infantry squares. The road movement exemption in Case 10.25 recognizes the fact that although the secondary roads (which are actually farm tracks) were rain-soaked, they were relatively free of cow manure, unlike the surrounding pastureland. The Lasne and Smohain streams were probably swollen in the wake of the downpour of June 17-18 and are therefore considered impassable. In any case, after sleeping in a puddle all night, there were probably very few volunteers willing to try and locate fording sites.
[11.0] The Relative Firepower Table
is probably the most elegant and accurate feature of Wellington's Victory. The playtesters, all of whom play Napoleonic miniatures, liked the table so much that they are planning to incorporate a similar table (possibly using percentage dice) for use in miniatures games. For Wellington's Victory, however, the single die table furnishes accurate results according to my major source on the lethality of Napoleonic firepower (a book entitled Firepower by Major General B.P. Hughes). This recently published book provides detailed analyses of several firefights which occurred between French and British formations during the major battles of the Peninsular War. The conclusions drawn in Firepower (which appear to be corrroborated by many less detailed historical accounts) resulted in the startling firepower of infantry and artillery in Wellington's Victory. This, in turn, made it possible to drop the "gang bang" multiple unit fire attack, and instead depict the "one on one," volleyfight between individual battalions. Thus, Fire Combat becomes a contest of firepower and Morale between opposing individual battalions rather than a laborious process of "counting rifles" to ensure that each attack is executed at the most advantageous "odds," or Combat Differential.
Surprisingly, the Relative Firepower system utilized in Wellington's Victory is very similar to the Firefight Combat system which was independently developed simultaneously at SPI. In any case, I am extremely glad to see alternatives to the more mathematical systems for Combat resolution (although I am sure the computer-programmers are currently preparing a major counteroffensive).
[12.0] The Shock Combat Rules
are a good example of bad design work! All of the complexity and additional playing time which was excised by the Relative Firepower Table eventually reappeared in the Shock Combat mechanics. From the outset I knew that the toughest design problem concerned the interrelationship of infantry and cavalry. Like you, I had played many boardgames where the Sequence of Play permitted infantry to occasionally surround cavalry. So, for Wellington's Victory, the Sequence of Play and the Shock Combat mechanics were viewed as interrelated problems. In designing the play sequence, I decided that 1) cavalry must be able to withdraw from a charge before being molested by Enemy infantry; 2) the Morale and mobility of infantry formations must be tempered by the threat of charging cavalry; 3) cavalry's ability to charge must be restricted both in terms of spontaneity and frequency. Once an appropriate play sequence was formulated, I began to work on the Shock Combat Table itself. I knew I wanted to portray Shock Combat as a "Morale showdown" rather than a freewheeling melee so the first decision mandated that Shock Combat would be resolved while opposing units occupied adjacent hexes. The conceptualization of the Shock Combat Table (using "odds" to account for the numerical disparity between attacker and defender and a Differential to account for qualitative disparity) took quite a while but ultimately fulfilled my requirements in the simplest possible format. The system as a whole, however, including Charge Zones et al, is top heavy and time consuming although cavalry charges are rather exciting to resolve when they finally occur during the Shock Phase. The only features I really admire are the restraints which reduce cavalry's overall potency and maneuverability and the optional rule permitting Command units to "spot" for Friendly cavalry.
[13.0] The Morale Rules
were derived from a variety of Napoleonic miniatures rulebooks but were greatly simplified to fit the context of a grand tactical boardgame. Unit morale based on an assigned Effectiveness Rating provides a simple method for making Morale checks and interrelating both the strength and quality of a unit to determine its reliability in combat. Because of the grand tactical game scale, the units in Wellington's Victory are considerably more brittle than their miniature counterparts. The fact is that even the Imperial Guard battalions were broken in a firefight of only three minutes duration. Infantry battalions of lower quality often routed before suffering any appreciable loss. The communicability of bad Morale from one unit to another is also an important factor of the Morale rules. Although the disintegration of the French Army following the repulse of the Guard infantry was singular to Waterloo, it was common for entire brigades or divisions to react unfavorably due to the morale failure of a single battalion. In contrast, veteran battalions were rarely unnerved by the flight of green recruits thus the communicability of morale failure is restricted to units of the same or inferior quality.
[14.0] The Concepts of Command, Army Morale, and Brigade Committment and Deactivation
introduce the main grand tactical problems which characterized a major Napoleonic engagement. The importance of army endurance and fatigue are particularly appropriate to Waterloo due to the fact that most of the participants had hardly eaten or slept during the preceding 24 hours. Thus fatigue is a major cause of Army Demoralization. Although treated abstractly, the interrelation of Brigade Committment and fatigue is probably the design feature which contributes most to the overall "flavor" and historical accuracy of the game.
The Command Control rules presented some difficulties due to the unorthodox organization of Wellington's army, however, the simulated chain of command ensures that brigades retain some degree of geographical unity and also depicts the time lag involved between the transmission and execution of orders.
The calculation of Army Morale was based on a formula which awarded one Morale Point for each Class 3 battalion, two Morale Points for each Class 2 battalion, and three Morale Points for each Class 1 battalion. Light cavalry regiments were valued at one Morale Point and heavy regiments at two. Each artillery crew added one Morale Point to an army's Morale total. The total number of Command Points in each army was halved and added to the Army Morale total. The final totals were then adjusted for possession of geographical objectives and the army's fatigue state prior to the start of a given Scenario. For example, both the French and Prussian armies lost Morale Points to reflect the exertion of component units which had to march varying distances to reach the field of battle. In a small way, this example is indicative of the great quantity of data which underlies many aspects of the game design which, unfortunately, could not be fully detailed in these Designer's Notes.
In summary, the production of Wellington's Victory involved an immense amount of time and labor which (hopefully) will reward Players with an enjoyable and instructive gaming experience. Because of the high production cost and the playability problems inherent in large games like Wellington's Victory, they appear to be a breed of dinosaurs that may soon become extinct. I sincerely hope, however, that the hobby will continue to support such major design endeavors which simultaneously attempt to elevate both the state of our art and our understanding of complex and compelling historical events like the Battle of Waterloo.
19.0 Bibliography
Research for Wellington's Victory utilized a wide variety of sources. Only the most valuable references are listed below.
19.1 Historical Accounts
History of the War in France and Belgium in 1815 by Capt. William Siborne. Napoleon and Waterloo by Capt. A.F. Becke. Wellington at Waterloo by Jac Weller. History of the British Army. Vol. X and Atlas by J.W. Fortescue. 1815, Waterloo, Vol. 2 by Henri Houssaye. Journal of the Waterloo Campaign by Gen. Cavalie Mercer. The Campaign of Waterloo by J.C. Ropes. Waterloo: A Near Run Thing by David Howarth. Men of Waterloo by John Sutherland.
19.2 Tactical Background
The Background of Napoleonic Warfare by R.S. Quimby. Studies in the Napoleonic Wars by Sir Charles Oman. The Face of Battle by John Keegan. The Transformations of War by Commandant J.L. Colin. The Campaigns of Napoleon by David Chandler. Firepower by Major Gen. B.P. Hughes. Cavalry in the Waterloo Campaign by Sir Evelyn Wood. The Prussian Army 1808-1815 by David Nash. French Napoleonic Line Infantry by Emil Bukhari. Napoleonic Organization: The Wargamer's Library, Vol. II and III by Ray Johnson.
19.3 Games and Simulations
Terrible Swift Sword published by Simulations Publications, Inc. La Bataille de la Moskowa published by Martial Enterprises. Empire by Scotty Bowden and Ken Ray. The Column, Line, and Square Battle Manual by J. Bauman and F. Vietmeyer. Frappe! by Ray Johnson. Napoleonique by Jim Getz. The Napoleonic Wargame by G.W. Jeffrey. Nopoleonic Wargaming by Bruce Quarrie. Napoleonic Wargaming by Charles Grant. Grand Army by Don Lowry and Peter Rice.
Countersheet Errata
The "0" Combat Strength indicated on the front of the French Command unit Letort (2/HC/IG) is an error and should be ignored.
Note: this 27-page Rules of Play booklet (Sections 1.0-19.0, plus Design Credits and Countersheet Errata) is transcribed here in full. The scanned file also includes two additional map-printed reference sheets — the French Army Initial Deployment display and the Anglo-Allied Army Initial Deployment display — which list every counter's starting hex and are keyed to the physical die-cut counters and mapsheets rather than containing rules text; they are not reproduced here.*