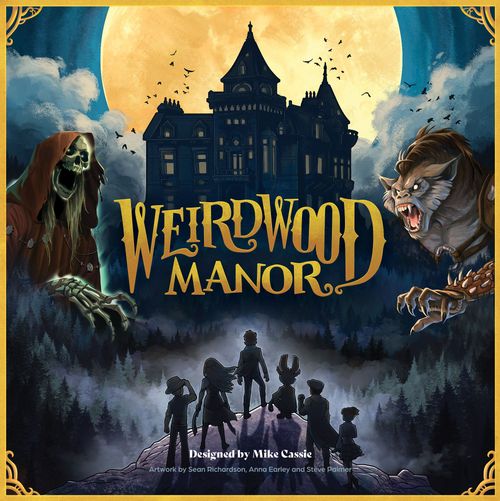
Weirdwood Manor
Weirdwood Manor Rulebook
Table of Contents
Table of Contents
Game Components
Board Components
- Dual-layer Folding Game Board Halves
- Day Corridor Ring Pieces
- Time of Day Corridor Ring
- 13 Outer Room Tiles
- 13 Middle Room Tiles
- 6 Inner Room Tiles
Player Components
- 6 Character Boards
- 6 Character Action Card Decks (13 cards per deck)
- 6 Cardboard Standees
- 5 Player Aids
- 5 Tracking Cubes for XP Power Track
- 5 Tracking Cubes for XP Tactics Track
Monster Components
- 3 Fae Monster Boards
- 20 Chaos Ogre Cards
- 20 Mîn Wraith Cards
- 20 Therus Cards
- 3 Cardboard Standees
- 5 Rubble/Fire Tiles
Miscellaneous Components
- Room Dice (d12 and d6)
- 8 Balanced Dice
- 10 Attack Dice
- 6 Defense Dice
- Mîn Wraith Die
- 48 Red Tracking Cubes (for dice, health, XP Battle track & other tracking)
- 15 Balanced Die Cubes
- 10 Defense Die Cubes
- Lady Weirdwood Cardboard Standee
- 26 Warden Tactic Cards
- Hit Battle Tracker Token
- Block Battle Tracker Token
- Group XP Tracker Token
- 25 Power Tokens
- Resources: 30 Mín Tokens, 30 Knowledge Tokens, 50 Clockwork Scarab Tokens (Mín is like mana!)
- 18 Companion Cards
Game Setup
Board Setup
These setup rules are for the default mode for the game. However, if you wish to play a slightly easier, family-friendly game, see Group XP Variant, page 22.
A
- Assemble the two halves of the main board.
- Randomly place 11 outermost room tiles in the outer ring.*
- Assemble the 4 pieces of the Day Corridor Ring on the board. Orient it so that Day 1 is at the top of the board (the gold rooms).
- Randomly place 11 middle room tiles in the middle ring.*
- Place the Time of Day Corridor on the board and orient it so that the first Morning spot is at the top of the board.
- Randomly place 5 inner room tiles in the inner ring.*
- Shuffle and place the Companion Cards near the board and deal out 4 face-up.
- Shuffle and place the Warden Tactic Cards in a face-down deck near the board.
- Place all other tokens in piles near the board: Scarabs, Mín, Knowledge, Power Tokens, and Battle Die cubes.
- Place all the Battle Dice and the Room Dice near the game board.
- Place 6 Scarabs in the indicated spaces in the Throne Room.
- Place 1 Scarab in each room in the inner ring of rooms surrounding the Throne Room.
- Add 3 additional Scarabs to the game board. Roll the Room Dice 3 times and place 1 Scarab in each room rolled, with the following exception: do not place a Scarab in a room that already contains a Scarab. In that case, roll the Room Dice again until you roll a room with no Scarabs in it.
* For your first few games, we recommend using only the base game room tiles (remove any room tiles with "E" on the back of the tile near the Blight cost). In the future, you can mix and match all rooms as you like to change the game experience.
Player Setup
B
- Each player will choose a character to play, taking the corresponding player board and place it face-up in front of them. The back of the each board has helpful information to aid in choosing and playing that character.
- Take 4 Tracking Cubes and place a red one on the highlighted starting health space (so the character has 3 Health) and on each of the Start spaces on their XP Tracks (a red cube for the Battle XP Track, a purple cube for the Power XP Track and an orange cube for the Tactics XP Track).
- For Wally, take one additional red Tracking Cube and place it on the zero space on his Thief's Gauntlet.
- For every character (except Wally), place one blue Balanced Die Cube on the bottom space of your Battle Dice track, representing the fact that you start the game with one Balanced Battle die.
- Players place their standees on the main game board, in the Entrance Hall.
- Take any starting Power or Resource tokens as indicated on your player board.
- Take your corresponding deck of Action Cards and pull out the Shadow Steps card and set it aside. Then shuffle your remaining 12 cards and draw 2 cards. Add those to Shadow Steps to form your starting hand of 3 cards (your hand limit will always match your current health).
- Set your remaining deck face down to the left of your player board as your draw pile.
Fae Monster Setup
C
- Select one Fae Monster to play against and follow their Setup Rules found on the back of their board and in this rulebook (see Fae Monster Rules, page 15). For your first play-through, we recommend playing against the Chaos Ogre.
You are now ready to begin playing the game.
(Chaos Ogre Setup, page 16; Mîn Wraith Setup, page 18; Therus Setup, page 20.)
Tip: Rotating the Corridor Rings
When rotating either of the corridor rings, we recommend placing one or two fingers on the corridor with a bit of downward force and gently dragging in the direction you want to turn the corridor, following the curve of the corridor.
If the corridor ring starts to stick, lift up your fingers and start over again from the opposite side of the corridor or just slide your fingers gently along the top of the corridor ring until it starts to move again.
With continued plays, the corridor rings will continue to get easier to rotate. Still need help? Visit the Greyridge Games website at greyridgegames.com to view a how-to video.
Tip: Repacking the Game
Need help repacking the game in its insert? Visit the Greyridge Games website at greyridgegames.com to view a how-to video.
Gameplay Outline
Choose a first player (we recommend the player who last did something that seemed magical). They will begin by taking their first turn. Turns will then continue in a clockwise fashion until the game ends with the players either collectively Winning or Losing the game.
Losing the Game
The game ends immediately and the players lose as soon as any of these Losing Conditions occur:
- Time Runs Out. If the players must move the Day Ring from Day 12 back to Day 1, they have not saved the Manor in time and they lose.
- Any Fae Monster loss condition triggers, as follows:
Chaos Ogre
- Blight Threat. If the players must move the Blight Threat tracker to the last spot as indicated on the Chaos Ogre board, they immediately lose.
- Lady Weirdwood's Health. If the players must move her health to its lowest value, they immediately lose.
Mîn Wraith
- Lady Weirdwood's Life Force. If the Mîn Wraith drains her life force completely, the players immediately lose.
Therus the Dark Mage
- Lady Weirdwood becomes corrupted. If the players must move Lady Weirdwood to the last left-most space on the corruption track, the players immediately lose.
Winning the Game
To win the game, the players must reduce the Fae Monster's health to 0 before any Losing Conditions occur.
Player Turn
On your turn, you have one mandatory action you must take and a variety of additional optional actions you may choose to take.
Mandatory Action
You must play an Action Card on your turn. You can play your Action Card at any point on your turn. For example, you might use any number of Optional Actions before playing an action card.
These cards will give you access to a variety of actions during the game, each of which is explained under Player Actions, page 10.
To Play an Action Card
- Select an Action Card from your hand.
- If that card has a resource cost (all resource costs in the game are always shown in red), you must pay that cost before playing the card.
- Then, place the Action Card face-up or face-down to an empty Time of Day Slot above your player board or recruited Companion.
- Next, advance the Time of Day on the main game board, according to the Time of Day slot you played the card to (see Time and Advancing Time, page 9).
- If you played the Action Card face-up, resolve the actions on the card (see Resolving Card Actions, next column).
- If you played the Action Card face-down, you can choose to either: perform one Move action, perform an Attack action in your current room, or gain any 1 resource (Mîn, Knowledge, or Scarab).
Resolving Card Actions
If you played your Action Card face-up, you will resolve the actions on your played card. All actions on a card are optional and can be performed in any order.
Example — Resolving Card Actions: Lightfooted Feint allows for two Moves and an Attack. You could decide to Move, Attack, and then Move again. Or Move (once or twice) and not Attack — or any other combination that suits your strategy.
Persistent Card Effects
Most Action Cards provide actions you take immediately when playing the card, but some cards provide persistent effects that remain in play as long as the cards remain in play. These persistent effects are:
- Hit Icons. Each hit icon adds one hit for the player when they are in battle.
- Block Icons. Each block icon adds one block for the player when they are in battle.
Gaining Icon Bonuses
Most Action Cards have icons in their top left and right corners that can give additional bonuses to you. On your turn, you'll receive the bonus of any matched icons between cards currently played in your Time of Day slots.
The possible bonuses are:
- Add one Hit in battle
- Add one Block in battle
- Pay one less Mîn when paying a cost
- Pay one less Knowledge when paying a cost
Mîn and Knowledge Bonuses
In the case of resource bonuses (Mîn and Knowledge), you reduce the cost of something you are paying for by the number of the matched bonuses you have.
Example — Mîn & Knowledge Bonus Icons 1: You are playing Bailey and on your turn you want to use Bailey's Burbit Book Jump power which costs 1 Power Token, 1 Knowledge and 1 Mîn (all resource costs in the game are always shown in red). You currently have a bonus of 1 Knowledge matched from Actions Cards you have played, so to use Bailey's Book Jump power, you only have to pay 1 Power and 1 Mîn.
Example — Mîn & Knowledge Bonus Icons 2: You end your movement in the Forge Arcanum and decide to forge 2 dice. One die costs 2 Knowledge and the other costs 1 Mîn and 2 Knowledge. You will need to pay a total of 1 Mîn and 4 Knowledge for the dice. However, you currently have a bonus of 2 Knowledge matched from Actions Cards you have played. So, you can reduce your total cost by 2 Knowledge, paying only 1 Mîn and 2 Knowledge for your dice.
Hit and Block Bonuses
In the case of matching Hit and Block icons, you gain those additional Hits and Blocks anytime you are in a battle, as long as the matching Action Cards are still in play.
Example — Hit & Block Bonus Icons: You are battling some Scarabs in your current room. You roll your battle dice and get 2 Blocks and 1 Hit. However, you have a matching bonus Hit from Actions Cards you have played, so you add that additional Hit to your rolled results for a total of 2 Blocks and 2 Hits.
Matching Wild Bonuses
Some cards have wilds as their bonus icons, which will match any other icon. Further, it is sometimes possible to match 2 wilds, in which case you can choose any bonus you wish, every time you battle or pay for something.
Example — Wild Bonus Icons 1: You are battling some Scarabs in your current room. You roll your battle dice and get 0 Blocks and 3 Hits. You have enough hits to defeat the Scarabs, but have no Blocks to block any hits they roll, so you decide to add 1 Block for your matching wilds.
Example — Wild Bonus Icons 2: You are going to recruit a Companion which costs 2 Knowledge and 1 Mîn. You have lots of Knowledge resources in your personal supply, so you decide to use your two matching wilds as 1 Mîn when paying for the Companion, thus you only pay 2 Knowledge from your personal supply to recruit the Companion.
Optional Actions
There are a number of optional actions you may take during your turn. Each of these is explained under Optional Actions, page 14.
Ending Your Turn
After you are finished resolving your Mandatory and Optional Actions, you must end your turn in this sequence:
1. Resolve Monster Cards
Each Fae Monster in the game has their own set of cards and corresponding actions and may require some number of their Monster Cards to be resolved at the end of your turn. Each Fae Monster has their own rules for resolving their cards and these can be found under their specific rules in this rulebook (see Fae Monster Rules, page 15). Refer to those rules for how to resolve their card(s) at the end of your turn.
2. Reset Action Cards
If you no longer have any empty Time of Day slots above your player board or recruited Companions, you must Reset your Action Cards.
To Reset Action Cards, follow this sequence:
A. Perform a Scarab Phase (see The Scarab Phase, page 8).
B. Discard any played Warden Tactic Cards. Take any Warden Tactic Cards you played on top of Action Cards and return them to a common discard pile near the Warden Tactic Deck.
C. Move all played Action Cards to a face-up discard pile near your Action Card draw pile.
D. Refresh any exhausted Companions.
Note that you can always choose to Reset your Action Cards while you still have open slots available if you so choose, but of course this will mean performing a Scarab Phase more often in the game (which is never good).
3. Check Actions Cards In Hand
Draw back up (or discard down) to your Hand Limit (which is equal to your current Health) so that you have the correct number of Action Cards in hand.
When drawing up, draw the appropriate number of cards from your face-down draw pile and add them to your hand. If you run out of cards in your draw pile, shuffle your discard pile and place it face-down near your player board and then draw the remaining card(s).
When discarding down, choose the appropriate number of cards from your hand and place them face-up in your discard pile.
Scarab Phase & Spawning
The Scarab Phase
The Scarab Phase occurs at the end of a Player's turn, when they Reset Their Action Cards and can sometimes occur when resolving certain Monster Cards.
In either case, when a Scarab Phase occurs, existing Scarabs will attempt to skitter towards the outer rooms of the Manor as connections allow, and new Scarabs will infest any empty, innermost rooms. Follow these steps to execute a Scarab Phase:
1. Move Middle Ring Scarabs
Starting at the Terrace of Temporal Rifts room and continuing clockwise on that ring, perform these steps for each room that has Scarabs in it:
A. Move all Scarabs in the room outwards to the room directly across the corridor if both rooms are connected (i.e. both doors are open).
B. Otherwise, if the Scarabs' current room is open to the outer corridor, move those Scarabs into the corridor and then clockwise to the next connected outer room.
C. Otherwise, if the Scarabs' room is not connected (i.e. not open) to the outer corridor, leave the Scarabs in their current room.
2. Move Inner Ring Scarabs
Follow the same procedure as Step 1, but this time beginning at the Fae Breach room and continuing clockwise on that ring, moving Scarabs outward into the Middle Ring Rooms.
3. Spawn Scarabs
A. Add 1 Scarab to each inner ring room that does not have any Scarabs in it.
B. Add 1 Scarab to one empty space of your choice in the Throne Room if there is at least 1 Scarab space already occupied by a Scarab.
This rule means that if the players ever Defeat all Scarabs within the Throne Room, no new Scarabs will ever spawn there for a Scarab Phase or for any Monster Cards for the rest of the game.
4. Flip Blighted Rooms
During this process, if there ever are 2 or more Scarabs in a room, flip the room to the Blight side (see Blighting Rooms, next column). If playing against the Chaos Ogre, update the Blight Threat Tracker (see Blight Threat, page 16).
Example — Rolled Room Spawning 1: If you rolled a 3 and the Outer Rooms Ring, you would spawn a Scarab in the outermost room, located wherever Day 3 currently is.
Example — Rolled Room Spawning 2: If you rolled a 4 and the Inner Rooms Ring, you would spawn a Scarab in the innermost room, located wherever Day 4 currently is. In this case, there are 2 rooms equally at Day 4, so you always choose the room clockwise from the rolled day.
Spawning in the Throne Room
Whenever you are instructed to spawn a Scarab in the Throne Room and there are no Scarabs left in that room, do not spawn a Scarab. Once the players clear the Throne Room of all Scarabs, no more Scarabs can spawn there for the rest of the game.
Other Spawning
Other events can require you to spawn Scarabs during the game when you encounter these icons:
- Roll the room dice and spawn a Scarab in the rolled room.
- Spawn a Scarab in the Fae Monster's current room.
- Spawn a Scarab in the room relative to the Fae Monster's current location.
Blighting Rooms
At any point during the game when Scarabs move or spawn, if that results in 2 or more Scarabs within a room that is flippable (i.e. not glued down), you must Blight that room. Remove anything in that room, flip the room tile over to the other side, and return all previously removed items back to the Blighted room.
You cannot use the room action of a room when it is Blighted (see Using Room Actions, page 12).
It is possible to clear a room of Blight (see Clearing Room Blight, page 13).
Time & Advancing Time
Time is divided into 12 Days and 4 Times of Day: Morning, Afternoon, Evening, Night.
The current Day and Time of Day are indicated by the 2 gold icons at the top of the board. At the beginning of the game, it is Day 1 and the Time of Day is the first position of Morning (each Time of Day has 3 positions: first, second and third).
Many actions in the game require players to move time; most advance time and some rare and special actions can reverse time.
To Advance Time, players will turn the Time of Day Corridor ring counter-clockwise (as indicated by the arrows on the ring) the appropriate number of spots — and occasionally the Day Corridor as well.
In rare cases when players are able to Reverse Time, they will turn the Time of Day Corridor ring clockwise (and sometimes the Day Corridor ring as well) the appropriate number of spots.
Advancing a Set Number of Spots
When encountering actions that require a player to Advance or Reverse the time by a set number of spots, these will be indicated by a number of advance or reverse icons or by text directing you to advance or reverse the time by "x number of spots".
When you encounter these as part of gameplay, you must turn the Time of Day Corridor the exact number of spots indicated by the number of icons or text.
Example — Advancing Time: If the current Time of Day is the second Morning position and you must advance time 2 spots (i.e. advance time two spots), you will rotate the Time of Day Corridor Ring counter-clockwise 2 positions so that the Time of Day is now the first position of the Afternoon.
Example — Reversing Time: If the current Time of Day is the third Evening position and you must reverse time 3 spots (i.e. reverse time three spots), you will rotate the Time of Day Corridor Ring clockwise 3 positions so that the Time of Day is now the third position of the Afternoon.
Advancing When Playing an Action Card
When you play an Action Card to a Time of Day slot on your player board, you must advance time by at least one spot and stop the Time of Day Corridor ring on one of the 3 spots matching the Time of Day you played your Action Card to.
Example — Advancing to a Time of Day: You play an Action Card above the Night Time of Day slot on your player board. Before resolving your card actions, you must advance the Time of Day on the main game board to match the slot you just played the card to. The current Time of Day is the second position of Evening, so you must advance time to one of the three Night positions. It is your choice which position to stop at.
Wild Time Slots
If you are playing an Action Card to a Wild Time slot, you can choose how much to advance time by, but you still must advance it by at least one spot.
Advancing to the Next Day
When the Time of Day advances past Night back to Morning (or another later Time of Day), you must also immediately advance the Day Corridor Ring to the next day.
Example — Advancing to the Next Day: If it is the third position of Night on Day 1 and you must advance time by 2, you would rotate the Time of Day Corridor Ring counter-clockwise to the second position of Morning and then advance to the next day, in this case by rotating the Day Corridor Ring counter-clockwise to Day 2.
Conversely, if the time ever reverses from Morning back to Night (or an earlier Time of Day), you must then turn the Day Corridor Ring clockwise one spot to the previous day.
Same Time of Day
If the current Time of Day is in the first or second position, and you must advance time to that same Time of Day, you will have to advance time to one of the next positions for the current Time of Day.
Example — Advancing Within Same Time of Day: You play an action card above the Night Time of Day slot on your player board. The current Time of Day is the first position of Night. You must advance the Time of Day at least one slot, so you will rotate the Time of Day Corridor Ring to either the second or third position of Night.
Third Time of Day Position
If the current Time of Day is in the third (i.e. last) position, and you must advance time to that same Time of Day, you will have to advance time all the way around and back to that Time of Day, as when advancing time you must always advance it at least 1 spot.
Example — Advancing from Third Time of Day: You play an action card above the Evening Time of Day slot on your player board. The current Time of Day is the third (i.e. last) position of Evening. You must advance the Time of Day at least one slot, so in order to stop on an Evening spot, you will have to rotate the Time of Day Corridor counter-clockwise all the way around to land on one of the three Evening positions. This will also advance the Day Corridor Ring to the next day, as in rotating the Time of Day Corridor Ring, you pass Night on your way back around to Evening of the next day.
Player Actions
The following are actions you may take during the game. Many come from playing an Action Card but they can also be the result of using Room Actions, Character Powers, Companion Abilities, and Warden Tactic Cards.
Attacking
When an action allows you to Attack, you may spend that Attack action to attack only enemies who are within your current room (unless another action or power states otherwise).
Scarab Rule: If the room contains both Scarabs and the Fae Monster, you can only attack the Scarabs (as they guard the monster) and you can never attack both at the same time.
Attack and Defend Sequence
In battle, the Attacker goes first and will follow these steps:
- Add any Blocks and Hits you have from Actions Card played in front of you, from Action Card matched bonus icons, from currently played Warden Tactic Cards, from recruited Companions and from XP Track bonuses.
You can track these — and any subsequent Hits and Blocks in the following steps — on the outside numbered ring of the main game board using the Hit and Block Counter Tokens, so you do not need to remember these totals.
-
Add any Blocks and Hits you have from Powers you may use before the battle (i.e. before the Attacker and Defender roll their battle dice).
-
Add any Hits from Lady Weirdwood. She can help the players in battle by adding Hits for them. She does this under different circumstances for each of the Fae Monsters.
-
Roll your Battle Dice. You can have access to Battle Dice from various sources. These include:
A. Your character board. Each character (except Wally, see Wally's Thief's Gauntlet Forging, page 12) has one blue Balanced Battle Die to start the game, and they may forge additional ones as the game progresses (see Forging Battle Dice, page 12).
B. Warden Tactic Cards. Certain Warden Tactic Cards can grant a Battle Die of your choice in battle.
C. Powers. Certain Powers will grant you Battle Dice.
D. Action Cards. Certain Action Cards grant Battle Dice.
E. Stealing. Wally is the only character who may steal Battle Dice from his enemies.
You may also have access to various abilities that will allow you to alter the dice results you roll.
After you roll all your Battle Dice and possibly have altered them, add all Blocks and Hits from your roll to your current total from previous steps.
-
Add any Blocks and Hits you have from Powers you may use after the battle (i.e. after the Attacker and Defender roll their battle dice). Note that if a Power does not specify before or after battle, you may use that Power at anytime during the battle.
Now the Defender will roll their dice, adding up their Hits and Blocks and the final totals are compared between the Attacker and Defender and appropriate damage is dealt out. To most easily calculate the successful Hits and Blocks, simply update the Hit and Block Counter Tokens on the outside ring.
Example — Calculating Damage Dealt: The Attacker had 7 Hits and 3 Blocks and marked those with the corresponding Counter Tokens. Then the Defender had 5 Blocks and 4 Hits. You would move the Attacker's Hit Counter Token backwards 5 spaces (one for each Defender Block), resulting in the Defender having incurred 2 Damage. Then you would move the Attacker's Block Counter Token backwards 4 spots (for each Defender Hit), resulting in the Attacker incurring 1 Damage (denoted by the small red numbers in the bottom, left of each tracking space).
Player Taking Damage
Whenever you suffer unblocked Hits from any source (in battle with Scarabs or the Fae Monster, Fire or Rubble Tiles or Fae Monster Cards), you must deal damage to yourself equal to unblocked Hits. You can assign this damage in any combination you like across these 3 areas:
- Health. For each Hit you suffer, you can reduce your health by 1. Note that your health can never drop below 1.
- Forged Battle Dice. For each Hit you suffer, you can discard the highest level (i.e. most expensive) Battle Die currently forged on your player board (or in the case of Wally, reduce the level of his Thief's Gauntlet by 1). You never discard your permanent, starting blue Balanced Battle die.
- Power Tokens. For each Hit you suffer, you can discard one Power Token from your personal supply.
If you still have more damage to suffer but have no more Health to lose, Battle Dice to discard or Power Tokens to discard, you ignore the rest of that damage.
Attacking Scarabs
When you use an Attack action to attack Scarabs, you must attack all Scarabs within the room you are attacking in. Each Scarab gets to roll 1 blue Balanced Die.
Whenever a Scarab rolls a burst, they will try to skitter out of their current room, following the same rules of movement for Scarab Phases. If they are able to skitter out of their room, they avoid any Hits directed to them and escape.
If Scarab(s) skitter while being attacked in the Throne Room, the first Scarab will skitter out to the Fae Breach — and each subsequent Scarab that skitters will skitter to the next clockwise room.
It takes only one successful (i.e. unblocked) Hit to Defeat a Scarab. When a player Defeats a Scarab, they remove it from the game board and decide to either keep it as a resource and score 1 XP or return it to the common pool of Scarabs and score 2 XP.
Example — Attacking Scarabs: You are playing Sekhmet and decide to attack the 4 remaining Scarabs who are currently in the Throne Room with you by playing Prepare Defenses. You would like to attack the Chaos Ogre, who is also in the Throne Room, but can't because Scarabs always guard a Fae Monster in their room.
You have 1 Hit already from a matching bonus on your Action Cards and 1 Block from Prepare Defenses. You mark those totals on the outside numbered ring of the main game board with the Hit and Block Counter Tokens.
For Battle Dice, you currently have 1 (blue) Balance Battle Die and 1 (red) Attack Battle Die forged on your player board.
You are not certain that will be enough to defeat all 4 Scarabs so you decide to use your Abraca-stab-ra Power to add another Battle Die. You pay the cost of 1 Power Token and 1 other resource and add 1 black Defense Die to your pool of dice and then roll all 3 dice. Your results are 2 Hits and 1 Block.
You update the Hit and Block Counter Tokens with those rolled Hits and Blocks for a grand total of 3 Hits and 2 Blocks. Now it is the defender's turn to go.
The 4 Scarabs roll 4 blue Balanced Dice with the following results: 1 Block, 2 Hits and 1 Burst.
Whenever Scarabs roll a Burst, resolve those first, so you move 1 Scarab (it does not matter which one) to the Fae Breach.
Then you adjust the Block Counter Token, reducing it by 2 (for each Hit the Scarabs rolled) to the number 0 space. This indicates that you take 0 Hits as you have successfully blocked each Scarab Hit.
You then reduce the Hit Counter Token (which is tracking the 3 Hits you rolled) by the number of Blocks the Scarabs rolled (1). This leaves the Hits Counter Token in the number 2 space, indicating that you have done 2 Hits to the Scarabs. Since it takes only 1 Hit to Defeat a Scarab, you remove 2 Scarabs from the Throne Room for each of the successful Hits (it does not matter which Scarabs you remove).
You want a Scarab to help pay the cost of using a Power on your next turn, so you place 1 Scarab in your personal supply and score 1 XP for it, and you return the other Defeated Scarab to the common game pool for an additional 2 XP.
One Scarab remains in the Throne Room which did not skitter or have any successful Hits directed at it and the battle is now ended.
Attacking the Fae Monster
When a player uses an Attack action to attack the Fae Monster, the Fae Monster cannot be attacked if there are any Scarabs in his room. If there are, the player can only attack those Scarabs guarding the Fae Monster.
For details and examples on attacking each Fae Monster, see Fae Monster Rules, page 15.
After Battle Benefits
After finishing an Attack in the room that you are currently in, if there are no longer any Scarabs or Fae Monster in that room, you can use the action of that room immediately before continuing your turn.
If you make an Attack in another room that you are not currently within (certain Powers and Action Cards may allow this), you do not get to use the action of that other room after such an attack because you are not standing within it.
Moving
When an action allows you to move, you may spend that Move action to move from the room you are currently in to another room. You can only move to and stop in rooms. You cannot stop in corridors, but only move through them.
When performing a single Move action, you can move as far as you want, as long as you obey the following rules (note that some card actions and powers allow you to ignore some of these rules):
Connected Corridors Rule: Your path can only go between rooms and corridors that are connected (i.e. have their openings aligned).
Scarab Rule: You cannot move through a room if it has Scarabs or a Fae Monster within it, but must end your movement immediately in that room. If you have another Move action on that turn, you may use it to then move out of that room and into another one.
Fire Rule: You cannot move through a room if it is on Fire, but must stop your movement within that room and take 1 damage. If you begin your movement in a room on Fire, you do not take any damage when leaving that room.
Rubble Rule: You cannot move into a room if it has been turned to Rubble. If it is turned to Rubble while you are in the room, you may move out of it when you next use a Move action.
Moving & Room Actions: When you end a Move in a room with no Scarabs or Fae Monster present, you may choose to use the action of that room (see Using Room Actions, below).
Multiple Move Actions: Once stopping in a room as part of a Move action, if you have another Move action, you can start movement again, obeying the same rules.
Portaling
When you use a Portal action, you may move your character to any other room in the Manor (including the Throne Room). When landing within that room, if there are no Scarabs or Fae Monster present, you may use the action of that room (see Using Room Actions, below).
Using Room Actions
Rooms offer access to many valuable actions in the game; many of which are only available within rooms. You can use the action of a room you are in only in the following circumstances:
- When you end a Move or Portal action in a room, with no Scarabs or Fae Monster in it — and before you take any other action.
- After you finish a battle and there are no Scarabs or Fae Monster remaining in the room (see After Battle Benefits, page 11) — and before you take any other action.
- When certain Powers or Action Cards specifically say you may use a Room Action.
Scarab Rule: As per above, if there are any Scarabs or Fae Monster in a room, you cannot use the room action.
All actions in a room are optional and can be performed in any order (for a list of actions, see Room Reference, page 23).
Forging Battle Dice
Whenever you can take a Forge Battle Die action, you will pay the required resources for the next empty Battle Die slot on your board (moving from least expensive to most expensive). Once paid, you can choose a colored Battle Die marker block to place in that slot to denote which Battle Die you have forged. The colors and corresponding Battle Dice are:
Blue Balanced Battle Die. These contain single Hit and Block sides, one Battle Surge side and one blank side. When you roll a Surge, you get to use the unique surge action on your specific character board.
Black Defense Battle Die. These contain single and double Block sides and one blank side.
Red Attack Battle Die. These contain single and double Hit sides and one blank side.
Once a Battle Die has been forged and placed, that Battle Die cannot be changed unless some action or power explicitly says otherwise.
Note that every character, other than Wally, starts the game with one permanent Blue Battle Die marker in the lowest slot on their board.
Whenever you forge your last (i.e. most expensive) Battle Die or when Wally's Thief's Gauntlet reaches level 4, you score 4 XP. This happens every time this event occurs, for example, where you lose your most expensive Battle Die in battle and then forge it again later.
Wally's Thief's Gauntlet Forging
Unlike other characters, Wally does not forge Battle Dice, but instead forges improvements to his Thief's Gauntlet. This Gauntlet allows Wally to steal Battle Dice from his opponent in battle (this does not include situations where he can only defend).
At the start of the game, Wally cannot steal any Battle Dice, but each subsequent level allows him to steal one more Battle Die.
When stealing Battle Dice, Wally must do that before battle commences and any dice are rolled, unless another Power says otherwise.
Wally can never steal more Battle Dice than what is available from his enemy. For example, if Wally's Thief's Gauntlet is at Level 2 and he is battling one Scarab, he can only steal the Scarab's single blue Balanced Battle Die.
Recruiting Companions
When an Action Card, Power, or Room Action allows you to Recruit a Companion, you may select one of the face-up Companions on offer and pay their associated resource cost to add them to the right of your player board. Then, draw a new Companion from the face down deck, to replace the one you removed from the offering pool.
As you recruit more Companions, the cost goes up. Your first Companion is just the cost printed on them. However, each subsequent Companion you recruit requires 2 additional resources of your choice. So a second Companion will require an additional 2 resources plus their cost, a third Companion, an additional 4 resources plus their cost, and so on.
Companion Time of Day Slots
When you recruit a Companion to your player board, you gain another Time of Day slot to play Action Cards to. As well, these slots are wild, meaning that when an Action Card is played to one of them, you choose that slot to be any Time of Day that you'd like when it comes to advancing time (see Advancing When Playing An Action Card, page 9).
Acquiring Warden Tactic Cards
When you encounter this icon, you will acquire one Warden Tactic Card. Draw the top card from the Warden Tactic Card deck and add it to your player area face-up. You will be able to play it in the future as an Optional Action (see Playing Warden Tactic Cards, page 14).
Clearing Room Blight
Whenever a room is Blighted (see Blighting Rooms, page 8), you cannot use its action and will have to clear the Blight in order for it to be usable again.
At any time on your turn, whenever you are in a Blighted room with no Scarabs or Fae Monster in that room, you may pay the resource cost printed on the Blighted side of that room to clear the Blight and flip that room back to its other side. When you do that, you will score the XP printed on the Blighted side of the room, and then you may use that Room Action after flipping the room back to its non-Blighted side.
Example — Clearing Blight: You play Shadow Steps and use your first of two Moves to travel to a Blighted room, stop there and pay 2 Knowledge and 2 Mîn to clear its Blight, scoring the 5 XP. You then flip the room over and use its action to collect 2 Knowledge and 2 XP, before using your second Move action on Shadow Steps to travel to another room.
Some Action Cards or Powers may allow Clearing Blight, even when there are Scarabs or a Fae Monster there. In these cases, the Action Card or Power takes precedence over these rules.
Healing and Hand Limit
You may gain healing during your turn and even during other players' turns. Whenever you gain Health, immediately move the tracking cube up on your player board's Health Track to match the amount of Health you gained.
Your Health can never go above 6 or drop below 1. If your Health reaches 6, you score 2 XP (this happens every time you raise your Health to its maximum).
Hand Limit
The number of Action Cards you hold in hand (your Hand Limit) is equal to your current Health.
Whenever your Health increases while it is your turn, you will be able to draw up to that new Hand Limit at the end of your current turn.
Whenever your Health increases while it is not your turn (due to some other player action), you will be able to draw up to that new Hand Limit at the end of your next turn.
However, whenever your Health decreases (whether during your turn or another player's turn), you must immediately discard down to that new Hand Limit.
Drawing Above Your Hand Limit
If a Power or Action Card (for example, Tactician's Gambit) allows you to draw additional cards above your current Hand Limit, you may do so, but will need to discard down at the end of your turn to match your current Health.
Gaining and Spending XP
You can gain XP from a wide variety of sources: playing Action Cards, using Powers, using Room Actions, using Companions, from Battles, or even from maxing out your Health or Forged Battle Dice.
Whenever you see the XP icon with a number inside, you gain the corresponding number of XP.
XP Tracks
When you gain XP, you will spend it on your own player board by moving up the 3 XP Tracks on it (unless you are playing the easier, more-family friendly version of the game, see Group XP Variant, page 22).
You may split up any XP you gain as you like across the Power, Battle and Tactics XP Tracks.
Whenever you land on or pass an icon on an XP Track, you will gain that benefit. All benefits are immediate, one-time benefits except for Hits and Blocks on the Battle Track, which are persistent and will add to your Hit and Block total for all battles you engage in.
Further, if you ever gain XP during a battle (for example, due to using a Power that grants you XP) and you spend that XP on your Battle Track which results in you gaining additional Hits or Blocks, you may add those to your current battle as long as you have not yet resolved dealing out damage to the combatants.
Example — Spending XP: You battle 3 Scarabs and Defeat them all. You decide to keep 1 Scarab in your personal supply and return the other 2 to the common pool, for a total of 5 XP. You decide to spend 3 XP on your Power Track, which gains you 1 Power Token and 1 resource of your choice. You then spend the remaining 2 XP on your Battle Track, which now will allow you to have 1 additional Hit in future battles.
End of XP Tracks
If you reach the end of any of the 3 Individual XP Tracks, you will gain access to an immediate special bonus:
Power Track Bonus. When you reach the end of this track, you can use any player Power (yours or another player's) for free at any time before ending your turn. If this occurs when it is not currently your turn, you cannot make use of this bonus.
Battle Track Bonus. When you reach the end of this track, you deal 2 damage immediately to the Fae Monster (and gain the XP for doing so, see monster rules beginning on page 16 for XP rewards when damaging monsters). You must also resolve any additional effects that occur as part of the Fae Monster taking damage (for example, adding a Monster Card to Therus' Plans, as indicated on his Health Tracker).
Tactics Track Bonus. When you reach the end of this track, you immediately clear a room of your choice of Blight for free (flip the room to the non-Blighted side) and gain the associated XP. If there are any Scarabs in this room, they are Banished (remove them to the common game pool). You do not have to be present in the room you choose to do this.
Once you are at the end of an XP Track, you can no longer spend XP on that track.
Order of Spending XP
When you spend XP, you must spend it as part of the action, power, or event that granted it to you, before moving onto any other action. This means that there can be some flexibility as to when you spend that XP.
Example — Order of Spending XP: You battled the Mîn Wraith and inflicted 4 successful Hits on him, which grants you 4 XP. He inflicted 1 successful Hit on you. You may choose to spend that 4 XP right away, or instead, first reduce your Health by 1 for the successful Hit against you, and then spend that 4 XP on your Battle Track, passing a Heal icon which allows you to raise your Health by 1. In either case, you must spend that 4 XP as part of finishing this battle before moving on to any other action on your turn.
Optional Actions
The following are optional actions available to you on your turn. The timing and use of each are explained below.
Using Character Powers
Each Character has their own set of unique powers listed on the 3 scrolls on their character board. These powers can be used once each at any time during your turn (even before playing an Action Card). Some Powers can even be used on other players' turns (such Powers will explicitly state this).
To use a Power, you must pay the cost listed in red at the top of the Power. This always includes a Power Token and (in most cases) some additional resources. Power Tokens can be gained in a variety of ways (via XP rewards, rooms, and Warden Tactic Cards) and are very valuable — so use them wisely!
If you cannot pay the required Power Token and any other associated resources, you cannot use that Power, unless some other ability specifically says you can.
To use a Power, move the required Power Token and resources from your supply to the resource cost area to denote that you're using this Power this turn. Then resolve the Power's effect. If the Power has two effects separated by "OR", it means you must choose between those two effects. Once used, you cannot use that Power again this turn, even if it has two effects to choose from.
At the end of your turn, return the spent Power Token and resources back to the game's resource piles.
Complex Character Powers
Each character has a complexity rating and the most complex characters have some Powers and abilities that require further explanation.
Eugene's Transfer Vault
When Eugene is in play, any player, once on their turn, may pay any 3 resources to transfer a played Action Card from their player board to the right of Eugene's board. If there is a card already in that spot, they take that card into their hand. This means players could be taking other character's cards into their hand (such a card stays with that player the rest of game, unless some other power or ability transfers it to another player).
Eugene and Companions
Eugene's Transfer Vault makes it impossible for him to recruit Companions during the game.
Eugene's Time of Day Slots
All 4 of Eugene's Time of Day slots are wild (like Companions).
Wally's Fae Infiltration Power
When Wally uses this Power, you can remove one Fae Monster Power card currently slotted to the Monster's board. You immediately score the 2 XP for removing the card, and you may then slot the card to the left side of Wally's board based on the current Monster strength (which is based on the current Day, see Power Cards, page 15).
In any future battle, you may use the benefit of any of the Fae Monster Power cards slotted to Wally's board and then return them to the bottom of the Monster's draw pile.
Wally can only hold a maximum of 2 of these Power cards at the same time, and you cannot use his Fae Infiltration Power if you do not have an empty slot on Wally's board to slot the Fae Monster Power card to.
Using Companion Abilities
Any Companions you recruit during the game will offer a unique ability which you may use at any time on your turn. Some abilities require you to exhaust the Companion, which requires flipping them over once you have used the ability. You can refresh the Companion when you Reset Cards (see Ending Your Turn, page 7) — and some rooms and powers can also refresh them.
Playing Warden Tactic Cards
A Warden Tactic Card in your personal supply can be played on your turn when you play an Action Card to a Time of Day slot.
To Play a Warden Tactic Card
When playing an Action Card, you may choose to play one of your Warden Tactic Cards from your supply on top of the Action Card you are playing (whether the Action Card is played face-up or face-down).
You gain the benefit on the Warden Tactic Card as indicated on the actual card when you play it. As well, Warden Tactic Card Icon Bonuses are always wild and so will always match the bonuses of Action Cards to either side of them.
Fae Monster Rules
Each Fae Monster has a slightly different setup, rules, and challenges to overcome for the players. We recommend playing against the Chaos Ogre for your first game(s) until you are ready for a new and more difficult challenge against the Mîn Wraith or Therus the Dark Mage.
Resolving Monster Cards
Each Fae Monster has their own unique set of 20 Monster Cards. During the game, these cards are always sitting face-down in a deck and the players can see a preview of the type of action the Fae Monster will take for the next card. The 4 types of cards are:
- Move Card. The Fae Monster will typically attempt to move around the Manor, obeying its own unique movement rules.
- Attack Card. The Fae Monster will attempt to attack someone in the Manor.
- Scarab Card. The Fae Monster will spawn Scarabs in the Manor.
- Power Card. The Fae Monster will add additional powers to his battle abilities.
When you must resolve a Monster Card:
-
Resolve the card front. Advance the Time of Day a number of spots according to the front of the Monster Card.
-
Resolve the card back. Turn the card over and resolve the back of the Monster Card.
Some cards will require resolving more (or different) effects depending on the Monster's corresponding strength, which is always based on the current Day. As he grows in strength, he shifts from Calm, to Angry to Enraged and some cards have sections tied to those 3 states.
-
Discard or Slot the Monster Card. After resolving the card, you discard or slot it. Move, Attack, and Scarab cards are always discarded (except for Therus, where you do not discard the card right away; see Resolving Therus Cards, page 21). Power cards are slotted to the Monster's board.
Example — Resolving Monster Cards 1: You are ending your turn, playing against the Chaos Ogre, and must resolve the top card from the Ogre's deck. You advance time 2 spots forward, and then turn the card over to resolve its effects. As it is currently Day 6, the Chaos Ogre is currently Angry. As such, you must resolve the topmost effect and the middle effect, as denoted by the plus sign between them. You do not resolve the bottom effect because the Chaos Ogre is not yet Enraged (Day 10 and above).
Example — Resolving Monster Cards 2: You are ending your turn, playing against the Chaos Ogre, and must resolve the top card from the Ogre's deck. You advance time 4 spots forward, and then turn the card over to resolve its effects. As it is currently Day 11, the Chaos Ogre is currently Enraged. After you resolve the top part of the card, you will resolve only the Enraged section of the card, as there are no plus signs indicating you must do multiple sections.
Power Cards
When you resolve a Power Card, advance the time and then flip it over and slot it to one of the 3 Power slots at the top of the Monster board, as indicated by this icon. These cards can confer additional dice, Hits, and Blocks to Monsters in battle.
When first slotting the card, you do so according to the current Monster strength, which is based on the current Day. In this case, if it were Day 4, you would slot the card to show only the first section, corresponding to Calm.
When his strength grows to the next level, starting at Day 5, you must slide up all cards on his board to reflect that next level.
When a Fae Monster enters battle with any Power Cards slotted to his board, he gains all benefits currently visible on his cards, so in the case above, he would roll 1 additional Balanced Die and gain 2 additional Hits.
After a battle finishes, you discard all currently slotted cards from his board and the player who battled him gains 2 XP for each card discarded.
Should you ever draw a Power Card and all his slots are already full, you discard the card you just drew.
On the following pages, you'll find the specific setup and gameplay rules for each of the 3 Fae Monsters.
Chaos Ogre
Difficulty: 1 (of 3)
A brutish beast called from the Fae, he can execute devastating attacks as he gains in power. His goal is to crush Lady Weirdwood, but he is also not very smart and sometimes will chase a player instead, even smashing through walls to do so.
Chaos Ogre Setup
Follow the general Game Setup on page 4 and then:
- Place Lady Weirdwood's standee in the Throne Room.
- Place the Chaos Ogre's standee on the other side of the Manor from the Entrance Hall.
- Place the Chaos Ogre board near the main board.
- Shuffle the Chaos Ogre's Monster Cards and place the deck near his board.
- Place all Rubble Tiles near his board.
- Place a red Tracking Cube on space 0 for the Blight Threat and on the starting space for Lady Weirdwood's health.
- Place 18 red Tracking Cubes on his health tracking areas (6 of each on his Head, Torso and Arm).
Blight Threat
The Blight Threat tracker should always match the number of currently Blighted rooms in the game. So whenever a room becomes Blighted and flips to the Blight side, you must increment the Blight Threat tracker accordingly. Conversely, wherever you clear rooms of Blight and flip them back, you must decrease the Blight Threat tracker accordingly.
As the Blight Threat increases, the Chaos Ogre becomes more powerful. Any dice symbols at or to the left of the current threat level will add those dice to the Chaos Ogre's roll whenever he battles.
If the Blight Threat ever reaches its maximum, the players lose the game immediately.
Rescuing Lady Weirdwood
The Chaos Ogre is using the Scarabs to trap Lady Weirdwood in her Throne Room, where he hopes to hunt her down and kill her.
Players may attempt to rescue her by Defeating all Scarabs in the Throne Room. Once there are no longer any Scarabs in the Throne Room, she is considered rescued and the players have access to these two benefits for the rest of the game:
- Battle With Her. When battling, if Lady Weirdwood is in your room, she adds 2 Hits to the battle for you. Note that she never takes damage in battles; she is only there to add 2 Hits.
- Move Her. Anytime on your turn, you may pay any 1 resource to move Lady Weirdwood to any connected room in the Manor (she ignores all Scarab rules). You can do this from anywhere on the board and do not have to be in the same room as her.
Once Rescued:
- In Battle. She adds Hits in battle when in the same room as the player.
- On Any Player's Turn. Pay one resource to move her to any connected room (ignoring Scarab rules).
Lady Weirdwood's Health
The Chaos Ogre will try to hunt Lady Weirdwood during the game, and if he ever resolves one of his attack cards while in her room, he will hurt her and the players will have to lower her health by one. If he manages to attack her enough times, the game is over and all players lose immediately.
Chaos Ogre's Health and Battling
To eradicate the threat to the manor and defeat the Chaos Ogre to win the game, the players will need to reduce his health to zero before time runs out, the Blight Threat loss condition triggers, or he kills Lady Weirdwood.
He has 3 areas he takes damage; his head, his torso, and his arms. Whenever you (or other events in the game) successfully hit the Chaos Ogre, remove one of the Health Tracking Cubes from his board and score 1 XP for each successful Hit.
The players can choose collectively where they want to remove the Health Tracking Cubes from, even splitting up successful Hits amongst different parts of his health areas.
Whenever a single row is cleared of Health Tracking Cubes, you must resolve the attached consequence in that row.
Whenever all Tracking Cubes are cleared from one of his three main areas (head, torso, arms), the following consequences are in effect for the remainder of the game:
- Head. The Chaos Ogre rolls one less blue Balanced Die in all battles.
- Torso. The Chaos Ogre rolls one less black Defense Die in all battles.
- Arms. The Chaos Ogre rolls one less red Attack Die in all battles.
When removing his last remaining Health Cube(s) from his board that would grant you victory by defeating him, you must still resolve the effects for any rows that are cleared due to removing those cubes. Should that result in spawning Scarabs that Blight rooms and cause the Blight Threat tracker to reach its maximum, you lose the game, even though you defeated him (as the Manor has become too contaminated with Blight).
Lastly, whenever the Chaos Ogre rolls a burst symbol, he spawns one Scarab in his current room and he adds one Hit to his battle total. He does this for each burst symbol he rolls.
Example — Chaos Ogre Battle: You are playing Celia and are attacking the Chaos Ogre in the Draconis Shrine. You roll your Battle Dice and total up any additional Hits and Blocks you have (see Attack and Defend Sequence, page 10). Your total ends up being 6 Hits and 4 Blocks, which you mark on the outside numbered ring of the main game board using the Hit and Block Counter Tokens.
Choose another player to act as the Chaos Ogre and follow this sequence to determine what dice he will roll and any other Hits and Blocks he might have:
Check Strength Tracker. The current Day is 8, so according to the Chaos Ogre's Strength Tracker, he starts with 2 black Defense Dice, 2 blue Balanced Dice and 2 red Attack Dice.
Check Blight Threat. The Blight Threat is currently at 6, so the Chaos Ogre gets one additional blue Balanced Die and one additional red Attack Die.
Check Health. The Chaos Ogre has no health remaining on his Torso, so he loses 1 black Defense Die.
Check Power Cards. The Chaos Ogre has one Power Card on his board that grants him 2 Hits in addition to whatever he rolls.
This results in the Chaos Ogre having 1 black Defense Die, 3 blue Balanced Dice and 3 red Attack Dice. The Ogre rolls these dice and his results are: 4 Hits and 2 Blocks, plus he has 2 additional Hits from his one Power card, for a grand total of 6 Hits and 2 Blocks.
Adjust the Block Counter Token, reducing it by 6 (for each Hit the Chaos Ogre did) to the space with a red 2. This indicates that you take 2 Hits from the Chaos Ogre. You must now deal with that damage with some combination of reducing your Health, Battle Dice, or Power Tokens (see Player Taking Damage, page 11).
Then adjust the Hit Counter Token, reducing it by 2 (for each Block the Chaos Ogre has) to the number 4 space. This means that you have done 4 Hits to the Chaos Ogre and will score 4 XP.
The players now collectively decide where to assign that damage to the Chaos Ogre, removing 4 health tracking blocks from anywhere on his board, amongst his 3 health areas: Head, Torso, and Arms.
To begin, the players remove 2 health blocks from the first row in the Arms area. Whenever the Chaos Ogre loses all of his health in any single row, the players must immediately resolve the effect at the right of that row, so in this case they must roll the Room Dice to spawn a Scarab in the rolled room.
For the 3rd damage dealt, they remove the remaining block in the Chaos Ogre's head area. They will have to then resolve the row effect, which is to spawn a Scarab in the Chaos Ogre's current room. However, now that the entire head area is cleared, the Chaos Ogre will always roll one less blue Balanced Die in battle.
For the 4th and last damage, they remove one health from the second row of the Chaos Ogre's arm area, and because there is still one health marker in that row, they do not resolve the row effect yet.
Lastly, discard the Chaos Ogre's Power card and you score an additional 2 XP for it.
That concludes the battle.
Rubble Tiles
Some of the Chaos Ogre's cards will have you place a Rubble Tile in his current room. When doing that, if there are any Scarabs in the room, they are killed instantly and removed from the room — and any players in the room suffer 1 damage.
Players and the Chaos Ogre can move out of a Rubbled room if they were in there when the Rubble Tile was placed, but they (and Scarabs) can never move (or Portal) back into that room, or travel through it.
If the room is Blighted when adding a Rubble Tile, that room will remain Blighted the rest of the game; no power or ability can un-blight it.
Resolving Chaos Ogre Cards
When playing against the Chaos Ogre and ending your turn (see Ending Your Turn, page 7), the first thing you must do is resolve the top card of his Monster Card deck (see Resolving Monster Cards, page 15).
If ever there are no Monster Cards left to draw, shuffle all previously discarded Monster Cards to form a new Monster Card deck, and then resolve the top card.
Monster Advice
The Chaos Ogre is unpredictable and rash. He may pursue the players or Lady Weirdwood — and he may destroy rooms in his anger and frustration. One thing though that is not unpredictable: anytime he is in Lady Weirdwood's room and gets to attack, he will attack her, bringing you one step closer to defeat. So, it is imperative to rescue Lady Weirdwood, and be careful where and when you move her around the Manor to help in battles.
And lastly, do not neglect the Blight. As the game progresses, it can creep up on you quickly and cause you to lose the game.
Mîn Wraith
Difficulty: 2 (of 3)
The Mîn Wraith feeds on the life force of others as it haunts the Manor, shifting through walls at will to devour its prey's life force in order to heal itself. It will feed on the life force that animates the Clockwork Scarabs, as well as Lady Weirdwood's own life force.
Given enough time, the Mîn Wraith can consume all of Lady Weirdwood's life force, resulting in her death and the downfall of Weirdwood Manor.
Mîn Wraith Setup
Follow the general Game Setup on page 4 and then:
- Place Lady Weirdwood's standee in the Throne Room.
- Place the Mîn Wraith standee in the Terrace of Temporal Rifts.
- Place the Mîn Wraith board near the main board.
- Shuffle the Mîn Wraith's Monster Cards and place the deck near his board.
- Place the Mîn Wraith die near his board.
- Place a red Tracking Cube on the starting space for the Mîn Wraith's health.
- Place a red Tracking Cube on the starting space for Lady Weirdwood's life force.
Lady Weirdwood's Life Force
Lady Weirdwood is sensitive to all that happens in her Manor and her power and life force extend throughout the Manor. Anytime the Mîn Wraith heals, he will also draw a little bit of Lady Weirdwood's life force as well.
As such, whenever the Mîn Wraith's health goes up, the players must lower Lady Weirdwood's life force a corresponding amount. This applies even when the Mîn Wraith is at maximum health. If he should heal then, even though his health cannot go any higher, you must still reduce Lady Weirdwood's life force the corresponding amount that he would have healed.
If Lady Weirdwood's life force ever moves to zero, the players immediately lose the game.
To counteract the Mîn Wraith's efforts, the players can share their life force with Lady Weirdwood. On their turn, if they are in the same room as Lady Weirdwood and there are no Scarabs or the Mîn Wraith present, a player can choose to lose any amount of their Health and transfer it to her.
Example — Healing Lady Weirdwood: Playing as Celia, you are in the same room as Lady Weirdwood with no Scarabs or Mîn Wraith present. You decide to lower your own health by 2 and raise Lady Weirdwood's life force by 2.
If Lady Weirdwood's life force gets high enough, she grows in strength and can help the players in their battle against the Mîn Wraith. Depending on the current position of her Life Force tracker, players will have access to these benefits:
Move Her
Any player may pay any 1 resource on their turn to move Lady Weirdwood to any connected room in the Manor (she ignores all Scarab rules). You can do this from anywhere on the board and do not have to be in the same room as her.
Battle With Her
When battling, if Lady Weirdwood is in your room, she adds 1, 2, or 3 Hits to the battle for you (depending on where her Life Force tracker is). Note that she never takes damage in battles; she is only there to add Hits.
Mîn Wraith Movement
The Mîn Wraith is mostly incorporeal and can shift through walls and other barriers at will. So, when moving (due to a Monster Card or rolling the Mîn Wraith Die), he always ignores corridor connections and moves directly to the indicated room as follows:
- Move the Mîn Wraith to the adjacent clockwise room on this current ring.
- Move the Mîn Wraith to the adjacent counter-clockwise room on this current ring.
- Move the Mîn Wraith towards the center of the board to the room across the corridor in the next inner room ring. If there are two rooms equally across from the Mîn Wraith, choose the further clockwise room. If he is already on the innermost room ring, move him across the Throne Room to the room opposite on the inner room ring.
- Move the Mîn Wraith away from the center of the board to the room across the corridor in the next outer room ring. If he is already on the outermost room ring, move him across the game board to the room opposite on the outer room ring.
Mîn Wraith and Spawning Scarabs
The Mîn Wraith has cards that spawn Scarabs relative to his location on the board. Like his movement (see previous section), when a spawn would be in the Throne Room, instead spawn in the room on the opposite side of the Throne Room. And when spawning outwards from the outermost room ring, spawn across the game board to the room on the opposite side.
Mîn Wraith Health and Battling
To eradicate the threat to Lady Weirdwood and defeat the Mîn Wraith, the players will need to reduce his health to zero before time runs out or before he fully drains Lady Weirdwood's life force. Whenever the players (or other events in the game) successfully hit the Mîn Wraith, the players will lower his health marker by 1 and score 1 XP for each successful hit inflicted.
Whenever the Mîn Wraith rolls a burst symbol, he adds one Block to his battle total and after the battle concludes, he rolls his Wraith Die and moves to the corresponding room or Heals one (he rolls his die for each burst symbol he rolls).
Consuming Scarabs
Whenever the Mîn Wraith moves into a room with Scarabs, he consumes the life force of one of the Scarabs in that room. Remove one Scarab from that room and increase the Mîn Wraith's health by one, and also lower Lady Weirdwood's life force tracker by one.
Healing After Battle
If the Mîn Wraith takes no damage when battling, he will gain further strength and confidence. In this case, he heals 1 at the end of the battle (and Lady Weirdwood's life force drops by one).
Healing Effects
When the Mîn Wraith heals and the players move his health tracker up, it is possible that certain effects will be triggered as he grows in strength and confidence.
- Whenever his health Tracking Cube moves up into a space with this icon, roll the Room Dice twice and spawn a Scarab in each rolled room. Note that this does not trigger when his health moves down into such a space.
- Whenever his health Tracking cube is at or above these spaces, he will roll these additional Battle Dice whenever he battles.
Resolving Mîn Wraith Cards
When playing against the Mîn Wraith and ending your turn (see Ending Your Turn, page 7), the first thing you must do is resolve the top card of his Monster Card deck (see Resolving Monster Cards, page 15).
If ever there are no Monster Cards left to draw, shuffle all previously discarded Monster Cards to form a new Monster Card deck, and then resolve the top card.
Monster Advice
The Mîn Wraith is very difficult to hit, and the danger exists of him healing in battles where he takes no damage, so it is paramount that players focus on putting together attacks with many Hits from other powers, matching bonuses and XP tracks.
As well, when playing against the Mîn Wraith, the players cannot lose due to Blight, which can make it tempting to not attack Scarabs as much. However, Scarabs provide healing to the Mîn Wraith, so don't neglect trying to remove them from the board.
Therus the Dark Mage
Difficulty: 3 (of 3)
Therus the Dark Mage, is a devious mage of malevolent intent whose ultimate goal is to corrupt Lady Weirdwood and bring her to his side, in order to rule the Manor together.
He does this by casting his Insidious Spell of Corruption on her. To accomplish this, he uses his ancient skills to siphon away some of the resources and power the players spend during the game. If he can cast his spell enough times, he will bring Lady Weirdwood fully under his control and rule the Manor with her for an eternity!
Therus Setup
Follow the general Game Setup on page 4 and then:
- Place Therus' standee in the Throne Room.
- Place Therus' board near the main board.
- Shuffle Therus' Monster Cards and place the deck near his board.
- Place all Fire Tiles near his board.
- Place a red Tracking Cube on Therus' starting health spot.
- Place the Lady Weirdwood's standee on her starting space on the Insidious Spell of Corruption track.
- Place a red Tracking Cube in each Start spot of the 3 arms of his spell.
Lady Weirdwood and the Insidious Spell of Corruption
Therus is constantly trying to power up and cast his Insidious Spell of Corruption, in order to bring Lady Weirdwood to his side. He does this by siphoning resources and power the players spend during the game in order to slowly power up his spell.
Powering Therus' Spell
His spell has 3 arms, each of which must reach their maximum in order for his spell to be cast on Lady Weirdwood. You will move the spell's Tracking Cubes under the following circumstances:
-
Anytime you spend resources (Knowledge, Mîn, Scarabs) or Power Tokens for any purpose, Therus will siphon from those to power up his Insidious Spell of Corruption.
The player who spent the resources will have to increment the Tracking Cube(s) by a total number of spaces matching the required total based on his strength (which is always determined by the current Day).
Day 1 to 3: Increment his spell 2 total spaces Day 4 to 7: Increment his spell 4 total spaces Day 8 to 12: Increment his spell 5 total spaces
You can choose which Tracking Cubes to move and may split the moves across any of the spell arms. Once a Tracking Cube is in the center (last) space for an arm, it cannot be moved further; you must then move Tracking Cubes on the other arm(s).
Example — Siphoning & Spell Arms: You spend 1 Knowledge and 1 Mîn to forge a battle die on your board. As it is Day 5, Therus is Angry and siphons enough from those spent resources to increase his Insidious Spell of Corruption by 4 spaces (as indicated by these icons which mean: when the player spends any resources, increment his spell by 4). You decide to move 1 arm 2 spaces, and another arm 2 spaces to avoid triggering one of his Monster Cards (see Spell Arm effects below). You could not move the other arm because the Tracking Cube is in the last space there.
- Therus can also power his spell from certain Monster Cards in his deck. In this case, follow the instructions on the Monster Card.
Spell Arm Effects
As each arm tracker increases, it can lead to certain consequences for the players. Every time the arm trackers increment, if the Tracking Cube covers (or passes) a space with a Monster Card symbol, the player must draw the next card from the Monster Deck and place it face-down next in the queue at the bottom of Therus' board under Therus' Plans. It will be resolved at the end of the current player's turn (see Resolving Therus Cards, page 21).
Triggering His Spell
When all 3 arms are at their maximum, the spell triggers.
You must move Lady Weirdwood's standee one space to the left (representing her becoming more corrupted under Therus' influence) and take any action in the upper half of the space she moves into, which can be adding Monster Cards to Therus' Plans.
In that case, draw the appropriate number of cards from Therus' Monster Deck and place those face-down in his queue under Therus' Plans at the bottom of his board.
Then reset all the trackers for each arm back to their starting spaces. If there were still remaining spaces required to increment his spell arms after reaching the end of each arm and triggering his spell, you must increment those remaining spaces after his spell arms have been reset.
If Lady Weirdwood ever reaches to the furthest spot to the left, she becomes fully corrupted and joins Therus permanently, and the players lose the game.
Countering Therus' Spell
It is possible for the players to counter Therus' spell and lessen his hold on Lady Weirdwood. To do so, on your turn, you can spend 4 resources of your choice when you are in the Throne Room and there are no Scarabs or Therus present. You can do this multiple times on your turn, as long as you have the required resources. Therus does not siphon any of these resources, and thus, does not power up his Insidious Spell of Corruption in response to you casting a counter-spell (these instructions are noted on Therus' board).
Each time you cast a counter-spell, score 2 XP and move Lady Weirdwood's standee one space to the right, and take any lower action on the space she is moving into, which can be reducing Therus' health by one (as countering his spell is often hurtful to Therus).
When you have cast counter-spells enough so Lady Weirdwood is fully to the right, you can no longer cast a counter-spell just to score the XP.
Lady Weirdwood and Battling
In any battle against Therus, Lady Weirdwood can offer support to either side, depending on her state of corruption. As she moves further to the left, she adds Hits to the battle for Therus, and as she moves further to the right, she adds hits to the battle for the player battling Therus.
She does not add any Hits when players are battling Scarabs; only when battling Therus.
Therus' Health and Battling
To eradicate the threat to Lady Weirdwood and defeat Therus, the players will need to reduce his health to zero before time runs out or he fully corrupts Lady Weirdwood. Whenever a player (or other events in the game) successfully hit Therus, the player will lower Therus' health marker by 1 and score 1 XP for each successful hit inflicted.
As Therus' health drops, he will become more desperate and will strive to do more to defeat the players. Whenever his health Tracking Cube lands on or passes a space with a Monster Card icon on it, you must draw a card from the top of his Monster Deck and add it to his queue under Therus' Plans at the bottom of his board.
When dealing the final Hit of damage to Therus, the players must resolve any cards under Therus' Plans before claiming victory. If resolving his cards results in the players running out of time (returning to Day 1), or if it causes his Insidious Spell of Corruption to fire and Lady Weirdwood to move into the final, leftmost corruption spot, then the players still lose the game as they were either too late to defeat him or Lady Weirdwood has stepped into his shoes as the evil, corrupted ruler of Weirdwood Manor.
Whenever Therus rolls a burst symbol, he adds one Hit to his battle total and after the battle concludes, roll the Room Dice and portal him to the corresponding room. He does this for each burst symbol he rolls.
Resolving Therus Cards
When playing against Therus and ending your turn (see Ending Your Turn, page 7), the first thing you must do is Resolve Monster Cards. Therus resolves his cards differently from the other two Monsters.
You must resolve each Monster Card under Therus' Plans, in the order laid out from left to right. For each card, increment the Time of Day according to the front of the Monster Card.
Then flip the card over and resolve the back of the Monster Card, leaving that card in place in its current spot under Therus' Plans if it is not a Power Card (otherwise if it is a Power Card, slot it to Therus' board the same as Chaos Ogre and Mîn Wraith Power Cards).
Then move onto the next Monster Card to the right of the one you just resolved and repeat steps above. When all cards in his queue have been resolved, move them to Therus' discard pile.
If ever, while resolving Therus' Monster Cards, an event occurs that requires adding additional Monster Card(s) to Therus' Plans, draw those from his Monster Deck and add them face down to the right of the rightmost card already there. You will have to resolve those cards as well before discarding all Monster Cards under Therus' Plans and moving on to completing your turn.
If you ever run out of spots to place cards at the bottom of his board, continue to place additional cards in the queue.
Fire Tiles
Some of Therus' cards will have you place a Fire Tile in a room. When doing so, if there are any Scarabs in the room, they are killed instantly and removed from the room — and any players in the room suffer 1 damage.
Players and Therus can move out of a Fire room if they were in there when the Fire Tile was placed. They can also move (or Portal) back into a Fire room, but players will always take 1 damage when doing so.
If the room is Blighted when adding a Fire Tile, that room will remain Blighted the rest of the game; no power or ability can un-blight it.
Rooms actions can never be used in a room that is on fire.
Monster Advice
It is paramount to clear the Throne Room of Scarabs in order to allow your team to cast counter-spells against Therus. Don't neglect working towards this goal early on in the game.
As well, spending resources earlier in the game is better, as Therus makes less use of them, so do your best to forge battle dice and recruit companions early on if you can.
Lastly, like the Mîn Wraith, players cannot lose the game due to Blight. However, when battling Therus, Scarabs can come into the game quickly, and if players are not careful, they can find themselves with few usable rooms later in the game.
Variants
Group XP Variant
For an easier, more family-friendly version of the game, you can play the Group XP Variant. This variant has all players pooling any XP they score and all gaining rewards at the same time. It results in more rewards collectively than in the default game, making the player's collective task easier. It also avoids the issue of younger — or less experienced players — falling behind, due to gaining less XP than more advanced players and having to make decisions about where and how best to spend their XP.
To play this variant, follow these setup and gameplay changes.
Setup
- All players do not use the Individual XP Tracks on their player boards, so do not place tracking cubes on these tracks.
- Place the Group XP token on the starting space of the Group XP Track, on the outside of the main game board.
Spending XP
All XP you gain will be spent on the Group XP Track that goes around the outer ring of the main game board — not on your individual player board. There are no choices here about where to spend that XP; you simply move the Group XP token on the Group XP Track to match the amount of XP any player gained.
As you land on or pass benefits on this track, every player in the game will immediately gain that benefit.
Example — Scoring Group XP: You gain 4 XP upon forging your last Battle Die. You move the Group XP token marker up 4 spaces, passing a Heal icon. Every player now gets to Heal one.
And like the Individual XP Tracks, any Hits or Blocks you land on or have passed remain persistent. In this case, they are persistent for all players and will add to any player's Hit and Block total when they are in battle.
End of Group XP Track
If you reach the very end of the Group XP track, you will move the Group XP token back to space 60 and continue to score XP from there, looping continuously as needed.
The Group XP track also offers the same Battle Bonus and Tactics Bonus as the corresponding Individual XP tracks. When you reach or pass a bonus on the Group XP track, you resolve that bonus (see End of XP Tracks, page 13) once only (not for each player). This means that for the Tactics Bonus, the players must choose only one player to use the Room Action of the room flipped back from the Blight.
Solo Variant
There are no rule changes for playing solo. We would recommend playing with two characters though, as it is both beneficial and fun to play with and exploit the synergies between different characters.
Difficulty Variants
Finding the game, or a particular Fae Monster, too easy? Try introducing one, or even multiple, of these variants to the game.
Difficulty Variant: Forge Rooms
This variant has you reducing the number of rooms in the Manor where you can Forge Battle Dice. This will require more careful planning and movement, in order to get access to growing your dice pool for battles.
When setting up the game, do not include the Forge Arcanum or Ancient Foundry rooms when setting up the board.
For further challenge, you can remove more rooms that allow Forging of Battle Dice like the General's War Room or Royal Armory.
Difficulty Variant: Less Time
You can start the game on a later day, giving you less time to win the game. We recommend the following for the first time you try this variant (but you can increase these if you think you're a true Warden veteran!):
Chaos Ogre: start on Day 4
Mîn Wraith or Therus: start on Day 2
Difficulty Variant: Scarab XP
This will reduce XP you earn during the game, making it more difficult to gain bonuses from your XP Tracks.
When playing with this variant, whenever you Defeat Scarabs and decide to return them to the general game supply, you score only 1 XP for each returned (as opposed to 2 XP in the normal game).
And when you decide to keep a Defeated Scarab from battle to place into your personal supply, you do not score any XP for each Scarab you keep.
Difficulty Variant: Scarab Loss
This was an original rule in the game that was removed to make the game a bit easier. With this variant, if at anytime during the game you must place a Scarab in any room (for any reason) and there are none left in the general game supply, you lose the game immediately.
This a great variant to add when playing against the Mîn Wraith or Therus, where you might be less worried about extra Scarabs in the Manor. So you'd better make certain to not let them run too far out of control and leave too few in the general game supply!
FAQs
For the latest FAQ information and rulebook updates, please visit GreyridgeGames.com.
Room Reference
Inner Rooms & Throne Room
- The Fae Breach. Lose 1 Health to gain 1 Power Token, 1 Mîn, and 1 Knowledge.
- Court of Conjuring. Gain 1 Mîn and 1 Power Token.
- Courtier's Salon. Recruit a Companion and then score 1 XP. Score 2 XP whether you recruit or not.
- Crypt of the Oracles. Gain 2 Knowledge. Score 2 XP.
- Forge Arcanum. Pay required resources to forge up to 2 Battle Dice. Gain 1 Mîn and 1 Knowledge.
- Phoenix Garden. Gain 2 Health. Refresh one exhausted Companion.
- Treasure Vault. Gain 1 Knowledge, 1 Mîn, and 1 resource of your choice.
- Throne Room. Portal to another room.
Middle Rooms
- Terrace of Temporal Rifts. For each resource spent, Reverse Time 1 spot.
- Altar of Altruism. Another player gains 1 Mîn or 1 Knowledge. You score 2 XP.
- Ancient Foundry. Pay required resources to forge 1 Battle Die. Gain 1 Mîn or 1 Knowledge.
- Atruim of Wishes. Gain 1 Health and score 1 XP. Gain 1 Mîn or 1 Knowledge.
- Cartographer's Chamber. Another player portals to another room.
- Cleansing Sanctuary. Gain 1 Health and Banish 1 Scarab from any room (other than the Throne Room).
- The Deep Mine. Exhaust a Companion, gain 3 resources of your choice.
- Draconis Shrine. Discard 1 card from your hand to gain 3 Mîn.
- General's War Room. Pay required resources to forge 1 Battle Die. Another player can pay 1 additional resource to forge a Battle Die.
- Glittering Cellar. Roll the d12 and gain the result: 1 Warden Tactic Card / 1 Power Token / 1 Power Token & 1 Warden Tactic Card.
- Lilypad Parlour. Jump to the left or right room (you can use the corresponding room action if it is not Blighted and there are no Scarabs or Fae Monster).
- Oratory Hall. Another player gains 2 XP and then another player (not the first one) gains 1 XP.
Outer Rooms
- Entrance Hall. Gain 1 Mîn, 1 Knowledge, and 1 Health.
- Abandoned Tunnels. Discard 1 card from your hand to portal to another room.
- Amphitheater of the Dead. Gain 2 Mîn and 1 Scarab.
- Ancestor's Arsenal. Another player can forge a Battle Die. You gain 2 XP.
- Archive of Mysteries. Discard 1 card from your hand to gain 3 Knowledge.
- Burbit Bibliotheca. Gain 2 Knowledge.
- Gambler's Den. Roll a d12 and gain the corresponding number of resources of your choice.
- Mad Scientist's Lab. Gain 1 Mîn and 1 Knowledge and then roll the room dice to portal to another room.
- Pools of Avalon. Pay 1 resource of your choice to gain 2 Health. Another player gains 1 Health, whether you pay or not.
- Roman Bathhouse. Advance time 2 spots to gain 1 Health, and then Move.
- Royal Armory. Pay required resources to forge 1 Battle Die. Score 1 XP whether you forge or not.
- Training Yard. Pay 1 resource of your choice to gain 1 Power Token and 1 XP.
- Recruit a Companion and then gain 1 XP. Another player can pay 1 additional resource to recruit a Companion.