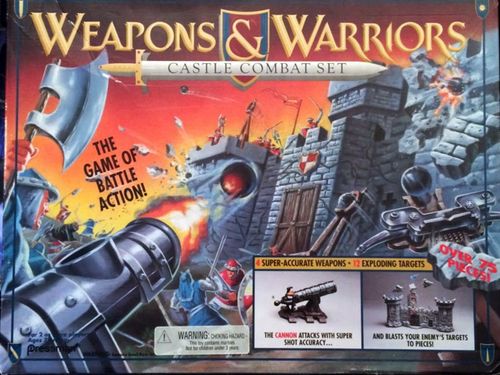
Weapons & Warriors: Castle Combat Set
Weapons & Warriors: Castle Combat Set Rulebook
Table of Contents
Table of Contents
Object
Be the first player to wipe out the opponent's army by hitting all of his soldiers and General.
Contents
The Castle (Wall with Drawbridge, 2 Towers, Keep), Triple Blast Barrier, 4 Defense Shields, 2 Power Catapults, Combat Cannon, Mighty Crossbow, Defender's Army, Attacker's Army, Battle Balls, Battle Dice, interlocking Battlefield path, path fasteners, 7 trees, rubber bands, label sheet.
Set Up
The Armies
Each army has 12 soldiers and 1 General as shown in figure 1. The Defender takes the blue army and the Attacker takes the red army. Remove and discard the small nibs on each soldier. Apply a shield label for each army member as indicated on the label sheet.
The Battlefield
Carefully detach the cardboard Battlefield path pieces. Carefully remove fasteners from their stems. The fasteners are made of top and bottom pieces which snap together (see figure 2A). Use them to connect path pieces as shown in figure 2. Fasteners allow path pieces to swivel, so your path can have a more interesting look to it. Once the Battlefield path is assembled, there's no need to take it apart.
Place tree tops on trees as shown in figure 2B. Insert 5 trees into the spaces on the central Battlefield area (the Woods). Insert 2 trees into the spaces on the Attacker's Battlefield. Turn each tree to lock into position.
The Defending (Blue) Army
Refer to figure 3 for an overview of the Defender Battlefield. Extra rubber bands are included for Castle assembly.
Assemble the two Castle Towers as shown in figure 4. Figure 4A shows how to position the rubber band to the ledge (the ledge comes assembled to the Castle Tower). Place the rubber band onto one of the two hooks. Stretch it under the ledge, between the side post spaces, and hook it onto the other side.
Figure 5 shows how to assemble the Castle Keep. Latch a rubber band onto the hooks on both sides on top of the Keep (it should be double looped as shown in figure 5A). Hold the 3 ledge pieces off to the side; you'll assemble them later (see Defender Target Spaces section).
Figure 6 shows how to assemble the Castle Wall. Figure 6A shows how to assemble the rubber band to the middle wall piece (it should be double looped). Hold the 3 wall pieces off to the side; you'll assemble them later (see Defender Target Spaces section). Apply the label to the shield space on the Castle Wall as indicated on the label sheet.
Fit the legs of the Castle Towers, Keep and Wall into the holes of the Battlefield path and slide them into place as shown in figure 2.
The Attacking (Red) Army
Refer to figure 7 for an overview of the Attacker Battlefield. Extra rubber bands are included for the Triple Blast Barrier and Defense Shields.
Assemble the Triple Blast Barrier as shown in figure 8. With the back of the Triple Blast Barrier facing you, attach the rubber band onto the hook on one side. Stretch it across the base, underneath the target spaces, onto the hook on the other side. Latch the rubber band underneath the center target space hook (the rubber band should be positioned as shown). Insert the shield on the post on the left side and apply the label as indicated on the label sheet.
Assemble each Defense Shield as shown in figure 9. Place the rubber band onto one hook. Stretch it across the base and carefully hook it onto the other side, as shown. Latch the rubber band underneath the target space hook to complete set up and apply the labels as indicated on the label sheet. Fit the legs of the Triple Blast Barrier and the Defense Shields into the holes of the Battlefield path and slide them into place as shown in figure 2.
Defender (Blue) Target Spaces
There are 8 target spaces on the Castle. Make sure they are all pushed into starting position.
To set each Castle Tower: hold the ledge down in place with one hand and snap the window into place underneath.
To set the Keep: insert the middle ledge piece, and while holding it down in place with one hand, snap the window into place underneath. Carefully fit the two side ledge pieces as shown. Close the doors.
To set the Castle Wall: close the small door on the right side and insert the middle wall piece (with the rubber band) into place as shown. Carefully add on the two side wall pieces. Shut the wall opening on the left side. Set the Drawbridge Gate by sliding it down until it's latched. Close the Drawbridge and pull the shield forward to secure its place.
One soldier is placed on the top ledge of each Tower (see figure 4). The General is placed on the target space behind the doors of the Castle Keep and 2 soldiers are placed on the top ledge of the Keep (see figure 5). Three soldiers are positioned on target spaces along the Wall and one soldier is placed on the target space behind the Drawbridge Gate (see figure 6). The remaining 4 soldiers are placed on the circle spaces directly in front of the Castle (see figure 3).
Attacker (Red) Target Spaces
There are three target spaces on the Triple Blast Barrier. Make sure they are pushed into starting position as shown by the white arrows in figure 8. For the center target space, just push down to set. For the two end target spaces, hold the trigger spots (wall sections) in place and then press down on the target spaces to set. The General is placed on the center target space and soldiers are placed on the two end spaces. Each Defense Shield has one target space. Make sure they are all pushed into starting position as shown by the white arrows in figure 9. Place a soldier on the target space of each Defense Shield.
The remaining 6 soldiers should be placed on the circle spaces near the Triple Blast Barrier and Defense Shields.
The Weapons
Each weapon has its own special firing abilities and range. Make sure to hold the weapon base securely when firing the Battle Balls. Weapons are used to fire Battle Balls only.
The Defender takes a Power Catapult, the Mighty Crossbow and some Battle Balls. Apply the labels to the weapons as indicated on the label sheet. Figure 10 shows how to load and fire the Power Catapult. It also shows the Adjuster which can be moved to set the firing range. Figure 11 shows how to load and fire the Mighty Crossbow.
The Attacker takes a Power Catapult, the Combat Cannon and some Battle Balls. Apply the labels to the weapons as indicated on the label sheet. Figure 12 shows how to load and fire the Combat Cannon. It also shows the Adjuster which can be used to set the firing range. When loading this weapon, make sure to pull the Trigger all the way out, so the Battle Ball can fall into place inside the Combat Cannon.
Hits
A soldier is hit if his target is hit and explodes, OR if he is hit directly and knocked over. Figures 4, 5, 6, 8 and 9 show the target trigger spots (indicated by the black arrows and Battle Balls).
Playing
The Attacker goes first by rolling the two Battle Dice and adding up the Battle Points. Each Battle Point allows a player to do one of the following: load and fire a weapon OR move any soldier in his army one space. A player can fire his weapons and/or move his soldiers in any combination. If he chooses to perform both actions, he must fire his weapon BEFORE moving his soldiers.
Note: The General cannot be moved at any time.
For example, a player who rolls 2 and 3 can:
- Fire his weapons 5 times;
- Fire his weapons 3 times and then move his soldiers 2 spaces;
- Fire his weapons 2 times and then move his soldiers 3 spaces; or
- Move his soldiers 5 spaces.
Whenever a player chooses to move a soldier, he has the option of moving one of his weapons along with the soldier.
Firing the Weapons
- Load the weapon with one Battle Ball and fire it at the opponent's army. This costs 1 Battle Point. Note: Weapons are used to fire Battle Balls ONLY!
- Battle Balls may be collected from anywhere. They are shared between players at all times.
- A player may move a weapon next to (but not past) any soldier on the Battlefield. From this point he can fire the weapon from any position parallel to that soldier's spot. He can also fire the weapon within the area behind that soldier but before the target spaces. If he is hit, his weapon goes back to the next soldier's position or back to the target spaces.
- Remember, a player must finish all the firing he wishes to do for his turn BEFORE moving any soldiers.
- Note: Players should stand to the side, away from their target spaces when an opponent is firing his weapon.
Moving the Army
- A player can split his Battle Points among many soldiers when moving them during his turn.
- Soldiers only move along the Battlefield path.
- Each Battle Point lets a soldier move one space forward or backward. Two soldiers cannot share the same space.
- The General and soldiers who begin the game on the Castle, Triple Blast Barrier or Defense Shields do not move. They must remain there until they are hit. Only the soldiers that start the game on the circle spaces can be moved.
- Soldiers may not advance past the furthest space of the Woods.
Winning
The first player to hit all of his opponent's army wins!
Optional Rule: The General Is Dead
If the General is knocked over, then the army is left without a leader. That player can only roll ONE Battle Die for his turn for the rest of the game.