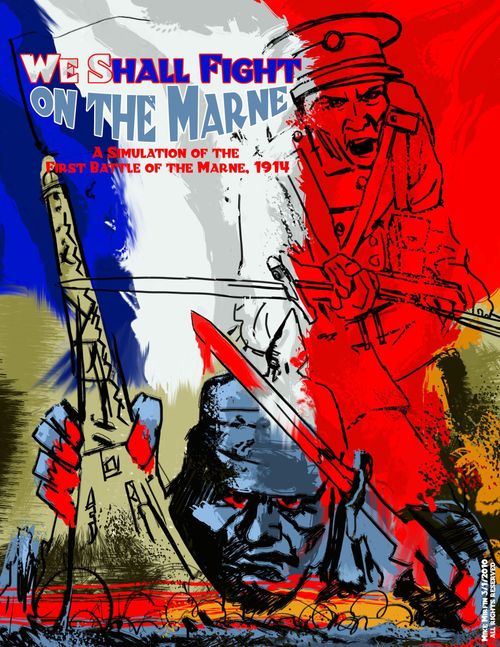
We Shall Fight on the Marne: A Simulation of the First Battle of the Marne, 1914
We Shall Fight on the Marne: A Simulation of the First Battle of the Marne, 1914 Rulebook
Table of Contents
Table of Contents
- [1.0] Introduction
- [2.0] Game Components
- [3.0] Definitions
- [4.0] Setting Up the Game
- [5.0] How to Win
- [6.0] Sequence of Play
- [7.0] Turn Weather
- [8.0] Air Observation
- [9.0] Movement
- [10.0] Cavalry Actions
- [11.0] Combat
- [12.0] End of Day
- [13.0] Reinforcements Arrival
- [14.0] Solitaire Play
- [15.0] Optional Rules
- [16.0] Play Tips
- [17.0] Designer Notes
- [18.0] Reference
- Player Reference Sheet
[1.0] Introduction
We Shall Fight on the Marne is an operational level simulation of the battle of the First Marne, 1914. Having invaded Belgium and north eastern France, the German army had reached within 30 miles of Paris. With victory seemingly near, the German First Army was instructed to encircle Paris from the east. Thus began the battle of the First Marne.
[2.0] Game Components
The Game Map: The 11" x 17" game board features a 21 by 13 hex map portraying the area where the battle of the First Marne took place. Each hex on the map represents approximately six to eight miles. The map comes in two 8.5" x 11" sheets and, once printed on card stock, will have to be joined.
The map has several terrain types as indicated in the following diagram.
The Playing Pieces: There are eighty-eight playing pieces in the game. Playing pieces are either "counters" or "markers". Counters represent units of varying sizes and types: corps, division, brigade, headquarters and generic division units. Markers are for weather, destroyed bridges, pontoon bridges and command points. Three armies are represented: the German, French and British. The information on the units is read as shown below. The counters can be printed on label paper, the label paper then mounted on card stock and the playing pieces cut out.
[3.0] Definitions
French Headquarters (HQ): HQ Command Range (number in yellow on red background) is the radial distance in hexes from a headquarters unit within which units belonging to the army of the HQ unit are "in command". Note: HQ units have no Combat Factor.
Commander is the name of the commander of the unit or army (HQ).
Army is the army to which the unit belongs.
Combat Factor (CF) is the relative strength of a unit to engage in combat.
Movement Points are the maximum number of CLEAR terrain hexes through which a unit may be moved in a single Movement Phase.
Pontoon Bridge Marker: The Pontoon Bridge Marker is used to cross rivers.
Destroyed Bridge Marker: The Destroyed Bridge Marker is used to mark a destroyed permanent bridge.
Weather Markers (Rain Marker shown) are used to indicate the current weather conditions and to mark the turn. Other Weather Markers are for Clear and Overcast.
Military Unit Size Notations on Counters: XXXX Army (HQ); XXX Infantry Corps (I and II Cavalry Corps); XX Division; X Brigade.
French Generic Cavalry Division with ID "R": Generic Unit ID is the unique identification letter for a generic unit.
Zone of Control (ZOC): The Zone of Control (ZOC) of a given hex is the area composed of the six hexes adjacent to the hex as shown in yellow in the diagram below. A unit's ZOC does not extend across a river edge even if connected by a bridge. (The Petit Morin River is an exception to this rule as it was shallow in most places.) The ZOC of an enemy unit is referred to as an EZOC.
Example of Zone of Control
Stack: A stack refers to the units in a given hex. A stack could be a single unit. The stacking limit is the number and type of units allowed in a given hex.
Command Points are used by a side (German or Allies) to modify or execute various actions in a turn and represent the ability of command staff to efficiently allocate military resources.
Out of Command: A unit is out of command if the distance in hexes between it and its army HQ unit is greater than the Command Range of the headquarters unit. Cavalry units operate independently of HQ units and are never out of command. The Command Range of a HQ unit does not extend across a river edge except for Petit Morin River edges. If a HQ unit has been eliminated, all the units belonging to that HQ unit are out of command for the rest of the game.
Broken: A unit is broken if, as a result of combat, it is removed from the game. The broken units' box is the location on the game board where corps, division and brigade counters, "broken" as a result of combat, are collected. Counters in the broken pile may re-enter the game only during the End of Day turns. The dead pile is where any unit is placed that has been eliminated from the game.
First Player: The first player is the player with the initiative for the turn.
[4.0] Setting Up the Game
Unit Start Positions. One player controls the German units and a second player controls the French and British (Allied) units. Set up units at the start of play in the following hexes or general area.
German
- IV R (Gronau) 0604
- 4th Cav. Div. (Garnier) 0505
- First Army HQ (Kluck) 0704
- IV (Armin) 0708
- II (Linsingen) 0808
- IX (Quast) 0908
- III (Luchow) 1007
- X R (Eben) 1108
- X (Emmich) 1208
- VII (Einem) 1307
- Gde (Plettenberg) 1207
- Second Army HQ (Bulow) 1106
- XII (D'Elsa) 1606
- XII R (Kirchbach) 1716
- XIX (Laffert) 1506
- Third Army HQ (Hausen) 1605
- I Cavalry Corps (Richthofen) 1002
- II Cavalry Corps (Marwitz) 1103
Allied
- IV (Boelle) Paris Entrenched Camp (PEC)
- Fifth Group (Lamaze) PEC
- Sixth Group (Ebener) PEC
- I Cavalry Division (Sordet) PEC
- Sixth Army HQ (Maunoury) PEC
- I BEF (Haig) 0710
- II BEF (Smith-Dorrien) 0609
- III BEF (Pulteney) 0509
- BEF Army HQ (French) 0610
- 1st Cavalry Division BEF (Allenby) 0409
- 2nd Cavalry Division BEF (Gough) 0810
- X (Defforge) 1110
- XVIII (Maud'huy) 1209
- Fifth Army HQ (d'Esperey) 1210
- IX (Duboise) 1508
- XI (Eydoux) 1408
- Ninth Army HQ (Foch) 1509
- II Cavalry Corps (Conneau) 1708
- Paris Garrison (Gallieni) 0307
Starting Command Points. The German side starts with two (2) Command Points and the Allied side with four (4) Command Points. Place the German Command Point Marker on the two box of the German Command Point Track and the Allied Command Point Marker on the four box of the Allied Command Point Track.
German Command Points Marker
Allied Command Points Marker
[5.0] How to Win
The Allied side wins by occupying Meaux, Chateau Thierry, and hex 1505 north of Epernay. Anything else is a German victory, which historically, may have resulted in a truce to the war and a settlement which would have favored Germany. Should a German unit occupy Paris and hold it for one night turn, the French side sues for peace and the game is over.
[6.0] Sequence of Play
The game is played in successive Game Turns, composed of alternating Player Turns. Each Game Turn is a segment of a Game Day (September 5, 6, 7, 8 and 9 of 1914): morning, afternoon, night and end of day. A Game Turn is divided into segments called "phases". The term "Phasing Player" describes the player who is currently conducting a phase. Some phases are done only in the End of Day turn as indicated below.
The Allied side has the initiative during the first Game Day. The player with the initiative is called the "first player".
AM, PM and Night Turn Phases
- Determine Turn Weather
- Air Observation
- First Player Movement
- Second Player Cavalry Reaction/Scouting
- First Player Combat
- Second Player Movement
- First Player Cavalry Reaction/Scouting
- Second Player Combat
End of Day Turn
- Process Broken Units
- Determine Next Day Turn Initiative and Command Point Increase
[7.0] Turn Weather
Weather is determined for the turn by rolling a d6. If the result is 5, the turn weather is OVERCAST. If the result is 6, the weather is RAIN. Any other roll result is CLEAR. Place the appropriate Weather Marker for the turn on the Turn Track. If the weather is RAIN, all unit Movement Points are divided by two for the turn.
[8.0] Air Observation
If the weather is CLEAR, each side rolls a d6 for results of observation by aircraft over enemy lines. If the result is 4, 5 or 6, the rolling side gets a plus 1 Command Point bonus for the turn. No air observations can be conducted in RAIN or OVERCAST weather.
[9.0] Movement
The phasing player may move any or all of his units. Movement Points are spent to enter a hex according to the Terrain Effects Chart.
Terrain Effects Chart
| Terrain of Hex | Cost to Enter |
|---|---|
| Clear, Hills, Town, Bridge (Permanent or Pontoon) | 1 MP |
| Road | 1 MP |
| Woods | 2 MP |
| Swamp | 2 MP |
| River | No Entry Across River Edge (the Petit Morin excepted) |
Roads. If all movement for a unit in a turn is on connecting road hexes, the moving unit gets a bonus in Movement Points for the turn. An infantry unit gets a +1 Movement Point bonus; cavalry and HQ units get a +2 Movement Point bonus. If a road is in a woods hex, the road is the terrain used to determine the MP cost.
Forced March. The phasing player can order a forced march for a unit for a cost of one Command Point per turn. Units under a forced march gain two (2) extra Movement Points in the turn. Forced marches cannot be conducted in RAIN weather.
River Crossings. Hex sides with river terrain cannot be crossed except at "permanent" bridges or by building pontoon bridges. Exception: In most places the Petit Morin was fordable; it can be crossed anywhere without a bridge.
Stopping in Enemy Zones of Control (EZOC). An infantry unit must stop movement for the turn if it enters the ZOC of an enemy unit. However, at the start of the next turn infantry units in an EZOC can move out of the EZOC but must again stop movement for the turn should they enter another EZOC. Cavalry units may move through EZOCs without stopping.
Exceptions: An infantry unit may move through one EZOC with the expenditure of one Command Point. This can only be done once per turn.
Out of Command Units. An infantry unit that is out of command at the start of a turn has a reduced Movement Point allowance of 1 MP. Cavalry units operate independently of HQ units and are never out of command.
Stacking Limits. A maximum of two units can occupy the same hex and only one of them can be a unit of corps size. HQ units do not count toward the stacking limit. A unit may move through a hex occupied by a friendly unit or units without penalty but may not stop movement in such a hex if occupying that hex would violate stacking limits. Exception: Two corps can occupy the same hex at the end of movement by spending a Command Point. The two corps remain stacked until one or both move at which time they must move separately. The expenditure of a Command Point is required to re-stack them after separate movement should that be desired.
Build Pontoon Bridges. An infantry or cavalry unit may "build" a pontoon bridge at the cost of one Command Point. To build a pontoon bridge, the phasing player places a Pontoon Bridge Marker in the same hex as the "building" unit. Pontoon bridges allow movement and combat in either direction across any of the river edges bordering the pontoon hex. A pontoon bridge can be used in the same turn it is built. A pontoon bridge cannot be built if all the Pontoon Bridge Markers are being used or if the phasing side has no Command Points. A pontoon bridge remains in place until removed by a Remove Bridge action.
Remove Bridges. Once an infantry or cavalry unit has stopped moving for the turn, it may remove a pontoon bridge in the hex occupied by the unit or "destroy" a permanent bridge on an edge of the hex, either action at the cost of one Command Point. To remove a pontoon bridge, take it off the map and place it in the pontoon bridge pile for later reuse. A permanent bridge can be destroyed by placing a Destroyed Bridge Marker in either of the two hexes sharing the common bridge edge. A bridge cannot be destroyed if all the Destroyed Bridge Markers are being used. A destroyed permanent bridge remains destroyed for the rest of the game. However, a destroyed permanent bridge can be replaced with a pontoon bridge.
Transferring Units. Before moving, a unit of any size can be transferred to the command of another army. The player owning the unit simply announces the change of command. A unit transfer action costs one Command Point and the unit being transferred must be within the command range of its original HQ unit. After a unit is transferred, the unit then belongs to the new HQ unit for purpose of determining being in or out of command.
Dividing Corps Units. Before moving, a corps unit can be divided into two or three generic division-sized (CF = 2) units if divisional generic counters for the army to which the corps belongs are available to be used. If all the divisional generic counters for that army are in use, a corps cannot be divided. One Command Point is required for this action and the action must take place within the range of the corps HQ unit. Corps divisions are based on the number of Combat Factors: an infantry corps with 4 CFs is replaced by (divided into) 2 generic infantry division counters (CF = 2); an infantry corps with 6 CFs is replaced by three generic infantry division counters. A cavalry corps (CF = 2) can be divided into two generic cavalry divisions (CF = 1). Place the replacement units in the same hex as the original corps hex. Stacking limits can be ignored until the replacement units conduct movement. Place the corps counter aside. This action cannot take place if the HQ unit of the unit being divided has been eliminated.
Combining Units. At the end of movement, generic division counters can be recombined into their original corps unit by the expenditure of one Command Point. Place the generic counters aside for later reuse and place the reconstituted corps unit in a hex adjacent to or in the same hex as its HQ unit. This action cannot take place if the HQ unit has been eliminated.
[10.0] Cavalry Actions
Cavalry Reaction. After the phasing side has moved all units, if a cavalry unit from the non-phasing side has had an enemy infantry unit move into its ZOC during the phasing side's movement turn, it may move (react) one hex out of the infantry unit's ZOC at no cost of Movement Points. In doing so, the reacting cavalry unit may not move into another EZOC.
Cavalry Scouting. Any cavalry unit from the non-phasing side within two hexes of an enemy unit may perform a scouting roll on the side that just moved. The player owning the cavalry unit rolls a d6. If the scouting roll result is 4, 5 or 6, the scouting side gets a plus 1 Command Point bonus for the turn. This procedure can be repeated for each such cavalry unit within two hexes of an enemy unit. For example, the Second Player has just finished moving. Now the First Player can perform cavalry scouting rolls.
[11.0] Combat
Combat is conducted by units in one or more hexes against an enemy unit or units in a single adjacent hex. Combat can take place across a river edge other than the Petit Morin only if the edge contains a permanent or pontoon bridge. A unit can attack only once per combat phase and be attacked only once per combat phase. Combat is optional.
Combat Procedure. The phasing player selects those units which will attack the enemy hex. For each combat, the attacking player rolls three d6, one for attacker bombardment, one for defender bombardment and one for combat (combat roll). Sum the Combat Factors for both sides.
Combat Factors Adjustments. A side with units defending in a hex with town, hill or forest terrain adds a bonus of two (2) Combat Factors for each such unit when tallying side Combat Factors. If a unit is being attacked from a hill hex and is defending in a hill hex, no bonus Combat Factor is awarded to the defender. A unit defending in the Paris Entrenched Camp adds two (2) Combat Factors. A unit attacking across a bridge or pontoon bridge subtracts one (1) Combat Factor.
Either or both players can choose to spend a Command Point to increase the sum of Combat Factors for their side by +2. This represents an increase of supplies and ammunition or artillery to the combat or the use of reserves. Only one Command Point can be used in this way per combat per side. The decision to spend a CP to increase Combat Factors by +2 must be made before any combat die rolls.
An HQ unit in the defending or in an attacking hex adds +1 Combat Factor to the side with the HQ unit. HQ units have a Combat Factor of zero. If a HQ unit is attacked and is the only unit in the defending hex, it is eliminated automatically.
Once Combat Factors are adjusted, subtract the sum of the Combat Factors in the defending stack from the sum of the attacking Combat Factors to yield a combat differential.
Apply any modifiers (see below) to the combat roll and cross index the combat differential with the modified combat die roll in the Combat Results Table on the Player Reference Sheet to find the combat result.
Bombardment Modifier. Infantry and cavalry units have an assumed artillery component. The attacking player's bombardment roll is effective if he or she rolled a 5 or a 6. The defending player's bombardment roll is effective if he rolled a 4, 5 or a 6. If both attacker and defender bombardments are effective, they cancel each other out and there is no result. If neither is effective there is also no result. If the attacker bombardment is effective and the defender's is not, the combat roll is modified in the attacker's favor by +1 (attacker advantage). If the reverse is true, the combat roll is modified in the defender's favor by -1 (defender advantage).
Out of Command Modifier. A side that has any of its attacking or defending units in a combat out of command takes a +1 or a -1 combat roll modifier that benefits the opposing side.
Enveloped Modifier. A defending stack that is attacked from two or more hexes is considered enveloped or flanked if two of the attacking hexes are not adjacent. See diagram below. In this case, the attacking side gets a +1 favorable combat roll modifier.
Example of an enveloped or flanked German unit
Combat Results
Attacker Retreats (AR1 or AR2). The attacking player moves the unit or units in his attacking hex or hexes one (AR1) or two hexes (AR2) away from the defending units in the opposite direction of the attack. A retreating unit cannot move into the ZOC of an enemy unit. The defending side may NOT advance after combat.
Defender Retreats (DR1 or DR2). The defending player moves the unit or units in his defending hex one (DR1) or two hexes (DR2) away from the attacking hex or hexes in the opposite direction of the attack. A retreating unit cannot move into the ZOC of an enemy unit. The attacking player must move the units in one of the attacking hexes into the hex vacated by the retreating unit(s).
Note: Any unit that cannot retreat or is forced to exit the map because of a retreat result is considered "broken".
Attacker or Defender Broken (AB or DB). Broken units are temporarily out of action. Remove attacker or defender broken units and place them in the appropriate broken units' box on the map. These units may return to the game during an End of Day phase.
If the defending side is broken, units from an attacking hex must move into the vacated enemy hex. From there, they can optionally move an additional number of hexes equivalent to their usual Movement Points (called breakthrough movement points), without regard for enemy ZOC or terrain. In effect, this is a breakthrough of enemy lines. Defending units cannot advance if the attacking side is broken.
Broken HQ units are eliminated from the game.
Combat Example 1
Two French corps, Duboise (6 CF) and Eydous (4 CF) occupy 1408 in the Saint-Gond Marshes. Following an attack by Hausen's Third Army against Foch's right, the two corps counterattack against Einem's corps (4 CF) positioned in hex 1407. The attacking bombardment is not effective (1) while the defender's bombardment is effective (5), which modifies the combat roll (6) by -1 to 5. The Combat Factors are French 10 (4 + 6) against 4 for a +6 differential. The result is DB or defender broken. Remove Einem's corps from the map and place it in the German Broken Units box. The two French corps move into the hex (1407) vacated by the broken German unit from which, using breakthrough movement points, they move into hex 1106 and then 1206 from where they threaten the approaches to Chateau Thierry.
Combat Example 2
With the French side having the initiative, BEF I and III corps (both have a Combat Factor of 4 for a total of 8 attacking CFs) attack across the Grand Morin on pontoon bridges into hex 0708 against the German IX corps (CF = 6). Neither bombardment is effective so the combat roll (5) is unmodified. Because the BEF is attacking across a river, two Combat Factors are subtracted from the Allied side to give 6 CFs (8-2). The Allies player decides to spend one Command Point to modify the Allies sum of Combat Factors by +2 to 8 (6+2). The combat differential is 2 (8-6) and the combat result is DR1. The German IX corps retreats to 0707 and the BEF I and III corps advance into 0708.
Meanwhile, BEF II (CF 4) attacks across the Grand Morin into hex 0607 against Linsingen's II corps (CF 6), losing one CF for the river crossing. The attacker bombardment was effective (5) but the defender bombardment was not (3), adding +1 to the combat roll, which yields 4 (3+1). The combat differential is (4 - 1) - 6 = -3 and for a modified combat roll of 4, the result is NR or No Result: this second BEF attack across the Grand Morin failed and BEF II and Linsingen remain in place.
Combat Example 3
Marwitz's German II cavalry corps is occupying Montirail at hex 1107. The French XVIII corps (Maud'huy) is at 1109 at the start of the French movement turn. Maud'huy's corps moves to 1108 and stops because it has entered II Cavalry Corps' ZOC, which extends across the Petit Morin River. After the French side has completed all movements, the German player decides to utilize cavalry reaction by withdrawing Marwitz's cavalry corps one hex north to 1106. In this way, the German player avoids a one-sided combat and, at the same time, in effect screens German units further to the north by preventing the French corps from crossing the Petit Morin during the turn. The German player also rolls a d6 for cavalry scouting. Since the scouting roll is greater than 3, the German side gains one (1) Command Point.
[12.0] End of Day
The End of Day turn, which takes place after each night turn, is a housekeeping turn used to process any broken units, determine the side with initiative for the next day and increment Command Points.
Process Broken Units. Any units (brigade, division or corps) in the Broken Units box for either side can attempt to be "rallied" during any End of Day turn, regardless of when the unit was broken, as long as the unit's HQ unit has not been eliminated.
Broken units rally based on their Combat Factor. For each broken unit, roll a d6 and obtain the rally result from the table below.
| Broken Unit Combat Factor | D6 Result Needed to Rally Unit |
|---|---|
| 1 - 2 | 6 |
| 4 | 5 or 6 |
| 6 | 4, 5 or 6 |
Place the rallied unit in any hex adjacent to or in the same hex as its army HQ unit, following stacking limits. Each unit successfully rallied costs the owning side one Command Point. If the side has no CPs, no units can be rallied.
Broken corps units that fail a rally roll remain in the broken units' box and can be rallied at a later End of Day turn.
Optionally, the owning player can choose to reduce a broken corps into one or two generic divisions, in effect, a permanent loss of strength. The action does NOT require a Command Point. If the corps has a Combat Factor of 6, two generic divisions (CF = 2 each) replace the unit. If a corps has a CF of 4, then one generic division replaces the broken corps. Any generic division units of the same type (infantry or cavalry) for the nationality of the unit being replaced (German, BEF or French) can be used. The generic unit or units are placed on the map in any hex adjacent to or in the same hex as the army HQ unit of the parent broken corps unit, following stacking limits. The replaced broken corps unit counter is placed in the dead pile and is never returned to the game. If no generic counter or counters are available, the broken corps unit cannot be so reduced and divided.
Day Initiative and Command Points Increase. Add two (2) to the current Command Point total of the German side and three (3) to the current total of the Allies side. Place the Command Points Marker for each side on the Command Points Track indicating the new number of Command Points available. As Command Points are added or subtracted during game play, move the markers to indicate the new totals. A side can have a maximum of six (6) Command Points at any one time and no less than zero Command Points. Any surplus Command Points are lost.
For example, it is the End of Day turn and the German side has a balance of two (2) Command Points and the Allies have two (2) Command Points leftover. Beginning the next day, the German side starts with four (2+2=4) Command Points and the Allies with five (2+3=5) Command Points.
The side with the highest number of Command Points after Command Point replenishment has the initiative during the next day. In the event of a tie, the Allied side has the initiative.
Next Day Event. For the next day event roll a d6 and apply the result from the Events Table on the Player Reference Sheet.
[13.0] Reinforcements Arrival
The following units arrive on the turn and at the hex or general area indicated.
September 6 Night
- French VII (Vautier) anywhere in Paris Entrenched Camp
- French 45th Infantry Division (Drude) anywhere in Paris Entrenched Camp
September 8 Night
- French XXI (Legrand-Girard) at 1411, if not occupied by an enemy unit
- German 43rd Reserve Infantry Brigade (Lepel) at 0301, if not occupied by an enemy unit
Both units can attempt arrival on successive turns should their entry be blocked by an enemy unit on the arrival turn.
[14.0] Solitaire Play
Roll a d6 and cross index with game situation A, B or C. The table result is the general German tactical approach (solitaire).
- A - Allied forces are south of the Grand Morin River and hold or are near the Saint-Gond Marshes and the French Sixth Army moves toward the Ourcq River.
- B - Allied forces are north of the Grand Morin and nearing the Ourcq River.
- C - Allied forces are at the Marne River and across the Ourcq River.
| D6 (Down) | A | B | C |
|---|---|---|---|
| 1 | a | a | a |
| 2 | b | a | a |
| 3 | c | b | a |
| 4 | c/d | c | a |
| 5 | c/d | c/d | a |
| 6 | e | c/d | a |
Solitaire Table Key
- a - German units move to defensive terrain (hills, rivers, towns, woods) and hold.
- b - German Second Army moves west to attack Paris.
- c - German Second (or Third) Army moves north to defend the Ourcq and conduct offensives against any French forces in that area.
- d - German Third Army attacks the town of Sezanne.
- e - All German units attack south across the Grand Morin River.
[15.0] Optional Rules
Initiative. The player with the initiative for a turn can be determined each turn instead of for the entire day with the side with the highest number of CPs having the initiative. In the event of a tie, the Allied side has the initiative.
Weather. Weather can be determined for the entire day instead of each turn.
Reinforcements. For both the French XXI (Legrand-Girard) and the German 3rd Reserve Infantry Brigade (Lepel) roll a d6 each turn starting with the September 5 AM turn. If the result is 6, then the unit enters that turn at the hex and under the conditions described in the Reinforcements Arrival section.
Source note: the optional-rules text reads "3rd Reserve Infantry Brigade" while Section [13.0] reads "43rd Reserve Infantry Brigade". Both are transcribed as printed.
[16.0] Play Tips
A quick glance will reveal that the German left wing is strong but that the German right wing is in deep do-do. The challenge for the German side is to shore up its right while maintaining cohesion.
The German player must be careful when allocating scarce Command Points. For example, if all Command Points are used by an End of Day turn, no broken units can be returned to the game and they are not available for at least a day. Having fewer starting CPs reflects the relatively poor German organization and communication during the battle.
Enveloping or flanking is a good tactic as it earns a +1 combat roll modifier for the attacking side. This can be done, for example, by dividing a corps into divisions. But this tactic spreads out your forces and makes them vulnerable to a concentrated counterattack.
The Allied player has the onus to capture the key hexes or it will effectively lose the war and so might best pursue the offensive vigorously. Conversely, if the German player can mount a strong defense, there will be celebration in Berlin and, after the truce on the Western Front, armies can be sent east to deal with the Russians.
[17.0] Designer Notes
When researching the battle of the First Marne, one thing that struck me was the poor execution of command of the German general staff apparently due to the German army's prewar neglect of communications and control procedures.
Another was the importance of cavalry in this early war battle. Cavalry was used for reconnaissance, screening and even in combat. They were augmented by horse artillery and would often dismount and fight like dragoons, making them a kind of mobile light infantry.
A third aspect was the transfer of units from army to army, depending on battlefield conditions.
Finally, I was impressed by the role water terrain played in the battle, which could have been appropriately named the Battle of the Four Rivers. Besides the Marne itself, there was the Ourcq River, the Grand Morin River, the Petit Morin River (which was shallow and easily fordable in most places), and the Saint-Gond Marshes as well as other smaller streams not shown on the game map.
The use of Command Points is a central part of the game mechanics used in We Shall Fight on the Marne. Command Points represent the application by command staff of resources in battlefield situations. As such resources are limited, the player is forced to choose among alternatives for using his or her supply of Command Points at any one time. By handicapping the German side with respect to Command Point accumulation, the game design reflects the fact that the German command staff showed less than stellar communication and cooperation during the battle.
Probably more legend than fact, the game title, "We Shall Fight on the Marne", comes from a quote attributed to General Joseph Joffre, commander of Allied forces at the Marne, while planning the Allied counterattack.
[18.0] Reference
The famous "taxis of the Marne" event that supposedly saved Paris was not included in the game because militarily it was insignificant. Two divisions of the Paris reinforcements due Maunoury's 6th Army mostly were sent by rail. Paris Governor Gallieni had the police confiscate twelve hundred Paris taxis and used them to transport the remaining elements to the front twenty miles away as a precaution in the event of a rail breakdown. The idea was brilliant but its execution dismal. Taxis veered off the road, ran into each other, had endless flat tires and got lost in the dark. Many troop passengers had to walk the last few kilometers to the battlefield. Still, Gallieni's taxis made history as the first use of motorized troop transport in war.
Holger H. Herwig, The Marne, 1914: The Opening of World War I and the Battle that Changed the World (Random House, New York, 2009)
Player Reference Sheet
Combat Results Table
Columns are the combat differential (sum of attacking Combat Factors minus the sum of defending Combat Factors, after adjustments). Rows are the modified combat roll.
| Mod D6 V | -9 or more | -8 to -5 | -4 to -1 | 0 | 1 - 4 | 5-8 | 9+ |
|---|---|---|---|---|---|---|---|
| < 1 | AB | AB | AB | AB | AR2 | AR1 | NR |
| 1 | AB | AB | AB | AR2 | AR1 | NR | NR |
| 2 | AB | AB | AR2 | AR1 | NR | NR | DR1 |
Combat Results Key
- AB - Attacker Broken
- DB - Defender Broken
- ARx - Attacker Retreats x Hexes
- DRx - Defender Retreats x Hexes
- NR - No Result
Combat Modifiers
- Def. in Defensive Terrain: +2 to Combat Factors Sum (CFS)
- Unit Attacking Across a Bridge: -1 to CFS
- Att. Or Def. Uses 1 Command Point: +2 to CFS
- HQ Unit: +1 to CFS
- Bombardment Roll Attacker (5-6): +1 to Combat Roll (CR)
- Bombardment Roll Defender (4-6): -1 to CR
- Defender Enveloped: +1 to CR
- Attacking Unit Out of Command: -1 to CR
- Defending Unit Out of Command: +1 to CR
Events Table (Next Day Event, rolled with a d6)
| D6 | Event |
|---|---|
| 1 | The BEF moves too cautiously. Halve the Movement Points of each BEF during the next day. |
| 2 | Foch calms a panicky Gallieni, the Governor of Paris: the Allied side gets one additional CP. |
| 3 | German units mount a surprise bayonet attack and get one additional CP. |
| 4 | Bulow fails to use air reconnaissance; subtract one German CP. |
| 5 | The telephone lines between Bulow and Kluck are not working; subtract one German CP. |
| 6 | Moltke and Bulow suffer from illness; subtract 2 German CPs. |
Actions Requiring Command Points
- Two Corps Stacked in a Hex
- Build Pontoon Bridge
- Remove Permanent bridge
- Forced March
- Move through an EZOC
- Divide/Combine a Corps Unit
- Transfer a Unit
- Combat Factors Sum + 2
- Rally Broken Unit (End of Day Phase)