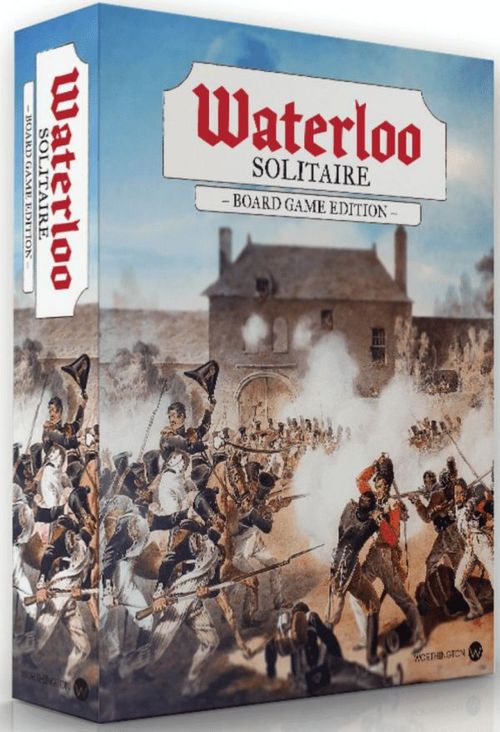
Waterloo Solitaire Board Game
Waterloo Solitaire Board Game Rulebook
Table of Contents
Table of Contents
Introduction
The battle of Waterloo is the most famous of the Napoleonic era, bringing that time to a close.
Its impact on history has been debated, but never doubted. The phrase "to meet your Waterloo" has entered the English language as a phrase signifying a great test with a final and decisive outcome. At stake was Europe's dominance, and in some respects the world.
Waterloo was the first and only time Napoleon and Wellington faced each other in battle during the Napoleonic wars. The historical result is known. The victor, Wellington, knew how close the outcome swayed.
Now you are in command and the decisions are yours...
Game Summary
You take the role of Napoleon commanding the French army against an opposing Allied autonomous player side, referred to as the Allied BOT side. And you can take the role of Wellington, commanding the Allied army against a French BOT side. Each opposing BOT side has 3 levels that relate to its skill; Challenging, Veteran, and Tough.
One side is played by you (either Allied or French) and uses player cards for the actions for the side being played. The BOT opponent uses the solitaire actions for the other side that are played via die rolls on the BOT player card.
A player can play one action card per game turn from their hand of cards available for the side they are playing. He also has the option of using Combined Arms Tactics with a supporting card action to the one card action played. Your choices can cause Die Roll Modifiers (DRM) that affect attacks with results that cause unit eliminations and tactical events to occur.
The object of the game for the French player is to defeat the Allies by the end of the game. This is accomplished by removing all units in 2 of the 3 Allied infantry formations. The object for the Allied player is to avoid defeat by the end of the game. Both sides also have several other ways to win or lose before the game ends.
Game Board and BOT Solitaire Action Charts
The game board shows the Waterloo battlefield map with French and Allied armies facing each other. The armies are represented by named formations and each has a group of units attached to them that represent troops of cavalry or infantry. The Allies have 7 formations; Hougoumont, Right Wing, Reserve, Cavalry, Left Wing, La Haye Saint and Prussians. The French have 6 Formations; III Cavalry, II Corps, Reserve, Imperial Guard, I Corps, and IV Cavalry.
The French units are blue wooden blocks. The Allies are red and green wooden blocks with the green units representing Prussians that enter play during the course of the game. In game terms the "Allies" represent both the red and green units. The wooden blocks are placed on each like color block image on the board. Images of blocks outlined in a color with a white center are reinforcements and do not have a block placed in them until reinforcements arrive. The board is used to remove units from play or show reinforcements arriving in play by adding or removing the wooden blocks from the game board.
There is also a sequence of play, Attack Results Table and Combined Arms Tactics chart. The Combined Arms Tactics chart on the game board is only used by you for the side being played. Artillery and all other elements on the game board are depicted for aesthetics.
The BOT solitaire action chart with the actions also has Tactical Events used for the opposing BOT side. They have 6 actions and 6 Tactical Events that can be played. They are brought into play each game turn by a die roll that determines which one action to use and if the Tactical Events are to be used for the turn. The player side uses cards to implement his actions.
Game play is centered around using the cards played by the player to activate Allied and French formations for the side being played. The BOT solitaire action chart shows the actions the BOT side has available when it plays the opposing side.
Game Components on the Game Board
Formations and Units
Each game is set up for play by placing wooden blocks on the game board that match the colors of each side's formation units. Each side has named Formations, composed of either Infantry Units or Cavalry Units.
A formation is composed of wooden units which represent troops in the Waterloo battle. When units for both sides are removed by attacks and tactical events, the unit wooden block is removed from the game board to show it is no longer in play.
Any formation that has all of its units on the game board removed is considered destroyed – which can affect the play of actions and can matter for victory purposes for certain formations. A player formation, once destroyed, may never be reassembled, and reinforcements cannot be added back into it.
Some formations have infantry units that are outlined on the game board which do not start in play. They have a white center with an outline in blue (French) or red (Allied) and green (Allied Prussians). They are reinforcement spaces and do not become units in play until they arrive as reinforcements. Place units in these spaces when reinforcement units arrive from reinforcement type actions (Reserve, Prussians Arrive.) and are treated as units of the receiving formation.
Board legend: Infantry Unit; Cavalry Unit; Reinforcement Space; French; Allied; Prussian.
Hougoumont and La Haye Saint are formations with 1 unit. They are NOT part of the right and left wing of the Allies for the game but DO affect French attacks against those wings IF allied controlled.
Actions
Each side has an action they can perform each game. Generally, actions activate formations to attack and they target an opposing formation that defends. Units within the attacking and targeted formations take hits from attacks which causes their removal from the game. Some actions can cause tactical events or bring reinforcements (Prussians and Reserves). When these actions occur, the units are removed to show they are hit or added to show reinforcements arriving.
The player side uses action cards for the side being played. The solitaire BOT side uses actions from the BOT solitaire action chart.
Each side (Allied and French) has actions that correspond to the formations on the game board. The actions (via cards for the player and a chart for the BOT side) list what a formation can do when selected for activation. There are some actions that are not directly related to formations (Fire Artillery, Napoleon, etc.). Some actions may have die roll modifiers (DRMs) it may use under certain conditions.
The player's actions are choices. You may only select ONE card action for each turn. Each player card action has a limited number of times it can be played based on the cards in the player deck. Play the action selected for the turn by playing a card from your hand. Carry out the action and place the card face up in a discard pile.
The opposing BOT actions are put into play each turn by a die roll that determines which one to select from the BOT Solitaire Action Chart for the side and difficulty level for the BOT. In some cases it also uses a tactical event for its implementation. BOT actions are not limited in the number of times they can be played unless the action requires the use of a BOT formation that no longer has units in play. In that case the action is ignored unless the action implements tactical events.
Game Start and Set Up
To start a game, select the side you want to play, Allied or French. Take the action cards for the side chosen and shuffle them and place them face down near you. This is the action card deck for the player. Deal cards for your hand based on the difficulty level of the BOT side being played; 7 cards for Challenging, 6 cards for Veteran, and 5 cards for Tough. The remaining cards will be drawn during game play to replace the cards played from your hand.
Select the BOT difficulty level you want to face for the opposing BOT. Place the BOT Solitaire Action Chart for that side and level on the easel facing you.
All other BOT Solitaire Action Charts and player cards for the side not being played are set aside and will not be used for the game.
Place wooden block units on each like color unit block image on the board. Images of blocks outlined in a color with a white center are reinforcements and do not have a block placed on them to start the game.
Place a cube on turn 1 of the turn track and a cube on the 3 space of the Combined Arms Tactics track if playing the British and the 5 space if playing the French.
The Allies control Hougoumont and La Haye Saint at the start of the game. No Prussian units are in play yet. No player side reinforcements have been moved to another formation yet. These unit spaces are treated as though no units are in them for the start of the game. As actions bring these units into place and play, they are placed in these spaces to show their arrival.
Allied Control of Hougoumont and La Haye Saint
Artillery is not a formation and the cannon depicted on the game board are for aesthetics only. Firing Artillery IS an action that can cause hits to a targeted formation but since artillery is not a formation it does not receive hits.
These locations start the game in Allied control. Also, the controlling Allied formation is named the same. If a French attack on them causes a hit to the Allied formations the Allies lose control. This is shown by marking an X on the unit in these formations. Once the Allies lose control of Hougoumont or La Haye Saint, they remain in that state for the rest of the game.
Turn Sequence of Play
The Sequence of Play is based on a "turn." It consists of you selecting one card from the hand available to you as a player, determining one solitaire opponent action, and carrying out the actions and results. Once completed the turn is over and a new one begins.
Each Turn Uses the Following Sequence of Play
- Select a card from your hand to play for the side (French or Allied) you are playing. If a Combined Arms Tactic is possible and being used, choose the supporting card card from your hand to play with the card played and reduce the Combined Arms Tactics available by moving the cube downward.
- Roll one die to determine the opposing BOT side action in play for the turn from the BOT Solitaire Action Chart being used and carry out the action instructions. This may include the use of Tactical Events.
- Play/apply the opposing BOT side action. If it calls for an attack, resolve the attack before the play of the card action for the side you are playing.
- Play the card action you selected, applying any BOT action affects (DRMs, etc.) to your action.
- Draw cards equal to the number played during the turn.
- Advance the cube on the turn track on the game board.
- Begin a new turn and repeat the turn sequence.
1. Select Your Card to Play for the Turn
Choose the card you want to play from your hand. Place the card face up in front of you.
Player cavalry and infantry formations that no longer have units on the board cannot be activated. A card that activates them can be played but no action is carried out for the formation without units in play. It clears a poor card from your hand.
2. Determine the BOT Side Action for the Turn
Their action is determined after you select a card to play. The solitaire opponent side does not "choose" which action to play, that is determined by a die roll. Roll 1 six-side die and use the result on the BOT Solitaire Action Chart to determine which BOT action to use for the turn.
If a Tactical Events occurs roll a die roll to determine what event to use for the turn.
3. Play/Apply the BOT Side Action for the Turn
The BOT action selected is in play for the current turn only. You must resolve any BOT side action attacks on your formations before implementing any attacks from your selected action for the turn. Hits are applied to the attacking and defending formations.
If a BOT action calls for an attack with a formation that has no units still in play, the action is ignored unless it says Use the Tactical Events. In that case the tactical events would be used for the action.
Design Note: It is to a player's advantage to eliminate all the units of an opposing BOT formation because when that BOT formation becomes active it cannot attack you. This is especially true when the formation does not have a condition that sends their action to the tactical events table.
Resolving BOT Attacks
For a detailed example of Resolving Attacks, see page X.
BOT attacks occur when attack type actions are used. When BOT actions attack, the attacking BOT formation identifies the player target formations.
BOT attack actions require you to roll one die and apply the results based on the Attack Results Table. Some opposing side actions require a Die Roll Modifier (DRM) when the Attack Results Table is used. Adjust the actual die roll up or down for the modifier to determine die roll result to use on the Attack Results Table. Modifiers are cumulative but the maximum DRM can be +2 for the Allies and -2 for the French.
Compare the die roll (1-6) to the appropriate row to determine results.
When a formation is hit in an attack, remove one of its units off the game board for each hit received.
BOT attacks against player formations that have no units are ignored unless it can use the Tactical Events.
4. Play Your Player Side Card Selected for the Turn
Once the BOT opposing side action is resolved, then execute your action(s) from the card played and any affects (DRMs, etc.) the opposing side action had on your action(s).
Each card action used explains how the action is executed and lays out the conditions required to be able to use the action.
If the player cannot play an action from a card played, the action is ignored, but the opposing side action is carried out.
If a player card action is canceled by a tactical event the action is not carried out.
Players are not allowed to "switch" the detail or target of an action played once selected. Place a cube on the action portion being used on the card to help keep track if necessary.
For example, on the French Cavalry Charge you must choose the III or IV Cavalry before seeing the Allied action and must stay with that choice after seeing the Allied action. The same for target selection.
Player actions can be affected by the opposing side's actions.
For example, the player is the French and he uses the Imperial Guard to attack the Allied Left Wing. The Imperial Guard has two units left on the board. The Allied action is cavalry charge against any player attacking action. It causes 2 units to be removed for the Imperial Guard, meaning that none are on board when it is time to execute the player action. The actions cannot be used because there are no units on board. In that case the action activation is ignored and not used.
Attack type orders use the Attack Results Table, and always cause hits that remove formation units (yours and the opposing side) from play.
Fire Artillery type actions use a die roll result on the card action that can cause a hit to the opposing side, but also have misses and never cause a hit to the firing side.
Reinforcement type card actions allow units to be added to formations from Reserve or in the case of the Prussians, come into play.
Resolving Player Side Attacks
Card actions list when formations can attack and what opposing formations can be targeted and any DRMs that apply. When an attack is chosen, the attacking formation rolls 1 die, and after applying any modifiers, checks the Attack Results Table to determine results.
Hits from the Attack Results Table are applied to target units and the activated attacking formation. 1 hit means 1 unit must be removed from the game board from the targeted formation.
Important: Once an opposing formation has lost all of its units there is no reason to attack.
Reinforcement for the Player Side
The player has the ability to reinforce his key infantry formations with additional units with his Reserve action. The Allied player can reinforce his Right and Left Wings. The French player can reinforce his I Corps and II Corps. This is accomplished by playing a card for the Reserve formation. When played, move Reserve units that are used to reinforce from Reserve to the formation reinforcement spaces receiving the additional units from Reserve.
For Example: The Allied Player plays a card that allows Reserve to reinforce his Right Wing. He removes 2 Reserve units from the Reserve formation and places them in the 2 Reinforcements units spaces of the Right Wing.
Napoleon and Wellington Special Ability for Player Actions
They may activate ANY action that is in the discard pile that has no activations available and still has units on the game board. Wellington can also activate the Prussians. Wellington and Napoleon cannot use activations for "Artillery Fire."
Combined Arms Tactics
At your discretion, you have combined arms tactics you can employ during your attacks on the opposing side. As the French player, you have 5 combined arms attacks that provide a -1 DRM to improve the odds of your attack. As the Allied player, you have 3 combined arms attacks that provide a +1 DRM to your attack odds. Move the cube along the track for each tactic used to show the remaining available.
How to Use Combined Arms Tactics
Two available cards are needed to perform a Combined Arms Tactic, one is the primary the other is the secondary. Using a Combined Arms Tactic allows the secondary card action to apply a DRM advantage to your primary card action (+1 for Allied Actions, -1 for French Actions).
The primary card action can only be an Infantry action or a Cavalry action. The supporting card action can be Infantry, Cavalry, or Artillery. However, the supporting cannot action cannot be the same type as the primary. Both actions must be able to target the same opposing formation that is being attacked. Only the target formation and primary card action's formation will receive hits during a Combined Arms Tactic, the secondary action does not receive hits.
For Example: The French player is going to do a combined arms attack against the Allied Left Wing with the Imperial Guard as the primary card action and the Cavalry Charge as the supporting card action. This is possible because both primary and supporting card action can target the Left Wing. To execute the Combined Arms Attack play both cards, the Imperial Guard card is the primary action and Cavalry Charge secondary support. After the Allied action is resolved for the turn, the French Combined Arms attack is played. The Imperial Guard attacks the Allied Left Wing with a -1 DRM. It rolls 1 die for the attack and applies the result from the Attack Results Table. It rolls 5, modified -1 DRM, resulting in a 4. This causes 1 French hit and 1 Allied hit. The hit for the French must be applied to the primary action, the Imperial Guard. The Allied hit is applied to the target, the Left Wing.
Fire Artillery Card Actions
Artillery causes hits but never receives "hits". The artillery fire uses its own hit table that is on the action, it does not use the Attack Results Table.
How to Win
The French Player vs. Allied BOT
The French player wins at the end of any turn when they eliminate all units in 2 of the 3 following Allied formations:
- Right Wing
- Left Wing
- Reserve
The French player can lose the game at the end of any turn when all the units (including any reinforcements moved from Reserve) for the French I Corps OR the French II Corps are removed from the game.
The French player loses if any turn ends and 7 or more Prussian units are on the board. Note, eliminated Prussian units do not count towards this number.
The French lose at the end of turn 18 if they have not achieved victory.
The Allied Player vs. French BOT
The Allied player wins if his Right Wing AND Left Wing still have units remaining on board at the end of turn 18.
The Allied player loses the game at the end of any turn when all the units (including any reinforcements from Reserve) for the Allied Right Wing or Allied Left Wing are marked out of the game.
The Allied player can win the game at the end of any turn if he eliminates all units in the French I Corps and II Corps.