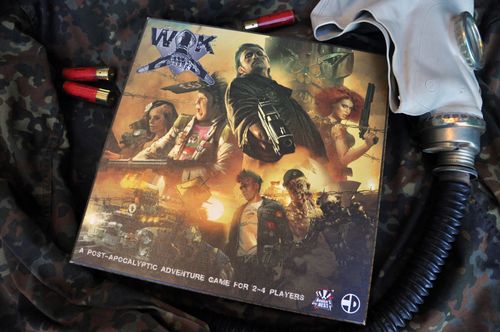
Waste Knights
Waste Knights Rulebook
Table of Contents
Table of Contents
- Introduction
- Game Components
- Game Setup
- Game Board Overview
- Knight Overview
- Game Overview
- Glossary
- Preparations Phase
- Wasteland Phase
- Making Checks
- Winning the Game
- Luck Cards
- Combat
- Duels and Interacting Knights
- Additional Rules
- Gear Cards
- Special Tokens
- Game Variants
- Reference Sheet: Hexes
- Reference Sheet: Icons
- Turn Reference
Introduction
During the game, players travel over a modular, hexagonal board representing Australia using various vehicles, face horrific monsters and mutants as well as brutal gangs, visit strange places and barter useful gear experiencing a rich and immersive, post-apocalyptic setting. Finally, they are the ones to decide whether humanity shall rise to its former glory or plunge into the depths of barbarity in this savage, new era.
Game Components
The game box contains the following components:
- This Rulebook
- Mission Book
- Modular, Hexagonal Board: 1 Central Board Tile (5-hex tile), 32 Board Tiles (1-hex tiles)
- 1 Mission Tile (1-hex tile)
- 6 Board Frame Pieces
- 13 Knight Sheets
- 13 Knight Markers
- 2 Villain Markers
- 4 Player Boards in 4 colors (amber, blue, red, yellow) with: 4 Fuel Indicators in matching colors, 4 Radiation Indicators in matching colors, 8 Plastic Connectors
- 8 Ammo Markers in 4 colors (amber, blue, red, yellow)
- 8 Health Markers in 4 colors (amber, blue, red, yellow)
- 1 Reference Sheet
- 117 Other Markers and Tokens, including:
- 20 Player Markers, 5 in 4 colors (amber, blue, red, yellow), including 4 Reputation Markers
- 1 Waster Marker
- 1 First Player Marker
- 1 Round Marker
- 1 Dominance Marker
- 1 Range Marker
- 16 General Markers
- 6 Health Loss Tokens (3 with -1/-2 values, 2 with -1/-3 values, 1 with -1/-5 values)
- 4 Dice Modifier Tokens (dice gained/suffered)
- 14 Route Tokens
- 14 Radiation/Contamination Tokens
- 14 Threat/Move Obstacles Tokens
- 6 Vehicle Damage Tokens
Component Descriptions
Mission Book. The Mission Book contains an example of a game round "Road to Gangraen" and 5 missions – game scenarios that players can choose from each game.
Game Board. The Game Board is formed of 37 hexes representing a large part of Australia. It is divided into City Hexes, Special Hexes and Normal Hexes. More about the game board, see the Game Board Overview.
Board Frame. The Board Frame is comprised of 6 pieces. They line the board and help set up different game components.
Knight Sheets. Knight Sheets represent characters that players impersonate during the game. They contain all information pertaining to knights, such as skills or starting gear.
Knight Markers. Knight Markers correspond to different characters and represent them on the board.
Villain Markers. Villain Markers correspond to different villains of the Waste that can be encountered in the wasteland and represent them on the board when playing certain missions.
Player Boards with Dials. Players use Player Boards to track resources at their disposal (Ammo, Fuel, Health, Radiation). Each board features 2 dials for counting current Radiation and Health levels.
Ammo and Health Markers. Ammo and Health Markers are used along with a player board to track a given knight's current levels of Ammo and Health.
Reference Sheet. The Reference Sheet contains descriptions of all cities and special hexes from the board as well as a list of icons from different game components. You can find the same information on the back cover of this Rulebook.
Player Markers. Each player has 5 Player Markers matching his player board color. The Reputation Marker is used to mark a knight's current Reputation on the Reputation and time track, while the other 4 markers have various applications ex. marking tasks, mission requirements etc.
Waster Marker. The Waster Marker indicates the player who is currently the Waster – the evil spirit of Australia responsible for choosing wasteland cards, playing as enemies and making various decisions during the game.
First Player Marker. This marker indicates the player who is the first to move and explore the board in a given round.
Round Marker. This marker indicates which round it is. Each mission is played over a certain number of rounds, after which the winner of the game is determined.
Dominance Marker. The Dominance Marker is moved along the Dominance Track to indicate which side has better chances of winning current combat.
Range Marker. This marker is placed on range cards. It indicates the current range at which combat is being fought.
General Markers. General Markers are mainly used to remind that certain gear cards have been used. They have other applications as well, depending on effects of various game components or missions.
Health Loss Tokens. Health Loss Tokens indicate during combat how much Health a given enemy from a wasteland card lost.
Dice Modifier Tokens. These tokens inform about dice gained or suffered by a knight or an enemy making a roll or check.
Route Tokens. The knight currently resolving his move uses Route Tokens to show the Waster the hexes through which he is moving.
Radiation, Contamination, Threat and Move Obstacles Tokens. These tokens are used to mark on the board effects of certain wasteland cards.
Vehicle Damage Tokens. These tokens are placed on vehicle cards to indicate damage suffered during the game.
Task Tokens. Task Tokens are used to mark hexes and other game components corresponding to available task cards. Token colors match spaces on the task frame, where task cards are placed.
Special Tokens. Special Tokens are used to mark on the board effects of certain task cards.
Mission Markers, Mission Supremacy Marker and Mission Tile. Large and Small Mission Markers, the Mission Supremacy Marker and the Mission Tile are used in different ways to mark game components important for the mission being played. Their function is described in the Mission Book and other materials containing new missions.
Plastic Bases and Dice. Knight, Villain and Mission Markers are slid into Plastic Bases and 10-sided Dice are used to make different checks or rolls.
Gear and Vehicle Cards. Small-sized Gear and Vehicle Cards represent useful equipment, drugs, weapons as well as vehicles necessary to survive in the Waste. They come in different colors depending on their value and can be traded in cities.
Wasteland Cards. Wasteland Cards represent strange encounters, events and enemies that knights face during the game.
Luck Cards. Luck Cards are used by knights for certain one-time, beneficial and powerful effects like dice rerolls, additional damage etc.
Task Cards. Task Cards describe short quests and errands given to knights by inhabitants of the Waste. Knights can accomplish them to gain Reputation and new gear.
Combat and Range Cards. These cards are used to resolve combat. They represent distance and combat maneuvers used by knights.
Assembling Player Boards
Before your first game, you should carefully remove all cardboard game components from their frames and then assemble player boards as described below. Each board is marked with a different color (amber, blue, red or yellow). You should attach 1 Radiation indicator and 1 Fuel indicator in a matching color to each board using plastic connectors. Attach indicators according to markings on a given board and its matching indicators.
Game Setup
In this section you can find the game setup and the gameplay for 4 players. The game setup and rules for 2 and 3 players are described in the 2 and 3 Players section. Mission rules can alter the normal game setup and always take precedence over the rules described below.
1. Game Board Setup
The game board is formed of three Tiers. When setting up the board, use the Board Setup Diagram (Tier 1: central tile C1 with S1, S2; Tier 2: C2, C3, S3, S4 plus normal hexes; Tier 3: C4, C5, S5-S10 plus normal hexes) and the reference sheet that contains city hex numbers. All board tiles are placed on the board face-up.
- A) Prepare Hexes: Divide board tiles according to their backs into city hexes (with a city icon), special hexes (with S icons) and normal hexes. Then, shuffle special and normal hexes separately without looking at them and place them into two separate, face-down hex stacks.
- B) Form Tier 1: Place the central board tile with the city of Gangraen [1] (C1) in the middle of the playing area. Then, draw top 2 board tiles from the special hex stack and place them one after another as shown in the diagram (S1, S2).
- C) Form Tier 2: Place the Pumps [2] and the Queen's Valley [3] city hexes as shown in the diagram (C2, C3). Then, draw top 2 board tiles from the special hex stack and place them one after another as shown in the diagram (S3, S4). Finally, complete Tier 2 by drawing and placing top board tiles from the normal hex stack. You can start placing normal hexes from any empty space and then continue clockwise around Tier 2 until all spaces are filled with board tiles.
- D) Form Tier 3: Place the New Sydney [4] and the Alice Offsprings [5] city hexes as shown in the diagram (C4, C5). Then, draw top 6 board tiles from the special hex stack and place them one after another as shown in the diagram (S5-S10). Finally, complete Tier 3 in the same way as Tier 2 using normal hexes. If there are any board tiles left, return them into the box – they will not be needed in this game.
- E) Assemble Board Frame: Place and connect all 6 pieces of the board frame as shown in the diagram so that they encircle and lock all board tiles together. The frame includes the Stalls Frames (two), Task Frame, Combat Frame, Range Frame and Wasteland Frame.
2. Player Setup
Each player rolls 1 die. The player with the highest result takes the First Player marker and from this moment on will be called the First Player. The player sitting directly opposite the First Player takes the Waster marker and from this moment on will be called the Waster.
The First Player chooses 1 knight sheet and places it in front of himself. Next, he chooses and takes 1 player board of any color, 5 matching player markers (4 normal markers and 1 Reputation marker) and 4 matching Ammo and Health markers. All other players do the same, starting from the player to the right of the First Player and going clockwise around the table.
All players place their Reputation markers (star side up) to the left of the Reputation and time track. Next, they place Ammo and Health markers on their respective spaces of their player boards so that the marker with the "2" side up is placed first and the marker with the "4" side up is placed on top. Radiation dials (upper ones) should be rotated so that they point at "0", while Fuel dials (lower ones) so that they point at "4". Then, each player takes his knight marker, slides it into a plastic base and places it on the Gangraen [1] hex. Finally, each player chooses 1 vehicle card (Strider, Off-road or Heavy-duty) and places it the yellow side up next to his player board.
The First Player searches the green gear deck for 4 sets of the following gear cards: Extra Bullets, Medi-shot and Rad-out and gives 1 set of cards to each player – these are knights' additional gear cards. Players can place those cards in their pockets, backpacks and/or vehicles. Place cards in your backpack and your vehicle face-down.
In order to finish the player setup, the First Player shuffles luck cards and deals 3 cards to each player, starting from himself and going clockwise around the table. Players can read their luck cards, but they should keep them secret from their rivals.
3. Cards Setup
- A) Wasteland Cards and Luck Cards: Shuffle wasteland cards and luck cards separately and use them to form 2 decks. Then, place them face-down on the Wasteland Frame (showing the matching card backs).
- B) Combat Cards: Divide combat cards into the blue and red combat decks. Then, place them face-down on the Combat Frame (with the dominance track and showing the decks' colors).
- C) Range Cards: Place face-up range cards on the Range Frame (showing the matching card back), placing the Short Range card on the leftmost space, the Medium Range card on the central space and the Long Range card on the rightmost space of the frame.
- D) Task Cards: Divide task cards into 2 decks. One deck should only contain task cards marked in the lower-right corner with a common-task icon. This is the Common Task Deck. The other deck should only contain task cards whose game text features bullet points. This is the Private Task Deck. Both decks should be shuffled separately and placed face-down near the Task Frame (showing the matching card back). Then, draw the top card from the common task deck and place it face-up on the leftmost (purple) frame space. Finally, draw top 2 cards from the private task deck and place them one after another on the other two frame spaces (orange and green, respectively) marked with screw heads bearing a private-task icon.
- E) Gear Cards: Divide all gear cards into separate decks according to their colors and number of stripes on their card backs (green, yellow, red and blue). Set the blue gear deck aside – it will be needed later during the game. Shuffle the other decks separately and place them face-down near the Stalls Frames (showing the matching card backs). Next, draw top 4 cards from the green gear deck and place them face-up one after another on the Stalls spaces showing green card backs, starting from the leftmost space. Repeat this process for 4 yellow and 2 red gear cards until all spaces on both Stalls frames contain a matching card.
- F) Vehicle Cards: Form a separate pool using all vehicle cards available at the beginning of the game and place it near the wasteland frame, next to the flag of Australia. This is the Vehicle Pool.
4. Choose Mission
Players decide together which mission they wish to play. If they cannot agree, the Waster chooses the mission. Missions can be found in the Mission Book, future game expansions and online game materials. Before your first game, it is recommended to read the example of the game round "Road to Gangraen" in order to learn the basic game rules and then to play the first mission "Savior of the Waste".
Once players have chosen their mission, they place the mission sheet (the Mission Book opened on the proper page or the mission from a different source) in a place visible to all players, read the sheet's contents and resolve the mission special setup (if required).
5. General Setup
All other game components are set up as described below:
- A) Round Marker: Place this marker the clock side up on the "1" space of the Reputation and time track.
- B) Dominance Marker: Place this marker the ying-yang side up on the "0" space of the dominance track.
- C) Range Marker: Place this marker on the Medium Range card.
- D) Task Tokens: Read aloud the story text and game text of all face-up task cards, take task tokens in proper colors from the task frame and place them on board hexes that match hex numbers from the task cards. Numbers on tokens indicate in what order players should fulfill task requirements (the "1" token should be placed on the board according to the description of the first requirement and the "2" token – according to the description of the second requirement from a given task card).
- E) Route Tokens: Form a separate pool using route tokens and place it within easy reach of all players. This is the Route Pool.
- F) Other Tokens and Markers: Form a separate pool using all other tokens and markers and place it within easy reach of all players. This is the Common Pool.
- G) Reference Sheet: Place the reference sheet within easy reach of all players. On the back cover of this Rulebook you can find one additional reference sheet.
- H) Dice: Place all dice within easy reach of all players.
Return all unused game components into the box (they will not be needed now) and start playing!
Playing Area Diagram (4-player example)
Common Area: 1. Board Hex, 2. Board Frame, 3. Knights' Markers, 4. The Stalls, 5. Gear Decks, 6. Range Cards, 7. Range Marker, 8. Combat Decks, 9. Dominance Track, 10. Dominance Marker, 11. Wasteland Deck, 12. Vehicle Pool, 13. Luck Deck, 14. Available Common Task Card, 15. Available Private Task Cards, 16. Task Decks, 17. Task Tokens, 18. Reputation and Time Track, 19. Players' Reputation Markers, 20. Round Marker, 21. Route Pool, 22. Common Pool, 23. Blue Gear Deck, 24. Waster Marker.
Player Area (only the First Player's area shown): A. Player Board, B. Knight Sheet, C. Player Markers, D. Vehicle Sheet, E. Additional Gear Cards, F. Luck Cards, G. First Player Marker.
Game Board Overview
The game board represents an imaginary map of Australia formed of 37 hexes. Each hex symbolizes contaminated, irradiated and dangerous terrain spanning hundreds of square kilometers. Together, the hexes are placed in 3 tiers containing a set number of cities and special locations, where players can perform actions as well as accept and accomplish tasks.
There are three types of hexes in the game:
- Normal Hexes: They represent typical landscapes and vistas of the Waste – deserts, swamps, jungles, mountains and highways.
- Special Hexes: They represent unique locations allowing players to perform special actions.
- City Hexes: In cities, players can trade gear cards with The Stalls, resupply, rest and sometimes perform special actions.
Detailed descriptions of hex names, available actions and special abilities can be found in the reference sheet.
Board Tile Overview
- Illustration: It shows a special location or area, through which knights travel and corresponds to a hex illustration from the reference sheet.
- Hex Number: It is a reference to a hex description from the reference sheet.
- Route Difficulty: Informs how many Movement Points are required to enter a given hex.
- Threat Icon: It increases the number of wasteland cards drawn by the Waster.
- Radiation Icon: It forces knights staying on a given hex to suffer Radiation.
- Contamination Icon: It forces knights staying on a given hex to lose Health.
- City Icon: It marks a given hex as a city.
- Hex Back: It helps identify a hex type when setting up the game.
Knight Overview
During the game, each player becomes a Waste knight – a hero of the post-apocalyptic world. This character is the counterpart of a given player in the game setting. It's the knight that travels, fights and experiences adventures on the board. Whenever rules and game effects refer to a player or to a knight, they actually refer to and influence this character.
Additionally, if any rule, ability, effect or game component uses the word "you" or refers directly to the reading player, ex. "Use before drawing luck cards", it refers to the knight/player who owns a given game component or is currently using its game text or effects.
All knights are represented in the game by a player board and a knight sheet.
Player Board
- Radiation Dial: It indicates the current Radiation level of a knight and how it affects him.
- Health Counter: It indicates the current Health level of a knight and how it affects him.
- Ammo Counter: It indicates the current Ammo level of a knight. Ammo is spent when attacking with many ranged weapons.
- Fuel Dial: It indicates the current Fuel level of a knight. Fuel is spent when moving with a vehicle.
- Player's Color and Icon: The color of displays on a player board identifies game components belonging to a given player (Ammo, Health and player markers), while the icon appears on player markers.
Knight Sheet
- Illustration: It shows a character that a player becomes during the game.
- Name and Vocation: They inform about a knight's name and what he does in the Waste.
- Skills: Here you can find 6 skills each knight uses to survive. Numbers next to skill names indicate starting skill values i.e. how many dice are rolled in a given skill check.
- Special Ability: This is a unique ability that defines a given knight. Some special abilities can only be used a limited number of times per round and must be marked after use.
- Hands: Here you place weapons recognizable among gear cards by a weapon icon. Weapons are used in combat.
- Body: Here you place armor recognizable among gear cards by an armor icon. Armor is used in combat.
- Pockets: Here you place useful equipment. Each knight has 3 pocket panels holding up to 3 gear cards that are not weapons, armor, or vehicle.
- Backpack: Here you store any gear cards except vehicles that are not currently needed. The backpack can hold a limited number of gear cards (usually 3) that should be placed below a knight sheet. Cards are stored in the backpack face-down.
- Starting Gear: This is a set of gear cards that have become a given knight's best friends in the Waste. He can freely use them until he finds better gear cards and covers his starting gear with them.
- Vehicle Card: Vehicles are used to travel around the board and to store gear cards. A number of cards that can be stored is limited by a vehicle's capacity. Cards are stored in a vehicle face-down.
Game Overview
Waste Knights is played in a series of Rounds divided into two Phases: the Preparations Phase and the Wasteland Phase, which are further subdivided into Steps. During the game, players mostly fulfill the roles of knights, but for a part of each round they also become the Waster – a kind of game master and evil spirit of the Waste, whose role is to manage wasteland cards (choose and resolve them, including combat), as well as decide about certain elements of the game and the currently played mission.
All steps should be resolved in the following order. If not mentioned otherwise, each round is played in the Round Order – all activities and actions are resolved starting from the First Player and then going clockwise around the table.
Preparations Phase
- Waster Step: a) Advance Round Marker and Mark Task Cards; b) Game Board Effects; c) Remove Long-term Effects; d) Mission Effects (optional); e) Update Stalls (optional); f) Pass First Player Marker and Waster Marker
- Knights Step: a) Unmark Cards and Sheets; b) Prepare Knights' Gear Cards; c) Draw Luck Cards
Wasteland Phase
- Move Step: a) Plan Route; b) Resolve Movement and Wasteland Cards
- Exploration Step: a) Exploration Check (if required); b) Hex Activities (in any order): Accept and/or Accomplish 1 Task; Perform 1 Exploration Action
- Rest Step: a) Trade Between Knights; b) Use Gear Cards; c) Quick Resupply; d) Regain Consciousness
Glossary
- Active Knight: The knight who is currently resolving his move in the Move Step or his exploration in the Exploration Step.
- Attack Check: A Blades/Guns check (for knights) or an Aggression check (for the Waster) made during combat in order to defeat an opponent.
- Available: When a gear card is available, a knight can use it for its effects. When a task card is available, a task described on a given card can be accepted and/or accomplished. Available cards are always face-up.
- Damage: A symbolic value shown with the damage (drop) icon that is used when resolving attacks in order to determine Health loss. Damage can only be dealt and soaked.
- Discard: When a card is discarded, it should be placed on a discard pile next to its matching card deck. When a marker or token is discarded, it should be returned to its proper pool.
- Escape Check: A check of a skill shown in the escape panel of a wasteland card that a knight must pass in order to ignore effects of a given wasteland card.
- Exploration: A series of activities connected with a knight's presence on a given hex and with using its abilities. Exploring a hex is not equivalent to performing an exploration action on this hex.
- Exploration Action: An action performed by a knight on a special hex or on a city hex, chosen from the description of a given hex in the reference sheet. A knight can perform up to 1 exploration action during the Exploration Step.
- Exploration Check: A check of a skill shown in the exploration panel of the description of a given hex in the reference sheet that a knight must pass in order to explore this hex.
Costs and Rewards
- +X (green/yellow/red gear icon): A knight draws X gear cards from gear decks of proper colors.
- -X (green/yellow/red gear icon): A knight chooses X gear cards he owns and discards them to a gear discard pile of the proper color.
- +/-X Ammo / Fuel: A knight increases or decreases the level of the proper resource by updating its counter or dial on his player board.
- +/-X Reputation: A knight increases or decreases his Reputation by moving his Reputation marker X spaces to the right or to the left of the Reputation and time track.
Golden Rules
- If any rules or effects from game components (cards, sheets, the Mission Book etc.) contradict or change rules from this Rulebook, rules from this Rulebook should be ignored.
- If any rule or effects states that something "cannot" be done, it takes precedence over rules or effects stating that something "can" be done.
- Play hard, but fair – having fun is the most important goal of Waste Knights.
Discarding Cards and Managing Decks
Cards should be discarded beside their matching decks. Together, all discarded cards form a discard pile for a given card type. For example, discarded wasteland cards are placed on the wasteland discard pile next to the wasteland deck. Once a given deck type is depleted, shuffle its matching discard pile to form a new deck.
Important: Accomplished task cards should be removed from the game immediately after resolving – no task can be accomplished more than once per game.
Preparations Phase
During this phase, players resolve effects from the game board and prepare various game components for the round. Some activities are performed by the Waster, while some by all players.
Important: Skip this phase during the first round of the game.
1. Waster Step
a) Advance Round Marker and Mark Task Cards. The Waster advances the round marker to the next space of the Reputation and time track. If it is the final round of the game (as indicated in the description of the currently played mission), the Waster should remind all players about this fact.
Next, the Waster marks all available task cards (including private tasks accepted by knights). If there are 3 general markers on any task card, such task becomes outdated – it should be immediately discarded and a new task should be introduced into the game (see Introducing New Tasks).
b) Game Board Effects. All players check hex icons from the hexes with their knight markers and resolve their effects in the following order:
- For each Radiation icon (from a hex and any Radiation tokens) on a given hex, each knight on this hex suffers 1 Radiation.
- For each contamination icon (from a hex and any contamination tokens) on a given hex, each knight on this hex loses 1 Health.
- If a knight is on a hex with a city icon, he can choose one option: heal 1 Radiation / heal 1 Health / gain +1 Ammo / gain +1 Fuel.
c) Remove Long-term Effects. The Waster discards from the board all tokens corresponding to wasteland cards and abilities used last round, ex. contamination tokens, threat tokens, move obstacles tokens etc. He returns them to the common pool.
If there is a special token (Nuked, Pills, Reboot) on the board, the Waster turns it from its light (brightly colored) side to its dark side. If such token was already placed on its dark side, it should be discarded from the board and returned to the common pool.
d) Mission Effects. The Waster introduces or removes from the game effects described in the mission special rules, ex. when playing the mission "Cult of the Manifold", during each even round the Waster would introduce into the game a new Cultist of the Manifold.
Important: This step is optional – it should be resolved only if required by the currently played mission.
e) Update Stalls. The Waster may discard up to 2 freely chosen gear cards from the Stalls to the proper gear discard piles. Then, he refills the Stalls.
Important: This step is optional – the Waster may choose not to update the Stalls.
f) Pass First Player Marker and Waster Marker. The First Player passes the First Player marker to the person sitting to his left. The Waster passes the Waster marker to the person sitting directly in front of the current First Player.
2. Knights Step
a) Unmark Cards and Sheets. Players discard general markers from all cards and sheets and return them to the common pool.
Important: Do not discard general markers from any task cards.
b) Prepare Knights' Gear Cards. Each player may freely re-equip (change the configuration of) his gear cards by moving them from his backpack and/or vehicle to his knight sheet, or vice-versa.
Important: From the moment this step is resolved until the beginning of the Rest Step, re-equipping can only be performed using the Defend combat card or certain special effects (of luck cards, abilities etc.).
c) Draw Luck Cards. Each player draws 1 luck card. Players can have up to 5 cards on their hands. If, at any point of the game, a player has more than 5 luck cards, he must choose and discard excess luck cards until he has only 5.
Wasteland Phase
This phase is the most important part of the game. During this phase, knights travel around the board facing wasteland cards, accomplish tasks and perform various actions on hexes. This phase is resolved in the round order.
The player who is currently resolving a given step of the Wasteland Phase (moving in the Move Step and exploring in the Exploration Step) is called the Active Knight. The Active Knight has priority when playing cards, using abilities and effects.
1. Move Step
Starting from the First Player (who is also the first Active Knight during a round), all players consecutively move on the board as described below. After the First Player ends his move, the next player in the round order becomes the next Active Knight. The Waster marker should be passed to the player sitting directly opposite the new Active Knight.
Important: After the last player ends his move, the Waster marker should be returned to the person sitting directly opposite the First Player. This person acts as the Waster until the end of the Waster Step of the next round.
a) Plan Route
The Active Knight chooses whether he moves on foot or using vehicle. Then, he takes route tokens from the route pool and places 1 route token on each hex, through which he wishes to move. He starts placing route tokens from the hex adjacent to the hex with his knight marker and ends placing them on the hex, where he wishes to end his move and explore. When planning the route, players should observe the following rules:
- The route cannot go through the same hex more than once nor through the hex where the movement starts.
- Hexes of the route must form an unbroken chain of adjacent hexes (i.e. "jumping" over hexes is forbidden).
- The planned route can be of any length.
- Once the route is planned, it cannot be changed.
- The hex where the movement starts is ignored – the route is counted from the first hex marked with a route token.
When planning the route, the Active Player estimates how many Movement Points he must expend to cover this route. The number of Movement Points expended to enter a given hex is shown on hexes as the Route Difficulty. Movement Points are gained by spending Fuel (see Resources: Fuel) and their amount depends on the Active Knight's Vehicle Speed. The vehicle speed determines how many Movement Points a given vehicle provides for each Fuel level spent. The Active Knight can spend any amount of Fuel he currently owns.
As the moving Active Knight progresses, he keeps expending Movement Points each time he enters successive hexes. Any excess Movement Points gained while moving are lost after the move ends.
Planning the route is also important to determine how dangerous the route is. For each Threat Icon from hexes of the route the Waster draws 1 additional wasteland card. This way, the Waster is able to play much harder challenges on the Active Knight.
b) Resolve Movement and Wasteland Cards
The Move Step is the most dynamic part of the game, demanding a lot of attention from the Active Knight and his Waster. The move is resolved as follows:
- The Active Knight may play any number of luck cards (see Luck Cards) played "Before moving" in order to modify his move. It is good to leave them on the table so that all players are reminded of their effects and to discard them after the Active Player's move ends.
- Next, the Active Player moves his character marker through consecutive hexes of the route he planned. He simultaneously counts the expenditure of Movement Points corresponding to the route difficulty and spends Fuel necessary to cover a given part of the route (he should also remember to update his Fuel dial). While moving, the Active Knight should consider all effects influencing the number of Movement Points, such as luck cards played before moving (ex. All Night on the Road), his knight's special abilities (ex. Mel Gearson), gear cards owned (ex. Road Map), or effects from the game board (ex. movement obstacles tokens placed after resolving the Tornado wasteland card).
- Important: The Active Knight cannot continue his move if he does not have enough Movement Points to enter the next hex of his route.
- When the Active Knight starts his move by entering the first hex of his route, the Waster draws and reveals the top card from the wasteland deck plus 1 additional card for each Threat icon from the first hex. As the Active Knight enters next hexes of his route, the Waster keeps drawing and revealing new wasteland cards for each Threat icon from those hexes.
- At any moment of the Active Player's move (after he enters a new hex), the Waster may choose to play 1 revealed wasteland card. If he does, the Active Knight suspends his move until this wasteland card is resolved. The Waster reads the card text aloud and the Active Knight must deal with the challenge it represents. The card is resolved on the hex where the Active Knight's marker currently is. After playing the card, the Waster discards all other revealed wasteland cards.
If the wasteland card played does not stop the Active Knight, he ends his move according to the route he planned.
Because of the way of movement resolution, you should remember about certain rules:
- If any Threat icons appear on a given hex of the route, the Active Knight should give his Waster a chance to read any revealed wasteland cards so that he can decide which card to play before the Active Knight continues his move.
- The Waster always plays exactly 1 wasteland card, no matter how many cards he revealed.
- The Waster is not obliged to draw and reveal all wasteland cards available on the route – he can choose to play a card at any point of the Active Knight's move.
- After the Waster plays 1 wasteland card, all remaining Threat icons from the Active Knight's route should be ignored – the Waster no longer draws or plays any wasteland cards.
Important: The Waster must always play 1 wasteland card on the Active Knight and he must do this before the movement ends. The last chance to play a card is the last hex of the route planned by the Active Knight.
Important: Only Threat icons affect the movement. Contamination and Radiation icons from hexes of the route should be ignored.
At some point the movement ends. This can happen because of the following reasons:
- The Active Knight reaches the last hex of his route.
- The Active Knight stops after resolving effects of a wasteland card or some other game effects.
- The Active Knight decides to stop before reaching the last hex of his route.
- The Active Knight has no more Movement Points to expend and cannot continue his move.
Once the First Player (and the current Active Knight) resolves 1 wasteland card and ends his move, the next person in the round order becomes the Active Knight. The Waster marker should be passed to the player sitting directly opposite the new Active Knight – players can continue the Move Step.
Important: When moving using a vehicle, the Active Knight must spend at least 1 Fuel no matter the route difficulty, possessed abilities, or card effects.
Important: When the Active Player starts his move with at least 1 Fuel, he can move to any hex adjacent to the hex where he started moving, even if effects of a wasteland card played by the Waster force the Active Knight to lose all Fuel.
Important: The Active Knight may stop before reaching the last hex of his route. If he does, he must give the Waster a chance to play a wasteland card.
Important: Moving is not obligatory. If the Active Knight chooses not to move, the Waster does not draw or play any wasteland cards and the next person in the round order becomes the Active Knight.
Moving on Foot
Usually, knights move using their vehicles as they enable them to quickly cover long routes. However, knights may also move on foot to save Fuel or when their vehicles are wrecked. Moving on foot is resolved in a similar way to moving using vehicle, with the following exceptions:
- The Active Knight always moves 1 hex to an adjacent hex.
- The Active Knight spends no Fuel and expends no Movement Points to move.
- The Active Knight ignores all Threat icons from hexes through which he moves.
- The Waster always reveals and plays 1 wasteland card on the Active Knight moving on foot.
- Certain effects do not affect the Active Knight moving on foot (ex. the Rough Terrain wasteland card).
- The Active Knight moving on foot does not leave his vehicle – it is assumed that he is driving economically, looking for gasoline in tanks of car wrecks beside the road or taking advantage of favorable landscape to slowly cover a short route.
Resolving Wasteland Cards
Wasteland cards are divided into two groups – Events with the event icon (warning triangle) and Enemies recognized by the combat panel. No matter the card type, the Active Knight decides whether he wishes to Escape or to Face the challenge represented by the card. Card effects and consequences of the Active Knight's decision are described below.
Wasteland Card Overview
- Card Title: The name of the card.
- Card Traits: Icons that inform what kind of challenge a given card represents. Some rules and effects refer to specific card traits.
- Game Text: Effects and abilities of the card.
- Escape Panel: It indicates the skill used during the escape check and the difficulty level of this check.
- Rewards Space: What the Active Knight gains after he successfully faces a given challenge.
- Combat Panel (only enemy cards): It displays combat icons that inform about combat capabilities of a given enemy.
Event Cards
Event cards represent aberrant weather phenomena, exceptional places and strangers, who can help or hinder knights in their travel.
Any game text on an event card that uses the word "you" or refers directly to the reading player refers to the Active Knight and informs what he must do to resolve a given event. Other activities pertaining to events (ex. placing tokens on the board) are performed by the Waster.
- Escape the Event: The Active Knight makes an Escape Check.
- If the escape check is passed, the event card is immediately discarded without effect. The Active Knight gains no rewards.
- If the escape check is failed, resolve the game text of the event card and discard it. The Active Knight gains no rewards.
- Face the Event: Resolve the game text of the event card and discard the card. The Active Knight gains all rewards shown in the rewards space of the card.
Important: Many events have only detrimental effects and bring no reward (ex. Radiation Storm). In such case, it is better to escape than to face a given event.
Example. The Waster plays the Acid Rain wasteland card on Heat Leisure, who is currently resolving his move. Heat chooses to escape, but his escape check is failed. It means that Heat immediately stops on the hex where the event is being resolved and loses 1 Health. This way his move also ends. Next, the Waster places contamination tokens on the proper hexes. Finally, the Acid Rain card is discarded.
Example. The Waster plays the Car Wreck wasteland card on Kate Blanksheet, who is currently resolving her move. Kate chooses to face this card. It means that she immediately stops on the hex where the event is being resolved and loses 1 Ammo. This way her move also ends and she will skip the Exploration Step this round. On the other hand, she gains all rewards shown on the card: 1 Reputation and 3 Fuel. Finally, the Waster discards Car Wreck.
Enemy Cards
Enemy cards represent dangerous inhabitants of post-apocalyptic Australia – gangs, horrific beasts, mutants, or crazed machines – that try to kill knights.
Any game text on an enemy card that uses the word "you" or refers directly to the reading player refers to the Active Knight and is in effect until this knight resolves a given enemy card.
Any game text on an enemy card that mentions "This enemy" refers to the enemy card being currently resolved. It informs about effects and special abilities that this enemy (i.e. the Waster) can use.
- Escape the Enemy: The Active Knight makes an escape check.
- If the escape check is passed, the enemy card is immediately discarded without effect. The Active Knight gains no rewards.
- If the escape check is failed, the Active Knight loses 1 Health. If the rewards space of this enemy shows a red gear card and/or Reputation, the Active Knight additionally loses 1 Health. Then, the enemy card is discarded without resolving combat. The Active Knight gains no rewards and can immediately resume his move.
- Important: If game text of an enemy card does not clearly refer to an escape check (ex. see the Shelobie wasteland card), it should be completely ignored. It is used only in case of combat with a given enemy.
- Face the Enemy: The Active Knight and a given enemy from a wasteland card start combat. The Waster acts as this enemy. If the Active Knight defeats this enemy in combat, he gains all rewards shown on this enemy's card. See Combat for combat rules.
Example. The Waster plays an InHR wasteland card on moving Russel Crown. The knight chooses to face this enemy. It means that he must resolve combat with this enemy and because of its special ability, Russel's combat checks will suffer -2 dice during this combat, i.e. the knight will roll 2 less dice when attacking. If he defeats InHR, he will gain 1 Reputation and 1 yellow gear card. After combat, the Gladiator will be able to resume his move unless unconscious.
Making Checks
In Waste Knights, players make lots of various checks. No matter the type of check, all of them are resolved in a very similar way. Each check is based on one of six skills described on knight sheets. A Checked Skill is indicated in a description of a given check. Next to a skill name you can find a Difficulty Level of a check written as a number in brackets, ex. Talk (7). Additionally, any background of a game component, where a check is described, is highlighted with a color matching the check's difficulty level. There are three difficulty levels in the game:
- Easy Check (5) marked in green
- Challenging Check (7) marked in yellow
- Hard Check (9) marked in red
In order to make a check, a player collects the basic number of dice shown on his knight sheet next to the checked skill, gains (adds) dice for positive modifiers (ex. for certain gear cards) and suffers (subtracts) dice for negative modifiers (ex. for lost Health):
Check Dice Pool = Skill + (dice gained) - (dice suffered)
Then, he rolls the dice and verifies if any dice results are equal to or higher than the difficulty level of the check. Each such result is counted as 1 Success. If the player rolls at least 1 success, the check is Passed. Otherwise, the check is Failed.
Checks usually need only 1 success to be considered passed and additional successes do not matter. If the number of successes rolled is important, it is clearly mentioned in game text of a given component (ex. a Hungry Locusts wasteland card).
Sometimes it is beneficial to roll a Critical Success – a so-called Bull's Eye (the "10" icon) counted on "0" dice results. Besides the fact that rolling a "10" means passing any check no matter its difficulty level, additional benefits may be connected with getting such result.
A check dice pool cannot be less than 1 die, no matter the negative modifiers suffered during the check. There is no upper limit to a check dice pool. If 6 dice included in the box are not enough to make a check, you should roll all 6 dice, remember or record any rolled successes and Bull's Eyes and then reroll any missing dice to determine the final check result.
Example. Naomi Vatt is making an exploration check to access Old Refinery [7]. Her Survival skill is 2 and she owns a gear card Prepper's Kit that provides 1 additional die in all Survival checks. Unfortunately, Naomi has only 1 Health, so she rolls 2 less dice in all checks. Finally, her check dice pool is only 1 die (2 + 1 - 1 - 1, but never less than 1). Naomi rolls 1 die and gets an "8" – it is more than the difficulty level of the exploration check (7), so she has 1 success, the check is passed and Naomi can explore Old Refinery.
Important: The Waster makes only attack checks in combat. They are based on Aggression of the enemy currently played by the Waster (see Combat).
Illustrated Movement Example
- Mel Gearson (the Active Knight) moving with Heavy-duty is planning his route – he is assessing all the required Movement Points and Fuel to spend in order to cover this route. Normally, when using Heavy-duty, a knight needs to spend 1 Fuel to gain 2 Movement Points, but Mel's special ability increases Movement Points gained from 2 to 3. The knight must spend only 1 Fuel for the whole route.
- Mel spends 1 Fuel and starts moving, while his Waster draws and reveals wasteland cards from consecutive hexes of Mel's route – 1 basic card and 1 more for each desert hex with a Threat icon.
- The Waster plays 1 wasteland card (Wounded Stranger) and discards all the remaining revealed cards. Mel suspends his move for a moment to resolve the card.
- Mel resolves the event card. He chooses to escape, not to face it, so he makes the required escape check – a Hard (9) Medicine check. He passes the check and escapes. The Waster discards the card. Then, Mel resumes his move and ends it on Gangraen [1] – the last hex of his route.
No matter the outcome of this combat, the Waster will discard the InHR card.
Example. The Waster plays the Furball wasteland card on moving Geoffrey Goldrush. Geoffrey chooses to escape, but he fails his escape check. It means that Geoffrey immediately loses 2 Health (as the rewards space of this enemy shows Reputation). However, no combat is resolved, the Waster discards Furball without further effects and the knight can resume his move.
Playing the Waster
Because players alternate acting as knights and the Waster – an entity with great influence on the gameplay – it is crucial to learn a few rules of post-apocalyptic etiquette:
- Waster is Mean: Do not try to be nice to other players just because they were nice to you. They were nice to your knight, after all...
- Waster is Harsh: Do not hesitate to defeat knights in combat and win missions. The Waste is a sandbox, but not like the one for children...
- Waster is Just: Observe all rules and wisely arbitrate unclear or contentious situations, even when it is disadvantageous for your knight.
Remember! Play in a challenging way and immerse yourselves in dangerous adventures of Waste Knights! Teach each other that common sense and careful planning will save you from (most) trouble.
2. Exploration Step
Starting from the First Player, all players in the round order explore hexes with their knight markers. Similarly to the Move Step before, the player currently performing activities connected with the hex exploration becomes the Active Knight.
Important: Do not pass the Waster marker in the Exploration Step. The person directly opposite the First Player acts as the Waster until the end of the Preparations Phase next round.
a) Exploration Check
Some special hexes force the Active Knight to make an Exploration Check. These hexes can be recognized by exploration panels under their illustrations in the reference sheet. If the exploration check is passed, the Active Knight can freely explore his hex. Otherwise, the Active Knight cannot perform the following activities on this hex:
- Accept or accomplish any tasks
- Perform any exploration actions
No matter the check result, the Active Knight places his player marker on this hex. As long as he stays on this hex (resigns from moving), he will be able to explore this hex without the need to make its exploration check. When the knight leaves this hex, he removes his player marker from it.
b) Hex Activities
The Active Knight can perform the following activities in any order:
- Accept 1 task
- Accomplish 1 task
- Choose and perform 1 exploration action available on a given hex
Task Activities
Task cards represent encounters between knights and different inhabitants of the Waste, who send them to far reaches of Australia on quests or who need their help. In return, knights can expect valuable rewards, such as unique gear cards and Reputation.
There are two groups of tasks in the game: Common Tasks and Private Tasks. All tasks are governed by rules described below. Detailed rules concerning common and private tasks can be found a little further.
When a knight accomplishes a task (i.e. fulfills all requirements of a given task), the following activities should be performed:
- The knight who accomplished the task gains rewards shown in the rewards space(s) of the task.
- The Waster resolves effects of the accomplished task (ex. places a special token on the board) and removes its card from the game (returns it to the box).
- The Waster draws 2 cards from the proper task deck (common or private, depending on the accomplished task), chooses 1 of them and introduces it into the game. He places the other card at the bottom of the task deck.
Introducing a task into the game means reading aloud its story text and game text, placing its card on the proper space of the task frame (the one emptied as a result of accomplishing the previous task) and placing task tokens on hexes connected with this task's requirements.
Tasks are available for a limited period of time. At the beginning of the Waster Step, in the Preparations Phase of each round, the Waster places 1 general marker on each available task card (i.e. marks these cards). If there are 3 general markers on any task card, such task becomes outdated and is immediately discarded. The Waster introduces a new task in its place according to the rules described above.
Important: Do not discard general markers from any task cards.
Important: Outdated task cards are discarded to the task discard pile – not removed from the game like accomplished tasks.
Task Card Overview
- Title: The name of the card.
- Story Text: An introduction to the circumstances of accepting a task and its goals.
- Game Text: Requirements that must be fulfilled to accomplish a given task.
- Rewards Space(s): What a knight gains after he accomplishes a given task. A card title indicates that the knight needs to search the blue gear deck for the card mentioned here.
- Bullet-point Icon (only private tasks): It marks requirements that must be fulfilled in the order shown to accomplish a given private task.
- People Icon (only common tasks): It helps distinguish common tasks from private tasks.
Common Tasks
Common tasks can be recognized by the people icon in the lower-right corner of their cards and by the opening game text sentence: "This task will be accomplished by the first knight...". They are placed on the leftmost, purple space of the task frame. There is always only 1 common task available at any point of the game. Knights do not need to accept common tasks – they simply accomplish them or not.
Any knight can accomplish a common task. He does this immediately after he fulfills all requirements described on its card. If two knights would be able to accomplish the same common task simultaneously, the Active Knight (or the knight sitting closer to the Active Knight in the round order) has priority. Knights can accomplish any number of common tasks per round.
Example. The Speed Record common task card is available in the game. It requires a knight to expend at least 15 Movement Points and move through at least 6 different hexes during one Move Step. Mel Gearson using a Strider vehicle card and a Road Map gear card plans his route to Gangraen [1] through 8 adjacent hexes. He must expend 16 Movement Points. The Strider's speed is 4, Mel's special ability provides him with 1 additional Movement Point for each 1 Fuel spent, Road Map increases the sum of Movement Points by 1, so the knight can cover his route for 3 Fuel. Mel escapes Radiation Storm on the way and ends his move on Gangraen. He is the first knight to fulfill the task's requirements, so he gains the blue gear card Muscle Car (he finds it in the blue gear deck) and 2 Reputation. Mel's Waster removes Speed Record from the game (the task is accomplished), draws 2 cards from the common task deck and introduces into the game Nice Trophy! – he reads the card aloud and places it on the purple space of the task frame. The other task card drawn is placed at the bottom of the common task deck.
Private Tasks
Private tasks can be recognized by bullet points appearing in their game text. They are placed on the central and the rightmost space of the task frame (featuring screw heads with the bullet-point icon). The number of private tasks depends on the number of players – 1 card in a 3-player game and 2 cards in a 4-player game. Private tasks in 2-player games are governed by different rules (see the 2 and 3 Players section).
In order to resolve a private task, a knight must first accept this task. A task can be accepted by the Active Knight during the Exploration Step if this knight explores a hex mentioned in the first requirement of any available private task and manages to perform all necessary activities (ex. he passes a skill check or discards a certain card). Once the Active Knight fulfills the first requirement, he takes the task card and places it in his player area. From now on, this task card becomes available only to him – other knights cannot accept nor accomplish a private task placed in any rival's player area.
The Active Knight can attempt to accept up to 1 private task during the Exploration Step. If he is not successful (ex. if he fails the required skill check), he can try to accept a given task again, but in the next Exploration Step.
A knight can have up to 1 private task in his player area and cannot accept more private tasks until he accomplishes his task or his task becomes outdated.
A knight accomplishes a private task when he fulfills the second requirement of this task. During one Exploration Step, a given knight can accomplish up to 1 private task.
Important: Accepting a private task by a knight does not trigger the introduction of a new private task into the game.
Important: After a knight is defeated in a duel, the winning knight can steal a private task card from the defeated knight (see Duels). If this happens, 1 general marker should be discarded from the stolen task.
Example. The Burn, Baby, Burn! task card is available in the game. It is placed on the green space of the task frame. Hugh Jackal is the Active Knight and wishes to accomplish this task. Hugh moves to Old Refinery [9] marked with the green "1" task token. During the Exploration Step, he passes the exploration check for his hex – a Challenging (7) Survival check – and then explores his hex. After performing the special action of Old Refinery (Hugh gains +4 Fuel), he attempts to accept Burn, Baby, Burn! by fulfilling the first requirement. In order to do this, he must pass a Challenging (7) Repair check. He manages to do this, so he takes the task card from the task frame and places it in his player area. Then, he removes the green "1" task token from his hex and returns it to the green space of the task frame. From now on, only Hugh can fulfill the second requirement of the task – exploring Rusty's Garden [12] marked with the green "2" task token. On the other hand, another knight may defeat Hugh in a duel and choose to steal Burn, Baby, Burn! from him. Although Hugh took the task card from the task frame when he accepted it, the number of available task cards did not change – the Waster does not introduce a new task into the game. He will do this after someone accomplishes Burn, Baby, Burn! or the task becomes outdated.
Task Tokens
Task tokens come in colors matching spaces on the task frame, where task cards are placed during the game. They facilitate finding board hexes key to accomplishing available tasks. They are particularly useful when resolving private tasks.
When a new task card is introduced into game, the Waster places on the board the task tokens in the color matching the task space, where he placed the task card being introduced. He places the "1" token on the hex mentioned in the first task requirement and the "2" token on the hex mentioned in the second task requirement. When the first requirement is fulfilled, the "1" token should be returned to the task frame. After the task is accomplished or becomes outdated, the "2" token should also be returned to the task frame. Using task tokens is optional.
Tasks and Enemy Cards
Some tasks require knights to defeat a specific enemy from wasteland cards. Such tasks contain the following expression: "Wasters / Your Waster must play [icon] enemy cards, if able". These tasks limit the Waster to playing wasteland cards that meet conditions described on a given task card (ex. Robo-killer forces the Waster to play enemy cards with the robot icon).
If, during the Active Player's move, the Waster does not reveal any enemy card that matches the task's conditions, but he still has opportunity to draw and reveal more wasteland cards thanks to Threat icons on the Active Knight's route, he must keep drawing and revealing cards. In other words, the Waster cannot play any wasteland card unless he makes sure that he will not draw a card meeting the task's conditions. If more than one revealed wasteland card enables the Waster to meet the task's conditions, he can choose which card to play.
Performing Exploration Action
The Active Knight can perform 1 Exploration Action available on the hex with his knight marker. All available exploration actions for each hex are described in detail in the reference sheet and on the back cover of this Rulebook.
Important: The Active Knight can choose and perform only 1 exploration action, no matter how many are available on a given hex.
There are three types of exploration actions:
- Special Action (S icon): It is available on all special hexes and some city hexes. Its description contains effects of a given action.
- Trade Action with the Stalls: It is available only in city hexes. It allows a knight to exchange any of his gear cards to any available gear cards placed on two Stalls frames. More about trading, see Trading.
- Resupply Action: If a knight discards a certain number of gear cards, he can regain resources.
- With the first resupply icon (city resupply), performing this action means that the Active Knight fully heals Radiation and Health.
- With the second resupply icon (wrench), performing this action means that the Active Knight fully regains Ammo and Fuel. Additionally, his vehicle is repaired (if it has any vehicle damage tokens).
Some exploration actions force a knight to pay a certain cost (ex. the resupply action in Gangraen [1] forces a knight to discard 1 green gear card). If he cannot pay this cost, he cannot perform a given exploration action.
Hex Description Overview
- Name: The name of the location.
- Illustration: It shows a given location and corresponds to the illustration from the hex tile.
- Hex Number: It is a reference to the hex tile.
- Special Action: Its description contains an action's effects. One hex can offer many special actions.
- Resupply Action: It indicates the cost to regain resources on a given hex.
- Trade Action with the Stalls (only city hexes): It informs about special circumstances of trading.
- Exploration Panel (only some special hexes): It informs about conditions of the exploration check – any checked skills and check difficulty levels.
3. Rest Step
During this step, all players can perform activities simultaneously. Resolve this step as follows:
a) Trade Between Knights. Knights on the same hex can trade with each other. They can trade gear cards, Ammo and/or Fuel. After they trade any resources, they should immediately update the proper counters and dials.
When knights trade among themselves, they do not need to pay attention to values of their gear cards – they are free to exchange cards however they like. More about trading between knights, see Trading.
Important: Knights trading during the Rest Step never risk starting a duel and they do not have to make search checks to interact (see Duels).
b) Use Gear Cards. Each knight can use any and all gear cards he owns – it does not matter whether these cards are available (placed on his knight sheet) or stored in his backpack and/or vehicle. If a knight uses a stored gear card, he must reveal it for a moment.
Important: During the Rest Step, gear card limits are still in effect. I.e. even if a knight owned 2 copies of the First-aid Kit gear card, he could still use only one of them (see Gear Cards).
c) Quick Resupply. Each knight can discard up to 1 luck card from his hand, ignoring its game text effects. Instead, he utilizes the resource icon found on the discarded card. If the knight discards a luck card with an Ammo or Fuel icon, he immediately gains +1 Ammo or +1 Fuel, respectively. If he discards a luck card with a Radiation or Health icon, he heals 1 Radiation or 1 Health, respectively.
Important: Future game expansions will include luck cards with a Reputation icon. Discarding such card will result in a knight gaining +1 Reputation.
d) Regain Consciousness. All knights who lost consciousness (i.e. were K.O.'d) during the round, now regain consciousness. Their knight markers should be returned to vertical positions and placed on the city hex nearest to their hexes. Then, these knights update their resource counters and/or dials on player boards. More about conditions, losing and regaining consciousness, see Conditions.
After all players resolve their activities in the Rest Step, the current round ends. If this was not the last round of the game, players should proceed to the Preparations Phase of the next round.
If this was the last round of the game (according to the time limit or end conditions of the current mission), check the winner of the mission as described in the mission sheet.
Winning the Game
Each game of Waste Knights is based on one mission sheet. This sheet contains entries informing how long a given mission lasts, if any special rules are used and what are its goals and victory conditions.
The winner of the game is the knight who manages to fulfill mission goals until the end of the game. In many missions ties are broken using Reputation and gear card value of cards owned by knights.
Additionally, some missions may end in victory or defeat of all knights.
Rival, Enemy, Opponent and Combatant
A knight's Rival is any other knight playing the game.
An Enemy is a creature from a wasteland card recognizable by the combat panel.
A knight's Opponent is the enemy from a wasteland card played by the Waster, with whom this knight is currently fighting. An enemy's Opponent is the knight, with whom this enemy is currently fighting.
A Combatant is any participant of combat.
Luck Cards
Luck cards represent fortunate coincidences and exceptional feats of skill and courage done by knights, who risk everything to succeed. Each knight starts the game with 3 luck cards and draws 1 card per round. The number of luck cards on any player's hand cannot exceed 5 luck cards.
Luck Card Overview
- Title: The name of the card.
- Timing: When to play the card.
- Game Text: It informs about effects of a given card.
- Resource Icon: It informs which resource is gained or healed when the card is discarded during the Rest Step.
- Card Rank: Similarly to normal playing cards, luck cards have ranks. Luck card ranks will be used in future game expansions.
Luck cards can be played in two ways:
- For Game Text Effects: This is the basic method of playing luck cards. A knight waits for the proper circumstances as described in the timing (ex. for a skill check), plays a card and uses its effects.
- For Resources: During the Rest Step, any knight may discard up to 1 luck card from his hand to gain or heal 1 resource shown on the discarded card (see Quick Resupply). Afterwards, this knight updates the proper counter or dial on his player board.
Important: Effects of discarding luck cards for resources cannot be ignored or negated.
Each knight may play any number of luck cards during one round. After a knight plays a card, he must wait a moment to give other knights a chance to respond with their luck cards. If no one responds, this knight can resolve effects of the luck card he played.
Combat
Combat is one of the most important elements of Waste Knights – it enables players to face deadly creatures prowling ruined Australia to gain valuable trophies and renown among human survivors terrorized by gangs, mutated beasts and mad machines. It is also a way to overcome other knights in the race for the ultimate prize – fulfilling the mission.
Combat occurs when the Active Knight chooses to face an enemy from a wasteland card (usually played by the Waster) or when he decides to duel another knight. In both cases combat is resolved in a very similar way. Below you can find rules for resolving combat against an enemy. Differences connected with dueling other knights can be found in the Duels section.
Each combat is divided into three phases. The most important phase is the Clashes Phase comprised of three Clashes. There are always two participants (or combatants) of combat: the Active Knight (usually resolving his move) and an enemy played by the Waster. During each clash, both combatants play combat cards, manipulate range, use special abilities and card effects to defeat the opponent.
Combat ends when any combatant is defeated or at the end of the third clash. In the latter case, the winner is determined by checking who has Dominance in combat.
At the beginning of combat, each combatant takes from the combat frame into his hand one combat deck (blue or red). Next, the Waster checks whether the range marker is placed on the Medium Range range card and whether the dominance marker is placed on the "0" space of the dominance track – if not, he places both markers where they belong.
The general combat sequence is described below. Each combat should be resolved according to this sequence. The detailed description of all combat phases can be found a little further in this section.
Combat Sequence
- Combat Start Phase: a) Use "Before Combat" Effects; b) Set Starting Range
- Clashes Phase: a) Choose Combat Cards; b) Resolve Combat Cards by Initiative; c) Determine Dominance; d) Set Range and End Clash
- Combat End Phase: a) Determine Winner; b) Rewards and "After Combat" Effects
Important: In combat, the player acting as the Waster can only use effects from the card of the enemy participating in this combat. He cannot use his luck cards nor effects from game components owned by his knight.
Only two players can participate in combat: the one playing the Active Knight and the one playing his Waster. All effects that affect combat (from luck cards, special abilities etc.) can only originate from combatants' game components and only they can use them.
Combat Start Phase
During this phase, combatants prepare for the coming combat.
a) Use "Before Combat" Effects. Starting from the Active Knight, both combatants can use any number of effects containing the expression "Before combat". Combatants alternate using one effect at a time until both pass. The Active Knight's effects can originate from luck cards (ex. Deadly Quick) and other game components he has (ex. the gear card Mini-bomber). The Waster's effects can only originate from the enemy card he is using.
b) Set Starting Range. If no "before combat" effect changed the starting range, combat starts at medium range. It is indicated by the range marker placed on the Medium Range card. If the starting range was changed, the range marker should be placed on the proper range card.
Important: Some game effects (ex. David Mayhem's special ability or the Furball wasteland card) enable a player to change the starting range. If both players use such effects, the starting range is not changed.
Clashes Phase
This phase is the most important part of combat. It is comprised of 3 consecutive clashes resolved as described below.
a) Choose Combat Cards. Combat cards represent maneuvers made by combatants to defeat opponents. Each combatant has one combat deck. Each deck is a set of 5 different cards. The decks are identical except for the color of card backs and arrows on card fronts (blue and red). During each clash, each combatant can choose and play exactly 1 combat card, if he meets the conditions to play it. Combat cards can be reused and return to the combatant's hand at the end of the current clash.
Combat cards are played face-down – combatants place them in front of themselves. When both are ready, they simultaneously reveal their cards and proceed to resolving them according to the initiative.
b) Resolve Combat Cards by Initiative. The game text of each combat card informs how to use a given card. The order of card resolution is based on Initiative determined according to the current range card and range icons chosen by combatants (see Attack Sequence).
If a chosen combat card contains the expression "Ignore initiative", effects of such card affect the game from the moment this card was revealed until the end of the current clash. All combat cards except Attack and Multi-attack ignore initiative. If both combatants play combat cards that ignore initiative, the Active Player resolves his card effects first.
While resolving combat cards according to initiative, the combatant with higher initiative resolves his card effects first.
Combat Card Overview
- Title: The name of the card.
- Dominance Change: Losses and gains of dominance are determined at the end of each clash using the dominance track and marker.
- Special Rules of Playing: Limitations or conditions that must be met when playing a given card.
- Game Text: It informs how to use a given card and what are its effects.
Range
Range Cards determine the current distance between combatants and circumstances of combat. There are three possible ranges in the game: short, medium and long. The current range is indicated by the range marker placed on one of range cards. The same range card affects both combatants.
Range Icons displayed on combat panels of enemies from wasteland cards and knights' gear cards represent various methods of fighting used by combatants. They indicate the possibility of making an attack and its efficiency depending on the current range. These icons fall into two groups – three of them symbolize Ranged Weapons capable of shooting or throwing deadly projectiles towards opponents and one of them symbolizes Melee Weapons capable of causing harm in close combat. Knights making ranged attacks use the Guns skill, while melee attacks utilize the Blades skill. Enemies make all attack checks using their Aggression.
- Long-range icon: Ranged attack most efficient at long range.
- Medium-range icon: Ranged attack most efficient at medium range.
- Short-range icon: Ranged attack most efficient at short range.
- Melee icon (crossed marks): Melee attack (close combat attack) efficient only at short range.
Important: If a range card does not feature any range icon from a given combat panel, attacks based on this range icon cannot be made at this range.
Important: If a combat panel of an enemy card or a gear card used displays more than one range icon, the combatant who controls this card chooses which icon to use when attacking.
Range Card Overview
- Range Name.
- Attack Check Conditions: They inform which skill (Guns or Blades) must be used by both combatants when making attack checks at this range and what is the difficulty level of all attack checks. Enemies always use Aggression instead of skills.
- Initiative: It indicates the order in which combatants make their attacks, depending on range icons chosen when attacking. Attacks are resolved starting from the leftmost range icon on the card and following arrows to the right.
- Attack Modifiers: They appear under certain range icons and modify all attacks based on a given range icon.
Combat Cards
Below you can find detailed descriptions of all combat cards. Attack resolution is described in the Attack Sequence section.
Defend
If the Active Knight plays this card, his opponent gains 2 dominance, but his opponent's attack checks suffer -2 dice during this clash. Additionally, the knight can immediately look at all his gear cards – including these stored in his backpack and/or vehicle – and freely change their configuration on his knight sheet. When the knight is ready, he informs his opponent about this and only then that opponent can attack.
If the Waster plays this card, his opponent gains 2 dominance, but his opponent's attack checks suffer -2 dice during this clash. The Waster ignores all other effects of this combat card.
Prepare
If a combatant plays this card, during this clash he does not perform any activities. He leaves this card face-up in front of himself to remember about its effects. If, during the next clash, this combatant plays the Attack combat card, he will be able to use all benefits of Prepare:
- His next attack check will gain +2 dice.
- His chances for a Bull's Eye (10) will double – critical successes will be counted on "9" and "10" dice results.
Otherwise, Prepare will be returned to this combatant's hand without resolving its effects.
Combatants are not obliged to play Attack after playing Prepare – this card could be used as a ruse.
Change Range
This card is used to change conditions of combat to more favorable ones. After a combatant plays it, he chooses whether he wants to advance or retreat:
- Advance: This combatant gains 1 dominance and his opponent's attack checks suffer -1 die during this clash. In the next Set Range and End Clash Step, the range marker should be moved to a range card representing a closer range, as described below:
- Long Range → Medium Range
- Medium Range → Short Range
- Retreat: This combatant's opponent gains 1 dominance, but his opponent's attack checks suffer -1 die during this clash. In the next Set Range and End Clash Step, the range marker should be moved to a range card representing a longer range, as described below:
- Short Range → Medium Range
- Medium Range → Long Range
If both combatants play this card, the Active Knight decides first about advancing or retreating. If one combatant advances and the other retreats, the current range is not changed.
Important: Remember that the range is not changed immediately, but at the end of the clash, i.e. all attack checks are based on the current range card.
Important: Combatants cannot retreat beyond long range nor advance beyond close (short) range. Playing the Change Range card is always allowed, but sometimes this may only result in forcing an opponent to suffer -1 die and changing dominance.
Catch Me If You Can. Sometimes for tactical reasons one combatant keeps retreating for the whole combat, while the other keeps advancing. This may lead to an apparent stalemate. However remember that the advancing side keeps gaining dominance. This may lead to one player winning combat without a single shot or blow.
Attack and Multi-attack
If the Active Knight plays one of these cards, he attacks his opponent. In order to do this, he must have at least one available weapon. Knights have weapons in their starting gear (shown in hand panels). Additionally, they may gain new gear cards with the "Weapon" trait. Such cards can be placed on knight sheets and used in combat. One-handed weapons bear a one-hand icon and are placed on one, chosen hand panel. Two-handed weapons bear a two-hands icon and are placed between hand panels.
If the Active Knight uses any ranged weapon to attack, he must spend Ammo (see Resources: Ammo) before making his attack check. If he uses a melee weapon, no Ammo is required. If the knight does not have enough Ammo to attack, he cannot play any of these combat cards.
- Attack Combat Card: The Active Knight spends 1 Ammo (or 0 Ammo when attacking with a melee weapon) and makes an attack check based on the Blades or Guns skill. He gains 1 dominance and additional 1 dominance for each 1 Health lost by his opponent as a result of this attack.
- Multi-attack Combat Card: In order to play this card, the Active Knight must attack using a weapon with at least 1 Multi-attack icon on its combat panel. He spends 2 Ammo (or 0 Ammo when attacking with a melee weapon) and makes an attack check based on the Blades or Guns skill. His attack check gains +1 die for each Multi-attack icon of the weapon used. The knight gains 2 dominance and additional 1 dominance for each 1 Health lost by his opponent as a result of this attack.
If the Waster plays one of these combat cards, he resolves his attack identically except that he uses an enemy's Aggression instead of any skills and he does not spend any Ammo. For the Waster to play the Multi-attack combat card, Multi-attack icons must be displayed on the combat panel of the enemy in combat.
c) Determine Dominance. Combat in Waste Knights can be won by causing an opponent to lose all Health or by presenting such an intimidating attitude that this opponent is discouraged from fighting. The latter solution is represented in the game by rules of Dominance. Dominance is tracked during combat using the dominance track and the dominance marker moving over it.
Damage and Health
There are two easily mistaken values in the game: Health and Damage, whose icons appear on various game components.
- Damage (drop icon): Damage is dealt in combat and can be soaked (negated) by armor when resolving attacks. Any damage not soaked causes Health losses. Damage cannot be healed – it is a symbolic value used only to assess effects of a given attack.
- Health (heart icon): Health can be lost or healed in different circumstances. It symbolizes actual wounds and direct changes on a knight's Health counter or an enemy's card. Health losses ignore armor. During combat, Health changes are tracked using Health markers and Health loss tokens.
Combat Panel and Combat Icons Overview
The Combat Panel appears on "Weapon" and "Armor" gear cards and wasteland cards representing enemies. It displays Combat Icons.
- Ferocity Diode: If it is lit (light-blue), it indicates a ferocious enemy that ignores dominance rules.
- Aggression: It shows a basic dice pool used by an enemy in attack checks.
- Range Icons: They symbolize capabilities of weapons as gear cards or armaments of enemies. If more than one range icon is displayed here, the combatant chooses which range to use when attacking.
- Attack Icons: These icons inform about additional effects of a given attack. They affect all attacks no matter the chosen icon range.
- Armor Value: It soaks (negates) damage dealt by opponents.
- Health: It indicates a given enemy's toughness and susceptibility to wounds.
Range Icons displayed on combat panels are described in detail in the Range section. All other combat icons have the following effects:
- Multi-attack: When attacking with the Multi-attack combat card, attack checks gain +1 die for each of such icons.
- Armor Piercing: Each bullet inside the icon lowers an opponent's armor value by 1 (min. 0).
- Additional Damage: The number inside the icon indicates how much additional damage is dealt when attacking.
- Armor Value: The number inside the icon indicates how much damage is soaked by armor.
- Health: The number inside the icon indicates the minimum sum of Health shown on Health loss tokens that is necessary to defeat a given enemy. Knights' Health is shown on player boards.
Dominance Track and Marker
If combat is being fought with a Ferocious enemy recognizable by the lit ferocity diode on its combat panel, combatants should ignore all dominance rules. During such combat, the dominance marker stays on the "0" space and a given ferocious enemy can only be defeated by causing it to lose all Health (i.e. placing enough Health loss tokens on its card to reduce its Health to zero or less).
If a given enemy is not ferocious, dominance is counted as described below.
During combat, each combatant uses either the red or the blue combat deck. Combat cards feature arrows with one or more arrowheads that indicate the dominance change introduced after a given combat card is resolved.
- The combatant using the red combat deck gains 1 dominance for each arrowhead of red arrows shown on all combat cards that were played during the current clash by both combatants.
- The combatant using the blue combat deck gains 1 dominance for each arrowhead of blue arrows shown on all combat cards that were played during the current clash by both combatants.
- Additionally, each combatant gains 1 dominance for each 1 Health lost by the opponent as a result of a given combatant's attack.
Important: Do not count all Damage dealt by attacks as it could be soaked by armor – only Health losses.
Combatants count the difference between their dominance gains and then move the dominance marker along the dominance track a number of spaces equal to this difference. The marker should be moved towards the arrow in the color of the combatant who gained more dominance during the current clash.
If the dominance change would cause the dominance marker to move outside the dominance track, turn the marker to its "+5" side and start counting dominance from the "0" space.
Important: Healing Health lost does not affect dominance. Even if some effect (ex. using a Medi-shot gear card) enables a combatant to heal, dominance gained for any Health lost is still counted.
Example. The combatant using the blue combat deck played Multi-attack and caused his opponent to lose 2 Health, thus gaining 4 dominance. During the same clash, the combatant using the red combat deck played Attack and caused his opponent to lose 1 Health, gaining 2 dominance. The difference equals 2 dominance in favor of the blue player, so the dominance marker is moved 2 spaces to the left of the dominance track (towards the blue arrow).
Adrenaline Rush
If, during combat, a knight's Health is lowered to 1 or 2, his Health marker shows -1 die icon(s). However, these negative modifiers do not affect the knight until the end of the current combat. Only after it is resolved, all his skill checks start suffering the indicated number of -1 die for Health losses. Enemies never suffer -1 die for Health losses.
Attack Sequence
If at least one combatant plays the Attack or Multi-attack combat card, his attack should be resolved as described below.
1. Choose Weapon and Range Icon
Starting from the Active Knight, both combatants make decisions pertaining to their attacks:
- The Active Knight chooses one weapon to attack with and one range icon from this weapon's combat panel.
- The Waster chooses one range icon from the combat panel of the enemy participating in combat.
The chosen range icon must be shown on the current range card. Otherwise, the attack is invalid.
2. Determine Initiative
Both combatants check the initiative from the current range card looking for their chosen range icons. The combatant whose range icon is shown more to the left has higher initiative and resolves his attack first. Then, the combatant with lower initiative can resolve his attack (unless he is defeated).
If both combatants choose identical range icons, they have equal initiative and resolve their attacks simultaneously. In such case, the Active Knight should resolve all activities connected with attacking first (for practical reasons).
3. Resolve Attack
The combatant currently resolving his attack is known as the Attacker, while his opponent is the Defender. The attacker with higher initiative makes an Attack Check and resolves effects of his attack. Then, the attacker with lower initiative does the same. All activities described below are identical for both attackers.
a) Attack Check
- The Active Knight making a ranged attack spends Ammo. Then, he makes the Attack Check using his Guns skill.
- The Active Knight making a melee attack makes the attack check using his Blades skill.
Important: Some weapons may require other resources before attacking (ex. the Chainsaw gear card requires 1 Fuel).
- The Waster never spends Ammo and always makes attack checks using the Aggression of the enemy participating in combat.
The current range card describes attack check conditions: valid skill(s) and the difficulty level of all attack checks. Rules for making skill checks can be found in Making Checks. The attack check dice pool is formed as follows:
Attack Check Dice Pool = Blades / Guns / Aggression + Dice Modifiers (dice gained) / - (dice suffered)
There are many modifiers affecting attack checks. They can originate from combat cards (ex. Prepare), luck cards (ex. Faster, faster!) etc. Remember to add all dice gained first and then subtract all dice suffered. The number of dice rolled in attack checks cannot be less than 1.
If the attack check is passed, the attack hits and the attacker determines its effects. Otherwise, the attack misses. In the latter case, the attacker with lower initiative can resolve his attack.
Important: Many luck cards are played before or after an attack check. The attacker alternates with the defender playing luck cards until both pass. Combatants must give each other a chance to play cards.
b) Deal Damage
The attacker counts damage dealt to the defender in the following way:
Total Damage Dealt = 1 Damage + 1 Damage per Bull's Eye (10) + Damage Modifiers
The most common Damage modifiers come from combat icons on combat panels, luck and range cards.
Important: A passed attack check basically deals 1 Damage. Additional Damage is dealt only for each Bull's Eye (10) – not for normal successes, no matter how many were rolled.
Important: Some weapons and special abilities deal 2 or more Damage for each Bull's Eye (10) rolled in the attack check.
c) Soak Damage and Lose Health
The defender checks his Armor Value (shown on the combat panel of his "Armor" gear card or wasteland card) and lowers it by the attacker's Armor Piercing value. If the armor value is higher, the difference indicates how much damage is soaked (negated):
Total Damage Soaked = Armor Value - Armor Piercing
The defender lowers the total damage dealt by the total damage soaked. If the total damage dealt is higher, he loses 1 Health for each 1 Damage not soaked:
- The Active Knight records this Health loss by updating the Health counter on his player board (he turns and/or discards Health markers).
- The Waster records this Health loss by placing Health loss tokens of the proper value on the card of the enemy participating in combat.
If the defender has 0 Health now, he is defeated. If he was supposed to attack (i.e. had lower initiative), he cannot do this – he is defeated before resolving his attack. If the initiative was equal, he resolves his attack as normal and is defeated afterwards.
If, after resolving all attacks, any combatant is defeated, proceed to the Combat End Phase. Otherwise, proceed to the Determine Dominance Step.
Important: Many effects increase Damage dealt, Armor Piercing or Armor Value. All such effects are cumulative.
Important: If a combatant loses all Health as a result of a single attack, he cannot even benefit from effects usable "at any time" to heal Health – he is immediately defeated.
Illustrated Combat Example
- Chris Hammersworn, the Preacher (the Active Knight) is moving through a mountains hex, when his Waster (Naomi Vatt, the Mechanic) plays the Hell Raiders wasteland card (see "Road to Gangraen" in the Mission Book). Chris chooses to face this enemy as the Nice Trophy! common task card is available.
- Chris takes the red combat deck and his Waster the blue combat deck. Before combat, Chris plays the Deadly Quick luck card and changes the starting range – he places the range marker on the Long Range card. The Waster uses no effects. Then, players proceed to the Clashes Phase.
- The first clash begins. Both combatants choose in secret 1 combat card each and reveal them simultaneously – Chris chose Attack and the Waster chose Prepare. Prepare ignores initiative and does not affect the current clash, so the Waster tells Chris to resolve his attack. The Preacher chooses P-A Shotgun (his only available weapon) to attack with and checks range icons from the weapon and the current range card. He can only choose the medium-range icon, because the short-range icon is not shown on the Long Range card. Next, he spends 1 Ammo and forms his attack check dice pool: his Guns skill is 2, so he should roll 2 dice, however the chosen range icon causes Chris to lose 1 die. He only rolls 1 die, but gets a "9" – a success! The attack hits and deals 2 Damage (1 for passing the attack check + 1 Damage shown in the combat panel of P-A Shotgun). Hell Raiders have Armor Value 1 that soaks 1 Damage. All in all, this attack causes 1 Health loss, so the Waster places a "-1" Health loss token on the enemy's card. The combatants determine dominance – Chris played Attack (+1 dominance) and caused 1 Health loss (+1 dominance), while the Waster gained no dominance. Therefore, the dominance marker is moved 2 spaces to the right ending on the "2" space of the dominance track. It is moved towards the red arrow, as the knight is using the red combat deck. The current range is not changed. Chris takes the Attack card into his hand, but the Waster leaves Prepare on the table. Finally, the combatants proceed to the second clash.
- During the second clash, Chris chooses the Attack card again. The Waster chooses Attack, too. The Preacher must use P-A Shotgun and the medium-range icon. The Waster also chooses the medium-range icon from Hell Raiders' combat panel. It means that both combatants have equal initiative. As Chris is the Active Knight, he resolves his attack first for practical reasons. He spends 1 Ammo again and rolls 1 die, but gets a "5" in his attack check – it's a miss! The Waster spends no Ammo – he simply forms his attack check dice pool: 4 for the enemy's Aggression and 2 for playing in the previous clash. Additionally, he loses 1 die for the range icon he chose. Next, he rolls 5 dice and gets the following results: "1", "3", "4", "7" and "9" – a success! The attack hits and deals 3 Damage (1 for passing the attack check + 1 for a Bull's Eye that is counted on "9" thanks to + 1 Damage from the enemy's combat panel). Chris has with Armor Value 1 that soaks 1 Damage. Finally, the Waster's attack causes 2 Health loss, so Chris discards the top marker from his Health counter – now the counter on his player board indicates 2 Health. Worrying about what may happen next, the Preacher immediately discards his to heal all Health lost (and updates his Health counter accordingly). The combatants determine dominance: Chris played (+1 dominance). The Waster played (+1 dominance) and caused 2 Health loss (+2 dominance) – for dominance purposes it does not matter that Chris used to heal himself. Therefore, the Waster gains 2 dominance during this clash. The dominance marker is moved on the dominance track 2 spaces to the left towards the blue arrow – now it is back on the "0" space. The current range is not changed. Both combatants take all combat cards into their hands and start the next clash.
d) Set Range and End Clash. If any combatant uses any effect causing the current range to change, such effect should be resolved now – the range marker is moved from the current range card to a different range card. From the beginning of the next clash, this will be the new current range card.
Usually, the range changes as a result of playing the Change Range combat card. There are other effects in the game that can lead to changing the range – they could cause setting a certain range (ex. a Silent Howler wasteland card) or enable a combatant to change the range by more than one card in one clash.
After the new range is set, the current clash ends. Combatants take all combat cards they played into their hands and proceed to the next clash. If they end the third clash, they proceed to the End Combat Phase instead.
Important: If any combatant plays the Prepare combat card, he leaves it face-up in front of himself until resolved.
Combat End Phase
During this phase, combatants determine final results of combat.
a) Determine Winner. The combatant who defeated his opponent is the winner of combat. It can be done in two ways:
- Losing all Health: As a result of a combatant's attacks his opponent has 0 Health. If a knight has 0 Health, he loses consciousness (see Conditions). If an enemy has 0 Health, his card is discarded after resolving the Combat End Phase.
- Important: If any combatant is defeated this way, combat may even end during the first or the second clash.
- Combat Dominance: If, after resolving three clashes, the dominance marker is placed on one combatant's side of the dominance track, he defeats his opponent. Ferocious enemies cannot be defeated this way.
- Important: Winning combat this way can only happen after resolving all three clashes.
If both combatants have equal initiative when they lose all Health in the same clash, they defeat each other and combat ends in a draw.
If the third clash ends and the dominance marker is still on the "0" space of the dominance track, combat ends in a draw.
Draws are not resolved in anyone's favor – no combatant wins or loses, no combatant gains rewards and no combatant can use any effects based on winning or losing combat. Effects based on defeating an opponent are resolved as normal.
Important: If a knight defeats his opponent, but he loses consciousness in combat, he still manages to accomplish any task that requires defeating an enemy or a knight (ex. Nice Trophy! or Robo-killer) and gains rewards for such task.
b) Rewards and "After Combat" Effects. If combat is won by a knight, he gains all rewards shown in the rewards space of the wasteland card representing the defeated enemy. Additionally, if by defeating a given enemy he accomplishes a task, he gains all rewards shown in the rewards space of such task (or tasks). The Waster immediately introduces a new task card into the game (see Task Activities).
Important: It is possible that defeating one enemy enables a knight to accomplish more than one task. The order of resolution of these tasks and how new tasks are introduced into the game is decided by the Waster.
If combat is won by an enemy played by the Waster, he should resolve any abilities that are triggered when a knight loses combat (ex. an Alice's Exiles wasteland card). The Waster gains no rewards for defeating a knight.
Important: If the Active Knight, who is currently resolving his move, is defeated in combat, but he does not lose consciousness and is not stopped by his enemy (ex. a Digger 2.0 wasteland card), the Active Knight can resume his move.
Future expansions introduce effects that are resolved in the Combat End Phase (ex. a promo luck card Witness Me! that increases Reputation gains after defeating an opponent in combat). If the game text of a given game component contains the expression "After combat", its effects should be resolved now.
After resolving the Combat End Phase, both combatants return their combat decks to the combat frame. Then, the Waster resolves a clean-up: he places the dominance marker on the "0" space of the dominance track and the range marker on the Medium Range card, returns all Health loss tokens used to the common pool and discards the enemy card to the wasteland card discard pile (no matter the result of combat). The Active Knight can continue playing the game.
Duels and Interacting Knights
When the Active Knight is resolving his move and his planned route goes through a hex with another knight marker (or markers), after entering such hex he may ask each knight present whether he wishes to interact:
- The Knight Agrees: The knights start a Duel (combat between knights) according to the rules described below. If both knights play the Defend combat cards during the first clash, the duel immediately ends and they may trade (see Trading). Otherwise, they fight each other according to the combat and duel rules.
- The Knight Refuses: The Active Knight may make a Search Check. It is a Challenging (7) Survival check made to locate another knight and force him to interact. If the check is passed, the knights start a duel as normal. This duel may still end in trading if both knights play the Defend combat cards during the first clash. If the search check is failed, nothing happens and the Active Knight can continue his move.
The Active Knight may interact with any number of knights during his move, as long as his route goes through their hexes.
Only the Active Knight can initiate interaction with other knights and make search checks – if he foregoes this opportunity, he simply ignores any knights on his route.
Duels between knights are resolved in a very similar way to combat with enemies from wasteland cards. All exceptions are described below:
- Both knights can play luck cards.
- Both knights choose one weapon to attack with.
- Both knights must spend Ammo or other resources when using weapons to attack.
- Dueling knights always use dominance rules – no knight is ferocious.
- Dueling knights do not use Health loss tokens – they track all Health changes on their player boards.
- The winner of a duel gains no rewards. Instead, he gains +1 Reputation and can steal from the defeated knight (see Stealing from Knights) even if this knight does not lose consciousness (i.e. the duel was resolved using dominance). Additionally, defeating another knight may lead to accomplishing a task (ex. the Pit Fight task card) or fulfilling mission goals (ex. the There Can Be Only One mission).
Important: If a duel ends with one knight losing consciousness, the winner of this duel cannot revive this knight during the same round he defeated him.
Additional Rules
This section of the Rulebook contains detailed descriptions of different game aspects that were not covered in the previous chapters.
Managing Resources
In Waste Knights, each player manages four basic resources: Ammo, Fuel, Radiation and Health. They are tracked on player boards using counters and dials. Below you can find how they affect the game.
Fully Healing and Regaining Resources
The two resupply actions result in a knight fully healing Radiation and Health and/or fully regaining Ammo and Fuel. In such case, this knight updates the proper counters and dials by rotating dials or placing resource markers on his player board so that it indicates respectively: 0 Radiation, 4 Health, 4 Ammo, 4 Fuel.
Ammo
Ammo symbolizes a meager supply of bullets, shells and other kinds of ammunition carried by each knight. This resource is used when making attacks with most ranged weapons.
The Ammo counter is comprised of three elements. The first one is a small display printed on each player board. It indicates 0 Ammo. The other two are Ammo markers indicating 1-4 Ammo. Each side of an Ammo marker represents 1 level of Ammo.
When a knight spends or loses Ammo, he turns or removes an Ammo marker from the Ammo counter for each level spent or lost. Losses of this resource may be indicated on game components with the "-" sign (ex. -1 Ammo).
When a knight gains Ammo, he turns or places an Ammo marker on the Ammo counter for each level gained. Gains of this resource may be indicated on game components with the "+" sign (ex. +3 Ammo).
The Ammo counter is limited to 0-4 Ammo. Any changes above 4 and below 0 should be ignored.
The game text of some ranged weapon gear cards contains the following expression: "No Ammo required". It means that when making attacks with such weapons the attacking knight does not spend any Ammo and cannot use any effects based on spending it (ex. a knight using Crossbow could not simultaneously use Hollow-points to improve his attack). Attacks with melee weapons require no Ammo.
Fuel
Fuel symbolizes the amount of gasoline or another propulsive liquid inside a knight's tank. It is mainly used when moving around the board using a vehicle.
The Fuel dial is comprised of two elements. The first one is a fuel gauge printed on each player board displaying a scale of 0-4 Fuel. The second one is a rotating Fuel indicator with an arrow that points at the current Fuel level. Each space of the Fuel dial represents 1 level of Fuel.
When a knight spends or loses Fuel, he rotates his Fuel dial counter-clockwise by 1 space of the dial for each level spent or lost. Losses of this resource may be indicated on game components with the "-" sign (ex. -1 Fuel).
When a knight gains Fuel, he rotates his Fuel dial clockwise by 1 space of the dial for each level gained. Gains of this resource may be indicated on game components with the "+" sign (ex. +4 Fuel).
The Fuel dial is limited to 0-4 Fuel. Any changes above 4 and below 0 should be ignored.
Some weapon gear cards (ex. Chainsaw) require a knight to "spend 1 Fuel" in order to use them in combat. In such case, the knight spends this resource before attacking and if he does not have Fuel, he cannot attack with such weapons. Spending 1 Fuel is enough for the whole combat, no matter how many times this knight attacks with a given weapon.
If a knight loses his vehicle (ex. trades it to another gear card(s) that is not a vehicle or his vehicle is wrecked), he immediately loses all Fuel.
Spending and Losing
Many effects mention spending resources. Spending is optional – a knight does not have to spend a given resource. However, if he chooses to, he must lower the level of a given resource as required. If he does not have enough, he cannot use a given effect. For example, a knight who wishes to play the Multi-attack combat card must have at least 2 Ammo and spend it before making his attack check.
Other effects mention losing resources. Losing is obligatory – a knight must lower the level of a given resource as required. For example, if a knight with 1 Health was forced to lose 2 Health, he would lower his Health to 0.
Important: If an effect mentions losing Health, a player ignores his armor value (if he has any). Armor protects only against Damage dealt in combat – not against direct Health losses.
Radiation
Radiation symbolizes the amount of harmful radiation that was absorbed by a knight's body and how it affects his actions.
The Radiation dial is comprised of two elements. The first one is a Geiger counter with special icons printed on each player board displaying a scale of 0-4 Radiation. The second one is a rotating Radiation indicator with an arrow and a small window to its left that points at the current Radiation level. Each space of the Radiation dial represents 1 level of Radiation.
When a knight suffers Radiation, he rotates his Radiation dial clockwise by 1 space of the dial for each level suffered. Suffering Radiation may be indicated on game components with the "+" sign (ex. +1 Radiation).
When a knight heals Radiation, he rotates his Radiation dial counter-clockwise by 1 space of the dial for each level healed. Healing Radiation may be indicated on game components with the "-" sign (ex. -1 Radiation).
The Radiation dial is limited to 0-4 Radiation. Any changes above 4 and below 0 should be ignored.
High Radiation level affects a knight's efficiency. If the window of the Radiation dial displays one or more of the following icons, remember about their effects until the Radiation level decreases:
- No Bull's Eyes: A knight gains no benefits for rolling a Bull's Eye (10), i.e. he deals no additional Damage and triggers no special effects connected with Bull's Eyes. However, a Bull's Eye (10) is still counted as a success in all skill checks.
- No Healing: A knight cannot heal Health until he lowers (heals) his Radiation level.
- K.O.: A knight loses consciousness (see Unconscious Knights).
Health
Health symbolizes a knight's physical condition – his exhaustion and severity of his wounds.
The Health counter is comprised of three elements. The first one is a small display printed on each player board. It indicates 0 Health and "K.O.". The other two are Health markers indicating 1-4 Health and -1 die icons. Each side of a Health marker represents 1 level of Health.
When a knight loses Health, he turns or removes a Health marker from the Health counter for each level lost. Losses of this resource may be indicated on game components with the "-" sign (ex. -1 Health).
When a knight heals Health, he turns or places a Health marker on the Health counter for each level healed. Healing Health may be indicated on game components with the "+" sign (ex. +2 Health).
The Health counter is limited to 0-4 Health. Any changes above 4 and below 0 should be ignored.
Serious wounds affect a knight's efficiency. One Health marker and the Health display show the following icons:
- -1 die icon: A knight rolls 1 less die in all skill checks for each of such icons.
- K.O.: A knight loses consciousness (see Unconscious Knights).
Conditions of Knights
Depending on what counters and dials indicate, a knight can fall under the following conditions:
- Healthy: A knight is healthy if his Health counter indicates 4 Health.
- Clean: A knight is clean if his Radiation dial indicates 0 Radiation.
- Wounded: A knight is wounded if he is not healthy.
- Irradiated: A knight is irradiated if he is not clean.
- Unconscious: A knight is unconscious if his Radiation dial indicates 4 Radiation and "K.O." and/or his Health counter indicates 0 Health and "K.O.".
A knight can be simultaneously affected by more than one condition.
Unconscious Knights
A knight loses consciousness (i.e. is K.O.'d) immediately when his Radiation dial indicates 4 Radiation and/or his Health counter indicates 0 Health. This knight's marker should be placed horizontally on the same hex where he lost consciousness. Until this knight regains consciousness, he cannot affect the game in any way – he performs no activities or actions and cannot use any effects from his game components unless they enable him to regain consciousness or prevent the knight from losing it (ex. the Adrenal red gear card).
The Active Knight may move through an unconscious knight's hex and pass a search check as normal (see Duels) to revive this knight or to steal from him.
Important: Being unconscious as a knight does not affect in any way a player's role as the Waster.
Reviving Knights
If the Active Knight revives an unconscious knight, this knight's marker should be returned to vertical position. This knight immediately heals 2 Radiation and/or 2 Health, depending on which counter or dial shows "K.O.". The Active Knight gains +1 Reputation and the knights may trade without risking a duel. Then, the Active Knight can continue his move.
If the revived knight has not resolved his move yet, he can continue playing as normal in the round order. If he has already moved, he must stay on his hex, but he can act normally during the following steps of the round.
Stealing from Knights
If the Active Knight steals from an unconscious knight, he can choose one of the following options:
- He takes 1 gear card (except a vehicle card or a blue gear card). This includes available gear cards.
- He gains +2 Fuel.
- He gains +2 Ammo.
- He takes a private task card from the unconscious knight's player area and removes 1 general marker from this card (if able).
If the Active Knight stole any resources, both knights update the proper counters or dials on their player boards. Then, the Active Knight can continue his move.
Regaining Consciousness
If an unconscious knight is not revived in the Move Step, he regains consciousness at the end of the Rest Step of the current round. His knight marker should be returned to vertical position and placed on the nearest city hex from his current hex (if two city hexes are in the same distance, the Waster chooses where to place the knight marker). The knight immediately heals 2 Radiation and/or 2 Health, depending on which counter or dial shows "K.O.". Finally, he loses 1 Ammo and 1 Fuel (if able) to illustrate that the help of strangers never comes cheap in the Waste.
Gear Cards
Gear cards represent various useful items that can be scavenged in the Waste. They are divided into five large groups, depending on specific rules that govern them: Weapons, Armor, Vehicles, Enhancements and General. Additionally, gear cards have traits symbolized by special icons (see the reference sheet).
General rules pertaining to gear cards are described below:
- A knight can place gear cards on panels of his knight sheet (in hands, on his body and in three pockets), in his backpack and vehicle. Each panel of a knight sheet can store up to one gear card (but see "Starting Gear" below). The backpack and vehicles can store a number of cards indicated by their Capacity.
- Gear cards placed on a knight sheet are available i.e. their owner can use them as described in their game text. Available cards are kept face-up.
- Gear cards kept outside a knight sheet are stored i.e. they cannot be used. Stored cards are kept face-down and should be placed horizontally below a knight sheet (when in the backpack) or below a vehicle card.
- A knight may freely move his gear cards between his knight sheet, backpack and/or vehicle only during the Knights Step and the Rest Step. During these steps, all gear cards owned by a knight are considered available. Outside these steps, knights must use special effects (ex. the Defend combat card) to re-equip their gear cards and gain access to cards from their backpacks and/or vehicles.
- If a knight gains a new gear card (ex. after defeating an enemy from a wasteland card or performing the Trade Action), he can immediately place it on his knight sheet. If this knight places the new card on a panel already containing another gear card, he must take that card and move it somewhere else (ex. place it in his backpack or vehicle).
- A knight can trade any gear cards he owns with the Stalls and other knights.
- Limited Cards: The game text of some gear cards contains the expression: "Limit 1 per..." (ex. "Limit 1 per knight"). It means that a given knight can only use 1 limited card with the same title. This limit is in effect for the whole game (ex. one knight cannot use two gear cards during one Rest Step).
Weapons
Weapon cards are placed on Hands panels of a knight sheet and are used during combat. A knight can have up to 2 one-handed weapons or up to 1 two-handed weapon available at any time. Other weapon cards must be stored in the backpack and/or vehicle (never in pockets).
Armor
Armor cards are placed on the Body panel of a knight sheet to provide protection during combat. A knight can have up to 1 armor available at any time. Other armor cards must be stored in the backpack and/or vehicle (never in pockets).
Vehicles
Vehicle cards are placed next to Fuel dials of player boards. They are a unique type of gear, because they are used by knights to move and store other gear cards. Vehicles have the following special rules:
- A knight can have up to 1 vehicle card available at any time.
- A knight's vehicle is always available, although it is not placed on his knight sheet.
- Vehicles use Fuel when moving.
- Vehicle cards cannot be stored.
- A vehicle can suffer up to 1 Vehicle Damage or become Wrecked. The current state of the vehicle may affect its performance. Each knight starts the game with an undamaged vehicle placed so that its higher-value side is face-up (usually yellow). When a vehicle suffers 1 Vehicle Damage (ex. when starting combat with a Digger 2.0 enemy card), the knight turns his vehicle card to the other side and places 1 vehicle damage token on it. If a damaged vehicle suffers Vehicle Damage again, it is wrecked instead – the knight returns its card to the vehicle pool and immediately loses all Fuel. He must move on foot until he gains a new vehicle card.
- Vehicles have Capacity. If a vehicle suffers Vehicle Damage and its new Capacity is less than the number of gear cards currently stored in this vehicle, the Waster immediately chooses and discards all gear cards exceeding the vehicle's new Capacity.
- All gear cards not chosen by players during the game setup form the Vehicle Pool. They are available for trading in all city hexes as normal (see Trading Vehicles). They can also be taken from the pool instead of drawing gear cards from a deck when a knight gains new gear cards (ex. as rewards).
Enhancements
Enhancement cards are attached (added) to other gear cards in order to improve them. Enhancement cards are distinguished by the "+" sign above a trait icon of gear cards to which a given enhancement can be attached. Enhancements cannot be used by themselves – they have effects only when properly attached. They can only be kept attached to a card or stored in the backpack and/or vehicle (never in pockets). Enhancements have the following special rules:
- An enhancement can be attached to a card with a certain trait icon if attachment rules of this enhancement allow.
- Enhancements are limited when considering a gear card to which they are attached i.e. it is invalid to attach more than 1 enhancement with the same title to one gear card.
- One gear card can have any number of enhancements attached.
- Each enhancement's game text contains a horizontal line. The description above the line is called attachment rules – it informs about limitations or requirements important when attaching a given enhancement. The description below the line is called attachment effect – it indicates changes in effects or use of a gear card after attaching a given enhancement. When attaching a card, the knight should slide the enhancement under the chosen gear card so that only the attachment effect is visible.
- An enhancement stays attached to a gear card no matter where this card is placed and takes space in the backpack or vehicle as if it was a separate gear card.
- If a gear card with any enhancements attached is destroyed, stolen or discarded, all enhancements are lost with it. If such gear card is traded, its owner can detach all enhancements from it and place them in his backpack or vehicle, or trade them following normal rules.
- Enhancements can be attached or detached only during the Knights Step and the Rest Step. They cannot be re-equipped or moved between gear cards using effects that normally allow a knight to change the configuration of his gear cards (ex. the Defend combat card). The only exception to this rule is when a knight trades a gear card with enhancements (see above).
General
If a gear card does not belong to any group described above, it is general gear of a knight. General gear cards are placed on one of the three pocket panels of a knight sheet or stored in the backpack and/or vehicle, depending on when a given card can be used. General gear cards fall into three categories based on their effects:
- Permanent Effects: The game text of a card is always in effect if the card is available (ex. Dundee Hat).
- One-use Effects: If a given card is available, it can be discarded for its game text effects (ex. Medi-shot).
- Marking Effects: If a card is available, a knight can use its game text effects once per round, as indicated on the card. Then, this card must be marked (ex. First-aid Kit used in the Rest Step). After the card is unmarked in the next Knights Step, it can be used again.
Marking and Unmarking
Some special abilities and cards are marked after being used. In order to mark a special ability or card, its owner places 1 general marker on the game text of this ability or gear card. Such ability or gear card cannot be used again until this marker is discarded.
Players unmark all game components at the beginning of the Knights Step each round i.e. they discard all general markers from them. From this moment, these game components are ready to be used again.
Important: If a game component is not normally marked to be used, but for some reason was marked (ex. as a result of the Shelobie wasteland card), it works normally.
Gear Card Overview
- Title: The name of the card.
- Game Text / Flavor Text: A description of effects.
- Gear Trait Icon: It indicates the type of gear card.
- Basic Trade Value: How much a card is worth.
- Hand Icons (only weapons): They indicate how many hands are required to use a given weapon and on which panels of a knight sheet to place it.
- Body Icon (only armor): It indicates on which panel of a knight sheet to place the armor card.
- Combat Panel (only weapons and armor): It contains combat icons used when attacking.
- Speed (only vehicles): It informs how many Movement Points a knight gains for each Fuel spent when moving with a given vehicle.
- Capacity (only vehicles): It indicates how many gear cards can be stored in a given vehicle.
- Attachment Rules (only enhancements): They indicate to which gear cards a given enhancement can be attached.
- Attachment Effect (only enhancements): It describes effects of an enhancement once attached.
Starting Gear
Each knight starts the game with a unique set of gear cards. Starting gear shown on knight sheets is used in a way very similar to normal gear cards, with the following exceptions:
- Starting gear cannot be destroyed, stolen or discarded in any way.
- Starting gear cannot be traded.
- Starting gear is printed on knight sheets and can be covered with other gear cards. Any covered starting gear is no longer available – it is considered stored until it is uncovered again.
- Starting gear is counted against any limited gear cards owned by a knight.
- Enhancement cards can be attached normally to starting gear. An enhancement card should be slid under a knight sheet so that only its attachment effect is visible. Enhancements attached to starting gear can be destroyed, stolen or discarded as normal.
- If starting gear must be marked, a general marker should be placed near the upper-right corner of the knight sheet panel that shows the starting gear to be marked. Marked starting gear can be covered with other gear cards. Such gear cards can be marked as normal, too. This way, one general marker could be placed on a gear card's game text and another in its upper-right corner to indicate the fact of marking starting gear under it.
The Stalls and Trading Gear
In Waste Knights, there is no currency – inhabitants of the Waste trade useful gear among themselves.
Value of each gear card is indicated with stripes of one color shown on each card back and inside the panel with a card's title on each card front. Vehicle cards feature these stripes beneath their titles and below the Capacity icon. Gear cards can have the following value:
- Green cards: Cheap and common.
- Yellow cards: Moderately expensive and rare.
- Red cards: Very valuable and rare.
- Blue cards: Priceless and unique gear that can be gained only after accomplishing certain tasks.
Gear cards have the following exchange rate based on their value: 3 green = 1 yellow; 2 yellow = 1 red.
Gear cards available for trading are displayed on the Stalls represented by two frame pieces. The Stalls are composed of 10 Stalls Spaces: 8 normal spaces and 2 special spaces for two cities – Pumps and New Sydney. Each knight performing the Trade Action in any city hex has access to all 8 normal Stalls spaces. Additionally, any knight on the Pumps hex or the New Sydney hex has access to the gear card placed on the matching special Stalls space.
The background of each Stalls space shows what gear card should be placed on it, while the color of the diode below informs about the current trade value of a given card when performing the Trade Action. Most cards are traded according to their basic trade value, with the following exceptions:
- On each frame piece, 1 normal Stalls space offers an unfavorable exchange rate (green for yellow or yellow for red).
- On each frame, 1 special Stalls space offers a favorable exchange rate (in Pumps yellow for green, in New Sydney red for yellow).
If, during the Exploration Step, the Active Knight on a city hex chooses to perform the Trade Action as his exploration action, he resolves trading with the Stalls in the following way:
- Offer: The Active Knight checks gear cards from the Stalls. Then, he chooses and offers for trading any number of gear cards he owns. They can be taken from any place (his knight sheet, backpack and/or vehicle). He places all offered cards below the Stalls frames.
- Choice: The Active Knight chooses any gear cards from the Stalls spaces that he has access to. The value of all chosen cards must be equal to or less than the value of all offered cards. The cards chosen from the Stalls should be slid a little upwards to distinguish them.
- Important: When trading, you should consider the current (Stalls) trade value of each card that is indicated by diodes.
- Deal: If the value of the offered cards is appropriate, the Active Knight discards them to gear discard piles of proper colors, takes all chosen cards from the Stalls and places them on his knight sheet, in his backpack and/or vehicle.
- Important: The knight receives no "change" when trading – if he offers gear cards of higher value than required and the Stalls do not contain cards that would compensate the difference, he loses any excess gear cards.
- Refill the Stalls: The Active Knight refills the Stalls by drawing and placing gear cards from gear decks of proper colors. He places these cards on empty Stalls spaces starting from the leftmost empty space and going to the right of the Stalls frames.
There are some effects in the game that allow a knight to perform the Trade Action outside city hexes and outside the Exploration Step (ex. the Wandering Merchant wasteland card). Unless their game text says otherwise, trading resulting from such effects should be resolved as described above.
Stalls Frame Overview
- Normal Stalls Space.
- Special Stalls Space (here Pumps).
- Value of a Gear Card Placed: A gear card back shown here informs what gear card should be placed on a given Stalls space.
- Stalls Trade Value: The color of the diode indicates what is the current value of a gear card placed on the Stalls space above. This value is in effect only when trading with the Stalls.
Trading Vehicles
Knights performing the Trade Action can trade not only "normal" gear cards, but also vehicle cards according to their current value. Vehicle cards available for trading do not occupy Stalls frames – they can be found in the vehicle pool common for all city hexes. Vehicle cards have different value depending on their state – fully functional ones have the "face" value (usually yellow), while damaged ones are cheaper. Besides that, trading vehicle cards is identical to trading other gear cards.
Important: If a knight trades his vehicle and has no vehicle after he resolves trading (he gets rid of his only vehicle), he immediately loses all Fuel. Knights can trade damaged vehicles.
Trading Knights
Knights can trade in the following circumstances:
- The Active Knight successfully interacts with another knight when resolving his move (see Duels). A duel must be resolved.
- The Active Knight revives an unconscious knight. They can trade without risking a duel.
- Two or more knights are on the same hex during the Rest Step. They can trade without risking a duel.
When knights trade, they are not limited by gear card value shown on cards – it is a mere suggestion on how to trade. Knights can make any deals pertaining to gear cards exchanged, they can trade gear cards, Fuel and Ammo (level for level, updating the proper counters and dials), as well as promise help for gear cards and resources.
Important: It is forbidden to make promises based on a player's role as the Waster. The Waster is considered an entity completely independent from knights.
Trading and Paying Cost with Gear Cards
When trading gear cards with the Stalls or discarding them to pay costs of certain effects, a knight can discard the equivalent of the required cards i.e. instead of discarding 1 yellow card, he could discard 3 green cards.
When drawing gear cards, ex. as rewards for defeating an enemy or performing a Special Action of a special hex, a knight must draw exactly the same gear cards as shown in a given rewards space or action description (see Costs and Rewards).
Blue Gear Cards
Blue gear cards represent unique items that can only be gained after accomplishing certain tasks. They are governed by the following rules:
- They cannot be destroyed, stolen or discarded.
- They cannot be traded with the Stalls, but knights can trade them among themselves.
- A knight may remove from the game his blue card when he gains it or during any Rest Step, to immediately gain +1 Reputation and draw 1 red gear card.
Special Gear Cards
There are three blue gear cards that are "teasers" for future expansions. Their rules can be found below:
- Cyber-arm: This is an Implant gear card. It is attached to a knight by placing it to the left of his knight sheet. It can only be discarded by performing the Special Action of Cerbero Tower [11].
- Scales: This is a Mutation gear card. It is attached to a knight by placing it to the left of his knight sheet. It can only be discarded by performing the Special Action of Cerbero Biolabs [6].
- Turbo-injector: This is a Tuning gear card. It is attached to a knight's vehicle card by sliding it under this vehicle card so that only the attachment effect is visible. It can only be discarded by performing the Special Action of Rusty's Garden [12].
More information about implants, mutations and tuning gear cards will be available in future game expansions.
Special Tokens
There are three special tokens in the game: Nuked, Pills and Reboot. Each has a unique appearance and is placed on the game board after a certain task is accomplished by one of knights.
Special tokens are placed on the board light (brightly colored) side up. During each Waster Step, all special tokens on the board are either turned to their dark side or discarded from the board (if the dark side is already face-up).
All special tokens have identical effect when in the game: as long as a special token is on a given hex, this hex cannot be explored and its description from the reference sheet should be ignored (i.e. considered blank). Because such hex cannot be explored, no exploration actions can be performed there and knights cannot accept nor accomplish any tasks there (for game purposes it is treated as a normal hex).
Special tokens will have other uses in future game expansions.
Game Variants
2-Player Game
A 2-player game is played in the same way as a 4-player game, with the following exceptions.
Game Setup
- First Player Marker and Waster Marker: The First Player takes his marker. In a 2-player game, the Waster marker is not used. The Waster is always the player who is not the Active Knight.
- Combat Cards: Each player takes one combat deck and uses it until the end of the game.
- Task Cards: Common task cards should be set up as normal. The private task deck should be shuffled. Then, the First Player deals 4 private task cards to each player. Both players choose 2 task cards from 4 dealt, place them face-down in their player areas and remove from the game all other private task cards (4 not chosen and the whole private task deck). They will not receive any other private tasks until the end of the game. Private task spaces on the task frame are left empty, but players may still use orange and green task tokens when resolving their private tasks.
Playing the Game
- Task Cards: Players resolve common tasks as normal. Additionally, each player has 2 face-down private task cards in his player area. When exploring the hex mentioned in the first requirement of any of his private tasks, a player reveals this task card and attempts to fulfill this requirement (ex. pass a skill check) according to its game text. If he successfully fulfills this requirement, he treats the task card as if he "took this card" and accepted the task. Then, he continues resolving it as normal. Otherwise, this task card is kept face-up until he manages to accomplish it. Players can have 2 private tasks and they cannot steal them from each other. Private task cards never become outdated – players have unlimited time to accomplish them.
3-Player Game
A 3-player game is played in the same way as a 4-player game, with the following exceptions.
Game Setup
- First Player Marker and Waster Marker: The First Player takes his marker. The player to the right of the First Player takes the Waster marker.
- Task Cards: Common task cards should be set up as normal. The private task deck should be set up as normal, but only 1 private task card should be drawn and placed face-up on the central (orange) space of the task frame. The green private task space and the green task tokens are not used in a 3-player game.
Playing the Game
- Waster Marker: In a 3-player game, the Waster is always the player sitting to the right of the Active Knight (not the one sitting opposite the Active Knight).
Reference Sheet: Hexes
Transcribed from the back cover. Icons are given as words: "Resupply (heal)" restores Radiation and Health; "Resupply (Ammo, Fuel, Repair)" restores Ammo and Fuel and repairs the vehicle; "Trade" is the Trade Action with the Stalls; "S" is a Special Action. Costs are gear cards of the color shown; "/" means one or the other, "+" means both. Where a small trait icon is shown, the best-fitting trait name is given.
City hexes
- 1. Gangraen: Trade. Resupply (heal) / Resupply (Ammo, Fuel, Repair): discard 1 green gear card. S: discard 1 green gear card, roll 1 die. 1-4: lose 1 Health. 5-9: gain +1 yellow gear card. 10: gain +1 red gear card.
- 2. Pumps: Trade (additional Pumps gear card from the Stalls available here). Resupply (heal) + Resupply (Ammo, Fuel, Repair): discard 1 green gear card.
- 3. Queen's Valley: Trade (knights cannot trade weapons here). Resupply (heal) / Resupply (Ammo, Fuel, Repair): discard 2 green gear cards. S: draw 2 luck cards.
- 4. New Sydney: Trade (additional New Sydney gear card from the Stalls available here). Resupply (heal) + Resupply (Ammo, Fuel, Repair): discard 1 green gear card.
- 5. Alice Offsprings: Trade (knights cannot trade drugs here). Resupply (heal) / Resupply (Ammo, Fuel, Repair): discard 2 green gear cards. S: discard 1 red gear card, gain +1 Reputation.
Special hexes (each also has S: gain +1 green gear card, except where noted)
- 6. Cerbero Biolabs: S: heal 3 Radiation. S: discard any number of mutation cards from your knight. S: +1 green gear card.
- 7. Red Tomb (exploration check REPAIR (7)): S: target any hex. All knights on that hex suffer 2 Radiation and lose 2 Health. S: +1 green gear card.
- 8. Cerbero Pharmaceuticals (exploration check MEDICINE (7)): S: heal 3 Health. S: take any drug card from the Stalls. Then refill the Stalls. S: +1 green gear card.
- 9. Old Refinery (exploration check SURVIVAL (7)): S: +4 Fuel. S: take any armor card from the Stalls. Then refill the Stalls. S: +1 green gear card.
- 10. Warata Industries: S: lose 2 Reputation, if able: gain +1 red gear card / +2 yellow gear cards. S: +1 green gear card.
- 11. Cerbero Tower: Attack checks of enemies on this hex and on all adjacent hexes gain +2 dice. S: +1 yellow gear card / +2 green gear cards. S: attach or discard 1 implant card from your knight.
- 12. Rusty's Garden: S: +3 Fuel and repair your vehicle. S: attach or discard 1 tuning card from your vehicle. S: +1 green gear card.
- 13. Kosciusko's Redoubt (exploration check TALK (7)): Resupply (heal) + Resupply (Ammo, Fuel, Repair): discard 1 green gear card. S: draw 3 wasteland cards, choose 1 and place it face-down under the Waster marker. Discard the other cards. In the next Move Step, instead of revealing wasteland cards from the deck, the Waster must play 1 card placed under the Waster marker.
- 14. Sandpiercer: S: discard 1 green gear card: place your knight marker on any hex. This is not considered moving. You can explore the new hex as normal, but you cannot perform any exploration action there. S: +1 green gear card.
Reference Sheet: Icons
Hex and action icons: City; Special Action (S); Trade Action – the Stalls; Resupply Action – Radiation, Health; Resupply Action – Ammo, Fuel, Repair.
General use icons: Reputation; Ammo; Fuel; Radiation; Health; Threat; Contamination; Movement Point; Gear Cards; Hands / Body; Capacity.
Combat and check icons: Die Gained (+); Die Suffered (-); Ranged Weapon – Long / Medium / Short Range; Melee Weapon; Multi-attack; Armor Piercing; Additional Damage; Armor Value; Bull's Eye (Critical Success).
Gear and wasteland card icons: Weapon; Armor; Vehicle; Enhancement; General; Implant; Mutation; Tuning; Drug; Equipment; Enemy – Beast, Cult, Gang, Machine, Mutant; Event – Nature.
Turn Reference
Preparations Phase. 1. Waster Step: a) Advance Round Marker and Mark Task Cards; b) Game Board Effects; c) Remove Long-term Effects; d) Mission Effects (optional); e) Update Stalls (optional); f) Pass First Player Marker and Waster Marker. 2. Knights Step: a) Unmark Cards and Sheets; b) Prepare Knights' Gear Cards; c) Draw Luck Cards.
Wasteland Phase. 1. Move Step: a) Plan Route; b) Resolve Movement and Wasteland Cards. 2. Exploration Step: a) Exploration Check (if required); b) Hex Activities (in any order): Accept and/or Accomplish 1 Task; Perform 1 exploration action. 3. Rest Step: a) Trade Between Knights; b) Use Gear Cards; c) Quick Resupply; d) Regain Consciousness.
Combat Sequence. 1. Combat Start Phase: a) Use "Before Combat" Effects; b) Set Starting Range. 2. Clashes Phase (up to 3 clashes): a) Choose Combat Cards; b) Resolve Combat Cards by Initiative; c) Determine Dominance; d) Set Range and End Clash. 3. Combat End Phase: a) Determine Winner; b) Rewards and "After Combat" Effects.
Attack Sequence. 1. Choose Weapon and Range Icon. 2. Determine Initiative. 3. Resolve Attack: a) Attack Check; b) Deal Damage; c) Soak Damage and Lose Health.