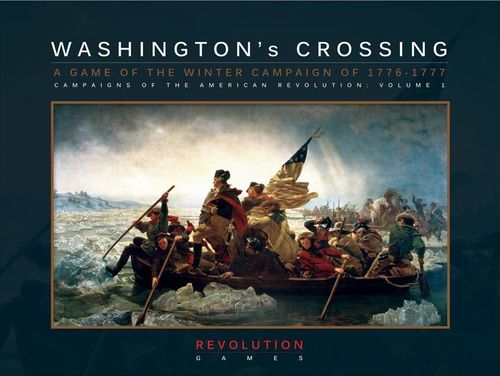
Washington's Crossing
Washington's Crossing Rulebook
Table of Contents
Table of Contents
- 1.0 Introduction
- 2.0 Components
- 3.0 Limited Intelligence
- 4.0 Stacking
- 5.0 Zone of Control (ZOC)
- 6.0 Sequence of Play
- 7.0 Weather Phase
- 8.0 American Raid Phase
- 9.0 Reinforcements
- 10.0 Command Phase
- 11.0 Movement
- 12.0 Fatigue
- 13.0 Recovery Phase
- 14.0 Detachments
- 15.0 Transferring Strength Between Leaders
- 16.0 Attack
- 17.0 Combat
- 18.0 Disorder and Rout
- 19.0 Entrenchments
- 20.0 Garrison Requirements
- 21.0 Game Setup
- 22.0 Victory Points
- 23.0 Winning the Game
- Players Notes
- Designers Notes
1.0 Introduction
Washington's Crossing is a simulation of the American winter campaign of December 25th, 1776, to January 6th, 1777, that resulted in the twin victories of Trenton and Princeton and turned the fortunes of the American Revolution.
Washington's Crossing is the first game in the Campaigns of the American Revolution series. Future linkable titles in the series will cover the New York campaign of 1776, the Philadelphia campaign of 1777, and the New Jersey campaign of 1778.
2.0 Components
The game consists of the following components:
- 200 Die-Cut Counters
- 2 Player Charts
- 1 Game Setup Chart
- 1 24 page rule booklet
- 2 Leader Displays (British and American)
- 1 22"x34" Map
- 1 10-Sided Die
2.1. Game Map
The game map represents parts of New Jersey and Pennsylvania from Philadelphia to Amboy. The border between Pennsylvania and New Jersey is the Delaware River. Each hex represents approximately 1.14 miles across.
2.1.1. Map Features
The map consists of hexes that represent the five major terrain features in the game; Clear, Woods, Marsh, Mountain, Ocean, and the roads, towns and cities of the region. There are several hexside terrain features in the game; Major Rivers, Minor Rivers, Creeks, and Ferries. Around the maps perimeter are labels for each of the terrain types. Major rivers are un-crossable except at ferries, or by American units using naval units, until the first turn of January 4th. All rivers and creeks that are crossed by a road are considered to have a bridge or ford and the road movement point cost is used when crossing the river or creek while moving along the road. A ferry is considered to connect to the roads in the hexes it links. Each terrain type has its own movement point cost listed on the Movement Costs Chart (MCC) except Ocean hexes that may not be entered by any leader; and towns and cities which have no effect on movement. Movement costs change during rain turns and beginning the first turn of January 4th rivers, creeks, and marshes freeze changing their costs.
2.2. Playing Pieces
2.2.1. Leaders
Leaders are the primary movable pieces in the game. The leaders represent two opposing sides the British and Hessians represented by the red counters (The Hessian leaders are identified by the small green Hessian flag) and the American leaders represented by the blue counters. All rules for British leaders also apply to Hessian leaders. Leaders have troops assigned to them on the Leader Display. The maximum number of troops a leader may have assigned to him is displayed next to the leaders name on the Leader Display. A leader not listed on the Leader Display may not have troops assigned to him. Examples: Cornwallis, Greene, Sullivan and Grant when a commanding leader. Leaders may activate other leaders up to the value of their command span. (See 10.1 Activation)
The leader counter shows: Activation Cost, Command Span, Leader Rating, Command Radius. A white box identifies a Militia Leader.
Activation Cost The activation point cost to activate a leader for movement and combat. (See 10.1 Activation)
Command Span The maximum number of leaders; expressed in activation point costs, the leader may activate. Leaders with a command span are defined as commanding leaders. (See 10.4 Command Span)
Leader Rating The leader rating is used to activate a leader by die roll and to determine which column is used on the Movement Matrix Chart and Combat Results Table.
Command Radius The number of movement points a leader must fall within to be activated by a commanding leader.
Rank American generals have some of the 13 stars highlighted on their counters. One star is a brigadier general, two stars a major general and three stars the army commander. Rank has no effect in the game; this is just for historical information.
Leader Capture A leader may be captured when he is in a hex alone without troops and an enemy leader with troops enters the hex, either by movement, retreat, reinforcement, or advance after combat. Roll one die, on a result of 0 to 4, the leader is captured and removed from the game, including detachments. If the leader is not captured, retreat the leader four hexes using normal retreat priorities. A retreating leader with no troops who is forced to retreat through an enemy leader with troops is captured. A leader who loses all his troops by retreating into an enemy occupied hex is captured. (See 17.3 Retreats). A leader may also be captured by a raid. (See 8.0 American Raid Phase)
Leader Removal During the Command Phase, any leader who has no troops assigned may be removed from the game. If the leader is a detachment, the leader may be returned to the game using the normal rules for detatchments. If the leader is not a detatchment, the leader may not return to the game.
2.2.2. Naval Units
There are two American naval units in the game, the Pennsylvania Navy and the Durham Boats. The naval units move along each hexside and assist in helping American leaders cross the Delaware River. These units have two movement allowances: one for going upstream, away from Philadelphia; and one for downstream, towards Philadelphia. Naval units do not need activation points to move. (See 11.6 Naval Movement)
The naval counter shows: Hexside Facing Arrow, Downstream Movement, Upstream Movement.
2.2.3. Informational Markers
There are several markers in the game that are used to assist players.
Fatigue Marker As leaders move and fight, they become fatigued. Fatigue is represented by seven levels, 0 to 6. When the fatigue level of a leader increases or decreases; adjust the fatigue marker on the Leader Display. For simplicity, if multiple leaders are stacked together and have the same fatigue level, the player may track fatigue on a single leader's display.
Day and Turn Markers Each day consists of 4 turns, two day turns 7 am and 12 pm, and two night turns 5pm and 12 am. The day and turn markers are used to record the current turn and day.
Disorder Marker Leaders' become disordered due to combat. Place a disordered marker on top of the leader counter when this occurs.
Rout Marker Leaders' become routed due to combat. Place a routed marker on top of the leader counter when this occurs.
Weather Marker Records the current turn's weather. Place the Weather Marker on the current turn's weather condition (Fair, Freeze, Snow or Rain) on the Weather Display located on the map.
Activation Points Marker Records the current number of activation points for each side. Players receive new activation points on the 12 am turn each day. Exception: The American player receives no new activation points on December 30th (the supply system collapsed that day). Players may accumulate a maximum of 30 activation points.
2.3. Displays and Tracks
2.3.1. Leader Display
There are two leader displays in the game, one for the American player, and one for the British player. The Leader Display is where each player tracks a leader's current troop strength and fatigue level. Leaders whose name is printed in gray are militia leaders for the Americans and Hessian leaders for the British. Numerical markers are used to record a leader's assigned troops rounded to the nearest 10 men. Numerical markers representing 10's, 100's, and 1,000's, are provided. Not all leaders have all three markers. Washington for example, only has a 10's and 100's marker as the maximum number of troops he may have assigned is 140. The American player starting with January 1st has four leaders who can have 1000 or more troops assigned and only three markers marked 1000. If all four have 1000 or more troops use the blank blue marker with a stripe for the fourth 1000 marker. This never occurred in many playtests.
Example: The American leader Cadwalader has a maximum troop assignment of 1,380 troops as show on the Leader Display. He currently has 1,380 troops assigned to him and a fatigue level of 5. This is marked on Cadwalader's track on the Leader Display by placing the 1,000 marker on the 1 box, the 100 marker on the 3 box, the 10 marker on the 8 box, and a fatigue marker is placed in the 5 box.
2.3.2. Player Record Tracks
There are two record tracks located on the map, one for the British player, and one for the American player. The record tracks are used to keep track of activation points and victory points for each player. A player may never accumulate more than 30 activation points. When a player reaches 31 victory points, flip the victory point marker to its blank side and place it in the one position on the record track.
2.3.3. Turn and Day Tracks
The current turn is recorded on the turn track located on the map by placing the turn marker in the appropriate box. Each night turn represents 7 hours, and each day turn represents 5 hours; at the end of each turn, move the turn marker one box to the right. When the turn marker reaches the "Move Day Marker" box, move the day marker one box to the right (the next day) and place the turn marker in the 12am box.
2.3.4. Weather Display
The current game turns weather is tracked on the Weather Display located on the map by placing the Weather Marker in the appropriate box; Fair, Freeze, Rain, or Snow.
3.0 Limited Intelligence
A leader's troop strength and fatigue levels are secret. You may not look at your opponent's Leader Display. During combat, total troop strength and maximum fatigue levels are revealed but not the details of how much troop strength or fatigue level each individual leader has.
Players may only observe the top leader in a stack of enemy leaders, including any markers placed on that leader. The top leader in a stack must be the leader with the largest printed activation cost. Any entrenchment marker must be placed on top of all other leaders and markers in a stack.
Exception: You may observe all leaders and markers in a stack at any time if you have a friendly leader adjacent to the enemy stack. When opposing leaders move adjacent to one another, both players must reveal if there are no troops in a hex. If a hex drops to 0 troops this information must be immediately revealed to the opposing player if an enemy leader is adjacent. When moving or retreating leaders attempt to move adjacent to an enemy occupied hex, both players must reveal if their stack of leaders are large enough to generate a Zone of Control (ZOC). If a hex drops below 400 troops and no longer generates a ZOC, this information must be immediately revealed to the opposing player if an enemy leader is adjacent. (See 5.0 Zone of Control).
Certain victory conditions during the game require forces to have a certain number of troops occupying a town to gain victory points. This intelligence is available to your opponent when you collect the victory point.
Note: These rules allow for a player not in contact with the enemy to partially conceal his strength and fatigue. During the American Revolution, both sides had fairly good intelligence about the number and location of enemy troops due to the large number of spies and sympathizers for each side.
4.0 Stacking
Any number of units (leaders or naval units) may stack in a hex but no more than 3,000 troops may occupy a single hex at the instant of combat, at the end of movement, advance after combat, reinforcement, or retreat. If as a result of retreat, a hex is over-stacked, the leaders must retreat another hex. Leaders may move through a hex creating a temporary over-stacking situation during movement at a cost of one additional movement point.
5.0 Zone of Control (ZOC)
A leader or group of leaders with at least 400 un-routed troops in a hex exerts a ZOC into the six adjacent hexes.
Exceptions: ZOC's do not extend across un-bridged major rivers, unless the river is frozen, in which case the ZOC does extend across the hexside. ZOC's do not extend across un-bridged minor rivers during rain turns. ZOC's do not extend into woods, swamps, or mountain hexes except along roads.
A leader must spend one additional movement point to enter or leave an enemy ZOC. A leader may move directly from one ZOC to another paying both the cost to enter and leave a ZOC in addition to the cost of the terrain.
6.0 Sequence of Play
Each game turn consists of several phases that must be followed in sequence.
- Weather Phase
- American Raid Phase
- Reinforcement Phase
- American Command Phase
- a. American player activates leaders with Activation Points
- American Action Phase
- a. Move and perform Normal/Hasty attacks with leaders activated by activation points (Defender may react, See 11.3 Reaction Movement)
- b. Move and perform Normal/ Hasty attacks with leaders activated by initiative roll (one leader per day turn) (Defender may react, See 11.3 Reaction Movement)
- c. Conduct all Prepared attacks (Defender may react, See 11.3 Reaction Movement)
- American Recovery Phase (Night Turns Only)
- British Command Phase
- a. British player activates leader with Activation Points
- British Action Phase
- a. Move and perform Normal/Hasty attacks with leaders activated by activation points (Defender may react, See 11.3 Reaction Movement)
- b. Move and perform Normal/ Hasty attacks with leaders activated by initiative roll (one leader per day turn) (Defender may react, See 11.3 Reaction Movement)
- c. Conduct all Prepared attacks (Defender may react, See 11.3 Reaction Movement)
- British Recovery Phase (Night Turns Only)
- End of Turn
7.0 Weather Phase
Weather affects both combat and movement. In addition to restrictions imposed by specific weather-related rules, there are also die roll modifiers related to weather. To determine weather, follow the procedure below:
-
A player consults the Continuing Weather Table to determine if the previous turn's weather will continue. Roll one die and cross-reference the result column. The previous turns weather may continue this turn on the following results:
- C - The previous turn's weather continues for all weather conditions.
- CF - The previous turn's weather continues if it was Freeze.
- CR - The previous turn's weather continues if it was Rain.
- CS - The previous turn's weather continues if it was Snow.
If the previous turn's weather does not continue, consult the New Weather Table to determine this turn's weather condition. Roll one die and cross-reference the result column. On night turns 1 is subtracted from the die on the New Weather Table.
From the first turn of January 4th to the end of the game, all fair weather becomes freeze and all rain becomes snow.
Example: It's the Weather Phase of the 12am turn and the previous turn's weather was freeze. The players consult the Continuing Weather table and roll a 6, which results in a "CS" result. The weather would continue if it was snow. Since the previous turn's weather was freeze, the players consult the New Weather table and roll a 5 and apply a -1 die roll modifier for a night turn for a modified result of 4. This turn's weather is freeze.
8.0 American Raid Phase
During the American Raid Phase, the American player checks on the Raid Table to see if one of his leaders will raid a British leader this turn. Follow the procedure below:
- The American player consults the Raid Table. Roll one die. On a result of 0, 1, or 2 a raid may occur.
- If a raid result was rolled on the Raid Table, the American player rolls one die and consults the Raid Leader Table to determine which leader will conduct the raid. Cross-reference the die roll with the leader column. If the leader selected is on the map, has troops and is not routed, the American player selects a British leader within 15 hexes of the raiding leader and conducts a raid. The American player may examine a stack of British leaders to select a target but must choose one of the leaders in the examined hex. If no British leader is within 15 hexes of the raiding leader no raid occurs.
- The American player then rolls on the Raid Results Table and applies the result. Any raid during a night turn causes the raided British leader who was the target of the raid to gain 1 fatigue level in addition to any fatigue results of the raid. Thus it is possible for a British leader to gain 2 fatigue levels during a night raid.
- If a raid eliminates all of a leader's troops, the leader is captured. Note: This applies to the American leader conducting the raid as well.
Example: The American player consults the Raid Table to see if a raid will occur this turn. He rolls a 2 which results in a possible raid. He now consults the Raid Leader Table to determine which leader, if any, will conduct the raid. He rolls a 3 which results in the leader Ewing being able to conduct a raid. The American player checks to see if there is a British leader within 15 hexes of Ewing and finds that Leslie and vonDonop are eligible to be raided. The American player declares that he is raiding Leslie and consults the Raid Results Table. The American player rolls an 8 which we results in a Def-30/1Fat. Leslie suffers 30 troop losses and increases his fatigue level by one. If it were a night turn, Leslie would increase his fatigue by an additional level for a total of 2.
9.0 Reinforcements
During the reinforcement phase, both sides check to see if reinforcements enter the game.
9.1. British Reinforcements
The British player receives reinforcements according to the table below. If an American leader moves into hex row xx21 British reinforcements arrive according to the Accelerated Arrival Column. This line is marked on the map with an orange shaded line to make it easier for players to remember this. Accelerated reinforcements whose turn of arrival has already passed arrive in the next phase reinforcement phase. Once reinforcements have been accelerated they remain so for the rest of the game.
9.1.1. British Reinforcement Table
| Normal Arrival | Accel. Arrival | Leader | Strength | Historical Regiment |
|---|---|---|---|---|
| Dec 28 12pm | Dec 27 12 pm | Det. | 500 | 46th |
| Dec 29 7am | Dec 28 7am | Det. | 200 | 71st |
| Dec 30 7am | Dec 29 7am | Det. | 900 | Kuhler, Loos |
| Jan 1 7am | Dec 30 7am | Det. | 500 | 57th |
| Jan 1 7am | Dec 30 7am | Cornwallis | - | - |
The British player places his reinforcements in any hex on the top map edge between 1300 and 2401, inclusive, with the exception of Vanguard who is placed with Leslie. The British player may not place reinforcements in a hex occupied by an American Leader with troops. If a hex is occupied by an American Leader without troops the British reinforcement may be placed in the hex and the British player rolls for leader capture of the American leader without troops. If all British reinforcement hexes are occupied by American leaders with troops, the reinforcements are delayed until the following turn.
When Vanguard is placed with Leslie, reduce Leslie by 100 troops which are transferred to Vanguard. If Leslie has been captured, or has fewer than 100 troops, Vanguard does not enter the game. Leslie may transfer more than 100 troops up to Vanguards limit of 300, or other British leaders stacked with Leslie could transfer troops into Vanguard in addition to the 100 from Leslie. Normal transfer rules for fatigue apply so Vanguard would acquire the fatigue level of the troops transferred to him.
If there are no British detachments in the counter mix available to place as reinforcements, the troops may be added to any British leaders in any hex on the top map edge between 1300 and 2401, inclusive. If the leaders' are at their maximum assigned troop level, the reinforcement is delayed to the next reinforcement phase.
9.2. British Command Reorganization
Beginning with the arrival of Cornwallis the British player reorganizes the command structure of his army. In addition on January 1st the British player suffers attrition from disease and desertion.
9.2.1. British Leader Grant
Grant begins the game as a commanding leader who may not have troops assigned to him but may activate other leaders. If Grant is captured before Cornwallis arrives, ignore the rules below for Grant as a subordinate Leader.
(The rule book shows the Commanding Leader and Subordinate Leader Grant counters.)
On the game turn Cornwallis enters the game, or any later game turn during the Command Phase, Grant; at the British players discretion may become a subordinate leader. If the British player decides to make Grant a subordinate leader, remove the commanding leader Grant counter that is currently on the map from the game. In addition, remove the Lt. Inf and replace the counter with the subordinate leader Grant counter; all of the troops assigned to the Lt. Inf are assigned to Grant the subordinate leader. Note that they share the same tracks on the British Leader Display. If Lt. Inf counter has been captured, place Grant the subordinate leader with any British leader.
9.2.2. Monckton Replaces the Grenadiers
On the game turn Cornwallis enters the game, during the Command Phase, Monckton is placed in the hex with the Grenadiers counter and the Grenadiers counter is removed from the game. All of the troops assigned to the Grenadiers are assigned to Monckton. If the Grenadiers counter has been captured Monckton may be placed with any British leader.
9.2.3. British Leader Stirling
On the game turn Cornwallis enters the game, or on any later turn during the Command Phase, the British leader Stirling may transfer all of his troops to another British leader he is stacked with and be removed from the game.
9.2.4. Disease and Desertion
During the Command Phase of the 12 am turn of January 1st, the British player must remove 300 troops from the Leader Display. The troops may be taken from any British leader with the exceptions that the garrisons of Amboy and Brunswick must remain at 500 or more troops, and no detachment may be reduced below 100 troops and remain on the map. A detachment may be reduced to 0 troops and be removed from the map. The removed detachment may be reused at a later time.
9.3. American Reinforcements and Withdrawals
9.3.1. American Reinforcement Table
American reinforcements arrive according to the following table. The Pennsylvania Navy and Durham Boats are removed from the map during the Reinforcement Phase on the turn indicated.
| Turn | Leader | Strength | Location |
|---|---|---|---|
| 12/29 7am | Mifflin | 1300 | Philadelphia |
| 1/1 12am | Penn Navy | Withdraw | |
| 1/2 7am | McDougall* | 750 | 0100 to 0601 |
| 1/4 12am | Durham Boats | Withdraw |
*McDougall may be placed in any hex on the map edge between 0100 and 0601, inclusive. He may not be placed in a hex occupied by a British leader with troops. If a hex is occupied by a British Leader without troops McDougall may be placed in the hex and the American player rolls for leader capture of the British leader without troops. If all of the reinforcement hexes are occupied by British leaders with troops, he is delayed until the following turn. The American player may choose to delay McDougall's entry to a later turn. Historically McDougall never entered the game but his presence forced the British to be concerned about their rear areas and they added troops to their garrisons, the 46th and 57th, to protect against the possibility of a strike against Amboy or Brunswick. I felt it was better to give the British the freedom to use these troops where they wish, and give the American player the chance to attack the British rear.
9.4. American Command Reorganization
On December 31st 1776 many of the enlistments in the American Army ended. This rule simulates the ending of these enlistments and the reorganization of command this caused.
9.4.1. End of Enlistments
During the Command Phase of the 12am turn of January 1st, the American player must remove 2,500 troops from the Leader Display. The troops may be taken from any leader with the following restrictions: The troops may not be taken from Griffin, Putnam, Stephen, St. Clair, Washington, or Mifflin. Cadwalader may lose a maximum of 230 troops. Ewing may lose a maximum of 120 troops. Fermoy may lose a maximum of 20 troops. Mercer, Hitchcock, Glover, Sargent, and Stirling, may lose all of their troops and be removed from the game. (see paragraph below) Troops may not be removed from any detachment unless all other eligible leaders have been reduced. No detachment may be reduced below 100 troops and remain on the map. A detachment may be reduced to 0 troops and removed from the map. The removed detachment may be reused at a later time. If after reducing all eligible leaders and eliminating all detachments the American player has still not removed 2500 troops he may remove the remaining troops from any American leader ignoring all of the above restrictions.
The American player must remove the following leaders on the 12 am turn of January 1st: Dickinson, Lord Stirling, Glover, and Sargent. Any troops assigned to these leaders may be transferred to other leaders that they are stacked with. A leader being removed may create a detachment to transfer his troops to. (See 15.0 Transferring Strength Between Leaders) St. Clair's command limit expands to 1,400 troops at this time and historically many of the troops from the American leaders whose commands were disbanded were transferred to St. Clair.
Note: It is in the American player's best interest to absorb most of the January 1st troop losses from the 4 leaders who will be removed, especially if they are routed, disordered, or extremely fatigued.
Optional Rule: The American player may remove troops from detachments where troops were transferred from leaders who are eligible to take losses as long as none of the restrictions above are violated. To do so, the American player must record for each detachment how many troops came from each leader contributing to that detachment.
Example: If the American player created a detachment with 300 troops from Lord Stirling and 50 troops from Hitchcock and 150 troops from Fermoy, he could remove 370 troops in the American Command Reorganization. The 300 troops from Stirling, 50 troops from Hitchcock and 20 troops from Fermoy because Fermoy may only lose 20 troops.
10.0 Command Phase
During the Command Phase players receive activation points, activate leaders, transfer troops, and create and absorb detachments. During the Command Phase of the 12am turn of each day, players receive activation points.
The American player receives 8 activation points per day, with the exception of December 30th, when they receive 0. If the British control Philadelphia, the Americans receive only 4 activation points per day.
The British player receives 8 activation points per day. If the Americans control Amboy, the British receive only 4 activation points per day.
Players may accumulate activation points from one turn to the next to a maximum of 30; any activation points accumulated past 30 are permanently lost.
10.1. Activation
Leaders are activated to move and/or attack by spending activation points or by rolling a die. Leaders who are routed or have a fatigue level of 5 or 6 may not be activated by die roll or by activation points. There are two types of leaders in the game:
Subordinate leaders: are leaders that do not have a printed command span or command radius and therefore may not activate other leaders. The activation point cost to activate a subordinate leader is printed on his counter.
Commanding leaders: are leaders who have a printed command span and command radius. The activation point cost to activate a commanding leader is printed on his counter. An active commanding leader may activate other leaders if his activation point cost is greater than the leaders he is activating. The number of leaders that may be activated is limited by the activating leaders command span, (see 10.4 Command Span) Leaders that are activated by the activating leader may in turn activate other leaders within their command radius up to the limits of their command span. A leader may only be activated once per action phase.
Exception: Commanding and subordinate leaders who have no assigned troops and who are not activating other leaders may be activated for free. Washington may be activated for free even if he has assigned troops as long as he activates no other leaders. Washington still gains normal fatigue for any movement or combat he engages in if he has troops assigned.
Exception: Leslie, vonDonop, Putnam, and Cadwalader, cost two activation points whenever they are activating other leaders with troops. They cost one to activate when not commanding other leaders with troops. Note: These leaders acted as commanding leaders and had troops assigned to them as well so their activation costs are higher when acting as a commanding leader to account for this. The printed values on their counters reflect the cost of these leaders acting as a commanding leader.
If a leader is two or more hexes away from a road or clear hex, the leader may not be activated using activation points. The leader may only be activated by activation die roll or by being activated by a commanding leaders command span.
10.2. Activating by Die Roll
During the activation phase of each day turn, after all other movement is completed, but before Prepared attacks, the phasing player may roll a die to activate a leader who was not previously activated during the command phase. The leader must have an activation cost of 2 or less, and the die roll must be equal to or less than the leader's rating. A player may only activate one leader by die roll per day turn. The leader activated by die roll may use his command span to activate other leaders.
Example: The British player has moved with all of his leaders that were activated in the command phase using activation points. The British player now attempts to activate vonDonop by die roll. vonDonop has an activation cost of 2 (meets the requirements for activating by die roll) and was not activated in the command phase by activation points. vonDonop has leader rating of 5, on a die roll of 0 - 5 vonDonop will be activated and be able to move and attack. Note that vonDonop also has a command span of 1 and could activate a subordinate leader with an activation cost of one, for example Stirling, who begins the game stacked with vonDonop.
10.3. British Initial Response
The British player may not activate British leaders (using activation points or by die roll) until the 7am turn of December 26th. British leaders may use reaction movement with no restrictions.
The British player may activate the following leaders starting on the 7am turn of December 26th.
- A. Any British leader, who has had an American leader move adjacent, not separated by the Delaware River, during any of the three American moves from the start of the game.
- B. Any British leader may be activated if an American leader is within 8 hexes of the leader, not separated by the Delaware River, at start of British 7am turn of December 26th.
- C. VonDonop, Stirling, and Detachment 2 may be activated if an American unit has crossed the Bristol ferry or Dunks ferry, during any of the three American moves from the start of the game.
All British leaders may be activated starting with the 12pm turn of December 26th.
10.3.1. Optional British Response
The historical British response was very slow. Better British preparation would have led to a quicker response. Players wishing a faster British response may use the following rule: The British player may not activate (using activation points or by die roll) British leaders until the 7am turn of December 26th. The British player may use reaction movement with no restrictions. All British leaders may be activated on the 7 am turn of December 26th.
10.4. Command Span
A leader's command span limits the number of other leaders he may activate in a single activation. The activating leader may activate other leaders up to the limits of his command span. Command span is measured in activation costs by totaling the activation costs of the leaders being activated up to the activating leaders printed command span (do not include the activating leader in this cost). Or to put it another way you spend an activated leaders' command span as if it were activation points; a command span of 6 could activate leaders costing a total of 6 activation points.
The leaders being activated using command span must be within the activating leaders command radius. (See 10.5 Command Radius)
The activating leader using his command span may only activate other leaders whose printed activation point cost is less than his.
Example: A leader with an activation cost of 3 may activate leaders with an activation cost of 2 or 1.
10.5. Command Radius
Each commanding leader has a printed command radius. The command radius is the maximum number of movement points which may exist between a commanding leader and a leader he wants to activate.
Exception: A commanding leader may always activate a leader in an adjacent hex, even across a major river or ocean hexside with no ferry, bridge or naval unit present.
The command radius may not be traced through hexes containing enemy leaders or enemy ZOC's unless occupied by a friendly leader with a minimum of 400 troops.
Example: Greene has a command radius of 2 so he can activate another leader that is 2 hexes away by road. Any leader Greene wishes to activate that is not on a road would need to be adjacent to Greene as clear terrain costs 2 movement points and woods and marsh even more.
11.0 Movement
During the action phase, activated leaders move from hex to hex expending movement points for terrain and hexside features according to the Movement Costs Chart (MCC). The MCC has three columns, one for Rain turns, one for turns of all other weather types from December 25th to January 3rd and one for turns from January 4th through January 6th. No rain is possible starting January 4th. Leaders may roll for movement separately or as a group.
To move a single activated leader, roll one die on the Movement Matrix Chart (MMC) and cross-reference the leader value of the activating leader and apply any die roll modifiers. The numbered result is the number of movement points the leader may move. After seeing the result, a player may decide not to move the leader and not incur a fatigue level for moving.
Activated leaders that roll a movement allowance result of at least one on the MMC may always move one hex regardless of movement point costs except across ferries, unfrozen major rivers or minor rivers during rain turns.
Example: Washington activates Greene and Sullivan who each have multiple subordinate leaders. As each leader is ready to be moved they will roll for movement points on the column corresponding to Washington's leader value as he is the leader providing the activation for the entire force. The modifiers used on the MMC for fatigue and disorder however will be from the leader being rolled not Washington's fatigue or disorder.
All leaders without troops and Washington move 13 movement points regardless of the movement point result from the MMC. These generals do not have troops assigned and are mounted and consequently move at a faster rate. Washington, who does have troops assigned to him, moves at a faster rate because all of the troops assigned to Washington are cavalry.
A player may roll on the MMC for a group of leaders with one die roll (Note: leaders always have the option to roll individually using the activating leader's leader rating). All leaders must be adjacent to each other and must be in the command radius of the activating leader. Use the leader value of the activating leader and consult the MMC. Use the fatigue modifier of the most fatigued leader in the group. Apply the modifier for disorder if any of the leaders are disordered. Note: All of the leaders do not need to be adjacent to the activating leader- they just need to be part of a chain of adjacent leaders.
Example: Washington, Griffin, and Cadwalader are in 3 consecutive adjacent hexes. Washington is activated and in turn activates Griffin and Cadwalader. Griffin and Cadwalader will determine their movement points using Washington's leader rating on the Movement Matrix Chart with a single die roll. Washington's movement allowance is always 13 movement points. This is a good way to keep a column on the road together as they all will get the same movement points and be able to maintain position with one another. Note: Griffin and Cadwalader also have the option of rolling individually using Washington's leader rating.
Once activated, all leaders operating under a single activation are moved separately unless they are stacked together. If moving as a stack, leaders may be dropped off and cease moving at any time, while the rest of the stack continues moving.
Exception: A player moving a leader or stack of leaders which enters a hex with another leader which was activated by the same commanding leader and is part of the same group of leaders for movement, (i.e. they rolled movement points with the same die roll), the leader which has not yet moved may join the moving leader for one additional movement point and if so, completes his move with the moving leader. The moving leader spends one additional movement point for each leader joining the moving stack. If the moving leader is one of the commanding leaders with a movement allowance of 13, his movement allowance is reduced to the number of movement points rolled for the group for this move.
Note: The purpose of this rule is for a player who has a column of leaders in multiple hexes to collect them as a stack during movement so they can make an attack while moving.
Example: The American player has Ewing in hex 2129 with 720 troops, Stephen in 2128 with 460 troops and Mercer and Washington in Trenton with 860 troops. The British have a detachment in 2528 with 150 troops. Washington wants to collect his troops and attack the British detachment so he activates all three of his leaders as a group and rolls for movement points and receives a result of 10 movement points. Washington and Mercer first move into Ewing's hex spending 1 movement point for the road and then 1 more movement point for Ewing to join the moving column. The now combined group moves into Stephens hex spending 1 movement point for the road hex and 1 movement point for Stephen to join the column. Washington now moves his united column through 2228, 2229, 2328 and 2428 for 4 movement points. Washington spend his last 2 movement points to launch a Hasty attack on the British detachment, 1movement point for the hex being entered and 1 for the Hasty attack.
A leader may not cross a minor river hexside during a rain turn except across a bridge or ferry.
To move into or leave an enemy ZOC costs 1 extra movement point. A leader may move directly from one hex in an enemy ZOC to another hex in an enemy ZOC, paying the costs both to leave and to enter an enemy ZOC.
A leader may not enter a hex containing an enemy leader unless the enemy hex has no troops.
If during movement, a leader moves through a hex containing friendly leaders, and the combined number of troops in the hex exceeds 3,000, the moving leader spends one additional movement point.
11.1. Night Movement
All American leaders may be activated at night; they receive a +4 modifier when they roll on the Movement Matrix Chart. Only one British leader with troops whose activation cost is 2 or less may be activated during a night turn. If the British leader activated has a command span the leader may activate other leaders up to the limits of his command span. British leaders without troops and routed leaders may move normally at night.
Optional Rule: American militia leaders that exit an enemy ZOC during a night turn may panic. Roll one die for each militia leader, on a result of 0-1 a panic has occurred and the leader then routs and retreats 4 hexes following normal retreat rules. This historically occurred on the night march to Princeton.
11.2. Forced March
A Leader may increase his number of movement points at a cost of additional fatigue levels. A leader without troops and Washington may not force march; they always have 13 movement points.
Before rolling for movement points on the MMC, a player may declare that a leader wishes to force march. Leaders who are disordered, or at fatigue level 4, 5 or 6 may not force march. All leaders in a group that are rolling for movement points do not need to force march - that it is decided on a leader by leader basis. Each American leader adds 3 movement points to the result rolled on the MMC. Each British leader adds 2 movement points to his rolled result.
Leaders that force march gain one additional fatigue level at the end of the action phase. A leader who declares a force march, and decides not to move, after rolling for movement points on the MMC gains one fatigue level for declaring a force march.
Exception: Washington and Cornwallis can each, once per game, activate and force march a group of leaders with troops for no additional fatigue cost to the leaders for the force march. All of the leaders must be stacked with or adjacent to Washington or Cornwallis for this benefit. Note: Washington and Cornwallis are not force marching, they always have 13 movement points.
Example: The British General Leslie declares that he wishes to force march. He rolls a 5 on the MMC and subtracts 2 from the result for being British. He references the 2-4 column on the MMC because Leslie's leader rating is 4. Leslie receives 5 movement points and adds two more movement points to the result for force marching. He now has 7 movement points. At the end of the British action phase, Leslie gains two fatigue levels, 1 for normal movement, and 1 for force marching. If after rolling for movement points, Leslie decided not to move he still would gain 1 fatigue level for declaring a force march.
11.3. Reaction Movement
Before a combat is resolved the defending player may attempt to perform reaction movement with his leaders. Reaction movement may only occur in response to Normal and Prepared attacks. There is no reaction movement in response to Hasty attacks.
Each defending player's leader who is not routed, disordered, is not at fatigue level 5 or 6 and has not retreated from combat in this player turn and is within 4 hexes of a combat, but not the leaders in the hex being attacked, may roll against his leader rating to see if he is eligible to perform reaction movement. If the die roll is less than or equal to the leader rating the leader may perform reaction movement. The leader then rolls for movement points on the MMC and receives 1/2 the result, rounded up. A group of leaders all stacked with a commanding leader may roll for reaction movement with leaders up to the limits of the commanding leaders command span as long as the commanding leader does not include any leaders with activation costs greater than or equal to his own. The player must declare which leaders are attempting reaction movement under the commanding leader before rolling the die to see if they can move. If the commanding leader fails then none of the leaders in the group may react to that combat, they do not then get to roll for their own reaction movement attempts.
Reaction movement is treated as normal movement; you cannot finish the move over stacked, you may move a minimum of one hex as long as any movement points were generated on the movement matrix, you may create detachments, etc. Exception: A reacting leader may not force march, attack or cross the Delaware river using a ferry or naval units, or the ferry next to Amboy. If the reacting leader moves, he gains one additional fatigue level at the end of the enemy player's action phase. Multiple leaders or groups of leaders may react to a single combat. If a leader makes a reaction move, he may not react for the remainder of the enemy turn. However if a leader failed to activate, or decided not to move after rolling for movement points, the leader may roll for reaction in response to another attack later in the enemy turn. The leader who is reacting is not required to move to the battle hex, the leader may be moved in any way the player sees fit.
Example: The American player attacks Kingston, guarded by 800 troops in the British Light Infantry, from Rocky Hill with 3,000 troops under Washington performing a Normal attack on the 7am turn of December 26th. The weather is snow. The British leader Leslie in Princeton with 2,100 troops and is within four hexes of the combat and may attempt to react. Leslie has a leader rating of 4, a die roll of 4 or less is needed for Leslie to react. The British player rolls a 2 and is able to perform reaction movement. Leslie next rolls for movement points on the MMC. The British player rolls an 8, modified down 2 for being British and down one more for the snow for a final roll of 5. This is a result of 6 movement points on the MMC which is then halved to 3 since this is reaction movement. Leslie moves 3 movement points to enter Kingston consisting of 2 road hexes and the cost of the American ZOC. Leslie would gain 1 additional fatigue level for the reaction move at the end of the American Players action phase. (And probably 1 more fatigue for the combat he entered).
Example: The American player attacks Princeton, guarded by Mawhood. Cornwallis is two hexes away in Kingston with Mathew and Vanguard. vonDonop is in Rocky Hill. All British leaders are eligible to react. The British player decides to split his force under Cornwallis for reaction die rolls to increase his chances that some leader will roll a reaction move. Cornwallis rolls for Mathew using Cornwallis' leader rating as he is stacked with Mathew and can command Mathew. On a roll of 5 Mathew may react. The British player then rolls a 6 for movement points on the MMC modified down 2 for being British for a result of 7 which is then halved to 4. Mathew moves into Princeton to reinforce Mawhood. Vanguard then rolls for reaction and on a roll of 6 and may not move. Mathew gains 1 fatigue for the reaction movement at the end of the American action phase. vonDonop then rolls for reaction movement and rolls a 4 and he also may react. vonDonop then rolls for movement points and receives a final result of 2 movement points. Since vonDonop cannot reach the battle hex the British player chooses not to move him and so vonDonop gains no fatigue and is eligible to react to other combats later in the action phase. Note that reacting leaders do not have to move to the battle hex, the player is free to move them as he pleases.
11.4. Major River Crossings
Major rivers may only be crossed at ferries, or by an American leader using naval units, or when frozen over by weather conditions, January 4th or later. The hexside labeled Trenton Falls is a major river hexside and also effects naval units' movement. British leaders may not cross the Delaware River unless it is frozen. A leader may not cross a ferry or cross using a naval unit into a hex occupied by an enemy leader with troops.
11.4.1. Amboy Ferry
Only British leaders may cross the ferry at Amboy at a cost of 4 movement points. The water in hex 2402 is ocean and does not freeze so the ferry is the only way to cross at this location.
11.4.2. Delaware River Ferries
The Delaware River ferries may only be used by American leaders. The number of red arrows crossing the Delaware River in one hex represents the number of ferries and determines the column used on the Delaware River Crossing Table. The first time an American leader with troops attempts to cross a Delaware River ferry for the turn, the American player must roll a die and consult the Delaware River Crossing Table. The table is used to determine the number of troops that may cross the ferry for the turn. The American player may only roll once per turn on the Delaware River Crossing Table for each ferry.
Procedure The American player moves a leader with troops next to a ferry hexside and declares that he is attempting to cross. The leader spends 4 movement points to attempt the ferry crossing and then consults the Delaware River Crossing Table, using the 1 Ferry or 2 Ferry column depending on the number of red arrows crossing the hexside. Note: the American player does not receive the modifiers on the Delaware River Crossing Table for the Durham Boats or the Pennsylvania Navy if either naval unit has moved this turn. Roll one die to determine the maximum number of troops that are able to cross the ferry for the turn. The number of troops that may cross is the total number in both directions.
The leader who makes the crossing attempt must cross with as many of his troops as are allowed by the crossing die roll or he may create a detachment that moves across the river with as many of his troops as are allowed by the crossing die roll while the original leader ceases movement. If only a portion of the leader's troops may cross due to the crossing die roll and not enough detachments are available to allow part of the leader's troops to cross and part remain behind then no troops may cross the river at that ferry during this action phase. The leader or detachment who crosses the river may continue moving after crossing. If the ferry still has unused troop capacity, additional leaders may cross later during that game turn, up to the capacity already determined. If no troops are allowed to cross, the leader who attempted the crossing may continue moving on the original side of the river using any remaining movement points.
An American leader without troops may cross a ferry without consulting the Delaware River Crossing Table but must still pay the movement point cost.
Example: It is American 5pm turn of December 25th, the American player wishes to cross the Delaware River from hex 1329 to 1328. Note that McConkey's Ferry and Johnson's Ferry both cross this hexside and it is the combined capacity of these two ferries that give the hexside its capacity to cross troops. The Durham Boats and Stephen with 460 troops are in hex 1329. Greene, Glover with 850 troops, and Sargent with 710 troops are in hex 1331. Greene activates Stephen, Glover, and Sargent for movement, all three leaders may NOT roll movement with one die roll because they are not in adjacent hexes but they may all use Greene's column on the MMC. The American player decides to roll for movement with the leaders in hex 1331 first. The American player rolls a 7 on the MMC. The weather is fair and it is a night turn which gives the American player a +4 modifier to the die roll which results in a modified die roll of 11. The leaders in hex 1331 have 9 movement points. The American player decides to move Glover first who will test the ferry to determine how many troops may cross the ferry for the turn. Glover spends 2 movement points to reach hex 1329 and 4 more movement points to attempt to cross the ferry. The American player consults the Delaware River Crossing Table using the 2 Ferry column because the hexside has 2 red arrows. The modifiers for the crossing attempt are; +1 for Glover, +2 for the Durham Boats in the hex, and +1 for the December 25th turn, a total of 4. The American player rolls a 2 adding 4 giving a total modified die roll of 6. The American player may cross 1,500 troops across this ferry for the turn. Since Glover made the crossing attempt, he must cross if he has enough movement points remaining. He crosses the ferry with his 850 troops for one more movement point. Glover now has spent 7 of his 9 movement points and continues to move to hex 1326. The ferry still has the capacity to cross 650 troops (1,500 - 850 for Glover's crossing). Because the American player rolled movement for the leaders in hex 1331, Sargent must move next. The American player decides to move Sargent to hex 1329 and cross the ferry. Since Sargent has 710 troops, only 650 may cross the ferry. The American player creates a detachment in hex 1329 and transfers 100 troops (the minimum size to create a detachment) from Sargent to the detachment. Sargent may now cross the ferry with his remaining 610 troops. He reaches hex 1328 spending 7 movement points and continues to move to hex 1428 spending his 9 movement points. The American player decides to move Greene across the ferry and join Glover in hex 1326. Greene is able to cross the ferry because he is a leader without troops. Also note that Greene has 13 movement points because he is a leader without troops. Glover and Sargent gain one fatigue level for moving. The American player, after seeing that only 40 troop crossing capacity remains at the ferry, decides not to move Stephen. By doing this, Stephen will not gain a fatigue level.
11.4.3. Delaware River Crossing by Naval Unit
The American player may attempt to cross the Delaware River at a non-ferry hexside by using naval units.
Procedure The American player moves a leader with troops adjacent to a naval unit and declares that he is attempting to cross. The naval unit may not move in the turn in which it is used to attempt the crossing. The leader spends 4 movement points to attempt to cross the river and then consults the Delaware River Crossing Table and uses the column for no ferry present. The American player may only roll once per turn on the Delaware River Crossing Table for each naval unit. Roll one die and determine the number of troops able to cross for the turn. The number of troops that may cross is the total number in both directions.
The leader who makes the crossing attempt must cross with as many of his troops as are allowed by the crossing die roll or he may create a detachment that moves across the river with as many of his troops as are allowed by the crossing die roll while the original leader ceases movement. If only a portion of the leader's troops may cross due to the crossing die roll and not enough detachments are available to allow part of the leader's troops to cross and part remain behind then no troops may cross the river using that naval unit during this action phase. The leader or detachment who crosses the river may continue moving after crossing. If the first leader that attempted the crossing does not use all of the crossing capacity for the turn, then additional leaders may cross later during that game turn, up to the limit already determined.
If no troops are allowed to cross, the leader that attempted the crossing may continue to move with any remaining movement points on the original side of the river. If no troops are allowed to cross, then leaders without troops may not cross.
Example: On the December 26th 5am turn, in a snowstorm, Glover with 850 troops is adjacent to the Delaware River and the Durham Boat is stacked with him and has not moved this turn. Glover spends 4 movement points to attempt to cross by naval unit to the other side. The modifiers for the crossing are; -2 for snow, +1 for Glover, +2 for the Durham Boats, and +1 because it is December 26th. The American player rolls a 4 adding 2 giving a total modified die roll of 6. The American player must cross 100 troops to the other side of the Delaware. Glover chooses to create a detachment of 100 men who moves across the river. Glover's move is over since when he creates a detachment during movement either he or the detachment must cease moving, Glover and the detachment each gain 1 fatigue level.
11.4.4. Brunswick Ferry
The Raritan River, although a minor river, has a ferry crossing at Brunswick. Both players may move across the Brunswick ferry for one additional movement point. Treat the Brunswick ferry as a minor river for combat and retreat purposes.
11.5. Leaving the Map
A leader adjacent to the map edge may leave the map by spending movement points equal to the cost of the terrain occupied by the leader. The British player may only exit the top and right map edges. The American player may only exit top, bottom and left map edges. The top edge of the map is the edge with Amboy; the bottom edge is the edge with Philadelphia. A leader who leaves the map may not return to play.
11.6. Naval Movement
Naval units move by moving from hexside to hexside and spend one movement point for each hexside entered. Naval units may only move along the Delaware River. They do not occupy a hex, but rather occupy a hexside of the Delaware River.
The Pennsylvania Navy may only move along the hexsides bordering the hexes between hexes 1953 and 2630 inclusive. The Durham Boats may only move along the hexsides bordering hex 0230 and the Trenton Falls exclusive. Note: The Trenton Falls prevented the Durham Boats from going further downstream toward Philadelphia.
12.0 Fatigue
Fatigue is measured in levels from 0 to 6, with 0 being no fatigue and 6 being extreme exhaustion. A player tracks each of his leader's fatigue levels with a fatigue marker on the Leader Display in the box corresponding to the leader's fatigue level. A leader with no troops cannot be fatigued and has a fatigue level of zero. A leader that is fatigued and losses all of his troops has his fatigue level reduced to zero.
Example: If Glover has a fatigue level of 3, the fatigue marker would be placed in the 3 box on Glover's display on the American Leader Display.
Each time a leader expends movement points the leader gains one fatigue level at the end of the action phase. Activating a leader for movement does not cause fatigue; only when the leader actually expends movement points does the fatigue occur. Cornwallis, Sullivan, Greene, and Grant the commanding leader, do not accumulate fatigue. Each time a leader declares a force march the leader gains one fatigue level. Leaders that perform reaction movement gain one fatigue level at the end of the enemy player's action phase.
Leaders that conduct an attack gain one additional fatigue level at the end of the action phase A leader that conducts multiple attacks in one action phase only gains one fatigue level. A Prepared attack expends all of a leaders movement points and is an attack so the attacking leaders involved all gain 2 fatigue levels. Exception: If an attack forces the defender to retreat-disordered (RD) or retreat-routed (RRT) and the odds ratio is 7-1 or greater, the attacking force gains no fatigue for the attack. The attacking force still gains one fatigue for movement.
Example: If Glover moved and performed two Hasty attacks, Glover would accumulate 2 fatigue levels at the end of the action phase, 1 for movement and1 for the attacks. The second attack causes no extra fatigue.
Example: Glover expends all of his movement points and conducts a Prepared attack. Glover accumulates 2 fatigue levels at the end of the action phase. A Prepared attack counts as both movement and combat and so costs 2 fatigue levels.
A leader that defends against one or more attacks gains one fatigue level at the end of the enemy player's action phase after all attacks have been performed. Exception: if the defending leader does not receive a loss of 5% or higher on the Combat Results Table, then he does not gain a fatigue level.
Leaders with a fatigue level of 5 or 6 may not be activated by die roll or by activation points. A leader this is at fatigue level 6 is at the maximum fatigue level and never suffers additional fatigue.
A leader recovers one fatigue level during the Recovery Phase for each night turn that the leader does not expend movement points. A leader may recover fatigue at the same time as recovering from Rout or Disorder.
When troops are detached from a leader to create a detachment, the new detachment has a fatigue level equal to that of the detaching leader.
When troops are transferred from leader to leader the leader receiving the troops has his fatigue level increased to the fatigue level of the transferring leader if the fatigue level of the transferring leader is higher.
Example: Glover and Griffin are stacked together. Glover has a fatigue level of 3 and Griffin has a fatigue level of 0. The American player transfers 100 troops from Glover to Griffin. Griffin's fatigue level becomes 3.
13.0 Recovery Phase
The Recovery Phase occurs only during night turns. During their respective recovery phases, British and American leaders recover one fatigue level if they have not moved or entrenched during that night turn.
14.0 Detachments
Detachment counters are labeled on the counters with a number between brackets ( 1 ). A detachment is a leader in all respects. Four American detachments are militia detachments. Only American militia leaders may create militia detachments. American militia leaders may only create militia detachments. Two British detachments are marked as Hessian detachments but function in all ways as British detachments. British leaders may detach these, transfer troops to them and absorb them. Hessian leaders may detach British detachments, transfer troops to them and absorb them. Note: Despite language problems the British and Hessian troops were often mixed together and transferred between commands during this campaign. The extreme of this is the Vanguard which was created out of a Hessian mounted jager company, a Hessian foot jager company, 100 picked Hessian grenadiers and the British 16th light Dragoons.
A detachment may be created by any leader that is not routed or disordered (including other detachments) during the friendly command phase. Place the detachment in the hex with the detaching leader and transfer the troops from the original leader to the new detachment. The detachment may be activated by spending activation points or by rolling for activation in the same turn it was created.
A detachment may be created by any leader that is not routed or disordered (including other detachments) during the friendly action phase at any point along its movement path. The detachment is placed in the leader's hex and troops are transferred from the original leader to the new detachment. If the leader who detached ceases moving, the detachment may continue moving with the remaining movement points of the leader who detached it. Otherwise the new detachment may not move in the action phase in which it was detached.
A newly created detachment must be given at least 100 troops; a detachment may not be formed with fewer than 100 troops. A detachment's maximum strength is listed on the Leader Display. A detachment inherits the fatigue level of the detaching leader.
Example: Cornwallis is stacked with Monckton with 1800 troops and a fatigue level of 1 and Leslie with 1000 troops and a fatigue level of 2. During the Command Phase Monckton creates a detachment of 400 troops with a fatigue level of 1. Cornwallis now activates Monckton and Leslie and moves down the road 3 hexes where Leslie creates a detachment with 400 troops and a fatigue level of 2. The detachment ceases moving while Leslie continues his move down the road with Cornwallis.
Absorbing Detachments A leader may absorb the troops of a detachment he is stacked with during the command phase. A leader may not absorb the troops of a detachment if by doing so the leader would exceed his maximum troop limit. A detachment that is disordered or routed may not be absorbed. Remove the detachment counter from the game. The detachment counter may be reused to detach new troops elsewhere. If the fatigue level of the detachment being absorbed is higher than the level of the leader who is absorbing them the absorbing leader has his fatigue level increased to the level of the detachment he is absorbing.
Exception: American militia detachments may only be absorbed by militia leaders. American militia leaders may only absorb militia detachments.
15.0 Transferring Strength Between Leaders
Leaders who are stacked together may transfer troops between themselves at the start of the command phase. Leaders may not transfer troops if it would result in the leader having less than 100 troops. A leader may never have more troops assigned than the number listed on the Leader Display. British and Hessian leaders may transfer troops between themselves.
When troops are transferred from leader to leader the leader receiving the troops has his fatigue level increased to the fatigue level of the transferring leader if the fatigue level of the transferring leader is higher.
A leader may not transfer or receive troops if he is Routed or Disordered.
American militia leaders may not transfer troops between themselves and non-militia leaders.
Exception: After the British Command Reorganization, the British leader Stirling may transfer all of his troops to another British leader and be removed from the game.
Example: Monckton with 1200 troops and a fatigue level of 1 is stacked with Vaughan with 1000 troops and a fatigue level of 3 and British detachment 3 with 800 troops and a fatigue level of 2. In the Command Phase the British player transfers 600 troops from detachment 3 to Monckton brining him to 1800 troops the maximum he may have assigned to him. Monckton would have his fatigue level raised to 2 as the troops Monckton is receiving have a higher fatigue level then Monckton had. Detachment 3 has 200 troops remaining and is now absorbed by Vaughan. Vaughan is now at his maximum troop level of 1200. His fatigue remains at 3 as the troops he is absorbing have a fatigue level that is less than his own. Detachment 3 has no troops remaining and is removed from the map for reuse at a later time.
16.0 Attack
Attacks occur during the action phase of day turns only. The attacking player expends movement points to perform various types of attacks.
16.1. Attack Types
There are three types of attack in the game, two (Hasty and Normal) occur during the action phase and one (Prepared) occurs at the end of the action phase after all other forms of movement have occurred. A leader may only attack a hex he can enter by movement. Exceptions: a leader may not attack across a ferry unless the river is frozen. An American leader may not attack a hex using his naval units to help cross a river into an enemy leader's hex. Before combat is resolved, the defending player may perform reaction movement when within 4 hexes of a Normal or Prepared attack (See 11.3 Reaction Movement).
16.2. Normal and Hasty Attacks
A leader or stack of leaders may attack an enemy leader during the friendly action phase by moving adjacent to an enemy leader and paying the appropriate terrain cost of entering the defenders hex. In addition, the attacking force must spend 1 movement point if conducting a Hasty attack, or 3 movement points if conducting a Normal attack. Note: the attacking force does not actually enter the defender's hex, even though it pays the terrain cost for that hex.
A leader may not attack from a hex that is over-stacked, i.e. has more than 3,000 troops at the instant the attack is resolved.
If the defending force gets a retreat result, the attacking leaders must advance after combat and occupy the hex vacated by the defender. Leaders with movement points remaining after an advance may continue to move and conduct further attacks. On all other combat results the attacking leaders move is over.
16.3. Prepared Attack
A Prepared attack occurs when an activated leader or group of leaders expend their entire movement allowance to attack a single hex. To attack a single hex from multiple hexes, all of the leaders must have been activated by a single commanding leader who is adjacent to the defender's hex. All leaders participating in the multi-hex attack expend their entire movement allowance. If the defending force retreats, the attacking leaders may advance after combat and take the hex.
17.0 Combat
To initiate combat an activated leader must declare that he is attacking a hex and spending the appropriate number of movement points for the type of combat: Hasty, Normal, or Prepared. A leader may attack with any additional leaders that he has activated during the turn. For a Normal or Hasty attack all attacking leaders must be stacked together and moving together. For a Prepared attack, all leaders must be adjacent to the defending hex, and have been activated by a single commanding leader and expend all of their movement points to perform this kind of attack. Note: The defender may react to Normal or Prepared attacks with leaders that are within 4 hexes of the attacked hex (See 11.3 Reaction Movement).
To perform combat, the attacking player must determine the final combat die roll modifier (combining the results from the Surprise Table, Attacker Combat Modifiers Table, and Attacker to Defender Ratio Table) and then consult the Combat Results Table to determine the combat result.
17.1. Combat Procedure
1. Determine Surprise Modifier Consult the Surprise Modifier Table to determine the die roll modifier to be used on the Surprise Table. The defending player uses the Surprise modifier for disordered if any of his leaders' are disordered and none are routed. The defending player uses the Surprise modifier for routed if any of his leaders' are routed. Roll one die and apply the die roll modifiers from the Surprise Modifier Table. Cross reference the die roll with the results on the Surprise Table. The first column identifies the die roll modifier to be applied to the Combat Results Table. The second column identifies any additional or reduced loss percentage to be applied to the attacker's combat result.
2. Determine Attack Ratio Modifier Consult the Attacker to Defender Ratio Table and compare the attacker's troop strength against the defender's troop strength, and round this ratio down in favor of the defender to conform to one of the ratios listed on the chart. The result is the die roll modifier to be applied to the combat die roll.
3. Determine Attacker Combat Modifier Consult the Attacker Combat Modifiers Table and apply all applicable modifiers. If any of the attacking units are attacking across a minor river and it is on or before January 3rd, use the modifier for Minor River. From January 4th on the minor rivers are frozen and there is no combat modifier for minor rivers. The attacking player uses the combat modifier for fatigue of his most fatigued leader in the attack. The defending player uses the combat modifier for fatigue of his most fatigued leader. The defending player uses the combat modifier for Disordered if any of his leaders' are disordered and none are routed. The defending player uses the combat modifier for routed if any of his leaders' are routed. Determine any modifiers from Outflank or Surprise (See 17.2 Additional Combat Modifiers).
4. Determine the Final Combat Die Roll Modifier The final combat die roll modifier is the cumulative result of the modifiers from steps 1 through 5 above.
5. Determine Combat Results Use the leader rating of the leader who activated the attack, for Prepared Attacks and for Hasty/Normal Attacks, use the leader rating of the leader with the highest activation point cost in the moving stack. If the activation point costs are the same, the player may choose which leader to use. The leader rating determines the column on the Combat Results Table (leader rating = leader value on CRT). Roll one die and consult the Combat Results Table, applying the final combat die roll modifier to the die roll.
The results are read ##/##. The number to the left side of the slash is the attacker's loss as a percentage of the defender's troops (remember to apply any positive or negative percentage from the Surprise Table result). The numbers to the right of the slash are the defender's loss as a percentage of the defender's troops. The symbols to the right or left of the number results are R - Retreat 2 hexes, ?- Retreat 3 hexes and become Disordered, !- Retreat 4 hexes and become Routed. (The symbols "?" and "!" are printed exactly so in the rule book's text; elsewhere the rule book refers to these results as retreat-disordered (RD) and retreat-routed (RRT).)
6. Apply Loss Round all losses to the nearest 10 troops. Losses may be distributed as the player desires among his leaders. Exception: The troops assigned to Washington may not take more than 10 troop losses in any combat unless he is the only leader involved in the combat or all other troops have been eliminated.
Forces of 100 troops or fewer who were attacked at a ratio of 7-1 or greater receive an additional 30 losses. Note: This rule is intended to show how ineffective very small forces were as blocking forces when attacked by an enemy with strength.
Example: a force of 90 troops attacked by 700 enemy troops receives a result of 10% loss. 10% of 90 =9, which would then round up to 10. However since the defending force is 100 or less troops and it was attacked by a force at 7-1 or greater odds an additional 30 losses are added to the result for a final defender loss of 40.
Optional Rule: Players desiring a more accurate method of distributing casualties may divide them proportional to the percentage that each leader contributed to the combat.
Example: A force of 2400 troops takes 600 losses. The force is made up of a leader with 1200 troops, a leader with 600 troops, and 2 leaders with 300 troops. The leader with 1200 troops is 50% of the force and takes 300 troop losses (50% of the loss). The leader with 600 troops takes 150 losses (25% of the loss). The remaining leaders take 70 and 80 respectively to fulfill the remaining 150 troop loss .
17.2. Additional Combat Modifiers
17.2.1. Attacker Outflank
Total the number of hexes occupied by friendly leaders with a minimum of 400 troops that are not routed, disordered or at fatigue level 5 or 6 that are adjacent to the defending leader's hex; subtract 2 from this sum. Terrain has no effect on this modifier, across a major river is fine. This number is the modifier added to the attacker's combat die roll. A friendly leader does not need to participate in the attack to create this modifier.
Exception: An attacking force may not receive a negative attacker outflank modifier, the worst result is no modifier.
Example: A defending leader is being attacked by enemy leaders from two hexes, one with 1,000 troops and one with 300 troops In addition, the defending leader is surrounded by enemy leaders in the 4 other hexes, each with 400 troops that are not attacking. The attacker would receive a +3 modifier to the combat die roll because the enemy unit is surrounded by 5 hexes with at least 400 or more troops and none of the attacking sides leaders are routed, disordered or at fatigue level 5 or 6. The attacker could have received a +4 modifier if the attacking hex with 300 troops had 400 or more troops.
17.2.2. Defender Outflank
The attacking player receives a -1 modifier to the combat die roll for each hex other than the defender's that is occupied by enemy leaders with at least 400 troops and is adjacent to at least one of the attacking leaders. To receive this modifier, the flanking enemy leaders must not be routed, disordered, or at fatigue level 5 or 6. Terrain has no effect on this modifier.
Example: Three defending leaders are adjacent to an attacking leader in one hex. All three defending leaders have at least 400 troops and are not routed, disordered or at fatigue level 5 or 6. The attacker would receive a -2 modifier to the combat die roll
Example: The British player has Vaughan in hex 1906, Monckton in 1807 and Mawhood in 1706. The American player has St.Clair in 1907, Washington and Cadwalader in 1808 and Stirling in 1707. All of these leaders have more than 400 troops and are not routed, disordered or at fatigue level 5 or 6. The American player declares that he is launching a prepared attack with Washington and the 3 other American leaders against Monckton. The American player has three hexes adjacent to the hex being attacked so subtracting the required 2 his attacker outflank modifier is +1. The British player has two hexes, Vaughan's and Mawhood's that are adjacent to an attacking unit and are not in the defending hex so the defenders outflank modifier is -2. The net result is a -1 outflank modifier to be applied to the American combat die roll.
17.2.3. Surprise Modifiers
All surprise modifiers are cumulative. For a full list of surprise modifiers see the Surprise Modifier Chart.
The defending player uses the surprise modifier for disorder if any of his leaders are disordered. The defending player uses the surprise modifier for rout if any of his leaders are routed. If a force contains both routed and disordered leaders, apply the routed modifier only.
If an American leader attacks Trenton on the 7am turn of December 26th, he receives a +7 surprise modifier. The attack must take place in the 7am turn and no American leader can move adjacent to Trenton until the preceding 12am turn.
Once during the game an American player may receive a +3 surprise modifier for a dawn attack. The attack must take place in the 7am turn, and no American leader can be adjacent to the British leader to be attacked until the preceding 12am turn. This modifier may not be combined with the Trenton surprise modifier. The game includes a red counter labeled dawn attack which is included as a memory aid for the American player. The American player should begin the game with the counter in his possession and once the modifier is used place it on the turn record track on the day of its use so both players can see that the modifier has been used. If the American player attacks during a snow turn, he receives a +2 surprise modifier.
The defending player receives a surprise modifier for creeks and/or minor rivers if any of the attacking units are attacking across these terrain types and it is on or before January 3rd. From January 4th on, rivers and creeks freeze and there are no surprise modifiers for rivers and creeks.
17.3. Retreats
If a combat result requires a leader to retreat it is governed by the following rules. Retreating leaders must finish the required number of hexes away from the defenders original hex, 4 hexes for routed results, 3 hexes for disordered results and 2 hexes for a retreat result. Continue retreating following the retreat priorities until this is accomplished. Retreating leaders may not reenter the original hex of combat or any other hex they entered during retreat. Leaders may not retreat across ferries. Leaders may not retreat across major rivers unless the river is frozen. Leaders may not retreat across minor rivers during rain turns unless the hexside is crossed by a road. A leader who finishes his retreat in an over-stacked hex retreats an additional hex and would then end his retreat one hex further away from the original combat hex then the result required.
In addition the retreat path is governed by the following priorities, listed in descending order. The lower numbered priorities should be observed first and never broken to accommodate higher numbered items.
- Leaders may only retreat through enemy occupied hexes if a leader has no alternative. In that case, compare the strength of the retreating leader's force to the strength of the enemy force that is occupying the hex that the retreating leader is entering. The retreating force may choose which enemy occupied hex to retreat through ignoring all other retreat priorities.
- If the retreating force is weaker, the retreating force takes an additional 20% loss of the retreating leader's strength at the start of the combat.
- If the retreating force is equal to or larger by a 1-1 to 2.99-1 ratio, the retreating force takes an additional 10% loss of the retreating leader's strength at the start of the combat.
- If the ratio is 3-1 or more, there is no additional loss to the retreating force
- Leaders will avoid retreating through enemy ZOC if they have another alternative. Friendly leaders with at least 400 troops negate enemy ZOC for purposes of retreat. If a leader is forced to retreat through an enemy ZOC there is no penalty to the retreating leader.
- British leaders must retreat towards the top edge of the map, the edge with Amboy. American leaders must retreat toward the bottom edge of the map, the edge with Philadelphia. Each hex has three adjacent hexes towards the top map edge and three adjacent hexes towards the bottom map edge. Retreating leaders who reach the board edge and still must retreat further hexes must retreat off the map. A leader who retreats off the map may not return to the game.
- If the retreating leader occupies a hex with a road the leader must, if possible, use a road to retreat.
- Leaders avoid retreating across a minor river hexside during a non-rain turn unless crossed by a road. If a leader has no alternative but to retreat across a minor river hexside uncrossed by a road because of higher ranked retreat priorities there is no penalty to the retreating leader. Exception: Ignore this priority once the rivers freeze, January 4th through 6th.
Note: The retreat rules cannot deal with every possible situation. For example a leader could receive a rout result and start retreating only to run into a bend in a major river that he cannot cross and he could not go back the way he came in because of the rule prohibiting reentering a hex already entered during the retreat. In cases like this the defending player must be allowed some discretion in following the retreat priorities so as to achieve a retreat that places his leader the required number of hexes away from the original combat.
Example: It is 7am turn of December 26th and the weather is rain. Rall in Trenton with 1,240 troops at fatigue level 2 is surrounded by American leaders, Dickinson in 2030 with 400 troops, Ewing in 2130 with 720 troops, Stephen in 2129 with 460 troops, St.Clair in 2028 with 420 troops, Fermoy in 1930 with 620 troops and Washington in 1929 with Greene, Mercer, Glover, Sargent and Lord Stirling, 2,990 troops in all. All American leaders are at fatigue level 2.
Washington is activated and uses his command span to activate his stack, Fermoy and St.Clair. The American player declares a prepared attack using all of these troops, 4030 in all. At this point the British player could attempt a reaction move if he has any leaders within 4 hexes of Rall but none are within range. The American player next determines the surprise modifier, in his favor +1 for a prepared attack and + 7 for attacking Trenton in the 7am turn of December 26th. There are no negative surprise modifiers. A die roll of 4 becomes a modified result of 11 which is a +3 to the combat die roll and a -10% to the attacker casualty %. The combat die roll modifiers are +1 for being American, +4 for a 6 hex outflank, + 3 from the surprise table, +3 for outnumbering the defender 3 to 1 and -2 for rain; a total combat modifier of +9. A combat die roll of 3 is modified to a 12, a result of 20/60! American loss of 20% is reduced to 10% by the -10% modifier gained from the surprise table. The American player must lose 10% of Rall's 1240 troops; 120 troops which he chooses to take from Glover. All of the American leaders in the attack gain 2 fatigue levels. Rall takes his 60% loss of his original 1240 troops, 740 troops leaving him 500 troops and retreats 4 hexes routed. Rall cannot retreat to hex 2030 as it is across an unfrozen major river; nor can he retreat to hex 2129 as that would be across a minor river during a rain turn and the hexside is not crossed by a road. Rall could choose to retreat into any of the four remaining American occupied hexes for the first hex of his retreat. Rall chooses to retreat into the hex occupied by St.Clair and Rall receives another 10% loss, or 125 troops rounded up to 130. Rall chose St.Clair because with 500 troops it is the only hex he is larger than and it limits his loss to another 10%. Rall now with 370 troops continues his retreat from 2028. Rall cannot retreat to 2128 across a minor river in a rain turn with no road, so his choices are 2027 or 1928. Both are in enemy ZOC and both are in the proper direction so neither hex has priority over the other. Rall retreats to hex 1928. For the last 2 hexes of his retreat Rall must retreat to 1927 and then 1926 as these hexes are not in enemy ZOC, in the correct direction, and are connected by road. Rall gains 1 fatigue level for defending in combat and taking at least 5% losses and 2 fatigue levels for being routed leaving him at fatigue level 5. Washington and other leaders who attacked may now advance into Trenton.
17.4. Surrender
At the end of a combat, either player may choose to surrender all of the leaders who were involved in the combat. The leaders and their troops are removed from the game. These losses do count to determine what level of victory the battle was for victory points. Note: A player may want his force to surrender if it is in a hopeless situation and his opponent is going to earn victory points by defeating it in battle multiple times over several turns. Saving needless losses is good for army morale.
18.0 Disorder and Rout
18.1. Disorder
A leader becomes disordered as a result of combat. When a leader becomes disordered place a disordered marker on top of the leader and increase the leaders fatigue level by one and retreat 3 hexes. A disordered or routed leader that receives a disordered result increases his fatigue level by one and retreats 3 hexes. Leaders with no troops may not become disordered or remain disordered once they lose all of their troops.
Effects of Disorder: The leader may not attack; he suffers a -2 modifier to movement die roll, and a +1 modifier to die rolls on the Combat Results Table and the Surprise Table. A disordered leader does not count for attacker or defender outflank modifier.
Recovery from Disorder: A leader may recover from disorder at the start of the action phase if he is not adjacent to an enemy leader. Remove the disordered marker from the leader. A leader that recovers from disorder may not move, attack, or entrench in the action phase he recovers from disorder. A player may choose to have a disordered leader remain disordered so he can move with that leader.
18.2. Rout
A leader becomes routed as a result of combat. When a leader becomes routed place a routed marker on the leader, remove any disorder markers, increase the leaders fatigue level by two and retreat 4 hexes. A routed leader who receives a disordered result increases his fatigue level by one and retreats 3 hexes but remains routed. A routed leader who receives a routed result increases his fatigue level by two and retreats 4 hexes. Leaders with no troops may not be routed. A routed leader who losses all his troops has his rout removed.
Effects of Rout: Routed leaders may not attack. A routed leader does not contribute to either the attacker or defender outflank modifier. Routed leaders have no ZOC. Each turn that a routed leader starts the action phase within 10 movement points of an enemy leader the routed leader must move 10 movement points away from enemy leaders. The routed leader must finish his move in the hex furthest away in movement points from all enemy leaders. He may move adjacent to enemy leaders while performing this move. Alternatively the routed leader may move 10 movement points towards his armies supply base; Amboy for the British and Philadelphia for the Americans. While moving towards the supply base the routed leader may not move adjacent to an enemy leader at any time. A routed leader may combine the two movement priorities in one move, say move 7 movement points away from enemy units and then move 3 movement points towards his base. When the routed leader reaches his supply base, and an enemy leader is within 10 movement points of the supply base, the routed leaders is removed from the map. A leader that is removed from the map in this manner may reenter the game as a reinforcement 3 days later in the 7 am turn. The leader returns with no rout, disorder or fatigue. Note: This rule simulates leaders rallying and resting troops in the areas off board in the rear areas of the American and British armies.
Leaders do not need to use activation points or activation die roll to move while routed. Each time the leader moves, increase the leader's fatigue by 1, up to a maximum fatigue level of 6. Routed leaders continue to move, even at fatigue level 6, until they meet the 10 movement point distance requirement above.
Recovery from Rout: A leader recovers from rout at the start of the action phase if he is at least 10 movement points from an enemy leader. When a leader recovers from rout, remove the rout marker and place a disordered marker on the leader. The leader may not move, attack or entrench in the action phase in which he recovers from rout.
Note: When calculating the 10 movement points between a routed leader and an enemy leader, measure the distance as if the enemy leader were moving from his current hex to the hex of the routed leader. This path may not enter or cross any terrain that the enemy leader is prohibited from moving through.
Example: British leaders may not cross the Delaware River while unfrozen, and therefore would not affect routed American leaders on the other side. Likewise, American leaders could not trace a 10-movement-point path to a routed British leader across the Amboy ferry, as only British leaders may use that ferry.
19.0 Entrenchments
Each side may construct a fixed number of entrenchments to improve a leader's defensive position. The American player may construct a maximum of five entrenchments and the British player may construct a maximum of three. The markers may not be reused; these are the limits for the entire game. The British player may only construct entrenchments in towns or cities. Entrenchments take two turns to build. To construct an entrenchment, a leader must be activated and have at least 400 troops. A leader may not build entrenchments if routed, disordered, or at fatigue level 5 or 6. The leader expends all of his movement points to build an entrenchment and gains one fatigue level and places an entrenchment counter blank side up in the hex. For the second turn of construction, the player must again activate a leader and expend his entire movement allowance and gain one fatigue level and then flips the entrenchment counter to the trench side.
Note: To build an entrenchment the player does not necessarily have to spend two consecutive turns to complete the entrenchment; it may be completed during any later turn. The entrenchment may also be completed by a different leader who meets all the conditions to build an entrenchment during some later turn. Entrenchments (even if partially built) may not be voluntarily removed. Entrenchments (even if partially built) are permanently eliminated if occupied by an enemy leader with at least 400 troops at the end of an enemy player's turn.
20.0 Garrison Requirements
The British must garrison Amboy and Brunswick each with a minimum of 500 troops. The Americans must garrison Philadelphia with a minimum of 500 troops. If enemy action eliminates or reduces a garrison a player is not required to send more troops to replace the losses.
21.0 Game Setup
There are 2 scenarios in Washington's Crossing; the Campaign Game and the Quick Start Game. The Quick Start scenario is about 45 minutes shorter to play and lets the British player start playing from the start of the game but limits the American player's options to the historical attack on Trenton. This scenario is good to learn the game but favors the British. Consult the Game Setup Charts on setting up the game for play.
22.0 Victory Points
Players collect victory points for objectives occupied during the game and at the end of the game, and for major and minor battle victories that occur during the course of the game. Players should record victory points gained from battles and objectives on their respective record tracks using the victory point markers provided.
22.1. Objectives occupied during the game
During the weather phase of each 12 am turn beginning with the 27th of December both players check for victory points for objectives occupied.
The British gain victory points for each of the locations below occupied with a minimum of 400 un-routed troops.
| Location | Victory Points |
|---|---|
| Burlington | 1 |
| Trenton | 1 |
| Bordentown | 1 |
| Philadelphia | 2 |
The Americans gain one victory point for each of the locations below occupied with a minimum of 400 un-routed troops.
| Location | Victory Points |
|---|---|
| Amboy | 1 |
| Brunswick | 1 |
The Americans gain one victory point if no British leader with at least 400 troops is in any town or city south of xx15 inclusive.
22.2. Battle Victory Points (either side)
The attacker or defender may achieve victory points for combat victories according to the following table:
| Battle Victory Type | Criteria | Victory Points |
|---|---|---|
| Major Victory | Losing side loses 600 or more troops, retreats and victor's modified casualty % is 1/3 or less than losing side's modified casualty %. | 6 |
| Moderate Victory | Losing side suffers 400 or more troops, retreats and victor's modified casualty % is 1/2 or less than losing side's modified casualty %. | 4 |
| Minor Victory | Losing side suffers 200 or more troops, retreats and victor's modified casualty % is 2/3 or less than losing side's modified casualty %. | 2 |
| Skirmish Victory | Losing side suffers 100 or more troops, retreats and victor's modified casualty % is less than losing side's modified casualty %. | 1 |
Casualty % are modified by results from the Surprise Table and by casualties taken when retreating through hexes occupied by enemy leaders with troops.
Example: Rall has 1250 troops in Trenton and is attacked by Washington with 2530 troops. Rall is surrounded by other American leaders with between 460 and 720 troops per hex. The American player rolls a +2 combat die roll modifier and a -5% casualty modifier with his surprise die roll. The American player then rolls a modified die roll of 11 for combat, a result of 20/50rd. The -5% surprise modifier makes this a 15/50. Rall suffers his 50% loss or 630 troops and then must retreat through an American leader. Washington's force would suffer a loss of 190 troops. The British player chooses to retreat through the American leader with 460 troops and Rall suffers another 10% loss from his original strength, 130 troops. For victory points this is a major victory for Washington as Rall has lost 760 troops, retreated, and the final modified casualty % for the battle is 15/60; the victors' casualty % is only 1/4 the losers casualty %.
22.3. Leader Capture
The British player receives victory points for capturing the following leaders:
| Leader | Victory Points |
|---|---|
| Washington | 20 |
| Greene | 4 |
| Sullivan | 2 |
| All others (incl. Detachments) | 1 |
The American player receives victory points for capturing the following leaders:
| Leader | Victory Points |
|---|---|
| Cornwallis | 6 |
| Grant | 3 |
| All others (incl. Detachments) | 1 |
22.4. Objectives occupied at the end of the game
At the end of the game, the British player will receive victory points for the following locations that are occupied by a British leader(s) with a minimum of 400 un-routed troops.
| Location | Victory Points |
|---|---|
| Philadelphia | 20 |
| Burlington | 3 |
| Princeton | 3 |
| Trenton | 3 |
| Bordentown | 3 |
| For each town not listed above | 1 |
At the end of the game, the American player will receive victory points for the following locations that are occupied by an American leader(s) with a minimum of 400 un-routed troops.
| Location | Victory Points |
|---|---|
| Amboy | 15 |
| Brunswick | 10 |
| Raritan Landing | 5 |
23.0 Winning the Game
The player with the most victory points at the end of the game is considered the winner. If victory points are equal the game is a draw.
Players Notes
Both Players: The keys to playing Washington's Crossing are the proper use of Activation Points, the management of fatigue, and the use of maneuver to force the enemy to fight on unfavorable terms. On offense you need to make a plan, save some activation points and make sure the troops are well rested before jumping off. If a major victory is possible push your leaders to the maximum fatigue and spend activation points freely. On the other hand if part way through it is clear the plan is going to fail then break it off and save fatigue and activation points. On the defense choose your ground and try to move your troops as little as possible. Wait for your opponent to spend most of his activation points and become fatigued and then launch your counterattack. On both offense and defense a firm concept of what your maneuver is trying to accomplish is vital. If you try to play this system by moving your leaders every turn you will constantly be fatigued and short of activation points and will be unlikely to accomplish anything decisive.
American Player: The American army is superior to the British in its speed of movement, its ability to move the entire army at night and in the quality of its leaders, especially Washington. The American army is able to move for several turns against an enemy who is unaware that an attack is coming and very badly deployed. So what can go wrong? The Delaware River crossing rules create a high degree of uncertainty and weather can make it even worse. The American player needs to begin with a plan but should expect a lot of it to fail or need to be modified. If the weather is fair or rain on the first turn then as many leaders as possible should head to cross the river in multiple places. Force march if you need to do it. Using Washington's one special force march which does not cause additional fatigue is a good move in this situation. On the other hand if the weather is snow or freeze you have a difficult choice, do you spend a lot of activation points only to see the ferry crossings fail and troops get fatigued to no purpose or do you wait for better weather? The American player also has multiple choices of targets for his first attacks. Trenton is certainly a good target and with good play and a little luck can be surrounded and perhaps eliminated entirely. However Princeton, Kingston, Bordentown and Mount Holly can also all be attacked and several of these can be attacked at once with some planning and some luck. After the first attacks the American player must decide what his long term objectives are. If you attack toward the Princeton area you are triggering accelerated British reinforcements and your goal should be to take Amboy, Brunswick and Raritan landing and try to hold at least one of these at the end of the game. You must at the same time watch vonDonop and Stirling in Mount Holly and the detachments near Bordentown. Left unchecked they can seize a lot of victory points or even Philadelphia. Or if you decide not to go north then vonDonop and Stirling and the detachments near Bordentown become targets to eliminate. Or finally you could stay in the central position keeping the British out of the victory point cities using a mix of dug in defenses and counterattacking as the British come south, essentially the strategy Washington chose. Regardless of the strategy chosen the American player must also remain aware that on January 1st a large part of his army goes home. If this is not planned for it can be a disaster. Also keep in mind that on December 30th you gain no activation points and if you have saved no points from previous days the British can potentially exploit an American army that is virtually unable to move. Late in the game the potential of McDougal to enter the game from the north and harry the British rear should be maximized to tie down British troops or gain some victory points.
British Player: The British player will initially feel that the situation is hopeless; a good deal of stiff upper lip is needed. The British move slower, have poor leaders, have few activation points and are scattered all over the map. The key to good British play is to remember that the victory conditions are primarily geographic; you can afford to lose quite a few battles and still win the game. Try to minimize your defeats by falling back if Washington moves up with a large force, exploiting defensive terrain and trenches and keeping reserves. Early in the game do not attack unless the odds are well in your favor. Look for opportunities to earn victory points by occupying the cities that earn victory points during the game; Trenton, Bordentown, and Burlington.
The British player also gets a lot of reinforcements during the game while the American player losses strength. This coupled with the arrival of better leadership in Cornwallis give the British a more even chance of battle in the second half of the game. The goal needs to be to maneuver and attack so as to force the American to give up victory locations. Trying to destroy the American army is usually impossible as they are much faster than you are and can avoid combat easily. Pay careful attention to the modifiers for the different types of attack, the prepared attack is the British great strength. Avoid attacking American trenches unless it cannot be avoided and then only do so with a Prepared attack. In the final few turns the British player needs to be making sure he maximizes his victory points by getting a leader with at least 400 troops into as many towns as possible. Remember that the Delaware River freezes solid on January 4th and is no longer impassable to British forces; Philadelphia is definitely a viable objective in the last few turns of the game.
The British player needs to manage his detachments during the game. With 2 starting on the board he is one short of the number needed to bring on all of his reinforcements. Some of the detachments need to be absorbed into the British subordinate leaders during the course of the game. The British player should also note that when Cornwallis enters the game he can make Grant a subordinate leader who can command a lot of troops or leave him in the game as a commanding leader who can manage a second front or be used to extend the command radius of Cornwallis, the latter probably being his best use.
Designers Notes
(The designer's opening paragraph crediting the games that inspired the design is omitted here as attribution. It continues: the designer decided to design an operational game as he has always loved the wide open maneuvering that these styles of games provided and felt that the American Revolution had some very interesting campaigns (New York, Philadelphia, the Winter Campaign of 1776-77, New Jersey 1778) that would adapt well to this style of game.)
Map: The map is a composite of every map of the period we could get our hands on. These disagree on basic features and distances. Our general rule was to add more roads, creeks etc. if a single source showed them and then to playtest the game to see if the maneuvering seemed to follow historical paths.
Order of Battle: Records of both armies are reasonably available but deciding if they are accurate, especially in the American army, is another problem. The American army returns from December 22, 1776 show an army that on paper has a lot of available manpower that is fit for duty. But every account of the campaign says the troops were sick, short of supplies, deserting and generally far weaker. The American strength was reduced substantially, and the British a little bit, to try to match my best estimate of what was really available for offensive action.
Attrition: Both armies lost troops to disease and desertion and I did not want a time consuming mechanism every turn or even day so both armies' strengths were reduced in the middle of the game to approximate these losses.
Activation: Activation points represent the logistical planning and supplies needed for a leader and his troops to move. The total of 8 per turn is based on the historical moves and accounts from both sides of when moves were not possible due to lack of supplies or transport. The winter nature of the campaign and the fact that New Jersey had been picked clean of supplies by both armies meant that leaders were limited in being able to move on their own initiative. This is why in the game only one leader per side can activate each day turn by die roll.
Supply: Both armies managed to supply their basic needs during the campaign despite a lot of maneuvering and surrounding of each other. I felt that at least for the period of this campaign a supply line or source of supply was not appropriate and would not yield the historical bold moves. The one restriction is that units that go far from the roads cannot be activated showing the difficulty in supplying these troops and getting orders to them.
Zone of Controls: These represent the numerous small patrols and outposts sent out from the main body of troops to gather intelligence and slow an attack. Rall at Trenton for example had many such groups in all directions about a mile or two away.
Surprise: Trenton and Princeton are obvious examples of the importance of surprise. Certain terrain increases the chance of surprise. Hasty attacks were more prone to being surprised and positive surprise modifiers for prepared attacks reflect the time spent to find an enemy's weak spot and scout the terrain.
Combat: Along with surprise the most important combat factors are numbers, outflanking and leadership. Complex battlefield maneuvering and combined arms tactics were almost unheard of in the American Revolution and so no tactical cards here. The Americans had more guns and used them more skillfully in the attack. This is the reason the Americans get a +1 combat mod.
Delaware River Crossing: These rules are some of the most important and original in the game. The problem of crossing a major river in the middle of winter at multiple locations and multiple times influenced both armies heavily. Every crossing at a brigade level or higher was studied to see how many troops got across, if any, and over what period of time. The table is the average of around 30 brigade sized crossing attempts and seems to produce results close to history while remaining very uncertain on any individual crossing which makes the decisions of the American player really challenging and makes the game take a different course almost every time.
Weather: Weather is not just a side issue it has large game effects. I felt that showing weathers effects on river crossings, movement, combat, and surprise was vital to understanding how difficult an environment this was and how quickly a plan could collapse in the face of bad weather.
Movement: I have always liked variable movement games as it is more historical and gets rid of the gamey tactics like staying one movement point beyond an attackers reach. That being said the variability is less than the Civil War games that use a six sided die for movement; essentially more like only the results of rolls 2-5 in that system; and I feel this matches the historical range of outcomes for this campaign. Force marching is costly in fatigue for only 2 or 3 extra movement points but cost effective in activation points as you get more movement per activation.
Fatigue: Troops only have so much energy to move and fight before they just stop or become totally ineffective and I wanted to show this in a simple format. The six levels of fatigue with recovery only at night really seemed to match well with the extended periods of marching and combat in the real campaign and in game terms had the testers constantly trying to decide if a move or combat was worth fatiguing the troops.
Raid: The raid phase represents all of the small American actions that constantly plagued the British. These caused fatigue, loss of supplies and a steady drain of casualties. In the game they can be combined with an overall strategy to yield surprisingly powerful effects, for example raiding an already fatigued leader at night so the leader is ineffective the next day.