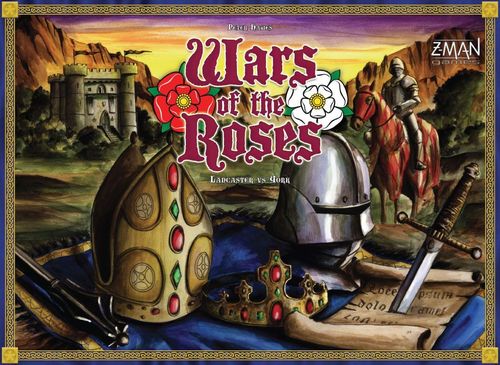
Wars of the Roses: Lancaster vs. York
Wars of the Roses: Lancaster vs. York Rulebook
Table of Contents
Table of Contents
- Game Contents
- The Game Board
- Course of the Game
- Playing the Game
- Rules for 2 & 3 Players
- Important Rules
- Hints on Play
- Historical Perspective
- Acknowledgements
Game Contents
1 Rule Book 1 Game Board 1 Summary Card 4 Player Screens 4 Planning Charts 54 Card Deck, comprising:
- 6 Bishop Cards
- 6 Ship Captain Cards
- 6 Mercenaries Cards
- 6 Royal Castle Cards
- 6 Large Town Cards
- 6 Town Cards
- 6 Port Cards
- 12 Noble Cards
4 French Aid Tokens 5 Special Award Tokens 4 Royal House Tokens 11 Royal House Counters 24 Noble Counters 12 Ship Counters 17 Mercenary Counters 80 Troop Counters (20 in each of the 4 player colors) 68 Coins (in denominations of £1, £3 and £10)
1 Turn Marker 48 Bribe Cubes (24 black, 24 white) 60 Ownership Cubes (15 in each of the 4 player colors) 60 Ownership Discs (15 in each of the 4 player colors) 8 large Scoring and Turn Order Discs (2 in each of the 4 player colors)
The Game Board
The board shows a map of England and Wales. For game purposes it has been divided by borders into 6 areas. Since these are amalgamations of various regions and counties of the time, generic names have been given to these grouped historical areas. These borders extend into the water (as blue lines), so that each area has at least one adjacent sea zone. The Northern Marches and Northern England each have 2 sea zones: 1 off their east and their west coasts. Sailing around the north of Scotland is not allowed.
Each land area has 6 distinctive icons which represent important game features. Ownership of these icons brings the owner a certain number of Control Points (CPs): a Royal Castle brings 6 CPs, a Large Town 4 CPs, a Bishop 3 CPs, a Town 3 CPs, a Port 2 CPs and a Ship Captain 2 CPs. In the sea zone adjacent to each area are the icons of the 2 Nobles that can enter the game through that area. Nobles bring CPs as well (the numbers in the shields on their counters), but they vary with the Noble: the higher ranked Nobles bring higher CPs. All 7 types of icons and their associated CPs are shown in the Control Point Chart. When scoring Victory Points for controlling areas, this chart is used for breaking ties: if 2 or more players have the same number of CPs, the player who owns an item furthest to the left on the chart wins. A Noble has priority over everything. If each player has a Noble, the Noble with the higher rank wins. If the Nobles are equal, then compare players' second or third Nobles. Then a Royal Castle takes priority over a Large Town, over a Bishop, over a Town etc. If only an equal number of ships, or two equal Nobles are present in an area, then such ties are broken in turn order: player 1 wins over player 2 etc.
- There is a naming scroll under each icon. Some of these have a cross symbol which indicates that they are Cathedral Towns and some have an anchor symbol to show that they are Ports. Bishop icons are always found next to Cathedral Towns. Similarly, Ship Captains always start "in Port", so their Ship icons are always found next to Ports.
- Each area has a Rose icon, half red and half white. On these go Royal House Counters to show which House has won the Votes in Parliament for this area (red side up for Lancaster and white side up for York). Each area has a set number of Votes in Parliament and Victory Points for the players with 1st and 2nd most control in the area.
- The Turn Order Chart shows the playing order for each turn.
- The Troops Chart shows the cost of Troops and availability of Mercenaries in each turn.
- The Turn Chart shows the game has 5 turns each spanning 10 years.
Terminology
- Royal Castles, Large Towns, Towns and Ports are referred to as Locations and their cards as Location cards.
- Nobles, Bishops and Ship Captains are Personalities and their cards are Personality cards.
- Ship Captains are represented by icons of ships and are named after the Port they sail from e.g. Ship of Berwick. They are referred to as Ships, but remember they are Personalities (Captains) and can be bribed.
- Ships on their starting Ship icon are referred to as being in their home Port.
- The term Cards refers to both Location and Personality cards. They are shuffled to form the Card Deck.
- The term Town refers to both Large Towns and Towns.
- A Garrison is the number of Troop Counters received when a Location is attacked. It is shown by the number of grey Troop icons next to the Location.
Preparation
This is the setup for a 4 player game. Alternate rules for 2 & 3 player games are on page 18.
- Shuffle the Card Deck and place it at one end of the board.
- There are 2 identical counters for each Noble and for each Ship. Place the pairs of Noble Counters and Ship Counters on their respective icons on the board.
- Set up a Bank near the board and place all the money there.
- Each player takes a Planning Chart and a colored screen. He then takes 6 white Bribe Cubes, 6 black Bribe Cubes, his color Troop Counters and £6 and places them on the supply area of his Planning Chart. Take the matching colored French Aid Token, Ownership Cubes & Discs and place them nearby the Planning Chart.
- Each player places one of his Ownership Discs at the start of the Score Track ('00') and another Disc next to the Turn Order chart.
- Place the 5 Special Award Tokens on their icons of the Awards & Bonuses chart.
- Place the stack of Mercenary Counters on their icon on the Troops chart.
- Place 1 Royal House Counter, Lancastrian (Red) side up, on the Rose icon of each of the six areas. Place a stack of five Royal House Counters on the Rose icon on the Turn Chart.
- Put the Turn Marker on Turn 1 of the Turn Chart.
- Shuffle the 4 Royal House Tokens and deal one face up to each player. Players keep these Tokens in front of them to identify their House.
Course of the Game
On each turn of the game, a number of cards are drawn and laid out to form an open display. Players in turn choose one card at a time until the display of cards is exhausted. Players' Cubes or Discs are placed on the board, to show ownership of these newly acquired possessions. Certain cards (Large Towns, Bishops, Towns, Ports and Ships) bring income, as stated on their card and this is distributed to the players in the Income Phase.
Next, all players simultaneously put their screens around their Planning Charts and enter a secret Planning Phase, in which all actions for the upcoming turn are plotted. Money may be spent in an attempt to get the Captain of Calais award. Then, by placing Troop Counters on their Planning Charts they "pre-order" the number of Troops they wish to purchase and nominate where they will be placed, both defensively and offensively. Any Nobles and Ships that will be moving this turn have their moves plotted by their counters being moved accordingly on the Planning Chart to reflect this. Lastly, Bribe Cubes are placed on Personalities that will be bribed this turn.
All players remove their screens to reveal their plans. In order, each player announces his bid for the Captain of Calais; pays for his Bribes and Troops; moves Nobles and Ships to their new positions and places his Troops and Mercenaries on the board. Next, a check on all bribed Personalities occurs. If a bribe was successful, the Ownership Disc is changed and the card for this Personality goes to the new owner. Any battles are resolved and if a Location is conquered, the Ownership Cube is changed to show the new owner, who also takes its Location Card.
In the last phase of a turn, Parliament is called and the 2 players who have the first and second most Control Points in each area receive that area's Victory Points. Each area also generates Votes for King. The two Lancastrians and the two Yorkists combine their Control Points to see which side has won these Votes for King. The Votes from all 6 areas are tallied and a King from one or the other Royal Houses is announced. The two players loyal to that Royal House receive VPs. Further VPs are received for owning the Special Awards and for Trade and Church Bonuses.
So ends one turn. Subsequent turns are conducted in the same manner with VPs being added cumulatively. The game ends after 5 turns and the player with the most VPs wins. Although the two pairs of players are nominally allied, they in fact play for themselves and will at times attack each other. This type of treachery was typical of the era.
Note: Specific strategic and tactical discussions between players are not allowed. For example, "Blue is winning, so you attack him in London and I will get him out of York". This is particularly important in the 4 player game where players are allied.
Playing the Game
The game has 5 turns each representing 10 years. Each turn has 8 phases and each phase is finished before going to the next phase. The player whose turn it is will be called the Active Player. These rules are for a 4 player game. Alternate rules for 2 & 3 player games are on page 18.
The 8 Game Phases
- Determine Turn Order
- Draw Cards
- Collect Income
- Planning
- Deployment
- Bribery
- Combat
- Parliament
1. Determine Turn Order
- On turn 1: One at a time randomly draw the 4 players' Turn Order Discs and place them on the Turn Order chart.
- On Turns 2 – 5: Turn order is determined by the relative positions on the Score Track with last going in position 1 and second to last in position 2 and so on.
Example: At the end of turn 1 red is on 10 VP, yellow 12 VP, green 13 VP and blue 16 VP. This results in a red, yellow, green, blue, turn order for turn 2.
If players tie on the Score Track, the tied players will maintain their positions relative to each other from the previous turn.
Example continued: At the end of turn 2, red and yellow are both last on 30 VP, then on turn 3, red will be first and yellow second, because their order carries over from turn 2.
2. Draw Cards
At the start of each turn a number of cards will be drawn from the deck and laid face up to form an open display. The number drawn depends on which game turn it is:
- Turn one: 12 cards
- Turns 2 – 5: 8 cards
Extra Cards in a Turn
During the Combat Phase it is possible for Royal Castles, Towns and Ports to become neutral. Their respective Location Cards are taken back from the players who owned them and placed face up on top of the Card Deck. At the start of the next turn, these cards are laid out first, then the appropriate number of new cards for that turn are laid out. Players choose the regular number of cards for that turn and any cards left over are returned to the box.
Example: If 2 Location cards are face up on the top of the deck at the start of turn 2, these 2 cards, then the regular 8 cards will be laid out in the display. Players still only choose 2 cards each (total of 8 cards) and the 2 left over cards exit the game. Return them to the box.
The Draw Cards Phase is done in a specific order starting with player 1. Each player in turn chooses 1 card from the open display and places it in front of himself. This continues until all the cards are chosen.
On Turn 1 the order is: Player 1, 2, 3, 4 for the first card chosen, then player 4, 3, 2, 1 for the second card chosen and then player 1, 2, 3, 4 for the third card chosen.
Example: Red gets the 1st, 8th and 9th cards chosen.
On Turns 2 – 5: The order stays the same. Player 1, 2, 3, 4 for the first card, then Player 1, 2, 3, 4 for the second card.
Example: Red gets the 1st and 5th cards chosen.
After picking up each card, the players must claim their new acquisition by placing one of their Ownership Cubes/Discs on the board on the corresponding icon or Counter for the card drawn. Cubes are used for Locations and Discs are used for Personalities.
When a Noble is chosen, the 2 matching Noble Counters are taken from that Noble's icon at the edge of the board. One is placed in its starting area on the board (anywhere in the open area, away from other icons) with an Ownership Disc on top. The other counter is placed on that Noble's icon on the player's Planning Chart.
When a Ship is chosen, one of the Ship Counters is placed on that Ship's icon on the player's Planning Chart. The other Ship Counter remains in its starting location on the board, with the owner's Disc on top.
Example: The red player chooses Stafford, Bishop of Winchester and Windsor castle. He places the Stafford Noble Counter anywhere in South East England. He then places a red Disc on Stafford, a red Disc on the Bishop of Winchester and a red Cube on Windsor castle. He takes the other Stafford Counter and places it on the Stafford icon of his Planning Chart. Note that the yellow player owns Neville, Winchester and Carisbrooke.
When a Mercenaries Card is chosen, the player takes the number of Mercenary Counters shown on the Troops chart for the current turn. These are stored on that player's Planning Chart and the Mercenary Card goes back in the box. These counters may be used on this turn, or kept until any future turn. They are used just like regular Troops, but at no cost. Once played onto the Planning Chart and then the game board, they will be removed at the end of that turn. They are returned to their place on the Troops chart.
3. Collect Income
Towns, Bishops, Ports and Ships generate income which is displayed on their cards in English Pounds. Each player in turn order adds up the total income on the cards displayed in front of himself and takes that amount of money from the Bank.
French Aid
At this point, on turns 2 – 5, all players except the player leading on the Score Track decide in turn order if they will visit France to raise money. If a player so wishes, he cashes in his French Aid token for an amount in pounds, equal to the difference between his score and that of the leading player. This token may only be used by each player once per game and the maximum aid is £25. Return it to the game box after use.
Example: The red player could cash in his French Aid token for £8 (38 minus 30). Yellow could get £5.
4. Planning
This phase is done by all players simultaneously. Players put their screens around their Planning Charts, then consider their strategies for the upcoming turn and then "plot" these actions on their Planning Charts. The decisions to be made are:
- How much to bid for the Captain of Calais.
- Which Ships and Nobles are being moved.
- What Locations to attack and defend and how many Troops to buy for this purpose.
- How much to spend on bribing Nobles, Bishops and Ship Captains.
This is done secretly, by moving Noble and Ship Counters and by placing Troop Counters and Bribe Cubes, on the Planning Charts. In this section all placements mentioned are on the Planning Chart and not on the game board.
Bidding for Captain of Calais
During the Planning Phase, players can put money onto one of the two icons for Captain of Calais, situated in the Midlands or South East England areas, of their Planning Charts, in order to "induce" the King to award him this title. It is awarded to the player who bids the most money. The money bid by all players is paid to the Bank.
If there is a tie for highest bid, player order determines the winner e.g. first player beats second etc. This award lasts one turn only and can not be lost during the Bribery Phase. It earns the player 4 CPs during the Parliament Phase (and is treated like a noble when breaking ties) and 4 VPs when the Special Awards are scored. At the end of the turn, the award token is returned to its starting position on the board, ready to be awarded again next turn. If no player bids anything, the award is not given that turn.
Example: Players may place money onto either of the two available Captain of Calais icons. If the player wins he places the Captain of Calais Token in the matching area on the board with an Ownership Disc on top.
Example: In this case the red player won with his bid, which was placed in South East England, so the Captain of Calais Token is placed in that area. This gives red 4 CPs in South East England. Note the yellow player owns London worth 4 CPs also, but later in the Parliament Phase, when this area is scored, red will win the tie because Captain of Calais is a Noble and Nobles are rated higher than Large Towns, when breaking ties.
Moving Ships
All Ships begin in their home Ports, but during each turn they may be moved up to 2 sea zones.
Intended Ship movements are plotted now on the Planning Chart. The Ship Counter is placed in the area that it will move to: place it on either side of the Planning Chart, where there are no icons.
Example: To move the ship of King's Lynn from Midlands north into Northern England, the King's Lynn Ship Counter is moved from its position in Midlands and placed in the empty area on the right side of the Northern England area on the Planning Chart. In the Deployment Phase this will result in the Ship of King's Lynn moving north into the sea zone adjacent to Northern England.
Note that a Ship's movement allowance of 2 sea zones would make it possible for a Ship in King's Lynn to reach Northern Marches or West Country.
Moving Nobles
During a turn Nobles may be moved to an adjacent area. This movement is plotted now in the same way as for Ships. The Noble Counter is placed into the area it is intended to move to: place it on the left or right side of the Planning Chart, where there are no icons.
Note: Only orthogonal movement is permitted. A Noble may not, for example, move directly from Wales to South East England.
Troop Placement Rules
Once purchased, Troops are used to defend Locations already owned by a player or to attack Locations owned by other players. (Thus, Troops can only be placed on Royal Castles, Towns and Ports).
Troops may not be used to attack neutral Locations i.e. Locations that do not have an Ownership Cube on them. In order to attack other players' Locations, the Active Player must have a presence himself in that area on the board. An Ownership Cube or Disc on any Noble, Royal Castle, Town, Bishop or Port (but not a Ship), fulfills this requirement.
Since Nobles can move to an adjacent area during the Deployment Phase, they can fulfill this "must be present in an area requirement", not only in their present area, but also in the new area that they are moving to. Therefore, Troops may be purchased for attacks in the Noble's present area and in the adjacent area to which the Noble moves.
Note: it is the Troops ordered to that Location that do the attacking, not the Nobles, which just stay in that area and give Control Points. They don't ever go onto the icon being attacked.
Example: Only red (Windsor and Stafford) and yellow (Bishop of Winchester) have a presence in South East England. The only legal attack in South East England would be that yellow could attack Windsor (Town of Winchester can't be attacked as nobody owns it and Bishops and Nobles can't be attacked). However, during this Planning Phase, blue could plot a move for Neville from West Country into South East England. This would give blue a presence in South East England, later during this turn, so blue could place Troops on Windsor on his Planning Chart and legally attack Windsor during the next phase. Although Neville moves, blue could still make attacks on other players' Locations in West Country, because blue had a presence there at some stage of this turn. For example, blue could also attack Carisbrooke.
Raising Troops
If a Location is to be defended or an opponent's Location is to be attacked, place the required number of Troops on that Location's icon. The cost of raising an army is £3 for each Troop Counter.
If the player has Mercenary Counters, he may deploy them on his Planning Chart on the icons of the Locations that he wants to attack or defend. They may be split up and placed in different locations, either by themselves or with that player's Troops. There is no cost for Mercenaries.
Bribing Nobles
Nobles on the board may not attack or be attacked, but a player may attempt to bribe other players' Nobles and bring them across to his side. To do this, place 1 black Bribe Cube on the icon of any targeted Nobles. For each Noble the cost of the bribe is two times the Control Point number for that Noble.
Players may wish to counter the threat of their Nobles defecting to an opponent by paying bribe money to them to keep them loyal. To do this, place one white Bribe Cube on an already owned Noble's Counter. This cost is one times the Control Point number on that Noble's Counter.
Bribing Bishops
Like Nobles, Bishops may not be attacked, but their loyalty can be bought. The procedure is exactly the same as that for bribing Nobles, except that the cost incurred depends on that Bishop's income. It is two times the income to bribe an opponent's Bishop (black Cube) and one times the income to keep him loyal (white Cube).
Bribing Ships
A Ship Captain can be bribed causing the Ship to change allegiance. This is done in the same way, by placing 1 black Bribe Cube on an opponent's Ship icon to get it to change sides or placing 1 white Bribe Cube on an owned Ship Counter to keep it loyal. The Ship's income is used in the cost calculation: two times the Ship's income to bribe an opponent's Ship and one times the income to keep it loyal.
Note: Unlike attacks, bribes may be made on owned Personalities anywhere on the board. The player need not have a presence in the area in order to bribe the Personality.
End of Planning
When each player finishes his planning, he should turn his Royal House Token face down. When all players are finished, the Royal House Tokens are turned face up again and the game moves on to the next phase.
Example Of Planning Chart Use: Using the situation from the last example with the addition of yellow now owning Winchester. Red wants to: attack Winchester with 3 Troops, move Stafford into West Country to get a presence there, in order to attack Carisbrooke with 4 Troops. He wants to defend Windsor with 1 Troop, bribe Stafford to stay loyal and bribe Neville to change sides.
Example: This shows red's use of the Planning Chart to bring about his intended move. He places 3 Troop counters on Winchester (cost £9), moves the Stafford Counter into the West Country sector of the Planning Chart and places 4 Troop Counters on Carisbrooke (£12). He places 1 Mercenary Counter on Windsor (Free) and a white Bribe Cube on Stafford (cost 1x6=£6) and a black Bribe Cube on Neville (cost 2x10=£20). Total cost is £47.
Note: Stafford will be moved into West Country, but it is the Troops that attack Carisbrooke. Stafford will bring his 6 CPs to the area to help earn Victory Points later, but his "strength" is not added to the fight for Carisbrooke.
5. Deployment
Purchase
All players simultaneously remove their screens to reveal their Planning Charts. (Leave the screens off the table until the Planning Phase of next turn). All money placed on the Captain of Calais icon is announced and put in the bank. The player spending the most takes the Captain of Calais Token. He places it on the board in either Midlands or South East England according to the location of his bid on his Planning Chart and places his Ownership Disc on it. This represents the Captain of Calais bringing his Calais garrison across from France and landing in either Midlands or South East England.
The rest of this phase is done in reverse turn order (4th, 3rd, 2nd then 1st player). Players look at their Planning Charts and work out the cost of what they have done. Calculate the cost of each Bribe Cube to which is added the cost of all Troop Counters (each Troop costs £3). This money is paid to the Bank.
Not Enough Money
If players can't fund their purchases, they must pay for what they can, in the following order:
- Captain of Calais bids
- White Bribe Cubes
- Black Bribe Cubes
- Troops
Within categories 2, 3 and 4 above, purchases are made in the order listed on the Control Point Chart — Nobles first and Ships last. If a tie breaker is needed for the same type of purchase, but from different areas, pay for purchases in order according to how many Votes each area generates (highest to lowest). With Nobles, pay for Bribe Cubes on higher ranked Nobles first. If the Nobles are tied, use their starting provinces with the above tie-breaker rule.
Example: Red has two Troops on Pontefract and two on Kenilworth. As he does not have enough money to purchase both sets of Troops, he must purchase those on Pontefract – Northern England (9 Votes), before Midlands (8 Votes).
"Illegal" Purchases & Moves
If a player's attempted purchases are not legal/logical, then he doesn't have to pay for them. Some examples are: Bribe Cubes placed on un-owned Personalities; Troops placed on un-owned Locations; white Bribe Cubes on opponents' Nobles; black Bribe Cubes on owned Nobles. If a Noble or Ship was ordered to an area or sea zone that it couldn't legally reach, then it stays in its current place.
Deploy
If the player moved a Noble or Ship to a different area, move the corresponding Noble or Ship Counter on the board to that area. Troop and Mercenary Counters are placed on the board in the Location that was nominated on the Planning Chart. If the player owns the Location, he places the Troop Counters under his Ownership Cube, on that Location ready to defend. If the Location is owned by an opponent, he places them next to that Location as an attacking force. If Mercenaries are attacking alone, the player must put his Ownership Disc on top.
Any white Bribe Cubes are placed on the corresponding Noble Counter, Ship Counter or Bishop icon on the board.
Example: This shows the game board changes that occur as a result of red's use of the Planning Chart shown in the last example. Red takes the 3 Troops from Winchester on the Planning Chart and places them next to Winchester, on the board. He puts the white Bribe Cube on Stafford, then moves him into West Country. He places the 4 Troops next to Carisbrooke. He places the single Mercenary on Windsor.
Note that blue moved Neville into South East England and also attacked Winchester. Since blue is moving after red in the turn order, his 3 Troops are placed below red's; he will attack Winchester after red has attacked first.
6. Bribery
Each player does his bribery in reverse turn order, starting with player 4. He takes any black Bribe Cubes from his Planning Chart and puts them on his opponents' Personalities. Resolve each black Bribe Cube. If a Personality has a white Bribe Cube on its Counter or icon, the attempted bribe has failed (the black Cube is returned to the Active Player and the white Cube returned to its owner). If there is no white Cube on this Personality, then the attempt is successful. The owning player removes his Ownership Disc from that Personality and the Active Player places one of his Ownership Discs on the Personality i.e. on the Noble Counter, Ship Counter or Bishop icon. The new owner takes the Personality's card, then in the case of a Noble or Ship Captain, he takes the Personality's Counter from the former owner's Planning Chart and places it on his own Planning chart in the same area that it occupies on the board. He also takes back his black Bribe Cube. It may happen that a particular Personality can change hands several times in this phase, if player 3, 2 or 1 subsequently bribe the same Personality.
Note that once one player has played a black Bribe Cube and removed a white Cube from that Personality, any subsequent player who plays a black Cube on this same Personality will be successful. When a Personality has no white Cube on it, the last player in reverse turn order to play a black Cube on it will gain ownership and take it from any player who also bribed it earlier this phase.
Also note that if a player loses a Noble to a bribe and he was that player's only presence in the area, the player's attacks in this area still go ahead. The player had a presence in the area (with this Noble) during the Deployment phase when the Troops were placed.
At the end of the phase all remaining white Bribe Cubes are returned to their owners.
Example: Red takes his black Bribe Cube from his Planning Chart and places it on Neville. Blue did not put a white Bribe Cube on Neville, who, as a result, changes allegiance. The blue Disc is replaced by a red Disc. Blue hands over Neville's card and the Neville Counter from the Planning Chart. Red places the Neville Counter on his Planning Chart in the South East England sector. Then red takes back his black Bribe Cube.
7. Combat
Each player does his combat in reverse turn order (4th to 1st). A battle is fought at every Location where the Active Player has Troops adjacent to a Location owned by an opponent. The defender's Ownership Cube is replaced by the appropriate number of "garrison" Troop Counters as shown by the number of Troop icons next to the Location — Royal Castle: 3 Troops, Town: 2 Troops and Port: 1 Troop. The battle is resolved by each player simultaneously removing one Troop Counter. The moment one side has lost its last Troop Counter the battle is over. If the defender runs out first, then the attacker wins and he places any remaining Troop Counters on the icon for this Location. He also takes the Location card, from the previous owner and places it in front of himself. No Ownership Cube is placed on the Location at this time. If the defender wins, he leaves any remaining Troops in place. If both players lose their last Troop at the same time, then nobody owns the location and the Location card is returned face up to the top of the Card Deck. If this Location is attacked again this turn, the new attacking player may claim the card from the top of the Deck.
This procedure is followed for all battles the Active Player is involved in. When completed the next player starts his Combat Phase. It may happen that one Location may change ownership several times, if subsequent players attack the same Location and win. Any Troops left from a previous battle may be called upon to defend against subsequent players' attacks. Note that once the Ownership Cube is exchanged for garrison Troops at the time of the first attack, no other player will receive this advantage for the rest of this turn's Combat Phase. Subsequent attacks just have to defeat the number of Troop Counters occupying the Location.
Example: Yellow has replaced his Ownership Cubes with the appropriate garrisons — 3 Troops on Carisbrooke and 2 Troops on Winchester.
Example: Red has attacked Winchester with 3 Troops and removed yellow's 2 Troops, leaving red with 1 Troop on Winchester. Yellow's 3 Troops have been removed from Carisbrooke, leaving red with 1 Troop on Carisbrooke. He takes the Winchester and Carisbrooke cards from Yellow.
Example: In blue's turn, he attacked Winchester with 3 Troops and removed red's 1 Troop and put his 2 remaining Troops on Winchester. He takes the Winchester card from red.
At the end of this phase, Ownership Cubes are placed on all Locations where combat occurred (unless now neutral). Then all Troop Counters are removed from the board and returned to their owner's supply. Any Mercenaries left on the board are returned to the Troops chart. In effect, these Troops become the Location's garrison. With the Ownership Cubes back in place, players will receive the benefit of the garrison Troops, if attacked next turn.
Example: At the end of the Combat Phase, red removes his Mercenary from Windsor and his Troop from Carisbrooke and places a single red Cube on Carisbrooke (he has already taken the Carisbrooke card from yellow). Blue removes his 2 Troops from Winchester and puts his blue Cube there. (He has the Winchester card from red already).
8. Parliament
Award Each Area's Victory Points
In this phase players will receive VPs for having the most and second most Control Points in each area. Ties are resolved using the Control Point Chart: icons take priority from left to right — Nobles win over Royal Castles, Royal Castles over Large Towns, etc. If both players have Nobles, the higher Noble wins. If the Nobles are equal, look to the second or third Nobles of each player. If Ships are tied, break the tie using Turn Order. Starting in the Northern Marches, each player adds up the CPs for any Personalities or Locations he owns. First and second in each area receive the VPs listed next to the area's Royal House Counter on the game board.
Example (Scoring Northern England): Yellow has 10 CPs (Neville 8, Kingston 2). Red also has 10 CPs (Pontefract 6, York 4). Yellow wins the tie, because Nobles take priority. Yellow gets 9 VPs and red gets 6 VPs.
Example: Red has 12 CPs (Percy 9, Bishop of York 3) and yellow also has 12 CPs (Plantagenet 9, Lincoln 3). Red wins, because a Bishop is further to the left than a Town on the Control Point Chart and breaks the tie.
Example: Red has Percy 9 and York 4 (13 CPs) and yellow has Plantagenet 9 and Herbert 4 (13 CPs). Yellow wins: they both have equally high Nobles, but yellow's second Noble, Herbert, takes priority over a Large Town.
Determine Votes in Parliament
After the Victory Points are scored in an area, support for the King must be worked out. The two Lancastrians and two Yorkists add their Control Points for this area together to see which Royal House has the most support. Ties are decided using the Control Point Chart, as before. The winning faction gets the stated number of Votes in Parliament to support their Royal House. Turn the area's Royal House Counter to their side face up. If no player is present in the area remove the Counter from the board for this turn — this area gets no Votes in Parliament.
Example: Red and blue are Lancastrians — 13 CPs (Pontefract 6, York 4, Lincoln 3). Yellow and green are the Yorkists — 13 CPs (Neville 8, Bishop of York 3, Kingston 2). The Yorkists win, because they have the highest tie-breaker: Neville. A Royal House Counter is placed White side up on the Rose icon for Northern England.
Once this has been done in the Northern Marches, proceed in the same manner and allot VPs and Royal House Counters for Northern England, Midlands, South East England, West Country and Wales.
When all areas are scored, both sides add up their Votes in Parliament that they earned from the areas they won. Simply check the Royal House Counter in each area to see which side won the Votes there. The Royal House with the larger number of Votes, wins (the "Royal Heir" from their House becomes King). The 2 players supporting that House, each gain 5 VPs. Place a Royal House Counter for that faction on the current turn's space on the Turn Chart as a record of this.
Example: Noting the Crests of both Royal Houses, we see here that the Lancastrians control the Northern Marches (4 Votes), Northern England (9 Votes) and South East England (7 Votes). The Yorkists control Midlands (8 Votes), West Country (6 Votes) and Wales (5 Votes). The Lancastrians win (20 Votes to 19) and claim the King for this turn. A Lancastrian Royal House Counter is put on the turn 1 space of the Turn Track and the 2 Lancastrian players each receive 5 VPs.
Score Special Awards
The Special Award Tokens are claimed as soon as any player satisfies the necessary criteria, but they are only scored at the end of each Parliament Phase. Players receive 4 VPs for each Special Award Token they own.
Lord High Admiral of England
The first player to own 2 Ships takes the Lord High Admiral Award Token and places it in front of himself. He keeps this award until another player has more Ships than him or he no longer has 2 Ships. If the owner of the award loses a Ship (and now has fewer than 2 Ships or fewer than other players) the first player in turn order, who has the most Ships (but at least 2) would take the award. If no player has at least 2 Ships the Token is returned to the board.
Archbishop of Canterbury
Exactly the same procedure is followed for this award, which goes to the first player to own 2 Bishops. The Archbishop of York is treated as a Bishop for this award.
Constable of the Tower Of London
Same as above, with this award going to the first player to own 2 Royal Castles.
Warden of the Cinque Ports
Same as above, with this award going to the first player to own 2 Ports.
Captain of Calais
This is awarded each turn to the player who bid the most money on the Captain of Calais icon of their Planning Chart, during the Planning Phase.
Score Bonuses
At the end of the Parliament Phase certain bonuses are also scored.
Trade Bonus
For each Port and Ship of that same Port that a player owns, he receives a 2 VP Trade Bonus.
Note: The Ship does not have to be in its home Port to receive this bonus.
Church Bonus
For each Cathedral Town and Bishop of that same Town that a player owns, he receives a 3 VP Church Bonus.
End of Turn
This completes one turn. Return the Captain of Calais Token to the Awards & Bonuses chart. Move the Turn Marker to turn 2 and continue playing turns 2 – 5 in the same manner.
Game End
The game ends at the finish of turn 5 and the player with the most VPs is the winner. Ties are broken in favor of the player whose Royal House won "King" the most times: check the Royal House Counters on the Turn Chart. If both tied players are from the same House, then use the Control Point Chart order, to decide the winner: highest Noble, then second highest Noble etc, then most Royal Castles, most Large Towns etc.
Special Rules for Ships
- Ships may move up to 2 sea zones, which are delineated by the blue lines in the sea. Whether a Ship is in its Port or in the adjacent sea zone it may move up to two sea zones away e.g. a Ship in Plymouth could move north to the sea zone off Wales or Northern England. Or it could sail east to the sea zone off South East England or Midlands.
- Once moved from their home Ports, Ship Counters are placed anywhere in the sea zone they have moved to (these Ships are trading with other ports not in the game). If a Ship returns to the sea zone adjacent to its home Port, it moves back onto the Ship icon next to its Port.
- Ships do not count for the purpose of having a presence in an area, in order to attack a Location there e.g. if a player has no Ownership Cubes or Discs in Northern England, he couldn't move his Ship from Berwick one sea zone down to Northern England and claim a presence there, in order to attack a Location there.
- Ships in their respective home Ports may not be attacked by Troops. Ships can only have their Captains bribed.
- Ships in sea zones off the coast (including the west coast of Northern Marches and Northern England) still contribute their 2 CPs towards control of whichever area they are in.
Example: Red has 6 CPs in South East England (Port of Sandwich 2, Ship of Sandwich 2, Ship of Plymouth 2). Yellow has 4 CPs (London). Red gets 7 VPs and yellow 4 VPs.
Rules for 2 & 3 Players
All rules are exactly the same as the 4 player game except for the following:
- The Royal House Tokens are not dealt out at the start of the game. Each player plays as an individual Noble family, not necessarily aligned to a particular House.
- Do not place the 11 Royal House Counters on the board. They are not used in a 2 or 3 player game.
- The number of cards laid out in the open display in each turn of the game depends on the number of players. 2 Players: 12 cards on turn 1, then 8 cards on Turns 2 – 5. 3 Players: 9 cards per turn.
- After VPs are awarded in each area, there is no "Determine Votes in Parliament" stage. No Royal House wins each area, no King is elected and no player gets 5 VPs for being aligned to the King's Royal House.
Important Rules
- Only owned Locations or Personalities on the board can be attacked or bribed, not unowned ones.
- To attack in an area, you must have a presence there.
- Ships do not give a presence in an area, in order to attack in that area.
- During a turn a Noble that moves has a presence in two areas — his start and finish locations. Attacks can therefore be made in each of these areas and these attacks remain legal even if the Noble responsible for giving a presence in these areas is bribed away. The Noble himself does not fight, so Nobles never occupy Locations.
- You may bribe any owned Personality on the board, without the need to have a presence in its area.
- Card drawing, bribery, battles and the receipt of the Special Awards are very dependent on turn order, which must therefore, be strictly adhered to.
Hints on Play
Money is very important in this game. With it you can ingratiate yourself to the King and hope to be appointed Captain of Calais. You can raise Troops, which capture opponent's Locations or you can bribe Nobles, Bishops and Ship Captains. This, in turn, gains you more money, more Control Points and then more Victory Points. This has a snowballing effect, so be very wary of any player who has an income of £10 – £12 more than everyone else. Even if the player is from the same Royal House, he should be treated as a threat and attacked to bring his income back, level with the rest. Wealth will be reflected on the Score Track, so never let a player get more than 10 VPs ahead.
Nobles are also important particularly in the early turns, for two reasons. Firstly, a single Noble such as Neville (10 CPs) or Percy (9 CPs) can perhaps win an entire area, gaining you a large number of Victory Points. It is not until perhaps turn 2 – 3, that any opponent would risk the required £18 – £20 to bribe these Nobles away.
Secondly, Nobles give you mobility and the capability to attack into areas where you do not have a presence. Again, this is most important in the first 2 turns, when the cards you have drawn might only give a presence in a few areas. Two centrally located Nobles will give you great flexibility in movement options and keep your opponents guessing which areas you will move to.
However, Nobles don't give you income and so the political power they bring you might be bribed away by an opponent who has adopted a purely economic strategy. Therefore, a critical aspect of the game is to get the balance between Nobles and income right.
French Aid is vitally important for any player who has had his income stripped from him. It gives a great opportunity to come back from a weak position. This money must be spent wisely. If the player doesn't make up ground on the leaders on the turn that he uses his French Aid, then he will find it difficult to recover. The timing of its use becomes crucial, but who can say when their fortunes are at their lowest? The Turn Order for choosing cards, bribing and battling, favors those most behind in the game. For example, if you are last or second to last and 15 points behind the leader, it is probably as good a time as any to take French Aid. Since the aid money maximizes at £25, the closer you are to 25 VPs behind the leader, the easier the decision becomes.
As the number of Locations and Personalities owned increases, it is tempting to try to defend as many as possible. This can often be a waste of precious financial resources. It is better to go on the offensive and take Locations and Personalities from opponents. Just defend those things that are vital financially or strategically (that help you win the important areas such as Northern England, Midlands or South East England).
The game mechanics help prevent a runaway leader, so no player should make himself a target early in the game by getting too far ahead on the Score Track. A big lead also allows greater French Aid, so attacks should be against stronger players rather than weaker ones. Aggrieved Nobles coming after you with a large amount of French Aid is not desirable.
Collecting a strong income base and a group of centrally located Nobles, perhaps all moved to one or two areas so as not to win too many areas early in the game, is the best strategy. Then on turns 4 – 5, make use of this income and go on the offensive. Three strong Nobles in Midlands or Northern England have a chance of winning the 3 adjacent regions.
The Special Awards and Bonuses can add up to a lot of VPs over 5 turns. Players should not underestimate their usefulness.
Historical Perspective
The Wars of the Roses (1455 – 1487) were a series of dynastic struggles fought between the great competing Royal Houses of Lancaster and York. The powerful noble families of England aligned themselves with one or other Houses and fought a series of sporadic Civil Wars that finally resulted in a Lancastrian victory and Henry Tudor being crowned King.
Background to the Conflict
The conflict arose from a disputed line of succession dating back to the time of Edward III, who died in 1377. His rightful successor, his grandson Richard II, was usurped by his cousin Henry Bolingbroke, Duke of Lancaster (Henry IV) in 1399 and this established the reign of the Lancastrian Kings. His son Henry V maintained control of the crown with good government and military victories such as Agincourt, which gave England control of much of France. He died prematurely in 1422 aged only thirty-five, leaving an eight month old Henry VI on the throne and a Great Council to govern during the King's minority until the age of sixteen.
Various nobles tried to advance their position during this time, but Richard Plantagenet, Duke of York was arguably the most powerful magnate in the country, having inherited great wealth and large estates across Northern England, the Midlands and Wales. He was also aware that he had a stronger claim to the throne than Henry VI. On his mother's side he was descended from Edward III's 3rd son, Lionel of Antwerp, 1st Duke of Clarence and on his father's side from Edward's 5th son, Edmund of Langley, Duke of York. Henry VI was descended from Edward's 4th son, John of Gaunt, 1st Duke of Lancaster.
A Country Divided
Henry's inferior claim to the throne was compounded by the fact that he turned out to be a weak ineffectual ruler, who suffered bouts of insanity and was then incapable of ruling for extended periods of time. He tolerated ongoing feuds between rival nobles such as the Percies and the Nevilles and failed to stop his magnates and ministers pilfering from the royal coffers, thus sending the country broke, despite the unpopular, high level of taxation. A widespread system of patronage and clientage existed, trade diminished and the great Lords interfered in the judicial system and elections to Parliament.
On the continent England suffered at the hands of Joan of Arc, who led her countrymen to recapture most of the territory lost in the 100 years' War. Henry's close advisors were blamed for this mismanagement, in particular Edmund Beaufort, 2nd Duke of Somerset and William de la Pole, 1st Duke of Suffolk. Despite Humphrey, Duke of Gloucester and York's protestations (these two were next in line to the throne), Henry continued to support his advisors. Somerset, already Lieutenant General in France, was appointed Constable of England, Supreme Judge in the Court of Chivalry and soon after, Captain of Calais. Suffolk had Gloucester charged with treason and likely killed. In the backlash, Suffolk had his head hacked off by angry dissidents whilst attempting to flee to France.
There was widespread unrest and an insurrection led by Jack Cade occurred in London in 1450. The citizens looked to the Duke of York to bring about change. When Parliament failed to get Henry to curb the power of his Lancastrian advisors, York finally resorted to armed confrontation. He was supported by his nephew John Mowbray, 3rd Duke of Norfolk, his brother in law Richard Neville, 10th Earl of Salisbury and son Richard Neville, 16th Earl of Warwick. The powerful Neville family had been in open hostilities with the Percies of Northumberland, who supported Somerset.
The Conflict Begins
On May 22, 1455 the first Battle of St. Albans took place. It was a Yorkist Victory and the Lancastrians Somerset, Thomas Clifford and Henry Percy, 2nd Earl of Northumberland, were killed and Humphrey Stafford, Duke of Buckingham was imprisoned. York was appointed Constable of England and Warwick Captain of Calais. Warwick, now very popular in London with the merchants, was given funds to augment the Calais fleet and protect the coastal trade. This was an insult to the Lancastrian Henry Holland, Duke of Exeter, who was Lord High Admiral of England.
At this point there was never any thought of replacing Henry, the aim was to get rid of his corrupt advisors. When Henry lost his mind for a second time from October 1455 to February 1456, Parliament packed with Yorkists appointed York as Protector. However, once recovered, Henry was encouraged by his wife, Margaret of Anjou, to reverse many of the Yorkist appointments, including Warwick's as Captain of Calais, which reverted to the new (3rd) Duke of Somerset, Henry Beaufort. York was sent back to his post as Lieutenant of Ireland.
Margaret ordered a Lancastrian force under Audley to attack Salisbury at Blore Heath on September 23, 1459. The Yorkists won the day. Henry and Margaret then raised a force of 30,000 and confronted York, Warwick and Salisbury at the Battle of Ludford Bridge on October 12, 1459. Somerset, the legal Captain of Calais got a message to Sir Andrew Trollope, leader of the Calais garrison, who took his men over to Henry. The Yorkists dissolved and fled: York and his 2nd son Edmund, Earl of Rutland, to Ireland and Edward, Earl of March (York's eldest son), Warwick and Salisbury to Calais.
York could draw upon his rich estates in Ireland and mount an attack into Wales and Warwick by his presence controlled Calais and commanded the narrow straights that separated him from the Yorkist areas in the South East and in East Anglia (part of "Midlands" on the game board).
Warwick landed at Sandwich in the South East and raised an army of 25,000, then moved north to confront Henry's army at the Battle of Northampton on July 10, 1460. Lord Grey de Ruthyn commanding Henry's vanguard, swapped sides and joined the Yorkists, resulting in a Yorkist victory. Buckingham, John Talbot 5th Earl of Shrewsbury, Beaumont and Egremont were killed and Henry was found abandoned in his tent.
Parliament's Act of Accord
York returned from Ireland and made straight for Westminster with the aim of claiming the throne. Parliament and senior nobles including Warwick and Salisbury were shocked by this, for there was still no thought of replacing Henry, just his corrupt advisors. Parliament considered York's stronger genealogical claim to that of Henry's and on October 31, 1460 passed the Act of Accord, leaving Henry as King, but York and his heirs were to be Henry's successors.
Tragedy for the Yorkists
Margaret, enraged at the disinheritance of her son Edward, Prince of Wales, set about raising another Lancastrian army. Jasper Tudor, 16th Earl of Pembroke, raised troops in Wales, Holland and Somerset in the West Country and Percy, 3rd Earl of Northumberland and John Clifford, in the north. The latter were the Wardens of the East and West Marches towards Scotland. Their combined forces numbered 15,000. York, hearing Margaret was at Pontefract, marched north to his castle at Sandal just south of Wakefield. On December 30, 1460 an overconfident York, enraged by the breaking of the Christmas truce, charged out of his castle and was ambushed at the Battle of Wakefield. John Neville, part of the Westmorland branch of the Neville family, betrayed the Yorkists and took his recruits across to Margaret. York and Salisbury's son Thomas Neville were killed. Salisbury and Rutland were captured and beheaded.
York's son March had been sent to deal with Pembroke and Wiltshire in Wales and defeated them at the battle of Mortimer's Cross on February 2, 1461.
Warwick left London to meet up with March, but was intercepted by Margaret's forces at the second Battle of St. Albans on February 17, 1461. Margaret offered Lovelace £4,000 and the Earlship of Kent and he swapped sides. The Lancastrians won and Warwick escaped with the remnants of his army, leaving Henry to be picked up by his supporters.
The Yorkists Triumph
By now, Warwick realized that Henry was never going to be his puppet and that he would always answer to Margaret, so he set about making a new King. While Margaret and her army went back to York, Warwick and March entered a predominantly Yorkist London, where the populace chose March over Henry. Edward Plantagenet, Earl of March was proclaimed king on March 4, 1461.
Norfolk, Warwick and his uncle Lord Fauconberg raised troops in the South East, Midlands and the West Country. They joined Edward who was leading the rest of the Yorkist army. There was an indecisive skirmish at the Battle of Ferrybridge on March 28, 1461 in which Lord Clifford was killed. The two opposing armies met head on at the Battle of Towton on March 29, 1461 with both sides agreeing to decide the issue this day. The Lancastrians were routed with Percy and most of the Lancastrian leading nobles (except for Somerset) being killed. Wiltshire and Thomas Courtenay, 14th Earl of Devon, were beheaded. Henry, Margaret and Edward took refuge in Scotland, while Edward IV was officially crowned king on June 28, 1461.
Edward's younger brothers (York's 3rd and 4th sons) George and Richard were knighted. George as Duke of Clarence and Richard as Duke of Gloucester. Warwick was restored as Captain of Calais and made Grand Chamberlain of England, Warden of the Marches against Scotland, Warden of the Cinque Ports and Constable of Dover. He was now the most powerful noble in the land.
On December 21, 1461 Parliament assented to an act of Attainder against Henry, Margaret and Edward, Prince of Wales, stripping them of all titles and possessions. The Lancastrian cause was at its lowest ebb. Henry and Margaret led limited raids across the Scottish border toward Carlisle and Durham and a few of the Lancastrian commanders held out in the northern castles of Alnwick, Dunstanburgh and Bamburgh. Somerset, on the promise of a pardon by Edward, defected at Bamburgh to the Yorkists. Edward wanted to end the fighting between the rival nobles, so he was keen to placate the great Lancastrian families.
However, treachery continued. Ralph Percy, although pardoned, later handed back the castles of Dunstanburgh and Bamburgh on two occasions. Sir Ralph Grey, a former Lancastrian, who had turned Yorkist after Towton, gave Alnwick over to the French. Somerset was nearly killed by veteran Yorkists, who could not conceive of such an enemy now riding with the King, so he promptly went back to Henry's side.
Montagu (Warwick's brother John Neville) was dispatched to clean up the Northern Marches. He attacked at Hedgely Moor on April 25, 1464 (Ralph Percy was killed) and at Linnolds near Hexham on May 15, 1464. Somerset, Lord Roos and Lord Hungerford were beheaded. By July all three northern castles had fallen and Henry was again captured and held in the Tower. The war was temporarily at an end. The last bastion of Lancastrian resistance was in Wales and this ended when Harlech Castle was put under siege (it finally surrendered in 1468).
Warwick the Kingmaker
Edward reigned peacefully between 1464 and 1469, but in this period he suffered a deteriorating relationship with his most powerful ally, Warwick. This stemmed from Edward's marriage to Elizabeth Woodville and the promotion of her Woodville relatives to positions of power. Edward also ignored Warwick's advice on foreign policy, preferring an alliance with the Duke of Burgundy, rather than Louis of France. Edward's brother George, Duke of Clarence, full of ambition and greed, was also jealous of the Woodvilles' advancement, to what he perceived as his detriment. Against his brother's wishes, George married Warwick's daughter Isabel on July 11, 1469.
Warwick, faced the fact that his own power was to be curbed by this new, strong and independent King, whom he could not control. He formulated a new plan, which was to defeat Edward, have him declared illegitimate and put his brother George on the throne.
Edward had promoted Herbert, Lord of Raglan, as the new Earl of Pembroke and Humphrey Stafford, Baron of Southwick, as the new Earl of Devon (following Courtenay's beheading after Towton). These two commanders had a falling out the night before the Battle of Edgecote Moor on July 26, 1469. Stafford left taking his army and all the archers. The Lancastrians won, with Herbert and then Stafford being beheaded. Edward was taken to Warwick castle as prisoner. Warwick now had two Kings as prisoners, since Henry was still held captive in the Tower. The country was in turmoil: riots in London, uprisings in the Northern Marches and threats from Edward's ally, the Duke of Burgundy. Warwick was only accepted as a reformer and not as a dictator. The populace were still loyal to Edward, so Warwick had to set him free.
Edward had the support of his youngest brother Richard, Duke of Gloucester and they raised an army and defeated their opponents at the Battle of 'Lose-Coat' Field near Empingham on March 12, 1470. Warwick and Clarence sailed for France. Here they met with King Louis and a deal was brokered with Henry's wife Margaret. Henry was to be put back on the throne and his son Edward was to be betrothed to Warwick's daughter, Lady Anne Neville. Louis provided troops, money and sixty ships for the Lancastrian cause.
Henry VI Returns, the 'Re-Adeption'
Warwick's forces landed at Plymouth and Dartmouth and joined up with Jasper Tudor (former Earl of Pembroke), Lancastrian loyalists and Warwick's brother Montagu. Montagu had earlier remained loyal to Edward, until during Edward's conciliation with the Lancastrians, he stripped Montagu of the Earlship of Northumberland and returned it to the Percies.
With Henry back in the picture, the mood of the country changed and Edward could not raise enough forces to compete with those amassed by Warwick, so he fled across Lincolnshire to King's Lynn, then by boat to the protection of the Duke of Burgundy. Henry VI was crowned again as King at the palace of Westminster on October 13, 1470.
With the proposed invasion of Burgundy by an alliance between France and English forces under Warwick, Charolais, the Duke of Burgundy, funded Edward with ships, an army and money for an invasion of England. They sailed on March 11, 1471 and landed near Kingston upon Hull, to a very lukewarm reception. Edward, using his charm, slowly turned the tide of public opinion and continued raising forces. Warwick was suddenly weakened by the defection of Clarence and his 4,000 troops back to Edward's camp. Clarence now had no prospect of becoming King and was bitter at the lack of rewards from Warwick. He was also jealous of Warwick's close ties to the crown, since Edward, Prince of Wales' marriage to Warwick's daughter, Anne.
Edward IV Prevails
Edward proceeded to London, where his loyal supporters flung open the Gates and welcomed him back. The Tower guards were overpowered and Henry submitted to Edward. He had the Archbishop of Canterbury put the crown on his head at Westminster and he left Henry in the Tower. Edward then set out after Warwick and the two sides clashed at the Battle of Barnet on April 14, 1471. The Lancastrians were defeated and Warwick and his brother Montagu were killed.
Margaret had been successfully recruiting in the West Country and was joined there by Somerset and Devon. They passed via Exeter, then Bristol, but their passage into Wales was blocked at Gloucester and on May 4, 1471 at the Battle of Tewkesbury, Margaret's army was destroyed. Edmund Beaufort, 4th Duke of Somerset and John Courtenay, 16th Earl of Devon, were killed and Henry's son Edward, Prince of Wales, was beheaded. Edward returned to London and had Henry killed in the Tower on May 25, 1471.
Henry's 're-adeption' had been short-lived and with its orchestrator Warwick dead, Henry dead and no heirs to the throne, the Yorkist grip on the Crown was strong indeed. However, Clarence soon became restless again. The confiscated Courtenay estates in the West Country and the Lieutenancy of Ireland were not enough for him. He was jealous of any gains by his younger brother Richard, Duke of Gloucester and tried to stop his marriage to Anne Neville, the widow of the dead Prince of Wales. He interfered in the business of the King's Council, caused trouble for the Woodvilles and accused Edward of being illegitimate and of having an invalid marriage.
Edward by now had had enough and called Parliament to try his brother Clarence on charges of treason. A court under Henry Stafford, 2nd Duke of Buckingham, convicted and attainted him. He was put to death in the Tower on February 18, 1478.
Over the next 5 years England was once again at peace, but then Edward at age 40 years, died suddenly on April 9, 1483 from a chill and soon the country was plunged back into turmoil.
The Princes in the Tower
At the time of Edward IV's death, his son Edward, now Edward V, was only 12 years old. Many of the nobility distrusted the Queen and her Woodville relatives, who were viewed as out to feather their own nests. Edward V had been raised by the Queen's brother, Anthony Woodville, 2nd Earl Rivers and it was feared the Woodvilles would have too great an influence over the young King. Edward IV had nominated his brother Richard as Protector of England, but the young King was still in the hands of his step uncle, Earl Rivers. Buckingham and William Lord Hastings, a loyal friend of Edward IV, helped Richard to capture Edward V from the Woodvilles. They entered London making assurances that the King was safe, but both he and his younger brother were soon held captive in the Tower.
Richard III
The Bishop of Bath and Wells declared the marriage of Edward IV to Elizabeth Woodville illegal, because he was already betrothed to a Lady Eleanor Butler, daughter of the Earl of Shrewsbury. This meant Edward and his nine year old brother Richard, Duke of York were illegitimate. Parliament, concerned about another contested succession and thinking that a fine commander such as Richard would be better able to govern than a young boy, enacted the Titulus Regius and Richard Plantagenet, Duke of Gloucester became Richard III. He was crowned on July 6, 1483 and his captives, the two young Princes, never left the Tower again disappearing under controversial circumstances.
Hastings had tried to protect his best friend's two sons and realizing the extent of Richard's ambition, set about trying to curb his powers. Hastings was wealthy and had many influential retainers, so Richard struck quickly and at a meeting of the Council, had Hastings charged with treason and executed.
Shocked by Richard's brutal actions and the possible fate of Edward V, public suspicion and resentment grew. By October 1483 there was an armed rebellion in the south of the country and its leader was Stafford, Duke of Buckingham. He joined other Yorkists loyal to Edward IV, the Woodvilles who were suffering under Richard and Lancastrians still hoping for a change of fortune. Richard acted swiftly and put down the rebellion and Buckingham was beheaded.
Henry VII
Before his death, Buckingham had put forward a Lancastrian contender for the throne, Henry Tudor. Henry was descended from Edward III's 4th son, John of Gaunt, who had an adulterous relationship with Katherine Swynford, which gave rise to the Beaufort family. Richard II had legitimated the Beauforts, but Henry IV had barred them from inheriting the crown. Henry's great-grandfather was Gaunt's son, John Beaufort. Thus, Henry's claim to the throne was rather tenuous and in defiance of a Parliamentary act.
Henry was living in France and was having a fleet prepared that was financed by the King of France, Charles VIII, who was also supplying troops for the planned invasion.
The force of around 3,000 landed in Wales on August 7, 1485 and continued raising troops along their march.
Richard summoned Percy, Norfolk, Thomas Lord Stanley (who was Henry Tudor's step-father) and his brother Sir William Stanley to meet him at Leicester. The two armies clashed at Bosworth Field on August 22, 1485. Richard had around 10,000 men and was an experienced commander in the field, whilst Henry had a smaller force of around 5,000 and had no fighting experience.
However, the Stanleys with 6,000 men betrayed Richard and attacked both his flanks at a crucial stage of the battle and Percy, whose troops formed Richard's rearguard, did not enter the fight. Richard and Norfolk fought gallantly, but greatly outnumbered now, they were both killed.
Henry VII was crowned king on October 30, 1485 and married Elizabeth of York (Edward IV's eldest daughter) the following year, thus uniting the Houses of Lancaster and York.
Lambert Simnel, claiming to be the son of George, Duke of Clarence, raised support from Yorkist sympathizers in Ireland and landed in the West Country, but Henry defeated them at the Battle of Stoke Field on June 16, 1487 and the Yorkist cause was finished.
A decade later, a young man named Perkin Warbeck claimed to be Richard, the younger of Edward IV's two sons, but he never achieved enough support to be a serious threat. He was captured and executed in 1499. The Wars of the Roses was over and the Tudor Dynasty had begun.
Acknowledgements
My special thanks go to Howard Posner, John Posner, Paul Gilbert, Carl Sonson and Peter Reardon, whose interest in historical games and desire to immerse themselves in a bygone era helped me focus on the task of designing this game. They wanted to see nobles such as Mowbray, Plantagenet, Percy and Beaufort out on the field of battle again, marching through York, Bristol or London on their way to immortality. Castles like Bamburgh, Kenilworth and Harlech were to rise up from the ground to attain their former glory, whilst ships such as Le Swan and Le Michael again took to the seas. Could we relive the intrigue and treachery of the times and witness "the Kingmaker" in action, helping to decide the outcome between the great Houses of Lancaster and York? Their playtesting sessions took the game from a collection of ideas and fashioned them into a cohesive working game and the finished product is a tribute to them. I also want to thank Leo Tischer, Ron Krantz, Bruce Reiff, Ralph Anderson, Corinne de Balman and the many great gamers from the Gathering, who offered helpful suggestions. Finally, thanks to Dave Rayner and Matthew Spring who helped with the heraldry and historical issues and Ben Nelson who worked tirelessly on the artwork.
Peter Hawes