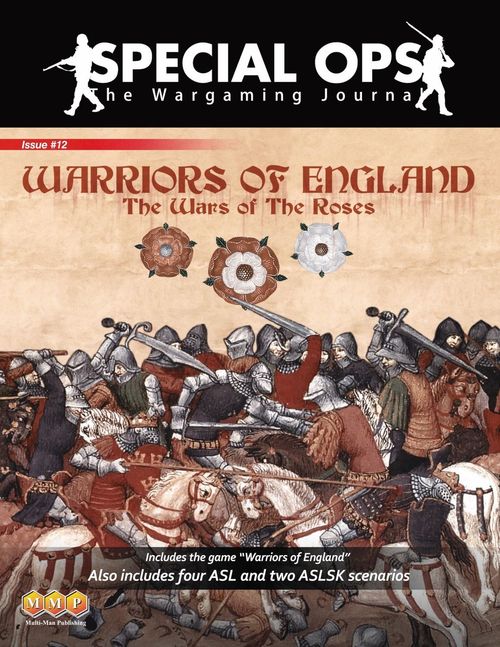
Warriors of England: The War of the Roses
Warriors of England: The War of the Roses Rulebook
Table of Contents
Table of Contents
2.0 Components
The game consists of:
- One 22" x 34" map
- 162 3/4" counters
- Players will need to provide several six sided dice.
- Players will also need an opaque cup for random draws.
2.1 Map
The map consists of 13 regions (including London, Calais, and Ireland) and 3 Friendly Foreign Areas (Scotland, France, and Burgundy). Each region has a name, an abbreviation and a Victory Point (VP) value.
Each Foreign Area has a name, a VP penalty, a coat of arms, and a rose that identifies which faction may enter the area.
Other map features include a Victory Point Track, Game Turn Track, Initiative Track, the Tower of London Box, and a Covert Box for each player.
2.2 Counters
There are three types of counters: Nobles, Troops, and markers.
2.2.1 Nobles
Nobles are rated for Battle and Leadership. The face-up, darker side is used from the start of the game; after being killed in battle, the Noble is flipped to its face-down, grey striped side. If killed again, the Noble is removed from play (exception: see 14.0 Henry VI). Red Nobles are Lancaster, white Nobles are York, green are neutral. Control of neutral Nobles is indicated by facing them so as to be read by their controlling player. Players may inspect Nobles that are in play at any time. Friendly Nobles are Nobles that you control, enemy Nobles are controlled by your opponent.
Nobles have a home region indicated by abbreviation; if it is a crown, the Noble has no home region. Nobles also have a rank from 1 to 3 gold stars: 3 stars = royal heir; 2 stars = influential lord; 1 star = minor lord.
The Noble counter diagram in the rulebook labels the following parts: Face-Up, Face-Down, Name and Title, Rank, Onboard Setup, Leadership Rating, Home Region, and Battle Rating.
2.2.2 Troops
Troop markers work like currency (numbers can be freely exchanged so long as the total is the same). Troops must always be attached to Nobles. A given Noble can have at most 2 Troops for each star of rank. Nobles count as 1 Troop in battle (this intrinsic strength point does not count against a Noble's ability to command Troops). Troops can never be transferred between Nobles. Each Troop point is about 1,000 men. The number of Troop markers provided are not a limit. Players may inspect Troops attached to a Noble at any time.
2.2.3 Markers
- Game Turn: Used to track the current game turn.
- Original Initiative: Marks the original initiative value during a turn.
- Impulses Remaining: Used to track Impulses Remaining for both players.
- Control: Used to mark control of areas.
- Aggressor: Marks which player is the aggressor for combat.
- Missed!: Used during combat turns.
- Disgraced: Marks Nobles who have retreated this turn.
2.3 Dice
At least one six-sided die is required for play, though more are better — 6 dice per player is a good number.
3.0 Setup
Players decide who will take which side and sets up their forces as listed below. Make sure your pieces face you.
Place all neutral Nobles with a green face-up side in the draw cup. For ease of setup, Nobles with a black dot on the right side of their counter are part of the standard setup for each game.
Lancaster
- Henry VI (face down, on his infirm side) + 2 Troops in LONDON
- Margaret of Anjou + 1 Troop in LONDON
- Edmund Beaufort, Duke of Somerset + 2 Troops in SOUTH MIDLANDS
- Humphrey Stafford, Duke of Buckingham + 2 Troops in SOUTH MIDLANDS
York
- Richard, Duke of York + 4 Troops in WEST MIDLANDS
Both Players
The York player draws 5 neutral Nobles from the draw cup and places them face up to the side of the board. Starting with the York player, each player selects one neutral Noble and places (11.2) them in their home region with 2 Troops each. (The York player will end up with 3 neutral Nobles and the Lancaster player with 2 neutral Nobles.) If a player draws Richard Neville (the 2 star Noble with a crown), he may be placed in any region containing a friendly Noble or in a Friendly Foreign Area with 2 Troops.
If a region contains Nobles from both players, the York player should mark his Nobles with an Aggressor marker.
The VP marker goes in its start box. The Turn marker starts on Turn 1. The remaining Lancaster (red) and York (white) Nobles are placed into the cup with the neutral Nobles.
Place Control markers in each area that is controlled by a player. Any area that contains Nobles from both players will be uncontrolled.
4.0 Sequence of Play
The game lasts a maximum of 9 turns, which represents 3-4 years each.
4.1 Determine Initiative
Determine which side has the initiative this turn (5.0).
4.2 Campaigns
Players take turns moving their Nobles (6.0).
4.3 Battles
Fight a battle in every region where both sides have Nobles (7.0).
4.4 Control
Both sides attempt to gain control of regions (8.0).
4.5 Levy
Players levy Troops in regions they control (including in Friendly Foreign Areas) (9.0).
4.6 Tower of London
The side that controls London may put prisoners on trial to pardon or execute them (10.0).
4.7 Placing Nobles
Players draw new Nobles and may play Nobles from their Covert Box to the map (11.0).
4.8 Victory Points
Adjust the VP marker, primarily based on control of regions (12.0).
4.9 Henry VI
The Lancaster player rolls a die to determine Henry VI's status for the next turn.
4.10 Advance the Turn Marker
Check for automatic victory. Advance the Turn Marker and begin a new turn (14.0). If this is the end of Turn 9 the game ends.
5.0 Initiative
Initiative has a big effect on campaigns and placing Nobles. To determine the Initiative each turn, both sides roll one die. The higher roll wins Initiative for the turn. If the roll is tied, the side without the Initiative last turn gets it this turn. If tied on the first turn, York has the Initiative. Add 1 to the roll by the player who lost Initiative. Place the Initiative marker in that column on the Initiative Track, in the box of the Initiative player. Place the Initiative Player's Impulses Remaining marker in the same column. The non-Initiative Player's Impulses Remaining marker should be placed in their box, one less than the Initiative player.
6.0 Campaigns
During Campaigns, each player take turns moving their Nobles. A Noble's Troops must always accompany them on the move.
6.1 General rules
- The Initiative player takes the first campaign. Players then alternate campaigns, moving the Impulses Remaining marker down the track for each player, until the marker enters the 0 column.
- A campaign is the movement of up to two Nobles (and their attached Troops) from a single region to a single adjacent region. Nobles may not split up and move to more than one region in a single campaign.
- For most campaigns, up to two Nobles may move. However, when crossing an obstructed boundary or a sea route, only one Noble may move.
- A player may pass instead of taking a campaign. A player may campaign on a later opportunity even if they passed earlier in the turn.
- A Noble may move in more than one campaign a turn, if otherwise eligible.
Campaign Example
During the Campaign Phase, the Lancaster player has John Talbot (with four Troops) and James Tuchet (with two Troops) in the North Midlands.
The Lancaster player can move both John Talbot and James Tuchet (and their Troops) across the Clear Terrain Boundary into the West Midlands.
If the Lancaster player wanted to move into the Northwest, then only one Noble could move during that Campaign Phase due to the Obstructed Terrain Boundary.
Remember, Nobles may not split up and move to different areas during a single Campaign Phase, so if John and James wanted to both move during the Campaign Phase they would need to move to the same region.
6.2 Campaign restrictions
- Your Nobles in a region with enemy Nobles may only leave to campaign if there are a number of friendly Nobles equal to or greater than the enemy Nobles remaining behind.
- Your Nobles can only move to a Foreign Area if it is friendly (Lancaster - France or Scotland; York - Burgundy).
6.3 Placing Aggressor markers
If you move a Noble into an area that contains one or more enemy Nobles, but no other friendly Nobles, you become the "aggressor." Place an Aggressor marker of the appropriate side in the area so you don't forget which side is the aggressor. If you move a Noble into an area that already contains an Aggressor marker (no matter which side is the aggressor), there is no effect.
7.0 Battles
After all campaigns are complete, a battle is fought in every region with Nobles from both sides. The Initiative player decides the order that battles are resolved in. Follow the sequence below to resolve battles. Completely resolve a battle for a region before moving on to the next.
7.1 Choose Commanders
Both sides choose one Noble to be their commander for the battle, non-Initiative player first. You must choose a Noble with the highest rank (number of stars) among your Nobles in the region.
7.2 Intrigue
Before battle, beginning with the non-Aggressor player, each side may attempt intrigue to get one enemy Noble to switch sides. A Noble that switches sides may later switch back to their original side.
- Choose an enemy Noble and roll a die. Subtract the enemy Noble's stars from your commander's stars. If the roll is less than or equal to this difference, the intrigue is successful and the enemy Noble (and all his Troops) switches to your side immediately.
- If the chosen enemy Noble is the enemy color, add 1 to the roll (i.e. it is more difficult).
- If the intrigue fails, there is no effect.
- If a commander switches sides, a player must choose a new commander from the remaining Nobles in the battle.
- If one player has no Nobles remaining after Intrigue, no battle is fought in this region.
7.3 Aggressor Side Attacks
- The Aggressor side rolls a number of dice equal to the number of Nobles and Troops on their side, or the commander's Leadership Rating, whichever is fewer. A hit is scored for every 6+ that is rolled.
- If your commander's Battle Rating is greater than the opposing commander's, you may add the difference to each of your dice. For example, if your commander's Battle Rating is 3, and the enemy commander's Battle Rating is 1, you may add 2 to each of your dice (hitting on 4+ instead of 6). If your commander's Battle Rating is the same or lower, there is no effect.
- If the aggressor did not inflict any battle hits on his opponent, he gets the 1st Round Missed marker; if this is his second consecutive round of missing, flip the marker over to its 2nd Round Missed side. If the aggressor already has a 1st Round Missed marker or a 2nd Round Missed marker and he scored a hit in this battle round, he can remove the marker.
7.4 Non-Aggressor Side Attacks
Same as 7.3 above (ignore item 3, Aggressor misses).
7.5 Scoring Hits
- Hits scored by both sides are applied simultaneously. Each player determines and rolls for their own Noble losses, under the restrictions below.
- Hits must be applied to Troops before they can be applied to Nobles, regardless of who they are attached to. A Troop point that takes a hit is eliminated.
- If any hits remain after all Troops have been eliminated, hits may be applied to Nobles (chosen by the recipient, but the commander last of all).
- When a hit is applied to a Noble, immediately roll a die on the Flight Table. The result may differ depending on who controls London.
- If the result is "Killed", the Noble is eliminated. If the Noble was face up, flip it and place it in its owner's Covert Box instead (after being flipped, if the Noble is neutral, place it in your Covert Box).
- If the result is "Tower of London", place the Noble in the Tower Box.
- For other results, see the Flight Table.
Flight Table
| Roll | Result |
|---|---|
| 1 | Killed |
| 2 | Killed |
| 3 | Move to your Covert Box |
| 4 | Killed* |
| 5 | Move to your Covert Box* |
| 6 | Exiled to friendly Foreign Area* |
* sent to Tower of London instead if your opponent controls London
Battle Example
During the Campaign Phase, the York player moved Richard Neville and Edward Hastings (and their Troops) into the North Midlands from Yorkshire. Since the Lancaster player had Nobles in the region, a York Aggressor marker is placed in the region.
The Lancaster player selects John Talbot as his commander. The York player selects Richard Neville as his commander.
During Intrigue the Lancaster player goes first. Since John Talbot has a rank of 2 stars he could try to bring Edward Hastings (who is a 1 star Noble) to the Lancaster side, but since Edward is a white (York) Noble +1 must be added to the roll John will not be able to roll the required number for a successful Intrigue. [John's 2 stars - 2 (1 star for Edward and +1 for being the enemy color) = 0]
The York player may attempt to Intrigue James Tuchet and rolls a "5", which is unsuccessful. A successful roll of 1 was required. [Richard's 2 stars - James' 1 star = 1]
During the first round of battle, the York player will roll six dice. [There are eight York Nobles and Troops in the area, but Richard's Leadership Rating is 6, so the lower number is used.] Since Richard's Battle Rating is 3 and John only has a Battle Rating of 2, Richard will have a +1 to all of his dice results. His final dice rolls are "2", "4", "6", "7", "6", and "6". Richard scores four hits against the Lancaster forces.
The Lancaster player will then roll five dice. [There are eight Lancaster Nobles and Troops in the area, but John's Leadership Rating is 5, so the lower number is used.] John's Battle Rating is lower than Richard's, he does not get any modifier to his dice rolls. His final dice rolls are "1", "6", "3", "4", and "6". John has scored two hits.
Both sides must apply the hits scored against them, the Lancaster player must apply four hits and removes four Troops. The York player applies two hits and removes two Troop (one from each Noble).
After this round of battle, either side may withdraw (starting with the non-Aggressor). If neither party withdraws, then another round of battle is resolved.
7.6 Withdrawal
After both sides have rolled their attacks, either side may withdraw from the region. At least one round of attacks must be made before either side can withdraw.
- The non-Aggressor player gets first opportunity to announce withdrawal, followed by the Aggressor player.
- Withdrawal is movement from the battle's region to an adjacent region.
- All of the withdrawing side's Nobles and Troops must withdraw together to a single region, declared in advance. Withdrawal to more than one region is prohibited.
- Campaign movement limits apply - i.e. up to two Nobles (and their Troops) may withdraw, but only one Noble across obstructed terrain or sea routes. If there are more Nobles that can withdraw, the owning player selects which Nobles can withdraw. Nobles that are not able to withdraw are forced to roll on the Flight Table and any Troops with them are eliminated. This happens before Step 6 below.
- You cannot withdraw to a region containing enemy Nobles. You may withdraw to an enemy-controlled region (e.g. if a battle cleared out all enemy Nobles).
- After a withdrawal is declared, the side that is not withdrawing conducts one round of attacks against the withdrawing units. After hits are applied, remaining forces withdraw to the declared region.
- Any Nobles that withdraw are disgraced (place a Disgraced marker on the Noble(s) as a reminder).
Withdraw Example
After the first round of combat, the Lancaster player decides to withdraw his forces to the West Midlands. [Since the boundary to the Northwest region is obstructed, only one Noble could withdraw to that region.] The York player will get one more round of battle against the withdrawing Lancaster forces.
The York player still rolls six dice. Richard still gets +1 to his rolls due to his Battle Rating. Richard's final dice rolls are "5", "6", "4", "6", "6", and "2". The York player scores three more hits.
Since the Lancaster player is withdrawing, they do not get to roll in this round of battle. The Lancaster player must take three hits and since there are only two Troops remaining, the other hit must be taken against a Noble. The Lancaster player applies the hit to James Tuchet and rolls on the Flight Table. The roll is "2", so James is killed. His counter is flipped over to the face-down side and is placed in the Lancaster Covert Box.
The Lancaster player may now withdraw his remaining forces to the West Midlands.
After withdrawing, John Talbot is marked with a Disgraced marker.
7.7 End of Battle
Conduct another round of battle starting with Step (7.3) until one side is eliminated or withdraws. However, if the aggressor began this battle round with the 2nd Round Missed marker and he scored no hits this round, the non-aggressor may elect to either:
- continue with another battle round; or
- force his luckless foe to run away as described in step (7.6, Step 3). If the non-aggressor chooses to continue with the battle, the aggressor removes the 2nd Round Missed marker.
8.0 Control
Checking control of regions can be done in any order. All regions may come under control of either Lancaster or York. Gameplay largely revolves around trying to increase the number of regions you control. Control markers are used to indicate which side controls a region (no marker means uncontrolled).
- Remove all Aggressor markers.
- You may attempt to gain control of a region if it is occupied by one or more of your Nobles that is not Disgraced.
- A Noble attempting to gain control of their own home region automatically succeeds.
- Otherwise, roll a die - if the roll is less than or equal to the rank (stars) of the highest ranked Noble in the region, you gain control.
- If the roll fails, the region becomes uncontrolled (if not so already).
- Once a region comes under your control, it remains so until your opponent attempts to gain control of it.
- Only a 3-star Noble can gain control of London. No roll is needed, control is automatic.
- If at any time you do not occupy London with a 3-star Noble, you lose control of it.
- Friendly Foreign Areas are always under the control of the faction they aligned with (as notated by the faction rose).
- Remove all Disgraced markers.
Control Example
Since the York player has Nobles in the North Midlands, they can attempt to gain control of that region. Since Richard is a 2-star Noble, the York player will need to roll a "2" or less. They get lucky and roll a "1" and gain control of the North Midlands.
The Lancaster player has John Talbot in the West Midlands, which is currently uncontrolled. However, since John was Disgraced at the beginning of the Control Phase, he may not attempt to roll for control of the West Midlands.
9.0 Levy
Nobles in regions you control (including Friendly Foreign Areas) may levy new Troops.
- The Initiative player levies first.
- Levy is done by region and is optional.
- The maximum number of Troops that can be levied in a region is the highest single rank (stars) among your Nobles in that region.
- Levied Troops must be attached to the Noble with the fewest Troops (at the moment). Levied Troops should be distributed so that all Nobles in the region have the same number of Troops attached, if possible (player's choice if not).
- A given Noble can have up to 2 Troops per star. If all Nobles have as many Troops as allowed, no more can be levied.
- Troops cannot be levied in London.
- Troops should be stacked under their attached Nobles to clearly indicate who they belong to.
Levy Example
Assuming the York player has the Initiative, they may levy first. Since they control North Midlands they may levy Troops in that region. Richard is the highest ranking Noble and has 2 stars, so they can levy two Troops in that region.
The first Troop will be attached to Edward Hastings, since he only has one Troop (levied Troops must be attached to the Noble with the fewest Troops first.) The remaining Troop will be attached to Richard since he only has three Troops and can have four attached to him.
Once the Lancaster player is done, the York player may levy Troops. Since the West Midlands is uncontrolled, the Lancaster player may not attempt to levy Troops in that region.
10.0 Tower of London
The side that controls London may put Nobles in the Tower of London Box on trial.
- The maximum number of Nobles that may be put on trial is this turn's Initiative number -2 (minus two). The controller of London may put any number of Nobles up to this number on trial, or none at all.
- Friendly, enemy, or neutral Nobles are all eligible for trial.
- A given Noble can be tried only once a turn.
- A trial can be for either a pardon or execution. You may attempt to pardon friendly or neutral Nobles (regardless of who originally controlled them) or execute enemy Nobles.
- To pardon a Noble, roll a die. On 5-6, the Noble is released and moved to your Covert Box. If Henry VI is pardoned, he is moved to the Covert Box in his infirm (face down) state. On a 1-4, no verdict is reached and the Noble remains in the Tower Box.
- To execute a Noble, roll a die and subtract 1. If the roll is equal to or less than the Noble's rank (stars), no verdict is reached and the Noble remains in the Tower Box. If greater, the Noble is executed and immediately eliminated. If the Noble was face up, flip it and place it in its owner's Covert Box (yours if it was a neutral Noble).
- You immediately gain 2 VP for executing an enemy 3-star Noble.
11.0 Placing Nobles
The players follow the sequence below for placing new Nobles on the map.
11.1 Noble Reinforcements
The Initiative player draws four Nobles at random from the draw cup and places them face up to the side of the board. Starting with the non-Initiative player, the players alternate selecting Nobles until all four have been selected. If not enough Nobles remain in the cup, draw as many as possible. Players must use the selection criteria below for each of their selections.
- If available, players must select a friendly Noble and place it on its face-up side in their Covert Box.
- If available, players must select a neutral Noble and place it on its face-up side in their Covert Box.
- If available, players must select an enemy Noble and place it on its face-up side in their opponent's Covert Box, or they may place it back in the draw cup.
11.2 Placing Nobles
Both players may play Nobles to the map from their Covert Box, as follows.
- As with campaigns, the Initiative player plays a Noble first, then players alternate. The Initiative player may play Nobles up to the original Initiative value, and the non-Initiative player one less.
- Only Nobles in your Covert Box may be played to the map.
- A Noble is played to its home region, regardless of the region's control status or current occupants. If the Noble has a crown for its home region, it is played to any region with a friendly Noble, or in a Friendly Foreign Area. When a Noble is played to the map, he is placed with 1 Troop attached to him.
12.0 Victory Points
Victory Points (VPs) are earned each turn as follows.
- Gain VP as indicated in each region you control.
- Lose 1 VP for each of your Nobles in exile (i.e. in a Friendly Foreign Area).
Both players compare their scores and move the VP marker equal to the difference.
13.0 Game End and Victory
- At the end of any turn, if a side's VP is at or above 15, that player wins.
- After 9 turns, the player with the most VPs wins.
- If after 9 turns VPs are tied, the player controlling the most 3-star Nobles in friendly controlled regions wins.
- If the players are still tied, neither player wins (England falls into chaos and becomes a vassal of France).
14.0 Henry VI
Henry VI was the King of England at the start of the Wars of the Roses. Impacted by mental illness for several years, his ability to rule the country was diminished. His incapacitation and his inability to rule created a dispute in the government and the Wars of the Roses began.
Henry VI can be in either a healthy or infirm state. Henry VI is not flipped if he is killed in battle or executed, he is removed from play.
- While Henry VI lives, each turn in this phase the Lancaster player must roll a die. On 3-6, nothing happens, but on 1-2, Henry VI's status changes - flip his counter from healthy to infirm or vice versa.
- If Henry VI is in the Tower of London, his status is automatically set to infirm.
- While Henry VI is infirm, his 3-star rank cannot be used for intrigue, gaining control, levy, or maintaining control of London (as notated by the black stars). While infirm he cannot move but he can retreat.