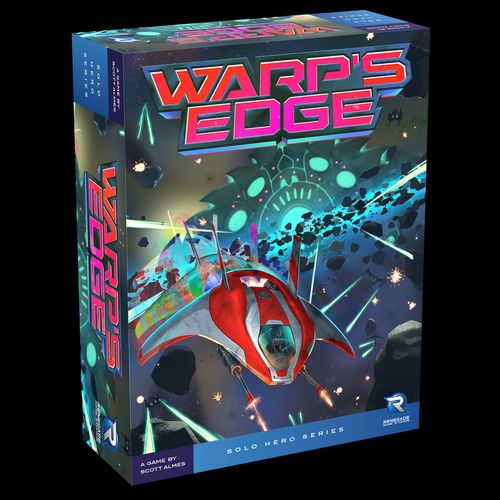
Warp's Edge
Warp's Edge Rulebook
Table of Contents
Table of Contents
Components
- 27 Enemy Cards (double sided)
- 18 Skill Cards (9 Level 1 — yellow, 9 Level 2 — orange, 9 Level 3 — red)
- 2 Starfighter Dashboards (double sided)
- 3 Mothership Dashboards (double sided)
- 109 Pilot Tokens:
- 10 Starting Tokens (white border)
- 99 Standard Tokens (no border)
- 5 Damage Markers
- 1 Hull Marker
- 1 Shield Marker
- 1 Mothership Marker
- 1 Warp Marker
- 2 Token Trays
- 1 Token Bag
- 1 Storybook
- 1 Rulebook
Diagram — Enemy Card
- Name: Indicates the name of this enemy.
- Species: Indicates which alien species this enemy belongs to.
- Level: Indicates how difficult this enemy is to defeat.
- Stats: Indicates the amount of lasers or maneuvers required to destroy or evade this enemy.
- Rewards: Indicates what reward you gain when this enemy is destroyed or evaded.
- Ability: Lists any unique abilities this enemy has.
- Attack Value: Indicates how much damage this enemy deals when it attacks.
Diagram — Skill Card
- Name: Indicates the name of this skill.
- Category: Indicates if this skill is categorized as offensive, defensive, or an upgrade. Some skills have no category.
- Requirement: Indicates the amount of energy, lasers, or maneuvers that must be spent to activate this skill. If this requirement has a red outline, the tokens spent to activate the skill are removed from the game.
- Effect: Lists the effect that occurs when you use this skill. Some skills have ongoing effects while others have one-time effects.
Diagram — Starfighter Dashboard
- Ship Class: Indicates the overall design of the ship.
- Ship Model: Indicates trim and configuration specs.
- Loadout: Indicates the five available power tokens.
- Hull Meter: Tracks the status of your hull.
- Shield Meter: Tracks the status of your shields.
- Hold: Indicates how many tokens can be stored and where to store them.
- Ability: Lists any unique abilities this ship has.
Note: Each starfighter dashboard has two sides, with a different ship class and model on each side. Choose the starfighter that is right for your play style!
Diagram — Mothership Dashboard
- Name: Indicates the name of this mothership.
- Species: Indicates which alien species this mothership belongs to.
- Difficulty: Indicates how difficult this mothership is to defeat.
- Enemy Deck: Indicates the composition of the enemy deck.
- Warp Track: Indicates the current warp and the maximum number of warps.
- Abilities: Lists any unique abilities this mothership has.
- Sections: Represents areas that can attack and be attacked individually.
- Stats: Indicates the amount of energy, lasers, or maneuvers required to defeat this section.
- Rewards: Indicates what reward you gain when this section is defeated.
- Attack Value: Indicates how much damage this section deals when it attacks.
Note: Each mothership dashboard has two sides. Each mothership has unique stats and abilities. Choose one with a difficulty rating that you are comfortable with!
Game Storage
Before your first game, and between games, you will need to sort the various game components and put them where they go within the included storage system.
The game has two removable plastic token trays. The printed overlays on top of these trays indicate which tokens go where and how much they cost during the game.
The standard energy, laser, and maneuver tokens are used in every game. Place all of these tokens in their marked slots in the two token trays, sorted by their values.
Only five types of power tokens are used per game. Before each game, you will need to load the power token tray with the five types of power tokens that correspond to your loadout, which is shown on the dashboard for your chosen starfighter.
Between games, store the starting tokens, as well as all power tokens not currently loaded into the token tray, in the main insert with the rest of the game components.
Game Setup
Important! If you read the included storybook, you will discover an exciting backstory for rookie pilot Taylor Minde. The choices you make as you read through the storybook will affect certain steps of setup. Otherwise, simply follow the instructions below.
-
Starfighter. Choose one of the available starfighters. Place that starfighter dashboard directly in front of you. Return all other starfighter dashboards to the game box.
- Place the hull marker in the top numbered space of the hull meter.
- Place the shield marker in the top numbered space of the shield meter.
-
Skill Cards. Shuffle the deck of skill cards. Place this deck off to one side, face down. Draw two cards from the deck, then choose one to keep.
- Place the chosen card to the left of your dashboard, face up.
- Return the other card to the bottom of the deck, face down.
-
Token Supply. Load the power token tray with the five types of power tokens shown in your loadout, sorted by their letters (P, O, W, E, R). The token trays should now contain 15 power tokens and all of the standard energy, laser, and maneuver tokens. Place these token trays off to one side as the supply.
-
Token Bag. Put the 10 starting tokens, which have white borders, into the bag. Take one of your signature power tokens — the yellow token shown in your loadout — from the supply and put it into the token bag, too.
-
Token Pool. Shake the bag to ensure that the tokens are properly mixed together. Then draw five tokens from the bag at random and put them to the left of your dashboard in your pool.
-
Mothership. Choose one of the available motherships. Place that mothership dashboard directly across from you. Return all other mothership dashboards to the game box.
Creating the Enemy Deck
- Sort the enemy cards into three face-down piles: level 1s (yellow), level 2s (orange), and level 3s (red). Shuffle each pile separately.
- Draw the indicated number of cards from each pile and set them aside face down, then return all of the other cards to the game box.
- Stack the drawn enemy cards face down, with level 3s (red) on the bottom, level 2s (orange) in the middle, and level 1s (yellow) on the top.
Victory and Defeat
Your goal is to defeat the mothership before you run out of time. Out in the cold vacuum of space, there are no scores in battle — only winners and losers. The game will end either in a decisive victory or a resounding defeat.
How to Win: If you defeat all sections of the mothership before the final warp ends, you win! Peace is restored to the Outer Rim.
How to Lose: If the final warp ends -OR- if your hull meter ever reaches zero, you lose! The enemy fleet overruns the Outer Rim.
You must strike a careful balance between speed and caution. You have to work fast, because you only have so many warps to succeed. But don't get too reckless, or your starfighter will be obliterated by the enemy onslaught.
Gameplay Sequence
The game is played in a series of rounds, known as warps. The maximum number of warps that the game could last is determined by the mothership you are going up against.
Each warp is divided into turns. The number of turns in each warp is determined by how quickly the bag is emptied; because you add more tokens to the bag during the game, each successive warp will usually have more turns than the previous.
Each turn is divided into four steps that occur in order:
- Enemy Arrivals – Add new enemies to the row.
- Pilot Actions – Use the tokens in your pool to take actions.
- Enemy Attacks – Resolve attacks from all enemies in the row.
- Pilot Plans – Draw five new tokens from the bag.
The end of the warp occurs when, during the final step of the turn, the bag is empty and you still need to draw more tokens.
Important! You are not allowed to look into the bag to see exactly which tokens are left in the bag. However, you are allowed to feel around in the bag with your hand to count how many tokens are left in the bag.
Step 1: Enemy Arrivals
In this step, you add new enemies to the row, refilling any empty slots so that there are four cards in the row once again.
For each empty slot, draw the top card of the enemy deck and place it face up in that slot. If there are multiple empty slots, refill them one at a time, from left to right. If there are no empty slots, skip this step instead.
If there are not enough cards left in the enemy deck to refill all empty slots, refill as many as possible, but do not slide the cards together to fill any gaps.
Step 2: Pilot Actions
In this step, you use the tokens in your pool to take actions. You may take each unique action as many times as you wish; you are only limited by the tokens available to you.
You may move tokens from your pool to your hold, and from your hold to your pool, at any time during this step. However, you may never store more tokens in your hold than its maximum capacity.
At the end of this step, discard any tokens remaining in your pool.
Action: Fire Lasers
Assign one laser token (value 1, 2, or 3) to an enemy. Place the laser token in the space below the enemy. The enemy is now stunned and will not attack this turn. Count the total value from laser tokens assigned to the enemy; if the total now meets or exceeds the enemy's hull stat, the enemy is destroyed!
When you destroy an enemy, gain the destroy reward, in the form of tokens or one-time effects. Any tokens gained this way come from the supply (if available) and go directly into the bag. Then discard all tokens from the enemy and place the enemy card in the discard pile.
For a full list of rewards and their effects, see the Rewards section.
Action: Perform Maneuvers
Assign one maneuver token (value 1) to an enemy. Place the maneuver token in the space below the enemy. The enemy is now stunned and will not attack this turn. Count the total value from maneuver tokens assigned to the enemy; if the total now meets or exceeds the enemy's speed stat, the enemy is evaded!
When you evade an enemy, gain the evade reward, in the form of tokens or one-time effects. Any tokens gained this way come from the supply (if available) and go directly into the bag. Then discard all tokens from the enemy and place the enemy card in the discard pile.
Action: Repair Shields
Discard one energy token (value 1, 2, or 3). The value of the token determines how much your shields are repaired. Increase your shield meter by a number of spaces equal to twice the value of the token. Your shield meter can never go above its maximum level.
Action: Buy Tokens
Discard one or more energy tokens. Gain one or more new tokens from the supply with a total cost equal to or less than the total value of the energy tokens you just discarded. Put the new tokens from the supply directly into the bag.
If the total value of the energy tokens you discarded is more than the total cost of the tokens you buy, the remainder is forfeited; you do not get "change."
Action: Use a Power Token
Use one power token for its unique effect. In every game, there are five types of power tokens available, based on your loadout. Most power tokens are assigned to enemies when used, while others are simply discarded.
Many power tokens count as lasers or maneuvers, which means they will stun the enemy and count toward the total value needed to destroy or evade the enemy.
For a full list of power tokens and their effects, see the Power Tokens section.
Action: Activate a Skill
Assign one or more tokens to a skill card. Each skill requires a certain amount of energy, lasers, or maneuvers to activate. You must assign enough tokens to meet or exceed its requirements in a single turn. Place the tokens on that skill card; it is now activated!
You may use activated skill cards at any time during this step — either on the same turn you activate them or any future turn. When you use a skill card, discard the tokens from the skill card, apply the text effect, and then exhaust the skill card by rotating it sideways. Each skill card can only be activated and used once per warp.
Ongoing: Some skill cards have ongoing effects. When you use a skill card with an ongoing effect, instead of discarding the tokens from the skill card, remove them from the game. Skill cards with ongoing effects only need to be activated and used once; they are not exhausted and their effects apply for the rest of the game.
Step 3: Enemy Attacks
In this step, you resolve attacks from all enemies in the row. Resolve these attacks one at a time, from left to right. To resolve each attack, follow these steps:
- Check to see if the enemy has any tokens in the space below it. If so, the enemy is stunned! Ignore the enemy's attack value and abilities completely.
- If the enemy is not stunned, you receive an amount of damage equal to the enemy's attack value. Reduce your shield meter by one for each damage. Once your shield meter is at zero, reduce your hull meter by one for each remaining damage.
- For each damage dealt to your shields (but not your hull), choose one token from your discard and remove it from the game. If you do not have enough tokens in your discard to do this fully, remove as many tokens as possible.
- Move any tokens from the space below the enemy to the space above it. Those tokens still count as assigned to that enemy, but the enemy is no longer stunned by them.
Some motherships can attack every turn, while others can only attack under certain conditions (see dashboard for details). If the mothership can attack, resolve a separate attack from each section of the mothership, after all attacks from enemies have been resolved.
Example: You assigned tokens to three of the enemies in the row. These three enemies are stunned and cannot attack you this turn. However, you did not assign any tokens to the fourth enemy, so it deals two damage. Move the shield marker down two spaces on the shield meter, then choose two tokens from your discard and remove them from the game.
Step 4: Pilot Plans
In this step, you draw five new tokens from the bag.
First, shake the bag to ensure that the tokens are properly mixed together. Then, draw five tokens from the bag at random and put them in your pool. These tokens, as well as any tokens stored in your hold, will be available for you to use during the next turn.
If the bag is empty during this step and you still need to draw more tokens, the end of the warp occurs. Otherwise, the next turn begins; return to Step 1.
End of the Warp
When the end of the warp occurs, follow these steps:
- Pilot Tokens – Retrieve all tokens in play and put them back into the bag. This includes tokens in your pool and discard as well as tokens that are currently assigned to enemies, mothership sections, and skills. However, any tokens in your hold remain there.
- Enemy Cards – Retrieve all cards from the row and discard pile. Shuffle these cards together, then place them on top of the remaining cards in the enemy deck, face down.
- Skill Cards – Refresh all of your exhausted skill cards by rotating them upright. Draw two new skill cards from the deck, then choose one to keep. Return the other card to the bottom of the deck, face down.
- Warp Marker – Advance the warp marker by one space on the warp track.
After carrying out the steps above, shake the bag to ensure that the tokens are properly mixed together. Then draw five tokens from the bag at random and put them in your pool.
You are now ready for the first turn of the next warp!
End of the Game
The game ends immediately when a win condition or loss condition has occurred. Do not finish the turn or even the current step of the turn.
Glossary
Adjacent – Enemies next to each other in the enemy row, with no empty slot between them, are adjacent. Sections next to each other on the mothership are adjacent. The enemy row and mothership are not adjacent to each other.
Attack – You attack targets by using lasers or maneuvers against them. Targets attack you by dealing damage to you. Some game effects prevent attacks in certain situations.
Buy – When you buy a token, you must pay its cost by spending energy. Tokens that you buy come from the supply and go into the bag when you buy them.
Defeat – This is an umbrella term that applies to all methods of defeating targets in combat, whether with energy, lasers, or maneuvers.
Destroy – This is the specific term for defeating a target with lasers. When you destroy a target, you gain the destroy reward, if there is one.
Discard – This is the area to the right of your dashboard, where you place tokens when they are discarded. At the end of each turn, all unused tokens in your pool are moved to the discard. Discarded tokens are put back into the bag at the end of each warp.
Enemy – This is the specific term for enemy cards in the alien fleet. When a game effect refers to enemies, it does not apply to the mothership.
Evade – This is the specific term for defeating a target with maneuvers. When you evade a target, you gain the evade reward, if there is one.
Gain – When you gain a token, due to a game effect, there is no cost whatsoever. Tokens that you gain come from the supply and go into the bag when you gain them.
Mothership – This is the specific term for the mothership of the alien fleet. When a game effect refers to the mothership, it does not apply to enemy cards.
Pool – This is the area to the left of your dashboard, where you place tokens when they are drawn. The tokens in your pool are available for you to use. Unused tokens in your pool are moved to the discard at the end of each turn.
Remove – Tokens that get removed by game effects are returned to the game box. Removed tokens are out of play for the remainder of the game.
Stun – You stun targets by attacking them (or via certain game effects). Stunned targets cannot attack you for one turn. Some game effects prevent stuns in certain situations.
Supply – This is the limited supply of tokens for any given game, loaded into the token trays. The tokens in the supply are available for you to buy or gain. If a particular type of token runs out, it is no longer available.
Target – This is an umbrella term that applies both to enemy cards and to the individual sections of the mothership. When a game effect refers to targets, it applies equally to all viable targets of the alien fleet.
Rewards
- Laser: Gain one laser token of this value from the supply.
- Energy: Gain one energy token of this value from the supply.
- Maneuver: Gain one maneuver token from the supply.
- Shields: Increase your shields by this number.
- Power Token (specific): Gain one power token that matches this letter from the supply.
- Power Token (any): Gain one power token of any type from the supply.
- Draw: Draw three tokens from the bag and add them to your pool.
- Any Token: Gain any one token from the supply.
- Recover: Choose two tokens from the discard and put them back into the bag.
- Skill: Gain one skill card from the deck.
Motherships
The Dread (Species: Viren)
The Dread is protected, so you must defeat all enemies before it can be attacked. Stun resistance means that it cannot be stunned by lasers, and its attacks get progressively stronger as you get closer to defeating it.
- Dreaded Strength: Once one section has been defeated, attacks from the remaining sections each deal one extra damage. Once two sections have been defeated, attacks from the remaining section deal two extra damage instead.
- Stun Resistance: This mothership cannot be stunned by lasers, but can still be stunned by maneuvers.
- Protected: This mothership cannot attack or be attacked until all enemies from the deck and row have been defeated during the current warp.
The Hydra (Species: Talos)
The Hydra has three sections that must all be handled differently: one defeated with energy, one evaded with maneuvers, and one destroyed with lasers. While its attacks aren't strong, its special abilities make your job more difficult.
- Ancient Power: Some sections of this mothership have special powers instead of attacks. Just like normal attacks, these special powers are active every turn unless the corresponding section has been stunned.
- Energy Weakness: This mothership has one section that can only be defeated by energy. This section cannot be stunned by energy, but can still be stunned by lasers and maneuvers.
- Unprotected: This mothership can attack and be attacked every turn.
- Repairing shields only increases your shield meter by one per energy (instead of two).
- Level 1 enemies require one extra laser to destroy or one extra maneuver to evade.
The Duo (Species: Gaard)
The Duo functions as two separate motherships, each with its own enemy deck and special powers. Both motherships are protected, so you must defeat all enemies from one deck before you can attack that mothership individually.
- Dual Leadership: This mothership functions as two separate motherships. During setup, create two enemy decks. Draw two cards from the left deck and two cards from the right deck to form the row. When adding new enemies, refill each empty slot with a card from the matching deck.
- Activation Cycle: During setup, place the mothership marker on space 1 of the wheel. On every turn, the space with the mothership marker is active. At the end of every turn, move the mothership marker to the next space clockwise.
- Stun Resistance: When space 2 is active, targets cannot be stunned by lasers. When space 4 is active, targets cannot be stunned by maneuvers. Once a mothership has been defeated, the effect of the matching space is ignored.
- Protected: Each mothership cannot attack or be attacked until all enemies from the matching deck and half of the row have been defeated during the current warp.
- The mothership on the right matches wheel space 2. The mothership on the left matches wheel space 4.
The Array (Species: Gaard)
The Array has five sections to defeat. Only one section is active each turn, which means you'll need to act quickly to target its weak spots. It is unprotected, so it can be attacked right away, but only the active section can be targeted.
- Unprotected: This mothership can attack and be attacked every turn. However, only the section that is active for the turn can attack and be attacked.
- Activation Cycle: During setup, place the mothership marker on the leftmost section. On every turn, the space with the mothership marker is active. At the end of every turn, move the mothership marker to the right until it reaches the next remaining section, looping back to the leftmost section and starting the cycle over again if necessary.
The Revenant (Species: Talos)
The Revenant has two modes. In spectral form, it is hard-hitting and protected. With only three warps to defeat it, you will need to make quick work of the enemy deck. Then it morphs into its true form, and you will have only one warp to take it down.
- Spectral Form: During setup, place the dashboard with this side up. Once all three sections have been defeated, the current warp ends immediately and the dashboard is flipped to the other side.
- Protected: While this side is up, this mothership cannot attack or be attacked until all enemies from the deck and row have been defeated during the current warp.
Power Tokens
- Photon Blast: Place this token between two adjacent targets. It counts as two lasers against both targets. When one of those targets is defeated, this token stays with the other target.
- Propulsion Cannon: Choose one target, then flip this token. If it lands face up, this token counts as five lasers. If it lands face down, this token stuns the target and is discarded at the end of the turn.
- Overdrive: Place this token between two adjacent targets. It counts as one maneuver against both targets. When one of those targets is defeated, this token stays with the other target.
- Outmaneuver: Choose one target, then flip this token. If it lands face up, this token counts as three maneuvers. If it lands face down, this token stuns the target and is discarded at the end of the turn.
- Warp Ahead: Draw three tokens from the bag and add them to your pool.
- Whirlwind: This token counts as two maneuvers when assigned to a level 2 or level 3 enemy or one maneuver when assigned to any other target.
- Electro-Bot: This token counts as one laser. When the assigned target is defeated, this token moves to another target of your choice without stunning it.
- Entrap: Add one enemy to the row. Gain one value 2 laser from the supply and assign it to that enemy.
- Randomizer: Choose energy, laser, or maneuver. Draw one token from the bag and add it to your pool. If it is the type you chose, gain one power token from the supply and add it to your pool.
- Retrofit: Activate one skill card. You must use that skill card this turn.