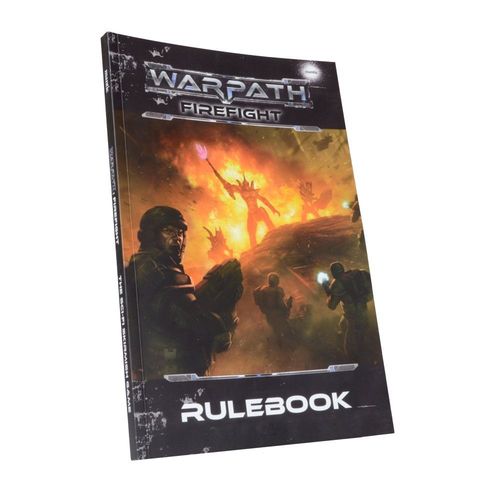
Warpath Firefight
Warpath Firefight Rulebook
Table of Contents
Table of Contents
- What You Need To Play
- Models and Units
- The Rules
- Command Points
- Orders
- Line of Sight
- Partially Blocked LOS
- Terrain Height and Line of Sight
- Types of Terrain
- The Turn
- Movement
- Ranged Attacks
- Assault
- Failed Assaults
- Resolving Assaults
- Pinning
- Nerve
- Psychic Abilities
- Reserves
- Buildings
- Large Buildings
- Vehicles
- Drones
- Keywords
- Missions
- Warpath Universe
What You Need To Play
Forces
Each player will need suitable Mantic models to assemble their Strike Force. Each Strike Force could range from a handful of units to whole armies of troops with walker and flier support - there really is no limit!
Command Dice
To play Firefight you will need a set of Command Dice. These 6 sided Command Dice are coloured black, orange or green which represent the capability of progressively more powerful commanders or units. Each die face will be either blank or has a number of energy swords on them. The number of energy swords rolled is the number of Command Points scored for that die.
Dice
Firefight uses 8 sided dice (abbreviated to D8s) for all other rolls in the game. Once rolled, the result is the number showing on the top face – just like on a standard six-sided die.
For most rolls in the game, you roll the required number of D8s and then compare the scores to the appropriate model or weapon's statistic (stat). For example a value of 4+ for a model's Shoot stat means scores of 4 or more are successes. Thus, all dice that equal or exceed the stat number are successes, and all that are less than the target number are failures. If a model has a stat of "–" then no dice are rolled and therefore no successes can be achieved.
For example, Ian rolls 3 D8s to shoot using his unit's Shoot stat of 4+. He rolls a 3, 4 and 7 scoring two successes.
Sometimes a D4 or D2 is required. In such cases, simply roll a D8 and determine the result using the table below.
| D8 roll | D4 result | D2 result |
|---|---|---|
| 1-2 | 1 | 1 |
| 3-4 | 2 | 1 |
| 5-6 | 3 | 2 |
| 7-8 | 4 | 2 |
Modifiers
Some dice rolls are modified by adding or subtracting from the number rolled, making a success more or less difficult to achieve. In all cases a natural roll (regardless of modifiers) of 1 is always a failure and a natural roll of 8 is always a success.
Modifiers are cumulative, so two modifiers that are both -1, result in a total modifier of -2 to the score on the dice for example.
Returning to our previous example, if Ian's rolls suffered a -1 modifier, his roll would have scored 2, 3 and 6, resulting in only one success. If the modifier was +1 his results would have been 4, 5 and 8 and all three would have matched the 4 or more he required, and so would all be successes.
Exceptional Rolls
Occasionally, you may need to roll more than 8 to achieve a success, e.g. 9+. If this occurs you will only roll half the number of dice, rounding down with rolls of 8 counting as a success.
Re-rolls
Some Keywords and orders will allow you to re-roll dice to improve your chances of a success, or force your opponent to re-roll successful dice rolls. In all cases such modifiers are cumulative, so Weight of Fire (2) and Weight of Fire (1) from different sources would become Weight of Fire (3) – allowing three dice to be re-rolled. However, in all cases, you may only ever re-roll each die once – you cannot re-roll a re-roll, even if the source of the re-roll is different.
If both players have rules allowing them to make re-rolls to the same roll, the players whose Turn it is, makes their re-rolls first.
Game Sizes
Firefight is suggested to be played on a 48" x 48" table space with 500-1250 points per player, or a 72" x 48" table for larger games of 1500 points or more per player.
Measuring
A tape measure marked in inches is required to play Firefight in order to determine how far units move or shoot etc.
Measurement between models, and range to targets is always taken from the base edge of the unit Leader (in the shooting or moving unit) to the base edge of a model in the target unit (thus between the two closest points of the models). In the case of models without bases, such as Vehicles, all measurements are taken from the edge of the main body or hull of the model itself, excluding guns etc., and must be taken from the Vehicle's position at the start of the activation, i.e. you may not rotate a model before measuring.
You can measure to check distances or range at any time.
Diagram caption: Measuring distance from the Leader model in a unit.
Tokens, Counters and Markers
There are a number of tokens, counters and markers used in games of Firefight, for tracking things like unit status and damage. What these look like and when to use them are described within the rules.
Models and Units
All models used in Firefight will be either individual models or part of a unit, typically of five or more models.
For simplicity, the term Unit is used for both formations of several models, or just a single model, such as a Commander or Vehicle.
Leader Models
Every unit should have a Leader model, which is important for determining many rules in the game. A Leader should be suitably modelled to look the part as well as being clear to both players. Some Leaders may have additional special rules or equipment and the Leader is always the last model removed from a unit when it takes casualties.
Unit Profiles
All units in Firefight have a profile of statistics or 'stats' which show how effective they are at moving, shooting, assaulting and surviving in a combat zone. In addition, the size of the models in a unit, its Keywords and weaponry are included in the profile.
Some models may be so poor at doing something they will be effectively unable to do it at all! Such units will have a stat value of "–" where appropriate.
An example of a unit profile is shown below.
STEEL WARRIORS (example profile, numbered call-outs as printed)
| 2 Type | 3 SP | 4 SH | 5 AS | 6 AR | 7 HP | 8 NE | 9 HE | 10 Base | 11 US | 12 Pts |
|---|---|---|---|---|---|---|---|---|---|---|
| Troop | 6/12 | 4+ | 5+ | 6+ | 1 | 4+ | 2 | 25mm | 1 | 100 |
13 Keywords: Headstrong, Suppressive Fire
14 Weapon Stats
| Unit | Weapon | Range | Dice | AP | Keywords |
|---|---|---|---|---|---|
| 1 x Steel Warrior Leader | Hailstorm Pistol | R12 | 1D | AP1 | - |
| Forge Hammer | Assault | 2D | AP1 | - | |
| 4 x Steel Warriors | Mk2 Hailstorm Rifle | R18 | 1D | AP1 | Blaze Away |
| Assault Weaponry | Assault | 1D | - | - |
Options
- Add 0-5 additional Steel Warriors for +18pts each.
- 0-2 Steel Warriors may each replace their weapons with one of the following:
| Option | Weapon | Range | Dice | AP | Keywords |
|---|---|---|---|---|---|
| Dragon Breath Flamer +10pts | Dragonbreath Flamer | R12 | 2D | - | It Burns! |
| Assault Weaponry | Assault | 1D | - | - | |
| Hailstorm Autocannon +15pts | Hailstorm Autocannon | R18 | 2D | AP1 | Pinning |
| Assault Weaponry | Assault | 1D | - | - |
- The Leader may replace its weapons with the following for free:
| Weapon | Range | Dice | AP | Keywords |
|---|---|---|---|---|
| Mk2 Hailstorm Rifle | R18 | 1D | AP1 | Blaze Away |
| Assault Weaponry | Assault | 1D | - | - |
A unit profile details the following information:
- Unit Name: Each unit is identified by its title.
- Type: The type of unit is used for building your Strike Force and is important for some Missions.
- Speed (SP): How fast a unit can move in inches. The number before the / indicates how far the unit can move as part of an Advance action and the number after the / is for a Sprint action.
- Shoot (SH): The ability of a model to fire ranged weapons accurately. A unit with a stat of "–" cannot Shoot or Blaze Away.
- Assault (AS): The skill or strength of a model in hand-to-hand combat. If a unit has a stat of "–" it cannot initiate an Assault and will roll no dice if assaulted.
- Armour (AR): The armour, or resilience of a model against taking damage.
- Health Points (HP): The amount of damage (or wounds) a model can take before it is removed from the game.
- Nerve (NE): The psychological willingness of a unit to stay in the fight.
- Height (HE): The unit's Height value. This value is used primarily to determine Line of Sight.
- Base: The size of base the models in the unit have (if at all).
- Unit Strength (US): The strength of will a unit has to control an objective in certain Missions.
Bases
A model's base is used for measuring throughout Firefight. All models should be attached to round bases of 25mm, 40mm, 60mm or even larger as shown on the unit stats. Some models, such as Vehicles may not have a base.
Base Contact
A model is in base contact with something if its base is physically touching it (such as another model's base, Obstacle, Objective etc.). For models that do not have a base, use the main body or hull of the model as the "base" to determine base contact (so ignoring things like guns or antenna sticking out from the model). When two models with bases are touching, they are in base-to-base contact.
The Rules
In a game of Firefight you and your opponent each take control of a Strike Force of soldiers to play an exciting battle game. Once the battlefield has been set up with terrain and any Objectives, your chosen Mission will tell you how to deploy your units and how to achieve victory!
Friendly Units
If a rule refers to friendly models, this means all units in your Strike Force.
Enemy Units
If a rule refers to enemy models, this means all units in your opponent's Strike Force.
Neutral Units
If a Mission requires the use of third party models, such as civilians, these are considered neutral and are classed as enemy models for both players.
In Play
All units and models are In Play if they are currently placed on the gaming table, including Flying units and also includes units within transports (even if the actual models are currently placed to one side until they emerge from their Vehicle). Units and models that are currently in reserve (awaiting deployment), or have been destroyed, are not In Play.
Rounds and Turns
A game of Firefight is played over a series of Rounds. Within each Round each player will alternate taking Turns to activate their units, one at a time, until both players have completed activating all the units in their Strike Forces. The Mission being played will determine the number of Rounds in a game.
Game Sequence
- Set Up
- Deployment
- Rounds a. Generate the Command Pool b. Take alternating Turns activating units c. End Phase
- Determine the Winner!
Who Goes First?
A Recon Roll (see page 50) will determine which player has the Initiative and takes the first Turn in the first Round.
In subsequent Rounds the player who finished activating their models first in the previous Round will have the Initiative.
A Round will always begin with each player rolling their Command Dice to generate a pool of Command Points.
Taking Turns
Players then take alternating Turns to activate a single unit starting with the player with the Initiative. During each of these Turns a player gets to do something (act) with one of their units. Each unit in a player's Strike Force only gets to act once in each Round and players must activate a unit if able during a Round. Once a unit has finished acting, the unit is marked as Activated.
Once a player has finished activating all their units and declares they are finished, the player with units yet to activate continues playing Turns until all their units are also activated. All units must be activated in a Round.
Players may not choose to pass a Turn and must activate all their units, even those in transports, or those off-table or In Reserve.
End Phase
The Round concludes with the End Phase. The player who finished activating first will have the Initiative for the next Round and completes steps 1 to 3 below. Their opponent then does the same.
- Remove Pin Markers from friendly units by spending Command Points. Each Command Point spent removes one Pin Marker.
- Perform a Nerve test for each Broken unit.
- Remove all Activation Markers and any other tokens that only last for the Round.
- Count Victory Points (depending on mission) and determine if the victory conditions have been met. If not, continue play for another Round.
Command Points
A good commander is able to bring the best out in their soldiers with expert leadership and tactical acumen. To simulate this we use Command Points to represent your ability to get the most from your Strike Force.
Generating the Command Pool
At the start of each Round both players create their Command Dice Pool by taking three BLACK Command Dice. Additional dice of the appropriate colour (BLACK, ORANGE or GREEN as shown on a unit's profile) are added to the roll for any of their units In Play with the Tactician Keyword.
Note that the Tactician Keyword may be on some units that are not Command units, and these units will contribute their Command Dice as normal but may not themselves issue orders (see below) or contribute dice to the Recon Roll. A player's Command Dice may be reduced as the game goes on if they are careless with their Commanders!
Each player rolls all of their Command Dice and adds up the Command Points. This is the total number of Command Points you have available for the Round about to be played. You may re-roll one Command Die for each Command unit you have In Play.
During a Round, Command Points are spent in a number of ways to increase the utility of a Strike Force. Players should either spend all their available Command Points for the Round or lose them. They cannot be saved for future Rounds.
Standard Uses of Command Points
The following options are available to both players during a Round by spending Command Points from their pool. These are not Orders (see opposite) and do not require a Command unit to use them.
| Command Point Cost | Use | When | Effect |
|---|---|---|---|
| 1 | Extra Activation | After activating a unit and completing its actions | Activate another unit before returning to the normal activation sequence. A player may only interrupt the normal Turn sequence like this once before their opponent must take another Turn. |
| 1 | Unpin | End Phase | Remove a Pin Marker from a unit. |
Orders
Orders are special commands that are paid for using Command Points. The number in brackets after the Order name is the cost in Command Points to use that Order.
A unit may only benefit from a single Order per Activation, including Orders with a persistent effect, such as some Command Orders. If a unit could be affected from multiple Orders, it must choose which to benefit from before any actions are made or dice are rolled.
All Orders must be declared before any relevant dice are rolled.
A player may only use the Faction and Command Orders available to their Force and units during one of their Turns. A Command order can also only be used when the unit that has it is Activating.
Faction Orders
Faction Orders are available to the Strike Force as a whole and represent the capabilities of that faction or species, rather than those of an individual commander or officer.
Faction Orders may be given to units that are In Play at the start of the activation and not Pinned. Faction Orders can only be used if the unit is within 12" of a friendly Command model, unless stated otherwise.
To use a Faction Order on a unit, spend the appropriate Command Point(s) for the Order at the point the Order would be applied. Any actions included in the Order description count as actions taken by the unit this activation.
Faction Orders will be described in detail within each army list.
Unless specified otherwise, a Faction Order given to a unit only lasts for that unit's current activation. Thus any special rules or bonuses an Order may grant, are temporary.
Some faction orders can be Boosted by spending additional Command Points to make them even stronger.
For example, one of the Forge Father Faction Orders is:
For the Forge Star (1): The unit gains the Weight of Fire (2) and Marksman Keywords.
To use the "For the Forge Star" Order, your unit must not be pinned, must be within 12" of a Command unit and must pay a cost of 1 Command Point. The unit the Order was played on would then have the Weight of Fire (2) and Marksman Keywords until the end of its activation.
Command Orders
Command models in Firefight have their own unique special rules to represent their impressive tactical decision-making on the battlefield. Like all Orders these Command Orders also require Command Points to use them.
A single Command Order may be used during a Command unit's activation, if it is not Pinned. The Order may be used before or after, but not during, an action. Command Orders will have either Aura or Instant effects.
- Auras last until the end of the Round. Aura effects will provide the stated benefit to all friendly units with at least one model within X inches of the Command unit's Leader.
- Instant effects are resolved immediately when the Command Points are spent and have no ongoing effect.
For example, a Steel Warrior Huscarl has the following Command Order:
Precision Optics [Aura] (2): All friendly units within 9" gain Marksman and Weight of Fire (1).
To use this Command Order the Command unit must not be Pinned and pays the cost of 2 Command Points. As an Aura, the effect lasts until the end of the Round and means all friendly units, while within 9" of the Huscarl, have the Marksman and Weight of Fire (1) Keywords.
Line of Sight
Line of Sight (LOS) is determined by using a bird's eye view, looking down on the models. Models have a 360 degree arc of sight – so they can see all around them.
To determine if a unit has LOS to a target, draw a straight, imaginary line from any part of the Leader model's base to the base of any model in the target unit. Models (and gaps between them) from the Leader's own unit, and any model with the Fly Keyword, do not block LOS. Any models, or gaps between models, in other units will block LOS up to that unit's height.
For models without a base such as Vehicles, simply measure from the edge of the main body or hull. Due to model positioning, it may appear that some other models in the unit cannot see a target, but we allow them to Shoot as, in effect, the models would be moving around within their area to take shots and then get back into cover.
- If the imaginary line passes over no other unit or terrain feature to the bases of 50% or more of the models in the target unit, then LOS is Clear.
- If either the unit drawing LOS, or the target unit, has a Height at three levels or greater than any other unit or terrain the line crosses, LOS is Clear.
- LOS is Blocked if there is more than 3" of Difficult Terrain of equal or greater height of both units, between the units (even if they are both within the terrain itself).
- If any other units or terrain types in the way are the same Height or greater than both the unit drawing LOS and the target unit, then LOS is Blocked.
Example: Both units are Height 2. The blue Leader can draw an unobstructed line to all the bases of the red unit's models. LOS to the red unit is clear. (Diagram shows a Wood of Height 5 and a Building of Height 4 nearby.)
Example: Both units are Height 2. The blue unit is on a Hill of Height 3, for a combined Height of 5. The blue Leader can draw an unobstructed line to all the bases of the unit's models because it is at least 3 levels taller than the intervening Rocks. LOS to the red unit is clear.
Example: Both units are Height 2. The blue Leader cannot draw an unobstructed line to any of the bases of the red unit's models as the Height 4 Building is blocking them. LOS to the red unit is Blocked.
50% of Single Models
When a rule calls for 50% of a unit (or more) to trigger a condition this means that:
- For single model units on 60mm bases (or larger!), determine 50% of the model using the centre of the base.
- For smaller based models, consider the whole base (i.e. the whole base or not at all).
- For models with no base such as a Vehicle, use the centre of the model as the reference point.
Partially Blocked LOS
On a battlefield there are many obstacles and detritus that may provide cover for the enemy.
LOS from a Leader model to the enemy unit is considered Partially Blocked if:
- More than 50% (but not all) of the enemy unit's models' bases are in a position that would be considered Blocked. At least some models can be seen.
- More than 50% of the enemy unit's models' bases are in a position behind terrain, such as an Obstacle, or another unit, but the models have a greater height than the intervening feature.
- The enemy unit's Leader and at least 50% of its models are within an area of Difficult Terrain that is of a lower Height than it is (regardless of how deep into the terrain they are).
- The enemy unit's Leader and at least 50% of its models are 3" or less within the boundary of Difficult Terrain of equal or greater height.
An enemy unit can be seen so long as LOS is either Clear or Partially Blocked. When LOS is Partially Blocked, the enemy unit is often said to be In Cover.
Note that Height 0 features (such as a flat pond) never Block, or Partially Block LOS drawn over them and do not provide cover for being within the feature.
Example: Both units are Height 2. More than 50% of the red unit's models are behind the Height 1 Wall. LOS is Partially Blocked.
Example: Both units are Height 2. The red unit is within Height 1 Difficult Terrain. LOS is Partially Blocked.
Example: Both units are Height 2. More than 50% of the red unit's models are behind the Height 4 Building. LOS is Partially Blocked.
Example: Both units are Height 2. The blue unit is drawing LOS through the Height 5 Difficult Terrain (Wood) to the red unit. As the red unit is less than 3" from the edge of the Wood closest to the blue unit, LOS is Partially Blocked. If all the models in the red unit were more than 3" into the Wood, LOS would be Blocked.
Terrain Height and Line of Sight
As we've seen, terrain can block LOS to any units behind it in the same way as a unit. For example, a Height 3 or higher building will block LOS between two units of Height 3 or less. Some terrain pieces such as rivers will be flat (Height 0) and so never block LOS.
The Height of all terrain should be agreed by both players before the game starts, as well as the level of cover it provides (see later). As a rough guide, a piece of terrain is one level of height for each 1" of physical height. For models and units, their height is listed in their unit description.
Some suggested Terrain Heights are as follows:
| Terrain Piece | Example Height |
|---|---|
| River, Pond | 0 |
| Obstacle | 1 |
| Hill | 3 |
| Building | 4 (per building level) |
| Woods | 5 |
If a model is standing on (not in) terrain, then add the height of the terrain to the height of the model when determining LOS.
Example: a unit of Height 2 will determine LOS using a Height of 5 when standing on a Height 3 Hill. A unit of Height 2 on the ground floor of a building would determine LOS at Height 2, but if it was on the next floor up it would determine LOS at Height 6, adding the Height of the floor it was standing on.
Obstacles
A unit with models in direct contact with, and tracing LOS over, an Obstacle of lower height than itself, can ignore that Obstacle for determining LOS.
Example: The Height 2 red unit is in direct contact with the lower, Height 1 Wall Obstacle. The red unit will ignore it when drawing LOS across it to the blue unit. The blue unit, however, will have LOS that is Partially Blocked to the red unit because of the Wall.
Types of Terrain
The battlefields of the future are littered with opportunities to use terrain to stay alive.
Open Terrain
The normal battlefield may have small undulations or debris across it but it does not impact on a model's movement or provide cover. Unless specified otherwise, all battlefield areas are Open Terrain by default.
Blocking Terrain
Some parts of the battlefield may be just so difficult to manoeuvre over that they are effectively impassable, such as huge rocks. We call this Blocking Terrain and no unit of any size may ever move through or stop on such terrain.
- Units cannot move across Blocking Terrain and must go around it.
- Blocking Terrain may impact LOS depending on its Height.
Difficult Terrain
Difficult Terrain consists of woods, rocks and waterways, as well as industrial debris or features, such as a pipe network or ruins. It is defined by a base or an area marked out. The exact placement of the features in the area of Difficult Terrain is not important.
Units may not Sprint through Difficult Terrain unless it is to make contact with an enemy unit to initiate an Assault as part of a Charge (which will then be Hindered – see page 26).
A unit with its Leader within Difficult Terrain will ignore the terrain when determining LOS to units outside of the terrain if the Leader is within 3" of the edge of the terrain to the target. Otherwise, Difficult Terrain affects LOS as noted on page 14. A unit within Difficult Terrain that is of equal or greater height than it is always In Cover.
A unit must have at least 50% of its models within the Difficult Terrain in order be considered as In Cover. This will normally be clear due to the Leader and model placement rules (the unit's models will either all be in or out the terrain).
Photo caption: Veer-myn scurry through the woods to intercept a unit of Marauders.
Obstacles
Obstacles are long and narrow linear pieces of terrain such as a line of sandbags, a barricade, fence or a low wall. Obstacles should in general be no more than 1" in height – roughly waist or chest-high to a human-sized model. Any higher and they should be considered Blocking Terrain instead.
- Units can move over Obstacles normally as part of an Advance action, even ending either side of them.
- Units may not Sprint over Obstacles unless it is to make contact with an enemy unit to initiate an Assault. This Charge will then be Hindered – see page 26.
- Obstacles are Height 1 and never block LOS, but may provide Cover.
Hills
Hills are elevated pieces of terrain that provide advantageous positions for units to see down on their enemies. They do not affect a unit's movement. It is suggested that players avoid placing Hills in deployment areas during Mission Set-Up.
- A unit's Leader model must be positioned with all of its base on the Hill for the unit to count as being on the Hill.
- If a unit's Leader model is on a Hill then the unit ignores the Hill when it is checking LOS. Otherwise, the Height of the Hill will impact LOS as normal.
Specialised Units and Terrain
Units may not perform a Sprint action through Difficult Terrain or over Obstacles unless it is a Charge to make contact with an enemy unit to initiate an Assault. Such Charges are then considered to be Hindered (see Assault on page 26).
Units such as Vehicles may have wheels or tracks that mean they move through terrain differently to other units. Certain Keywords have effects as follows:
- Wheeled units may not cross Difficult Terrain or Obstacles.
- Tracked units may cross Difficult Terrain or Obstacles as if it were Open Terrain.
- Anti-Grav units may move over Difficult Terrain of Height 2 or less, and any Obstacles, with no penalty to movement. They may use a Sprint action to move into or through Difficult Terrain and any such move that is a Charge will not be Hindered. They may also disembark more easily from a Vehicle with the Fly Keyword.
- Walkers may ignore Obstacles for movement and when determining if a Charge is Hindered. They are still affected by Difficult Terrain.
Units (typically Vehicles) that can Fly may move freely over any terrain but their base must be able to be placed back on the gaming surface at the end of a move and they may not be placed on Blocking Terrain.
Buildings as Terrain
Buildings are a unique terrain feature that not only obstruct LOS for units moving around and beyond them, but may also be entered by some units. For detailed rules on using buildings as accessible terrain (see page 36).
Photo caption: GCPS Rangers take cover behind a damaged wall.
The Turn
Activations
To use a unit in a game of Firefight it must be Activated.
Players take it in Turns to each Activate a single unit and perform its actions, before play passes to their opponent (who then in turn activates a single unit from their own army, and so on). Each unit can only activate once per Round, unless specified otherwise, and should be marked with an Activation Marker when it has finished its activation. All units even those in transports or which are off table or In Reserve must be activated before the Round ends.
Actions
Each unit in Firefight may perform up to two short actions or a single long action during its activation. A unit may not repeat an action during the same activation. A unit may also be activated to Halt and do nothing should a player wish.
| Action | Duration |
|---|---|
| Shoot/Blaze Away | Short |
| Advance | Short |
| Hit the Dirt | Short |
| Sprint | Long |
Shoot/Blaze Away (Short)
A key part of most armies' weaponry is ranged combat using a bewildering variety of weapons. A unit with ranged weapons may perform a Shoot or Blaze Away action with all weapons in range of the target and eligible to shoot.
See Ranged Attacks on page 22.
Advance (Short)
To get around the battlefield a unit must make a movement action. The basic form is an Advance action. The unit is moved a number of inches up to the first of its Speed stat values, e.g. a unit with a SP stat of 6/12 could Advance up to 6". A unit may not pass or end its move within 1" of an enemy unit unless it wishes to engage that unit in close combat. An Advance action that ends in base contact with an enemy unit will initiate an Assault. See Movement on page 21.
Hit the Dirt (Short)
Units may choose to Hit the Dirt to gain what cover they can from their surroundings. If they do this they will count as being In Cover (see page 24) until the unit next activates. No additional benefit is gained by also being in terrain that provides Cover. The unit is marked with a HtD Marker.
Units may Hit the Dirt as a free action when Pinned if the owning player wishes.
Units with the Bulky, Fly, Wheeled, Vehicle or Walker keywords cannot Hit the Dirt. If a unit loses or draws an assault it may not Hit the Dirt if it gains a Pin Marker, and will lose a Hit the Dirt marker if it already had one.
Sprint (Long)
Some units will do their best to close the distance to their enemy or to get into cover as quickly as possible, relying on speed and aggression rather than firepower.
A unit may make a Sprint action in the same way as an Advance action but the unit may move a number of inches up to the second of its Speed stat values, e.g. a unit with a SP stat of 6/12 could Sprint up to 12".
A unit may not pass or end its move within 1" of an enemy unit unless it wishes to engage that unit in close combat. A Sprint action that leads to an Assault is called a Charge and, under certain conditions, there will be an advantage to the charging unit (see Assault later).
Free Actions
Occasionally Orders or some Missions may allow Free Actions. Free Actions can be taken in addition to the normal two short or one long action limit.
Free actions may take place out of the normal activation sequence and may even be used by a unit that has already activated where the rules permit.
Movement
To achieve your Mission objectives your units will have to move around the battlefield to gain tactical advantage.
Coherency
Soldiers in Firefight have been trained to act as part of a team following the directions of their unit leader.
All models within a unit must remain within 3" of their Leader model. This is called Coherency. This also applies when a Leader is placed within a terrain piece, any models in that unit must also be placed within the same terrain, whenever possible.
In very large units with more than 10 models In Play, all models must remain within 6" of their Leader to be in Coherency.
Removal of models from a unit, e.g. due to casualties, should be performed to maintain unit Coherency whenever possible.
If any model from a unit finds itself outside of Coherency, the first action the unit must perform when next activating is to Advance or Sprint until it returns within or as close as possible to Coherency.
Example: The blue unit declares an Advance action. To move around the building, the Leader model moves 3" forwards and then changes direction to move a further 3". The remaining models in the unit are then arranged back in Coherency around the Leader's new position. (Building HT3.)
Moving Units
To move a unit, simply measure the distance from the edge of the Leader model's base and move the Leader model up to the maximum it can move for the action being performed. This move can be in a straight line, or curved to avoid other models or terrain. Once the Leader model is in position, move all the other models in the unit back to within Coherency from the Leader. Note this may mean that some models may move further than their maximum movement would normally allow, but we allow this for simplified play.
When placing the rest of the models in a unit after the Leader has moved, they may not be placed in a piece of terrain in which the Leader has not also been placed.
Models cannot be placed in base contact with an enemy model unless the Leader model has done so and engaged in Assault.
Moving Units onto the Table
Some units may enter the table after deployment as part of Mission set up rules or by bringing in Reserves. To move onto the table simply activate the unit then measure from the edge of the board onto the table as part of an Advance or Sprint action and place the Leader model plus the other models in the unit in Coherency as normal. The unit is now In Play. A unit coming onto the table in this way may Assault an enemy unit in the same Turn.
Moving Units off the Table
No unit may move off the table under normal circumstances and must immediately stop if forced to do so. If permitted to leave the table by Mission-specific rules then any Leader model, which can reach the table edge as part of an Advance or Sprint action, can leave the table. Then simply remove all the models from the unit and place them off the table, making it clear they have not been destroyed. They are, however, no longer In Play.
Interpenetration of Units
To make it clear which models belong in each unit, models should not come within, or be placed closer than 1" to those from enemy units at any time, unless they are initiating an Assault (see page 26). In addition, models in a unit should not end their movement within 1" of models from a friendly unit.
Unless it is initiating an Assault, a unit may move through another friendly unit as long as its models end their move 1" (or more) away.
Ranged Attacks
Units armed with weapons with a range shown in inches may perform a Shoot/Blaze Away action against a single target unit to which they have either Clear or Partially Blocked LOS. Units to which LOS is Blocked cannot be chosen as a target.
In all cases LOS, Cover and Range are determined from the Leader model of the shooting unit and not from the individual models of the shooting unit.
Example: The blue unit declares a Shoot action, targeting the red unit. The range is measured from the blue Leader to the closest model in the red unit that can be seen. The range is 13". Only weapons in the blue unit that have a listed range of 13 or more are eligible to shoot. Models X and Y are actually closer and within 12", but this is not considered for measuring range to determine eligible weapons.
How to Resolve Shooting
Check Weapon Range
Measure the distance between the base of the Leader model of the shooting unit and the base of the closest model within Clear or Partially Blocked LOS in the target unit to determine the range. All weapons in the shooting unit that have a listed range equal to or greater than the distance measured to the target, are eligible to fire.
If a model has more than one weapon option they may fire with all eligible weapons. Any weapons with a maximum range less that the measured distance are not eligible and cannot fire at the target.
Note that because range is measured from the Leader, some weapons in the unit may be firing slightly more than their maximum range (or not at all), given their model's positions, but we accept this abstraction for speed of play.
For models without a base such as Vehicles simply measure to/from the nearest edge of the body or hull of the model from which LOS can be drawn.
Determine Number of Dice to Roll
Take a number of D8s equal to the dice value of each eligible weapon being used by the shooting unit.
For example a unit of 6 Marauder Commandos with rifles shoots and rolls 1 die for each model for a total of 6 dice.
If there are weapons with different AP values, or Keywords, then dice should be rolled separately for those weapons, or alternatively, use different coloured dice so that both players know which weapons have resulted in a hit.
Roll to Hit
Roll the dice and apply any relevant modifiers to the results. Any dice that then equal or exceed the Shoot value of the firing unit, will each result in a hit. Modifiers are cumulative, unless specified otherwise.
If, due to modifiers, a player would need to score more than 8 in order to hit, half the number of affected dice (rounding down) being used before making the roll.
Remember, natural rolls of 8 are always a success irrespective of the Shoot value or modifiers.
Natural rolls of 1 always miss (but may still be re-rolled by some Keywords).
Standard Shooting Modifiers
| Modifier | Condition |
|---|---|
| -1 | Target is In Cover |
| -1 | Target is a Small Unit |
| -1 | Target is a Vehicle with the Fly Keyword |
| -1 | Target has the Stealthy Keyword |
Example: the previous unit of Marauders are rolling 6 dice, normally requiring scores of 5 or more to get hits on the target (Shoot value of 5+). However, the target is In Cover, so all the results suffer a -1 reduction (so in effect, only results of 6 or more will now be successful hits). The player rolls and gets 1, 3, 5, 6, 6 and 8, resulting in 3 hits. If the target had not been In Cover, the result of 5 would also have been a hit.
Roll to Damage
For each hit, take a die and roll again. If, due to modifiers or a high Armour value, a player would need to score more than 8 in order to cause damage, half the number of affected dice (rounding down) before making the roll.
Any dice that equal or exceed the Armour value of the target unit will each result in causing a point of damage on the target unit. The AP (Armour Piercing) of weapons that hit in a Shoot action will reduce the Armour value of the target unit by an amount equal to the AP of the firing weapon, improving the chance to damage. For example, an AP of 1, would reduce Armour of 6+, to 5+.
Where multiple armour values are present in a unit always roll against the highest.
Remember, natural rolls of 8 are always a success irrespective of the Armour value or modifiers. Natural rolls of 1 always fail to damage (but may still be re-rolled by some Keywords).
Remove Casualties
Damage is now allocated to models in the unit. When a model has been allocated as many points of damage as it has Health Points (HP) on its profile, the model is removed from play (dead). Damage must be allocated to remove whole models before allocating to another model. Any excess points of damage that cannot remove a whole model are marked next to the unit and are added to future damage suffered. Damage counters are provided to help track this.
Models that are allocated damage and removed from a unit are determined by the player using that unit in their Strike Force. Models removed from the unit should be first taken from models within Clear or Partially Blocked LOS. If all models within Clear or Partially Blocked LOS, except the Leader, are removed then further models may be removed outside of LOS until all damage has been applied.
The Leader model is always the last model to be removed.
Blaze Away
A unit may choose to Blaze Away at a target rather than perform a standard Shoot action. During a Blaze Away action only weapons with the Blaze Away Keyword may be used and each weapon increases its Shoot dice by one. Weapons without the Blaze Away Keyword may not be used.
Follow the standard steps for LOS, range, number of dice etc. However, no modifiers are used and hits are only scored on natural rolls of 8, regardless of the firing unit's Shoot stat.
Damage and casualties are resolved as normal (see above). If at least one hit is scored the target unit will gain a Pin Marker.
Cover
In cases where the target unit is partially visible behind another unit or terrain piece, the Shooting unit might suffer a negative modifier to its to hit rolls. To decide whether the target unit is In Cover, follow the rules for LOS. Units which have Partially Blocked LOS will be In Cover.
Types of Cover
Terrain such as a woodland, hedge, wall, ruins or rubble provides limited defensive benefit to units within it or units behind it. Terrain like this can provide cover.
Some well-built terrain such as a building, or fortifications, may provide a significant defensive benefit to units within it or behind it. Terrain like this can provide cover but in addition units within will gain the Defensible Keyword.
Big Targets
Intervening units/terrain that are three Height levels smaller than either the firing unit or the target offer no cover. For example, Height 1 units/terrain do not offer cover to or from Height 4 units.
Not Sure?
In the rare, marginal cases when it is not clear whether a target is In Cover or not, simply roll a die. On a 5+ it is not, on a 4 or less it is.
Photo caption: An Enforcer patrol seeking cover from a pair of Marauder Skyscrapers.
Assault
Some units are keen to tear their enemies limb from limb in bloody hand-to-hand combat. This is called an Assault.
Other units will do their best to avoid this at all costs.
Should a Leader model move into base-to-base contact with an enemy model then the unit is now Assaulting the enemy and is deemed the Attacker. The unit being assaulted is the Defender.
A unit may only make contact with an enemy unit if it intends, and is permitted, to initiate an Assault and may only Assault a single enemy unit. Assault can only occur as part of an Advance or Sprint action unless specifically noted otherwise, such as from an Order. A unit cannot move through a friendly unit to initiate an Assault.
The player initiating the Assault must declare this before any movement is made to allow their opponent to declare any Assault Reaction in response, if their unit is able to do so (see page 27).
When Assaulting an enemy unit, move the unit Leader the shortest distance possible into base-to-base contact with an enemy model in the target unit using the normal movement rules. There must be a clear path to the target model at least the width of the Leader's base to travel through. Then move the remaining models back into Coherency, placing as many of them as possible into base-to-base contact with enemy models in the target unit. All models from both units that are within their unit Coherency are then considered to be part of the Assault.
It is permitted that the final placement of models that are making an Assault can be within 1" of other enemy units.
If the closest enemy model is in contact with, and behind an Obstacle, simply place the Assaulting Leader model directly opposite across the Obstacle. Note that the Leader must still have the movement available to reach this point, and must have the potential movement distance to reach the enemy model, if the Obstacle was not present.
Determine whether the Assault is Hindered (see next section) based on the movement and final placement of the Assaulting Leader model.
Example: The blue unit declares a Sprint action, and its intention to initiate an Assault against the red unit. The blue player checks that the Leader has enough movement to be able to reach the target model and then positions their Leader opposite against the Obstacle. With the distances checked and OK, the blue Leader moves into position, and then the remaining blue models move back into Coherency, lined up in what would be base-to-base contact if the Wall was not present. LOS to the red unit was not Blocked and the blue Leader moved in a straight line. However, the red unit is in contact with the Obstacle being fought across and so the blue unit's Charge is Hindered.
Charging
If a unit initiated an Assault using a Sprint action it is called a Charge. A Charging unit will benefit from a +1 to hit modifier in the subsequent Assault and will fight before the enemy unit. There is no such benefit to initiating an Assault via an Advance action.
Hindered Charges
A Charge is considered to be Hindered in any of the following circumstances:
- The Charging unit does not have LOS to the target unit before it moves (LOS is Blocked).
- The Charge movement (from Leader to target) is not in a straight line (e.g. the Leader had to run around another unit or terrain feature).
- The Charge movement (from Leader to target) travels through or over any Difficult Terrain or Obstacle, or engages an enemy unit across an Obstacle it is in contact with, or that is within a building.
- The Charge movement originated within a Building, Transport Vehicle or from an area off-table, such as arriving from Reserve.
Units performing a Hindered Charge will still fight before their opponent but will not get the +1 to hit modifier mentioned above.
Assault Reactions
Any un-Activated and non-Pinned unit that would be contacted as part of an Assault, has an opportunity to react before the Assaulting unit moves. This is called an Assault Reaction. Units that have already been Activated this Round, and/or that are Pinned, cannot make an Assault Reaction.
The Assault Reactions a unit may perform (if any) are detailed on the unit's profile, alongside other Keywords. If one of the reaction types below is not listed on the unit's profile, the unit may not perform it.
After performing an Assault Reaction, mark the reacting unit as Activated (whether the Assault Reaction was successful or not) and complete the move of the Assaulting unit into contact (or as far as possible – see Failed Assaults on page 28).
Orders cannot be used on a unit when it is performing an Assault Reaction.
Suppressive Fire
A unit with at least one weapon with the Blaze Away Keyword may perform a Suppressive Fire Assault Reaction. This Assault Reaction is taken as per the rules for a Blaze Away action in the Ranged Attacks section. Only weapons with the Blaze Away Keyword may be used. LOS to the Assaulting unit is considered to be Clear.
Remember that if any hit is scored, the Assaulting unit will gain a Pin Marker. After the Assault Reaction is resolved, and assuming there are models left in the Assaulting unit, move it into base contact as normal. Damage caused by the Blaze Away will count towards the shooting unit's Assault Resolution in the subsequent Assault.
Evade
A unit with the Evade Keyword may use this reaction type.
An Evading unit must pass a Nerve test (see page 34). If successful, it makes an Advance action in a straight line Directly Away (see page 28) from the Assaulting unit. After the Assault Reaction is resolved, move the Assaulting unit into contact if it is still able to (see Failed Assaults on page 28).
If the Nerve test is failed, or the Evading unit does not manage to get out of range of the Assaulting unit, or cannot move Directly Away, an Assault will be performed as normal.
Controlled Fire
As an Assault Reaction, a unit with the Controlled Fire Keyword performs a Shoot action with a -1 modifier to hit, counting LOS as Clear and ignoring any cover. After the Shoot action is resolved, move survivors from the Assaulting unit into contact. Damage caused by Controlled Fire will count towards the shooting unit's Assault Resolution in the subsequent Assault. Special rules that apply modifiers to Shoot actions, such as Stealthy, still apply to this Assault Reaction.
Counter Charge
A unit with the Counter Charge Keyword making this reaction is not moved but fights simultaneously with the unit that initiated the Assault if it also Charged, or before the Attacking unit if the Assault was initiated as part of an Advance action. The counter charging unit will not gain the +1 to hit for Charging.
Failed Assaults
Should a unit trying to Assault be unable to move its Leader into base-to-base contact with its target, (e.g. as the result of an Evade Assault Reaction), then the Assault will have failed.
Instead, move the Assaulting unit an Advance move towards the target, as far as possible, but remaining outside of 1" from all units as normal. The unit that failed to Assault is then marked as Activated.
Example: The blue unit needs to move Directly Away from the red unit. The direction of travel is determined by drawing a line through the centre of the two unit Leader models. The unit cannot move without ending up within 1" of enemy units. It is trapped!
Directly Away
Sometimes, the rules call for a unit to move Directly Away from another unit. In such cases, the direction of movement is determined by drawing a line through the centre of both unit's Leaders. For models with no base such as a Vehicle, use the centre of the model as the reference point.
The Leader model of the unit moving Directly Away follows this line moving up to the required distance (as stated in the relevant rule, for instance losing an Assault), ignoring any models in an enemy unit they are currently in base-to-base contact with it. Then place the remaining models of the unit in Coherency.
If at any point the Leader would come into contact with Blocking Terrain or the table edge stop the move when the Leader reaches the point of contact. If at any point the Leader would come into contact with an enemy unit or, if during the final placement of all models in Coherency, any models are unable to be placed at least 1" from enemy models then the unit is trapped and destroyed. Enemy Vehicles with the Fly keyword are ignored when determining this distance. If the unit would finish within 1" of a flying vehicle then the enemy flier must be moved (by the owning player) the minimum distance to allow the unit moving directly away to complete its move.
Units moving Directly Away may move through any friendly units provided they have enough movement to finish 1" away from them on the other side, otherwise stop the move 1" short. It is possible to move into a building with this move (see Buildings on page 36).
Resolving Assaults
Who Fights in an Assault?
The unit initiating the Assault is the Attacker and the other unit is the Defender.
Both units in an Assault will fight. If one unit Charged it will resolve all its attacks before the opponent. This may mean that the unit going second may get less models to strike back with due to casualties. In all other circumstances, both units will fight simultaneously.
All models within a unit are eligible to fight as long as they are within their unit Coherency or in base-to-base contact with an enemy model (and still alive when their time comes!).
Determine Number of Dice to Roll
Take a number of D8s equal to the dice value of each Assault weapon being used by models in the unit striking first (usually the Attackers).
If there are weapons with different AP values, or Keywords, then dice should be rolled separately for those weapons, or alternatively, use different coloured dice so that both players know which weapons have resulted in a hit.
Roll to Hit
Roll the dice and apply any relevant modifiers to the results. Any dice that then equal or exceed the Assault value of the attacking unit, will each result in a hit. Modifiers are cumulative, unless specified otherwise.
If, due to modifiers, a player would need to score more than 8 in order to hit, half the number of affected dice (rounding down) being used before making the roll.
Remember, natural rolls of 8 are always a success irrespective of the Assault value or modifiers. Natural rolls of 1 always miss (but may still be re-rolled by some Keywords).
Standard Assault Modifiers
| Modifier | Condition |
|---|---|
| +1 | Unit Charged (not if Hindered) |
| -1 | Unit is Pinned |
Roll to Damage
For each hit, take a die and roll again. If, due to modifiers or a high Armour value, a player would need to score more than 8 in order to cause damage, half the number of affected dice (rounding down) before making the roll.
Any dice that equal or exceed the Armour value of the target unit will each result in causing a point of damage on the target unit. The AP (Armour Piercing) of weapons that hit in an Assault will reduce the Armour value of the target unit by an amount equal to the AP of the Assault weapon, improving the chance to damage. For example, an AP of 1, would reduce Armour of 6+, to 5+.
Where multiple armour values are present in a unit always roll against the highest.
Remember, natural rolls of 8 are always a success irrespective of the Armour value or modifiers. Natural rolls of 1 always fail to damage (but may still be re-rolled by some Keywords).
Remove Casualties
Damage is now allocated to models in the unit. When a model has been allocated as many points of damage as it has Health Points (HP) on its profile, the model is removed from play (dead). Damage must be allocated to remove whole models before allocating to another model. Any excess points of damage that cannot remove a whole model are marked next to the unit and are added to future damage suffered. Damage counters are provided to help track this.
Models that are allocated damage and removed from a unit are determined by the player using that unit in their Strike Force.
Models removed from the unit should be first taken from models in base-to-base contact with enemy models. If all models within base-to-base contact, except the Leader, are removed then further models may be removed who are not in base-to-base contact until all damage has been applied.
The Leader model is always the last model to be removed.
Fighting Back
After resolving all attacks with the first unit (usually the Attacker), the other unit now rolls its attacks in the same way, as described above, adjusted for any models that may have been removed as casualties.
Simultaneous Fights
If the units are fighting simultaneously, calculate the damage both sides cause before any casualties are removed from either unit.
Example: a unit of five Kalyshi Charge a unit of five Enforcers. The Enforcers are un-Activated and un-Pinned and so are able to make a Controlled Fire Assault Reaction which causes 2 damage and kills two Kalyshi. The Kalyshi unit moves into contact and is the Attacker. The Enforcer unit is the Defender. The Kalyshi roll 3 dice per surviving model for a total of 9 dice, normally requiring scores of 3 or more to hit the target (Assault value 3+). However, the Kalyshi Charged, so all the results benefit from a +1 modifier to hit. The player rolls and gets 8 hits! The Kalyshi unit then rolls to damage against the Enforcers' armour of 6+, modified by -1 due to AP1 on the Kalyshi's Glaives, for a target number of 5+. The player rolls and gets 4 wounds, removing four Enforcer models as casualties. The single remaining Enforcer now fights back with 1 dice needing a 5+ to hit. It rolls an 8 and so scores a hit. The Kalyshi Armour is 5+ and is not modified as there is no AP on the Enforcer assault weaponry. The Enforcer player rolls a 6 and kills a Kalyshi. The Kalyshi unit wins the Assault by 4 (4 damage scored in the Assault) to 3 (2 damage scored in the Assault reaction and 1 in the Assault).
Assault Resolution
Once both sides have struck their blows, total up all the points of damage caused by both the Attacker and Defender during the assault, and include any additions due to Assault Reactions.
If both units are still present, the one which caused the most damage is the winner. The other is the loser.
Loser
If one unit has been destroyed, with all its models removed as casualties, it has automatically lost.
Assuming it has models remaining, the losing unit in an Assault is marked as Activated and gains a Pin Marker and must remove its Hit the Dirt Marker if it has one. In addition, it must then withdraw 6" Directly Away from the winning unit, remaining 1" from enemy units, and leave any terrain or building it was within if able.
Draws
If the Assault is a draw or no damage has been caused by either side, then both units move 3" Directly Away from each other. Determine the direction of travel for both and then move the Defending unit first. Both units are then marked as Activated and both gain a Pin Marker.
Winner
The winning unit in an Assault may make a 3" consolidation move in any direction, remaining 1" from enemy units. The consolidation move may not be into a Transport Vehicle or building, but may be into other terrain. The winning unit may immediately remove a Pin Marker if it has one. If the losing unit was occupying terrain the winner may move to occupy the same terrain feature as part of its consolidation move, if the Leader can reach it.
Trapped!
Any unit required to move Directly Away after an Assault for any reason, that cannot get further than 1" from enemy units is destroyed and removed from the table (even in the case of a draw!).
Pinning
The Battlefield is a dangerous place and many soldiers will want to keep their heads down to protect themselves reducing their combat effectiveness. We call this being Pinned.
A unit will be Pinned, and receive a Pin Marker in the following situations:
All Units
- It loses an assault.
- In response to some Keywords or Orders.
Non-Vehicles
- It Draws an assault.
- It is hit as part of a Shoot action by a weapon with the Pinning Keyword.
- It is a unit emerging from a destroyed Transport Vehicle.
- It is hit as part of a Blaze Away action.
Vehicles
- It suffers one or more damage from a weapon with the Anti-Tank Keyword.
- It has the Fly Keyword and suffers one or more damage from a weapon with the Anti-Aircraft Keyword.
A unit may only have a single Pin Marker placed on it, and while it does it has a status of Pinned.
When a unit receives a Pin Marker it may Hit the Dirt for free.
A Pinned unit will suffer a -1 modifier to its to hit rolls in an Assault and also to any Nerve tests it makes (see page 34).
Units that begin their Activation Pinned must spend a short action to remove the Pin Marker as their first action when they Activate.
Pin Markers may also be removed by spending Command Points in the End Phase, or by some Orders and Keywords.
Photo caption: Asterian Kalyshi engaged in a deadly Assault with Enforcer Operatives.
Nerve
All units have a Nerve value, which represents their psychological willingness to remain in the fight when the chips are down or, in the case of robots or machinery, the accumulated malfunctions that come with being in a warzone.
A unit may also need to test Nerve in response to certain Keywords, Orders or Psychic attacks. The effect of this will be explained in the appropriate section.
How to Test Nerve
To perform a Nerve test roll a single D8, using the modifiers listed below. Modifiers are cumulative, unless specified otherwise.
Natural rolls of 8 are always a success irrespective of the unit's Nerve value or modifiers. Natural rolls of 1 are always a failure. If the unit has the Inspiring (self) Keyword, or is within range of a unit with the Inspiring or Very Inspiring Keywords, it may re-roll a failed Nerve test.
Standard Nerve Test Modifiers
| Modifier | Condition |
|---|---|
| -1 | The unit is Pinned |
| -2 | The unit is now the single remaining model from a Troop or Specialist unit |
| +1 | The unit is in a Building |
If the result equals or exceeds the Nerve value of the unit, the Nerve test is passed and the unit suffers no further effect, although the unit will keep its Pin Marker if it had one.
Broken Units
Taking heavy casualties can lead to units becoming combat ineffective well before they are wiped out. To represent the effect of such attrition, units which have less than 50% of their original model count are said to be Broken. Broken units will need to make a Nerve test in each subsequent End Phase. You can use a Broken Marker as a reminder.
For example, a unit that starts a game with 7 models will be Broken once it has lost 4 models. A unit that starts a game with 4 models, will be Broken once it has lost 3 models.
In the End Phase, if the Nerve test for the Broken unit is failed, the unit is destroyed and removed from the game.
Note that it is possible for a unit to lose its Broken status. For example, as a result of recovering previously removed models due to the Medic or Regenerate Keywords.
Iron Will
Command units are meant to lead from the front and are never marked as Broken. They will still need to test Nerve in other situations however.
Psychic Abilities
In the cold depths of space, there are many strange and unusual alien races. Some of these creatures are imbued with innate or learnt talents that allow them to use the power of their minds to perform unimaginable acts. This may even lead some less developed cultures to assume that these creatures are in some way magical. In fact, the ability to use such skills is often a feature of a highly developed brain structure that transcends normal physical functioning to generate these psychic abilities.
In games of Firefight, each Psychic ability works in a different way as explained in the unit profile and may have an action cost associated with them. A unit may use different Psychic abilities in the same Activation as long as each Psychic ability is not repeated, and the unit has enough actions available.
Psychic abilities that are also Ranged Attacks should be measured from the Psychic unit's Leader model to the closest model in the target unit irrespective of LOS (and so can target units where LOS is Blocked). Psychic Ranged Attacks are not modified by the target being In Cover or by the Stealthy Keyword, but will be affected by any other modifiers.
Reserves
It is not always advisable to show your full hand when fighting in a warzone and an astute commander will make good use of reserves, allowing them to enter the fray only when the time is right.
Units may only begin the game in Reserve due to Mission set up or other special rules. While in Reserve, units do not contribute to the Command Pool or victory conditions and are not In Play until they are placed on the table. Units in Reserve will still contribute Command Dice to Recon Rolls made at the start of the game however.
Unless a Mission says otherwise, Reserves can always be brought onto the table from their player's own table edge or up to the centre-point along either side of the table, from the start of Round 2. All reserves must be In Play on the table by the end of Round 3.
Some units may have Keywords, which allow them to use modified Reserve rules for aerial or subterranean deployment as described in the unit's profile.
Buildings
Buildings as a terrain feature on any battlefield can be of vital importance to defence and a real burden for an attacker to clear.
Before the game begins, every building must be designated as having a Capacity (n), in the same way as Transport Vehicles (see page 38), or be classed as Blocking Terrain. You can always place a die or token on the building to remind you of its Capacity during the game.
For each point of Capacity they may hold a single model, of Height 2 or less.
For each 2 points of Capacity they may hold a single model of Height 3 or more.
Models with the Bulky or Vehicle Keywords may not enter buildings.
While within a building, a unit gains the Defensible Keyword.
Example: a building with Capacity (10), can be occupied by up to 10 Enforcer Operatives (Height 2), or perhaps six Enforcer Operatives and two Peacekeeper models (Height 3).
Entering and Exiting a Building
A unit may enter a building if its leader model ends its movement in base contact with the building. Don't worry if your building doesn't have a suitable entrance modelled on it, as troops are assumed to make their own (potentially explosive) entry points. Simply reposition all models from the unit in the building. Entry to, and exit from a building, is at the ground floor level.
If a unit's current model count is too great for a building's current (or remaining) Capacity then the unit may not enter the building at all.
Units may leave a building as part of an Advance or Sprint action, which may be to initiate an Assault. Simply measure the distance moved from the side of the building that the unit wishes to move from.
A unit cannot both enter and leave the same building in the same Round.
Buildings and Shooting
It is assumed that all buildings have suitable windows, doors, battle damage or small firing holes that can be shot into and out of. Units in buildings are In Cover. When shooting at a unit within a building, determine LOS and measure range to the building itself, not the unit within.
Units within a building can shoot out of all sides of the building with all of their weapons. Determine LOS and range from the side of the building itself, not the Leader model within.
Buildings in Assault
Charges against a unit within a building are always Hindered. Units may only Assault defenders that are on the ground level of a building, unless they have the Fly or Anti-Grav Keywords and have the movement to reach the target unit.
Should the Assaulting unit win they may occupy the building if able (and the losing unit must leave). Units that are unable to enter buildings, those with the Bulky Keyword, may still Assault units in buildings, but may not occupy the building. Defending units which lose an Assault must leave the building and be placed 6" away from the building in a direction of the losing player's choice. In the event of a draw the defending unit must remain within the building.
Vehicles may not Assault units within buildings.
Should the building zone (see below) also contain another enemy unit and the Assaulting unit wishes, and is able to occupy the building, then they must immediately perform a second Assault against this unit. The second Assault will be fought simultaneously and the defending unit will gain the Defensible Keyword as it is inside a building. A second unit assaulted in this way may not make Assault Reactions.
Large Buildings
Some very large buildings may be divided into multiple zones, horizontally or vertically, each with their own Capacity (n). It should be agreed before the game how many zones and of what size and Capacity a building is. For example, players may decide that each floor of a larger building is its own zone. It is suggested that buildings greater than 6" in any direction should be divided into multiple zones for ease of play. If a unit assaulting from one building zone to another wins the assault it will occupy the defender's zone and the loser must leave the building and be placed 6" away from the building in a direction of the losing player's choice. In the case of a draw or the attacking unit loses the assault it must return to the building zone it began the assault from and the defender remains in place.
Moving from one zone of a building to another, horizontally or vertically, requires an Advance action; units may not Sprint or Charge within buildings. If a unit is moving from one zone of a building to another zone occupied by an enemy unit this will lead to an Assault with both sides counting as having Defensible.
Units may not perform a Shoot or Blaze Away action between, or through, zones of the same building. A unit that wants to Shoot out of a building must do so by determining LOS and range from the sides of the zone it is currently in.
Building Roofs
Some buildings may be designated as having an accessible roof zone which should have a Capacity like any other zone. Units may access a roof zone through the building as described previously or directly from above as part of an aerial deployment, or by exiting a Transport Vehicle with the Fly Keyword. In addition, units with the Anti-Grav or Fly Keywords can access roof zones as part of an Advance or Sprint action without needing to enter the building first. Units with Anti-Grav will need to count additional distance travelled vertically in inches to access roof zones above Height 4.
If a building has a roof zone which is accessible from the ground via a clearly marked ladder, external stairway or ruined surface then any unit may access the roof zone, or descend to the ground as described, without needing to enter the building. Count the additional distance travelled vertically in inches to determine the unit can reach the roof zone (or return to a lower level).
Vehicles may only be placed on a building roof zone at the start of a game if they have the Fly or Anti-Grav Keywords.
Units in roof zones will only count as being In Cover from Shoot actions (they will not be granted the Defensible Keyword), but will count as being in a building for Assaults.
Photo caption: Enforcer Pathfinders capture and hold a key building.
Vehicles
Vehicles come in many shapes and sizes. Many Vehicles will have their movement further defined by one of the following Keywords; Walker, Fly, Wheeled, Tracked and Anti-Grav. Vehicles follow the normal rules with the following exceptions.
Vehicles and Buildings
Vehicles may not enter buildings but vehicles with the Fly or Anti-Grav keywords may be placed on a Building Roof Zone.
Vehicles and Shooting
If a Vehicle doesn't have a base, determine range and LOS to and from the Vehicle using the main body or hull (ignoring guns, aerials, fins, etc).
Vehicles and Assault
Vehicles may engage in an Assault but may not Assault units in buildings.
Vehicles losing an Assault will receive a Pin Marker, but are not marked as Activated (unless they are the attacking unit that initiated the Assault).
Vehicles that lose an Assault and cannot move Directly Away, are only destroyed if the Winning unit is either a Vehicle or has a Range Assault weapon with the Anti-Tank keyword. Otherwise they are marked as both Pinned and Activated.
Vehicles and Pinning
A Vehicle will only gain a Pin Marker in the following circumstances:
- It suffers one or more damage from a weapon with the Anti-Tank Keyword.
- It has the Fly Keyword and suffers one or more damage from a weapon with the Anti-Aircraft Keyword.
- It loses an Assault.
Destroyed Vehicles
When a Vehicle is destroyed it is removed from the table. Players are encouraged to model suitable ruined remains, but this has no impact on gameplay.
Flying Vehicles
Vehicles with the Fly Keyword must perform an Advance or Sprint action during each Activation. This move must result in them being placed at least 6" from their starting point. If they cannot do this, they are destroyed and removed from the game.
Vehicles with the Fly Keyword may not initiate an Assault and may not be attacked in Assault by another unit unless that unit has the Anti-Grav or Fly Keyword.
Shoot actions against a Vehicle with the Fly Keyword will suffer an additional -1 to hit modifier, unless the firing weapon has the Anti-Aircraft Keyword.
Vehicles with the Fly Keyword do not block LOS to other units. They cannot claim, or be placed with their base touching an Objective.
Transport Vehicles
Some Vehicles' roles are to deploy troops deep into the battlefield, offering them a degree of protection while they race to the drop-off point. Units with transports therefore begin the game inside their Vehicles, and will exit later in the game.
Transport Vehicles carry troops into action and will have a Capacity (n) listed on their profile.
For each point of Capacity they may hold a single model of Height 2 or less.
For each 2 points of Capacity they may hold a single model of Height 3 or more.
Models with the Bulky or Vehicle Keywords may not be placed in Transport Vehicles.
Only full units may be carried in Transport Vehicles – units cannot be partially embarked in a Vehicle or split between two Vehicles. More than one unit may be placed in a Transport Vehicle as long as all conform to the Capacity limits.
Transport Vehicles Activate separately from any units they are currently transporting. Units within Transport Vehicles must be Activated as normal but may be Activated to do nothing (Halt). Command units within a Vehicle may still use Command Orders when they activate. Measure the range for orders and Inspiring from the Vehicle transporting the Command unit.
Units within a Vehicle may not perform a Shoot/Blaze Away action out of it or interact with terrain or Objectives while within the Vehicle. Units within Vehicles may not be targeted by Shoot/Blaze Away actions. The only exception is for Psychic Abilities, which may be used by, and against, units inside a Transport Vehicle.
Entering and Exiting a Transport Vehicle
During the deployment step of game set-up, a player can deploy a unit within a Transport Vehicle, observing normal Capacity rules. Mark the presence of the unit within the Vehicle in some way, such as by leaving a single model from the unit in base contact or on the vehicle.
During the game, units may enter a Transport Vehicle by using an Advance or Sprint action to have their Leader reach the side of the Vehicle, in much the same way as entering a building. Units may never enter and exit a vehicle in the same Round.
A unit may exit (disembark) a Transport Vehicle if its first action is an Advance or Sprint. A unit may Assault from a Transport but any Charge will be Hindered. Simply move the Leader model, measuring from the body of the Vehicle. This may be done before or after the Vehicle has moved.
Exiting a Flying Transport Vehicle
A unit may exit a Transport Vehicle with the Fly Keyword if its first action is an Advance or Sprint, but it may not Assault an enemy unit in the same Activation. Simply move the Leader model, measuring from the base of the Vehicle. This may be done before or after the Flying Vehicle has Activated.
Destroyed Transport Vehicles
If a Transport Vehicle is destroyed, any unit that is currently on board must be placed in base contact with the transport model's last position. In addition, units will gain a Pin Marker and be marked as Activated.
If the Transport Vehicle has the Fly Keyword any unit on board without the Anti-Grav or Fly keywords will be destroyed.
Drones
Drones are support robots or creatures which may be added to some units to provide additional benefits.
Units with the Drone (x) Keyword will have the benefits listed within the Drone model's description while the Drone remains In Play.
Additional weapons granted to a unit by a Drone work like normal weapons, and Keywords related to them are applied to the Drone's attacks only. Drones will still benefit from any orders played on the unit or Keywords attached to the unit itself.
Drones do not have an individual profile but do count as a model within the unit for all rules, such as Coherency, building or Vehicle Capacity, LOS, Assault, etc. Drones do not count as a model for determining casualties, or to determine when a unit is Broken.
Drones may not normally be chosen as casualties and remain with the unit until all other models in the unit are killed, at which point the unit and any attached Drones are all removed from play.
The only exception is as follows: if a unit inflicts damage with a weapon that has the Sniper Scope Keyword, a Drone model may be selected by the shooting unit to take this damage. The Drone is assumed to have a single HP and is then removed instead of applying that HP loss to another model within the target unit.
Keywords
Not all soldiers are equal, and some will have a unique set of special abilities that set them out from the rest. The range of skills and abilities your troops might have are all represented by Keywords. The following table lists the Keywords used in Firefight, and their effects.
Keywords will be listed on the unit's profile and their weapons. Some may also be gained due to certain Orders or situations in game.
| Keyword | Effect |
|---|---|
| Advanced Training | The unit may use a Faction Order even when outside of 12" of a friendly Command unit or if all friendly Command units have been destroyed. |
| Aerial Deployment | The unit can be deployed at the start of the game as normal, and has the Scout Keyword until the first Round begins. Alternatively the unit may always enter as Reserves even if they are not normally allowed by the mission. If entering from Reserve the unit does not follow the normal rules but may instead be deployed in any Open Terrain or building roof zone that is more than 6" from any enemy units as a short action. |
| Anti-Aircraft | This weapon may ignore the -1 to hit modifier for shooting at Vehicles with the Fly Keyword. A Vehicle with the Fly Keyword that suffers one or more damage from an Anti-Aircraft weapon will gain a Pin Marker. |
| Anti-Grav | Anti-Grav units may move over Difficult Terrain of Height 2 or less, and any Obstacles, with no penalty to movement. They may use a Sprint action to move into or through Difficult Terrain and any such move that is a Charge will not be Hindered. They may also disembark more easily from a Vehicle with the Fly Keyword. |
| AP (n) | The Armour Piercing value of this weapon reduces the target's armour stat when rolling to damage by (n), e.g. an AP1 weapon reduces a target's armour from 6+ to 5+. |
| Anti-Tank | A Vehicle that suffers one or more damage from an Anti-Tank weapon will gain a Pin Marker. Anti-Tank weapons ignore the Heavy Armour Keyword on target units. |
Assault Reaction Keywords
(refer to page 27)
| Keyword | Effect |
|---|---|
| Controlled Fire | A unit with this Keyword can perform the Controlled Fire Assault Reaction. |
| Counter Charge | A unit with this Keyword can perform the Counter Charge Assault Reaction. |
| Evade | A unit with this Keyword can perform the Evade Assault Reaction. |
| Suppressive Fire | A unit with this Keyword may perform a Suppressive Fire Assault Reaction with all models with the Blaze Away Keyword. |
Missions
In Firefight, armies will clash over land, strategic objectives, or just to crush the enemy. This can be as part of a brief encounter, or as a key battle in a larger engagement or story. Each game played will therefore have a specific Mission that the players are trying to achieve as they battle for victory.
There are two types of Missions you can choose from:
- Battle Missions for more balanced and competitive play.
- Narrative Missions for more story driven games.
Getting Ready to Play
You have an opponent and you have your models, so now you want to play a game! There are a few easy steps to go through to set one up.
Decide on the Game Size
You can play Firefight with just a few units per player, without worrying about the two sides being equally matched. This is great for learning the game, but after you've become familiar with the rules and have amassed a larger collection of models, you will want to play games where the armies facing one another across the battlefield are balanced, so that both players have an equal chance of winning the game (at least to start with!).
In order to achieve this, both players must pick a Strike Force before the game by spending a number of 'points'.
For smaller games, players will each have around 1,000 to 1,250 points each to spend. This is great for a table size of 4' x 4'. For games at 1,500 points or larger, you should use a larger table (e.g. 6' x 4').
Choose Your Strike Force
Each player now picks units from their chosen list in the Force Lists book to build their Strike Force. Each unit costs a certain amount of points, as shown in its entry. More powerful or specialist units will cost more points. Players keep adding their unit costs until they have reached the total agreed for the game. You can, of course, spend less than the agreed total, but you cannot spend even a single point more. However, a Strike Force is still considered to be the size of the maximum total the players agreed on (e.g. a Strike Force which comes to 995 points would still be considered a 1,000 point Strike Force).
For more information on how to choose units and build a Strike Force, see the Force Lists book.
Determine the Mission
Players can either choose one of the Missions that follow, or roll a die to randomly select a Battle Mission or Narrative Mission to play.
Place Terrain
Battlefields are rarely totally flat, featureless wastelands. They will invariably be small hills, vegetation, and buildings or ruins scattered across the land. Unless the Mission specifies terrain placement you should follow the advice below for giving a dramatic and tactically exciting landscape to fight over.
Place a single piece of terrain (approximately 6" x 6" in area) within each 24" square area of the table, plus one additional piece. Optionally, you may place up to the same number of linear obstacles (or a similar equivalent) on the table in the same manner: one per 12" square area, plus an additional piece. Place all terrain in a mutually acceptable manner.
For example, when playing on a 4' x 4' table, you would place five pieces of terrain roughly 6"x6" each, and up to five smaller linear obstacles or other similar items.
Of course, if you and your opponent agree, you can have as much or as little terrain as you want!
Mission Descriptions
Each mission will detail a number of elements that will affect how the game is set up and played.
- Terrain: Some Missions may have specific requirements as to what terrain to use and where to place it on the board. Any other terrain can then be selected and placed as normal. Unless specified otherwise, place terrain and any Objectives before any Initiative roll or deployment.
- Deployment: Placing units onto the table at the start of the game is called Deployment. Units are typically placed into each player's specified Deployment Zone. Each Mission will include a map of the battlefield showing where each player can deploy their units on the board. It will also state whether there are restrictions on the use of Reserves or Scouts.
- Game length: Each Mission will have a determined number of Rounds before a winner will be decided.
- Special Rules: Some Missions will impose restrictions on your Strike Force construction or have special in-game actions. This is more common in Narrative Missions.
Recon Roll
Every game will start with a Recon Roll. Each player rolls a number of Command Dice equal to those provided by Command units in their Strike Force and compare their total scores. Re-roll in the case of a draw.
Note that Command Dice from any source other than Command units are not considered.
The player with the highest score is the winner and may choose to have the Initiative or give it to their opponent. The player with the Initiative then chooses which board edge and Deployment Zone to take as theirs. The player with the Initiative then deploys (see below) their entire Strike Force onto the table first and will take the first Turn in Round one.
Example: Sam and Graham both make their Recon Rolls. Sam scores 3 and Graham scores 5. Graham wins the roll by two and elects to take the Initiative, choosing his Deployment Zone and then deploying his units, including any Reserves. However, he can also choose to withhold up to two units until Sam has finished deploying her Strike Force and decides to do so.
Once Sam has completed her deployment, Graham then deploys his final two withheld units onto the table in his Deployment Zone. Note that he could also have decided to deploy one or more of these withheld units In Reserve if allowed.
Deploying Models
The player with the Initiative places (deploys) their entire Strike Force onto the table, unit by unit, wholly in their deployment area, deploying (and recording) any unit being kept in Reserve (off the table). Units must be placed in Coherency and in legal positions (e.g. a player cannot deploy a Vehicle into a building). Their opponent then does the same for their Strike Force.
The player with the Initiative, who deploys first, may withhold a number of units of their Strike Force up to the difference in successes between the players' Recon Rolls instead of deploying them. Units withheld this way should be made clear to the player's opponent. Withholding units is not the same as putting them in Reserve.
Once their opponent has completed their deployment the player may then deploy these withheld units within their deployment zone following the normal Mission rules, but gaining the advantage of knowing where their opponent has deployed their units. Withheld units deployed in transport vehicles will count as one for the transport and another one for each unit within.
First Player
In Round 1, the player with the Initiative takes the first Turn.
In each subsequent Round, the player who finished activating their units first in the previous Round, has the Initiative, and will get to take the first Turn.
Example: Graham has the Initiative in Round one. At the end of the Round, Sam was the player that finished activating units first. Sam therefore has the Initiative, and takes the first Turn, in Round two.
Unit Strength
Some Missions will only be achievable if the right sort of troops are occupying the Mission Objectives. Unit Strength (US) is a way to determine the presence and tactical ability of a unit to accomplish this and each unit has a Unit Strength stated in its unit profile.
Last One Standing
If a Troop or Specialist unit is reduced to a single model, it will have a Unit Strength of zero. This does not apply to Support or Command units.
Objectives
Some Missions include Objectives, which players must claim to win the game. This may be at the end of the game, or might be calculated at the end of each Round.
Objectives can be pieces of vital Intel, hardware, ammunition or even food. You can use the tokens provided or they can each be suitably modelled on a 40mm base. Objectives do not block LOS or affect movement.
To claim an Objective, a unit must have at least one model in base contact with the Objective and have its Leader model within 3" of the Objective. In addition, if there are multiple units meeting these criteria the Objective will be claimed by the player with the most combined Unit Strength of all the units eligible to claim the Objective. Neither side can claim in the case of a tied score.
A unit may only claim a single Objective at a time, even if it is eligible to claim more.
Units with the Vehicle or Beast Keywords may not claim objectives. Vehicles with the Fly keyword may not claim or be placed with their base touching an Objective.
Some Objectives may require a model to interact with them as an action. This will be described in the Mission special rules.
Example: Graham and Sam both have units contesting an Objective. Sam has two units, whose Unit Strengths are 1 and 2. Graham has a single unit with a US of 2. Sam's combined total is 3 and therefore Sam claims the Objective.
Battle Missions
Battle Missions are designed for more balanced or competitive play. There is nothing to stop you using them for any type of game though!
Meeting Engagement
Even in the futuristic battlefields of Firefight, not everything always goes to plan, and sometimes armies just blunder into each other without fixed objectives and in a brief but violent encounter!
- Terrain: There are no specific terrain requirements for this Mission.
- Deployment: 12" Deployment Zones for each player along the longest opposite table edges.
- Game Length: The game will last 5 Rounds.
- Victory Conditions: At the end of the game, compare the points values of all units destroyed during the game from each side. If the difference between the scores is at least 10%, the player who destroyed the most will be the winner. For example in a game where the Strike Forces are equal to 1,000 pts, you need to have destroyed at least 100pts more than your opponent to win.
Diagram: Player A and Player B 12" Deployment Zones along the long table edges.
Occupation
It is imperative that your Strike Force occupies a communications hub vital to this sector. This may be represented by a communications array, transmission tower, power plant or military HQ.
- Terrain: Mark out a circular area 12" across from the exact centre of the table. This is the communications hub to be occupied. This central zone should have one building within it, of Capacity (10).
- Deployment: 12" Deployment Zones for each player along the longest opposite table edges.
- Game Length: The game will last 5 Rounds.
- Victory Conditions: At the end of the game, the Strike Force which has the most combined Unit Strength fully within (all models in a unit) the central zone will win.
Diagram: the central zone is labelled "Comms Hub", with 12" Deployment Zones for Player A and Player B.
Control the Intel
Your Strike Force must capture a series of Objectives scattered throughout the battlefield. These Objectives could be such vital equipment as terminals and ammo dumps, or even food that your troops need.
- Terrain: There are no specific terrain requirements for this Mission.
- Deployment: 12" Deployment Zones for each player along the longest opposite table edges.
After the player with the Initiative has chosen their Deployment Zone, but before either player deploys any models, roll a D4+2 to determine the number of Objectives. Starting with the player that has the Initiative, players alternate placing these Objectives on the table outside of all Deployment Zones and in the opposing player's half of the table, no closer than 6" from any other Objectives.
- Game Length: The game will last 5 Rounds.
- Victory Conditions: Victory Points (VPs) are awarded at the end of each Round. Each Objective you hold is worth 1VP. The player with the most accumulated VPs at the end of the game is the winner.
Refused Flank
Sometimes even with the best intel the GCPS can provide armies find themselves misaligned with each other when they meet on the battlefield. Nothing can be done except to correct this error by force of arms.
- Terrain: There are no specific terrain requirements for this Mission.
- Deployment: Each player has a triangular deployment zone from the middle of one long edge to the middle of the short table edge to their left-hand side.
Starting with the player that has the Initiative, but before deployment, players alternate placing three Objectives each on the table outside of all Deployment Zones and in the opposing player's half of the table, no closer than 6" from any other Objectives.
Diagram: Player A and Player B triangular deployment zones, with Mid-Point markers on the table edges.
- Game Length: The game will last 5 Rounds.
- Victory Conditions: Calculate the values of all units destroyed during the game from each side. If the difference between the scores is at least 10%, the player who destroyed the most will be the winner. For example, in a game where the Strike Forces are equal to 1,500 pts, you need to have destroyed at least 150pts more than your opponent to win.
Each Objective controlled by a player at the end of the game will count as an additional 100pts towards determining who has won.
Take and Hold
On the battlefield there are many valuable objectives to be gained, but you must also try to keep what you already hold. This seesaw of mission tactics is only achievable by boldness in the face of the enemy and using the best commanders and troops your Strike Force can muster.
- Terrain: There are no specific terrain requirements for this Mission.
- Deployment: 12" Deployment Zones for each player along the longest opposite table edges. Place 2 Objectives in each deployment zone 10" in from the back of the board and 12" in from the side edge. Place 2 Objectives along the centre line of the table 12" in from the side edge. In games using a table larger than 4'x4' place an additional Objective in the centre of the table.
- Game Length: The game will last 5 Rounds.
- Victory Conditions: Victory Points (VPs) are awarded at the end of each Round. Each Objective you hold in your own deployment zone is worth 1VP. The Objectives along the centre line of the table are worth 2VP. Objectives you hold in your opponent's deployment zone are worth 4VP. The player with the most accumulated VPs at the end of the game is the winner.
Last Stand
A portion of your Strike Force is stuck deep behind enemy lines, with very little hope of rescue. You have one opportunity to assist them, before it's too late and the enemy closes in for the kill.
- Terrain: There are no specific terrain requirements for this Mission.
- Deployment: 12" Deployment Zones for each player along the longest opposite table edges. 50% (rounding up) of each player's Strike Force's units must be deployed at the start of the game in their Deployment Zone. The rest of each Strike Force is held In Reserve and will be available from Round 2 onwards following the normal rules for bringing in Reserves.
- Game Length: The game will last 5 Rounds.
- Victory Conditions: Compare the points values of all units destroyed during the game from each side. If the difference between the scores is at least 10%, the player who destroyed the most will be the winner. For example, in a game where the Forces are equal to 1,250 pts, you need to have destroyed at least 125pts more than your opponent to win.
Secure The Sector
Your Strike Force must control the battlefield by performing systematic sweeps and securing sectors. Once this is complete, you can concentrate on eradicating all opposition.
- Terrain: There are no specific terrain requirements for this Mission.
- Deployment: 12" Deployment Zones for each player along the longest opposite table edges. 50% (rounding up) of each player's Strike Force's units must be deployed at the start of the game in their Deployment Zone. The rest of each Strike Force is held In Reserve and will be available from Round 2 onwards following the normal rules for bringing in Reserves.
- Game Length: The game will last 5 Rounds.
- Victory Conditions: Divide the table into a grid of 24" x 24" squares (four for a 4' x 4' and six for a 6' x 4' table). At the end of the game, use the Unit Strength of all units in each square to determine who controls the square. The player who controls the most grid squares is the winner.
Diagram: Player A and Player B 12" Deployment Zones along the long table edges.
Stop The Signal
Multiple data upload signals have been detected from your vicinity. They almost certainly contain vital intel on the enemy's activities. You must shut them down and replace the signals with fake intel to put your opponents on the wrong track.
- Terrain: There are no specific terrain requirements for this Mission.
- Deployment: 12" x 12" (12" deep x 18" wide if playing on a table larger than 4' x 4') Deployment Zones in each corner of their table edge for both players. Each Player deploys half (as equally split as possible) of their Strike Force's units in each of their two Deployment Zones following the normal rules for deploying models. D4+1 Signal Emitters (use Objective markers) will need to be placed on the table outside of Deployment Zones. Players take it in turns to place a Signal Emitter in the opposing player's half of the board no closer than 6 inches from another Signal Emitter.
- Game Length: The game will last 5 Rounds.
- Victory Conditions: A unit (excluding units with the Walker, Vehicle or Beast Keywords) controlling a Signal Emitter at the end of the Round gains 1 VP. If the unit controlling the Signal Emitter has the Hacker Keyword then the player gains 2 VPs instead. The player who has the most accumulated VPs at the end of the game is the winner.
Diagram: four corner Deployment Zones for Player A and Player B along the table edges, with 12" and 18" dimensions marked.
Narrative Missions
Narrative missions are designed to have a greater focus on fun and in telling a story, rather than more balanced or competitive play.
Seismic Shift
The planet is erratic due to excessive mining, natural events or interplanetary warheads breaking the core apart. The ground is unstable and shifts unpredictably. What a place to fight a battle!
- Terrain: There are no specific terrain requirements for this Mission.
- Deployment: 12" Deployment Zones for each player along the longest opposite table edges.
- Game Length: The game will last 5 Rounds.
- Victory Conditions: At the end of the game, compare the points values of all units destroyed during the game from each side. If the difference between the scores is at least 10%, the player who destroyed the most will be the winner. For example in a game where the Strike Forces are equal to 1,000 pts, you need to have destroyed at least 100pts more than your opponent to win.
Special Rules: At the start of each Round roll a D8 and check below to see what the seismic effect is this Round:
- 1-2 Unstable: All units immediately make a Nerve test. If a unit fails its Nerve test it gains a Pin Marker.
- 3-4 Cracked Earth: Units may not perform a Sprint action this Round.
- 5-6 Rumbling Ground: All Shoot actions will have an additional -1 to hit modifier this Round.
- 7-8 Eruptions: Each unit immediately loses 1HP. If a unit is in a building, it loses 2HPs from falling masonry.
Diagram: Player A and Player B 12" Deployment Zones along the long table edges.
Lab Raid
This entire area is a Mazon Labs black site for research into secret and dangerous tech. The rewards, and the risks, from searching this area can be vast.
- Terrain: Place Terrain such as hills and Obstacles as normal. After the player with the Initiative has chosen a side, but before any units are deployed, players (starting with the player with the Initiative) then take it in turns to place a total of 6 Mazon Labs research buildings on the table. All buildings must be placed outside of Deployment Zones and in the opposing player's half of the board, no closer than 3 inches from another building. Other terrain can then be placed if desired, but no other buildings should be used.
- Deployment: 12" Deployment Zones for each player along the longest opposite table edges.
- Game Length: The game will last 5 Rounds.
- Victory Conditions: The player with the most VPs at the end of the game is the winner.
Special Rules: When a unit (excluding units with the Walker, Vehicle or Beast Keywords) moves into contact with a research building it may search for valuable research. Buildings may not be entered by units in this game. Buildings may be searched more than once but only once per Round. To search a building a unit in base-to-base contact must perform a short action and roll a D8, checking the result below:
- 1-2 Research Specimens!: You have unleashed some specimens (counts as a 2-model unit of Plague Stage 2A 'Leaper's)! The specimens immediately make a Charge and no Assault Reactions are allowed. Resolve the Assault and then remove the Research Specimens. The Searching unit gains 1 VP if it is not destroyed.
- 3-4 Med Packs: The unit recovers D4 Health Points previously lost but gains a Pin Marker if it does so. This may restore models already removed as casualties. Units with the Construct keyword may not recover health points in this way.
- 5-6 Research Files: Gain 1 VP.
- 7-8 Vital Research: Gain 2 VPs.
Diagram: Player A and Player B 12" Deployment Zones along the long table edges.
Take Back the City
Not all battlefields are perfectly flat with clear fields of fire. Often the urban battlefield is the most difficult but also holds the highest prizes in propaganda as well as access to industrial and technological hubs.
- Terrain: Players take it in turns to place a total of four buildings, (each with Capacity (10)). For games of 1500 points or more, use six buildings, and use eight buildings for games of 2000 points or more. All buildings must be placed outside deployment zones in the opposing player's half of the board no closer than 3" from another building. Each player will also note down one building they have deployed as holding strategic assets of great value. Keep this secret from your opponent.
- Deployment: 12" Deployment Zones for each player along the longest opposite table edges.
- Game Length: The game will last 5 Rounds.
- Victory Conditions: Each building occupied by a unit from your Strike Force with no enemy models within it is worth 1 Victory Point, claimed at the end of each Round. Each strategic asset building is worth an additional 3 VPs claimed at the end of the game once the buildings are revealed. The player with the most accumulated VPs is the winner.
Diagram: Player A and Player B 12" Deployment Zones along the long table edges.
Evacuate
The rapid advance of a Strike Force can often catch local inhabitants unprepared leaving them trapped in a warzone. Whilst many corporations care little for their workers and their families, occasionally there may be someone worth saving amongst the herd. These high value civilians are usually scientists, politicians or OverDrive stars!
- Terrain: Players take it in turns to place a total of four buildings. All buildings must be placed outside of Deployment Zones in the opposing player's half of the board no closer than 3" from another building. Place one high value civilian model inside each building. Less valuable civilians are considered to be fleeing the battlefield and are not placed on the table.
- Deployment: 12" Deployment Zones for each player along the longest opposite table edges.
- Game Length: The game will last 5 Rounds.
- Victory Conditions: Each high value civilian attached to a player's unit is worth 1 Victory Point at the end of the game. The player with the most VPs at the end of the game is the winner.
Special Rules: When a unit (excluding units with the Walker, Vehicle or Beast Keywords) moves into contact with a building containing a high value civilian it may encourage/intimidate the civilian to join them. Buildings may not be entered by units in this game. As a short action attach the civilian to the unit and gain the following rules:
Drone (Civilian): While a unit has a Drone (Civilian) attached, it may move a maximum of 6" as an Advance, and may not Sprint. A unit may detach a civilian as a short action in which case the civilian remains in place allowing the unit to move away.
If a unit with an attached civilian is destroyed, the civilian is left in place on the table or can be attached to the victorious unit as a free action if destroyed in an Assault. Otherwise a civilian left abandoned on the table can be attached to any unit making contact with it as a short action. Civilians do not block LOS or movement and cannot be targeted by any attacks.
Diagram: Player A and Player B 12" Deployment Zones along the long table edges.
Hearts and Minds
Even in the worst of battlefields you need to get the populace onto your side, normally by convincing or cajoling them into supplying your troops and not hindering your mission. Sometimes even by infecting them with rare and unknown viruses. Each to their own I guess…
- Terrain: Players take it in turns to place a total of six buildings. All buildings must be placed outside of Deployment Zones in the opposing player's half of the board no closer than 3" from another building.
- Deployment: 12" Deployment Zones for each player along the longest opposite table edges.
- Game Length: The game will last 5 Rounds.
- Victory Conditions: For every building with one of your tokens on it in the End Phase of each Round you gain 1VP. The player with the most accumulated VPs at the end of the game is the winner.
Special Rules: When a unit (excluding units with the Walker, Vehicle or Beast Keywords) moves into contact with a building it may spend a short action to attempt to win the locals' hearts and minds. Buildings may not be entered by units in this game. Roll a D8 and on a 5+ place a token on the building to represent you controlling the inhabitants. You may re-roll a failed test if using a Command unit. If there is already a token from another player on the building you may replace it with your own.
Diagram: Player A and Player B 12" Deployment Zones along the long table edges.
Fighting Withdrawal
Sometimes the fight goes against you and all you can do is retreat and reorganise. Will the enemy let you though?
- Terrain: There are no specific terrain requirements for this Mission.
- Deployment: The attacker has a 12" Deployment Zone along one long table edge. The defender deploys 6" either side of the midline of the table across the whole width. the player who wins the recon roll chooses to be the defender or attacker. The Attacker has the initiative in the first round.
- Game Length: The game will last 5 Rounds.
- Victory Conditions: For every unit the defender moves off their long table edge they gain 1VP (2VPs for a Command unit). For every unit destroyed by the attacker they gain 2VP (3VP for a Command unit). The player with the most VPs at the end of the game is the winner.
To exit the board a unit's Leader model must reach the board edge as part of an Advance or Sprint action. The unit will immediately be removed from the board and its US added to the VPs scored for it escaping. Once a unit has escaped in this way, it cannot return to play (but of course is also not counted as destroyed).
Diagram: the defender's exit edge is the opposite long table edge to the attacker's 12" Deployment Zone, with a 12" distance marked.
Weapons Testing
This entire area is a Corporation weapons research facility. There may be valuable new and untested military tech here.
- Terrain: Players take it in turns to place a total of four weapons testing buildings. All buildings must be placed outside of Deployment Zones in the opposing players half of the board no closer than 3" from another building.
- Deployment: 12" Deployment Zones for each player along the longest opposite table edges.
- Game Length: The game will last 5 Rounds.
- Victory Conditions: The player with the most VPs at the end of the game is the winner.
Special Rules: When a unit (excluding units with the Walker, Vehicle or Beast Keywords) is in contact with a building, it may spend a short action to search the weapons facility, but a unit may not repeat the search in the same activation. Each building may be searched a maximum of three times during a game, but no units may enter any of these buildings. To perform the search, roll a D8 and check the result below:
- 1-2 Tick, Tick, BOOM!: You have found some unstable Bombs! The searching unit takes D8 hits with Blast (D2), AP1. The Searching unit gains 1 VP if it is not destroyed.
- 3-4 Ammo!: The unit gains Weight of Fire (1) for the rest of the game.
- 5-6 Sweet Tech!: One model within the unit may use new weaponry with the following profile: R24, 4D. Gain 1 VP.
- 7-8 Fizz Banger!: One model within the unit may use new weaponry with the following profile: R36, 2D, Blast (D4), AP2, Anti-Aircraft, Anti-Tank. Gain 2 VPs.
Diagram: Player A and Player B 12" Deployment Zones along the long table edges.
Data Retrieval
The local defence network has gone down but valuable data is still held in terminals across the battlefield. Finding and accessing this data will be vital to winning the planet to your cause.
- Terrain: Players take it in turns to place a total of six terminals (Objective markers) outside of Deployment Zones in the opposing player's half of the board no closer than 6" from another terminal.
- Deployment: 12" Deployment Zones for each player along the longest opposite table edges.
- Game Length: The game will last 5 Rounds.
- Victory Conditions: The player with the most VPs at the end of the game is the winner.
Special Rules: When a unit (excluding units with the Walker, Vehicle or Beast Keywords) moves into contact with a terminal it may attempt to access the data. To access a terminal a unit must perform a short action and roll 1D8 (this increases to 2D8 if the unit has the Hacker Keyword). Each result of 5+ (on either die) counts as a success. The player will gain 1 VP for each successful access of data.
Once a terminal has been successfully accessed remove the terminal and place a new one 8" away in a direction determined by the apex of a rolled D8. If this would be off the table edge then roll for direction again.
Diagram: Player A and Player B 12" Deployment Zones along the long table edges.
Warpath Universe
The Galactic Co-Prosperity Sphere
Today, the Galactic Co-Prosperity Sphere stands astride the galaxy as a titan. Its current borders, loosely defined but undeniably vast, encompass as much as a quarter of known space. Countless star systems are included upon its asset register and scores of sentient species are listed amongst its population. It is not a single state as such, but an interstellar conglomerate. It is a syndicated superpower, a competitive collective. One whose wealth and weightage is already unimaginable, but also exclusively directed towards a singular goal - the acquisition of more. Its constituent corporations, most of them constantly striving to outdo and outgrow their rivals - and the rest of the galaxy at large - are at the very same time bound together under a single, all-powerful leadership: the Council of Seven. Securing the safety of the Spheres, and ensuring the rulings of the Council are strictly enacted, are the super-human soldiers known as the Enforcers.
The GCPS is the greatest enterprise in the history of mankind. After nearly one thousand years of growth and development, it is stronger than it has ever been before. But it is not the only power moving across the stars. As the GCPS and its leaders prepare to celebrate a millennium of existence, its enemies, both within and without, those seen and unseen, are also gathering their strength and putting their own plans into motion. Plans that could threaten the future of the GCPS and bring an end to its relentless expansion. Plans that could change the entire galaxy, forever.
The Five Spheres
It all began on the world now known as 'Old Earth'. That dried-out husk of a planet outlived its own usefulness a long time ago but, in its last gasps of life, it birthed a movement that has, so far, proved unstoppable: unadulterated, undiluted and unapologetic capitalistic commercialism. Old-fashioned nation states developed the original space programmes on Old Earth. But the inefficiencies of the political system meant their efforts were hamstrung and unable to truly shine. Instead it was private enterprise that first carried man to other planets, and then to other stars. These earliest corporations took mankind's first faltering steps out into the galaxy and, fittingly, they and their descendants still drive the GCPS forward today. Companies like Trontek, Mi-Gan, Accutek, and Mazon are the backbone of the GCPS; its body, and, most of the time, its teeth. They and a thousand more continually feed on new worlds, new technologies, and even entire new civilisations, as fast as they can be incorporated. In turn these commercial giants churn out all the products, goods, consumables, and share dividends the Five Spheres demand.
Since its birth, the GCPS has undergone several phases of expansion. Each one has been marked by a rush of corporations eager to claim the riches known or suspected to exist on worlds as yet untouched by human hand. The first phase of an expansion, or a new 'Sphere', allows for unmanned probes to be dispatched out of corporate space and into the neighbouring unknown and unexplored areas. Some fly under their own power, using smaller versions of the McKinley drive to reach their destination. Others are sent aboard hive-barges and spread out like jetsam in their mothership's glittering wake. On reaching their target, be it a sun, a planet, or some other interplanetary feature like an asteroid or concentration of interstellar gas, the probe will evaluate what it has found.
How much and how many valuable minerals appear to be present, viable farming land, indigenous lifeforms, and so on. The target's Exploitable Assets are thus catalogued, roughly, giving corporations vying for new contracts an idea of what they might get for their money. Whole star systems can be parcelled out this way, auctioned off to the highest bidders like cuts of meat on the abattoir floor. And then, once contracts have been signed and the Council of Seven has given their approval, the expansion can truly begin; colonists and workers can be recruited, seed vessels can be dispatched, and factories and processing plants can be constructed.
The GCPS is not 'old' in galactic terms - its Establishment was made official just less than a thousand G-standard years ago. But, in that relatively short time, it has been able to inaugurate five Expansion Spheres.
The First and Second Spheres are the most technologically advanced and wealthiest parts of mankind's dominion. The reason for this is simple - these are the oldest colonised worlds in the corporations' journey through the stars and it is to them that most of the GCPS's wealth is now funnelled. The First Sphere 'Core Worlds' are home to the oldest and most powerful families in the galaxy - the people pulling the strings of mega-corporations like Trontek, Accutek, and Mi-Gan. It is also where the Council of Seven sits, administering their control over all five of the expansion Spheres currently under their dominion. Many of these Core worlds are paradise planets - havens of unparalleled luxury and sophistication, where the only limits of indulgence are ultimately one's imagination. The Core is where almost every corporate citizen with a working intelligence aspires to live one day. Few though will ever have the financial and political clout to ever get there. Money moves far more easily than people do through the corporate strata. However, even a home in the Second Sphere will give most of its residents access to an abundance of luxury and leisure.
Further out from the Core is the Third Sphere. Few worlds here even come close to the splendour and spectacle of the Core, but they are at least aspirational, if not inspirational places to live. Many veterans of the corporations' wars across the galaxy have made their homes on Third Sphere worlds, earning their places by hard service and more than a little luck. Generations of military employment have made many of these planets relatively safe, while that same unending martial career path also prevents them becoming overly crowded. Other Third Sphere worlds are still active combat zones; planets whose indigenous populations continue to actively resist incorporation or removal, or places the GCPS's true rivals are claiming as their own. They may even be sites where disagreements between rival corporations have boiled over into outright armed combat.
War is even more common amongst the Fourth Sphere worlds. Many of them are only lightly colonised and most are still actively being worked for their resources. Although nowhere outside the Core is truly impregnable, it is here that many of the GCPS's enemies find the ripest opportunities to attack. Lightly-armed miners make tempting targets for predators who are neither prepared nor equipped to conduct their own surveys of a sector's resources. Even colonies that are garrisoned with corporate troops might be many parsecs from resupply or reinforcements.
Further still from the bright centre of the GCPS lies the Fifth Sphere - the Fringe. The Fringe has only been licensed for exploration for fewer than forty Galactic-standard years, but has already produced a higher concentration of valuable asset allocations than any other Sphere did within the same timeframe. Worlds rich in precious ores, including the Newtonium essential for interstellar travel, rare gases and other treasures abound. There are, however, also abundant dangers in those parts of the galaxy and it takes a special kind of personality to take on the risks associated with working the Fringe. It is here one is most likely to encounter hostile alien races, including those not properly incorporated into the GCPS. And there are numerous bands of pirates, privateers and other outlaws open to preying upon the unwary and unprotected. Luckily for the GCPS, there is no shortage of corporate employees brave, desperate, or simply foolish enough to try their luck in the Fringe worlds and the Council of Seven would have it no other way.
Dating the GCPS
The Establishment of the Council of Seven and the formal recognition of the Galactic Co-Prosperity Sphere marked the beginning of an entirely new calendar for all of its citizens. Years since those great events are dated as 'AE', as in After the Establishment. All events occurring before that date are referred to as 'BE' - Before the Establishment. And, even though every planet in the galaxy has its own local day and calendar, official GCPS documents almost always refer to G-standard days and years - those times being equivalent to a day or year on Old Earth.
In this way business is able to be carried out across the Five Spheres without all the confusion of needing to factor in time dilation and relativity into contracts and calculations.
The McKinley Drive
The early growth of the GCPS was slow and perilous. Even with the most powerful ionic hydrogen engines, interstellar transports could take years, decades even, to reach their destinations. Cryo-sleep technology was frequently employed, allowing colonists and explorers to sleep away the years between worlds but it was prone to mishap and malfunction.
Navigational systems were similarly imperfect - sometimes ships would miss their targets entirely, leaving their passengers drifting endlessly in the void between star systems or marooned on whatever rock they were lucky enough to reach before their fuel ran out. Most of this changed though when a little more than a hundred years after the Establishment, the McKinley drive was born.
The drive creates an artificial black hole at the prow of its parent ship, allowing that ship to 'slide' along the gravity slope before it, moving many times faster than light. A vessel can, in this way, cross vast distances in a short space of time, but there is an accompanying degree of danger. Any significant gravity source - planets, asteroids, actual black holes - can pull a ship off course. Hazards like these must therefore be mapped and monitored. Ships using a McKinley drive can then slide between and around them, using data received from the NavCorp network. Any discrepancies or out of date data risks a ship being destroyed and it is a fact that not all astral entities are entirely stable. Because of this, there are many well-travelled routes across the galaxy - and a corresponding number of sectors and star systems that rarely, if ever see corporate traffic.
Diagram labels: Heat Dump; Power Core; Gravitational Feeler; Bekenstein Radiation Gauge; Gravitational Load Emitter (Einstein's Finger); Carbon Latticework Beams.
The Council of Seven
The early days of mankind's expansion into the galaxy saw slow but steady growth. The most aggressive and entrepreneurial corporations used ion drives and sleeper ships to push out from the planet of their birth and into the neighbouring stars. Colonies were established and fortunes were made and lost. These were chaotic times, when apparently legal claims to newly discovered resources often weren't worth the datachips they were recorded on. The distances being travelled, and the time it took to do so, meant ownership of a colony world could have changed hands several times before prospective settlers emerged from their cryo-tubes. Might also made right, more often than not, when you were lightyears away from the next settlement. Having the right paperwork, all properly signed and witnessed, meant absolutely nothing if a stronger corporation came in with assault marines and vaporised all your documents and your witnesses to boot. And so the most vicious corporations grew and prospered, carving out niches for themselves in the new economy in ways that even Darwin and Keynes could not have foreseen. Greed ruled supreme and more than a few corporations - and all their employees - were wiped out in the struggle to secure a foothold in the new order. The prosperity that accompanied the settling of the worlds that today more or less make up the Core came at a great price.
It seems likely that this state of affairs could not have lasted forever; the corporations had not escaped Old Earth merely to destroy each other on distant planets, and yet it seemed this outcome of the whole venture was a distinct possibility. Eventually, matters would get out of hand. Before that could be allowed to happen, someone would have to take the reins of the rapidly growing interstellar empire, steering it onwards, with at least some degree of cooperation, towards ever greater challenges.
The original 'group of seven' were the heads of major corporations, chosen by a consensus of their peers, as a kind of formal coordinating committee. The seven would be responsible for settling disputes between rival companies and for negotiating terms with alien groups when their interests conflicted with that of mankind. In the event those negotiations failed, the seven would be able to recommend and facilitate the formation of military coalitions, drawing from all the corporations, to meet and destroy the new threat. They would not have to wait long before getting the opportunity to do exactly that.
DESTRUCTION OF POLLUX
The Alliance Europeenne Occidentale, or AEO, was the first company to reach the Pollux system, home of an alien race with whom no human had had prior contact. The Mojat were no more technologically advanced than mankind was at that time - they had not even achieved interstellar space travel yet. The AEO, officially at least, wanted nothing more than to establish friendly trading relations with their newly discovered galactic neighbours. A delegation was duly dispatched to meet with the Mojat but not one of them is believed to have lived for more than twenty-four hours after landing on the Mojat home world. The 'why' of their fate is to this day unclear. The 'what' was clearly established from transmissions received from the delegates' subdermal bio-monitors: roughly half the team were dead within an hour of landing and half the remainder died at some point over the next day. As if this were not horrific enough, the last few AEO delegates appeared to have suffered prolonged exposure to some kind of painful stimulus before they too succumbed to however they were being treated. The delegation, it appeared, had been betrayed: ambushed, hunted down, and tortured to death.
The 'Pollux Betrayal' had a galvanising effect on humanity. As was their remit, the group of seven quickly drew up plans for a joint military expedition, one using the combined private security forces of as many corporations as could be reached. Factories were retooled and shipping rerouted, creating and mobilising a vast amount of armour and firepower. Even Old Earth was brought, temporarily, back into the fold, as mankind united to defeat the alien threat. A massive conscription effort added hundreds of thousands of troops to the existing militaries of mankind. It is fair to say however that almost all the conscripts from Earth were more than happy to join up if it meant a chance to get off their dying planet. The task force, at the time the most powerful in the history of mankind, laid siege to the Mojat within months.
Official histories of the attack on the alien home world show an almost one-sided affair. The Mojat were completely overwhelmed, their own tiny starfleet blasted into dust within hours and their planetary defences obliterated shortly thereafter. There were so many human ships in the Pollux system, some said you were more likely to collide with a friendly vessel than be hit by anything the Mojat threw at you. No more humans ever set foot on the planet's surface - they didn't need to. A sustained bombardment of the beleaguered world completely wiped out all life on its surface and, eventually, cracked its mantle. The planet was rendered sterile, wracked with a fire that burned for centuries.
The mystery of why the Mojat chose to massacre the AEO delegation remains, to this day, unsolved. No records of their decision-making process survived amongst the smouldering ruin of a planet they left behind. What was made very clear by what happened to their race though was the strength a united humanity was able to muster when provoked. That, and the lengths the human race would go to to protect its interests. Pollux was a statement as much as a reaction. It put the rest of the galaxy on notice - the corporations were a force to be reckoned with.
New World Wars
The unity of purpose that made the eradication of the Mojat such a success was not to last for long. Once the war was over, old rivalries surged again to the fore. The New World Wars that followed were fought between corporate enemies that were now even more well-armed than they ever had been before. During this dark time even the group of seven found themselves under attack. The wars raged for decades, with colony fighting against colony, until, after nearly a century of bloodshed and destruction, the group of seven were finally able to restore some form of order.
Even before the Mojat, the corporations had encountered more than a few alien races since leaving Old Earth, but corporate intelligence suggested there was worse yet to be found. Dwarfs, a stout race of engineers that called themselves 'the Forge Fathers', were known to command the stars to the galactic north. They were clearly mankind's superior in technology if not height. And there were rumours of an even more powerful empire, one of tall, slender aliens with vast armies of mechanoids, holding the stars to the west. To the group of seven, one truth was blindingly obvious: mankind did not yet have the power or discipline necessary to meet dangers such as these.
The galaxy was far too dangerous a place in which to allow a fractured and fractious mankind to travel. A new structure, the seven reasoned, was needed. A co-operative one, one that did not stifle its members yet still bound them together, allowing each to benefit financially from the security their collective strength gave. Many were quickly brought into the fold, others took longer to convince. But the seven were ruthless in their quest to end the wars and bring every other corporation to heel.
Eventually the last rogue corporations were hunted down and new treaties and pacts were signed and notarised. As the last guns were silenced, the Council of Seven and the Galactic Co-Prosperity Sphere was formally established. A golden era followed as the corporations, no longer held back by infighting and suspicion, were able to truly embrace their destiny amongst the stars. The creation of the McKinley drive, a machine that allowed starships to travel at faster than lightspeed further accelerated the GCPS's growth. Over the following centuries the GCPS expanded relentlessly, adding three more Spheres to the Core worlds, developing numerous novel technologies, and incorporating or destroying every new alien race it discovered along the way.
During the GCPS's Fourth Sphere of Expansion though, even with the Council's firm guidance, peace between the corporations was becoming strained at best. Many of them seemed to think they could only continue to thrive at the expense of the others. The Council's powers, though authoritative, were still limited. They could adjudicate disputes brought before them, but there was often little they could do to prevent them arising in the first place. Collectively the GCPS was practically unstoppable, but the Seven foresaw it might not take much to drive a fatal wedge between them all. Acting with characteristic decisiveness, they wasted little time in attempting to remedy this deficiency.
Their solution was one filled with manipulation and machination. A conflict was created, one that would force the corporations to work together and realise the larger existential danger the rest of the galaxy posed. The group of seven chose the Marauders, alien mercenaries that had been employed for many years to augment certain corporate troops, as their fall-guys. Seemingly without warning, Marauder units rose up against their human employers and laid waste to entire planets. The Mandrake Rebellion, as it came to be known, was only intended to demonstrate the inadequacy of the corporate military structure as it stood. To persuade the heads of all the corporations that their alliances must be made stronger and permanent. Instead it nearly toppled the entire GCPS, stretching its collective defences almost to the breaking point.
In time, the war against the so-called "orcs" was finally won though. By deploying the prototypes of what would soon become the most powerful warriors in humanity's history, the Seven were victorious and the rebels crushed. These events, and others like them, provided the Seven with the impetus and the political capital to achieve something they could never have bought with anything else: absolute power.
Nearly one and a half centuries on, today's Seven and how they function are quite different to the founding members, as is the galaxy they face and the GCPS they lead. But the wounds caused by Mandrake have not all completely healed. Neither have all the legends and monsters of that time completely gone away either.
A Galaxy Incorporated
As has been noted, the GCPS is vast. There are enormous distances between even the closest colonised systems and there are countless worlds upon which no corporate foot has ever trod. As it continues its endless mission to exploit every corner of the territory it claims as its own however, the great variety of life in the universe means that the GCPS continues to uncover new races and civilisations within its borders to this day.
Contrary to what certain 'casters on the pirate nets would have you believe though, the GCPS does not exterminate every alien race it encounters. Only the ones that resist. Indeed, its preferred protocol on discovering an intelligent species within its borders is incorporation. Sentient, compliant races are typically initially offered Preferred-level membership when they first join, progressing in status as they increase their contribution to the GCPS's wealth and strength. Successfully incorporated races include the Teratons, Ada-Lorana, and Chovar, all of whom occupy unique and valued positions across the Five Spheres.
The Exo-Threat
Sidebar: Counteraction Unit
There can be few organs of the corporate machine with as much influence as the Eco-Threat Counteration Unit. Its power is rivalled only by the Office of Market Intelligence. The reports generated from its vast headquarters in the Core - and its numerous though often far better hidden stations across the Five Spheres - can quite literally start or avoid wars. This is because ETCU's primary tasking is the analysis and monitoring of every alien species the GCPS encounters. New races are surveilled - in secret if possible - while ETCU evaluates their technological capability, cultural mores, and likely response to overtures by the Council. Does the new race have anything of value to the GCPS? Are they likely or able to resist incorporation? Should the Council dispatch diplomats or warships to make their introductions? The answers to questions like these have obvious, far-reaching consequences, thus the ETCU is given almost limitless funding and time to do its job. But even after a new species has been conquered or incorporated ETCU's work is not done. After all, more than one so-called 'ally' has turned traitor after being brought into the fold in times past, so the Council watches its friends just as closely as it does its enemies. A supervising ETCU Grade-3 agent may often make the evaluation that it is more cost-effective to annihilate a new race on discovery than it might be to repair the damage done by turncoats.
The Mandrake Rebellion
History, they say, is written by the victors, and in no case is this more true than in the case of the Mandrake Rebellion. It helps, of course, that in the GCPS the study of history is not exactly encouraged. But for those that can be bothered to tear themselves away from the latest entertainment show on the CorpsNet, a sanitised, Council-approved version of the story is available.
According to corporate records, in the year 850AE, greedy orc warlords, hungry for power and envious of the success of humankind, rebelled against their GCPS officers and went on an interplanetary rampage. Marauder troops had been a part of the corporate military for a very long time and then, at some point, they decided they wanted more. Millions were slaughtered by the merciless orc horde and entire star systems occupied or laid to waste by the green tide.
Defeating them took an unprecedented amount of cooperation by the corporations and led to the development of the Ichiban project - the precursors to today's Enforcer corps. And, again, according to corporate records, the masterstroke that put an end to the rebellion occurred at Nihil Rex when the bulk of the orc army was obliterated thanks to superior corporate manoeuvring. The star that still shines there serves as a reminder to all of the GCPS's strength and power - or a warning against testing its resolve.
Naturally, there are others alive today who tell a different tale, would have you believe the corporations - or the Council themselves - were to blame for what happened in the Mandrake sector. But those losers aren't bringing you new seasons of OverDrive, are they, so who cares?
Greater Powers
The GCPS might have collapsed early in its existence if it were not for the discipline imposed by the first Council of Seven and all those that have followed it. But by bringing order to the corporations, open warfare between rivals is usually restricted to one or two star systems and never allowed to interfere with the GCPS and its profits at large. The Council is rightly pleased with its ability to hold so many would-be enemies in check for so long. There are races in the galaxy to whom mankind is but a child though and the antics of the GCPS similarly immature.
One such is the race of dwarfs known as the Forge Fathers. The Forge Fathers are an ancient race - according to their legends they are nothing less than the oldest of all that now live. Whether this is true or not is perhaps moot, but they are certainly amongst the most powerful.
Excelling in engineering and craftsmen beyond compare, the Forge Fathers are often found travelling and living aboard vast Ward ships. Each one is a colossal starship, flagged to a single Forge Father clan, and populated by thousands of dwarfs. Within the Ward ship are countless foundries and workshops, each of them alive with the sound of ringing hammers and bubbling molten metal. There are also barracks and hangars and vast stores of raw materials and consumables. Many Forge Fathers would happily live their entire lives aboard their clan's Ward ship, filling their days crafting and creating, training and tooling, though all of them spend at least part of their lives as warriors. Their most impressive creations are the Forge Stars, gargantuan mega-constructions, designed to harness the power of entire suns. The average GCPS citizen is far more likely to meet a dwarf on the field of battle than ever see the wonders that lie within the Star Realm though.
Spitzenner was the site of the first recorded contact between man and dwarf, in the year 353AE, during the third expansion phase of the GCPS. Corporate settlers had taken possession of what had seemed to them to be an unoccupied world to the galactic north of Old Earth and were eking out a new life on a hard planet. Unbeknownst to them, Spitzenner had already been claimed by one of the most powerful Forge Father clans. When the Strikhammr clan's Ward ship, along with its attendant fleet of warships and auxiliary vessels, arrived in-system, armed conflict was not far behind. Friction between the GCPS and the Star Realm was almost inevitable - if it hadn't happened on Spitzenner it would probably have happened on some other nearby world. This is because the Forge Fathers have in fact already laid claim to every single usable resource in the known galaxy. It has simply never seemed necessary to them to let anybody else know.
Dwarfs are a long-lived race, and a patient one. Their engineers are quite content to spend countless cycles painstakingly draining every iota of worth out of each world they come to. So their progress across the galaxy is, by most races' standards, very, very slow. It had so far also been inexorable. Over the aeons of its own expansion, the Forge Father civilisation had never once been stopped by any of the races they had yet encountered. When they met the GCPS, the Forge Lords were genuinely and unpleasantly surprised to find themselves faced with an enemy almost as stubborn and convinced of its claim to the galaxy's wealth as they were.
The extermination of the human colonists on Spitzenner began the War of the Short Front. Numerous clans and just as many corporations were dragged into the fight as more colonies were found by the dwarfs on worlds they believed to be their own. The cost to both sides in lives and resources was enormous. Fleets were reduced to drifting hulks and armies were annihilated. Planets were rendered uninhabitable as vast amounts of munitions were expended. So devastating was the war that eventually certain Forge Lords concluded something previously unthinkable might now be the only way to end such a costly conflict. These Lords set forth their plans to take the unprecedented step of unleashing the nuclear firepower of the Forge Stars themselves. First they would utterly annihilate each and every world the GCPS had colonised within the borders of the Star Realm. Then they would turn those same fires on every other planet humans had claimed. It would not be a quick operation, but, as has been mentioned, this is no reason for a Forge Father to not commit to a well-planned course of action. However long it took though, the result would likely have been that humanity would, eventually, be literally burned out of existence.
Thankfully, other Forge Lords advanced a far less violent way to solve the conflict of interests and end the war. Rather than excising their foe completely and, along the way, wasting all the resources that would have been atomised along with them, the Forge Lords decided to speak to them in the only language both sides seemed to understand: commerce.
Today the Forge Fathers are the GCPS's most important trading partner. Not all the Forge Lords take part and there are still many conflicts ongoing in that part of space. The GCPS continues to nibble at worlds the dwarfs claim for their own, and vice versa. But both sides tend to tolerate this. The Forge Lords, for their part, value the GCPS and its armed forces as allies who, at the very least, are busy taking care of enemies far away in the galaxy, long before those same enemies become a problem for the dwarfs. But, it is the GCPS who arguably have the better part of the bargain. For it is the Forge Fathers themselves who have supplied much of the technology that has made the GCPS the equal of practically anything else in the galaxy. Most vitally of all, they supply the Council of Seven's private army, the Enforcer Corps, with its armour.
ETCU and the Star Realm
Trade with the Forge Fathers is vital to the continuing success and profit of the GCPS. Without their armaments, the Enforcer Corps would likely be a shadow of its current self. And, without the Enforcers, the Council of Seven would have no way to prevent the GCPS being eaten alive by its enemies, both within and without. So, the Forge Fathers are one of the few races known to exist that ETCU are officially prohibited from monitoring or studying. Corporate starships are expressly forbidden from crossing into recognised Forge Father space and ETCU may not board or monitor any dwarf ship in the Five Spheres belonging to clans the Council has designated as 'partners'. To their credit, there is no publicly available, verified record anywhere of ETCU researchers ever contravening these regulations. This is not to say that ETCU never has, of course. Only, and most importantly, that it can never be proved, in any legally enforceable way, that they are responsible for the unexplained disappearance of any dwarf traders, rogue Ward ships, or small mining expeditions in isolated systems at any point in the last few hundred years. The galaxy is a big place and people and starships go missing all the time.
Operation Heracles
Not all the clans of the Forge Fathers agreed with the plan to trade with the GCPS and not all of them benefit from it today. The GCPS has many enemies in the Star Realm and conflicts, albeit on a far smaller scale than the Short Front, continue to erupt. Typically these are due to one side staking a claim on a world or resource already claimed by the other. Sometimes the provocation is far more deliberate.
Corporate forces on the world of Triton were besieged by the Steel Warriors of the Forge Father clan Krestursson. The clan's lord, one Ingulf Krestursson, known to his race as 'the Dragon', led the invasion force with two goals in mind. The first was to lay hold of the planet's seams of primordial metal, an element of enormous value to all Forge Fathers. His second was simply to spark conflict between his people and the GCPS.
Krestursson is descended from the lords who initiated the peace talks that ended the War of the Short Front, but he himself feels only hatred for mankind. Many of his kin have died at the hands of the Council of Seven's agents since the talks on Stjarnseer, and Ingulf desires nothing more than outright war between the two great powers.
The Dragon's aggression on Triton was swiftly answered when an Enforcement Protocol Group, codenamed Heracles, led by Forward Observer Roca, launched their own counter-assault. The fighting that followed was brutal and hard and cost the lives of many dwarves and Enforcers. Great swathes of terrain and most of the planet's nascent townships were laid to waste as the dwarf forces struck again and again at the corporate defences. Still though, to Krestursson's chagrin and ever-increasing anger, the Enforcers were eventually able to claim victory.
Part of Krestursson's plan for Triton was to use the battle as a kind of rallying cry, to demonstrate to other clan lords the insatiable greed of mankind as well as its vulnerability. He had hoped those lords would bring their Ward ships into orbit above Triton, creating a ring of forged steel the GCPS could not hope to break and starting a war that would never end. Dwarf politics move far more slowly than one lord's vengeance-fuelled plans though and no other lord came to aid the Bruderheim in its time of need. The Enforcers had no such problems.
When it became clear how strong the Forge Fathers' forces were on Triton, and how urgent the need for decisive action was, Forward Observer Roca called for immediate reinforcements for his EPG. Starships were quickly diverted from the Long Patrol, enough to flank the Bruderheim and its fleet and threaten their annihilation in space. Krestursson was forced to withdraw as many of his warriors from the planet's surface as possible, lest he lose everything. His fleet fled the system, harried for only a short distance by the Enforcer ships - their duty on the border with the Death Arc precluded a more decisive engagement.
Now, unbowed by his defeat on Triton, Ingulf Krestursson continues his campaign to sow discord and destruction throughout the GCPS. While his emissaries continue to attempt to sway opinion within the Star Realm and win more lords to his cause, the Dragon himself conducts lightning raids across the Five Spheres, assaulting the GCPS wherever he sees an opportunity. His rage is unquenched and his attacks are unpredictable and costly too. The Dragon ranks highly on the Council's list of Priority Acquisition Targets, meaning every Enforcer across the Five Spheres would attempt to kill him on sight. There are indeed several Targeted Termination Teams working secretly to locate and assassinate the lord of the Krestursson clan already. For the sake of all the GCPS it is to be hoped perhaps that they succeed in their mission and soon.
Because not all the Krestursson Forge Fathers were successfully lifted from Triton before the Bruderheim was driven away. Several were captured and swiftly spirited off-world to corporate Black Sites for what Central Command terms 'Advanced Interrogation'. All of this is strictly forbidden under the terms of the treaties between the GCPS and its allies in the Star Realm and grounds enough for some severe consequences. But, to make matters worse, one of the captives is Ingulf's uncle, the venerable but vicious Krakun Krestursson. If word were ever to leak out that such a senior lord had survived the war on Triton only to be tortured and interrogated interminably by the GCPS, it might just be exactly what Krestursson needs to kickstart a final and decisive war with mankind.
Hidden Power
There is known to exist one other great power in the galaxy that rivals and counters that of the GCPS: the Asterian Empire. Centred on the world of Asteria Prime and governed by the Tesseract, it is, quite simply, huge, reaching all the way from the GCPS's furthest outposts in the galactic west to the galaxy's northern rim. So many star systems might be unmanageable to most species, but Asterians' mastery of technology has long been so great that mere distance is immaterial to them. Asteria mastered the bio-forming of worlds in millennia long past, even moving planets when it suited their purposes. The Asterians are - or were - perhaps the most powerful race the galaxy has ever known. This power has been tempered by unimaginable tragedy though and Asteria is held back by its past as much as built upon it.
Asterians are taller than most humans, often slimmer, and potentially far, far older. As technological masters, they have shown very little interest in anything the GCPS or any other race might have to offer and have consistently refused to allow the passage of corporate ships through their space. The leaders of Asteria nevertheless found themselves forced to deal with their primitive neighbours when the GCPS began expanding in the direction of their empire.
Growing Pains
The invention of the McKinley drive in AE117 massively accelerated the growth of the GCPS. Many starships could now travel further and faster than ever before, allowing the rapid colonisation and exploitation of resource-rich planets. In some ways, the expansion program ran out of control and the GCPS grew for a long time faster than even the Council could keep track of or support. The GCPS had barely begun its Fourth Sphere of expansion when it began sending out probes for the Fifth. So it was that when a string of newly discovered worlds to the galactic west of the Core were earmarked for investigation, there was little to stand in the way of any interested corporations.
Remote probes were the first to reach them, scanning their surfaces and searching for potential assets for exploitation. Analysts of the data the probes sent back were not surprised to find evidence that someone else had been there long before them. Ruins of an ancient civilisation, clearly technologically advanced, but also apparently extinct, lay all around. There were great cities, replete with impressive buildings and exotic works of art, some seemingly centuries old but all completely abandoned. There were some signs of battle too, and more than a few skeletons, but their race could not be identified and, truth be told, nobody tried that hard to. This was not the first time the GCPS had discovered a defunct species in its journey across the stars and probably would not be the last. What mattered was not who the unknown aliens were or why or how they died. What mattered was how big the stores of valuable minerals and ores they left behind was and how much of the tech they had abandoned could be salvaged and repackaged.
And then the Council did something it had never done before: it forbade any further exploration or exploitation of what had come to be known as the Canco Worlds. No reason was given as to why this area of space was being made off-limits, it was simply stated as fact. These events occurred long before the Mandrake Rebellion. So, to reinforce the concept, a blockade of Marauder starships was sent to patrol the area, with orders to eliminate any and all trespassers from the GCPS's side.
Such an action was unprecedented. The Council's authority had grown enormously since the Establishment. But cutting off an area of space the size of the Canco Worlds was still a big step. The Council does nothing without good reason though, and this was no exception to the rule. Unbeknownst to any dissident voices in the GCPS, the Council had done its own research into the Canco Worlds. Furthermore, elements of the Council had met with representatives of the Asterian Tesseract and what they had learned at that meeting had shocked them to the core.
THE DEATH ARC
The Long Patrol, an Enforcer-led blockade of the Canco Worlds, what would eventually become known as the Death Arc, exists to this day. It is an expensive and extensive operation, designed to prevent the spread of the bio-contaminant known as The Plague. There are many Asterians who feel that the measures taken to control the worlds of the Arc - and humanity itself - have not been nearly severe enough though. Citing the numerous outbreaks of the Plague across corporate space and the apparent inability of the Council of Seven to halt the infected fleets currently known to exist in its territory, these Clades have formed an informal and unofficial alliance: the Conclave of Respair. The Asterian Emperor has spent many long years in exile. But, in him the Conclave sees a potential path to restoring the balance. Increasing numbers are advocating rejecting the Tesseract's authority and joining what is becoming more like an armed insurrection every day.
Countering this movement has long been the concern of the Tesseract. Many of its Counsels believe that nothing less than a military coup is being staged and that the integrity of the Empire itself is at risk. Intense efforts have been made to prevent the issue spiralling out of control, including the dispatch of several of those same Counsels to the monastery homes of the most belligerent Clades. These elder Asterians, bearing messages of reconciliation from the Halls of the Tesseract, have met with limited success. To make matters worse, Tasim Shu'u'lak, a Prime Counsel to the Tesseract, along with her son, Tui Hu, himself a senior overseer of the Clade of the Golden Rose, has disappeared from public view. Some believe the two must be dead, others that the Prime Counsel is hiding from would-be assassins. The loss of the leading voice of opposition to the Conclave and a resurgent emperor though means open warfare between Asteria and any who stand in its way is no longer a distant prospect.
Deadzones
The Council of Seven defends its treasures zealously and there are few who would claim it is wrong to do so. The past has, after all, shown all of humankind the folly in not seizing the initiative - and anything else of worth - and then holding onto it with an iron grip. Perhaps its most valuable possession of them all though is knowledge. Understanding of how the universe really turns and who holds the handle, the true scale of danger and malevolence that exists within the Five Spheres and beyond, has the power to perhaps topple the entire GCPS. For that reason, information across the Five Spheres is policed, controlled, and guarded with great diligence.
One of the greatest threats to whatever peace can be found in the galaxy is the Plague. So great did the Council of Seven view the danger of contagion to be that an entirely new way of administering information and the GCPS itself had to be created to contain it.
The Plague's origin is undetermined and its precise biology is difficult to pin down. The bio-contaminant that is spread by the infected via bite, scratch, or pustulent explosion, is neither virus nor bacteria, but something more minacious than either. What is known is that when a new outbreak occurs, it is almost always preceded by the discovery of an alien artefact. Sometimes they are buried deep beneath a newly colonised world's surface. Sometimes they are found amidst the ruins of long-dead alien civilisations. But always, shortly after being uncovered, these monolithic death-traps open, releasing the Plague into the atmosphere and beginning a new cycle of death and destruction.
The first recorded artefact was discovered on Adriana, a well-developed world along the frontier of corporate space. Madness followed its unearthing, an entire planet's population literally ripping itself apart as they were transformed into monsters by the contaminant. The chaos was only stopped by the fire from Enforcer Wyverns sent to investigate the crazed communications the planet was sending out to the rest of the GCPS. Since then the CorpsNet is monitored for any mention of certain keywords, anything that might hint at the potential discovery of a new source of the Plague.
This is because the Council has faced the Plague before and seen the damage it can do if left unchecked.
Around the GCPS's western border lies a region of space known to corporate navigators as the Death Arc. Travel here is expressly forbidden - standard NavComps do not even register any celestial bodies being there at all - and the Arc is guarded by a special division of the Enforcer corps known as the Long Patrol. Before the inception of the corps though, corporations did dare to ignore the orders of the Council and travel to the worlds within the Arc. Among them was House Grace, at the time one of the oldest corporations in the GCPS. The prime officer of the company chafed at being told where he could and could not go while also being part of a reportedly free society.
To Cadmeyer Grace, only the markets could tell corporations what their limits were and, as far as he was concerned, those limits were nowhere near being reached. Grace sent three fleets of colonial explorers into the Arc, navigating around the Marauders who were guarding it at that time, with the possible intent of setting up his own rival to the GCPS. Contact with the fleets was lost some time between their departure and Cadmeyer's arrest and trial for treason. But it was not the last that was ever heard of them. Some of Grace's ships did come back, more than a century later, but their crews were no longer human. A fleet of Plague vessels, their crews hideously malformed and under the thrall of even greater monsters, struck out at the GCPS. Since they had left corporate space the Marauders had been replaced by the Enforcers and the Plague fleet easily broke through their thin line. They subsequently burned a path deep into the GCPS and were able to lay waste to the better part of the entire Parris sector before they were stopped.
The Plague are unique amongst all the enemies of the Council of Seven in that they are the only one whose armies grow larger as they conquer more territories. The Plague's ranks are swelled, literally, by those they have not killed outright, but instead infected with their own strain of madness. The bio-contaminant at the heart of the Plague is incredibly contagious and capable of infecting almost all known sentient species. Parris taught the Council that even a single case of infection can rapidly lead to an entire world being lost. And, once one world is lost, whole systems can be threatened. To meet the existential threat the Plague appears to pose, the Council enacted the Containment Protocols. These measures are intended to prevent, at all costs, the spread of the biological infection as well as that of panic. The GCPS is, it has been noted, built on commerce first and foremost, and it is difficult for anyone to sell the latest luxury fashions and exotically scented soaps when people are worried their neighbours are going to try to eat them. The goals of the Containment Protocols therefore are to confine, as soon as possible, any world infected by the Plague as well as any knowledge of what has happened there.
The first anyone in the affected system might know of a Containment Protocol being imposed could be the loss of data in their ship's NavComp. NaviCorp is wholly owned by the Council and operates a network of navigational relays across the Five Spheres. In normal times, these relays feed the NavComp computers aboard travelling starships all the data necessary for them to safely slide at speeds faster than light between and around stars. But, when the order is given for a full-scale containment, an infected planet is immediately cut out of NaviCorp's publicly distributed database, meaning no ship can leave or enter the system.
To prevent alien races - or enterprising homebrew navigators - from using their own interstellar means of transport, so-called Deadzones are subsequently blockaded by warships. Usually these are Enforcer starships, though, as outbreaks become more common, private military forces are being called upon more often to hold the lines. Once the Protocol is in place, the planet under containment is likely to stay that way for several decades - long enough, at least, for the infected to die out.
Despite the best efforts of the Long Patrol, there have been several successful breakouts from the Death Arc and from Artefact-afflicted worlds closer to the Core. At least three large Plague fleets, all of them consisting of a mix of captured and infected military and commercial vessels, are known to currently be moving across corporate space. They are difficult to track - none of their ships are using standard NavComp equipment and how they are finding their way between stars at all is yet another mystery to vex ETCU investigators. Thankfully, their attacks on civilised worlds are infrequent and sporadic: none have, yet, made serious attempts to do anything like the damage they did to Parris in 891AE. It can only be a matter of time though before they reveal their true purpose in the galaxy and it can only be hoped the GCPS and its allies are able to stop them when they do.
Pathfinders
The history of warfare has taught the leaders of the Enforcer Corps many lessons. Not least of which is that the better prepared a military force is, the better the chance they have of victory. The role of the Pathfinder division is to help the Enforcer Corps - and the GCPS at large - be as prepared as it can be. The corps hides its numbers, strength, and movements almost religiously - Enforcers are typically not permitted to remove their helmets outside their bases for just this reason - but the fact is they are a limited resource. The Council does not wish to waste them. So it is the job of the Pathfinders to respond first to any possible security threats to the GCPS, to evaluate that threat, to act against it if necessary and to call on the rest of the Corps when a larger intervention is needed.
Pathfinder duty is even more dangerous than that of a typical Enforcer. They are often alone or operating in pairs or small units. By definition they are looking for trouble all across the galaxy and they often find it. Thus the move from the Strike Teams to the Pathfinder division is not an easy one. The failure rate in the conversion course is high and often results in the death of the applicant. Those that make it are, by far, some of the most deadly people in the galaxy.
Pathfinders that have identified a threat requiring the intervention of the larger corps will often remain on-site, transitioning to a support role. Many are excellent snipers, using EP-54 monocycles to move around the battlefield or deploying their D.O.G drones and Tag rifles to mark targets for termination by other, more heavily armed units.
Digging Deep
There are those that also have a strong interest in stopping the Plague, though for their own reasons, not out of any love for the GCPS. Hunter clades of Asterians covertly travel throughout the Five Spheres, using their own technology to evade detection while they track down the Plague fleets. If this was all they did, the Council might be happy enough to let them play their game. But it is not. Sometimes, it seems, the Clades act pre-emptively, attacking corporate sites that stand in Plague's path, perhaps in an attempt to deny them more recruits. There have also been at least two cases of attacks where the Asterians' objective seemed instead to be to remove something from a planet's surface before the corporate colonists could discover it.
One such was New Gallimech. A garrison of Cro-Tek marines were besieged by phalanxes of Asterian constructs, the alien constructs appearing without warning just beyond the marines' perimeter. As Cyphers probed their defences, the garrison's walls were pounded for a full local day by fission beams mounted on Phanta-class gunships. Soon after the siege began, the garrison began receiving distress calls from miners at a dig ten kilometres to their southwest. More Asterians had been spotted and the miners were ill-equipped to defend themselves. The marines were unable to leave their base in response though. Every time one of their Hornets appeared above the garrison's wall it was instantly vaporised by unseen anti-vehicle weapons.
A Mule convoy met a similar fate, its lead vehicles being quickly knocked out by sniper drones, leaving half the transports stranded outside the base walls. Eventually the marines stopped trying to break out and resigned themselves to concentrating their efforts on staying alive within their walls. And, eventually, the distress calls stopped coming. Early on the third day of the siege, the Asterian guns stopped firing. No signal the marines were aware of had been given - the alien gunships simply left, vanishing as quickly as they had appeared. Scouts soon reported there were no more Asterians anywhere near the base - the siege was over. Their constructs and war machines were not all the Asterians took with them though.
A second Mule convoy was organised, accompanied by what was left of the marines' Hornets, and dispatched to the mines. Cresting the last ridge along the way, the first Hornet pilots to reach the dig site could barely believe their eyes and their superiors back in the garrison couldn't believe what they were being told: the mine was gone. Where there had once been an extensive operation to recover ore laced with precious metals, there was now nothing but a colossal hole in the ground. It looked, to quote the marine pilot who discovered it, 'like somebody just scooped up the whole place and carried it away'. The hole measured nearly a kilometre across and nearly a kilometre down. The miners, all their equipment, and anything they might have dug out of the Gallimech ground was gone.
Old Enemies
The GPCS is not the only galactic power struggling to maintain its integrity and strength. The Asterian Empire and the Star Realm of the Forge Fathers were at war with one another before man's ancestors slithered out of the swamp. Hostilities had largely died down in recent centuries. However, as the Forge Father fleets have moved ever onwards and the warrior clades of Asteria have grown restless to reclaim former glories, the flames of old enmities have been fanned into life once more.
Grid Kappa Nu, a sector of star systems, far from the GCPS's borders but sandwiched between dwarf and Asterian territories, is a current flashpoint. Clan Halvorakken led the dwarf's attempts to strip-mine worlds in the sector but met resistance in the form of Asterian legions. Peace talks between the two sides failed, for reasons unknown, and war broke out. Today, more than a dozen planets and moons are besieged.
To Forge Father eyes, the worlds of Kappa Nu appeared uninhabited. With true Forge Father pragmatism, they reasoned that planets that were clearly long disused by their Asterian masters should be open to being worked by the dwarfs. To the Asterians though, these same planets were not discarded at all. They were merely sleeping. Many planets in Kappa Nu are the sites of dormant and well-hidden scientific outposts, preserved for centuries until an Asterian mind has use for them once more. Others serve a far more esoteric purpose: their galactic position and even their geological makeup contribute to the Balance in ways other races are simply incapable of comprehending.
On one such planet, one the Asterians call 'Teel'ur', Halvorakken's Steel Warriors launched an operation to support their miners stripping the mineral deposits from the northern continent. Orbital scans had shown the place to be uninhabited with only the remains of an ancient Asterian coastal city showing any sign the world had ever seen intelligent life. The miners had barely sunk their first pits, fifty kilometres inland, before they learned how inadequate their assessments of the planet's strategic importance had been.
No Asterian needed to be on Teel'ur for it to matter to the Empire and no Asterian needed to be on its surface to defend it. As Sho'senn and clade pilots sealed themselves in their control pods aboard command ships hundreds of kilometres from Teel'ur, beneath it, legions of Cyphers and Marionettes that had laid dormant for centuries hummed into life. In a matter of mere minutes, an army of drones, all perfectly preserved and still perfectly deadly, marched forth to meet the invaders. Alongside them hovered lines of Asterian force platforms and weapons drones. A silent army, unified of purpose and dedicated to one goal alone: the eradication of every intruder on Asterian soil.
In a pattern that has been repeated many times across Kappa Nu, the Forge Fathers were forced to deploy their Steel Warriors to quickly reinforce their militias and workers on the ground. Hammerfist drop-troops raced down from low orbit and Sturnhammer battle tanks roared out of their armoured carrier ships, each powered by a steely determination not to dishonour their clan lords or their ancestors. Battles raged in a dozen locations as the two sides, each of them utterly convinced of their own right to hold their ground, threw everything they had at one another.
Despite often appearing greatly outnumbered, a living Forge Father is the equal of any single Asterian construct, and the Forge Fathers have thus far been able to hold onto much of the territory they had claimed. And yet their Asterian foes seem able to endlessly replenish their numbers. For every phalanx of robotic constructs the dwarfs turn to slag, another appears in its place. Kappa Nu has become a war of attrition, with regiments of warriors on both sides endlessly striking at one another, trying to find a way to break the deadlock.
For the Forge Fathers, the cost is obvious - every dwarf life ended, no matter how gloriously, is impossible to replace. For Asteria, the price is possibly far higher. While the Asterians rarely suffer actual death amongst their ranks, they have been forced to divert several Clades and Sho'senn divisions from their positions guarding the Silent Lands to fight the war in Kappa Nu. The Tesseract is only too aware that every living Asterian who no longer protects those places makes it that much easier for trespassers to tread their hallowed soil freely. And, many of those that do so will almost certainly carry the Scourge away with them.
The Price of Failure
As a strategy, Containment Protocols are not without merit. The Council of Seven is well served by its intelligence agents, particularly its Forward Observers, and therefore well placed to evaluate threats to both the GCPS and the galaxy at large. The Containment Protocols are blunt, brutal instruments of state, but their usefulness is undeniable. Countless lives have doubtlessly been saved by cutting off those who are most likely to be infected and least likely to be saved. So effective are the Protocols believed to be, they have also been approved for several other types of incursion into corporate space. The Protocols are not infallible though - particularly when other powerful agents are actively working to subvert them.
At Exham IV, a planetary movement caused chaos, bringing the planet to the edge of destruction and sparking panic amongst all its inhabitants, corporate and otherwise. The local colony of Veer-myn in particular saw the writing on the wall early on and made best efforts to flee the surface via the orbiting Priory Station. This of course only made it that much harder for everyone else to leave. Enforcer Strike teams were sent to secure the system, and the very valuable space station, but were hard pressed to complete their mission. As is often the case, amidst the chaos of a planetary population attempting to evacuate before the Containment Protocols sealed their fate, other more predatory outfits were moving in the opposite direction. A well-developed planet, filled with corporate tech, gear, and other saleable commodities is a tempting prospect to all manner of Rebs, Marauders, and outlaw corporations. Even Plague-infected Strike Teams could find useful and much-needed munitions and supplies on such a relatively undefended world. And where the Plague go, so do hunter Clades from Asteria.
Eventually the Enforcers were successful in their task, saving Priory Station and eradicating every Veer-myn they could find on Exham IV. Unbeknownst to their commanders though, they did not completely wipe out the colony.
Thanks to an under-the-table deal between the Council and its allies in the Star Realm, Forge Father ships had arrived in orbit above Exham IV. They began to mine its assets, even as the Enforcers were digging out the Veer-myn. To the Veer-myn, this was an unmissable opportunity. Secreting themselves aboard ore containers, brethren from several nests, some of them clutching bundles of cargo far more valuable than mere rocks, were able to reach the orbiting Forge Father ships. Amongst them were Technorati who used their advanced technological skills to defeat the security grids that typically keep Forge Father ships free from infestation. Some of these Veer-myn subsequently launched an assault on a Forge Star, locking its controlling clan in an interminable war to resecure its almost-holy power and prevent it being used by the Veer-myn for their own nefarious ends.
Perhaps as important as the potential destruction of entire worlds though, is what happened to the ragged bundles that were smuggled off Exham IV. Each one was borne to safety by none other than a Malignus, accompanied by small coteries of Night Crawlers and Brood Guards. Their mission was even more vital than that of the Veer-myn who had taken the Forge Star. For these Veer-myn each carried with them a juvenile female to a different part of the Star Realm. Before long a handful of new colonies were formed, the young females quickly reaching maturity and beginning the process of birthing scores of new offspring. Forge Father operations, usually run with clockwork timing and laser-like precision, have been delayed and derailed all across the Star Realm. Most of the new colonies can be found relatively close to the Realm's borders with the GCPS though.
Fighting Fires
In many ways, the GCPS is more powerful than it has ever been. Most of its constituent corporations are thriving, moving across the galaxy at unprecedented speed, snapping up exploitable resources and using them to feed the new markets they are building. Its colonies, cities, and space stations are bigger, its pockets deeper, its shareholders richer. But, like everything else in corporate space, all this progress comes at a price. All across the Five Spheres and in neighbouring territories, conflicts are becoming increasingly common.
The presence of Plague Fleets has destabilised traffic in multiple sectors. Starships and space freighters, carrying nothing less than death and destruction, have struck at outposts across the outer Spheres, seemingly at will and without reason. Piracy has always existed and is an accepted risk of interstellar commerce. But even the most ruthless thieves can be reasoned with and they rarely kill their victims - they understand it would be bad for business if starships stopped travelling through their sectors entirely or corporations ceased seeding colonies on their worlds. What the Plague does to the ships it attacks and the people it gets hold of is clearly far worse.
The consequences of more Plague presence are inescapably dire too. More Plague attacks require increased Enforcer responses. And, though there are many Enforcers in the corps, their numbers are not infinite and they are not a cheap commodity either. Diverting them from other operations creates rents in the GCPS's interstellar armour, gaps through which other races - rebels, Marauders, the Nameless - can slip in. The Council is finding it increasingly necessary to call upon the private armies of the corporations to shore up some of these holes.
The political situation within the Asterian Empire is far outside the Council's influence, of course, but upheaval across the border is being felt within the Five Spheres. Without a moderating voice to calm their anger, the Clades are becoming more aggressive. As well as seeking out the Plague wherever it spreads, Asterian armies have been encountered on apparently uninfected worlds too. Forge Father and corporate operations alike have found themselves under sudden assault from enemies able to teleport into their midst, seemingly at will. Whether they are there to stop an infection occurring or simply to bloody the nose of their perceived enemies is known only to their own commanders. Whatever their motivation, all these incursions must be met, often with unflinching aggression.
There are other consequences of the disruption of the normally well-regulated functions of the GCPS too. The Veer-myn, for a long time an accepted but largely invisible part of corporate life, have shown signs of increasing agitation across the Five Spheres. Sometimes their uprisings are understandable - the exodus at Exham IV, the internecine war sparked by the arrival of a new colony on Acreon. Other times though, the rationale behind these offensives is far more oblique. Analysts at ETCU have nevertheless put forward a theory: the Veer-myn, somehow, are reacting to the Plague.
Some, if not all of the recent exoduses of Veer-myn populations have occurred just before either the discovery of a Plague Artefact or an attack by elements of a Plague fleet. And the Veer-myn threaten the GCPS in at least one more certain and tangible way too - almost all the recent infestations of Forge Father clans have occurred at sites belonging to allies to the Council. Several of these have threatened the supply of armour for the Enforcer corps.
Some of the most persistent, and destabilising, security threats can come from within. Rogue corporations, while having the funding and manpower to put up a fight, are much easier to deal with than the scattered groups of disenfranchised or desperate people known as the Rebs. Seen as terrorists in the eyes of the council, these fragmented cells of humans and aliens can be found throughout the GCPS, instigating protests, riots, sabotage and will even, under the temporary leadership of a notorious human or powerful alien individual, bring full-scale war against the corporations which they revile.
The GCPS thus finds itself both surrounded and infiltrated by its enemies. Each one of them is stronger and more prepared and motivated than ever before. But then so is the GCPS itself. Its history is brief in galactic terms, but it has arguably achieved more in one thousand years than any other race ever has. In that time it has also successfully faced down more than one existential threat. If history is a teacher, the lesson is clear: the GCPS and the Council of Seven are never stronger than when they are threatened. Time and time again, they have come together to meet the danger, using their wits as much as their military strength to overcome it.
The stakes of the conflicts breaking out across the galaxy today could not be higher. Will the next thousand years see even more expansion spheres added to an unstoppable and indefatigable Galactic Co-Prosperity Sphere? Or will it be their rivals that come to the fore, either reacquiring the glory of their past, or building something entirely new?
UNTOLD DANGERS
Whether they sense the corporations' weaknesses or are more threatened by their strength, the GCPS finds itself under attack from almost every direction. In 992AE, Barker's World, a Fourth Sphere planetoid located halfway along the shipping route between Azure IX and Cho was censored when classified experiments there went awry. Scientists investigating the manipulation of transwarp energy signatures inadvertently opened a rift to a neighbouring dimension, one populated by the race known as the Koris. The nightmarish creatures that tore through the portal - and then through most of the planet's population - justified an immediate Containment Protocol involving three whole companies of Enforcers and a battlegroup of Drakenhof Marines.
The race of almost uncategorisable beings known simply as the Nameless have also caused significant disruption to the GCPS. Argolis, Fergal, and the Colema systems have all been attacked by Nameless forces. These amphibious aliens seem keen to avoid direct confrontation with corporate forces. Instead, they appear to prefer more covert operations, secretly inserting their own bio-forming equipment before quietly beginning the remaking of their target world's atmospheres. On the whole, the Council does not yet recognise the Nameless as any kind of existential threat - their attacks so far are more of an irritation than a deadly blow. Even small wounds must be tended to though, and elite teams of Enforcers or even private mercenary groups have been dispatched to combat the invaders.
Assault on Upphämer
The border of GCPS space, at least where it runs up against the Star Realm, is often poorly defined. This is particularly true in areas where the local controlling dwarf clan is not one of the dozen or so who profit from trading with the Council of Seven. Ownership of planets unfortunate enough to be located in these contested parts of space is regularly, and hotly disputed. More often than not the argument over rights is settled - at least temporarily - through the application of superior firepower. A good example is the planet known as Upphämer.
Upphämer exists in a region of space roughly three-quarters of the way towards the eastern edge of the line between the GCPS and the Star Realm. Access to its mines and salt plains has been disputed since it was first located by GCPS probes in 890AE and then immediately claimed by the Forge Fathers. Lord Dagamar Reif-Gurnisson's claim to ownership of Upphämer is a weak one though, being gained through battle, not by blood. The previous lord of the clan, Elik Gurnisson, was killed in battle with Marauders in 855AE and left no heirs, all his sons having met similar fates in earlier wars.
While Dagamar was the senior Huscarl of clan Gurnisson at the time of Elik's death, he was not a popular choice to lead the whole clan. Lacking the support then of other more influential clan lords, Reif-Gurnisson has been unable to make his claim to ownership of Upphämer stick. As a result, the surface of the planet is occupied by sizeable Forge Father and corporate armies. There are constant small-scale engagements between both sides for possession of the numerous dig-sites and processor plants dotted across the planet's surface. Each side hopes to make enough small gains to eventually add them all up to a big win.
One such flashpoint is the small township built around the shipping depot at Smallhaven. In 996AE Sierra Technical Holdings moved most of its forces out of the settlement to defend the ring of Mineral Extraction Works in the nearby hills and plains. STH's local commander, Captain Sterri Neal, knew there were Forge Fathers somewhere nearby and that they weren't there for the spectacular views. What he couldn't be sure of was where the dwarfs would attack. He decided to split his forces. To each MEW he dispatched one or two platoons of marines, with artillery dug in at the elevated entrances to MEW-002 and MEW-005. More troops were held in reserve at an encampment near the Bitterstill River to the north while Neal's Hornets, based in Smallhaven, ran resupply missions.
The marines were barely in position when Reif-Gurnisson's dwarfs struck at MEW-009. The Forge Father tactical advisors had determined 009 was relatively exposed and was the site most accessible to their Drakkar transports. Two platoons of Steel Warriors, led by Huscarl Ogrim Fiskr in his Iron Ancestor armour, rumbled towards the site at dawn, under cover of fire from the Hailstorm cannon mounted on a Jotunn weapons platform. A hail of fire quickly overwhelmed the marine pickets and, before noon the dwarfs were at the centre of the site. The marines there put up a good fight - their mortar team reacted quickly and was able to slow the Steel Warriors considerably and a squad of Rangers was even able to cripple the Iron Ancestor. It wasn't enough though and those who could were forced to flee, abandoning 009 to its new owners.
Warlords of Cerberus
As the GCPS approaches its one-thousand year anniversary, much of the Core is understandably preoccupied with preparations for its accompanying celebrations. Rumours abound of extravagant displays of opulence, grand gestures, pardons of some of the Council's greatest prisoners, perhaps the allocation of new Exploitable Assets. Imaginations are running wild. In a hidden corner of the GCPS though, there are some whose ambitions for the coming millennium are less grand though no less significant. A cadre of outcasts, non-humans who have been alienated from the rest of the Five Spheres, are about to put into action plans that are nearly a century in the making. Soon the whole GCPS will know their names - and the meaning of the name Mahu'Oran.
It is an understatement to say Chief Mahúar is a legend amongst Gorans today. Leader of the Marauders of the Mandrake Rebellion, his name is engraved on the barrels of a hundred thousand guntracks and the hearts of ten times as many warriors. Only Mahúar had the sheer strength of will required to bind the fractious tribes of Gora and forge them into a fighting force that threatened the galaxy.
Even the prototype Enforcers the Council pushed into battle were not truly enough to stop them. Indeed, if it had not been for the events of Mandrake Rebellion, the orcs might well be the dominant force in the galaxy today. They were defeated though and Gora is now a heavily policed world. Enforcers of the feared Black Company patrol the sector, making sure the native population never gets out of control. Controlled numbers of Gorans are allowed to leave their home world each year, but only to travel to pre-approved employment as adjuncts to corporate militaries or menial labourers. Occasionally, small groups of them slip through the net, travelling unregulated routes to find the roving bands of their kind that ply their trade as mercenaries. Those few free, ungoverned Marauders are of little concern to the Council though. Their natural enmity towards each other works in the Council's favour, after all. It keeps them separate, makes them even work against each other. At least, it did until now.
The Cerberus Maw
Far out in the southern stretches of the Fourth Sphere lies a region of space barely noticed, let alone exploited by the GCPS. The Orphic sector can only be reached by ships brave enough to traverse the Cerberus Maw. A ring of three neutron stars, each one a super-dense mass of radioactive fire, the Maw's gravitic presence makes travel to any of the planets between it using a McKinley drive a dangerously complex procedure. Their frequencies and profiles fluctuate over time too, sometimes unpredictably. More than a few ships were lost to this phenomenon early in the sector's history.
Despite these stellar complications, the frontier-colony specialist Cabot Group did push through the Maw and, in 953AE, even started to build settlements on some of the worlds within it. They bought licenses to settle on a system of five planets, all of them orbiting a sun that appeared far more stable than those of the Maw itself, and began recruiting colonists. Cabot made no secret of the fact that life on the sites it had leased would be hard. But its no-nonsense presentation of the dangers of living on the edge of the GCPS probably only helped it attract a certain kind of customer.
These were rough and ready types, willing to roll up their sleeves and pitch in in return for owning a slice of a pristine planet as far from the pampered elites of the Core and their rulers as possible. Tough as they were though, Cabot had never fully researched what living so close to the radiation coming from the Maw might do to its colonists. Within a decade, the majority of them were dead of Cabot's Syndrome - a range of cancers and mutations with no apparent cure. Those that survived left the Maw and their prefabricated Shensig settlements far behind and launched legal actions which quickly ruined Cabot. In the records of Administration Central, the Orphic sector has been marked as 'Delta Grade Material' - not worth the trouble and expense any corporation might have to go to to profit from it. It is a rare cast-off from the GCPS's register. An ideal place then for a people who have likewise been written off by the corporations.
It is on one of the five Cabot worlds that an orc commander, one Marshal Tung, has built his base. For the Marauders, the radiation that drove off the humans that tried to settle in the sector poses no threat - their green skin evolved as protection from the radiation of their original homeworld's own sun. Add to that a world, complete with ready-made accommodation and plentiful abandoned supplies, almost entirely out of view of the Council and its agents, and Cabot III is ideally suited to Tung's purposes.
To the GCPS at large, Tung is an orc commander of some distinction. For more than twenty G-standard years, he has led the Predators, a Marauder company with a reputation for deadly hit and run raids throughout the Fringe. Sometimes the Predators were employed by the corporations, sometimes they fought against them. They fought Asterians too, and Forge Fathers and rebels and pirates alike. Occasionally they were even sent to fight the Plague.
The Predator's reputation grew with every successful contract they completed. Like all orcs, Tung's commandos could be relied upon to deliver bloodthirsty violence that turned into winning results and they did just that on their last deployment. But it was not just strength in numbers they brought to the table when they were recruited to bolster the marines besieged on Rhada. The colonel of the marines Tung had relieved in that last campaign reported that the Predators had achieved victory through an uncanny tactical competence. It was as if their commander could predict the enemy's moves almost faster than they did. Marshall Tung, the colonel went on to say, also had an unparalleled hold on the loyalty of all the other chiefs in his company. True, Tung was bigger than many of the other senior Marauder commanders beneath him, and clearly he was possessed of the same love of violence as they were. But there was something more to their relationship than that.
What that marine colonel did not know, what in fact no human in the Five Spheres then knew, was that 'Tung' is only a nom de guerre. The real name of the massive orc that had so impressed him is Mahu'Oran. Marshal Tung is the grandson of none other than Mahúar himself.
The Greatest
Over the many years he spent working alongside and for the corporations, Tung was building more than just a reputation. For a start, Tung's Predators, though large, is only a fraction of the Marauders Tung commands. As well as them, commanders from Storm Force, the Outriders, and the Nomads have also brought their warriors - and their hardware - to Tung's banners. Some of these alliances between former rival outfits were made possible by Tung's heritage, others he forged through charisma, cunning, and charm. Where those all failed, he simply beat his rivals into submission.
Because Tung's vision is not just to lord it over a few other orcs on a backwater world. His dream is to unite all the Marauders from across the galaxy on a new home world, free from corporate interference. From a place like that, they could conquer the galaxy...
If You Want to Be the Best...
The education camps on Goran teach their students the ways of the GCPS - its languages, history, the benefits of capitalism over any other system of thought or belief. But, in secret, older Marauders have always shown the young the way things used to be. As much as Marauders have taken to life as interstellar professional soldiers, tradition still plays a big part in their lives.
Mahu'Oran left Gora as a young orc but, after rising to lead the Predators as 'Tung', he returned to Gora to undergo the Ritual of Chieftains. To be recognised not just as a commander or Marauders, but as a leader of tribes, Mahu'Oran passed a series of tests and trials, culminating in hunting and slaying a wild Mawbeast. These legendary creatures are not the same as those sometimes seen in the GCPS, hurling themselves at enemies, chain-maws whirring furiously. The Mawbeasts of Gora are easily twice the size of those relatively tame animals. Mahu'Oran knew he would still have to kill a monster in order to gain the respect he would need.
He fought and eventually slew a pack leader, a monster of a Mawbeast that was known to have killed the five previous would-be chiefs that had gone after its pelt. Realising the danger that lay in attacking his quarry head-on, Mahu'Oran didn't go straight at the monster in its lair, as the others had done. Instead he lured it into his own kill-zone, striking the beast from hidden positions and wounding it with traps to weaken it further.
Eventually, exhausted and bleeding, the beast reached the place of Mahu'Oran's choosing. Only then did he strike it down with the same Hrunka blade his grandfather had carried into battle and take grisly proof of his deed. The fangs of the beast adorn his armour today, a reminder to all other orcs of his status, as is the Hrunka blade that hangs from his belt.
Black Company
Following the Mandrake Rebellion, the Council had demurred exterminating every Goran, recognising that the Marauders might yet prove useful to their future plans for expansion. Instead they chose to devote an entire battalion of the Enforcer Corps to monitoring and containing what was left of them.
This is the Black Company, one of the most highly resourced divisions within the corps. The Marauders were allowed to live, even to leave Gora and to seek work where they chose - within certain limits. When a warband of Marauders grew large enough to pose a threat to normal corporate operations or threaten a sector's internal security, or struck against a corporate target without a proper contract, the Black Company would act.
No protocol was placed off limits. Numerous orc commanders have found their outfits targeted mid-slide, their ships blown out of the sky, their operating bases raided or lasered from orbit, their strike teams gunned down in ambushes. The Black Company have done all of this and much more, all according to the Will of the Council and always while leaving few witnesses to tell the tale. For more than a hundred G-standard years, the Black company has successfully guarded the GCPS against the green menace. Until now they have taken great pride in doing so successfully.
The Missing Link
One such Enforcer is Commander Link Mantenna. Mantenna is a glowering savage of a human, a man with the appearance of being born for nothing else but warfare. Recruited into the Enforcer corps in AE985 from a prison barge, Mantenna has excelled as an Enforcer. His natural size and strength were both enhanced by the Program, but although Mantenna has never hesitated to unleash his own brand of lethal brutality against a Marauder he has a stern respect for his enemies born out of hard years fighting them.
He first saw service on Pilgrim, where his Strike Team was tasked with eliminating a group of Marauders that had branched out from their normal work as hired muscle and formed an ad hoc crime syndicate. The targets were using the cave systems beneath New Coronado City to move large quantities of illicit chemicals into the city without detection by local security services. Following a lightning attack on the orc compound, Mantenna was the sole survivor of the subsequent massacre in the caves beneath it. More Marauders than anticipated had escaped into the subterranean network but, despite the Company's significant losses, the mission was considered a success. It was the making of Mantenna too; he was promoted for his actions on Pilgrim and went on to lead an exemplary career in the Black Company. His experience on that operation taught him two valuable lessons though: never to underestimate the fighting strength of a Marauder, and never to rely too heavily on corporate intelligence when engaging one.
The Spirit of Death
Orcs prize a warrior spirit highly. Those that possess a certain kind of fearless aggression are said to have 'madd'ur'ak', a gift from Da'grak, the Spirit of Death. One such group of death-defying warriors are the Skyscrapers. For these elite orcs, the thrill of combat is simply not enough. For them, battle is best approached at speeds faster than sound. Using jetpacks, some of which are heirlooms that date back to the Mandrake Rebellion, these orcs might deploy from Vulture dropships just inside a planet's atmosphere, screaming down onto their enemy's position in a blaze of fiery fury. Sometimes, the age of their kit and the sheer danger associated with their deployments means some Skyscrapers inevitably will not survive the journey. There is always another orc ready to take up a 'pack when a place in a chalk becomes available though. How better to prove yourself to every other Marauder?
The Hammer Drops
While Tung's plans were carried out in utmost secrecy, being discovered eventually was always inevitable. Pathfinder units, investigating reports of unmarked Marauder ships transiting corporate space towards the Maw, quickly established how big the problem building beyond it might be. Using their own covert methods, a Pathfinder surveillance unit was sent to the Fawcet worlds and, when word of what Tung had built there reached the ears of the Council of Seven, their reaction was dramatic and immediate. The Black Company was ordered into immediate action and, three days later, Enforcement Patrol Group 'Hammer' was en route to the Orphic sector.
The Wyverns of EPG Hammer were used to going where they willed, without objection and, usually, without detection. Nevertheless, they ought to have been better prepared for what awaited them in the Orphic sector. There were after all only a few locations they could have safely slid into beyond the Maw that would not send them straight into the gravity well of one of the super-dense stars.
They were fired upon almost as soon as they slowed from faster-than-light travel and two of the three ships in the group were quickly crippled, their engines set ablaze by lasers and missiles. A fleet of Marauder warships had the drop on their foes and the battle in space quickly became like shooting Pusk in a barrel. As the Wyverns struggled to manoeuvre and began to return fire, the power core of one of the damaged ships detonated, destroying it instantly. On the bridge of the group's command ship, the truth was inescapable - the first brief battle was lost. If something were not done soon, all the Enforcer ships would be wrecked. EPG Hammer's commanding officer had seen the reports of launches from the destroyed Wyvern, but she had no way to help whoever had been aboard those Accusers. Faced with imminent destruction, there was no choice but to order a quick withdrawal, to get her embattled Wyverns away from the system as quickly as their faltering engines would convey them.
Lair of the Mawbeast
A mere fraction of the Enforcers sent to rein in the rogue Marauders of Cabot III actually reached the surface. As what remained of the EPG's starships struggled to reach a safe distance from the orc blockade, Commander Mantenna took stock of what had made it down with him. The good news was his Accusers were well equipped, having been fully prepped for the mass assault that had been planned. The bad news was he only had limited numbers of any particular piece of kit.
Mantenna knew that reinforcements would eventually reach them - there was just no way of knowing for exactly how long he and his operatives would be cut off. Not that it mattered. Even on their own, the mission of Mantenna and the EPG Hammer Enforcers has not changed: they must prevent Cabot III becoming the new home of the Marauders. A hard task, to be sure. And with limited access to resources, Mantenna knew he would have to fight smart. To survive, they would need to secure whatever resources they could from what already exists on the planet. They would need to raid Marauder outposts, kill as many enemies as they could while avoiding large-scale engagements for as long as possible, and gather as much intelligence on the rebellious orcs as they could find along the way.
If they didn't know it already, the Marauders would soon be aware there were Enforcers on their self-proclaimed home world and Mantenna and his Hammers would be hunted every step of the way. But, Mantenna thought as he pulled back the priming lever on his Genling 45, it wasn't as if he was trapped on an isolated alien world with an army of hostile Marauders to take care of - they were trapped on Cabot III with him.
The Hunt Begins
As Mantenna briefed his operators on the tasks ahead of them, Marshal Tung, the great Mahu'Oran, was reflecting on how his own destiny may have changed in the last few hours. Having won the first battle in the skies above his planet, Tung knew he had just sent the rulers of the GCPS an unequivocal message - don't come here. But, even though the Council's first foray into the Cabot system was now reported to be running away with its tail between its legs, he also knew more would come after them. It was in their nature to rise to a challenge from a rival, just as it was his. When they did come back, Tung knew his Marauders would be waiting for them again.
Until then, he had to deal with a far more present and just as clear danger - the Enforcers that had already landed on Cabot III. Goblin spotters had tracked them, though they could not be sure how many of the smoke trails they saw streaming across the bright sky were dropships and how many were wreckage. Maybe all of them were harmless pieces of debris from the battle, they had said. But Tung was not fooled. It did not matter if it was a single Accuser or a hundred. Even one Enforcer, if they were left alive, could kill him and end his uprising before it had even properly started.
As the marshal, and as the chief of all the Marauders in the sector, it would be up to him alone to finish what the fleet had begun. While the bulk of his troops had to be kept ready to repel the next invasion attempt when it came, Tung himself would take charge of hunting down those already on his world.
Mawbeasts
Marauder Mawbeasts are infamous in the Outer Spheres. Resembling enormous canines, each one is a frenzied mass of fur-covered muscle and gnashing, razor-sharp teeth. And these are the normal ones. Like everything else that lives on Gora, the Mawbeast is notoriously hardy and many orc warlords have taken advantage of this to enhance their already quite deadly animals with bionic parts. Some Mawbeasts are equipped with chain-maws to rip their targets apart, some with mechanical legs to get them onto their target even faster. Perhaps the most terrifying of them all though are the Mawbeasts carrying high-grade explosives with deadman's triggers on their backs. The creatures of this type seen in the GCPS though are nothing compared to those that roam the hills of Gora. Mawbeasts are thought to be amongst the oldest forms of life on that planet. Some can live as long as fifty local years, growing larger - and more ill-tempered - all the time.