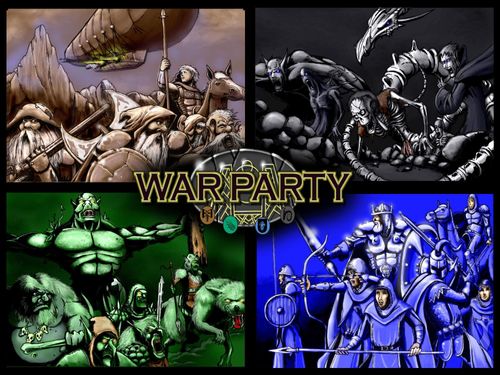
Warparty
Warparty Rulebook
Table of Contents
Table of Contents
1. Units and Unit Properties
Units are the pieces in the game that represent the various armies. Each unit counter represents a small regiment or company of the unit type. There are a number of properties that make up each unit. The attack value, defense value, movement rate, and row may be found on each unit counter. The attack value is located in the upper left hand corner, the defense value is located in the lower left hand corner, and the movement rate is highlighted in a circle in the upper right hand corner. The row is noted by R2 or R3 in the lower right hand corner. When one or more of these properties is not indicated on a unit counter, it has a default value of 1. There is no limit to the number of units which may occupy any territory. It is always permissible for a player to inspect the units of another player.
### Unit Properties
Cost: How many Crowns (Currency) a unit costs. Attack Value: Represented by a number between 1 and 5, it is the highest number which can be rolled in order to achieve a successful attack. The attack value is located in the upper left hand corner of each counter. When a unit involved in combat is attacking, the player must roll a number equal to or under its attack value in order to a score a hit against the opposing unit. When an attacking unit has an attack value that includes a negative number in parenthesis, this number must be subtracted from the target unit’s defense value. For example, when a unit with an attack value of 3(-1) is attacking an enemy unit with a defense value of 3, the unit being attacked must roll a 2 or less to defend instead of a 3, because of the (-1) modifier. Modifiers are noted in parenthesis within the rules and on the army sheets, but are noted in smaller subtext on the actual counters. Think of these modifiers as a unit’s ability to pierce armor Defense Value: Represented by a number between 1 and 5, it is the highest number which can be rolled in order to achieve a successful defense. The defense value is located in the lower left hand corner of each counter. After an opposing unit has scored a hit, the targeted unit may defend the attack. In order to successfully defend the attack, the player must roll a number equal to or less than its defense value. When a defending unit has a defense value that includes a negative number in parenthesis, this number must be subtracted from the attacking unit’s attack value. For example, when a unit with a defense value of 3(-1) is being attacked by a unit with an attack value of 3, the attacking unit must roll a 2 or less to score a hit rather than a 3, because of the
(-1) modifier. Modifiers are noted in parenthesis within the rules and on the army sheets, but are noted in smaller subtext on the actual counters. Think of these modifiers as a unit’s extra ability to avoid damage. Movement Rate: This is the number of territories a unit may move in turn. A circled number located in the upper right corner of the unit represents the total number of territories a particular unit may move. Units with no movement value located in the upper right corner have a default movement value of 1. Only flying units may move through enemy occupied territory. Flying units are discussed in greater detail below. Row: All units are designed as either 1st, 2nd, or 3rd row units. An “R2” or “R3” located in the lower right corner of the unit represents whether it is a row 2 or row 3 unit. Units without an R2 or R3 have a default designation of row 1. Units should be lined up accordingly for battle, either on the game board for small battles or off the game board for larger battles. An enemy must kill all first row units before attacking 2nd row units. An enemy must kill all 2nd row units before attacking 3rd row units. Throughout the rules, first row units will be referred to as front row; 2nd and 3rd row units will be referred to as back row. Units must also attack in row order. All front row units must execute their attacks before 2nd row units. 2nd row units must execute all of their attacks prior to the attacks by 3rd row units. Hits: All units have a certain number of hits they can withstand per battle before they are eliminated from the game. This number is indicated in red font located in the middle-right side of each counter. When this property is not indicated on the unit counter, it has a default value of 1 hit. All units surviving a battle fully regenerate immediately afterward. Use a collection marker
to track hits during combat
infantry, such as Ghoul Manglers from the Undead Army, take more than 1 successful undefended hit to kill.
Unit Types
Infantry: Infantry, the most basic unit in the game, is the backbone of every army in Warparty. These units are individually referred to as Soldiers, Skeletons, and Warriors. At a cost of 5 crowns, they attack at a 3, defend at a 2, and move 1. Archers: Archers, the basic 2nd row units, can be used strategically in conjunction with infantry and heavy infantry. As a 2nd row unit they cannot be attacked until all front row units are killed. At a cost of 5 crowns, Archers attack at 4, defend at 1, and move 1. Heavy Infantry: These units are similar to infantry, but generally have greater attack and/or defense values. Some types of heavy
Cavalry: Cavalry are expensive, fast moving, hard-hitting units. An additional premium is paid for the extra mobility of cavalry units. Knights, Wolf Riders, and Vampires are examples of cavalry units. Hero Units: Heroes are special individual units that can gain experience and receive additional abilities as the game progresses (See the section on Hero Advancement for more details). Hero units may not be repurchased if they are killed. Hero units are typically weaker in combat than an equivalent value of infantry units, however they have additional mobility and they can scale up and become very powerful if they gain levels. Ranged Attack and Siege Units: The Ballista, Catapult, Cannon and Dwarven Airship are considered siege units. If a siege unit ends its turn in an enemy city it may destroy that city on that turn without waiting an additional turn (regardless of rough terrain penalty). Most Siege units do 2 points of damage for each successful hit in combat. Siege units may also function as ranged attack units, meaning they may fire into an adjacent territory. They may make this attack as long as they are not or have not engaged in combat already on the turn. There are no “attack backs” for ranged attacks. These units will specify that they can make a ranged attack at a certain number, which refers to the attack strength and not the range of the attack. All ranged attack units may only fire into one immediately adjacent territory unless otherwise noted. The ranged
attack unit will designate their target, observing the row order. Ranged attack units which have moved into rough terrain may still make their ranged attack. Ranged attacks may only be made by the army whose turn it is, not by a defending army. When making a ranged attack, siege units typically will attack with an attack strength less than their normal attack strength. The attack strength for units making a ranged attack will be noted under the individual units on their army sheet. Units which are Invented: Some units such as Catapults, Musketeers and several others, noted in the individual army sheets, must to be invented before they can be purchased. Once they are invented they can be purchased for the remainder of the game on any turn following the turn which they were invented. Units with Multiple Attacks: Some units will have the ability to make more than one attack. These count as separate attacks. They may attack the same or different units in a battle with these attacks. If these types of units receive any type of attack enhancement or penalty it will apply to all attacks for that unit. Units that can make “up to” a certain number of attacks: Some units, which have multiple attacks, may not attack the same unit twice in the same combat round. It will be noted if they have this limitation. In this situation they are not able to target units in rows behind the units which they are initially attacking on the same round. For example, a Fireball spell which can attack “up to” 3 units could not target two skeletons and the skeleton archer behind them. Even if it eliminated the two
skeletons, the archer could not be targeted that round by the same spell. Transport Units: Units that may carry other units, such as the Chariot, are called transport units. Transport units may carry a specified number of regular units and an unlimited number of hero units. Transport units may not carry units that move more than 1 territory or have more than one hit (with the exception of heroes). Transport units may not carry siege units. Speed spells may be cast upon Transport units to enhance the movement of the transport unit and by doing so, all the units it may be carrying. It is permissible for a transport unit to pick up and/or drop off units during the movement phase. This is only allowed if the unit they are picking up or dropping off has not yet executed its own move. Being picked up or dropped off by a transport unit counts as the movement for any unit being picked up or dropped off. For example, a Chariot unit with a greater speed spell cast on it could move one space, pick up an Orc unit, move two more spaces, drop off the Orc unit (in the 3rd space) and still move one final space. Flying Units: Certain units like the Vampires, Bone Dragon, and the Dwarven Airship have the ability to fly. With the exception of the Dwarven Airship, flying units are not always in the air. Vampires and the Bone Dragon must land to attack and also must land at the end of their turn. Flying units may move over territories occupied by enemy units during the movement phase without having to engage in any combat. Flying units can cross the lake and count it as one movement. Flying units may cross the river
without using a bridge and it will not count as an extra movement. The Airship is always in the air and is only vulnerable to missile attack units and units which can fly. Missile Attack Units: These units include any unit that does not make a melee hand to hand combat type of attack. Archers, Musketeers, Cannons, Catapults, Ballista, and Shades are all missile attack units. Spells and basic attacks by Wizard and Priest type heroes are also considered to be a “missile attack” Tier 3 Units: Each army has an ultimate unit, called a tier 3 unit. These units are the Bone Dragon, Troll Giant, Dwarven Airship and Lord Ancon. Tier 3 units may not be repurchased if they are destroyed in battle and they may not be returned to the game from any spell such as Raise Dead. They are not considered hero units.
2. Game Set Up
When playing with two players, each player controls either the forces of good or the forces of evil. When playing with three players, one player controls an entire side while the other two players each control an army from the opposing side. When playing with four players, each player controls one army. Basic set up rules are as follows:
- Teams are decided by agreement or dice roll.
- Which player controls which army is determined by agreement or dice roll.
- A player from each team rolls a die to determine who will start the game. The side with highest roll gets to choose whether to move first or second.
- Armies on the same team move simultaneously. For example the Humans and Dwarves both
move at the same time. 5. The capital cities of each army are located at the corners of the board. The armies of the team that moves first begin with 9 infantry units each in their capital cities and those of the team that moves second with 10 infantry units each. 6. Each player is dealt three quest cards at the start of the game. They must discard one and keep two. They may not discuss these cards or show these cards to any other player.
3. Game Turn
There are 3 phases to a side’s turn. Both armies from each side move through these phases together. They take place in the following order: A. Movement B. Combat C. Collection and Placement
A. Movement
During the movement phase the player(s) on one side may move any or all of their army units on the board, up to the maximum number of spaces that they are able to move. Units may not move through enemy units. If a side moves its units into a territory occupied by enemy units, combat will take place in the next phase of the turn. Units may move through any unoccupied territory or one occupied by allied units, with the exception of rough terrain. There are no limits on the number of units that may occupy a single territory. (Units may move out of the capital city or dungeons to any adjacent territory regardless of the visual effect of gates or entrances for any of these territories.) Once the movement phase is concluded and the combat phase begins a player may not re-adjust any movement for units.
Rough Terrain: Rough Terrain is defined as a forest or mountain territory. These are separate territories and are not part of regular plains territories. Some units may move into and through these areas unimpeded, but most units will suffer a rough terrain penalty immediately upon entering the territory, in which case they are turned upside down and forfeit their next movement turn. If they receive this penalty they still may attack on the same turn in the rough terrain or defend if attacked by the enemy on the enemy’s turn. They may also explore dungeons even after suffering a rough terrain penalty. Dwarves may move through mountain territories without penalty and may also conquer them and collect for them. Goblins may move similarly through forest territories and may conquer and collect for them. Flying units and Hero units with Eye of the Explorer or the Teleport spell may move through or into rough terrain without penalty, though they may not conquer and collect for them unless they are Dwarves in a mountain or Goblins in a forest. (See the section on Collection below for more details). Units which would normally suffer a rough terrain penalty will not suffer a penalty if they move into a territory with other units (either their own or their ally’s) who are immune to the penalty, with the exception of the Teleport spell, where only the units affected by that spell are immune to the rough terrain penalty. Flying units are immune to rough terrain penalty, but are also an exception to the above noted rule and they will not free other units from this penalty.
An ally’s cities always provide immunity to the rough terrain penalty.
Examples: A Skeleton and a Goblin enter a forest territory to attack a human. If the Goblin is killed, the Skeleton will not suffer the penalty because the penalty is accessed on the movement phase. A Wizard with Teleport and an Infantry enter rough terrain. The Wizard will not suffer the movement penalty but the Infantry will, unless the Wizard has Group Teleport and uses it to move the Infantry the next turn. A melee Hero and a Cavalry enter rough terrain together. The Hero is not under the effect of Eye of the Explorer so their movement ceases and their counters are turned over. At the end of the turn a Priest is purchased and chooses Eye of the Explorer. The Hero and Cavalry counters are immediately turned back over and they will be able to move on the next turn again. This is due to the immediate effect of the Eye of the Explorer spell.
Streams/Rivers: Streams are not considered rough terrain, but count as a movement unless a bridge is used. Units may not move up or down streams, but may cross over to the territory immediately adjacent to the stream. A unit that ends its movement on a stream should be placed on it with half of the unit in the territory from which it came and half the unit in the territory into which it may move to. On its following turn,
the unit can move into or through (if it is a multimove unit) only those two territories. Units may be attacked when in a stream by enemy units which move into the stream to attack them. Flying units and units that can teleport are not affected at all by streams or rivers and pass over them without any type of movement penalty. All other units must count the stream as one move. Siege units may make a ranged attack over streams. Units may not retreat into a stream. Lake: The lake is impassable, except by flying units or units that are using a teleport spell. When passed over by these units, it is counted as one move. The Dwarven airship is the only unit that may end its turn over the lake.
B. Combat
Combat takes place when opposing forces find themselves in the same territory after a side declares its movement phase has ended. Prior to the combat phase a side may adjust moves made during the movement phase, though this should be kept to a minimum to avoid confusion. The Combat phase may not be part of every turn, especially at the start of the game. For the purpose of combat, units may be lined up opposing each other next to the game board. A battle marker may be placed in the territory where combat is taking place while the units are lined up off the board to resolve combat. For small battles this is not necessary and combat can be done on the game board. Each unit has an attack and defense value; in the case of the basic infantry unit, the attack value is 3 and the defense value 2. For a successful attack
or defense these numbers or less must be rolled on a 6-sided die. Some units have attack and/or defense modifiers as well, such as knights, whose attack value is 4(-1) and defense 3(-1). The attack modifier of (-1) is applied to the defending unit’s defense value, reducing it by 1. The defense modifier of (-1) is applied to the attacking unit’s attack value, reducing it by 1. Some special units have more than one hit point, such as Heroes, who begin with 2 hits, meaning it would take 2 successful undefended hits to kill them. The side that has moved its units into the contested territory attacks first. The attacking side must designate which of its units is attacking which of the enemy units in turn, beginning with the front row units and then moving on to the second and third row units (see Units and Unit Properties section). The attacker rolls a die for the designated unit. If the attack value or under is not rolled successfully (after modifiers have been taken into account) the attacker moves on to roll for the next attacking unit. If the attack value or under is rolled successfully a hit is scored and the defender rolls for the unit being attacked. If the unit’s defense value or less (after modifiers) is rolled successfully the hit is defended and the unit remains in the battle. If it is not rolled successfully the unit is turned over (face down). Once the attacker’s side rolls for all of its units that are in the battle it becomes the defender’s combat turn. The defender has two choices: attack or retreat (see the section on retreating). If the defender attacks, the above noted scenario takes place with the defender now being the attacker and vice versa. The units that were turned over get one final attack before they are removed from the battle and returned to the force pool. This final attack is called an “attack-back”. It is
important to note that units from the side that initiated the battle (the original attackers) do not get an attack-back after they are successfully hit. When a unit that is an original attacker is hit and lost, it is removed and returned to the force pool immediately.
not target the 3 soldiers with the hero until the hero has been killed. (This may or may not be a good strategy, depending on the situation.
The two sides can continue to attempt to attack and defend against one another until there is a victor or one side retreats. There may be some instances where both forces eliminate each other and there is mutual annihilation.
It is advisable to work through the combat examples below with the actual unit markers laid out in front of you. You should remove the units from the battle as you read through these examples. Taking the time to work through these six examples will give you a good understanding of how the combat system works.
Combat Turn Order: If heroes are exploring a dungeon on a given turn, it will take place during the combat phase. This will be done before armies roll out any battles. Once any dungeon explorations are resolved (see the section on dungeons) then all other combat will take place. If there are multiple battles taking place the attacker(s) may choose which battles will be resolved first and the order in which subsequent battles will be resolved. Special Combat Rules: Attack and defense modifiers may allow certain units to attack or defend at a 6 (automatic hit or defense). It is possible for a unit to have an attack or defense of 0 (no chance to hit or defend) due to modifiers. In these cases, no dice will be rolled. Combat in Rough Terrain: Units may enter rough terrain and engage in combat immediately even if they will suffer a rough terrain penalty. If they do receive the penalty they will not be able to retreat from the battle. Attacking One Unit with Multiple Attackers: It is permissible for multiple attacking units to target a single enemy unit even when there may be other enemy units they could target. Six Skeleton units could target an enemy Warrior Hero and
Combat Examples
Combat Example 1: A unit of Human soldiers attacks a Goblin warrior unit. Both units have an attack value of 3 and a defense value of 2. The Human rolls a 4 for his attack and misses. The Goblin may attack or retreat. The Goblin attacks and rolls a 1: a successful hit. The Human rolls a 2: a successful defense. The Human attacks again and rolls a successful 3. The Goblin unit rolls a 5 in defense and is killed. As the original defender the Goblin unit gets one attack-back before being removed from the battle: it rolls a 4 and misses, and is returned to the force pool. The Humans are victorious in the battle, and take control of the territory. Combat Example 2: Three Goblin Warriors attack a Dwarf Archer. The Goblins roll a 2, 1 and 3. All three attacks hit. The Dwarf Archer rolls a 1 and defends the first attack, rolls a 4 on the 2nd attack and is killed and flipped over. The Dwarf as the original defender gets to make a final attack and rolls a 6, a miss and is removed from the game.
Combat Example 3: Two Undead skeleton units attack two Dwarven warrior units and a Human soldier. All are basic infantry units with attack of 3 and defense of 2. The Undead roll attacks of 2 and 6, designating the two Dwarven warrior units as the targets. The 2 is a hit and the 6 a miss. The Dwarves make one defense roll at 1 and the hit is defended. Now the Dwarves and Human units attack, rolling a 1, a 2, and a 4 respectively: two successful hits. The Undead make two defense rolls a 2 and 4. The 2 defends but the 4 does not: one skeleton unit is removed from the battle. The Undead take their turn to attack, this time designating the Human soldier as the target, and roll a successful 3. The Human unit rolls a 3 for defense and is killed. The unit is turned over to designate it has been lost, but gets one attackback. The Dwarves roll a 4 and a 3, The Human rolls a 2. The Undead make two defense rolls: a 2 and a 5. The 2 defends but the 5 does not and the remaining Skeleton unit is killed and removed from the battle, along with the Human unit (which had been turned over). With two surviving Dwarven units the forces of good win the battle. Combat Example 4: 5 Dwarves attack 2 Skeletons and 1 Skeleton archer. The Dwarves roll a 3, 5, 1, 1 and 4, for a total of 3 hits. These dice may be rolled all at once or one at a time based on the
discretion of the attacker. When rolling all at once the attacker must designate the order in which his hits should be applied. This is ONLY possible when there are defenders in the battle that do not have any negative defensive modifiers (see combat example 5). For new players it is recommended to just roll the attacks one at a time. The first two defenses are for the Skeletons. They roll a 3 and a 6; both skeletons are flipped over and designated as killed. The last attack is applied to the Skeleton archer which rolls a 2 and is killed as well. The 3 Undead units do get their final attack backs before being removed from the board. Combat Example 5: A Goblin wolf rider and two goblin archers attack three Human soldiers. The soldiers have an attack value of 3 and a defense value of 2. The wolf rider has an attack value of 4 and a defense value of 2(-1), while the archers attack at a 4 and defend at a 1. The archers are second row units and can only be attacked after the wolf rider, which is front row, is killed. Since the three soldiers are front row and all have the same values, the Goblins make their three attacks at 4 at once. They roll a 5 and two 3’s: two successful hits. The Humans make two defense rolls: a 2 and a 6. One soldier unit is killed and turned over. The Humans must now make one attack at a time, since the wolf rider’s (-1) defense modifier means they need to roll a 2 or less to hit it, after which, if it does not defend successfully, any 3 or less would hit
an archer. Their first roll against the wolf rider is 3 and misses. Their second roll is a 2 and hits. The wolf rider rolls a 3 and is killed and removed from the battle. With the Goblin’s front row gone, the third and last soldier attacks an archer and rolls a 3, which hits. The archer rolls a 2 and is killed and removed from the battle, along with the turned over soldier. The Goblins attempt to retreat and roll a 2: their lone surviving archer unit may retreat and does so, to the territory from which it came (see the section on retreating). The Humans have triumphed, and may look forward to attacking the retreated archer unit on their next turn. Combat Example 6: Three Dwarven warriors (attack 3, defense 2), a Dwarven archer (4,1), and a cannon with an attack of 5(-2) and defense of 1, attack the Undead who have two skeletons (3,2), two vampire units which attack at 4 and defend at a 3(-1), and one archer unit (4,1). Archer and cannon units are all second row, while the skeletons, warriors, and vampires are front row. The Dwarves decide to attack the skeletons first with two warrior units and roll two 3’s. The skeletons roll a 3 and a 4 in defense, and both are killed and turned over. The third warrior now attacks a vampire unit and rolls another 3, which misses due to the vampire’s defense modifier of -1. Now the Dwarves’ second row attacks the vampire units. The archer rolls a 3 and hits. The vampire rolls a 4 in defense and is killed and turned over. The cannon attacks the remaining vampire. It needs a 4 or less to hit due to the defense modifier and rolls a 3. Since the cannon has an attack modifier of -2 the vampire must roll a 1 to defend. It rolls a 3, dies and is turned over. Now it is the Undead’s turn. The two turned over skeletons take their “attack-backs” against two warrior units and roll a 3 and a 2. The Dwarves roll two 4’s in defense, are killed and removed
from the battle. Next, one of the two turned vampires takes its attack-back against the last warrior and rolls a 4, another hit. The last warrior unit rolls a 2 and survives. The other turned over vampire attacks the warrior unit again, rolling a 3. The warrior unit rolls a 3, failing to defend, dies and is removed from the battle. With the Dwarven front row gone, the Undead archer unit may attack either the cannon or the archer, and designates the cannon as its target. It rolls a 4 and hits. The cannon rolls an unsuccessful 2 in defense and is removed from the battle. The turned over Undead units are removed from the battle, and it is again the Dwarves turn to attack with their last surviving unit, the archer unit, against the Undead’s last surviving unit, also an archer. The Dwarves decided to press on. The archer attacks and rolls a 3. The Undead unit fails to defend, rolling a 4, and is turned over. On its attack-back against the Dwarven archer it rolls a 4, hitting it. The Dwarven archer rolls a 2, dies and is removed from the battle. The Undead turned over archer unit is also removed. With both armies destroyed neither side wins, although the Undead have managed to keep the Dwarves from taking control of the territory they held.
Retreating
Units can retreat from a battle, but in doing so they forfeit their next turn. In order to retreat a 2 or less must be rolled. One roll may be made once per attack round. It is recommended that if
a player is considering a retreat that they roll for it immediately. If they are successful then they can decide if they want to retreat or attack. If the roll is unsuccessful combat proceeds as usual. There is no combat penalty for attempting retreat. Forfeiting the next turn means that the unit(s) which have retreated may not do anything on the following turn except defend themselves if attacked. Retreated units may not make use of the benefit of the Wizard’s tower or similar type upgrades, may not summon, may not conquer or de-conquer territory it now occupies, etc. If a retreat is made all units in a battle from one army (or team if allied units are present) must retreat. A side may not retreat some units and leave the rest in the battle, even if units are split up between two allied players. All or none of the units from one team must retreat. In the event that units from two allied armies are retreating together only one die roll will be made for both armies. Either player may make that roll. When a side retreats any units that were turned over because they were previously hit, still get their final attack. The decision to attempt a retreat may be made any time before the units which are still alive execute an attack. Units that have retreated should be turned over (face down) to signify they have retreated and are forfeiting their next turn. At the end of their next turn the retreated unit counters are turned face up. Units that are facing down because they retreated or moved into rough terrain on their previous turn may not retreat. Retreating as the attacker: If the army that is retreating is the attacker than its units must retreat to the territories from which they came. If they used spells such as a teleport or speed to
get there then they must use the same means to return if at all possible. If for some reason it is not possible, they must retreat in the direction from which they came. Retreating as the defender: If the retreating army is the defender they must retreat to friendly or neutral territory (meaning a territory either owned by their own army, their allies, or not controlled by any army). An army may retreat into unoccupied enemy territory if there are no other options available, though they will not be able to conquer the territory under these circumstances. All units must retreat to the same territory, except multiple move units which have the option to use their full movement value and retreat to a territory other than that of the rest of the army. All multiple move units (of the same movement value) must retreat to the same location. Units may never retreat into an enemy city. A retreat occurs after any defending units that were killed and turned get their final attack.
Example:
A Human army initially had 6 soldiers, but now have just 2 alive. 4 were killed by the 5 Goblin Warriors. It is the Human’s combat round and they decide to roll a retreat and get a roll of 1. They are “eligible” to retreat. First their 4 slain solider units get their “attack backs”. 3 of the 4 soldiers hit and the Goblins do not make any successful defensive rolls. Now the Goblins have just 2 warriors remaining and there are still 2 soldier units who were not killed, but are eligible to retreat. In this situation, the Humans decide not to retreat their remaining two soldiers, but instead press the attack.
Example Two:
A Wolf Rider and a Goblin Archer have successfully rolled a retreat from a battle but
all the adjacent territories are controlled by the enemy. The Goblin Archer retreats into an unoccupied enemy territory, turns over and is not eligible to conquer the territory this turn. The Wolf Rider moves 2 spaces (through one unoccupied enemy territory) to a neutral territory, where it will turn over and will not be able to conquer the territory this turn.
Retreating into rough terrain: Units cannot retreat into rough terrain unless the army is able to move into that territory unimpeded and without penalty. For example, the Goblins could retreat into the forest (assuming it was not occupied by enemy units). Retreating into a river is not allowed. Retreating into a battle: This is never allowed. Thus, if an enemy army is surrounded on all sides by enemy occupied territory, retreat is impossible.
C. Collection and Placement
Collection: A territory control marker is placed in every territory that a player moved into (not through) which had been previously controlled by an enemy or unconquered. A unit must end their turn in a territory in order to place a territory control marker in it. This is considered conquering the territory. If the territory was previously unconquered (there were no control markers) than the player’s collection is adjusted upwards on the collection board (using a control marker) for each new territory according to its resource value. There are certain resource rich territories, surrounding the capital cities and in the center of the board, that are worth more than one and they are marked accordingly with a
number in them; if not so marked, a territory is worth one crown in collection value. If there was an enemy marker in the in the territory then the enemy marker is removed and the enemy’s collection is adjusted downward in addition to the player’s collection being adjusted upwards. If there was an allied control marker then no adjustment is made and no control marker is placed. A player may not elect to not conquer a territory if they occupy it at the end of the turn, if the territory was previously unconquered or controlled by an enemy. In the event that combat takes place and both armies destroyed, then the territory remains in control of the original army. No changes take place in that scenario. In the case where allies both move into the same territory on the same turn, they may choose (or roll a die to determine) who gains the economic benefit of the territory. In the case of rough terrain, only Dwarves may conquer and control the mountains, and only Goblins may conquer and control the forest. An opposing army unit moving into such a space, although it may not conquer it, may de-conquer it immediately, removing the enemy control marker and adjusting that enemy’s collection downwards accordingly. The collection board reflects how much income each army collects which may be spent in conjunction with any saved money during the Collection & Placement phase. Silver coins represent 1 crown. Gold coins represent 5 crowns. Red coin tokens (Rubies) represent 25 crowns. Placement: After players collection are adjusted for all new territories conquered, players may purchase new units and place them in any of their cities, based on the amount of crowns they are receiving on the collection board and any
crowns they have saved. They may also purchase new cities and place them in any occupied territory under their control (certain conditions apply). In addition, they may purchase upgrades for their capital city, however only one upgrade may be purchased each turn. If they already have upgrades that entitle them to technology or summoning rolls, they may make these rolls during this phase of their turn. Players may save money on any turn to be used on a later turn. They may use any portion or save any portion of the crowns they collected each turn. They may not pass money to their teammate. Units which require prerequisites may not be purchased on the same turn as the prerequisite. For example, a player may not purchase a Stables and a Knight on the same turn.
Technology and Summoning
During the placement phase players may research technology and/or make progress towards summoning other units (see the specific armies for additional details). Research for technology and summoning is kept track of on the Experience and Research Tracking board. Place the counter for the unit being summoned or the technology being researched on the tracking board and advance it each round as rolls are made. Once the unit or technology achieves the stated number of research or summoning points then the counter is removed from the tracking board and placed on the edge of the game board outside the player’s capital city. Extra research points do not carry over to additional inventions.
Example of the First Two Rounds of Play
The Good team has won the roll to move first. The Humans and Dwarves may move any or all of the 9 one-move infantry units (Human Soldiers and Dwarven Warrior) in their capital cities one space to any adjacent territory. Since there are no enemy units in those territories no combat will take place. The Dwarves move 5 units into the middle territory and 2 units into each of the other territories adjacent to the capital. The Humans move 6 of their units to the territory at the bottom of the board that leads to the Goblin capital. They place 2 units in the upper right territory, and the last soldier unit in between. They then place a territory control marker in each of the new territories they have conquered and adjust the collection board accordingly. The Dwarves’ and Humans’ collection will be 2 for each of the three new territories conquered plus 5 for their capital city and territory it is on. The total collection for both players is 11. The collection board should now be adjusted to reflect 11 by placing a brown territory control marker for the Dwarves at 11 and a blue territory control marker for the Humans on 11 as well. The Dwarves choose to purchase an upgrade to their capital, the Gnome Workshop, spending all 11 crowns they have collected. The Dwarven income is now increased to 12 to reflect the value of the city upgrade. This increase applies to future turn’s collection. The Humans purchase an archer and save 6 crowns (one gold coin token worth 5 and one silver coin token worth 1). Placement (placing the newly purchased units on the game board in any of the players’ cities) concludes the good side’s turn and the evil side then take their turn in similar fashion.
Because the Evil are moving second, they start with one additional infantry unit for a total of 10 Skeletons and 10 Goblin Warriors. The Undead move 3 skeleton units to each of the adjacent side territories, and 4 units to the central adjacent territory. They gain 6 crowns for the three newly conquered territories and 5 for their capital, for a total collection of 11, placing a black control marker at 11 on the collection board. The Goblins move similarly and increase their collection to 11 as well, placing a green control marker on the collection board. The Undead purchase an upgrade, the “Pit of Eternal Burning Flesh”, for placement in their capital at a cost of 6 crowns and also purchase another skeleton unit for 5 crowns. The Undead collection is adjusted by 1 more to account for the extra 1 income provided by their city upgrade. The Goblins purchase another warrior unit for placement in their capital, at a cost of 5 crowns, receiving 6 crowns in change. On the good team’s second turn they first advance the turn marker to 2 (since they were the team that moved 1st). They may move the units that they moved previously and any units they purchased and placed the preceding turn. (It is recommended that players first move the units that are furthest from their city in order to help keep track of which units have moved and which have not). After they move all units which they wish to move (there still being no possibility of combat), they then place a territory control marker in each new territory and adjust their collection up accordingly.
4. The Economy
Money: Crowns represent money. Each silver coin token is worth one crown. Gold coin tokens are worth 5. Red coin tokens (Rubies) are worth 25.
Resource Depletion: This may also be referred to as inflation and takes place when one army collects 45 or more. The costs for everything will double following that team’s turn, unless they were the team that moved first, in which case the opposing team will have one last turn to purchase at normal costs before prices double. Once Resource Depletion is reached it remains in effect until “Bleeding the Land Dry” is reached, even if all armies are collecting below 45. Bleeding the Land Dry: This may also be referred to as quadruple inflation and takes place when one army collects 57 or more. The costs for everything will quadruple following that team’s turn, unless they were the team that moved first, in which case the opposing team will have one last turn to purchase at double costs before prices quadruple. Once Bleeding the Land Dry is reached it remains in effect for the rest of the game, even if all armies are collecting below 57. Actual Collection: Building new cities and placing city upgrades provide an economic bonus. A collection counter for a particular army may be adjusted above Resource Depletion or Bleeding the Land Dry levels after a player’s turn when cities and upgrades are built, but cost increases are not in effect until a player actually collects income at a level above or equal to the Resource Depletion and/or Bleeding the Land Dry levels. Costs: All costs should be adjusted for Resource Depletion and Bleeding the Land Dry (including costs for research rolls, summoning, etc.). It should be noted that only costs are adjusted. Cities, city upgrades, and spells such as “Tax of the Magi” provide adjustment to collection, but these adjustments do not change when costs increase.
## 5. Cities Dwarven Fortresses, Goblin Strongholds, Undead Tombs and Human Cities will all be referred to as “Cities” in the rules. Cities have several functions. The most important function of a city is that it allows players another point of unit placement. When units are purchased they can only be placed in cities. Due to this rule, cities serve a highly strategic function. Sometimes players build forward cities not too far from their enemies, so they can launch an offense from that point. City upgrades can be made to capital cities, which provide various benefits to each army (see each individual army’s section on cities for details). Units that require the purchase of a city upgrade may be purchased in any city of that army after the upgrade is built. Cities themselves cost 12 and provide an economic bonus of 4 (except for the capital city which is worth 5 including the territory). Dwarves only build their cities in mountains and Goblins only build their cities in forest. All other armies only build their cities in open plains areas. The starting territories (capital cities) for Goblins and Dwarves are considered forest or mountain respectively. Cities may not be built on territories which contain dungeons. Capital Cities: Each capital city is located in a corner of the game board. An army cannot collect any income or place any units unless they control the territory where their capital city is located. Once a capital is actually destroyed and burned the game is over and the opposing side wins. It takes a full turn to destroy a city so a city can be captured but not yet destroyed (see details below for more information). If an allied army reclaims a capital city possession of the city and the territory reverts to the ally who
owned it originally. This is an exception to the rule regarding not being able to transfer territory ownership to an ally. Crowns which have been saved by the army which lost its capital are stolen by the army which takes control of an enemy capital city. Building Cities: Cities take 2 turns to build and require that a unit remain in the city for the duration of the building process. The 1st turn is placement of the city. The unit that builds the city must remain in the city for the entire next turn. The city is placed face down during the first turn. At the end of the 2nd turn the city marker turns over and the city is built. At the very end of the 2nd turn , after the player has collected income and purchased units, the income is adjusted for the new city (by +4), to be collected and used on the player’s next turn. During the placement phase of the 3rd turn units may be placed in the city. Hero units may not build cities. The maximum number of expansion cities a player can have in the game is 4. More than one city may be built in a turn. No more than one city may be built in a single territory. Interrupted City Construction: If a unit leaves a city during construction (with no other units in the city at the beginning of that turn), then construction ceases. The player may later resume work on the city by moving another unit into the city. A turn of construction is not counted until the unit spends an entire turn in the city. A player cannot move a unit into a partially constructed city and count it as a phase of construction all on the same turn. Attacking/Capturing a City: If a city is undefended, an enemy player can capture it by simply moving a unit into the territory where the city is located. If the city is defended the attacker must engage in combat and win to capture the
territory. If the attacker is successful the defender loses the 4 economic value from the city as well as the value for the territory. If the defender loses the city, but can reclaim it before the attacker burns the city then the economic value is returned. A player may not place any units in a city that is occupied by an enemy or one whose territory is under the control of an enemy. A player may not build their own units in an enemy city that they have captured. A player does not receive income from a captured city. Burning/Destroying a City: It takes one full turn to burn a city. This means that if units move into a city and defeat the army defending it then the city will not be burned on that turn. At least one enemy unit must remain in the city to burn it for one full turn. Siege units are the exception to this rule. They can burn cities immediately if they end their turn in an enemy city. Any units, including Hero units, may burn cities. Hero units receive 12 XP if they are in the territory when an enemy city is burned (they do not need to be present for the entire turn to receive the XP, just at the end of the turn). Partially built enemy cities are destroyed in the same manner. If units attack a city that is in rough terrain and they sustain a movement penalty (see rough terrain section for more details), they will not be able to burn the city for two turns. They must occupy the city without a movement penalty for one full turn to burn the city. In order to build a city on the ashes of a burnt enemy city, the enemy city must be removed on the turn prior to building the new city. After a city is burned the player who burned it should claim it and place it off the game board near them. This will count as a victory point if the game ends by victory points (see the section on winning the game for more details).
Example:
The Humans invade the Bone Lands and kill all the Undead units. On the Undead’s turn they are not able to reclaim the Bonelands. At the end of the Human’s next turn they burn the capital city of the Undead and win the game for themselves and their allies. If the Humans have a catapult however they would be able to burn the city immediately after winning the battle.
Leaving an Enemy City Before it is Burned: If the enemy units leave without burning the city, collection will not be adjusted upwards for the city nor may any units be purchased in that city. An enemy collection marker should be placed on top of the city to signify that it has been captured. In this situation the city will need to be recaptured by an allied unit in order for the city to operate normally again. If an allied unit conquers the territory which contains the city, the city will immediately operate as normal and collection will be adjusted upwards for it. Moving Through a City: Units may move through territories where there is an unoccupied enemy city (unless the city is built in rough terrain such as mountains or forest, in which case they might suffer a rough terrain penalty). City Upgrades: There are various upgrades that may be purchased and placed only in capital cities, which provide a variety of advantages. Upgrades are specific to each army. (See the individual army sheets for details.) Only one upgrade may be built per turn. Upgrades are built immediately at the end of the placement phase and the advantages they provide are available on the player’s next turn. Upgrades generally add an economic bonus to the next turn’s collection round, some allow for the purchase of special
units and others for bonus rolls, which typically take place in the Collection and Placement phase. When upgrades are purchased, place the upgrade counter in the appropriate box outside of the capital city. Upgrades do not represent a separate territory. If a Hero unit is taking advantage of an upgrade such as a Wizard’s Tower (as an example) there is no need to place the Hero counter outside of the city in the upgrade area. As long as the Hero is in the city (for a full turn) they are able to take advantage of the upgrade. Upgrades that are prerequisites for other units allow those units to be purchased in any of the player’s cities (unless otherwise noted).
6. Hero Advancement and Spells
Hero units gain experience points (XP) throughout the game and advance in power as they gain experience. Heroes gain experience at the rate of 1 per pre-inflationary cost of an enemy unit killed. The hero must actually be in the battle and survive the battle in order to receive experience points. The hero need not actually kill the enemy unit(s), so long as the hero is with a group of his own or allied units that kill the enemy unit or units (this includes ranged attacks from siege units). All heroes in a battle receive the same XP for enemy units killed (unless otherwise noted); they do not divide the XP among themselves.
Example:
A Hero is with a large army that kills 5 enemy infantry. The Hero earns 25 XP.
Destroying an enemy city provides 12 XP for any
hero in the territory where the city is when it is burned. Heroes may also gain XP by exploring dungeons and taking part in certain ceremonies and rituals, depending on their individual army. Quests may also provide XP. To track hero experience use the hero XP counters and place them on the Experience and Research Tracking Board as XP is gained for the particular hero. XP may be awarded immediately after a battle. There are three types of heroes: warrior heroes, wizard heroes and priest heroes. Warrior heroes typically do not have the ability to cast magic spells, but instead have a strong defense. Wizard heroes are powerful spell casters. Priest heroes have limited and more defensive magic spells, but are less costly than wizards. Warrior heroes are always front row. Priest and wizard heroes are third row. Priest and wizard’s basic attacks are considered magic and attack in a similar manner to that of archers. All heroes start with two hits. Priest and wizard heroes each start with two 1st level spells. (See the specific spell cards for the powers of the individual spells.) All heroes are immune to the Fear spell. The advancement table for heroes is noted below. When a hero advances a level they must announce this to the rest of the players. The spell numbers reflect additional spells gained at the level, not total spells. Warrior heroes do not receive spells, but they receive an additional hit each level, making it more difficult for them to be killed. After level 3, new levels are gained for each 100 XP. Additional spells are earned according to the level 3 schedule. Priests do not gain level 3 spells, but gain additional spells according to the level 2 schedule as they progress beyond level 2.
Hero Advancement
| Hero Level | XP | Spells Level 1 | Spells Level 2 | Spells Level 3 |
|---|---|---|---|---|
| 1 | 0 | 2 | 0 | 0 |
| 2 | 50 | 1 | 1 | 0 |
| 3 | 120 | 1 | 1 | 1 |
Magic Spells
Casting Spells: The spell caster must be in the same territory to cast the spell on a target (either friendly or enemy), unless otherwise noted on the spell card. Each spell card will have the details of the specific spell listed on it. Each spell card will list the phase in which the spell is cast, either movement, combat or placement. There are some spells that have an immediate affect and do not need to be cast. Their affect is immediate upon their selection. Many spells are cast only during the combat phase of the turn. There are some spells that may be cast during the movement phase and also the placement phase. Unlike spells cast in the combat phase, a spell caster may only cast one spell per turn during the movement and placement phase. A Wizard could cast a teleport spell to move into a battle, cast Summon Monster once, and then Flaming Arrow several times over the next few combat rounds of combat and finally cast a Tax of the Magi spell after the battle during the placement phase. It is important to note that a Wizard may only cast one spell per combat round even if they have selected the same spell twice. As an example, a Wizard should never select the Flame Arrow spell more than once, because they may only cast a spell once per combat round. Ranged Spells: Spells with a range of 1 may attack units in an adjacent territory. These types
of spell can usually be cast as a normal spell as well (in the same territory). An example of this type of spell is Rain of Fire. See the specific spell in question for more details. Units killed with a ranged spell will yield XP to any hero from the same army or allied army which is in the same territory as the hero which cast the spell. Spells of this nature follow the same rules of Ranged Attacks made by siege units. Movement Spells: Spells such as Speed and Teleport are used either on the movement phase or in combat as a retreat. Once cast their affects are immediate. Spell Selection: When a unit which may cast spells is purchased (such as a Wizard or Priest hero) they must choose their new spells immediately by selecting them from the spell cards. They do not have to announce their new spells to other players, but must allow access to this information should any other player request it. If a player forgets to choose their spells for any reason, they do not forfeit them, but they should make every attempt to select their new spells as quickly as possible. An opposing player can stop the game and demand that the player choose their spells before they continue with their turn. Players are free to select the same spell more than once (select an extra spell marker and place it on top of the original spell card to signify that the spell has been selected another time). Selecting spells more than once might make sense for some spells that may only be cast once per game, such as Tax of the Magi, or spells which may only be cast once per battle such as Fear, but it would never make sense to select a spell such as Flame Arrow twice, as it may be cast unlimited times throughout a battle. Heroes may not cast spells on the same turn in which the hero unit is purchased. Spells which have an immediate affect are not cast, however and the hero’s army
would receive the benefit of those types of spells immediately when the spells are selected. When heroes gain new levels they may select their new spells on the placement phase of a turn and they may use them on that same turn if they are able. If a full turn passes since a hero was eligible to select spells (either because they were purchased as a new unit or because they leveled up) and now it is the heroes turn again and spells have still not been select an opposing player may deem this not to be fair. In this case the player who has not yet selected spells must wait until after their turn to select them and not use any new spells on their present turn or select the top two spells from the list below as their selected spells. Spells with a prerequisite such as Teleport or Resurrection may not be selected unless the prerequisite is attained prior to the selection of that spell.
Wizard Spells
| Level 1 | Level 2 | Level 3 |
|---|---|---|
| Flame Arrow | Lightening Bolt | Fire Ball |
| Guide Fate | Summon | Frost Bolt |
| Teleport | Rain of Fire | Summon Greater Monster |
| Speed | Group Teleport | Summon II |
| Tax of Magi | Summon Monster | Teleport Army |
| Greater Speed |
Priest Spells
| Level 1 | Level 2 |
|---|---|
| Fear | Exorcism (Good Only) |
| Mark of Passing | Raise Dead |
| Heal | Resurrect |
| Symbol of Fortitude | Unholy Word (Evil Only) |
| Eye of the Explorer | Hardened Armor |
Quest Cards
At the beginning of each game, after players decide which army they want and the order of movement, quest cards are drawn. Each player draws three cards, but only keeps two and returns one to the deck. The quest cards are kept hidden from other players. Quest cards have a secret mission with an objective and a reward on them. If the player achieves the objective they may reveal the card to the rest of the players and received the reward. After they receive the reward the quest card is discarded, unless otherwise noted. Sharing the quest card information with any other player (allied or enemy) will result in the quest being disqualified and returned to the deck. If a player is playing multiple armies they draw 3 cards per army. Players will not draw any additional cards after the start of the game.
## 7. Dungeons, Monsters and Treasure
Dungeons
There are six dungeons. The Haunted Ruins, Howling Cavern, Ancient Sanctuary, Forgotten Temple, The Lost Keep, and Tomb of Fallen Heroes. (Details on these specific dungeons can be found at the end of the rule book.) Territories which contain Dungeons: These territories may be conquered by units that can conquer that terrain type, but a city may not be built on a territory where there is a dungeon. These territories may be occupied by non-hero units, but only hero units may explore the actual dungeons contained within these territories. Heroes might suffer a rough terrain penalty for entering some of these territories (depending on the heroes and the terrain); if they do suffer the penalty this does not stop them from exploring the dungeon on the same turn they enter the territory. Exploring Dungeons: Dungeons are explored during the combat phase of the turn by hero units only. Dungeons may have other specific rules that pertain to that specific dungeon in terms of what monsters can be found there. The specific dungeons are listed at the end of the rule book. If a dungeon has been explored and the monster or monsters within the dungeon are slain then that dungeon may not be explored again. At this point if the dungeon is completed it is no longer considered active, and an Explored marker should be placed on the dungeon. When exploring a dungeon (fighting monsters), heroes
are considered the original attackers in the battle. It is permissible (and often recommended) to have multiple allied heroes from two different armies explore a dungeon together. Retreating from Dungeons: If heroes decide to retreat from dungeons they must retreat into the territory where the dungeon is located, even if the territory is rough terrain. This is an exception to the normal retreating rules. The territory containing the dungeon is the only territory to which the heroes may retreat when retreating from a dungeon. Heroes do not need to roll a 2 or less when retreating from a dungeon. It is permissible for heroes to retreat from a dungeon immediately after they see what monsters are in the dungeon without ever engaging in combat. If a dungeon is explored but the monster or monsters have not been slain then the dungeon remains active. In the event that the monster or monsters are not slain, the monsters that were found there are removed from the deck and will now only be found in that particular dungeon. Tuck the monster card(s) partially under the game board near the dungeon to denote the location of the monster(s). If a dungeon which has not been completed is re-entered new monsters are not rolled for, but the existing monsters will still be present. If a monster that has been removed from the deck is found in another dungeon (by way of die roll), then a random monster must be selected instead. Enemies in Dungeon Territories: If an enemy unit is located in a territory that holds a dungeon the enemy unit must be defeated before the heroes may enter the dungeon. Hero units are not able to enter the dungeon on the same turn that they have engaged in combat with an enemy unit in that territory. This essentially allows players to block dungeons with their own units delaying the enemy heroes’ access.
Multiple Monsters in Dungeons: Some dungeons contain more than one monster. In the event that one of the monsters is a unit allied to the heroes, the heroes would only gain the services of the allied monster unit by defeating the other monsters in the dungeon first, without the help of the allied monster unit. If heroes retreat after defeating one monster while other monsters remain, the heroes receive the XP for defeating the monster, but not the treasure. All monsters will attack on the same turn. Traps: There is a potential with most dungeons that a trap will be encountered. A trap will be encountered typically on a roll of a 6. (See the Dungeon Details section for more information.) If a trap is encountered all heroes will be attacked at a 4 as they enter the dungeon. The trap attacks just 1 time and will hit for 1 damage. Their normal defense will apply. After the trap attack is concluded the normal monster encounter will begin. The trap will be active for any dungeon that has not been completed. This means that if heroes retreat from a dungeon and later reenter it, they will need to face the trap. Place a trap token on top of the monster encountered to denote that the dungeon is trapped when and if heroes retreat.
Monsters
Only heroes can fight monsters in dungeons. If other units that are allied with heroes are in the same territory they may not participate in the battle. The monster’s attack and defense rolls will be made by the player to the left of the player who encountered the monster. Monsters may not retreat or move from the dungeon unless they are allied with a particular army (see the individual
monster card for more details). Monsters are immune to the fear spell in dungeons. When monsters are killed by heroes, heroes receive XP as noted on the monster card when the dungeon is resolved if the hero is still alive. Monster cards are returned to the monster deck after they are killed. There are tier 1 and tier 2 monsters (T1 & T2). The tier 2 monsters are much more powerful and are found in more difficult dungeons. The dungeon will dictate which type of monster card(s) are drawn. Allied Monsters: Some monsters are allied with either the forces of Good or Evil, and will come immediately under their control when a dungeon has been explored. Individual monster cards have details pertaining to this. If a monster becomes allied with a particular army they will defend at a 4 against Fear spells. If the monster is an ally the heroes that discovered that monster will be awarded the XP as noted on the monster card, plus an additional 10 XP. No treasure is awarded for allied monsters, even if they are later slain by an opposing force. Allied monsters may not fight in dungeons. Allied monsters never suffer rough terrain movement penalties and therefore will also free units who are in the same territory with them of any rough terrain movement penalty. Allied monsters conquer territory for the army that controls them just like any other unit of that army, though they may not build cities. Monsters are always in the front row. Allied monsters have unit counters for each potential army. In some cases allied monsters can be assigned to either army within a team, for example the Elf Champion can become part of the Dwarf or Human army. The allies must decide among each other who will gain control of the allied monster if heroes from both armies discover the allied monster, otherwise the army which discovers the allied monster will control it.
### Treasure
Treasure is obtained when heroes slay monsters in dungeons. Each treasure card will award XP to the hero who receives the treasure. When treasure is claimed by a particular hero it is placed with the hero card to denote ownership of the treasure. XP is only granted to the heroes that claim treasure which they can use. If the last remaining hero in a dungeon and monster kill each other simultaneously no treasure is gained for the hero. There are two types of treasure cards, tier 1 and tier 2. The type which a hero may receive is dictated by the level of the monster they have slain. This will be indicated on the monster card. If there are no heroes that are able to use the treasure card, the treasure card will be placed in the capital city of the hero which found the treasure. If another hero from the same army or allied army is able to use that treasure card they must claim it from the capital city by moving there. Instead of placing the treasure that (cannot be used) in a capital city the player may claim 15 crowns instead and discard the treasure card (30 for tier 2 treasure). If a hero is killed they do not lose any of the treasure cards they possess. The treasure card is not returned to the deck and will be awarded back to the hero if they are resurrected (see the level 2 Priest spell resurrection for more details). Heroes may not give treasure to other heroes at any time. Treasure is awarded at the very end of the combat phase, after the dungeon is resolved. It may be possible to use it on the same turn during the placement phase. Using Treasure: Some treasure cards may only be used once. Once they are used they are returned to the deck. When treasure is used in battle such
as a healing potion or scroll of resurrection it takes place instead of an attack, retreat or other combat action by the hero, with the exception of Cullow’s Lucky Charm which does not require the forfeit of a combat action on the combat round which it is used. Treasure such as weapons and armor may be used over and over and will typically enhance the combat abilities of heroes. If a hero possesses more than one weapon that hero may only use one weapon at a time. Treasure items may be used continuously, unless otherwise noted on the card.
8. Winning the Game
The game is won when one side captures and destroys an enemy capital city or if one side decides defeat is inevitable and surrenders. This is considered a complete victory. An enemy city is considered burned and destroyed only after the invaders have remained there for one full turn after capturing it, unless they have a siege unit in which case it is destroyed immediately. In the case of the Goblin and Dwarf capital cities, it takes two full turns after capture due to the rough terrain penalty, unless the enemy forces have a siege weapon or some other way to destroy it immediately. Alternatively, if the enemy units do not suffer a rough terrain penalty the city may be destroyed at the end of the following turn.
Marginal Victory
A marginal victory may be achieved 3 different ways. It may be achieved by economic victory, by agreement, or by victory points. In tournament or league play a marginal victory is worth 3 points with 1 point being awarded to the losing team. A complete victory is worth 4 points.
Economic Victory: Economic victory is achieved when one team has a combined income which is 50 (or more) greater than the combined income of their opponents at the end of their opponents turn. Victory Points: Turns are tracked on the collection board by the team that moves 1st. Each turn at the start of their turn they may advance the turn marker. At the conclusion of turn 14 (both teams have moved), victory points must be counted. One victory point is awarded for each enemy city destroyed. One victory point is earned for occupying (but not yet destroying) an enemy capital city at the end of the game. The team with the most victory points will be awarded a “Marginal Victory”. If, at the conclusion of turn 14, both teams have an equal amount of victory points the game then total combined income of each team will be the tie breaker. If both teams are tied in collection and VPs than it is considered a tie and 2 points would be awarded for tournament or league play. For a quicker game or for a tournament 12 turns can be used instead of 14. Victory by Agreement: At any point, one team may offer the other team a marginal victory or marginal defeat. This is best used when the eventual outcome of the game appears to be favoring one side.
9. Quick Play Variant
The Quick Play Variant is recommended for new players or for player who prefer a quicker game. The standard rules apply; only the starting set up is changed as noted below. (We recommend the traditional version of Warparty for players who enjoy a greater depth of strategy, as players develop and expand their empire in the first 4 to 5 turns.)
For Quick Play all players start with:
- Control markers in the resource rich territories located within two territories of their capital
- Two cities, 3 territories away from their capital
- 30 Crowns to spend before the game begins, only 4 of which may be saved. This may not be used to build additional cities.
- 6 or 7 infantry units depending on whether they move 1st or 2nd
- Players may buy up to two upgrades before play begins
- Players may place the units they purchase in addition to their 6 or 7 infantry in any of their cities or territories which they control.
The team that moves 2nd may adjust the placement of their cities and purchase after the team that moves 1st has confirmed that their purchase and placement is complete.
Additional Rules:
- The Dwarves may pay for and make 1 research roll before the start of the game if they purchase the Gnome Workshop before the game begins.
- The Humans and Goblins may pay for and make up to two invention rolls for Catapults and Ballista respectively before the game begins.
- The Undead and Humans may not place a tomb or city 3 spaces out if a mountain or forest territory is involved for the purposes of counting territories.
- The Undead may only buy 1 shade before the game starts.
- Players may start the game with units which require pre-requisites that were purchased prior to the start of the game. For example, the Goblins could buy a Wolf's Den and a Wolf Rider during the set up phase.
- A marginal victory may be earned by the 11th turn instead of the 14th (or for shorter games / tournament formats use turn 9).
10. Dungeon Details
Haunted Ruins
This once peaceful town is now said to be occupied by evil Spirits
Monster Encounter (roll a die):
| Roll | Monster |
|---|---|
| 1 | Ghost |
| 2-3 | Zombie Horde |
| 4-5 | Random T1 Monster |
| 6 | Trap & Random T1 Monster |
Ancient Sanctuary
Centuries ago this was rumored to be the home of the Wood Elves. What lurks here now is another mystery.
| Roll | Monster |
|---|---|
| 1 | Elf Champion |
| 2 | Treant |
| 3 | Elf Spearmen |
| 4-5 | Random T1 Monster |
| 6 | Trap & Random T1 Monster |
Tomb of Fallen Heroes
In the years of the Great War many heroes who fell in battle were laid to rest here. It is believed that magical treasures were buried along with them. What guards the tomb now is unknown.
| Roll | Monster |
|---|---|
| 1 | Elf Champion |
| 2 | Ghost |
| 3-5 | Random T1 Monster |
| 6 | Trap & Random T1 Monster |
The Lost Keep
This small foothold in the mountains was once the home of a Dwarven warlord. It has since been over-run by a dark and nefarious presence.
| Roll | Monster |
|---|---|
| 1 | Hill Giant |
| 2 | Minotaur |
| 3-5 | Random T1 Monster |
| 6 | Trap & Random T1 Monster |
Howling Cavern
It has been said that this cave has an appetite of its own.
Fight 2 monsters simultaneously. Roll twice on this table.
| Roll | Monster |
|---|---|
| 1-3 | Random T1 Monster |
| 4-6 | Random T2 Monster |
Forgotten Temple
Long ago this temple was a glorious place of worship for deities that have since been forgotten. For unknown reasons the gods became unhappy with their parishioners and struck them down. It has been said that anyone who attempts to enter the temple now will evoke their wraith
Fight two T2 monsters simultaneously and one T2 Monster. In addition if a 6 is a rolled then a trap must be faced as well.
Changes in the 2nd Edition
The majority of the changes in the 2nd edition rules were to provide additional clarity and examples around specific areas such as retreating and rough terrain rules. We compiled a list of questions on rules which were asked on our Board Game Geek page over the last year and a half and made sure to update these 2nd edition rules to answer them.
In addition to adding clarity and examples there have been several rule changes which are covered in these rules and summarized below.
- Turn limit increased to 14 turns (Quick Play variant turn limit increased to 11).
- Rubies (red coins) are now valued at 25 instead of 50.
- Allied Monsters provide +10 bonus XP
- Quests - Draw 3 at random and discard 1
- Increased the crown value of treasure which cannot be used by heroes from 10 to 15 for tier 1 and 20 to 30 for tier 2.
- Victory points are no longer awarded for cities built, only cities destroyed.
- Occupying (but not yet destroying) an enemy capital city at the end of the game is worth 1 VP.
- Combined income will be the VP tie breaker.
- Economic victory is achieved when total collection for one side has a combined income total of 50 (or more) greater than their opponents at the end of their opponents turn.