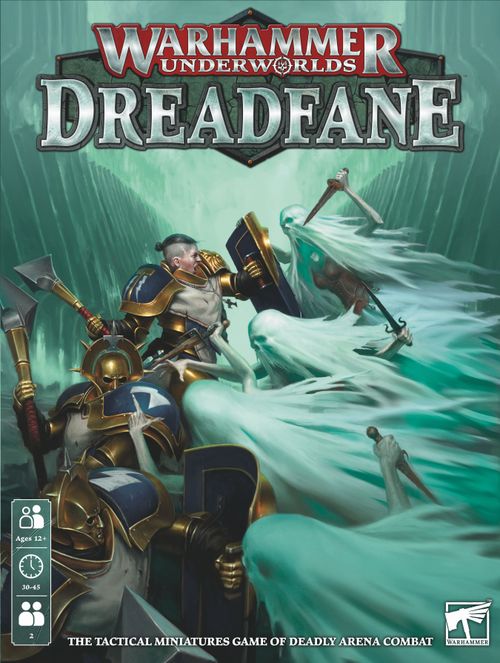
Warhammer Underworlds: Dreadfane
Warhammer Underworlds: Dreadfane Rulebook
Table of Contents
Table of Contents
Introduction
Warhammer Underworlds: Dreadfane is a game of strategy, fast-paced combat and devious ploys for two players. Each controls a warband of fantastically detailed Citadel Miniatures, pitting them against a rival within the deadly Dreadfane. Though it's an easy game to pick up, you'll find it has more than enough depth to reward dedicated players.
Warhammer Underworlds is an expandable miniatures board game with many different warbands and expansions to collect. This box contains two warbands and introduces the unique setting of the Dreadfane. It's a different way to play Warhammer Underworlds; it's quick to get set up, and the objective is simply to cut down your opponent's fighters. However, it uses many of the core Warhammer Underworlds rules, so it also serves as a great introduction to the game. You might find some rules in this book that don't take effect if you're using the two warbands in this box – they're there in case you want to include elements from other Warhammer Underworlds expansions in your games, such as different warbands or upgrades. Fighters from some of the many diverse warbands you can collect are shown in the book – each has their own cards and playing styles, allowing for endless variety.
Objective of the Game
In this game, your warband is engaged in a desperate struggle within the Dreadfane. Trapped in this lethal coliseum, your fighters must try to destroy the warband that opposes them. If neither warband is destroyed, victory will go to the player who has the most glory points.
Warbands
A warband is a collection of fighters who fight for the same goal. Warhammer Underworlds: Dreadfane comes with two warbands – Ironsoul's Condemnors and Lady Harrow's Mournflight – a collection of mighty heroes and fell villains, all trapped within the sinister Dreadfane.
Each warband has its own distinct character, and always consists of the same fighters, identified by their fighter cards (see opposite) and represented by their miniatures.
Each time you play a game of Warhammer Underworlds: Dreadfane, you and your opponent simply decide between you who will use which warband. You can both use the same warband if you each have a set of the miniatures.
Ironsoul's Condemnors consists of three fighters: Gwynne Ironsoul, Tavian of Sarnassus and Brodus Blightbane. Lady Harrow's Mournflight consists of four fighters: Lady Harrow, the Screaming Maiden, the Anguished One and Widow Caitha.
Sometimes a rule may refer to a warband. When it does so, it means all of the fighters in that warband and all of the cards used by the player of that warband. A fighter in your warband is a friendly fighter. A fighter in any other warband is an enemy fighter. Each warband has a leader, who is identified by a crown symbol on their fighter card.
Terminology
If you come across a word in these rules and you're not sure what it means, you can refer to the Glossary (pg 20-21) where all of the game's terms are described. When a word is in bold type, it is a keyword, meaning that it refers to a rule in this book.
Fighter Cards
A fighter's fighter card tells you their characteristics (how fast, how tough and how well-armoured or evasive they are), their Attack actions, and any other actions they might have.
- Picture of your fighter's miniature.
- Your fighter's name. A fighter with a crown symbol before their name is your warband's leader.
- Your fighter's Attack action (or actions) with Range, Dice and Damage characteristics (pg 11).
- Your fighter's Inspire condition. When this condition is met, the fighter immediately becomes Inspired (pg 19): flip the fighter card over, revealing the fighter's Inspired characteristics and actions. There is no Inspire condition on the reverse of the fighter card.
- Your fighter's Move characteristic.
- Your fighter's Defence characteristic.
- Your fighter's Wounds characteristic.
- Additional abilities or Attack action rules may be found here. Attack action rules that have the same name as an Attack action on the fighter card only apply to that Attack action. If there are no rules here, you will find text that tells you more about the fighter or the world they inhabit – such text has no effect in the game.
- Your fighter's warband symbol.
The Decks
As well as a warband, you will need a number of decks to play Warhammer Underworlds: Dreadfane. Each player uses two decks of cards: an objective deck which consists of 12 cards, and a power deck which consists of at least 20 cards. You cannot look at the cards in your opponents' decks. Additionally there is a 20-card hazard deck, which reflects the dangerous nature of the Dreadfane.
If you are playing Warhammer Underworlds: Dreadfane using the contents of the box, the necessary decks have been pre-constructed and are ready to go. Though these decks have set cards, other Warhammer Underworlds expansions contain a wide array of additional cards and these can be added to your power and objective decks in place of the ones found here as you like. In fact, choosing which cards go into these decks is an important and strategic part of the wider Warhammer Underworlds game system.
For your first game, it is best to use the included pre-constructed decks. There is a power deck and an objective deck for Ironsoul's Condemnors, and a power deck and an objective deck for Lady Harrow's Mournflight.
The warband symbol identifies Lady Harrow's Mournflight or Ironsoul's Condemnors. The universal symbol identifies cards which are usable by all warbands.
Other Cards
As well as fighter cards, the pre-constructed decks for the two warbands in this set include objective cards, which are used to gain glory points, and power cards, which are either ploys or upgrades. Games of Warhammer Underworlds: Dreadfane also feature hazard cards, used to represent the dangers of the Dreadfane. The different kinds of cards are described below.
Objective cards (pg 19): Objective cards are identified by the glory point symbol in the top-left corner (1). Each objective card has a name (2) and a condition (3). If you meet the condition specified on the card, you score the number of glory points shown at the bottom of the card (4). The symbol in the top-right corner (5) tells you which warbands can include the card in their objective deck (pg 3). If it is the universal symbol, any warband can use the card. If it is a warband symbol, only that warband can use the card.
Upgrade cards (pg 15): Upgrade cards are identified by the cogwheels symbol in the top-left corner (1). Each upgrade card has a name (2) and an effect (3) (which could be to modify one or more of a fighter's characteristics, for example). As with objective cards, the symbol in the top-right corner (4) tells you which warbands can include the card in their power deck. Some upgrade cards also have restrictions as to which fighters can be upgraded with the card (5) – where that is the case, the card will list the fighters who can use the upgrade, or will instead have a crown symbol, in which case it is restricted to leaders only.
Ploy cards (pg 15): Ploy cards are power cards you can play during the power step, and are identified by the dagger symbol in the top-left corner (1). Each ploy card has a name (2) and an effect (3), which is usually short-lived (it might be to allow a fighter to make an extra Move action, for example). As with objective cards, the symbol in the top-right corner (4) tells you which warbands can include the card in their power deck. You will get a chance to play these cards in the power step which follows each of a player's activations (pg 15).
Hazard cards (pg 9): Hazard cards are identified by the spiked skull symbol in the top-left corner (1). Each hazard has a name (2) and an effect to resolve (3). All Hazard cards have the universal icon in the top-right corner (4), as they are not associated with any particular warband.
'Cannot': If two or more rules come into conflict, and one of them says 'cannot', that rule takes precedence (e.g. if a fighter has an ability which says they cannot be pushed, a card which lets you push a fighter does not work on that fighter).
Tokens: Some rules tell you to give a fighter a token. When you give a fighter a token, place the relevant token next to that fighter. That fighter is then said to have that token, and whenever that fighter's position on the battlefield changes, their tokens go with them. Note that wound tokens are an exception: they are instead placed on the damaged fighter's fighter card.
Some rules tell you to remove a token. This means that you take that token from next to the fighter, or from their fighter card. If the fighter or card has none of the relevant token, you cannot remove it.
But my card says…: Some cards allow you to do things that you wouldn't normally be allowed to do by the rules in this book. Whenever a card contradicts the rules in this book, the card takes precedence (even if the rule in this book says 'cannot').
Abilities: Rules found on a fighter card or power card are referred to as abilities.
The Battlefield
Here you can see the battlefield of the Dreadfane. It is divided into hexes, which are used to determine the position of fighters, and the distances between them.
Incomplete and starting hexes: The incomplete hexes at the edge of the battlefield are not part of the battlefield and not part of the game – fighters cannot be moved into them, nothing can be placed in them, and so on. Some of the hexes contain a white Warhammer Underworlds symbol – these are used when placing your fighters, and are called starting hexes.
Blocked hexes: Some hexes have a thick white border. These are blocked hexes – an obstacle within that hex means fighters cannot move through or stand in the hex, and blocks line of sight to what is beyond the hex (pg 11). If blocked hexes are adjacent to each other, some of the grid lines will be missing to help show that they are no-go areas. Lady Harrow's Mournflight have an ability that allows them to move through blocked hexes – such obstacles mean nothing to these ethereal ghosts!
Counting distances: These diagrams show you what the rules mean when they refer to distances. Note that a fighter is always considered to be within zero hexes of itself. When counting the distance between two hexes, count the shortest distance possible (which can be straight through blocked hexes).
- B is within one hex of A. These hexes are adjacent.
- B is within two hexes of A.
- B is within four hexes of A.
- This diagram includes two blocked hexes.
Objective hexes: There are five objective hexes on each side of the board. These are numbered 1-5 and are used to score certain cards from your objective deck. Objective hexes do not block movement or line of sight (pg 11) – they simply indicate important areas of the battlefield that the warbands will fight to hold. A fighter (and their warband) is said to hold an objective if they are standing in the corresponding objective hex.
Edge hexes: An outermost hex on the battlefield is an edge hex in addition to any other types (e.g. an edge hex that is a starting hex is both a starting and an edge hex). If a hex is not adjacent to six hexes, it is an edge hex.
Occupied hexes: A hex that contains a fighter is an occupied hex in addition to any other types. A single hex cannot contain more than one fighter. A fighter in a hex is said to be standing in that hex.
Empty hexes: A hex that does not contain a fighter and is not blocked is an empty hex in addition to any other types.
Players' territory and no one's territory: A player's territory is made up of all the hexes on the half of the game board that contains the starting hexes they will place their fighters in (pg 5). Hexes on the other player's half of the game board are enemy territory. Remaining hexes are no one's territory (see the diagram on page 5).
Placing fighters, comet tokens and ambershard tokens: When a fighter, comet token or ambershard token is put onto the battlefield, it is said to be placed. When placed, fighters, comet tokens and ambershard tokens must be positioned in a hex.
Lethal hexes? Though Warhammer Underworlds: Dreadfane does not contain any lethal hexes, you will have noticed that the fighter cards for Lady Harrow's Mournflight, and the Ironsoul's Condemnors Enchanted Robes upgrade card, refer to them nonetheless. Lethal hexes represent spike-filled pits, pools of acid and other more esoteric dangers in the game. They form a core component of other Warhammer Underworlds products, and ethereal fighters such as Lady Harrow's Mournflight are not affected by them. Should you wish to expand your Warhammer Underworlds collection to fight against even more varied enemies in strange and terrifying locations, this ability will become very important.
Game Sequence
A game of Warhammer Underworlds: Dreadfane is played in the following sequence:
- Set up: 1. Choose your warbands. 2. Place the board. 3. Draw cards. 4. Place the fighters.
- Round 1: Hazard phase, Action phase, End phase.
- Round 2: Hazard phase, Action phase, End phase.
- Round 3: Hazard phase, Action phase, End phase.
- End of the game.
1. Choose Your Warbands
The players each choose a warband from their collection and reveal it to their opponent simultaneously.
Roll-offs: When the rules tell you to roll off, each player takes any combination of four attack or defence dice and rolls them. The player who rolled the highest number of critical symbols wins. If both players are tied for the highest number of critical symbols, or if neither player has rolled any critical symbols, the player who rolled the highest number of blade (or hook, for defence) symbols wins. If there is still a tie, the player who rolled the highest number of crossed-blades (or shield, for defence) symbols wins. If there is still a tie, the players re-roll (see below). Do this as many times as necessary to establish a winner.
Re-rolls: When a rule tells you to re-roll a dice, roll it again, immediately after making the relevant roll. If you are told to re-roll a dice roll that involved multiple dice, roll all of them again unless specified otherwise. Whatever the new result is, it replaces the old result, even if it is worse. Unless specifically stated otherwise, you cannot re-roll a re-rolled dice.
2. Place the Board
The Warhammer Underworlds: Dreadfane game board is double-sided.
In this step, the players roll off (see above). The player who wins decides which side of the game board will be used. That player places the game board with the side they have chosen face up. Once the game board is placed, you have what is called the battlefield.
The other player then chooses their territory. The territories that can be chosen from the two sides of the board are shown on the board and are marked A and B. Once each player has a territory, orient the board so that the short board edge in a player's territory faces them.
3. Draw Cards
Each player shuffles their objective and power decks separately and places them face down next to the battlefield. Each player then draws three objective cards and five power cards. When a rule tells a player to draw a card, this means that they take the top card from the relevant deck. The cards a player has drawn but has not yet played are referred to as their hand, and are kept secret from their opponent. There will be opportunities for players to draw additional cards during a game. A player's hand can contain any number of power cards, but never more than three objective cards. If a player would draw a card, but the relevant deck is empty, they cannot draw a card – discarded cards are not shuffled back into the deck.
When a player discards a card, they place it face up in a pile next to that card's matching deck (so you will have an objective discard pile for your objective cards and a power discard pile for your power cards). Rules on cards in discard piles have no effect on the game, unless they specify otherwise. All players can look at the cards in any discard pile.
If a player doesn't like their initial three objective cards or initial five power cards, they can use a 'do-over' to discard the relevant cards and draw a new hand. If they do so, they must discard all cards of the same type before drawing. For example, if a player doesn't like two of their objective cards, they might discard all three objective cards and draw three new ones (keeping all of their power cards). A player can even discard all of their cards for a completely new hand. A player cannot decide to discard one type of card, draw those cards, and then decide to discard the other type of card – they do all of their discarding and then all of their drawing. The player who decided which side of the game board would be used is first to decide whether to use a do-over.
4. Place the Fighters
The players roll off again. Whoever wins chooses which player will place a fighter first. That player places one of their fighters on an empty starting hex in their territory. Then players take it in turns to place one fighter at a time in the same way, until all of the fighters in the warbands have been placed. If either player runs out of fighters to place, the other player continues placing fighters until all of the fighters have been placed. A fighter on the battlefield is referred to as a surviving fighter.
Once the board has been set up, both players have drawn their objective and power cards, and they have placed their fighters on starting hexes in their territories, it's time to begin the first round.
Playing the Game
Hazard Phase
Even in a city as hazardous as Shadespire, the Dreadfane stands apart: the already-deadly traps and pitfalls left there by the Katophranes during their experiments have been as corrupted by Nagash's magic as the rest of the city.
To represent this dangerous environment, during the hazard phase one player draws the top card from the hazard deck and resolves its effects. Do this a number of times equal to the round number (e.g. in the third round, draw three cards).
If there are multiple effects on a hazard card, then they are resolved in the order they appear on the card.
Some hazard cards specify when they are discarded – where this is not the case, the effect on the hazard card will last until the end of the game. Once a hazard card is discarded it has no further effect. This can happen at the start of the hazard phase; if so it is done before another card is drawn.
Action Phase
Actions: At the start of each action phase, the players roll off (this happens before anything else described as happening at the start of an action phase). In the first round the player who finished placing their warband first adds one to their roll – if you're using the two warbands in this box, this will always be the player controlling Ironsoul's Condemnors. As they're outnumbered by Lady Harrow's Mournflight, they need to take whatever advantages they can! The player who wins decides which player is first to take an activation in that action phase.
You will use most of your activations on your fighters. When you activate a fighter they can make an action. Doing so uses one of your four activations for the phase. The actions common to all fighters are as follows:
- Move (see below).
- Attack (see opposite).
- Charge (pg 14).
- Guard (pg 14).
Other actions fighters can make may be found on fighter and upgrade cards.
You can also take activations to make player actions. These don't involve your fighters – instead, these actions allow a player to do something. Doing so uses one of your four activations for the phase. The actions available to all players are as follows:
- Draw a power card.
- Discard an objective card and draw an objective card.
- Pass (forfeit an activation).
Note that although most activations allow a fighter to make an action, activations and actions are different things!
Players take it in turns to take an activation. Each player has four activations that they can take to perform actions, such as making Move or Attack actions with their fighters. After they have taken an activation there is a power step where both players can play power cards (pg 15), and then play passes to the other player to take their activation. When both players have used all their activations, the action phase is over, and the end phase begins.
It can be easy to lose track of how many activations you've taken in the heat of battle! To help you keep track, use the four activation tokens. Each time you take an activation, turn one of the tokens over.
Move Action
When a fighter makes a Move action, they can move in any direction, moving into an adjacent empty hex (pg 6) up to a number of times equal to their Move characteristic. A fighter that makes a Move action cannot end their Move action in the hex they started the Move action in. When a fighter completes a Move action, give that fighter a Move token. A fighter cannot make a Move or Charge action while they have one or more Move tokens.
In the diagram on page 12, Tavian would need a Move characteristic of at least 2 to move to hex A, at least 3 to move to hex B, and at least 4 to move to hex C.
Pushes and Other Exceptions
When a rule tells you to push a fighter, simply push their miniature into an adjacent hex the number of times specified by the rule, in any direction each time. Note that nothing can push a fighter into or through a hex that is blocked or occupied. A fighter that is pushed cannot end the push in the hex they started the push in. A push is not a Move action – you do not need to give a pushed fighter a Move token. Similarly, when a fighter is driven back (a special kind of push, see page 13) or placed on a different hex by a rule, these are not Move actions, and you do not need to give that fighter a Move token.
Attack Action
Most fighters have at least one Attack action on their fighter card. Fighters gain Attack actions when they are given an Attack action upgrade (pg 15), or in some cases when they are Inspired (pg 17). A fighter must have a valid target that is within range and line of sight (see below) to be able to make an Attack action. All Attack actions have the following information:
- Name.
- Range characteristic. An Attack action with a Range characteristic of 1 (a Range 1 Attack action) can only be made to target an adjacent fighter. All of the Attack actions in this set are Range 1 Attack actions, but other warband expansions boast longer ranges. Attack actions with a Range characteristic of 2 or more can be made to target fighters who are within that number of hexes of the attacking fighter, as long as the attacking fighter has line of sight to the target. The distance to the target of an Attack action does not affect the Range characteristic (e.g. a Range 3 Attack action used to target an adjacent fighter is still a Range 3 Attack action). Some cards may refer to, for example, 'Range 3+ Attack actions': this means all Attack actions with a Range characteristic of the stated value and higher.
- Dice characteristic. This tells you how many attack dice to roll when making the Attack action, and the symbol (blade or crossed-blades) you need to roll for a success. The more dice you roll for an Attack action, the greater your chance of success.
- Damage characteristic. This tells you how much damage the attacking fighter deals to the target if the Attack action is successful.
- Some Attack actions have additional rules text, which may refer to a number of common abilities, such as Cleave and Knockback (pg 14) or may include more esoteric rules that change how the Attack action works.
Line of sight: Line of sight is used to determine which other fighters each fighter can see, and is usually used when checking if one fighter can make an Attack action that targets another. Fighters have line of sight in all directions – it doesn't matter which way the miniature is facing.
To check if a fighter has line of sight to a hex, draw a straight imaginary line from the centre of the hex they are standing in to the centre of the hex in question. If that line goes through or touches any blocked hexes, or goes through any incomplete hexes, the fighter does not have line of sight to that hex. Otherwise, they have line of sight to that hex, and anything in that hex is considered to be visible to that fighter. Fighters (and occupied hexes) do not block line of sight.
In the diagram on page 13, Gwynne has line of sight to all hexes labelled A, but does not have line of sight to any of the hexes labelled B.
Combat Sequence
When you choose one of your fighters to make an Attack action, follow the sequence described here. Once the sequence is complete, that action has been resolved. A fighter making an Attack action is referred to as an attacker while that action is being resolved, and that fighter's player is referred to as the attacking player.
-
Declare Attack action: Choose an Attack action and a target. You can only choose one Attack action (which will be on the attacker's fighter card or on an upgrade that fighter has), and the target must be within the Attack action's Range and visible to the attacker. You cannot target a friendly fighter.
-
Attack roll: Roll a number of attack dice equal to the Attack action's Dice characteristic and count the number of successes you roll. This is called the attack roll. A critical symbol is a critical success, which is always a success (see below). Blade and crossed-blades symbols can be successes, depending on supporting fighters (see below).
-
Defence roll: The target's player rolls a number of defence dice equal to the target's Defence characteristic and counts the number of successes they roll. The target's Defence characteristic tells you which symbol (shield or hook) their player needs to roll for a success. This is called the defence roll. A critical symbol is a critical success, which is always a success (see below). Shield and hook symbols can be successes, depending on supporting fighters (see below). Ironsoul's Condemnors use the shield symbol, which is more reliable than the hook of Lady Harrow's Mournflight – these heavily armoured warriors are usually more likely to roll successes in their defence roll.
-
Determine success: If you rolled fewer successes than the target's player, the Attack action fails – skip to step 8. Similarly, if neither you nor the target's player rolled any successes, the Attack action fails – skip to step 8.
If you rolled the same number of successes as the target's player (and at least one success) the Attack action fails. However, the target can be driven back – skip to step 7.
If you rolled more successes than the target's player, the Attack action is successful.
-
Deal damage: The attacker deals damage to the target equal to the Damage characteristic of the Attack action (see opposite).
Note that fighters do not gain a token for making an Attack action – a single fighter can make multiple attack actions in the same round.
Outmanoeuvred: If, at the start of any of the steps 2-5, the target is no longer visible and/or within range, the Attack action fails – skip to step 8.
Support: In combat, fighters rarely have the luxury of facing their foe one-on-one. Each fighter's allies will try to help them and hinder their enemies, and in Warhammer Underworlds: Dreadfane this is represented by support.
- The attacker receives support for each other friendly fighter that is adjacent to their target.
- The target receives support for each other friendly fighter that is adjacent to the attacking fighter.
- A fighter who provides support in this way is said to be supporting.
Whichever fighter has more support has a greater chance of success, either in attack or defence. If one of the fighters has one more supporting fighter than their enemy, rolls of the blade symbol (or hook symbol, for defence) are successes in their attack or defence roll. If one of the fighters has two or more supporting fighters more than their enemy, rolls of the blade and crossed-blades symbols (or hook and shield symbols, for defence) are successes in their attack or defence roll.
In the diagram on page 14, if Tavian (A) was attacking Widow Caitha (D), Gwynne (B) would support the attack and neither Lady Harrow (C) nor the Anguished One (E) are in a position to support Widow Caitha, as they are not adjacent to Tavian. This would give Tavian one more supporting fighter than his target, so he would count blade symbols as successes. If, on the other hand, Gwynne was attacking Widow Caitha, Tavian would support the attack, but Lady Harrow would support Widow Caitha. Again, the Anguished One is not in a position to support Widow Caitha. Neither fighter has more supporting fighters, so neither fighter counts blade symbols as successes.
Critical Successes
Critical successes (critical symbols) are always successes in attack and defence rolls, and are included in attack and defence totals in the same way as other successes.
If at step 4 of the combat sequence the attacker has more critical successes than the target, then the Attack action is successful, regardless of the number of successes rolled by the other player. The Attack action also results in a critical hit (see below).
If at step 4 of the combat sequence the target has more critical successes than the attacker, then the Attack action fails – skip to step 8.
If at step 4 both players have the same number of critical successes, the success or failure of the Attack action depends on the total number of successes rolled (including critical successes), as described in step 4. If the Attack action succeeds and the attacker had at least one critical success, it also results in a critical hit.
Driven Back
If the target of an Attack action can be driven back, the attacking player can choose to push the target one hex. This can be in any direction that takes the target further away from the attacker. A fighter is only said to be driven back if they are pushed from the hex they were standing in.
Trapped
If the target of a failed Attack action could be driven back, but the fighter cannot be pushed (because all of the hexes they could be pushed into are blocked or occupied, or because the edge of the battlefield prevents them being pushed), the target is trapped: the Attack action is successful instead of failing. Return to step 5 of the combat sequence (Deal damage) and deal damage to the target. Do not resolve step 7 (Drive back) a second time for this Attack action – instead, after step 6 (Check if the target is taken out of action), skip to step 8 (End sequence).
In the diagram on page 15, when Tavian drives Widow Caitha back, Widow Caitha can be pushed into one of the three hexes shown.
Critical Hit
When you roll one or more critical symbols for an Attack action, and the Attack action is successful, your fighter has scored a critical hit. This has no effect in itself, but some cards have abilities that take effect when a critical hit is scored. Where this is the case, it will be stated on the card.
Damage
When a fighter is dealt damage, take a number of wound tokens equal to the amount of damage dealt (which will usually be the Damage characteristic of an Attack action that targeted them and succeeded) and give them to that fighter (pg 5).
Out of Action
Once a fighter has a number of wound tokens on their fighter card equal to or greater than their Wounds characteristic, they are taken out of action. Take them off the battlefield and clear all of their tokens from the battlefield and their fighter card. Note that these tokens are not said to have been removed (so, for example, that fighter is not healed – see below). A fighter that is out of action plays no further part in the game – they cannot be activated, they cannot make actions, you cannot use any abilities on their upgrades and so on.
When a fighter is taken out of action, the other warband's player gains two glory points – they take two glory point tokens. Note that the other warband's player gains these glory points regardless of what deals the damage.
Sometimes you need to know who or what is considered to have dealt damage to a fighter. If an Attack action or an upgrade a fighter has deals damage, the fighter is said to have dealt that damage. If another card deals damage, the warband of the player who played that card is said to have dealt that damage. If a hazard card deals damage, the hazard card is said to have dealt that damage.
Some cards allow you to prevent a fighter from being taken out of action. If you use one of these cards and your fighter is not taken out of action, your opponent does not gain glory points, and their tokens are not cleared.
Heal
Some cards allow you to remove wound tokens from a fighter's fighter card. This is known as healing. If a card tells you to Heal (X), where X is a number, that means that you remove that number of wound tokens from the fighter or fighters described by the card (if they do not have enough wound tokens, simply remove all their wound tokens). A fighter is only said to have been healed if at least one wound token was removed from their fighter card.
Attack Action Keywords
Cleave: If an Attack action is noted as having Cleave, rolls of the shield symbol cannot be successes in the defence roll.
Ensnare: If an Attack action is noted as having Ensnare, rolls of the hook symbol cannot be successes in the defence roll.
Knockback: If an Attack action is noted as having Knockback X, where X is a number, when the Attack action is successful the target can be driven back a number of additional hexes equal to X. This means that if an Attack action with Knockback 1 succeeds, the target can be driven back one hex for the successful Attack action (following the normal combat sequence), and a further hex for the Knockback. Any second or subsequent hex of the push must be in the same direction as the original push. If it is not possible to push the target further in that direction because of a blocked hex, the target is not pushed any further. Note that the Trapped rule (pg 13) does not apply to Knockback, as Knockback only applies to successful Attack actions. If an Attack action has two or more rules giving it Knockback, add the numbers together for a combined total (e.g. if an Attack action has two rules giving it Knockback 1, it has Knockback 2).
In the diagram on page 16, Tavian attacks Widow Caitha with a successful Attack action with Knockback 1. The attacking player can choose one of three hexes to drive Widow Caitha into as a result of the successful Attack action, and the arrows show how that movement continues as a result of Knockback.
Scything: If an Attack action is noted as having Scything, when that Attack action is made it can target each enemy fighter adjacent to the attacker. If there is only one adjacent enemy fighter, the Attack action is resolved as if it didn't have this ability. If there is more than one adjacent enemy fighter, the Attack action is resolved as a superaction (see right). To resolve such an Attack action, the attacking player resolves the Attack action against each of the targets separately, in whatever order they choose. Because each Attack action is resolved separately, if there is a rule in effect that affects the next Attack action, it will only affect the first of the Attack actions resolved in this way, not the whole superaction.
Charge Action
A Charge action is an action that lets you make a Move action with a fighter, and then make an Attack action with them. To make a Charge action, you must follow the rules for Move and Attack actions (pg 10-11), with the exception that you give the fighter a Charge token (rather than a Move token) after the Move action. If any of the conditions for making those actions cannot be met, the fighter cannot make a Charge action. Once you have followed the rules for those actions, the Charge action is complete. A fighter with one or more Charge tokens cannot be activated.
Superactions: A Charge action is an example of a special kind of action known as a superaction. These actions combine two or more actions in one, and when you activate a fighter to make a superaction it only requires a single activation. Each action within a superaction follows the rules for an action of that type (so an Attack action within a Charge superaction follows the rules for Attack actions, and can, for example, be reacted to – see page 16). When an Inspire condition (pg 17) is met during a superaction the fighter is not Inspired until after the superaction. Similarly, surge objective cards (pg 19) whose conditions are met during a superaction are scored after that superaction is resolved.
Guard Action
As an activation, a fighter may make a Guard action. When they do, give that fighter a Guard token: the Guard action is then complete. A fighter with one or more Guard tokens is on Guard, which means they count both the shield and hook symbols as successes in their defence rolls. In addition, they cannot be driven back. This effect lasts until the end of the phase. If a fighter who is on Guard makes a Charge action, they are no longer on Guard – remove their Guard token(s). A fighter with one or more Guard tokens cannot make a Guard action.
Power Step
The best-laid plans in Warhammer Underworlds: Dreadfane rarely survive contact with the enemy. This section of the rules explains how ploy and upgrade cards can be used to disrupt your opponent's plans, or carry out your own.
After each activation is resolved (e.g. after a fighter has made a Charge or Guard action, or after a player has taken an activation to draw a power card) both players have the chance to play power cards – this is called the power step. To play a power card, a player simply reveals the card from their hand they wish to play and follows the directions on the card if it is a ploy, or gives the upgrade to their chosen fighter if it is an upgrade card. Each player in turn may play a power card, or pass (saying 'pass'), starting with the player who took the activation. Any number of power cards can be played after any activation, but once both players pass in succession, the power step ends and the next activation can take place.
Some power cards describe an additional condition that must be met before they can be played (reactions are the most common of these, and are described on page 16). A player can only play these power cards when that condition is met. For example, if a card instructs you to choose two friendly fighters, and you only have one friendly fighter, you cannot play that card.
Note that the power step applies even after the final activation in an action phase – both players must pass before the end phase begins.
Power step example: In the diagram, Tavian has just made a Move action that puts him adjacent to Widow Caitha. With that activation finished, it is time for the power step. Tavian's player is the first to decide whether or not to play a power card. They reveal and play the Outflank card, which allows Tavian to be pushed a further two hexes, allowing him to lay claim to an objective hex that would otherwise have been out of reach! It's Tavian's player's turn again, and with no more ploys in their hand and no glory points for upgrades, they pass. Widow Caitha's player is next to decide whether to play a power card or pass. They have a Sidestep card in their hand, but they don't want to play it just yet, so they pass. Both players have now passed in succession, so the power step ends and it is Widow Caitha's player's activation.
Ploy cards: Ploy cards are held in a player's hand until they are revealed. These cards give the player holding them the chance to change their situation with a burst of speed, an extra attack or a cunning trick.
When you play a ploy card, reveal it and follow the text on the card. Once you have done so, the card is said to be resolved, and you discard it.
Some ploy cards refer to the next event of some kind – the next activation, Attack action, or so on. Leave these ploy cards face up in front of you until you apply their effects: once you have done so, they are said to be resolved and you discard them. Note that all such ploy cards only remain in effect for the duration of the next activation, or until the end of the round – whichever comes first. Once that point is reached, any remaining unresolved face-up ploy cards of this type are discarded with no effect.
Persist: Some ploy cards say that they persist – these cards have an ongoing effect. Leave these cards face up in front of you. They are not discarded until they specify that they are, or another card specifies that they are. If a card that persists specifies more than one event that it persists until, it persists until the first of those (e.g. if a card said 'this persists until the next Attack action or the end of the round', it would persist until the first of these events occurs).
Additional actions: Some ploy cards allow you to make additional actions with your fighters. These additional actions do not cost you an activation – the fighter is not activated – and can allow you to make actions with fighters who normally would not be allowed to make those actions. These cards either specify a particular action or actions (e.g. 'Reaction: Play this after you give a fighter an upgrade in an action phase. They can make a Move or Attack action.') or they allow a fighter to make an unspecified action (e.g. 'Choose a fighter. They can make an action.').
When a ploy allows a fighter to make an action, but does not specify which action, the fighter cannot make an action that would not normally be allowed by the rules of the game. For example, a fighter with a Move token could not make a Move or Charge action, as the rules forbid a fighter with a Move token from making a Move or Charge action.
When a ploy specifies an action, or actions, a fighter can make those actions even if the rules of the game would normally not allow it. For example, if a ploy says that a fighter can make a Move action, they can do so even if they have a Move token.
Upgrade cards: Upgrade cards are held in a player's hand until they are played. They are used to give permanent boosts to a player's fighters. To play an upgrade card, a player reveals that card, then spends one of their unspent glory points by flipping it over to its spent side. Once they have done so, they declare which friendly fighter they are giving the upgrade to (following any restrictions, see page 4), and place it adjacent to their fighter card. The fighter has that upgrade for the rest of the game. A fighter can be given more than one upgrade. A fighter cannot be given an upgrade if they are not on the battlefield or are out of action (though they keep any upgrades they have when they are taken out of action).
If a fighter has an upgrade that includes a modifier, that modifier applies to that fighter (pg 18). If a fighter has an upgrade that includes an action, that fighter can make that action when activated (or when granted an action). If it includes a reaction, it will state when that reaction can be used.
Reactions
Reaction opportunities: In some situations in a game of Warhammer Underworlds: Dreadfane, you can use a reaction. You can use the reaction on a fighter card, an upgrade card (only one that has been given to a fighter, unless it specifies otherwise), or a ploy card in your hand when the situation described on the card matches what is happening in the game – it does not cost you an activation to do so, and you do not need to wait for the power step.
Each reaction describes the situation in which it can be used. It might say, for example, 'after an attack roll', 'after an Attack action' or 'after a player plays a ploy'. When this situation arises you can use the reaction by declaring that you will do so and, in the case of a ploy, revealing the card from your hand. Then simply resolve the reaction as described on the card. This happens immediately, which in some cases will mean putting part of the game on hold (for example, the combat sequence, if the reaction happens during an Attack action) until the reaction has been resolved.
You may find that in some situations more than one reaction could be used at exactly the same time – for example, at a particular point during an Attack action. However, only one reaction can be played at each such reaction opportunity.
If both players wish to play a reaction at the same opportunity, the player whose activation is next takes precedence. If they play a reaction, the other player cannot play a reaction at that opportunity. If the player whose activation is next does not wish to play a reaction, the other player can play a reaction. For example, if both players had a reaction that could be used after an Attack action, the player whose activation came next would decide whether or not to use their reaction. If they use it, the other player cannot use their reaction. If they decide not to use it, the other player can then decide whether or not to use their own reaction. When there is no player whose activation would come next, because you have played the last activation in an action phase, the player whose activation would be next if there were a fifth activation takes precedence.
Once a reaction is resolved, if it was a ploy the card is discarded, and then play continues from the point where it was interrupted. If this was part way through resolving an action or effect (e.g. an Attack action or a ploy card), finish resolving that action or effect, unless the reaction has made this impossible (e.g. if a fighter's position has changed so that they are no longer in range to complete an Attack action). In that case, the action or effect ends without being resolved any further.
Reaction opportunities are very specific – there are many distinct opportunities to play a reaction even during a single Attack action (these will normally be after a particular step in the combat sequence, see page 12). This means that multiple reactions can be played during a single Attack action, as long as each is played at a different reaction opportunity. Some reactions may have the same reaction opportunity even if their condition is different: for example, a reaction that can be played after an Attack action and a reaction that can be played after an Attack action that fails – in both cases the reaction opportunity is after an Attack action.
If a reaction happens during a fighter's action, that fighter is still considered to have made that action, even if you are unable to finish resolving that action. For example, if a reaction made during a Charge action prevents that action being resolved, the fighter making that Charge action still gets a Charge token.
Some reactions are triggered after an activation. Note that the end of a fighter's or player's last action in an activation is simultaneous with the end of their activation – the reaction opportunities are simultaneous. If a player uses a reaction after the last action made by an activated fighter or player in that activation, that activation ends at that point, and no further 'after an activation' triggers arise until after the next activation.
Reacting to a reaction: Some reactions can be used because another reaction has created a situation in which they can be used, before play continues. When this happens, rather than precedence going to the player whose activation would be next, precedence instead goes to the opponent of the last player to use a reaction.
For example, a player plays a reaction after an Attack action that allows one of their fighters to make a Move action. Both players have a reaction that can be used after a fighter makes a Move action, so the player who did not play the first reaction has precedence. If they decide not to use their reaction, the other player will be able to use theirs.
Fighter card reaction: When Lady Harrow is Inspired, she gains a reaction. This lets her swiftly move around the board when not being attacked. The reaction happens during the enemy fighter's Attack action, after the Attack is declared. (Reaction: After an opponent declares an Attack action, if it does not target this fighter, push this fighter one hex.)
Ploy reaction: Enervating Sorrow is a ploy reaction that can be played when another player plays a ploy. It forces that player to discard a power card – if they do not, or cannot, their ploy has no effect. The reaction happens after the opponent's ploy is played, but before its effects are resolved. (Reaction: Play this when an opponent plays a ploy, before that ploy is resolved. That opponent can discard a power card. If they do not, the ploy is not resolved.)
Upgrade reaction: The Hallowed Aura card allows the fighter that has this upgrade to make a reaction when they are dealt damage. This reaction gives the player a chance to heal some or all of the damage. (Reaction: After an Attack action that deals damage to this fighter, roll an attack dice. On a roll of [the two symbols shown on the card, not recoverable from the text layer], Heal (1) this fighter.)
Inspire
When the Inspire condition on a fighter's card is met, that fighter becomes Inspired. A fighter keeps all their upgrades and tokens when they become Inspired.
If a fighter is Inspired as a result of an event in the game, such as an action or ploy, the fighter becomes Inspired after that event has been resolved; if that event is an action taken as part of a superaction, the fighter becomes Inspired after the superaction has been resolved. Once a fighter becomes Inspired, they remain Inspired for the rest of the game, unless un-Inspired by a card. When a fighter is un-Inspired, flip their fighter card over so that the Inspired side is hidden. A fighter keeps all their upgrades and tokens when they become un-Inspired.
Modifiers
Various effects in Warhammer Underworlds: Dreadfane apply changes to the values printed on cards or the dice you roll. These are called modifiers. Modifiers are cumulative, so if a single characteristic or roll has more than one modifier applied to it, apply them all. Apply modifiers that multiply or divide before modifiers that add or subtract (even if the modifiers that multiply or divide are on cards played after those with modifiers that add or subtract).
Modifying characteristics: When a modifier changes a characteristic, that characteristic is said to be the modified value. For example, a fighter with a Move characteristic of 4 is given the Swooping Dash upgrade. Swooping Dash gives the fighter it is applied to +2 Move, so that fighter's Move characteristic is increased by 2 to 6.
Dice and Defence modifiers may change the value or the type of the characteristic. For example, +1 Dice means that you would increase the number of an Attack action's Dice characteristic by 1 (and therefore roll an extra dice for that Attack action). On the other hand, a ploy that makes the next Attack action have a crossed-blades characteristic doesn't change the number of dice you roll, but means that rolls of crossed-blades (rather than the symbol on the Attack action) are successes for the attack roll of that Attack action.
Setting characteristics: Some modifiers set a characteristic at a particular value, rather than modifying an existing value. For example, a card might set a fighter's Move value at 1 for the next activation. Apply these modifiers before any others. If two of these modifiers affect the same characteristic or roll (e.g. a fighter's Move characteristic is set to 1 by one card and to 3 by another card), whichever of those rules came into effect last is the value used, for as long as that rule is in effect (or until another card is played that sets the value). For example, if a fighter has an upgrade that sets their Move characteristic to 5 and a player plays a ploy that sets all Move characteristics to 1 for the next activation, the ploy takes precedence: that fighter's Move characteristic is 1 for the next activation, and then it reverts to 5 when the ploy is no longer in effect. If the upgrade was played after the ploy, the fighter's Move characteristic would be 5 (regardless of the ploy).
Modifiers and re-rolls: Dice-roll modifiers also apply to any re-rolls of those dice (pg 7). For example, when rolling to see who chooses the first player to take an activation in the first round, the player who finished placing their fighters first adds one to their roll. If this roll is re-rolled, they add one to that re-roll (and any subsequent re-rolls) as well.
Innate symbols: Innate symbols can appear on fighter cards, on upgrade cards, on hazard cards and on ploy cards – for example, Innate (crossed-blades or blade) or Innate (hook or shield). These symbols are modifiers and are added to attack rolls and defence rolls. Unlike other modifiers, these success symbols do not stack – no matter how many of these innate symbols a fighter has, you can only apply one to their roll. For example, if a fighter had Innate (crossed-blades or blade), you would choose to add either crossed-blades or blade when they make an Attack action, and if a fighter had Innate (shield) from two or more sources, you would only add a single shield when they are the target of an Attack action.
Champions of Sigmar (example card): The first Range 1 or Range 2 Attack action made by a friendly fighter in the next activation has Innate (blade).
Sequencing
If a player has two or more abilities that would resolve at the same time (e.g. at the beginning of the action phase) they choose in which order they are resolved. If two players have abilities that would resolve at the same time, they roll off (pg 7). The winner resolves an ability first, then the other player resolves an ability. They keep resolving abilities in the same order until all abilities they wish to resolve have been resolved. Some abilities are optional (they use the word 'can') – a player can choose not to resolve such an ability, but if they do so they cannot resolve any further optional abilities at this time.
Note that there are different rules for reactions (see page 16).
End Phase
Once both players have taken all of their activations and the last power step in an action phase has been played, the end phase begins. In the end phase, you have the opportunity to score objective cards, upgrade your fighters, discard cards and replenish your hand. Take it in turns to run through the following sequence, starting with the player who took the first activation in the action phase.
- Check your objective cards, and if you have met the conditions on any of them you may score that objective card. To score an objective card, reveal that card and collect the number of glory points specified on that card. Discard the card revealed in this way. Repeat this step for any further objective cards you wish to score.
- You can discard any of your remaining objective cards.
- You can play any upgrade cards, as described on page 15.
- You can discard any of your remaining power cards.
- If you have fewer than three objective cards in your hand, draw objective cards until you have three in your hand, or your objective deck is exhausted (whichever happens first).
- If you have fewer than five power cards in your hand, draw power cards until you have five in your hand, or your power deck is exhausted (whichever happens first).
Note that players cannot use ploys in the end phase.
Once both players have followed this sequence, clear all Move, Charge and Guard tokens from the battlefield (these tokens are not said to have been removed). Flip your activation tokens over – a new round then begins.
Surge objective cards: Most objective cards are scored in the end phase as described above. However, some objective cards are scored 'immediately' – for example after an action or ploy – as long as the conditions on the objective card are met. These objective cards are called surge objective cards. If the condition is met during an activation, the player scores that card after that activation. If the condition is met during a superaction not made during an activation, the player scores that card after that superaction. If the condition is met during an action not made during an activation or superaction, the player scores that card after that action.
When a player scores a surge objective card, that player can immediately draw another objective card. Note that you cannot score any surge objective cards drawn this way until after a subsequent action, reaction or ploy – you cannot draw and immediately score a surge objective card, even if the conditions on the card have been met.
Hybrid objective cards: Some objective cards have two different conditions on them (separated by the word 'or'), either of which allow you to score the objective card. These objective cards are called hybrid objective cards. When you satisfy either or both of the conditions on the objective card you can score that objective card. Hybrid objective cards may also be surge objective cards.
Dual objective cards: Some objective cards have two different conditions on them (separated by the word 'and'), both of which you must satisfy to score the objective card. These objective cards are called dual objective cards. When you satisfy both of the conditions on the objective card you can score that objective card. Dual objective cards may also be surge objective cards.
Rounds 2 and 3
Round 2 works in the same way as round 1 – simply return to page 9 and play through another hazard phase, another action phase and another end phase. The hazard and action phases of round 3 work in the same way as rounds 1 and 2. However, when you get to the end phase of round 3, each player only plays the first step of the end phase, scoring any objective cards whose conditions have been met in the same way as in the other end phases. You do not discard cards, play upgrade cards or draw cards. The game then ends.
Victory
If one warband is entirely taken out of action during the action phase, the game ends. If one warband is entirely taken out of action during a hazard phase, complete the hazard phase – the game then ends. When the game ends, if only one player has any surviving fighters, that player wins. If both warbands are entirely taken out of action at the same time (or in the same hazard phase), or if neither warband has been entirely taken out of action at the end of the game, whichever player has the greatest number of glory points (whether or not they have been spent on upgrades) is the winner. If neither warband has been entirely taken out of action and the players are tied for glory points, whoever is controlling the greatest number of objective hexes wins. If there is still a tie, the game is a draw.
Glossary
Ability: Any rule found on a fighter card or power card (including those that are explained in this book, such as Cleave).
Action (pg 10): Something a fighter can do when activated. There are common actions (like Charge or Guard) and actions on fighter and upgrade cards.
Action phase (pg 10): The second phase in each round, during which fighters are moved and attack one another, and players attempt to score objective cards. Each game has three action phases.
Activation (pg 10): A player's turn in the action phase, during which they can make an action with a fighter, draw a power card or discard and draw an objective card. Each player has four activations in each action phase.
Adjacent: A term used to describe two hexes that are next to each other. Things in adjacent hexes are adjacent to each other. A thing is never adjacent to itself. When a rule on a fighter or upgrade card refers to adjacent fighters, adjacency is established relative to that fighter, unless stated otherwise.
Attack action (pg 11): An action a fighter can make to attempt to damage one or more enemy fighters.
Attack dice: Dice used to make Attack actions.
Attack roll (pg 12): The dice roll made by a player when one of their fighters makes an Attack action. Step 2 in the combat sequence.
Attacker: A fighter making an Attack action.
Attacking player: A player whose fighter is making an Attack action.
Battlefield (pg 5): The area defined by the game board side picked at the start of each game. Incomplete hexes are not part of the battlefield.
Blocked hex (pg 6): A hex defined by a thick white border. Fighters cannot stand in, move through or draw line of sight through blocked hexes.
Cannot: A term used to establish rules priority. Where there is a conflict between two rules, if one of them says 'cannot', that rule takes precedence.
Charge action (pg 14): A superaction that lets you make a Move action followed by an Attack action with a single fighter. A fighter that makes a Charge action is given a Charge token (instead of a Move token) after the Move action.
Charge token: A token that indicates that a fighter cannot be activated.
Check if the target is taken out of action (pg 12): Step 6 in the combat sequence.
Choose: A rules term relating to the selection of fighters. Certain cards tell you to choose one or more fighters, and some rules interact with these cards, most notably the Inspire condition for the fighters of the Spiteclaw's Swarm warband. A fighter is only 'chosen' by a card if that card contains the word 'choose' and tells you to choose one or more fighters, and you choose that fighter. Similar words, such as 'pick', do not mean the same as 'choose'.
Cleave: An Attack action keyword. If an Attack action is noted as having Cleave, rolls of the shield symbol cannot be successes in the defence roll.
Critical hit (pg 13): Scored when you roll one or more critical symbols for an Attack action, and the Attack action is successful. Some Attack actions have an ability that takes effect if a critical hit is scored when making that Attack action. Where this is the case, the Attack action will specify this.
Critical success (pg 13): A roll of a critical symbol on any dice. A critical symbol is always a success. In an Attack action, if the attacking player rolls more critical symbols than the target's player, the Attack action is successful. If the target's player rolls more critical symbols than the attacking player, the Attack action fails.
Damage (characteristic) (pg 11): An Attack action characteristic. When an Attack action is successful, the target fighter is dealt that amount of damage.
Deal damage (pg 12): Step 5 in the combat sequence. If something deals damage to a fighter, place a number of wound tokens equal to the damage dealt on their fighter card.
Deck: A set of cards used by a player. Each player has two decks – the power deck and the objective deck. These are individually shuffled at the start of the game and kept face down next to the battlefield. Cards are drawn from the top of the decks. When a deck is exhausted, a player cannot draw any more cards of that type.
Declare Attack action (pg 12): Step 1 in the combat sequence.
Defence (characteristic) (pg 3): A fighter characteristic, found on the fighter card and consisting of a number and a symbol. The number tells you how many dice to roll when they are the target of an Attack action, and the symbol (shield or hook) tells you what you need to roll for a success. A critical symbol is always a success.
Defence dice: Dice used to make defence rolls.
Defence roll (pg 12): The dice roll made by a player when one of their fighters is the target of an Attack action. Step 3 in the combat sequence.
Determine success (pg 12): Step 4 in the combat sequence.
Dice (characteristic) (pg 11): An Attack action characteristic, consisting of a number and a symbol. When a player makes an Attack action, they roll a number of dice equal to the number of that Attack action's Dice characteristic. The symbol (blade or crossed-blades) tells you what you need to roll for a success.
Discard (pg 8): The act of putting a card face up into a discard pile.
Discard piles: The locations where discarded cards are placed. Each player has two discard piles – the power discard pile and the objective discard pile. These are kept adjacent to the corresponding decks. Cards are placed in the discard piles face up and have no effect on the game, unless they specify otherwise.
Do-over (pg 8): An opportunity for a player to discard and redraw cards. Players can use a do-over at the start of a game if they don't like their initial hand.
Draw: A term used to describe a player taking the top card from the relevant deck and adding it to their hand.
Drive back (pg 12): Step 7 in the combat sequence.
Driven back (pg 12): A push that may result from an Attack action. A fighter that is driven back is pushed one hex. This push must take them further away from the fighter driving them back.
Dual objective card (pg 19): An objective card that has two conditions, both of which must be met for it to be scored.
Edge hex (pg 6): An outermost hex on the battlefield.
Empty hex (pg 6): A hex that does not contain a fighter and is not blocked.
End phase (pg 19): Each game has three end phases. In the first two end phases objective cards are scored, upgrades are played and cards are discarded and drawn. In the third end phase objective cards are scored and the game then ends.
End sequence (pg 12): Step 8 in the combat sequence.
Enemy fighter: A fighter in any opponent's warband.
Enemy player: An opponent.
Enemy territory: Hexes on your opponent's half of the game board are enemy territory.
Enemy warband: An opponent's warband.
Ensnare: An Attack action keyword. If an Attack action is noted as having Ensnare, rolls of the hook symbol cannot be successes in the defence roll.
Fails (Attack action): A term denoting an Attack action that is unsuccessful. An Attack action that fails doesn't cause damage.
Fighter: A member of a warband. Each fighter is represented by a miniature and a fighter card. When a rule refers to 'a fighter' or 'fighters' without specifying 'friendly' or 'enemy', it refers to both.
Fighter action: An action taken by a fighter (as opposed to a player).
Friendly fighter: A fighter in your warband.
Give: A rules term relating to tokens. A fighter given a token is said to have that token.
Glory point: A token that represents a warband's success. Each time an enemy fighter is taken out of action, you score two glory points. When you meet the conditions of an objective card, you score the number of glory points specified on the card. You can spend a glory point in the power step or the end phase to give an upgrade to one of your fighters – when you do so, flip the glory point over to show that it has been spent. At the end of the game, if either warband has been entirely taken out of action, whoever has the most glory points (both spent and unspent) wins.
Guard action (pg 14): An action a fighter can make when activated. When they do so, give them a Guard token. A fighter with one or more Guard tokens cannot make a Guard action.
Guard token: A token indicating that a fighter is on Guard. Rolls of the shield and hook symbols are both successes for defence rolls for a fighter with one or more Guard tokens. In addition, they cannot be driven back. If a fighter with one or more Guard tokens makes a Charge action, remove their Guard token(s).
Hand: The objective cards and power cards a player has drawn but not yet played or scored. A hand should be held or placed so that other players cannot see what cards are in it. A hand cannot include more than three objective cards, but can include any number of power cards.
Hazard card (pg 4): A type of card, representing the dangers of the Dreadfane.
Hazard phase (pg 9): The first phase in each round, during which hazard cards are drawn and resolved. Each game has three hazard phases.
Heal (pg 13): A keyword. Some cards direct you to Heal (X) one or more fighters, where X is a number. Remove that number of wound tokens from the fighter card(s) of the fighter(s) affected. A fighter is only healed if you remove at least one wound token from their fighter card.
Hex: A space on the battlefield, used to determine where fighters, comet and ambershard tokens are, and the distance between them. Incomplete hexes are not hexes.
Hybrid objective card (pg 19): An objective card that has two conditions, either of which can be met for it to be scored.
Incomplete hex (pg 5): A partial hex at the edge of the battlefield. Incomplete hexes are not part of the battlefield or the game.
Innate (pg 18): A symbol on a card that adds a success to a dice roll. Only one Innate symbol can apply to each dice roll.
Inspired (pg 17): The state of a fighter whose Inspire condition – found on their fighter card – has been met. When a fighter is Inspired their fighter card is turned over to reveal their Inspired characteristics. An Inspired fighter remains Inspired for the rest of the game.
Keyword: A word in bold text that refers to a rule in this book (e.g. Cleave).
Knockback (pg 14): An Attack action keyword. The target of a successful Attack action noted as having Knockback X, where X is a number, can be driven back a number of additional hexes equal to X.
Leader: A type of fighter. A warband's leader is denoted by a crown symbol before their name.
Lethal hex: A type of hex referenced on the fighter cards of Lady Harrow's Mournflight and Enchanted Robes. Unused in Warhammer Underworlds: Dreadfane, these are referenced for compatibility with other Warhammer Underworlds products.
Line of sight (pg 11): A term used to define visibility. Line of sight is drawn from the centre of a fighter's hex to the centre of any other hex. If the line touches or goes through a blocked hex or goes through an incomplete hex, there is no line of sight. Otherwise, the fighter has line of sight to that hex.
Modifier (pg 18): An alteration of a characteristic or dice roll.
Move (characteristic): A fighter characteristic, found on the fighter card. The Move characteristic tells you how many hexes that fighter can move when they make a Move action.
Move action (pg 10): An action a fighter can make when activated. When they do so, they can move into an adjacent hex up to a number of times equal to their Move characteristic. They cannot move through other fighters or blocked hexes. A fighter that moves must move at least one hex, and cannot end their Move action in the hex they started the Move action in. Once a fighter has made a Move action, give them a Move token.
Move token: A token indicating that a fighter cannot make a Move or Charge action.
No one's territory: Hexes on the border between the two players' territory are no one's territory.
Objective card (pg 4, 19): A type of card. When the condition described on an objective card is met, the player can score that card. They gain the number of glory points indicated on the card.
Objective deck (pg 3): One of a player's two decks, made up of 12 unique objective cards.
Objective hex (pg 6): A type of hex. The number on the objective hex identifies it for the purpose of scoring objective cards. Objective hexes do not block movement or line of sight.
Occupied hex (pg 6): A hex with a fighter in it.
Out of action (pg 13): The state of a fighter who is not on the battlefield. If a fighter has a number of wound tokens that is equal to or greater than their Wounds characteristic, they are out of action, and their model is taken off the battlefield.
Pass action: A player action in which they forfeit an activation.
Persists (pg 16): A keyword. Some ploy cards say that they persist – these cards have an ongoing effect. Leave these cards face up in front of you. They are not discarded until they or another card specifies that they are.
Place: A rules term. When placed, fighters, comet tokens and ambershard tokens must be positioned in a hex.
Player action: An action taken by a player (as opposed to by a fighter).
Ploy card (pg 4, 15): A type of power card. Most ploy cards are played in the power step, though some specify an additional condition that must be met before they can be played. Some ploy cards are reactions, and can be played as described by the condition on the card.
Power card (pg 4): A type of card. Power cards can be upgrade cards or ploy cards.
Power deck (pg 3): One of a player's two decks, made up of 20 or more unique power cards, with no more than half being ploy cards.
Power step (pg 15): Part of the action phase. A power step follows each activation, and gives players the opportunity to play power cards.
Push (pg 10): A rules term. A pushed fighter is pushed the number of hexes specified by the rule, in any direction (unless specified otherwise).
Range (characteristic) (pg 11): An Attack action characteristic, which tells you how far that Attack action can reach in hexes.
Re-roll: A rules term. When a rule tells you to re-roll a dice, roll it again, immediately after making the relevant roll. If you are told to re-roll a dice roll that involved multiple dice, roll all of them again unless specified otherwise. Whatever the new result is, it replaces the old result, even if it is worse. Unless specifically stated otherwise, you cannot re-roll a re-rolled dice.
Reaction (pg 16): A special kind of action, found on a fighter card, upgrade card or ploy card, that describes a condition that must be met for it to be used. When that condition is met, the action can be taken without costing that player an activation.
Remove (pg 5): A rules term relating to tokens.
Roll-off (pg 7): A rules term. Roll-offs are used to randomly determine a player for various purposes.
Round: One third of a game. Each round includes a hazard phase, an action phase and an end phase.
Scything (pg 14): An Attack action keyword. If an Attack action is noted as having Scything, when that Attack action is made it can be used against each adjacent enemy fighter.
Standing: A rules term. A fighter is said to be standing in a hex if they are in that hex.
Starting hex: A type of hex, identified by the Warhammer Underworlds symbol.
Success: A rules term. Various symbols on the dice are considered successes in attack rolls and defence rolls.
Succeeds (Attack action) (pg 12): A rules term. An Attack action that succeeds deals damage.
Superaction (pg 14): An action made up of two or more actions.
Support (pg 12): A rules term. Friendly fighters adjacent to enemy fighters who are either making an Attack action or are the target of a friendly fighter's Attack action provide support. A fighter with more support than their opponent has a greater chance of success.
Supporting fighter: A fighter who is providing support.
Surge objective card (pg 19): An objective card that has a condition that allows you to score it during the action phase.
Surviving: The state of a fighter who is on the battlefield.
Target: A rules term. A fighter that is the target of an Attack action is a target.
Territory (pg 8): A division of the battlefield. A player's territory is made up of all the hexes on their half of the game board. Hexes on the other half of the game board are enemy territory.
Trapped (pg 13): A rules term. When a fighter could be driven back by the result of a failed Attack action, but there are no hexes they can be driven back into, they become trapped and the Attack action becomes successful.
Un-Inspired (pg 17): The state of a fighter whose Inspire condition – found on their fighter card – has not yet been met, or who has been un-Inspired by an ability.
Upgrade card (pg 4, 15): A type of power card. A player can play an upgrade card in the power step or end phase by spending a glory point and giving the upgrade card to an eligible fighter. The fighter has that upgrade for the rest of the game.
Visible (pg 11): A rules term. If a fighter has line of sight to a hex, everything in that hex is visible to that fighter.
Warband (pg 2): A specific set of fighters identified by a unique symbol on their fighter cards. Each warband has access to unique objective and power cards.
Wounds (characteristic): A fighter characteristic, found on the fighter card. The higher this number is, the more damage a fighter can be dealt before they are taken out of action.
Wound token: A token that represents the damage dealt to fighters. If a fighter has a number of wound tokens that is equal to or greater than their Wounds characteristic, they are out of action: take them off the battlefield.
Reference
Combat Sequence
- Declare Attack action (choose an Attack action and a target).
- Attack roll.
- Defence roll.
- Determine success (compare your successes to your opponent's).
- Deal damage.
- Check if the target is taken out of action.
- Drive back.
- End sequence.
Determining Success
| Attack roll | Defence roll | Attack action result |
|---|---|---|
| No successes | Any | Fails |
| 1 success | No successes | Succeeds |
| 1 success | 1 success | Fails but drive back |
| 1 success | 2 successes | Fails |
| 2 successes | 1 success | Succeeds |
| 2 successes | 1 critical | Fails |
| 1 critical | 2 successes | Succeeds |
| 1 critical | 1 critical | Fails but drive back |
Key: ✗ No successes; ✓ A success; critical symbol: Critical success.
Activation Options
- Make a Move action with a fighter.
- Make a Charge action with a fighter.
- Make a Guard action with a fighter.
- Make an action printed on a fighter card or upgrade (such as an Attack action) with a fighter.
- Draw a power card.
- Discard an objective card and draw an objective card.
- Pass (forfeit an activation).
Round Sequence
Hazard phase
- Draw and resolve hazard cards equal to the round number.
Action phase
- Roll-off to determine player order.
- Resolve any 'Start of the action phase' abilities.
- Play the following sequence four times:
- First player's activation
- Power step
- Second player's activation
- Power step
End phase
First player, then second player do the following:
- Score objective cards.
- Discard objective cards.
- Give fighters upgrades.
- Discard power cards.
- Draw objective cards.
- Draw power cards.